How to Make Rustic Signs: Complete DIY Guide for Beautiful Wood Signs
How to make rustic signs starts with selecting the right wood and tools for a natural, weathered look. Using affordable wood lath or a 1×10 board can keep your costs low while offering an authentic farmhouse style. Begin by preparing the wood with stain and light sanding to create a base that improve your sign’s rustic charm.
Key Takeaways
- Buy wood lath or 1×10 boards in 4-foot lengths to control sign size and cost effectively.
- Apply wood stain with a foam brush, letting it soak for 5, 10 minutes for deeper color.
- Wipe off excess stain after soaking to avoid overly dark areas and maintain texture.
- Design lettering on paper first, then transfer it using carbon paper or stencils for clean lines.
- Light sanding before and after painting softens edges and adds to the rustic effect.
- Distress wood with sanding blocks or wire brushes to create natural wear and aged spots.
What You Need to Start Making Rustic Signs
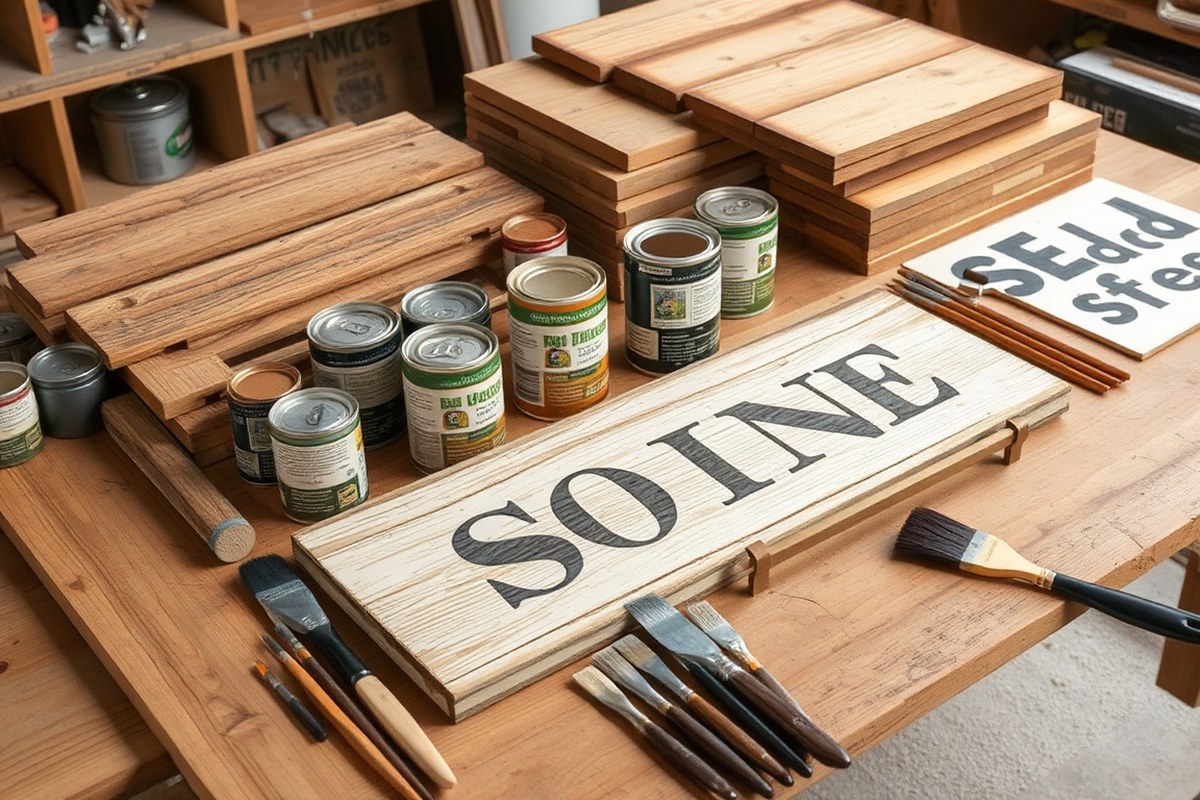
To start making rustic signs, gather a few essential materials and tools that fit your budget and project goals. Wood is the main material, and reclaimed wood is an excellent option if you want authentic rustic charm without spending much. You can find reclaimed wood at local salvage yards, recycling centers, or even from old pallets, fences, or discarded furniture. Outdoor plywood or wood lath are also affordable choices that work well; for example, wood lath can yield up to eight signs for about $18.
Select wood that is around 1 inch thick to ensure durability without too much weight. Softwoods like pine or fir are easier to cut and distress but tend to be less durable outdoors compared to hardwoods like oak or maple, which cost more but hold up better. Keep in mind that reclaimed wood may have nails or rough spots that need extra prep time. You’ll want to look for pieces that are relatively flat but can have some natural gaps or inconsistencies to keep the rustic look genuine.
Besides wood, you’ll need tools for precise cutting and painting. A handsaw or a power saw such as a circular saw or miter saw can cleanly cut the wood to your desired size. For metal signs, specialized cutting shears or a metal cutting saw are necessary to shape the metal sheet properly. For painting, basic brushes, foam applicators, or even stencil brushes work well depending on the lettering and design complexity. If you want to transfer pre-made lettering, vinyl materials and a craft knife come in handy for crisp edges.
- Wood: reclaimed wood, wood lath, outdoor plywood (1-inch thick recommended)
- Cutting tools: handsaw, circular saw, miter saw; metal cutting shears if using metal
- Painting tools: brushes, foam applicators, stencil brushes
- Lettering transfer: vinyl sheets, craft knife
- Glue: wood glue for layering pieces
- Sandpaper: coarse to fine grits for prepping and distressing wood
- Protective finishes: sealants (optional)
Choosing reclaimed wood saves money and adds character but requires careful cleaning and may need some sanding to remove splinters. Wood lath and plywood are budget-friendly and ready to use with less prep work. Tools can be simple or more advanced depending on your setup; beginners often start with handsaws and basic brushes to keep costs low. Precise measurements ensure each sign looks professional and fits your space.
The good results show clear lettering, sturdy wood that will last years, and authentic rustic imperfections like knots and slight gaps. Avoid cutting tools that are dull or using paint too thickly, which can spoil the rustic aesthetic. Having the right materials lets you create rustic signs that add charm without breaking your budget.
Preparing and Priming Wood for a Rustic Look
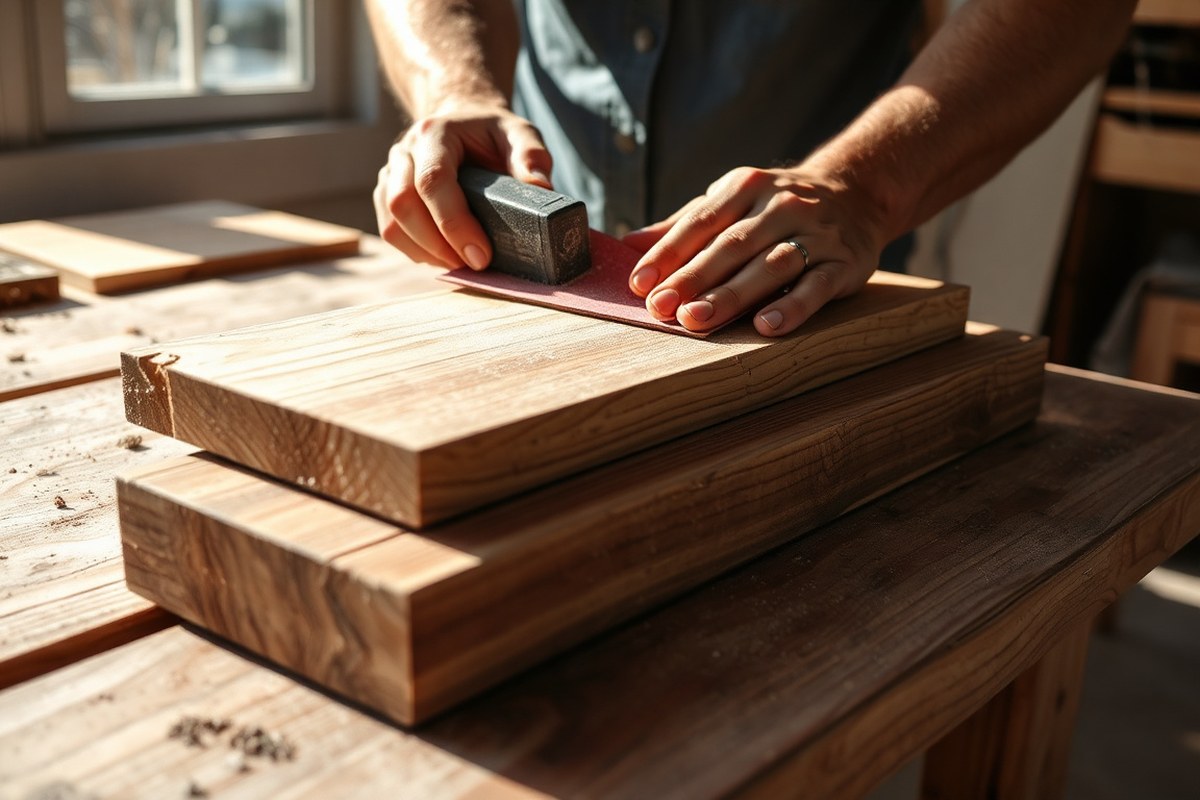
Preparing and priming wood sets the foundation for a rustic sign that looks naturally aged and charming. Proper sanding removes rough spots, shapes distressed edges, and exposes the wood grain to create character. Priming seals the surface for paint or stain, ensuring durability while keeping the rustic vibe intact.
Choosing the Right Sandpaper Grit
Select sandpaper that allows you to shape the wood without overly smoothing away texture. Start with coarser grits, like 80 to 120 grit, to remove splinters and rough patches quickly. For a softer, weathered look, switch to 150 to 180 grit for final smoothing, focusing on achieving variation rather than perfection.
Use finer sandpaper around edges and raised areas where you want natural wear to show through. Avoid using very fine grits below 220, which can polish the surface too much and reduce the rustic effect.
Techniques for Creating Distressed Edges
Focus sanding efforts on edges and corners to simulate years of wear. Lightly sand these areas unevenly to mimic natural distress patterns. Using sanding blocks or an electric sander with variable pressure helps create random, authentic-looking wear.
Cross-grain sanding and sanding over knots or imperfections also adds to the aged character. Consider adding small dents or scratches with the corner of the sandpaper backing or a screwdriver before sanding to improve visual texture.
Applying a Base Coat or Primer
Choose a primer compatible with your paint or stain choice to seal the wood pores and promote adhesion. Apply an even, thin coat using a brush or foam roller. Let the primer dry for 1 to 2 hours at room temperature before lightly sanding with 180-grit paper to remove raised grain and smooth rough spots.
For a rustic style, priming does not mean achieving a perfectly smooth surface. Lightly sanding the dried primer retains texture important to a weathered look. Avoid heavy sanding after priming as it can remove too much primer and negate your base coat’s protection. Follow this step-by-step preparation and priming process for rustic wood signs:
- Inspect the wood for rough spots, splinters, or imperfections.
- Sand the entire surface with 80 to 120 grit sandpaper, focusing on smoothing rough areas and edges.
- Switch to 150 to 180 grit sandpaper to soften edges and create a natural worn look.
- Distress edges further by sanding unevenly and adding small imperfections if desired.
- Remove dust with a tack cloth or damp rag.
- Apply a thin, even coat of primer and let dry for 1 to 2 hours.
- Lightly sand the primed surface using 180 grit sandpaper to lightly expose the wood grain.
- Clean the sanding dust off completely before moving on to painting or staining.
Take care not to over-sand the edges after priming; leaving some texture is essential for maintaining the rustic character of your sign.
How to Design and Transfer Lettering Onto Wood
Creating and transferring lettering or designs onto rustic wood signs requires careful planning and the right tools to ensure the result looks professional and authentic. Start by choosing your lettering style and design based on the rustic theme you want, simple block letters, cursive fonts, or hand-drawn elements all work well depending on your skill level and the sign’s purpose. Use design software or free online tools to create or print your desired lettering at the correct size. For larger signs that go beyond standard paper sizes, scale your design digitally first, then divide it into sections for transferring piece by piece to keep the proportions accurate.
Three popular methods exist to transfer your design onto wood: hand painting freehand, vinyl stencils, and graphite paper tracing. Hand painting offers full customization but requires steadier hands and more time to correct mistakes. Vinyl stencils, created from adhesive vinyl and applied with transfer tape, provide clean, sharp lines and work great for repeatable designs. Graphite paper tracing lets you transfer printed designs directly onto the wood’s surface with pencil outlines for painting afterward, ideal when stencil-cutting equipment is unavailable.
| Transfer Method | Materials Needed | Cost Estimate | Best For | Pros | Cons |
|---|---|---|---|---|---|
| Hand Painting | Paint, brushes | $5, $10 per set | Artistic, custom letters | Fully customizable; personal touch | Requires skill; errors harder to fix |
| Vinyl Stencils | Vinyl letters, transfer tape | $10, $20 for materials | Sharp lines; repeat designs | Precise; easy clean edges | Needs stencil cutting tools; less flexible |
| Graphite Paper | Graphite paper, printed design, pencil | $3, $7 per pack | Simple transfer for painting | Affordable; easy to find materials | Messy; partial transfer loss possible |
When using vinyl stencils, place the transfer tape with the vinyl letters face-down on the wood surface, centering the design based on your measurements. Always cut the transfer tape larger than the design on all sides for easier handling. Press the transfer tape gently but firmly to ensure good adhesion, then slowly peel back the backing paper, leaving the vinyl letters on the wood. This method mostly eliminates smudging and helps create professional-looking signs. For graphite paper, position the printed design onto the wood with graphite paper underneath, then trace the outline with a pencil. This leaves a light graphite line you can follow when painting. Work in small sections, especially for larger signs, to avoid misalignment.
Larger designs require extra care in scaling and aligning. Measure the wood surface carefully and use a ruler or level to mark the design’s borders with a pencil beforehand. For very large signs, divide your design into grids to transfer each part individually, ensuring they stay proportional and straight. Vinyl stencils and graphite transfer methods work well with this grid technique. Also, reserve the straightest wood pieces for larger signs to maintain alignment during transfer and painting, particularly if the sign uses multiple wood laths glued together in sections.
Select the transfer method that matches your skill, budget, and style goals. Vinyl stencils cost a bit more and require equipment or pre-made sets but yield the cleanest results. Graphite paper is budget-friendly and simple for reproducing designs, but can be less precise and more labor-intensive. Hand painting saves money and allows creativity but needs steady hands and more time. Preparing thoroughly with accurate measurements and neat transfers leads to rustic signs that improve your home’s warm, farmhouse feel.
Painting Techniques for Authentic Rustic Signs
Achieving the authentic rustic look on your wood signs starts with choosing the right paint and stain combination. Fusion Mineral Paint in Casement, a cool white color, stands out because it requires no topcoat and offers a smooth surface ideal for lettering and stenciling. For the wood base, apply a stain that improve the grain and textures without overpowering it. Different stains vary in ingredients and drying times, so testing on a scrap piece helps you pick what best suits your board and style.
To paint clean letters, especially with small script fonts, use a foam paintbrush and dab the paint gently onto stencils rather than brushing. This method controls the paint flow, prevents bleeding under the stencil edges, and preserves sharp letter lines. Dab firmly but lightly, reload the brush with paint periodically, and remove the stencil immediately after application to avoid smudging. For distressed script or more weathered lettering, paint your letters solid first, then lightly sand random areas after drying to create a worn effect.
Fixing mistakes during painting is easier when you know a few quick tricks. If paint bleeds under the stencil, wait for it to dry then carefully scrape off the excess with a craft knife or fine sandpaper. For small smudges or misplaced strokes, a damp cloth or cotton swab with a bit of mineral spirits can lift fresh paint without damaging the wood. When mistakes happen, don’t rush to cover them up with more paint, let each coat dry well to avoid buildup and uneven texture. Re-stenciling after cleanup works best when the surface is smooth and dry.
To add rustic charm, consider using the chippy paint technique. Apply wax over dried paint selectively, then add a contrasting paint layer on top. Once dry, rubbing or sanding those waxed spots removes the top layer, revealing the color below and mimicking natural paint wear. You can control the level of distressing by adjusting how much wax you apply and where. This method requires patience, letting each paint layer dry for at least 1-2 hours before proceeding. It costs only a small investment in wax and paint but dramatically improves your sign’s rustic appeal.
Combining stains and paints can create depth. Start with a mid-tone wood stain base, then paint over with a lighter or contrasting color and distress selectively to reveal both layers in places. Allowing drying times of up to 24 hours between layers prevents peeling. Since rustic signs suit many themes, experimenting with different finishes on smaller practice boards can help you find your unique look.
Distressing and Weathering Wood for Rustic Charm
Distressing and weathering wood brings out the classic rustic charm by simulating years of natural wear or reclaimed character. You can use gentle mechanical techniques and safe finishes to create realistic aging without harsh chemicals. These methods take only basic tools and materials you can find at home or a hardware store.
Mechanical Distressing Tools and Methods
Start by roughing up the wood’s surface to mimic natural aging marks like dents, scratches, and worn edges. Use tools such as wire brushes, coarse-grit sanding blocks (60-80 grit), and hammer or chain to add dings and grooves. Scrape or chip paint off with a putty knife once the paint partially dries for a peeling effect. Focus on edges and areas that would logically see more wear, such as corners or near the bottom of the sign board.
These mechanical actions create texture and depth that paint alone can’t achieve. Be cautious not to overdo hammering or chiseling; subtle damage looks more natural. Also, wear goggles and gloves to protect yourself from wood splinters and dust.
Using Stains and Paints to Improve Weathering
Applying stains or paint over distressed wood helps amplify the aged look. Start with a light-colored base stain close to a natural wood tone, then dry brush darker tones or colors onto the surface to highlight grain and texture without fully covering the distress marks. Soap or Vaseline applied in spots before paint can cause peeling where you want natural wear revealed.
- Apply a base wood stain and let dry for 24 hours.
- Brush on Vaseline lightly on edges or desired peeling areas.
- Paint a thin coat of your top color over the entire surface.
- After drying for 1 to 2 hours, scrub off the paint where Vaseline was applied with a fine steel wool or cloth.
- Lightly sand edges and raised spots with a 120-grit sanding block to expose the base stain.
- Optionally, apply a thin wash of diluted black or brown acrylic paint to the surface for extra weathering, then wipe off excess creating shadows.
This layering approach shows wood texture through paint, simulating peeling and sun-faded surfaces. Avoid thick coats that obscure distressed details.
Avoiding Over-Distressing Mistakes
Over-distressing wood can lead to an unnatural look with uneven or exaggerated damage. Avoid removing too much wood or paint from one area. Working slowly and stepping back often to assess your progress keeps the finish believable. Remember, real aged wood usually has character without excessive gouges or completely bare spots.
Do not use chemical weathering solutions like bleach or chemical strippers if you are a beginner. These require careful handling, ventilation, and disposal procedures. Stick with mechanical and paint techniques that are safer and easier to control as a novice.
Focus on gradual, layered distressing rather than aggressive methods to keep the rustic look authentic and easy to manage.
Finishing and Sealing Your Rustic Sign for Longevity
To finish and seal your rustic sign properly, use a clear matte sealer that protects against moisture, UV rays, and daily wear without adding gloss. This keeps the natural wood texture and matte finish intact, preserving the handcrafted look you want. A spray sealer is often best for even coverage and ease of application. Apply two thin coats in perpendicular directions, allowing each coat to dry completely, usually 1-2 hours between coats at room temperature.
Choosing the right sealer depends on whether your sign will go indoors or outdoors. For indoor signs, a water-based polyurethane or acrylic sealer works well. These cost around $10 to $15 per quart and are easy to clean up with soap and water. This option maintains the wood’s look without yellowing or thickening the surface, so your rustic sign retains its original charm.
| Sealer Type | Finish | Protection Level | Best Use | Approximate Cost |
|---|---|---|---|---|
| Water-based Acrylic | Matte to Satin | Moderate (Indoor) | Indoor rustic signs | $10-$15 per quart |
| Water-based Polyurethane | Matte to Satin | High (Indoor and mild outdoor) | Indoor or protected outdoor signs | $12-$18 per quart |
| Outdoor Clear Varnish | Matte to Slight Sheen | High (Outdoor; UV & moisture resistant) | Fully exposed outdoor signs | $20-$30 per quart |
| Spray Sealers | Matte to Satin | Moderate (Indoor and light outdoor) | Easy application on smaller signs | $8-$15 per can (12-16 oz.) |
For outdoor signs, opt for a clear outdoor varnish designed to withstand UV damage and moisture. These sealers protect your sign from cracking or fading over time. Apply two coats, letting each dry thoroughly. Remember to keep your sign out of direct ground contact and avoid excessive moisture pooling to extend its lifespan.
Cleaning and maintaining your finished rustic sign requires gentle care. Dust it regularly with a dry microfiber cloth to prevent surface buildup. Avoid harsh chemicals or abrasive scrubbers that might damage the sealer. If needed, wipe the sign with a slightly damp cloth and mild soap, then let it dry completely. Check your sign annually for signs of wear like peeling or fading, and reapply sealer as needed to keep the protection strong.
Proper sealing not only shields your rustic sign from damage but also improve the texture and appearance, maintaining that matte, natural wood look. It costs relatively little but greatly extends the beauty and longevity of your handmade piece. Avoid thick glossy sealants, as they can look out of place and reduce the authentic rustic feel you’re aiming for.
Creative Rustic Sign Variations and Sizing Options
You can customize rustic signs in many ways by adjusting their size, shape, and theme. These changes help your sign fit perfectly in any space and reflect the season or occasion. Adding elements like 3D letters also creates depth and interest that make the sign stand out.
Scaling Rustic Signs for Different Spaces
Rustic signs can be made both large and small to suit various areas of your home. To resize wood properly, start by measuring the space where you want to hang the sign. Use a saw to cut your wooden board to the desired length and width, keeping the edges natural or roughly sanded for a rustic feel. It’s common to work with pine or reclaimed pallet wood, which can be found in sizes from small 12-inch boards to larger planks around 4 feet long. Working with thinner wood laths also lets you create multiple smaller signs from one board, stretching your materials and budget.
Make sure to consider the thickness of the wood too. Thicker wood (around 3/4 inch) holds up better for signs with heavier embellishments but can cost more. Plan for securing your sign with sawtooth hangers or sturdy hooks, especially with larger pieces. Uneven edges or intentional imperfections improve the rustic look but watch out for splinters or unstable boards that could weaken the sign’s durability.
Incorporating Seasonal Themes and Designs
Seasonal rustic signs differ primarily in their color palettes, lettering styles, and added seasonal motifs. Creating a fall sign might mean using warm colors like rust, gold, and brown, while a winter or Christmas sign often features white, red, and green tones along with snowflakes or wreath accents. Paint in thinner layers for seasonal signs since you may want to easily switch them out year to year. Chalkboard paint is another option for signs that transform with the seasons.
To add holiday charm, consider attaching small, removable decorations, such as miniature pinecones, small garlands, or velvet ribbons, using hot glue or hooks. DIY rustic light-up Christmas signs use battery-powered LED string lights attached carefully behind cut-out lettering or outlines for a festive glow. Crafting a Thanksgiving sign might include adding painted pumpkins or leaf stencils directly on the wood surface, using stencils for sharp design elements that contrast with rustic textures.
Adding 3D Letters and Embellishments
Dimensional letters and small wood pieces raise the visual interest of your rustic sign and are surprisingly easy to add. Purchase thin wooden letters or cut your own from plywood using a jigsaw, then sand and paint them separately. Once dry, attach with wood glue or small nails to your base sign. The depth of these letters creates shadows and texture that simple paint can’t achieve. For a rougher look, distress the edges of your 3D letters by sanding them unevenly or using a wire brush.
Beyond letters, you can add hooks, small shelves, or decorative wooden shapes like stars or hearts. These embellishments serve both decorative and functional purposes, such as hanging wreaths or keys. Keep in mind added pieces increase the sign’s weight and may require stronger mounting methods. Balance is key: layering too many thick elements can take away from the rustic simplicity, while a few well-placed 3D touches enrich your design without overpowering it.
Common Beginner Mistakes and How to Avoid Them
One of the most frequent mistakes in rustic sign-making is paint bleeding under stencils. This happens when too much paint is applied or the stencil is not secured properly. To prevent this, use a stencil brush or a sponge with a light amount of paint, dabbing instead of brushing. Tape down the stencil firmly with painter’s tape, and remove it gently while the paint is still slightly wet for cleaner edges.
Uneven wood preparation is another common issue. If the surface isn’t sanded well or primed correctly, paint won’t adhere properly, causing a patchy look. Sand the wood smoothly with 120- to 150-grit sandpaper, wipe off dust with a damp cloth, and prime with a water-based primer. Let the primer dry for at least 2 hours before painting. Skipping this step often leads to blotchy finishes that reduce the rustic charm.
Many beginners try to fix mistakes by adding more paint, which usually makes the problem worse by creating thick layers that crack or peel. Instead, if paint bleeds or you have smudges, wait for the paint to dry completely. Then, gently sand the area with 220-grit sandpaper to smooth out mistakes. Reapply paint carefully using a scant amount with your brush or sponge.
Handling tools and paint safely is as important as getting the look right. Always work in a well-ventilated space. Wear a dust mask when sanding and gloves when using paint or stains to avoid irritation. Keep paint and solvents away from children and pets, and clean brushes and tools properly after use to prevent accidents.
- Paint bleeding: Use a light touch and secure stencils with painter’s tape.
- Uneven sanding: Sand smooth with 120- to 150-grit paper and clean dust.
- Poor primer coverage: Let primer dry fully before painting.
- Fixing wet spills: Blot excess immediately, don’t spread paint.
- Fixing dry mistakes: Sand gently with 220-grit paper, repaint lightly.
- Safe sanding: Always wear a dust mask and work in airflow.
- Proper disposal: Follow local rules for paint and solvent waste.
Work slowly and test your technique on a scrap piece of wood before painting the sign to avoid costly mistakes on your final piece.
Other missteps include insufficient drying time between coats and over-distressing the wood, which can weaken the sign. Allow at least 4 hours drying time after each paint or stain coat, and distress lightly with fine sandpaper or steel wool to keep the wood sturdy. By spotting these issues early and applying simple fixes, you’ll create rustic signs that look authentic and last longer without expensive tools or materials.
Step-by-Step Action Plan for Making Your Rustic Sign
Follow these steps to create your own rustic sign with confidence. Each phase focuses on one key part of the process so you can see progress clearly.
- Before You Start: Gather all the materials listed in your plan, including wood, paint, brushes, and sealant. Check that you have everything on hand to avoid interruptions.
- Day 1: Prepare and prime your wood by sanding it smooth and applying a base coat. You’ll know it’s ready when the surface feels even and the primer is dry to touch.
- Day 2: Design your lettering on paper and transfer it onto the wood using transfer paper or stencils. Confirm the design looks crisp and correctly aligned on your sign.
- Day 3: Paint your lettering and any decorative elements with thin, even coats. Let each coat dry before adding another, checking for coverage and the rustic look you want.
- Day 4: Distress your sign by sanding edges and spots gently. Look for light sanding marks that create a worn, authentic feel without damaging your design.
- Day 5: Apply a matte or satin sealant to protect your sign from wear and sunlight. The finish should be even and dry without sticky spots.
- After 1 Week: Place your sign in its display location and inspect for any touch-ups needed. Adjust paint or sealant if you notice any flaws.
Frequently Asked Questions
How to Make Rustic Signs?
Start by selecting suitable wood, prepare and prime it, then transfer your lettering and paint using distressing techniques for an authentic look. Finish with sealant to protect your sign and ensure longevity.
What Wood Works Best for Rustic Signs?
Wood lath or reclaimed wood are ideal for rustic signs because they provide natural texture and a weathered look.
How Can I Make My Rustic Sign Look Aged?
Use sanding and distressing tools to create gaps and inconsistencies, simulating natural wear and tear on the wood surface.
Can I Use Stencils for Lettering on Rustic Signs?
Yes, stencils help transfer clean and consistent letters onto the wood, making your design easier to paint.
Is Sealing the Sign Necessary?
Yes, sealing protects your rustic sign from moisture and dirt, helping it last longer without fading or damage.
How Much Does It Cost to Make Rustic Signs?
Creating up to eight rustic signs can cost about $18, making it an affordable DIY home décor project.
The Bottom Line
Making rustic signs involves patience with each step but results in charming, personalized decor you can be proud of. Start with a small project, practicing each technique to build your skills comfortably. Pick one simple sign idea today and gather your supplies so you’re ready to begin. Your handcrafted rustic sign will add character and warmth to your space in no time.