How to Make a Kitchen Sign with Cricut: A Complete Step-by-Step Guide
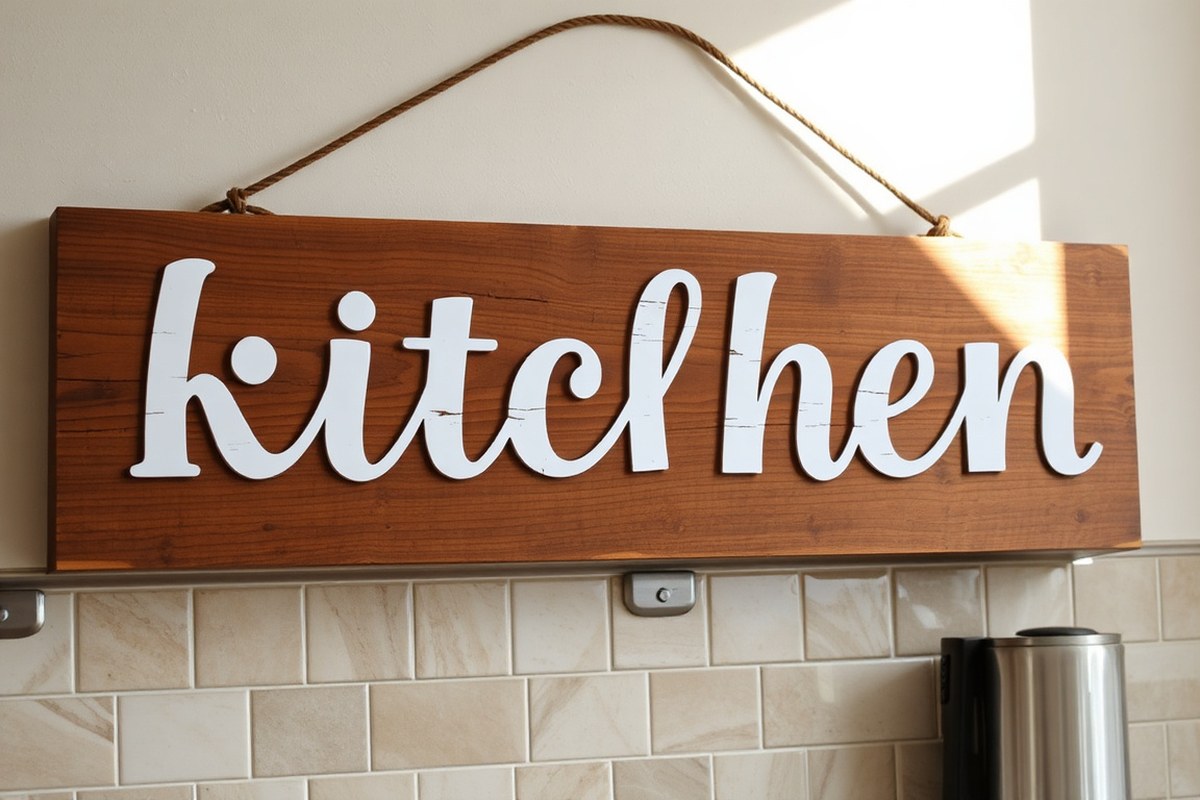
How to make a kitchen sign with Cricut starts with selecting the right materials and designing your sign in Cricut Design Space. Using black permanent vinyl ensures durability, especially when applied to a well-prepared wooden base. Begin by sizing your design for an 11 x 14-inch sign and prepping your frame and plywood base before cutting and applying vinyl.
Key Takeaways
- Use 1/2-inch plywood sized to your sign dimensions before adding an outer frame made from 1 x 2 lumber.
- Design your kitchen sign in Cricut Design Space sized about 11 x 14 inches for framed signs.
- Choose black permanent vinyl rated for exterior use to ensure your sign lasts up to 3 years outdoors.
- Use a 12×24 inch cutting mat with your Cricut Maker or Explore machine for best results.
- Wait 24 hours after painting your sign base before applying vinyl decals to allow paint curing.
- To add a 3D effect, consider using chipboard and the Cricut Knife Blade for farmhouse-style elements.
What Materials and Supplies You Need for a Cricut Kitchen Sign

To make a kitchen sign with a Cricut, you’ll need a mix of essential materials and some optional tools that make the project easier and more professional-looking. Start with a sturdy base such as wood or canvas. Wood is popular because it offers durability and a classic look. You can find craft wood boards sized around 11 x 14 inches, which is a convenient size for kitchen signs. Canvas is lighter and works well if you plan to cling vinyl directly onto it, but it may require sealing to protect your design.
The primary decorative element is the vinyl. For kitchen signs, permanent vinyl designed for outdoor or kitchen use is best. Cricut Premium Permanent Vinyl in black or colors stands up well to moisture and cleaning, lasting up to 3 years according to Cricut’s guarantee. You can choose either to cut out a full vinyl decal or create a stencil using stencil vinyl to paint the design onto your base. Each option affects what other supplies you’ll need.
- Wood or canvas sign base (approximately 11 x 14 inches)
- Cricut Premium Permanent Vinyl or stencil vinyl
- Transfer tape for applying vinyl smoothly
- Cricut tools such as weeding hooks and scraper/squeegee or a craft stick
- Painter’s tape if using stencil vinyl for painting
- Acrylic paint and small brushes for stenciling
- Optional: Cricut Knife Blade and chipboard for 3D elements
Using transfer tape allows you to lift and position your vinyl design carefully. Smooth it down thoroughly with the Cricut scraper tool, a craft stick, or even a credit card to avoid air bubbles. Then peel the tape back slowly. You might prefer painting; in that case, apply stencil vinyl directly to wood or canvas, then fill in with acrylic paint after taping the edges with painter’s tape to avoid bleeding.
Adding 3D elements like chipboard cut with the Cricut Knife Blade can add texture and visual interest. This step requires the Cricut Maker model and some practice but improve basic vinyl signs to a new level. Basic tools like scissors, a ruler, and painter’s tape also come in handy for precise cutting and paint masking. Consider the final look you want and the effort you’re willing to invest when picking materials and tools.
How to Design and Customize Kitchen Signs in Cricut Design Space
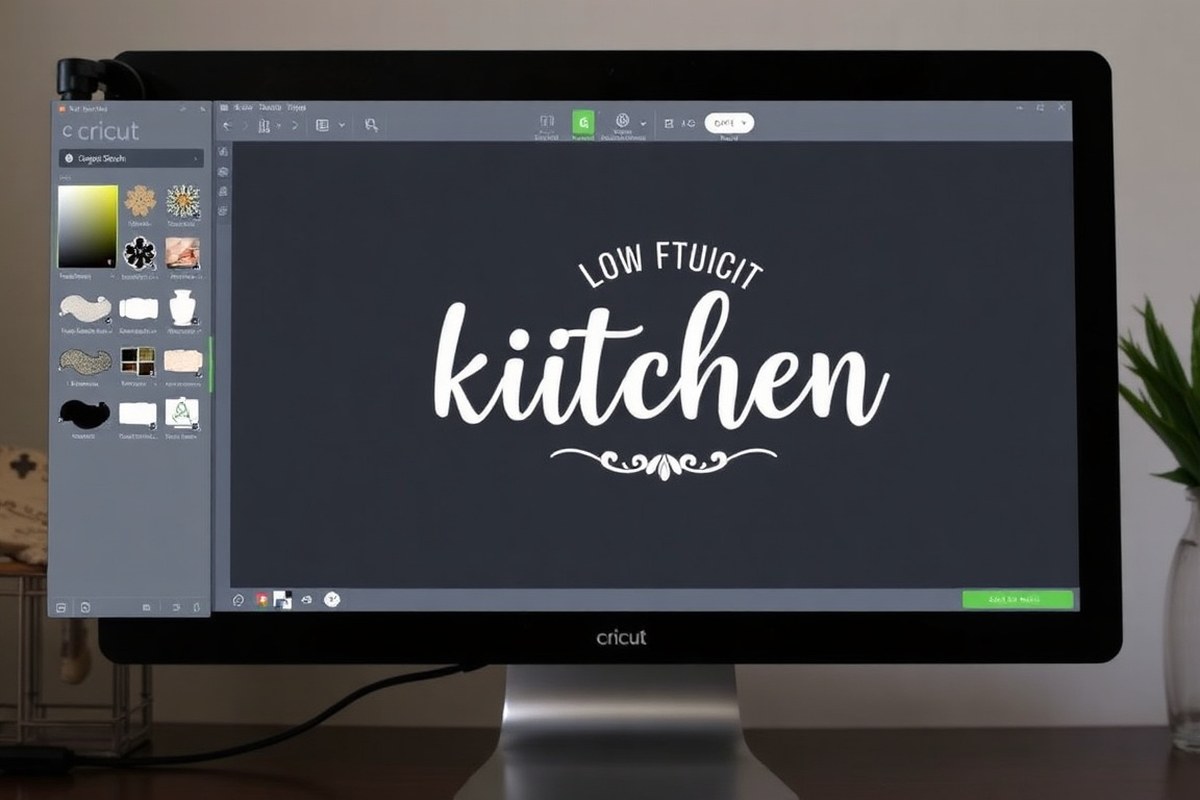
Designing and customizing kitchen signs in Cricut Design Space gives you full control to create personalized décor that fits your kitchen perfectly. Carefully sizing and layering your SVG images ensures the design matches your sign base and looks polished. Adding text or images to existing SVG files lets you customize messages to suit your style or theme.
Selecting and Importing Free SVG Files
Start by choosing kitchen-themed SVG files that fit your style from free resources or your own collection. Many websites offer free kitchen sign SVGs, which you can download to your device. These files contain all the cut layers and shapes needed for vinyl or stencil application.
To import SVGs into Cricut Design Space, open the software and select “Upload” on the left side menu. Then, browse to find your saved SVG file and upload it. Name and tag the design to find it easily later. This process works similarly on desktop and the iPad or iPhone apps.
Adding your own SVGs means you can pick from a variety of fonts, styles, and motifs, like utensils, quotes, or farmhouse icons. Using free files saves time and effort while giving you starting points to fully customize your sign.
Resizing and Positioning Designs for Your Sign
After importing, sizing your SVG design to fit your sign base ensures it looks balanced and professional. Measure the width and height of your wooden or canvas sign base first. For example, if your sign is 12 inches wide and 6 inches tall, aim to size your design slightly smaller so it leaves a margin around the edges.
Use the resize handles or enter exact dimensions in Design Space to adjust your design. Keep the proportions locked to avoid stretching the image. Position the design in the canvas area, centering it or placing it according to your preferred layout.
- Measure the width and height of your sign base.
- Open your SVG file in Cricut Design Space.
- Select the design and get the aspect ratio if you want to customize height and width independently.
- Enter the desired dimensions for your design to fit the sign.
- Drag the image to position it where you want it on the canvas.
- Use the “Align” tool to center or adjust alignment.
Keep the design slightly smaller than the sign base to leave a clean border and prevent cutting off edges during application.
Adding Personal Text and Design Layers
To make your kitchen sign unique, add custom text or additional images over your SVG file. Click the “Text” button in Cricut Design Space to type your message. Select fonts that fit your kitchen vibe, whether modern, farmhouse, or playful.
Adjust the font size and spacing to fit your sign’s dimensions. Use the “Attach” feature to hold text or extra images together in the right layout for cutting. Layers can be arranged above or below graphic elements to create depth and highlight key details.
You can also import extra SVGs or use built-in Design Space images for icons like spoons, leaves, or hearts. Group layers properly and assign vinyl colors to each if you plan multicolor cuts, making your kitchen sign more eye-catching and personalized.
Choosing and Preparing Vinyl and Stencil Materials for Signs
Choosing the right vinyl or stencil material for your kitchen sign depends on the surface you’ll apply it to and the look you want. Permanent vinyl works well on wood and offers durability, making it ideal for signs that need to last in the kitchen environment. Removable vinyl is better for temporary projects or if you want to reuse the vinyl later. For painting stencils, stencil vinyl cuts cleanly and sticks firmly enough to prevent paint bleed without damaging the surface when removed.
Wood surfaces must be smooth and clean before applying vinyl. Sand the wood base lightly to remove rough spots and wipe away dust with a damp cloth. This prep ensures that vinyl adheres well and your sign keeps a polished finish. For canvas, permanent vinyl sticks well but can leave residue if removed, so choose removable vinyl for temporary designs. Preparing stencil vinyl involves cutting your design on a Green StandardGrip Mat, then carefully weeding out the areas you want to paint through.
Below is a table comparing vinyl and stencil materials commonly used for kitchen signs. This guide explains when to use each type, the best surfaces, and tips for preparing materials for your Cricut machine. This comparison helps you select the right option for your project’s needs.
| Material Type | Best Surface | Use Case | Preparation Tips |
|---|---|---|---|
| Permanent Vinyl | Wood (smooth), Canvas (permanent designs) | Long-lasting signs, dishwasher-safe surfaces | Sand and clean surface; Place on Green StandardGrip Mat |
| Removable Vinyl | Canvas, Wood (temporary) | Temporary decorations, test designs | Clean surface; Use StandardGrip Mat; less pressure |
| Stencil Vinyl | Wood, Canvas | Paint stencils; multi-color painting | Attach firmly to mat; weed negative spaces; test transfer |
To prep vinyl or stencil materials for cutting with Cricut, load your chosen vinyl onto the appropriate mat (usually a Green StandardGrip for vinyl). Select the matching material setting on your machine’s software, such as “Premium Vinyl – Permanent” for highly adhesive vinyl. Using Smart Vinyl with compatible Cricut models (Maker 3, Explore 3, Joy) lets you cut without a mat by choosing “No Mat” in the settings. After cutting, carefully weed out the excess vinyl or stencil areas using weeding tools.
For the best results, ensure your vinyl is free of wrinkles or dust before cutting. When making paint stencils, you can use scrap pieces of stencil vinyl to cover parts of your sign to protect areas from paint. Align and press your stencil firmly on the wood or canvas to avoid paint bleed during application. This attention to preparation saves time and leads to cleaner edges and a professional finish on your kitchen sign.
Step-by-Step Process to Cut and Weed Vinyl or Stencils
Cutting vinyl or stencil designs accurately with your Cricut machine ensures sharp details and a professional look for your kitchen sign. Use the appropriate blade and settings to avoid tearing or incomplete cuts. Weeding, the process of removing excess vinyl, requires patience and the right tools to avoid damaging fine details in your design. Here is a clear sequence to follow for the best results.
- Load your material properly. Place adhesive vinyl or stencil material shiny side down on a Cricut StandardGrip cutting mat. Ensure it’s firmly adhered without wrinkles or bubbles for precise cuts.
- Select the right blade and settings. Use a Fine-Point blade for most vinyl types. Set your Cricut cutting pressure to ‘Default’ or adjust slightly higher for thicker vinyl or stencil film. Choose the material setting matching your vinyl or stencil brand. For example, select ‘Vinyl, Adhesive’ for Cricut vinyl or ‘Stencil Material’ setting for specific stencil sheets.
- Send your design to cut. In Cricut Design Space, position your design within the mat preview area, then press ‘Go’. Let the Cricut cut through the vinyl cleanly. A well-cut design has smooth edges without any connected scraps.
- Unload the mat and prepare for weeding. Remove the mat once cutting is done. Flip the mat over and gently peel it away from the vinyl piece to avoid curling or ripping the design.
- Weed excess vinyl carefully. Use a pointed weeding tool to lift and pull away the vinyl around letters, shapes, and details. Work slowly on inner cuts and small elements to prevent tearing. Leave only the parts of the design that will transfer to your sign.
- Cut transfer tape to size. Use transfer tape slightly larger than your weeded vinyl stencil. This helps hold all parts securely for moving the design.
- Apply transfer tape and transfer the design. Peel the backing off the transfer tape, place it sticky side down onto the weeded vinyl, and press firmly with a scraper tool. Slowly lift the transfer tape with vinyl attached, then position it on your prepared sign surface.
- Press down and remove transfer tape. Smooth the vinyl onto the sign with the scraper, applying even pressure. Gently peel the transfer tape away at a sharp angle to leave the vinyl perfectly placed.
Using a Fine-Point blade and settings matched to your vinyl or stencil material avoids incomplete cuts and wasted material. Weeding requires delicate handling; rushing can cause small pieces to tear or stick incorrectly. A small Cricut weeding tool usually costs under $10 but makes this step easier. Clean cuts and clean weeding pay off with crisp, professional-looking kitchen signs.
How to Prepare and Paint Your Wooden or Canvas Sign Base
Preparing and painting your wooden or canvas sign base involves smoothing and cleaning the surface, applying a suitable primer, and painting with the right type and color of paint. Allow the paint to dry completely, typically 24 hours, before adding vinyl to ensure the best adhesion and prevent lifting or smudging.
Sanding and Cleaning the Sign Surface
Sanding is essential to create an even, smooth surface for paint to stick well. For wooden signs, use medium-grit sandpaper (around 120-150 grit) to remove rough spots and any old finish. Then, follow with fine-grit sandpaper (220 grit) to smooth the surface further. Canvas signs need no sanding but do require cleaning to remove dust or debris.
After sanding, clean off sawdust or dirt with a tack cloth or a slightly damp rag. Make sure the surface is completely dry before priming or painting to avoid trapping moisture under the paint.
Priming and Painting Tips for Durable Finish
Priming adds a protective layer and helps paint adhere better, especially on raw wood. Use an all-purpose primer suitable for wood if your sign has a natural finish. For canvas, skip priming unless the fabric is very porous or you want a smoother surface.
Acrylic paint is recommended for kitchen signs because it dries fast, resists chipping, and comes in many colors and finishes. Opt for a gloss or satin finish acrylic to seal and brighten your design. White, cream, light gray, or pastel colors are popular backgrounds that make vinyl designs stand out. Apply thin, even coats with a synthetic brush or foam roller to avoid streaks or drips.
- Lightly sand the wooden sign with 120-150 grit sandpaper, then finish with 220 grit.
- Wipe the sign clean of all dust using a tack cloth or damp rag, then let dry.
- Apply one coat of all-purpose primer on wood; allow it to fully dry (usually 1-2 hours).
- Choose an acrylic paint color and finish that complements your kitchen decor and vinyl colors.
- Paint thin, even coats using a synthetic brush; let each coat dry before applying the next.
- Apply at least two coats for full coverage and durability.
- Allow the final coat of paint to dry to the touch before handling.
Use light sanding between coats if the paint feels rough, but avoid over-sanding or it can remove the primer layer.
Drying Times and Curing Before Vinyl Transfer
Let the paint dry at room temperature, ideally around 65-75°F (18-24°C), with low humidity to ensure proper curing. Though paint may feel dry to the touch within 1-2 hours, full curing takes about 24 hours. Applying vinyl too soon risks peeling or smudging your freshly painted surface.
For faster drying, use thin coats and keep your workspace well-ventilated. Avoid direct sunlight or extreme temps, which can cause paint to dry unevenly and crack. Waiting a full 24 hours before applying vinyl ensures the paint is set hard enough to support vinyl adhesion reliably.
Applying Vinyl to Your Sign: Tips for Smooth Transfer
To apply vinyl smoothly to your kitchen sign, using transfer tape correctly is key. It helps pick up the vinyl design and hold it in place as you move it onto your sign surface. You’ll avoid bubbles and misalignment by pressing the tape firmly, aligning carefully, and removing it at the right angle after the vinyl sticks well.
Choosing and Applying Transfer Tape
Transfer tape should be slightly larger than your vinyl design. Cricut transfer tape is affordable and works well for kitchen signs. Hold your transfer tape in a loose “U” or taco shape, with the bottom touching the center of your vinyl design first. This method minimizes air bubbles under the tape.
Once the tape touches your vinyl, press down firmly and smooth it from the center outward using your fingers or a scraper tool. Firm pressure ensures full vinyl contact. This step removes air pockets and helps the vinyl stick to the tape so the design moves as one piece.
Aligning and Positioning Your Design Carefully
Before sticking the vinyl to your sign, position it gently on the surface to check alignment. Take your time to avoid misplacement that will require peeling and repositioning, which can damage your vinyl or base.
- Hold your vinyl with transfer tape over the sign surface without fully pressing it down.
- Step back and view it from different angles to confirm placement.
- Once aligned, press down the center of the design lightly to tack it in place.
- Use a scraper or a hard flat edge to firmly smooth from the center outward, applying even pressure across the whole design.
- Work slowly to press out air bubbles, which can cause puckering or lifting later.
Applying even, firm pressure is important to preventing bubbles. For best results, use a store loyalty card or Cricut scraper tool to press down each section. Finger pressure alone may miss tiny bubbles.
Removing Transfer Tape Without Damaging Vinyl
Wait about 30 seconds to 1 minute after firmly pressing the vinyl before removing the transfer tape. This short pause helps the vinyl stick fully to the sign surface.
Lift one corner of the transfer tape slowly and pull it back at a low angle, almost parallel to the sign’s surface. Pulling too quickly or at a steep angle risks lifting vinyl pieces off the base.
If any vinyl lifts with the tape, press it back down gently and repeat the scraping and slow tape removal process. Smooth the surface again with your scraper tool if needed.
Sealing and Adding Finishing Touches for Durable Signs
Sealing your kitchen sign protects it from humidity, spills, and daily wear. Use a clear spray sealer designed for your sign material, like acrylic-based spray for wood or canvas. Apply it outdoors or in a well-ventilated area to avoid inhaling fumes. Hold the can about 8 to 12 inches away, spraying in thin, even coats. Let each coat dry for 15 to 30 minutes before adding another. Two to three coats usually provide good protection without clouding the colors or vinyl finish.
Sealing matters because kitchens have high humidity and occasional splashes, which can cause paint or vinyl edges to peel over time. Polyurethane sealers add a durable, moisture-resistant layer, extending your sign’s life. For indoor signs, satin finish sealers offer a soft sheen that hides fingerprints better than glossy ones.
Adding 3D elements or decorative touches improve your sign’s look and personalizes your space. Use lightweight wood cutouts, painted accents, or fabric bows attached with hot glue on dry signs. Small faux greenery or floral picks can also add charm without risking warping from moisture. Be cautious not to overload the sign, which can make hanging difficult. Position decorations mainly on corners or frames to avoid obscuring vinyl text. To ensure your sign remains long-lasting:
- Use a clear acrylic or polyurethane spray sealer compatible with your base and vinyl types.
- Apply sealers outside or in a dust-free, ventilated area to avoid debris on your finish.
- Allow at least 24 hours of curing time before hanging your sign in the kitchen.
- Attach 3D elements with a high-temperature hot glue gun for stronger bonds.
- Consider adding felt pads behind decorations to prevent scratches on the sign surface.
- Wipe signs gently with a damp cloth to clean; avoid abrasive cleaners that strip sealant.
- Reapply a fresh sealer coat every 1 to 2 years if you notice wear or dullness.
Sealing can cost around $5 to $15 per can of spray sealant, available at craft stores or online. Hot glue sticks for decorations usually cost under $10 and last for several projects. Signs sealed well and kept dry retain brightness and vinyl adhesion longer, avoiding peeling or fading common in humid kitchens. Following these steps helps your kitchen sign remain a beautiful, lasting addition to your decor.
Common Mistakes and How to Fix Them in Cricut Kitchen Sign Projects
One common mistake in Cricut kitchen sign projects is cutting vinyl too fast or with dull blades, which can cause incomplete or jagged edges. This makes weeding difficult and leads to messy designs. To fix this, slow down the cutting speed in your Cricut settings and replace your blade if it’s been used extensively. Testing cuts on spare vinyl can help you dial in the right pressure and speed.
Weeding errors occur when small pieces of vinyl get torn or lost, affecting the design’s look. Using a fine pointed weeding tool and good lighting helps you remove excess vinyl precisely. If vinyl tears, you can carefully patch it with a tiny piece of matching vinyl, but avoiding too many patches is best for a smooth finish.
Applying vinyl transfer tape too soon is another issue, especially if the paint on the sign base hasn’t dried fully. Paint can stay tacky for hours, depending on humidity and thickness of the layer. Rushing this step makes the vinyl slide or bubble. Wait at least 24 hours after painting for best results, or use a hair dryer on low heat to gently speed up drying. A fully dry surface ensures better adhesion and a flat look.
Vinyl bubbling during or after transfer usually happens when air gets trapped under the vinyl or the surface isn’t clean. To avoid this, clean your wood or canvas base with a lint-free cloth before applying vinyl. During transfer, press firmly using a scraper or credit card at a 45-degree angle to smooth out bubbles. Small bubbles can be popped with a pin and pressed flat again. For stubborn bubbles, gently lifting that section and reapplying often corrects the problem without damaging the vinyl.
Peeling vinyl often means the edges didn’t stick well, possibly due to dust, moisture, or rough textures on the surface. Fix peeling by warming the vinyl slightly with a hair dryer and pressing it down again. For long-term durability, seal your vinyl sign with a clear matte or satin finish spray designed for vinyl. Spray in thin, even coats and allow each coat to dry at least 30 minutes. This step protects your design and prevents vinyl from lifting over time.
Always confirm paint is fully dry to the touch and not tacky before applying vinyl; waiting 24 hours or using gentle heat prevents bubbling and peeling.
Step-by-Step Action Plan for Your Cricut Kitchen Sign
Follow this plan to create your kitchen sign efficiently and confidently. Each step builds on the last, so take your time and check your progress as you go.
- Before you start: Gather all materials including your Cricut machine, vinyl or stencil, sign base, transfer tape, paint, and sealing supplies. Confirm you have everything by laying them out on your workspace.
- Day 1: Design your kitchen sign in Cricut Design Space. Use simple fonts and graphics, then preview your design to make sure sizing fits your sign base.
- Day 2: Cut your vinyl or stencil on the Cricut machine. Check that all details cut cleanly by inspecting the edge sharpness before weeding.
- Day 3: Weed the vinyl or stencil carefully by removing unwanted material. Make sure the letters and shapes remain intact without tears or missing parts.
- Day 4: Prepare your sign base by lightly sanding and applying a base coat of paint if needed. Let the paint dry fully with no stickiness.
- Day 5: Apply transfer tape to your weeded vinyl or stencil. Place it carefully on the sign base, smoothing out all bubbles and wrinkles for a clean transfer.
- Day 6: Paint over your stencil or press down vinyl firmly to adhere. Wait for recommended drying times to avoid smudging or peeling.
- Day 7: Seal your finished sign with a clear coat or appropriate sealer for protection. Verify the surface looks even and dry before displaying or gifting your sign.
Frequently Asked Questions
Can I Add 3D Elements to My Cricut Kitchen Sign?
Yes, adding 3D elements like chipboard cut with the Cricut Knife Blade can make your sign stand out. This technique brings depth and a farmhouse look that simple vinyl cannot achieve.
What Size Should a Kitchen Sign Be for Wall Display?
A common size for framed kitchen signs is 11 x 14 inches. This size fits well in most kitchen spaces without crowding and is easy to design for in Cricut Design Space.
Can I Make a Kitchen Sign Without Using a Mat on the Cricut?
If you have a Cricut Maker or the newer Cricut Venture, you can cut large projects without a mat. This makes handling bigger kitchen signs easier compared to older models.
What Type of Paint Works Best for Wooden Kitchen Sign Bases?
Acrylic paint is ideal for wooden bases because it adheres well and dries fast. It also allows for easy layering, which helps create a smooth, professional finish.
How Do I Transfer Intricate Vinyl Designs Smoothly Onto Wood?
Use transfer tape and apply it slowly, smoothing with a scraper tool. This prevents air bubbles and misalignment, preserving details in small or complex patterns.
Can I Reuse the Vinyl Stencil After Making a Kitchen Sign?
Vinyl stencils can be reused several times if handled carefully and stored flat. This is efficient for making multiple signs with the same design or practicing techniques.
Wrapping Up
Your kitchen sign project will add a personalized touch to your cooking space and give you great practice using your Cricut. Start by opening Design Space and creating your first layout today. Take your time on each step for the best results and enjoy making a sign that feels truly yours.