How to Carve Letters in Wood: A Complete Guide with Tools, Tips & Techniques
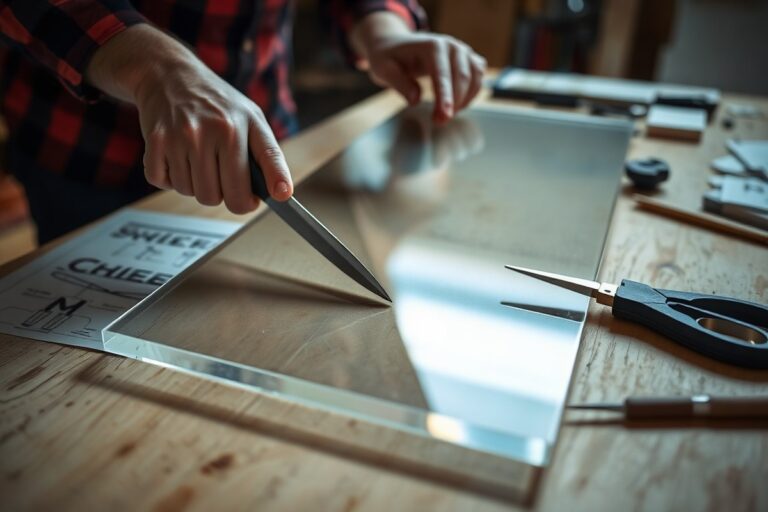
How to carve letters in wood starts with choosing the right tools and preparing your wood properly. Use a sharp carving knife or gouge at about a 30° angle off vertical to shape letters accurately. Begin by sketching or tracing your design carefully on the wood surface to ensure clean, balanced lettering.
Key Takeaways
- Trace letter outlines slowly with a pencil or use carbon paper for accurate transfer onto wood.
- Hold your knife at a 60, 65° angle when entering the wood for controlled cuts.
- Use gouges at roughly 45°, resting the side on the beveled v-groove for smooth curves.
- Keep letter spacing consistent; shrink letter size before tightening spacing to avoid cramped looks.
- Carve no deeper than ¾ of the wood thickness to maintain board strength.
- Use a mallet or your palm to tap chisels gently until the wood cuts smoothly again.
How to Carve Letters into Wood Step-By-Step

Carving letters into wood involves transferring your design, carefully cutting the wood along the outlines, and finishing the piece to highlight your work. The basic process includes preparing the wood surface, transferring the letter design, carving the letters to a suitable depth and width, and then sanding and finishing to clean up the details. Timing varies depending on the letter size and complexity but expect about 30 minutes to an hour for simple designs.
Preparing and Sanding the Wood Surface
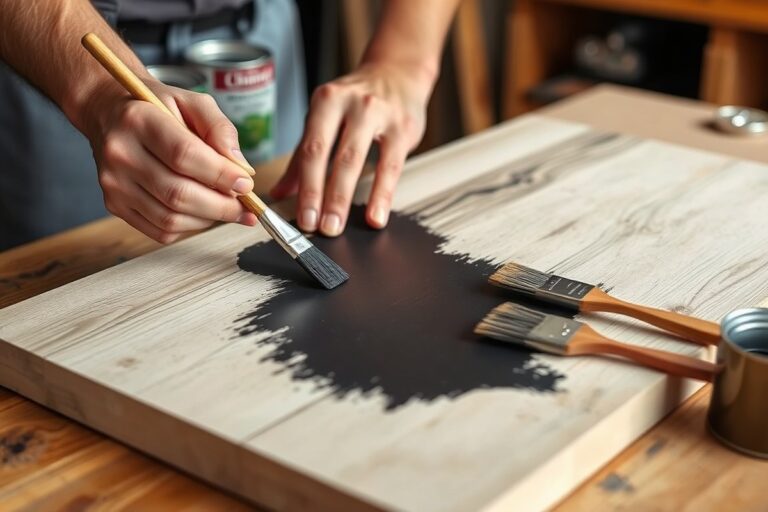
Start by choosing a wood piece appropriate for carving, typically a soft hardwood like basswood or pine. Smooth the surface using 80 to 120-grit sandpaper to remove any roughness or imperfections. Proper surface preparation ensures the design transfers clearly and your carving tools glide more easily.
A flat, sanded surface also helps prevent slips when carving, which can ruin delicate letter details. Avoid sanding beyond the 120-grit stage before carving, as too smooth a surface can make transferring the design harder to see.
Transferring the Letter Design
Transfer your design clearly onto the prepared wood before carving. Reliable methods include using carbon paper, tracing patterns directly with a pencil, or drawing freehand. Make sure the outlines are crisp and visible without being too thick, as this will guide your cuts precisely.
Double-check letter spacing and alignment at this stage to avoid mistakes during carving. Once the design is on the wood, avoid erasing unnecessary lines to prevent confusion. Clear outlines make removing background wood easier and protect letter shapes.
Carving and Shaping the Letters
Follow a step-by-step approach to carve the letters, working slowly and carefully for clean results. Carve the outline first, using small chisels or carving knives to define each letter’s edges. After outlining, chip away the wood just outside the letters, removing larger chunks away from the design rather than inside the outline.
Ideal carving depth is between 1/8 inch and up to 3/4 of the thickness of the wood, ensuring enough depth for visibility without weakening the piece. Letter width depends on your design, but letters carved too thin risk breaking, while overly wide lines may lose detail. Typical letter widths range from 1/8 inch to 1/4 inch.
Set aside enough time for detail work, especially on complex letters like K, where angles require careful carving. Patience here avoids uneven or jagged edges. Letter carving times vary: simple single letters or short words may take 30 to 60 minutes, while more complex or larger letters could require several hours.
- Outline each letter carefully using a sharp carving knife or a small chisel.
- Remove wood from the background area, working away from the letter edges.
- Clean up edges and refine the letter shapes by shaving small amounts of wood.
- Check the letter depth regularly, ensuring you do not exceed three-quarters of the wood’s thickness.
- Maintain consistent letter widths to keep the design balanced.
- Use a mallet only if necessary, mainly for tougher woods or larger gouges.
Sanding and Finishing the Carved Letters
After carving, use 80 or 100-grit sandpaper folded into a small piece to sand inside the carved letters gently. This smooths out chisel marks without erasing fine details. Be careful not to over-sand shallow letters, which can remove depth and clarity.
Sand the surrounding wood surface as well for an even finish. After sanding, apply your preferred wood finish or sealant according to the wood type and project use to protect your work and improve appearance. Finishing touches bring out the contrast and ensure lasting durability.
Essential Tools for Carving Letters and How to Use Them
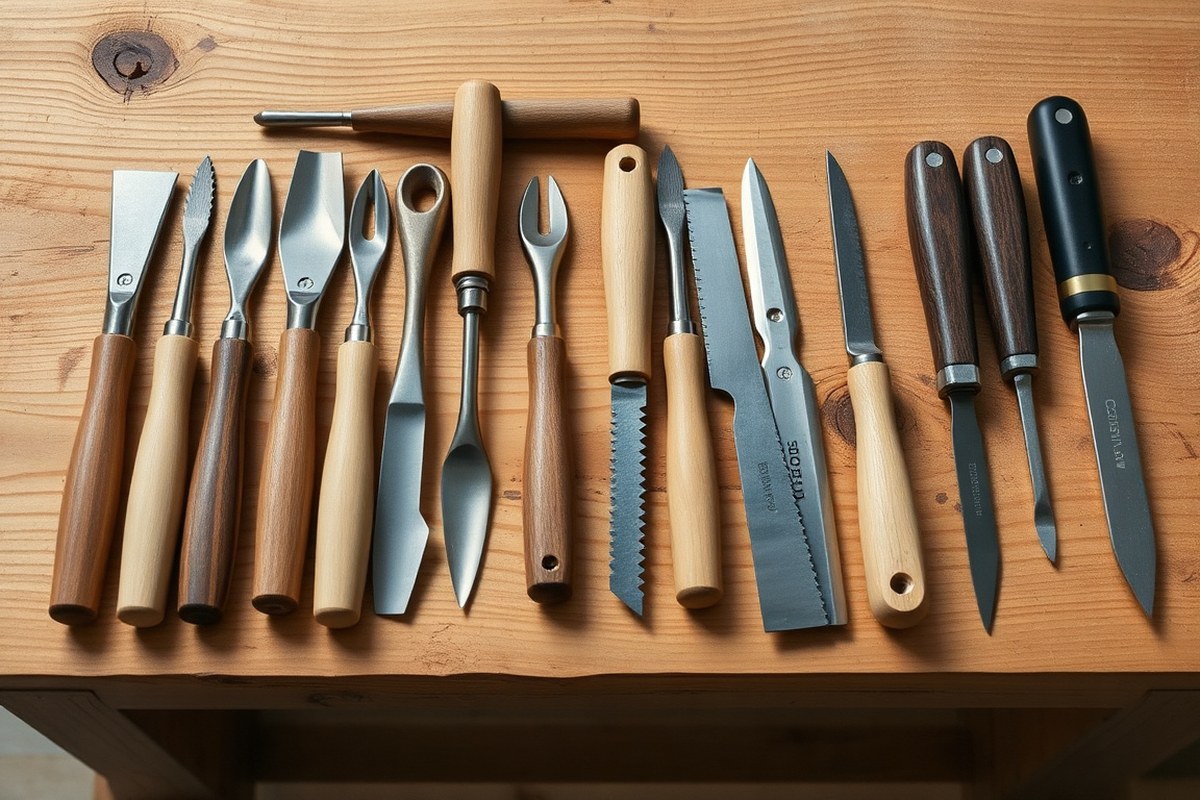
You need a basic set of hand tools to carve letters into wood effectively: a variety of carving gouges, a V-tool for fine lines, and a carving mallet. Gouges come in different shapes and sizes and help scoop out wood, making it easier to shape the depth and curves of your letters. A V-tool is essential for cutting crisp, clean letter edges, especially on straight strokes or corners. Using a mallet to tap your gouges provides more control and reduces hand fatigue, especially when carving harder woods.
Power tools like Dremels and routers can speed up carving by cutting through wood faster and with less physical effort. They are helpful for larger or more repetitive letter carving projects. However, they sacrifice some control and finesse, which you usually get from hand tools. For beginners focused on precision and detail, hand tools often deliver better results and a more satisfying experience. Higher Janka hardness woods require sharper tools and sometimes power tools to avoid tearing grain.
Maintenance starts with keeping your chisels and gouges sharp. Use a combination of oil stones and fine diamond hones to sharpen edges regularly, sharpen before each session if the tool feels dull. Sharpen by first flattening the backside and then honing the bevel between 25 to 30 degrees. Stropping on leather with a polishing compound removes the burr and smooths the edge. Light rust prevention involves wiping tools clean after each use and storing them in a dry place. Avoid hitting the tool’s edges on hard surfaces, which can nick the blade.
Using a carving mallet requires a steady rhythm to drive tools through wood without damaging the blade or causing hand strain. Tapping with your palm first helps you get the feel for force needed, especially with softwoods like basswood or eastern white pine that carve easily without much force. Hardwoods such as black walnut or cherry will need more solid strikes but also benefit from sharper tools and occasional power tool assistance.
Never try to carve with a dull blade; it causes slips that lead to uneven cuts or injuries. Keep your tools sharp and take your time on each stroke.
Choosing the Best Wood for Letter Carving Projects
Choosing the right wood for carving letters makes a big difference in how easy and clean your results will be. Softer woods with fine, even grains tend to carve better for beginners. Hardwoods like oak are tougher and require more skill and sharper tools. The wood grain direction guides your carving path; carving with the grain helps avoid tear-outs and rough edges. When grain patterns are open or pronounced, as in oak, you’ll notice more texture on your letters, which can be challenging for detailed shapes.
| Wood Type | Grain | Hardness |
|---|---|---|
| Basswood | Fine, even | Soft |
| Pine | Visible, can be knotty | Soft to medium |
| Oak | Pronounced, open | Hard |
| Maple | Fine, generally even | Hard |
| Walnut | Fine to medium | Hard |
Basswood stands out as a top pick for beginners because it is soft and has a smooth, even grain that allows tools to cut easily. It produces clear, precise letter edges with less effort. Pine is another option but watch for knots and more visible grain. Hardwoods like maple, cherry, and red oak offer durability and a richer look, but they demand sharper tools and more carving experience. Oak’s open grain is often too tough for beginners, and the grains can cause chip-outs if you carve against or across them.
Carving with the grain means following the wood fibers as you work. Start by examining the board’s surface to spot the grain direction, then align your blade accordingly. If ripping or tearing happens, try carving in the opposite direction. This tactic helps you avoid splintering, especially in woods like pine or oak. Avoid warped or defective wood; imperfections make precise letter carving hard and may cause your tools to slip or catch unexpectedly.
For beginner-friendly lettering, block letter styles without delicate serifs allow easier cuts with less risk of breakage. A more even grain and softer wood lets you carve smooth curves and straight lines cleanly. Hardwoods can be used once you gain confidence but expect to spend more time sharpening tools and carving carefully around grain changes. Distinct woods like walnut or butternut add color and grain interest but maintain relative softness for controlled carving.
Accurate Methods to Design and Transfer Letters Onto Wood
Accurate transfer of letter designs onto wood is key to precise carving. Several methods exist beyond carbon paper, each with its advantages depending on your project size and style. Knowing how to use stencils, tracing techniques, and digital print transfers helps you get clean letter outlines that make carving easier.
Using Carbon Paper for Tracing
Carbon paper is still widely used for copying printed or drawn letters onto wood. Tape your printed letters onto the light side of carbon paper, ensuring the dark, wax-coated side touches the wood. Secure the papers on your wood with tape to keep them steady. Use a pencil to carefully trace each letter’s outline, applying enough pressure to transfer the carbon color without tearing the paper. This process leaves a neat but temporary outline on the wood.
This method is affordable, with carbon paper sheets costing around $5 to $10 for a pack of 25. It works well for detailed fonts and moderate-sized projects but can struggle with very rough wood surfaces where the transfer may be patchy. Avoid rubbing motions during tracing, as this can smear the carbon and blur letter edges, making your carving less accurate.
Stencil and Freehand Drawing
Using stencils offers a straightforward way to ensure uniform letter shapes and spacing. You can buy plastic or metal letter stencils inexpensively at craft stores or online, often for under $10. Place the stencil on the wood and carefully fill the letter cutouts with a pencil or fine marker. This approach works well for beginners still developing freehand skills and is highly repeatable for multiple signs or plaques.
Alternatively, freehand drawing your letters directly onto the wood lets you personalize the design. Sharp pencils or fine graphite sticks produce clear lines to guide carving. Take your time sketching slowly to get smooth curves and consistent letter sizes. This method suits rustic or artistic projects where slight variations add character. Keep in mind freehand letters need steady hands and practice to avoid uneven spacing that can throw off the overall balance.
Digital and Printed Transfers
Digital printing expands options for precise lettering, especially for complex fonts or logos. Use a word processing program to create your text at the desired size and print it on regular or lightweight paper. You can then apply transfer methods like carbon paper tracing or use an adhesive spray to temporarily glue the printout to the wood. After allowing the adhesive to set for 1 to 3 minutes, trace over the letters with a pencil or stylus, pressing firmly to imprint the design. Peel the paper carefully to reveal crisp outlines.
This approach requires access to a printer and possibly adhesive products but offers excellent scalability from single letters to large text blocks. For larger projects, break the design into smaller sections on multiple sheets to avoid printing distortions. While not recommended on very rough or porous wood, digital transfers show letter shapes with higher precision than freehand or manual tracing.
Carving Techniques for Clean, Precise Letters
Clean and precise letter carving depends largely on your control of tool angles and consistent cutting depth. To avoid rough edges and splintering, keep your carving tools sharp and carve in the direction of the wood grain. Dull tools crush the wood fibers instead of cutting them cleanly, which leads to a ragged look around the letter edges. Before you start, set your tools at a 25 to 30-degree angle for V-groove cuts, which are common for creating dramatic shadows and clear letter outlines. Holding the tool too steep can gouge the wood, while too shallow an angle makes it harder to carve crisp lines.
Maintaining a consistent depth for your cuts is important for neat, uniform letters. Carve to a depth that reflects the width of your font strokes; for example, if your letter stroke is 1/4 inch wide, aim for a V-groove depth around 1/8 inch. Avoid cutting deeper than three-quarters of the wood thickness, as this risks weakening or splitting the board. Use gentle, controlled pushes instead of heavy force, especially on curves and corners, to keep the cuts even and avoid breaking delicate edges.
For carving curves, guide your tool slowly and make small, overlapping cuts rather than trying to carve the curve in one pass. This method provides more control and smoother edges. Straight chisels and small skew chisels help clean and refine these curves and tight corners after the initial cuts. Skew chisels work well when pare away waste wood in narrow stroke areas without damaging the letter edges. After carving, you can slightly round the letter edges by rubbing them with fine sandpaper or a rotary tool sanding bit, but finish sanding the board to 180 grit beforehand to keep edges crisp.
Consistent cutting angle and depth not only define the letter shapes but also create shadows that improve readability. For block letters with wide strokes, use a larger chisel to maintain even cuts across broader surfaces. Conversely, smaller or script fonts require finer tools and shallower, narrower cuts to avoid over-carving. Aligning your tool at the proper angle and steady hand pressure makes the difference between clean, professional looks and rough, uneven letters. Most practicing carvers develop a light touch over time by carving slowly and removing small amounts of wood incrementally.
Always sharpen your carving tools before starting to prevent rough edges and splintering, which happen quickly with dull blades cutting against the wood grain.
Maintaining Letter Spacing and Layout for Balanced Results
Achieving even letter spacing and straight alignment is critical to making your wood-carved letters look balanced and professional. Planning your layout carefully on the wood surface before carving helps you avoid mistakes that are difficult to fix later. Keeping letters proportional to each other and to the size of the board also plays a big role in the overall appearance.
To maintain consistent spacing between letters, use a rule of thumb based on the letter height. For block capitals, allow about 0.75 times the letter height for each letter plus the gap between letters. Include a margin equal to one letter height at each end of the board to create balanced whitespace. For example, if you plan to carve letters 2 inches tall, give each letter and its surrounding space about 1.5 inches in width, with a 2-inch blank margin on both sides.
Letter size depends on your project’s scale. Signs intended to be seen from a distance work best with letters at least 2 to 3 inches tall. Gifts or small decorative plaques can use letters from 0.5 to 1.5 inches. Make sure the height fits the board while leaving some room around the edges.
Using a straightedge, ruler, and pencil for the layout step is essential to keep everything aligned and proportioned. Mark your baseline and cap height lines across the board with a pencil. Then use a measuring tool or spacing template to mark vertical lines that show where each letter will sit. This guides you while transferring the letters and carving by hand, helping prevent crooked or uneven spacing.
- Measure your board’s length and width. Decide the letter height and calculate total lettering width by multiplying letter count by 0.75 times letter height. Add twice the letter height for margins.
- Draw horizontal baseline and cap height lines. Use a ruler or straightedge to mark these on the wood with a pencil to maintain consistent letter height.
- Mark vertical spacing lines. Starting from the left margin, use a ruler to measure intervals of 0.75 times your letter height for each letter and space. Draw light vertical pencil lines at these intervals.
- Sketch your letters within the guidelines. Use your preferred lettering style, keeping each letter inside the vertical space to maintain even spacing.
- Check spacing visually. Step back and look at the layout from the typical viewing distance to ensure letters look balanced and straight.
- Transfer your pencil layout if needed. Use carbon paper or poke holes along the outline if you prefer a stencil for carving accuracy.
- Carve carefully along the pencil lines. Remove wood shavings often to keep the outlines visible and ensure straight, proportional letters.
Common Letter Carving Mistakes and How to Fix Them
Uneven depth is one of the most common mistakes when carving letters into wood. You might find some parts carved to 3mm deep and others carved twice as deep on the same letter. This inconsistency can make your work look amateurish and uneven. To fix this, use a consistent reference point while carving and check your depth frequently with a small ruler or caliper. Setting a depth guide on your gouge can also help maintain uniformity across the entire letter.
Cuts outside the letter lines happen when you apply too much force or lose control of the tool. This often results in rough edges or overcutting beyond the intended outline. To correct this, gently pare away the excess wood with a sharp chisel, working slowly to avoid further mistakes. Prevent this issue by matching the gouge profile to the letter’s curve, such as choosing a #5-16mm gouge for most outside curves on a 3-inch letter. Using the right tool size helps you follow the lines accurately without forcing the cut.
Splintering and crumbling of carved letters usually occur when the wood grain is too coarse, or the carving depth is too aggressive for the wood type. This damage weakens your project’s appearance and durability. Avoid this by selecting the right wood and carving at a consistent depth no deeper than 3 to 4mm for most beginner projects. Also, carve along the wood grain instead of against it, and keep your tools razor-sharp to make clean, controlled cuts. After carving, sanding with 80- or 100-grit sandpaper smooths rough edges and seals small splinters.
Another source of errors is poor letter spacing, which can cause your text to look cramped or unbalanced. If your design calls for large letters and your board is smaller than planned, reduce the letter size instead of squeezing the spacing. Tight letter spacing makes the carving harder and the final product less readable.
For finer lines, use smaller gouges or chisels, while larger tools work better for removing excess wood around the letter shapes. Balancing the tool size with the letter proportions will give you cleaner results. When fixing mistakes, patience is key, carve small amounts at a time and check your work frequently. This approach helps you avoid overcorrecting and damaging the wood further.
Finishing and Protecting Your Carved Letters Project
To finish your carved letters project properly, you need to sand carefully to preserve sharp edges, then apply a sealant to protect the wood and improve its look. Finally, polishing adds smoothness and depth without hiding the letter details. These steps make your carving last longer and look professional.
Sanding Inside and Around Letters
Sanding is key to removing roughness but must be done gently to keep the letters crisp. Use finer grits as you progress to avoid rounding letter edges. Start with 120-grit sandpaper for general smoothing, then switch to 220-grit or finer for detailed areas. Sand along the grain, not across it, and use small, flexible sanding tools or folded paper to get inside carved curves.
For tight spots inside letters, wrap 220- or 320-grit sandpaper around a toothpick or use a small sanding sponge. Do not apply heavy pressure because it can wear down sharp bevels or corners. Keeping cuts clean during carving helps reduce how much sanding you need inside the letters.
Choosing and Applying Sealants
Applying a sealant is recommended to guard your carved letters against moisture, dirt, and wear. Clear polyurethane offers durable protection with a hard finish. Danish oil penetrates the wood, coloring it slightly and emphasizing grain and carving details. Wax adds a softer glow and can be buffed to a shine but offers less protection. Choose based on the look and durability you want.
Follow these steps to seal your project: apply a thin sealant coat with a brush or cloth, let it dry at least 4 hours, sand lightly with 320-grit sandpaper, then apply additional coats (2 to 3 total). Avoid pool accumulation inside letter cuts to keep details visible. Danish oil usually requires fewer coats but needs longer curing time (up to 24 hours).
Final Polishing and Care Tips
After sealing, use a soft cloth to polish the surface lightly, removing excess finish and improving the shine without filling the letter texture. For wax finishes, buff in small circular motions until the wood looks even. Avoid harsh chemicals or abrasive materials, which can dull carving edges or damage the finish.
Protect your finished letters from extreme humidity or direct sunlight, which causes wood to expand or fade. Regularly dust with a soft brush or dry cloth to keep detail sharp. Reapply wax yearly if used, or polyurethane every few years depending on wear. Proper finishing and care warranty your carved letters retain their beauty over time.
- Sand the surface starting with 120-grit paper to smooth rough areas.
- Use 220-grit sandpaper to gently smooth inside letter cuts and edges.
- Remove sanding dust thoroughly using a tack cloth or soft brush.
- Apply the first thin coat of your chosen sealant evenly over the entire project.
- Allow sealant to dry; follow product instructions (4 to 24 hours).
- Lightly sand the sealed surface with 320-grit paper to remove raised grain.
- Apply 1, 2 additional coats of sealant, letting each dry fully.
- Buff the final coat with a soft cloth for a smooth, polished finish.
Take care not to over-sand inside letter grooves, as this can round edges and reduce clarity of your carving.
Step-by-Step Action Plan to Start Letter Carving
Follow this practical timeline to begin carving letters into wood with confidence. Each step builds toward a neat and balanced letter carving project.
- Before you start: Gather the essential tools like carving knives, gouges, and a mallet. Confirm each tool is sharp and comfortable to handle.
- Day 1: Select a soft wood such as basswood or pine for easier carving. The wood should have a smooth grain and no knots in the carving area.
- Day 2: Design your letters on paper, then transfer them onto the wood surface using carbon paper or pencil tracing. Check that lines are clear and correctly sized.
- Day 3: Outline each letter with a V-tool at a shallow depth. The cuts should be clean and consistent without gaps.
- Day 4: Carve away background wood around the letters with gouges for a relief effect. Ensure the letter edges remain sharp and defined.
- Day 5: Sand gently around the letters to remove rough spots, avoiding the carved areas. The surface should feel smooth without rounding the letter edges.
- Day 6: Apply a wood finish such as oil or a clear sealer to protect and highlight the carving. The finish should dry evenly without blotches.
- After 2 weeks: Inspect your work for any chips or uneven paint spots. Touch up any areas with fine carving tools or finish touch-ups as needed.
Frequently Asked Questions
What Is the Best Way to Fix a Mistake While Carving Letters in Wood?
You can lightly sand or use wood filler to fix small mistakes, then recarve or touch up the area for a clean look. Taking your time and steadying your hand helps prevent errors during carving.
How Deep Should I Carve Letters into Wood for Durability?
Carve letters no deeper than ¾ of the wood’s thickness to avoid weakening the piece. Shallow carvings last well and reduce the risk of wood splitting over time.
Can I Use a Router Instead of Hand Tools for Letter Carving?
Yes, a router with a V-groove bit works well for cutting letters and speeds up the process. It’s important to practice first to control depth and precision.
How Do I Maintain Consistent Letter Size When Carving by Hand?
Use a stencil or carefully measured pencil guidelines before carving to keep letters uniform. Marking letter heights and widths ensures balanced spacing and appearance.
What Type of Pencil Is Best for Sketching Letters on Wood?
A sharp graphite pencil works best because it makes clear, erasable lines without damaging the wood surface. Avoid heavy pressure that can indent the wood before carving.
Is It Necessary to Seal Wood Before Carving Letters?
Sealing before carving isn’t required but applying a finish after protects the wood and improve the letter contrast. Some woodworkers prefer unfinished wood during carving for better control.
Before You Go
Carving letters into wood takes steady hands and patience, but by using the right tools and techniques you can create clear, attractive lettering. Start with simple designs on softwood and practice steady, shallow cuts for best control. Try your first carved letter project on a small piece of wood to build your skills before moving on to more complex signs or gifts.