How to Make Chalkboard Signs: A Complete Step-by-Step DIY Guide
Learning how to make chalkboard signs is simple and inexpensive with a few basic materials like chalkboard paint, wood or thrifted frames, and chalk markers. Start by preparing your surface with two coats of chalkboard paint and seasoning it once dry to ensure smooth writing and erasing. Using free-standing picture frames allows for easy customization and can keep costs under $10.
Key Takeaways
- Use thrifted picture frames as affordable, ready-made bases for your chalkboard signs.
- Apply two coats of chalkboard paint for an even, durable writing surface.
- Season your chalkboard with chalk after the final coat dries to prevent ghosting.
- Cut wood bases into manageable sizes, such as 8×10 inches, for easier handling.
- Transfer designs using stencils, chalk transfer paper, or freehand drawing methods.
- Choose simple lettering styles for clear, easy-to-read signs suitable for any event.
What Materials and Tools Do You Need to Start?
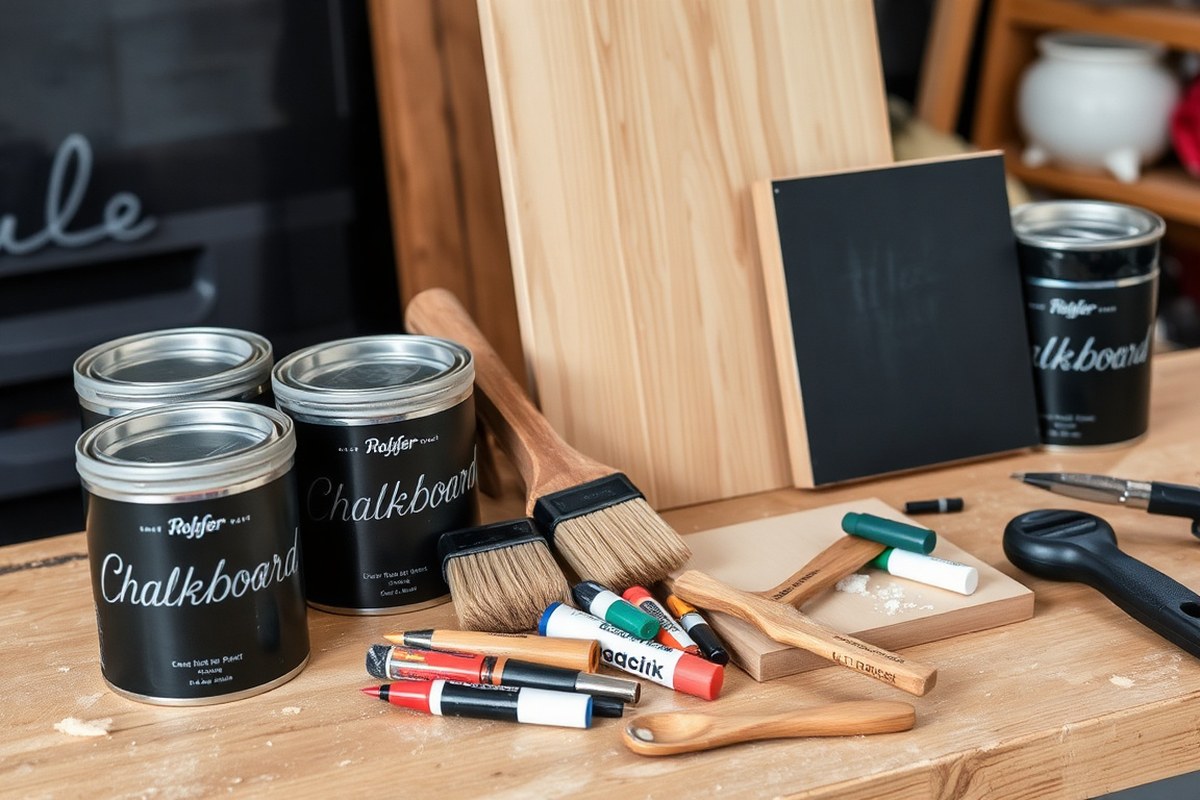
To make chalkboard signs, start with the right materials and tools to get clean cuts, smooth surfaces, and lasting finishes. Essential materials include a base board like plywood, MDF, or pre-cut chalkboard panels. Plywood and MDF sheets typically come in 1/4-inch to 1/2-inch thicknesses, providing a sturdy surface that won’t warp easily. You can often find scraps or smaller pieces for under $5 at hardware stores. Paint quality matters because chalkboard paint creates the writing surface. Popular brands like Rust-Oleum or Krylon chalkboard paint cost around $10 per small can and give a smooth, chalk-friendly surface. Choose a satin or matte finish to reduce glare.
For tools, you’ll need a saw to cut your board to size. A handsaw or jigsaw works well for beginners, often available at low cost or borrowed. Sandpaper (150, 220 grit) helps smooth edges before painting. When framing signs, use a tape measure, a carpenter’s square for right angles, and a hammer or nail gun for attaching frames or supports. Budget framing options include repurposed picture frames or simple wood strips cut to fit around the board’s edge. These can be found at thrift stores for 50 cents or less, making it easy to keep costs low without sacrificing style.
- Base board: plywood, MDF, or chalkboard panels (1/4″, 1/2″ thick)
- Chalkboard paint: brands like Rust-Oleum or Krylon, ~$10 per small can
- Cutting tools: handsaw, jigsaw, or borrowed saw
- Sanding: 150, 220 grit sandpaper to smooth edges and surfaces
- Measuring and framing tools: tape measure, carpenter’s square, hammer or nail gun
- Optional frames: thrift store picture frames ($0.50 each) or wood strips
- Regular chalk or chalk markers for writing and decorating
Painting requires applying two even coats of chalkboard paint, allowing each coat to dry for about 2 hours. Before painting, lightly sand the board and wipe it clean. Budget options include using leftover regular paint for frames or backing for contrast. Recycled materials like old picture frames or scrap wood give the project character and reduce expense. What makes a chalkboard sign look good is smoothness and even paint coverage, avoid thick clumps or rough textures to get clean, easy lettering. You can customize size and shape according to your project by cutting boards smaller for tabletop signs or larger for events or business use.
Working with these materials and tools ensures your chalkboard sign will be sturdy, reusable, and visually appealing. Keep your workspace well-ventilated while painting and follow label instructions for drying times to achieve the best results.
How to Prepare and Season Your Chalkboard Surface

Preparing your surface carefully and seasoning your chalkboard properly are essential steps for creating durable, reusable chalkboard signs. The right preparation helps chalkboard paint adhere smoothly and prevents flaking. Seasoning the surface before use improves how chalk writes and erases.
Choosing the Right Surface Material
Pick a smooth, non-porous surface for the best chalkboard results. Wood, glass, and metal all work well once cleaned and prepped. Wood should be sanded lightly to create a smooth base, while glass and metal only need thorough cleaning.
The surface should be free of dust, grease, or old paint that could prevent chalkboard paint from sticking properly. Avoid using regular paint as a base; it won’t provide the same chalk-friendly surface as specialized chalkboard paint. Using high-quality chalkboard paint designed for your chosen material ensures good adhesion and a vibrant finish.
Applying Chalkboard Paint Properly
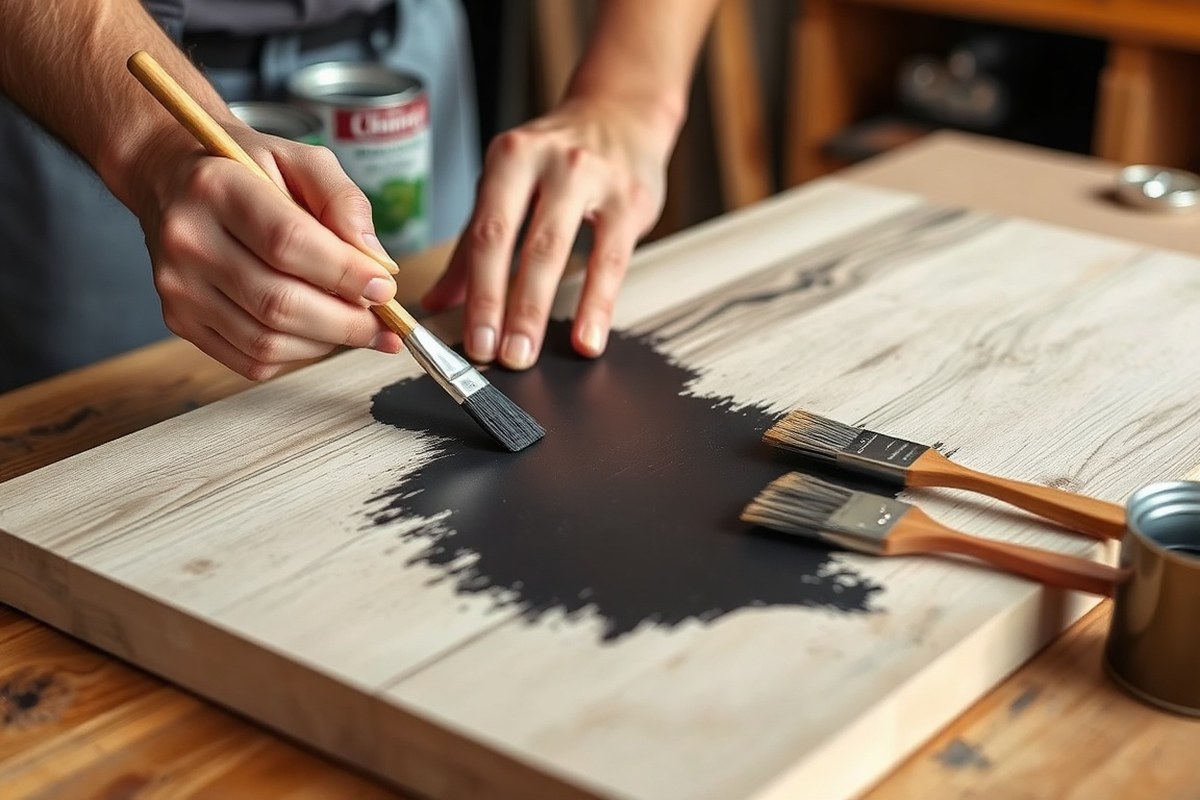
Applying chalkboard paint correctly ensures your sign has a smooth, even finish that holds up to frequent use. Use a foam roller or high-density foam brush for applying the paint; they help avoid brush marks and create a flat surface. Applying multiple thin coats yields better results than one thick coat. Follow these steps to apply your chalkboard paint:
- Clean the surface with soap and water; let it dry completely.
- Sand wood lightly with fine-grit sandpaper to smooth rough spots, then wipe away dust.
- Use painter’s tape to mask edges where you don’t want paint.
- Stir the chalkboard paint thoroughly without shaking to avoid bubbles.
- Apply the first thin coat evenly with a foam roller or brush, moving in one direction.
- Allow the paint to dry fully, usually 2 to 4 hours depending on brand and conditions.
- Apply a second coat for full coverage, repeating drying time.
- Remove painter’s tape carefully once paint is dry.
Uneven or thick coats can cause bubbling and peeling, so go slow and keep coats thin.
Seasoning and Curing the Chalkboard
Seasoning your chalkboard is a important step that helps prevent permanent marks and makes the surface easy to write on and erase. Once paint is fully dry, typically 24 to 48 hours, spread chalk evenly across the entire surface.
To season, take the side of a piece of chalk and rub it over every inch of the chalkboard. This fills tiny pores in the paint and lays down a base layer. Then wipe the surface clean with a dry cloth or chalkboard eraser before first use.
Let your chalkboard cure for at least 3 days after the last coat of paint and seasoning before heavy use. This waiting period ensures the paint hardens fully and improves durability.
What Are Easy DIY Methods to Create Chalkboard Signs?
Making chalkboard signs at home can be simple and fun using several beginner-friendly methods. One of the easiest ways is painting wood with chalkboard paint. Start by sanding a smooth piece of wood, then apply two coats of chalkboard paint, allowing 1 to 2 hours to dry between coats. Choose a paint designed for chalkboards that costs around $10 to $20 per quart. This method creates a durable surface that can handle regular chalk or chalk markers and works well for both indoor and outdoor signs.
Another easy method involves recycling old picture frames. Remove the glass and back, then paint the backing board with chalkboard paint. Old frames can often be found at thrift stores or around the house, which keeps the cost low and adds a charming border to your sign. Using a recycled frame is a great way to turn unused items into useful decor without buying additional materials.
Transferring designs onto your chalkboard sign can raise the quality of your artwork without needing advanced freehand skills. One simple technique uses transfer paper between your printed design and the chalkboard surface. Sandwich the carbon side of the transfer paper between the paper and the board, then trace your design with a pencil. The faint outlines guide your chalk or chalk marker decoration. This method costs about $5 to $15 for a pack of transfer paper, and it works well on painted wood or smooth surfaces.
| Method | Materials Needed | Cost Approximate | Time to Complete | Best For |
|---|---|---|---|---|
| Painted Wood | Wood panel, chalkboard paint, sandpaper | $10 – $20 | 4 – 6 hours (drying time) | Durable home decor & outdoor signs |
| Recycled Picture Frame | Old frame, backing board, chalkboard paint | Usually free or under $5 | 2 – 3 hours (drying time) | Decorative framed signs, low cost |
| Transfer Paper Design | Printed design, transfer paper, chalkboard surface, pencil | $5 – $15 | 30 minutes to 1 hour | Precise lettering and artwork |
Working with wood or recycled materials offers flexibility and can fit different budgets. Painting wood provides a sturdy base that will last longer outdoors or with frequent use. Using a picture frame works well when you want a polished look with minimal effort. Transfer paper helps you maintain design accuracy, especially for intricate patterns or fonts, without requiring artistic skills.
Common challenges include uneven paint application on wood or boards, which can result in a rough chalk surface. Make sure you sand your wood before painting and apply thin, even coats of paint. When using recycled frames, test that the backing board accepts chalkboard paint well and isn’t warped. For transfer paper, press firmly while tracing and check that the chalkboard surface is clean and smooth for better line visibility.
How to Design, Plan Layout, and Choose Lettering Styles
Planning your chalkboard sign’s design is the first step to a professional finish. Start by deciding what message you want to convey and who your audience is. Sketch your design on paper first to balance text and graphics. Think about the hierarchy: the main message should be the largest and boldest, secondary info smaller but clear. For example, a menu board should highlight the dish names prominently, with prices or descriptions smaller underneath.
Choose lettering styles that match the event or use. For a wedding welcome sign, elegant script or serif fonts work well, while a business promotion might call for bold block letters for easy reading at distance. You can practice different styles using large chalkboard pieces before committing to your final board. Mixing a decorative font for headings with a simple, legible font for details is a good rule.
To transfer your design, draw it lightly with pencil on the board, using horizontal guidelines to keep letters even. These lines should be faint so they erase easily afterwards. If freehand drawing isn’t your strength, print or trace your design onto the chalkboard. This helps avoid mistakes and keeps proportions right. After laying out your lettering, fill it in with chalk or chalk markers.
- Use a ruler or level to draw straight baseline and height guidelines for consistent letter size and spacing
- Create letter hierarchy by varying size, weight, and style, titles larger, important details next, less critical info smallest
- Select at least two complementary fonts or styles for visual interest without clutter
- Leave blank margins and space between lines to improve readability, roughly 10% of total sign height
- Sketch lightly with pencil first, then finalize with chalk to allow corrections
- Consider your sign’s location and typical reading distance when sizing letters; 1 inch tall letters are readable from about 5-6 feet
- For event signs like weddings, use soft, curved letterforms; business or menu boards benefit from clear, bold, sans-serif letters
Good design avoids overcrowding. Leave breathing room around text and graphics. Keep your message simple and direct to catch attention. After finishing your chalk lettering, gently erase the pencil lines without smudging the chalk. Using a clear chalkboard sealer will protect your design and make it last longer, important for frequently handled signs.
What Materials and Techniques Work Best for Lettering and Art?
Choosing between chalk and chalk markers depends on the look you want and how much detail your sign needs. Traditional chalk lets you blend and erase easily but can smudge or fade quickly. Chalk markers offer bolder, cleaner lines that resist smudging but can be trickier to remove if you make a mistake. For vibrant, precise lettering that pops, chalk markers work best, especially on indoor boards or signs you want to last through events like weddings or menus. For casual, temporary signs, standard chalk gives you flexibility and a soft, rustic feel.
Using chalk effectively means lightly holding it at an angle for broader strokes or using the tip for thinner lines. To achieve crisp outlines or flourish details, try layering by first sketching a light outline then darkening interiors. Chalk markers perform well for detailed work: start with thin-tipped markers for fine lines, then use chisel tips for filling bigger areas. A steady hand and slow strokes help avoid uneven lines. Drawing decorative borders or small motifs like leaves can add personality and sophistication to your sign.
Fixing mistakes depends on your medium. For chalk, dampen a cotton swab or a soft cloth with water and gently rub the error, let it dry, then redraw. Mistakes with chalk markers require extra care: wipe fresh errors immediately with a damp cloth. If the marker has dried, use a small amount of rubbing alcohol on a cloth to lift the stain but test a hidden spot first. Be cautious of permanent marker stains, which might need sanding or a specialized chalkboard cleaner to remove.
| Material | Best Use | Advantages | Drawbacks |
|---|---|---|---|
| Traditional Chalk | Temporary signs, rustic style | Easily erasable, low cost (about $1, $3 per stick) | Smudges easily, less vibrant, less precise |
| Chalk Markers | Detailed, bold lettering for indoor use | Bright colors, precise lines, smudge-resistant | Harder to erase, risk of permanent stains, costs $5, $8 each |
| Water and Cloth | Correcting chalk mistakes | Quick fixes, reusable | Must dry before redrawing |
| Rubbing Alcohol | Removing dried chalk marker stains | Effective on stubborn marks | May damage surface if used improperly |
Test any cleaning method on a small corner of your chalkboard to avoid damage before fixing mistakes.
Adding decorative elements can be as simple as using contrasting colors or drawing borders that match your event’s theme. Using chalk markers to outline chalk lettering adds dimension, while white chalk lets you create soft shadows. Keep your design balanced by spacing lines well and alternating thickness. Practice your details on scrap chalkboard material before finalizing. Highlighting educational quotes or seasonal messages also makes your chalkboard sign engaging and purposeful.
How to Build Frames and Supports for Free-Standing Signs
Building sturdy frames and supports lets you display free-standing chalkboard signs indoors or outdoors without extra help. You can create stable bases using wooden frames or easels or use practical hanging systems for wall mounting. Following safe cutting and assembly practices keeps the project manageable and prevents injuries.
Cutting Wood for Frames Safely
Always wear safety goggles and work gloves when cutting wood for chalkboard frames to protect your eyes and hands. Use a stable work surface and clamp down the wood to avoid slipping. Measure twice before cutting to reduce mistakes. Choose a saw appropriate for your skill level, handsaws offer more control but take longer, while power saws can speed up cutting but require more care.
Keep your blades sharp, and cut slowly through the wood, especially when working with hardwood or thicker planks. Maintain a clean workspace free of clutter to prevent accidents.
Assembling Free-Standing Bases and Easels
Free-standing chalkboard signs often use A-frame bases or simple easels made from wood. The base should be wide enough to support the board’s weight and prevent tipping. Using screws instead of nails provides a stronger hold. Consider weatherproofing outdoor signs with exterior wood paint or sealant to avoid damage. Here is a basic step-by-step for assembling an A-frame base suitable for most chalkboard panels up to 18 by 24 inches:
- Measure and cut four wooden pieces: two vertical legs about 30 inches long and two horizontal crosspieces 18 inches long.
- Sand all pieces to smooth rough edges and prevent splinters.
- Attach the horizontal crosspieces between the legs near the top and bottom, forming a rectangle with open sides.
- Secure the joints with wood screws and wood glue for added strength.
- Attach a hinge at the top between the two vertical legs so they can open and close like an easel.
- Fix a small chain or wooden brace on each side at mid-height to prevent the legs from spreading too far apart.
- Mount the chalkboard panel onto the front of one side using screws or strong adhesive strips.
- Test stability by opening the frame and gently pressing to make sure it stands firmly without wobbling.
This type of base typically costs around $10 to $15 in scrap wood or basic pine lumber. Using pre-cut lumber or repurposing old wood saves money.
Options for Hanging Chalkboard Signs
Hanging chalkboard signs work well for doorways, walls, or window displays. You can build a simple frame with built-in hooks or use wire and eye screws to create a secure hang system. For lightweight boards under 10 pounds, picture-hanging wire combined with D-ring hangers works well.
Measure the board’s width, and space the hardware evenly to distribute weight. Use a level to ensure the sign hangs straight. Prefer drywall anchors or wall studs for heavier boards to avoid damage and accidents.
For outdoor hanging signs, weather-resistant chains or heavy-duty cords provide better durability. Avoid thin strings or tape; they wear out quickly and risk falling.
How to Seal, Protect, and Maintain Your Chalkboard Sign
To protect your chalkboard sign and extend its life, sealing painted or inked designs is key. Use a clear matte acrylic sealer spray, applying 2 to 3 thin coats. Hold the can 8 to 12 inches from the surface and let each coat dry for 15 to 30 minutes. This prevents smudging and fading while preserving the chalk-friendly surface. Avoid glossy sealers, which can cause glare and reduce erasability. Sealing helps especially if your design uses permanent paint or markers, shielding it from moisture and scratches.
Reuse your chalkboard sign by cleaning it properly to avoid ghosting, faint leftover marks that make your sign look worn. Use a soft, damp cloth or a chalkboard cleaner to wipe the surface gently after each use. Avoid abrasive scrubbers or harsh chemicals that can damage the paint layer. Chalkboards conditioned with chalk before first use wipe clean more easily, reducing lingering chalk dust. For occasional deep cleaning, mix a few drops of mild dish soap in water, dampen a cloth, and gently clean, then dry thoroughly.
Some common mistakes shorten your chalkboard sign’s life. Avoid pressing too hard with chalk or markers, which scratches or dents the surface. Don’t use oil-based paints or permanent markers on the chalk area without sealing; these can bleed or damage the finish. Also, protect your sign from direct sunlight and extreme temperatures, both of which degrade chalkboard paint and cause peeling or cracking. Store your chalkboard signs indoors during harsh weather.
For signs with vinyl masks on painted wood, ensure good adhesion by cleaning the surface before applying vinyl, and seal the design afterward to prevent bleeding between paint and vinyl edges. If you apply shading techniques or mix paint colors, seal carefully to maintain color vibrancy without sealing the entire chalk surface, which can reduce erasability. Keep your sealer costs low by buying small cans for about $5 to $10, enough for multiple signs.
To maintain the best look and functionality, set up a routine check of your chalkboard signs every few weeks. Clean any dust or chalk buildup before it settles in and reseal permanent designs yearly. Doing so keeps your signs crisp, readable, and ready for many uses, whether for home decoration, events, or business displays.
How to Customize Chalkboard Signs for Different Events
Chalkboard signs offer versatile design options that suit different occasions, from elegant weddings to lively parties and practical business use. Customizing these signs involves matching your message and style to the event while considering the space and audience. Using the right fonts, colors, and decorations helps create a sign that draws attention and fits the occasion perfectly.
Wedding and Event Welcome Signs
For weddings, chalkboard signs often serve as welcome boards or directional guides. Choose script fonts or hand-lettered calligraphy styles in white or soft pastel chalk for a romantic feel. Adding floral drawings or simple border designs around the edges can improve elegance without crowding the text.
Keep the wording short and friendly, such as: “Welcome to the Wedding of Emily & John,” followed by the date beneath in smaller lettering. Including a short quote or a thank-you note creates warmth.
- Use cursive or serif fonts for an elegant look
- Include event name, date, and a warm greeting
- Draw simple flowers, leaves, or heart shapes around text
- Stick to monochrome or pastel color chalks
- Place sign on an easel near the entrance for visibility
Test your chalk designs on paper before applying to the board to avoid mistakes and smudging.
Business Promotions and Menus
For business use, chalkboard signs help highlight daily specials, promotions, or store hours. Bold, clear fonts with bright chalk colors like yellow, red, or green attract customers’ attention. Use block lettering or simple sans-serif styles for easy readability from a distance.
Keep messages concise and informative, such as: “Today’s Specials: Iced Coffee $3, Fresh Baked Croissants $2.” Use icons like coffee cups or dollar signs to visually break up text. Regularly update the sign to keep content fresh and customers engaged.
- Choose bold, easy-to-read fonts and vibrant chalk colors
- Include prices and special offers prominently
- Use simple icons or drawings related to products
- Keep the layout organized with clear sections
- Clean the board and reapply markings daily or weekly
Make sure your sign is placed where foot traffic naturally flows for maximum visibility.
Seasonal and Holiday Decoration Ideas
Seasonal chalkboard signs add lively, thematic decoration for holidays or changing months. Drawing pumpkins with orange chalk for fall, snowflakes with white and blue chalk for winter, or flowers and birds for spring creates a festive mood. Using bright accent colors highlights seasonal words like “Happy Holidays,” “Welcome Spring,” or “October Fest.”
Make sure to change the design every few weeks or when the season shifts. Combining fun lettering styles such as bold capitals for headings and casual script for messages adds a playful contrast. Include simple phrases that fit the occasion, like “Trick or Treat,” “Let It Snow,” or “Spring Has Sprung.”
- Use seasonal colors and themed drawings (e.g., leaves, snowflakes, florals)
- Change messages and artwork to fit current holidays
- Mix bold fonts for headings with casual scripts for messages
- Keep designs clear to avoid clutter
- Use waterproof chalk markers outside to withstand weather
Step-by-Step Action Plan for Your Chalkboard Sign Project
Follow these steps to create a chalkboard sign that looks professional and suits your event or space perfectly.
- Day 1: Gather all materials and tools including chalkboard paint, brushes, chalk markers, and your base board. Confirm you have everything before starting to avoid delays.
- Day 2: Prepare and season your chalkboard surface by applying at least two coats of chalkboard paint, letting each coat dry fully. Test by rubbing chalk over the surface and wiping it clean with a dry cloth.
- Day 3: Sketch your design on paper, plan layout, and choose lettering styles. Make sure the design fits the size and purpose of your sign before transferring it.
- Day 4: Transfer your design to the chalkboard using chalk or a light pencil, then add your lettering and art with chalk markers. Check that lines are clean and easy to read from a distance.
- Day 5: Build or attach a frame or support, such as a free-standing easel or wall hooks, so your sign is stable and well-displayed. Ensure it stands firm without wobbling.
- Day 6: Seal your artwork with a clear spray fixative to protect it from smudging, especially if it will be displayed outdoors. Test a small area to confirm no discoloration occurs.
- Day 7: Clean your sign regularly with a damp cloth and reapply chalk art as needed, especially before new events. Check for any wear or fading after each use.
Frequently Asked Questions
What Are Some Budget-Friendly Materials to Make Chalkboard Signs?
You can use thrift store picture frames and affordable chalkboard paint to create signs under $10. This approach saves money and lets you customize your design freely.
Can Chalkboard Signs Be Used for Business Promotions?
Yes, businesses use chalkboard signs to creatively display specials, hours, and policies. They offer flexibility to update messages regularly.
How Do You Make Chalkboard Signs Permanent?
Use paint designed for permanence and possibly CNC machinery for precision. This gives a decorative, durable finish that lasts longer than regular chalk.
Are Chalkboard Signs Good for Organizing Home Spaces?
Chalkboard signs are great for adding creativity and organization at home. You can create labels, schedules, or reminders that are easy to update.
Can Kids Participate in Making Chalkboard Signs?
DIY chalkboard signs can be a fun family project that encourages creativity and teamwork. Kids can help with painting and drawing simple designs.
What Types of Events Benefit from Custom Chalkboard Signs?
Events like birthday parties and baby showers benefit from personalized chalkboard signs that add a creative touch and help with directions or welcomes.
Final Thoughts
Making chalkboard signs takes a mix of careful preparation, artistic effort, and proper finishing. Start by selecting the right materials and following a simple process for design and lettering. Your next step is to pick a project, perhaps a welcome sign or a menu board, and begin creating with the basic materials you have on hand.