How to Make Cardboard Signs: A Complete Guide with Proven Tips
Knowing how to make cardboard signs starts with choosing sturdy, appropriate cardboard and planning the design for clear visibility. Use materials like 10 mm white honeycomb cardboard or 4 mm EB-flute for durability and easy handling. Begin by sketching your message clearly and making sure it is readable from a distance of 10 to 20 feet.
Key Takeaways
- Select cardboard thickness based on sign size and use: 10 mm honeycomb for durability and recyclability, 4 mm EB-flute for simpler projects.
- Design letters large and bold, checking readability from 10-20 feet to ensure your message stands out clearly.
- Cut 1/2 cm slits spaced 2 inches apart around letters to make shaping and folding easier without tearing.
- Leave a 5 cm gap at the bottom of cardboard pieces to slide in handles, making signs easier to hold or display.
- Use sticks or poles between 3 and 8 feet long, choosing length according to how tall you want your sign to be.
- Set aside about 30 minutes to cut and sand any wooden handles or supports for safer, smoother use.
Which Materials Work Best for Cardboard Signs?
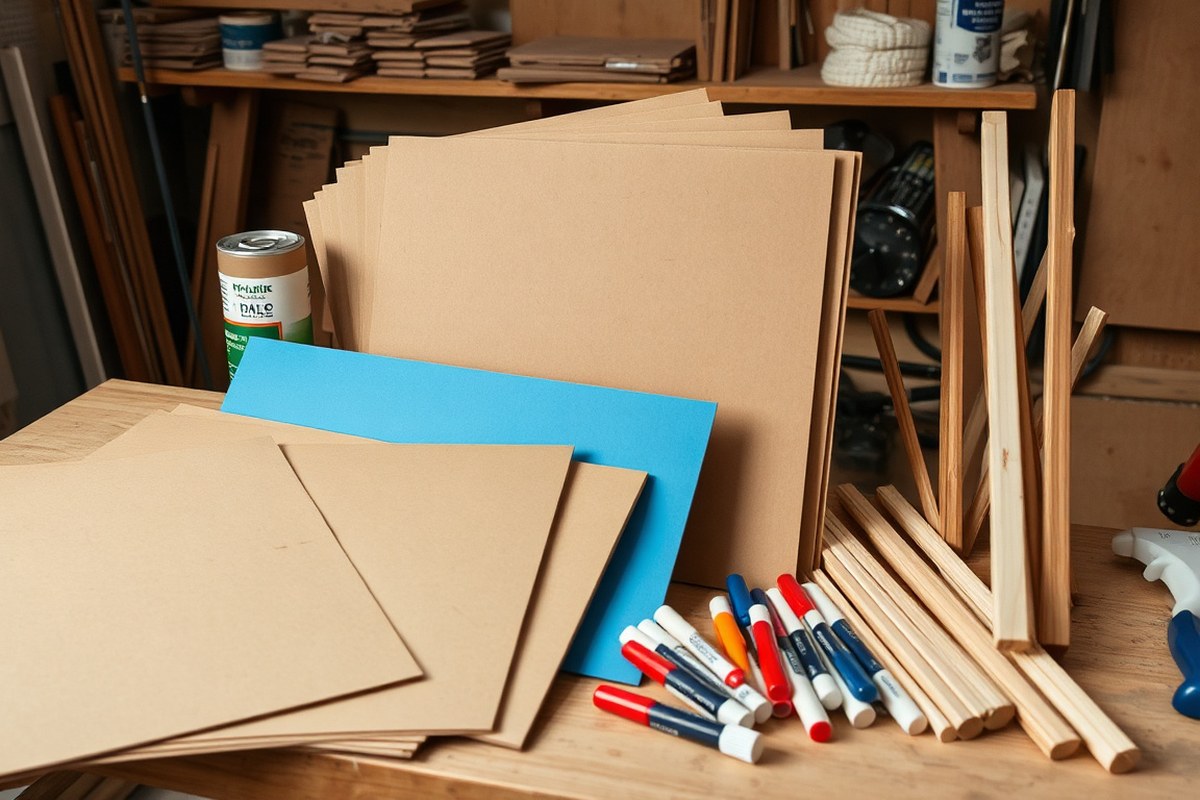
Choosing the right materials for your cardboard sign affects how durable it will be, how easy it is to work with, and its environmental impact. The main types of cardboard to consider are 10 mm white honeycomb cardboard and 4 mm white EB-flute cardboard. The honeycomb version offers a sturdy yet lightweight option widely accepted for recycling programs, while the EB-flute tends to be thinner and less durable but more traditional and easier to cut. Thickness plays a key role in the strength and rigidity of your sign, especially if you intend to use it outdoors or hold it for long periods.
| Cardboard Type | Thickness | Durability | Recyclability |
|---|---|---|---|
| White Honeycomb Cardboard | 10 mm | High, strong and rigid, resists bending | Widely recyclable |
| White EB-Flute Cardboard | 4 mm | Medium, easier to cut but less sturdy | Recyclable but less common |
For paints, acrylic and latex are good choices. Latex house paint, including leftovers, works well on cardboard for a budget-friendly option. Acrylic paint tends to dry faster and offers vivid color. Chalkboard paint is less common but useful if you want to write and erase messages. Generally, use darker paint shades contrasted against the white or light background of the cardboard for better visibility. Paint markers also perform well for lettering because they offer control and sharp lines.
When selecting adhesives, strong glue such as tacky craft glue or PVA glue binds paint and cardboard reliably. Double-sided tape or duct tape can attach handles quickly and cleanly. Staples give mechanical strength to attach reinforcements or layers, but can damage cardboard if overused. If you want eco-friendly options, look for glues and paints labeled non-toxic or water-based to minimize environmental harm. Recycled cardboard paired with eco-friendly paint and sealants creates a sustainable sign that holds up well without toxic fumes.
To achieve good results, prepare your cardboard surface first by lightly sanding any rough edges and ensuring it’s dry and clean. Apply paint in thin layers to prevent warping, allowing at least an hour to dry between coats. When attaching handles or poles, use suitable adhesives combined with mechanical fasteners like staples or tape for durability. Avoid soaking cardboard as it weakens the structure and can ruin the appearance.
How to Design a Cardboard Sign for Maximum Readability

Design your cardboard sign with the goal of easy reading from a distance. Choose large, simple fonts and strong color contrasts to help your message stand out. Use digital tools to plan your layout clearly before putting pen to cardboard.
Selecting Readable Fonts and Sizes
Use bold, sans-serif fonts like Arial or Impact for clear letters that catch the eye. Consider your viewing distance to size the font correctly: for every 10 feet away, the letters should be about 1 inch tall. For example, if people will see the sign from 30 feet, your letters should be at least 3 inches high. Keep your message brief to fit the font size without crowding.
Signs intended for sidewalks or rallies, viewed at 5 to 10 feet, can use 1 to 2-inch letters. Signs for outdoor protests or events where viewers are 20 to 50 feet away need 2 to 5-inch letters. Avoid ornate fonts that reduce readability from a distance.
Choosing High-Contrast Colors
Color contrast is key for readability. Use dark letters on a light background or the reverse. Popular combinations include black on white, white on red, or yellow on black. Limit your sign to 2 or 3 main colors to avoid visual clutter. The colors should fit your message tone; for example, red for urgency or blue for calm.
Check your color scheme by stepping back from your sign during design or showing it to a friend from 10 feet away. The letters and background must stand out sharply so the message is easy to scan. Avoid patterns or gradients that obscure letters.
Use matte paint or markers instead of glossy finishes to reduce glare, which can make your sign hard to read under sunlight.
Using Software to Draft Sign Layouts
Drafting your design digitally saves time and keeps your layout balanced. Use simple software like Microsoft Word or free tools like Canva. Start by typing your message in a large, bold font, adjusting size according to viewing distance rules. Add any images or symbols that support your message, keeping them simple and uncluttered.
Ensure spacing between words and lines is wide enough to keep the text legible. Use grid or ruler tools in your software to align elements precisely. Print a scaled version of your design on regular printer paper (A4 or US Letter) and tape those together to preview the size before transferring to cardboard. The following steps outline how to draft and prepare your sign design:
- Open a word processor or design app and set your document size to match the cardboard dimensions.
- Select a bold sans-serif font and type your main message in all caps or sentence case for clarity.
- Adjust the font size so letters measure roughly 1 inch for every 10 feet of expected viewing distance.
- Choose a background color and font color with strong contrast; preview on screen and print sample pages.
- Add simple supporting images or icons if desired, limiting total colors to three.
- Print a mockup on standard paper, assemble if in parts, and hold it at the intended viewing distance to check readability.
- Make layout adjustments for spacing, size, and color based on your test before moving to cardboard.
How to Cut and Prepare Cardboard Pieces Safely
Cutting and preparing cardboard sheets or letters carefully preserves the material’s strength and keeps your sign looking sharp and professional. Using the right tools and techniques helps avoid warping or uneven edges. Following basic safety steps prevents injuries during cutting.
Tools Required for Cutting
A sharp utility knife is the best tool for cutting cardboard with precision. Replace the blade regularly to ensure clean cuts. A metal ruler helps guide straight lines. Keep a cutting mat or a protected surface underneath to prevent damage below the cardboard. Heavy-duty scissors work for thinner cardboard or small cuts but may create rougher edges. Masking tape and a pair of scissors come in handy for tidying edges or attaching layers.
Have a flat, sturdy workspace to support the cardboard and help avoid bends as you cut. Avoid flimsy tables that might flex, causing uneven cuts or warped cardboard.
Cutting Techniques for Clean Edges
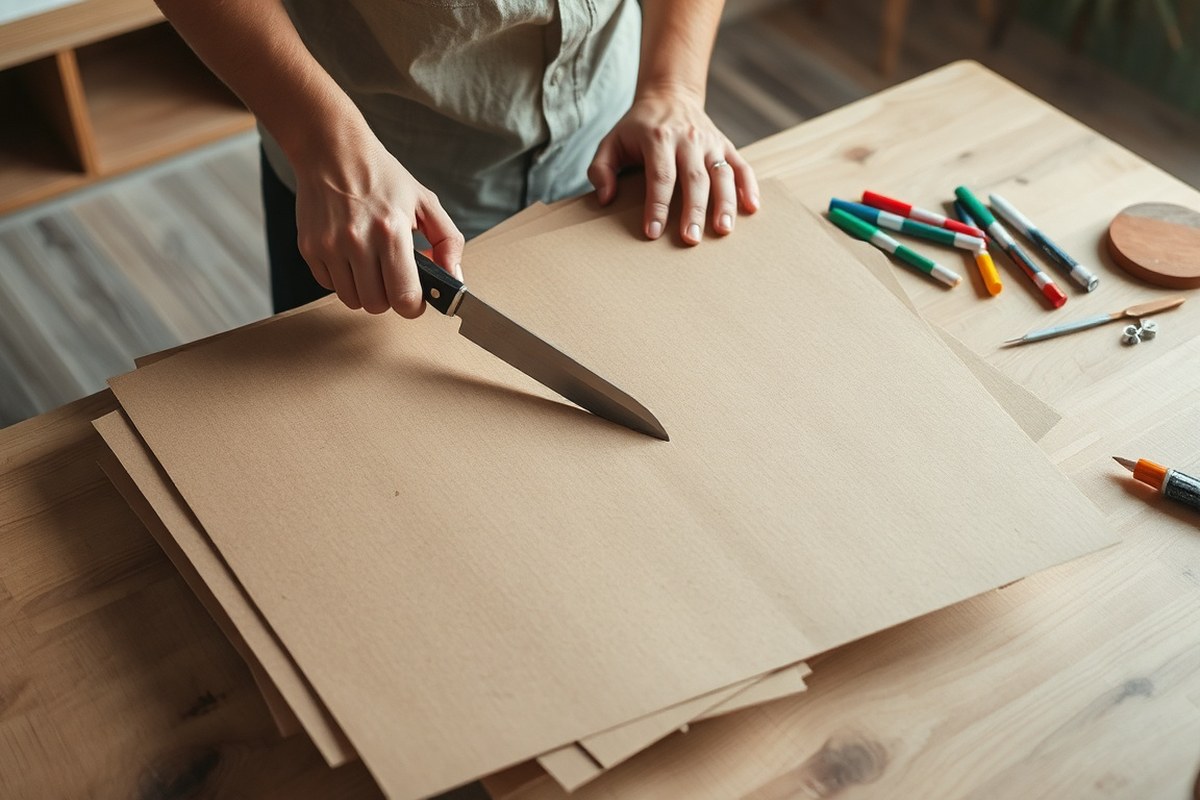
To get clean, straight edges, score the cardboard lightly before cutting all the way through. This reduces tear-out and helps you stay on line. Use a metal ruler to guide your cuts. Cut slowly and steadily, applying even pressure. For letters or shapes, mark the outline clearly before cutting.
When working with multiple pieces or layers, glue or tape them together on a large base board before detailed cutting. This keeps the whole sign rigid and prevents warping. Cutting 1/2 centimeter slits about 2 inches apart around letters can help flexible attachment without cracking the edges. For decorative tape, cut with scissors instead of ripping to achieve neat edges.
- Place your cardboard on a cutting mat or thick, flat surface.
- Mark your cutting lines clearly using a pencil and ruler or stencil.
- Score the lines lightly with a sharp utility knife and metal ruler as guide.
- Cut along scored lines applying steady and even pressure with the utility knife.
- For curves or letters, make small, controlled cuts, rotating the cardboard instead of the knife.
- Trim any rough edges with scissors for a smooth finish.
- Glue or tape multiple pieces to a solid backing before final cutting to keep them flat.
Safety Tips for Handling Sharp Blades
Always keep your fingers clear of the cutting path. Hold the ruler firmly but away from the blade edge. Cut away from your body, not toward it. Work slowly to maintain control. Changing the blade when it dulls prevents slipping that can cause injury.
Use protective gloves if you feel unsure handling knives. Store knives safely when not in use. Avoid distractions while cutting. A steady hand and deliberate movements reduce chances of accidents. If younger crafters are involved, supervise closely or assign safer tasks like drawing outlines.
What Are the Best Methods for Lettering on Cardboard?
Painting, stenciling, printing, and using adhesive letters are common ways to add lettering on cardboard signs. Choosing the best method depends on your budget, the tools you have, and how polished you want the final product to look. Painting offers creative freedom but takes patience to get neat letters. Stenciling produces more uniform results and works well when you want professional-looking text without expensive gear. Printing can deliver crisp letters if you have access to a large printer. Adhesive letters simplify the process but can get costly and may not stick well on rough or curved cardboard surfaces.
| Lettering Method | Pros | Cons | Cost & Tools |
|---|---|---|---|
| Painting Freehand | Highly customizable; personal touch | Requires steady hand; risk of uneven letters | Low; paint and brushes under $10 |
| Stenciling (DIY or Purchased) | Uniform, professional look; reusable | Time to cut stencils; may smudge if paint is wet | Very low; cardboard for stencils and paint cost $5-$10 |
| Printing (direct or transfer) | Sharp, precise lettering; fast for multiple signs | Requires access to large printer; less flexible | Moderate; ink and printer use varies |
| Adhesive Letters | Quick application; clean edges | More expensive; sticks poorly on rough cardboard | High; packs of letters $10-$20+ |
| Cut-Out Letters (from cardboard) | Creates dimension; reusable letters | Labour-intensive; requires cutting tools | Low to moderate; time investment |
Making your own stencils is practical and budget-friendly. Start by selecting a font that’s simple and bold. Print the text on regular paper at your desired size, then tape it onto a piece of thin cardboard. Use a craft knife or box cutter with a sharp blade to carefully cut out the letters. Removing these cutouts creates a stencil that lets you paint clean letters on your sign. A wide roll of masking tape holds your stencil firmly on the sign while you paint to avoid bleeding. Peel away the stencil after the paint dries to reveal clear, uniform letters.
For neat and consistent lettering by hand, lightly sketch your letters with a pencil before painting or drawing. Use a ruler or a straight edge to keep lines even and measure spacing. Chalkboard paint can be a good base if you want to use white chalk for lettering, allowing easy edits or updates. Taking your time and applying paint in thin layers reduces drips and smudges. Avoid the smallest paintbrushes, they often create uneven strokes. A medium flat brush or paint marker works well here.
Choosing between cutting letters out and applying paint or adhesive depends on the look you want and the effort you’re willing to spend. Cut-out letters add depth but take more time and skill with tools. Painting or using stencils is faster and more common for most cardboard signs. Experiment with techniques on scrap pieces before starting your final sign.
How to Assemble and Attach Handles or Poles Securely
Attaching handles or poles to cardboard signs ensures you can hold and display them securely without damage. Using the right materials and techniques prevents the handle from loosening during transport or use. Secure fastening methods like taping, stapling, or gluing, combined with reinforcement, give you a reliable grip and extend the life of your sign.
Choosing the Right Pole or Handle
Pick a sturdy pole or handle that matches the sign’s size and weight. Lightweight signs work well with thin wooden dowels, broomsticks, or plastic rods, usually 24 to 36 inches long. Taller poles, around 48 to 60 inches, help raise signs above crowds but add weight. Flat wooden sticks or cardboard tubes can also serve as handles for smaller signs. Handles wrapped with electrical or hockey tape improve grip and comfort during long use.
Consider the event type: for outdoor or windy conditions, heavier poles and firmer attachments prevent the sign from bending or blowing away. For quick, temporary use, lightweight materials plus removable fasteners like double-sided tape or Velcro strips offer convenience.
Preparing Cardboard for Attachment
Strengthen the cardboard where the handle will attach. Mark the center or lower edge of your sign for balance. Reinforce this area by taping a strip of masking tape (2-inch wide) across both front and back. This taped area prevents tearing from handling stress.
For thicker or corrugated cardboard, cut a small slot or notch to insert the pole slightly before fastening. This slot gives extra grip and alignment accuracy. If using thin poster board, add an extra cardboard layer glued behind the handle area for more support.
Securing Poles with Tape, Glue, or Staples
Choose fasteners based on materials and sign weight. Stapling works well on thicker cardboard; use heavy-duty staples spaced 1 to 2 inches apart along the handle base. For thinner boards or lighter poles, use strong packing tape or duct tape wrapped tightly around the entry point and handle. Double-sided tape or self-sticking glue suits very light signs but may need extra reinforcement. Follow these steps to attach your pole securely:
- Position the pole on the marked spot at the lower edge of the cardboard.
- Insert the pole into any pre-cut slot or align it flush against the cardboard surface.
- Apply a thick strip of glue along the contact area and press the pole firmly.
- Tape around the handle base with masking tape or duct tape, wrapping it in overlapping layers for strength.
- Staple the handle to the cardboard on both sides if material thickness allows, placing staples about every 1.5 inches.
- Cover staples and edges with additional tape to prevent injury and reinforce attachment.
- Wrap the handle shaft with hockey or electrical tape for comfortable gripping.
- Let glue dry completely (usually 30 minutes to 1 hour) before using the sign.
Staples work best on corrugated cardboard, but always cover sharp ends with tape to avoid cuts or damage to your hands and clothes.
How to Add Color, Decorations, and Waterproofing
Adding color and decorations to cardboard signs can make them more eye-catching without adding much weight. Use water-based acrylic paints, which dry fast and stay lightweight, typically under 0.1 pounds per square foot. Natural dyes from fruits, vegetables, or coffee offer a non-toxic way to add subtle tints and can be brushed or dabbed on for a rustic look. For bolder colors, apply two or three thin paint layers rather than one thick coat to avoid the cardboard warping or sagging. Between layers, let the paint dry for about 15 to 30 minutes in a well-ventilated space at room temperature. Adding shadows or highlights with a fine brush after the base colors dry can give your message more depth and make it stand out from a distance.
To decorate further, you can glue lightweight embellishments like tissue paper shapes, stickers, or printed cut-outs. Attach these with glue sticks, white craft glue, or double-sided tape to keep the sign flat and manageable. Avoid heavy materials like multiple layers of fabric or thick cardboard pieces since they increase weight and can cause the sign to bend or tear easily during handling.
Protecting your cardboard sign from weather and wear is key, especially for outdoor use. Exposure to rain, humidity, or direct sunlight can cause cardboard to warp, fade, or disintegrate in days or weeks. Applying a waterproof sealant extends the life of your sign. Use a clear acrylic spray sealant or brush-on varnish designed for paper surfaces. Sealants typically cost between $5 and $15 per can or bottle, and one application dries within 30 minutes. For best results, apply two thin coats about an hour apart, allowing each layer to dry fully. Spray sealants offer an even finish but should be used outdoors or in a ventilated area to avoid inhaling fumes.
You can also tape the edges with clear packing tape or weatherproof duct tape. This adds extra protection against moisture seeping into the cardboard layers. Using tape also helps reinforce the sign’s structure and prevents frayed edges. When protecting signs for longer outdoor displays, consider placing them under some form of cover like an awning or in protected corners to reduce exposure to direct rain and sunlight.
Layering paint and sealants not only helps waterproof your sign but also improve durability against scratches and fading. A well-sealed and decorated cardboard sign will maintain bright colors and clear text for several weeks outdoors or many months indoors with gentle handling. Signs exposed to harsh weather without protection can start to peel, lose color vibrancy, swell, or crumble within a few days.
How Long Does It Take and What Are Typical Costs?
Creating a quality cardboard sign usually takes about 1 to 3 hours from start to finish, depending on the size and complexity of your design. Preparing the cardboard, cutting it to size, sketching your letters, painting or decorating, and assembling handles or stands each take a specific amount of time. For example, prepping the cardboard and cutting can take 20 to 40 minutes, lettering another 30 to 60 minutes, and finishing touches like coloring or waterproofing another 30 to 60 minutes. Working efficiently means organizing your materials in advance, using stencils for lettering, and allowing paint or glue to dry in parallel steps if possible.
Costs for cardboard signs vary based on the materials chosen and whether you already have basic tools at home. Recycled cardboard or free boxes significantly cut expenses, while buying fresh corrugated board usually costs $1 to $3 per sheet. Permanent markers, paint, or other decoration supplies can range from $2 to $15 depending on quality and quantity. Handles or poles for holding the sign add to costs but can be made from inexpensive wooden dowels or sturdy sticks found at home or in nature. Budgeting ahead helps you prioritize where to spend, such as investing in waterproofing if the sign needs durability, or saving by using only one side of the cardboard if the back won’t be seen.
| Item | Average Cost (USD) | Estimated Time to Use |
|---|---|---|
| Corrugated cardboard sheet | $1 to $3 | 20 to 40 minutes (cutting and prepping) |
| Permanent markers or paint | $2 to $15 | 30 to 60 minutes (lettering and decorating) |
| Wooden dowels or poles | $1 to $5 | 15 to 30 minutes (assembling handles or mounting) |
| Adhesive tape or glue | $1 to $3 | 10 to 20 minutes (assembly) |
| Waterproof spray or coating (optional) | $5 to $12 | Additional 30 to 60 minutes with drying time |
Working economically means using recycled or free cardboard and repurposing household materials for handles or decoration. Limiting your sign to one side of the cardboard reduces time and material use if the back won’t be visible. Preparing your design layout on paper before marking the cardboard can prevent errors and costly material waste. Drying times for paint and glue can be used productively by working on other parts of the project or setting up your workspace. The main tradeoff is between speed and durability, faster signs might skip waterproofing or detailed decoration but may not last outdoors or during extended events.
You can adjust the time spent based on your sign’s purpose. For a one-time protest sign, quick sketching with markers on recycled cardboard can take under an hour. For a party decoration or photo booth backdrop, investing more time in design, color, and sturdiness improves visual impact and longevity. Always follow safety and material instructions, especially when using sharp tools or sprays, and test a small area if using a new paint or waterproofing product.
What Common Mistakes Should Be Avoided and How?
Common mistakes in making cardboard signs often reduce their clarity, durability, or visual impact. Rushing the drying process is one of the top errors. When paint or markers haven’t dried completely, colors can bleed or smudge, ruining the text or image. Let your sign dry in a well-ventilated area for at least 2 to 4 hours, depending on the paint and humidity. Pressing materials firmly during painting prevents uneven edges or streaks, so use a steady hand or masking tape as a guide.
Warping happens when cardboard absorbs moisture unevenly or gets exposed to strong sunlight. To avoid this, pick corrugated cardboard with a sturdy, thick fluted core for better resistance. Keep your signs dry and store them flat under a heavy book or board overnight after painting. Applying a clear coat sealer after drying can protect the surface from humidity and fading, but don’t spray too close to avoid bubbles or running.
Readability from a distance hinges on simple, bold fonts and contrasting colors. Test your sign’s visibility by stepping back at least 10 feet and squinting slightly. This helps you see if letters stand out clearly or blend into the background. For larger signs, increase letter height to around 2 inches per 10 feet of viewing distance. Avoid cluttering your message with too many words, 5 to 7 words max works best for visibility. Here is a checklist of frequent pitfalls and how to fix them:
- Smudged paint or marker, allow sufficient drying time before handling.
- Warped cardboard, choose thick, corrugated pieces and press flat after painting.
- Faded colors, apply a clear waterproof sealant once paint is dry.
- Unreadable text, use large, simple fonts with high contrast colors.
- Paint bleeding outside lines, firmly press down stencils or use painter’s tape.
- Sign tearing at edges, reinforce corners and edges with clear packing tape.
- Unstable handles or poles, attach handles securely with strong tape or staples.
Test your sign by stepping back at least 10 feet to ensure all text can be easily read before the paint dries.
Signs meant for outdoor use benefit most from thicker cardboard and weatherproof coatings, while indoor signs can use lighter materials and standard markers. A budget-friendly sign with a wood trim border might cost around $15, but expect to spend up to $40 for materials like waterproof paints and sealers for a more durable result. The extra time to properly dry and seal your sign ensures it lasts longer without warping or color loss.
Step-by-Step Action Plan for Making Your Cardboard Sign
Follow these steps to create a clear and sturdy cardboard sign ready for your event or project.
- Before you start: Gather corrugated cardboard, permanent markers, a utility knife, ruler, tape, and a pole or handle. Confirm materials are sturdy and safe for use.
- Step 1: Plan your message on paper with large, simple letters. Make sure your design has strong contrast using dark markers on a light background.
- Step 2: Cut your cardboard to the desired size using a ruler and utility knife on a safe surface. Check that edges are smooth and even.
- Step 3: Mark letters on your cardboard lightly with pencil before outlining them in permanent marker. Ensure letters are spaced evenly for readability.
- Step 4: Attach your handle or pole securely with strong tape or staples, reinforcing where needed. Test that the handle does not wobble or bend under gentle pressure.
- Step 5: Add color or simple decorations with paint or markers if desired, allowing to dry completely. Apply a clear waterproof spray and let it dry to protect from rain.
- Step 6: Inspect your finished sign in daylight to confirm all text is clear and visible from a distance. Make adjustments if letters are faint or background glare is strong.
Frequently Asked Questions
Can Cardboard Signs Be Made Reusable for Multiple Events?
Yes, use durable materials like thicker cardboard and waterproof coatings to extend their lifespan for multiple uses. Reusable signs save money and reduce waste but require extra care in storage and handling.
What Size Should a Cardboard Sign Be for Visibility in a Crowd?
A sign around 18×24 inches balances visibility and portability well in crowds. Larger sizes increase impact but can be heavier and harder to hold for long. Choose based on viewing distance and sign holder comfort.
Is It Better to Make Signs Single-Sided or Double-Sided for Protests?
Single-sided signs are faster and simpler to make and lighter to carry. Double-sided signs offer visibility from both directions but require more time and material. Pick based on how much time you have and how often you’ll reuse them.
Can You Use Spray Paint Effectively on Cardboard Signs?
Spray paint can work but tends to soak through and warp thinner cardboard. Use thick, coated cardboard and apply light, even coats if choosing spray paint. Otherwise, acrylic or latex paints offer better control and coverage.
What Type of Marker Works Best for Detailed Lettering on Cardboard?
Paint markers are excellent for clear, detailed text on cardboard. They apply evenly, offer vibrant colors, and don’t bleed much. Permanent markers can work but might not show up well on darker backgrounds.
How Can You Ensure a Cardboard Sign Stays Upright Without a Pole?
Use a sturdy base like a weighted board or lean it against a solid surface. Alternatively, attach a cardboard stand or support at the back to keep it upright during events. Stability depends on sign weight and wind conditions.
The Bottom Line
Creating an effective cardboard sign involves clear lettering, strong materials, and secure assembly. Start with a simple message and work carefully through each step to avoid common pitfalls like flimsy handles or hard-to-read text. Your next move is to draft your sign’s wording on paper, focusing on legibility and message impact before cutting any cardboard.