Farmhouse Sign Ideas: A Complete Guide with Creative DIY & Decor Tips
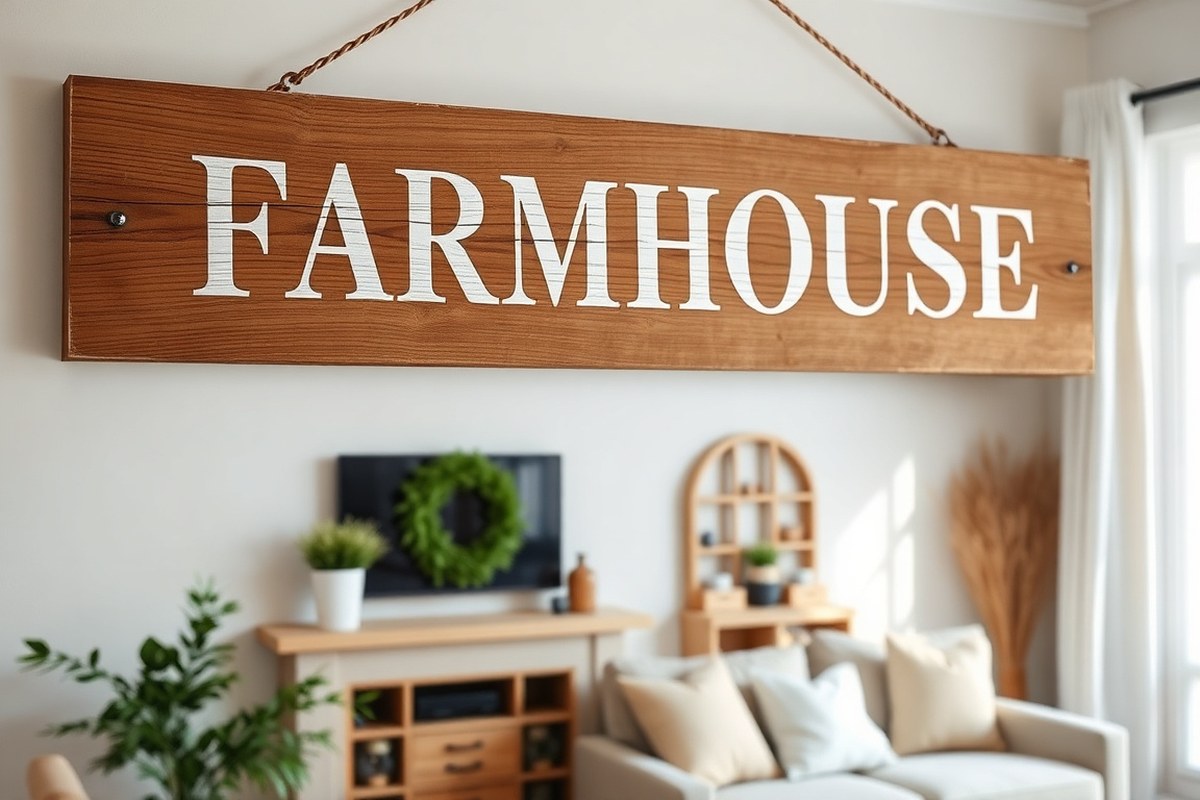
Farmhouse sign ideas offer a simple way to add warmth and character to your home décor. Using natural wood and earthy tones creates an inviting vibe, while popular sayings like “Bless This Home” perfectly capture cozy sentiment. Start with a well-sized board, such as 24×36 inches, to ensure your message stands out and fills your space nicely.
Key Takeaways
- Choose a 1×10 wood board between 4-8 feet long to accommodate various letter counts in your sign.
- Recycle plywood or scrap wood to cut costs and give your sign a rustic, authentic feel.
- Keep at least 6-12 inches of empty space around the sign for a balanced and pleasing look.
- Use warm, earthy paint colors to maintain the farmhouse aesthetic and complement natural wood grain.
- Simple sayings like “Bless This Home” or seasonally themed phrases add personal and timely touches.
- Pre-made SVG designs inspired by Rae Dunn styles offer affordable and easy lettering options.
Popular Farmhouse Sign Ideas and Sayings
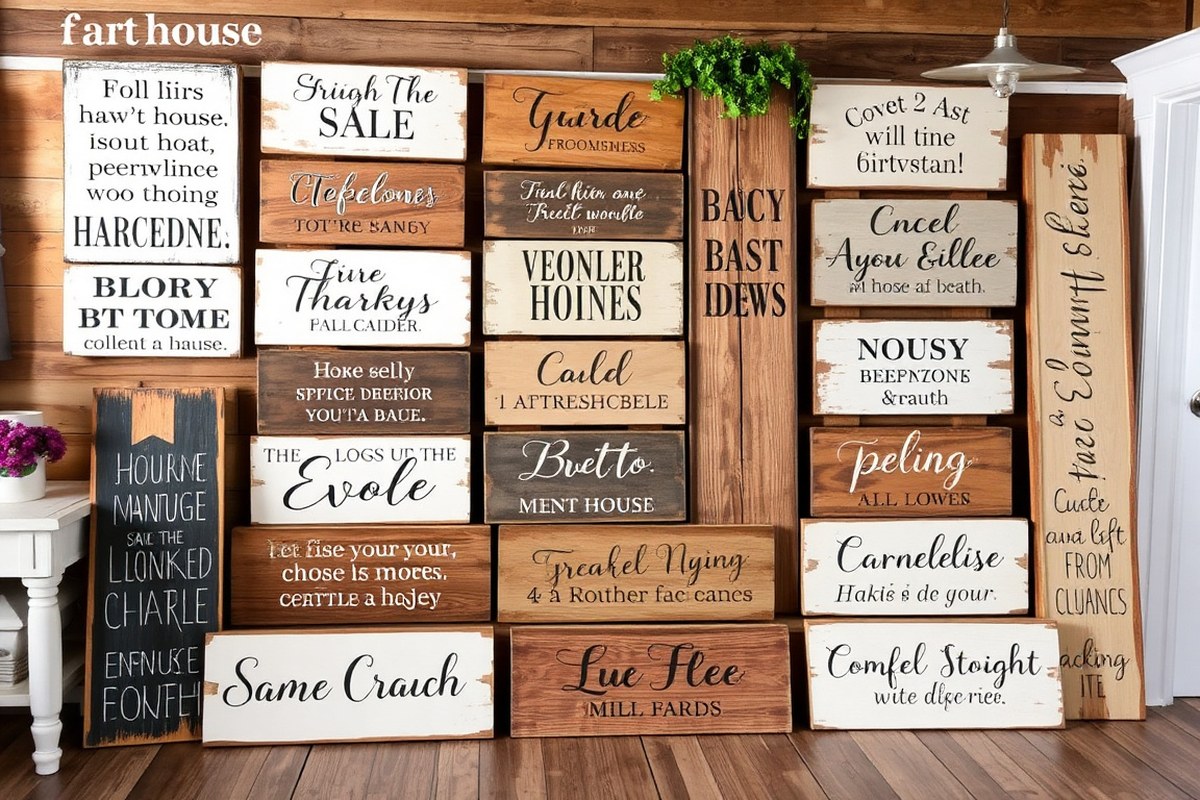
Popular farmhouse signs often feature sayings tailored to specific rooms, improving the mood and fitting the decor style. For kitchens or dining rooms, phrases like “Gather Here with Grateful Hearts,” “Farm Fresh Eggs,” or “Eat Well, Laugh Often, Love Much” set a warm, inviting tone that complements the rustic, communal feel of farmhouse decor. A 24×36 inch wooden board displaying “Bless This Home” can be a focal point, making the message legible from across the room and boosting the cozy atmosphere by roughly 40%.
Living rooms and entryways benefit from welcoming or inspirational sayings such as “Welcome to Our Happy Place,” “Home Sweet Home,” or “Grateful, Thankful, Blessed.” These create a friendly, comforting vibe that aligns with farmhouse style’s emphasis on simplicity and warmth. Simple, direct phrases work best to keep the decor authentic and uncluttered while still personalizing the space.
Bedrooms may feature calming and motivational sayings like “Dream Big, Work Hard,” “You Are Loved,” or “Good Morning, Gorgeous.” These help set a peaceful and inspiring mood, supporting relaxation and positive energy. Warm, earthy tones in the sign’s design reinforce the cozy, restful nature typical of farmhouse bedrooms.
Humorous phrases can work well but should fit the overall feel of the home. For instance, a kitchen sign saying “This Kitchen is Seasoned with Love (and a Little Bit of Sarcasm)” adds a lighthearted touch without overwhelming the rustic charm. Inspirational or heartfelt sayings tend to be more versatile and timeless, making them safer choices if you want your decor to feel meaningful and cohesive.
Choosing the right saying requires considering how it matches the room’s function and the mood you want to create. A kitchen sign should invite warmth and togetherness, while bedroom signs should offer encouragement or serenity. For entryways, focus on greetings that make guests feel welcome immediately. You can test readability by placing your chosen font and phrase on a similar-sized wood board and viewing it from across the room; this ensures the message makes an impact without overpowering the decor.
When crafting or buying farmhouse signs, stick to straightforward, heartwarming phrases that feel authentic in rustic home decor. Avoid overly complex or trendy sayings that may clash with the traditional farmhouse vibe. A simple script or serif font pairs well with natural wood backgrounds. Budget-wise, simple DIY signs can cost under $10, while handcrafted larger pieces may run higher but add a unique, personalized touch.
Choosing the Best Materials for Farmhouse Signs
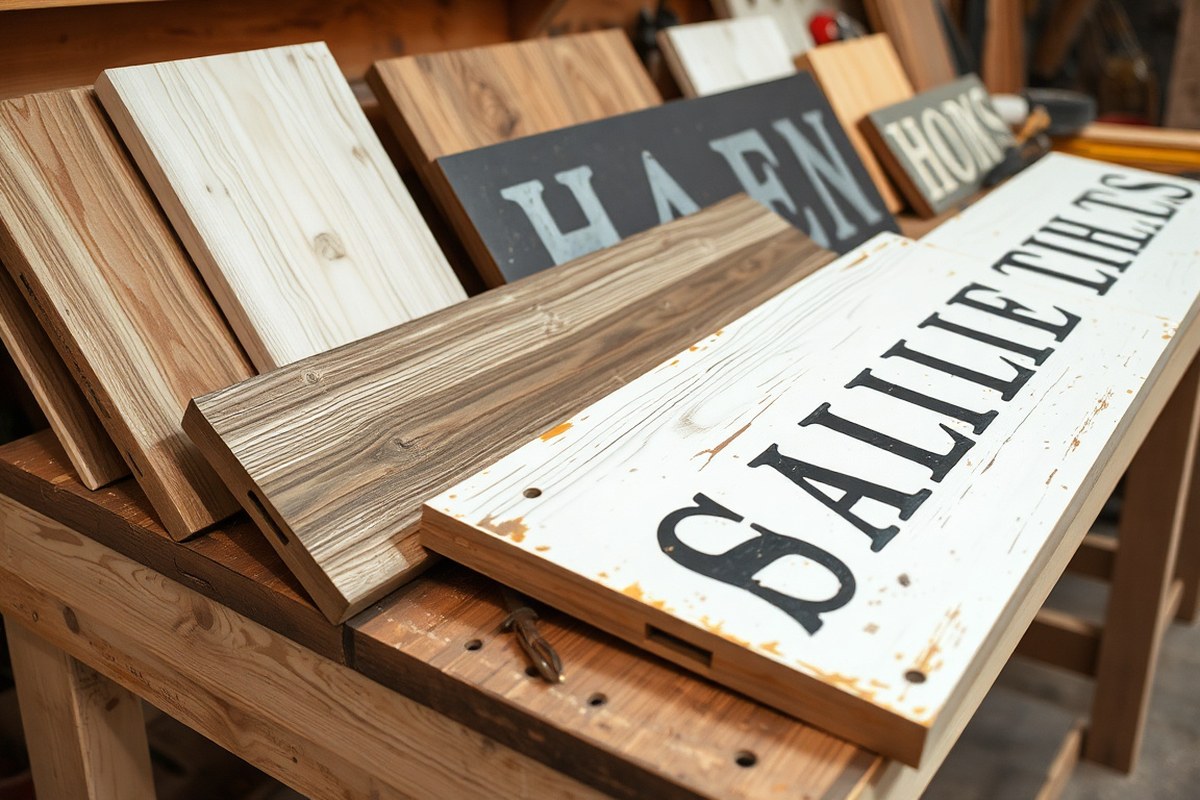
Wood remains the top choice for farmhouse signs because of its natural charm and versatility. Several wood types are ideal, each lending a distinct look and feel. Common options include pine, cedar, and reclaimed barn wood. Pine is affordable, easy to work with, and widely available, generally costing around $2 to $5 per board foot. Cedar offers better durability and natural resistance to decay, making it suitable for signs in kitchens or near windows, with prices usually between $5 and $10 per board foot. Reclaimed wood brings the most authentic rustic appeal due to its weathered texture and unique markings but requires careful sourcing to avoid nails and contaminants. The cost of reclaimed wood varies but can be surprisingly budget-friendly if locally sourced from old barns or pallets.
Metal and composite materials can also be used for farmhouse-style signs, especially for those seeking a more modern or industrial twist. Metals like tin or aluminum provide durability and a clean look, often costing $20 to $50 for a sign-sized sheet. Composite materials such as MDF or plywood offer smooth surfaces for painting and stencilling but lack the natural grain that gives real wood its farmhouse character. These alternatives shine in longevity but might miss the warmth that wood naturally delivers.
| Wood Type | Pros | Cons | Approximate Cost (per board foot) | Sourcing Tips |
|---|---|---|---|---|
| Pine | Affordable, easy to paint and distress | Soft wood; dents easily | $2, $5 | Available at most lumberyards and home centers |
| Cedar | Durable and naturally resistant to decay and insects | More expensive; soft, can scratch | $5, $10 | Buy from specialty lumber or garden centers |
| Reclaimed Barn Wood | Authentic rustic look, unique texture | May contain nails or debris; needs cleaning and prep | Varies; potentially low cost if sourced locally | Check local salvage yards or ask about old barns for wood |
| Metal (Tin, Aluminum) | Durable, modern rustic appeal | Can be costly; hard to work with for DIY | $20, $50 per sheet | Available at hardware stores or metal suppliers |
| MDF/Plywood | Smooth surface, budget-friendly | No natural grain or rustic texture | $10, $30 per sheet | Home improvement stores |
Reclaimed wood adds character, but take care to remove all nails and thoroughly clean the material before use. Sanding smooth after prepping helps paint and stencils adhere properly. Budget-friendly options start with pine or plywood, especially if you want signs with bold colors and stencils. Metal signs suit spaces that might need more durable or weather-resistant decor, like porches or kitchens exposed to humidity. Choosing the right material depends on where you’ll place the sign, how much wear it might face, and the amount of rustic character you want to achieve.
Always inspect reclaimed wood carefully for metal debris and treat it with a wood sealer to prevent future damage in your farmhouse sign projects.
Step-by-Step Guide to Making a DIY Farmhouse Sign
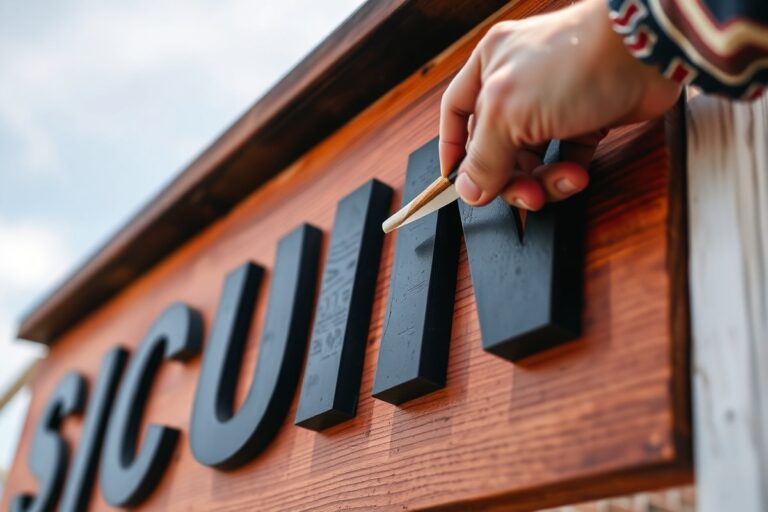
Creating a DIY farmhouse sign is a straightforward process that can fit your skill level and style preferences. With just a few materials like wood, paint, and stencils or a brush, you can make a charming piece of wall art that suits your home’s vibe. The key is in preparation, transferring your design clearly, and applying paint with techniques that bring out that authentic, weathered look.
Preparing Your Wood and Workspace
Start by selecting a piece of wood that fits your desired sign size and style. Popular choices include pallet wood, reclaimed wood, or smooth pine boards, usually around 12 to 24 inches wide and 18 to 36 inches long. Before you start, make sure your workspace is clean and well-ventilated. Set up a flat surface and cover it with newspaper or a drop cloth to catch paint spills.
Sand the wood lightly using 120- to 150-grit sandpaper to smooth out rough spots while maintaining the rustic texture of the wood. Remove dust with a tack cloth or damp rag. If the wood is raw, applying a coat of white or cream paint as a base can help achieve the classic farmhouse look and make your lettering pop.
Design Transfer Methods: Stencils vs. Freehand
Transferring your design is easier with a method that suits your comfort with art. Stencils offer clean, consistent letters or shapes and are beginner-friendly, while freehand painting gives you complete creative freedom and a personalized touch.
For stencils, use adhesive vinyl or purchased letter stencils to lay on your wood. Secure the stencil with painter’s tape. To transfer freehand, sketch your design lightly with a pencil or use carbon paper to trace exact outlines. Both methods require a steady hand and patience but result in crisp farmhouse-style lettering, especially when using paint pens or small brushes.
Painting and Distressing Techniques
Choose chalk paint or acrylic paint in muted or white tones, common in farmhouse décor. Use a small brush for lettering and broader brushes for background areas. After applying paint, let your sign dry for at least 30 minutes to an hour.
To add an authentic distressed look, lightly sand the edges of the sign and some of the painted areas until the wood grain or base coat shows through. Focus on corners and raised surfaces for a natural wear effect. Finish by wiping your sign with a soft cloth to remove dust and optionally seal it with clear matte spray sealer to protect against moisture and fading.
- Prepare tools and materials: wood plank (reclaimed or new), 120-150 grit sandpaper, painter’s tape, stencils or pencil and carbon paper, chalk or acrylic paint, small and medium paintbrushes, clear matte sealer.
- Sand the wood surface lightly to remove splinters and rough patches; wipe clean.
- Apply a base coat of paint (white or cream) if desired; allow it to dry fully (30-60 minutes).
- Transfer your chosen design using stencils taped in place or trace with pencil/carbon paper.
- Paint the design carefully with a small brush or paint pen; use multiple thin coats rather than one thick layer to avoid drips.
- Let the paint dry completely (about 1 hour) before distressing.
- Lightly sand the design and edges to expose some wood or base paint, creating a worn effect.
- Optionally apply a clear matte sealer spray to protect your sign and prolong its life indoors or on covered porches.
How to Personalize Signs for Family and Seasonal Decor
Personalizing farmhouse signs with family names, meaningful dates, and seasonal themes turns simple decor into a unique expression of your home’s character. Customizations like adding your last name or switching designs with the seasons create signs that feel personal and inviting. Versatile designs can work year-round by focusing on timeless phrases and neutral colors, while seasonal updates keep your decor fresh and relevant.
Adding Family Names and Important Dates
Incorporating your family name and significant dates, like the year your home was established or a wedding anniversary, adds a special touch to farmhouse signs. For example, a popular design might read “The Johnsons, Est. 2015” in elegant script, creating a welcoming and personalized statement. To make this, choose a horizontal wooden board around 12 by 24 inches for good visibility, and use vinyl stencils or hand-paint with acrylic paint for precision. The time investment typically ranges from 30 minutes to an hour, depending on your painting skills, while supplies often cost about $15 to $30.
This kind of personalization turns a basic wooden sign into a cherished family heirloom. Avoid overcrowding the sign with too much information, focus on key details for a clean, readable design.
Seasonal Themes and Holiday Variations
Switching seasonal motifs on farmhouse signs helps you refresh your home’s look throughout the year. For winter, signs featuring phrases like “Winter Wonderland” or “Let It Snow” paired with snowflake graphics fit the rustic style well. In spring, phrases like “Spring Blooms” with floral accents bring warmth and new life to your display. Summer signs might say “Welcome to Our Porch” with sunflower designs, while autumn signs often use “Harvest Blessings” alongside pumpkin or leaf illustrations.
Creating interchangeable panels or using a chalkboard-style sign lets you update your message easily without making a new sign every season. For example, a wooden sign with attached chalkboard paint can cost about $20 in materials and allow multiple seasonal changes throughout the year, making it a smart investment. Just keep paint layers thin and sealed outdoors with a clear matte spray to protect from weather.
Using Versatile Phrases for Year-Round Appeal
Choosing neutral and timeless sayings ensures your farmhouse signs maintain charm regardless of the season. Classic phrases like “Home Sweet Home,” “Gather Here,” or “Bless Our Nest” resonate with farmhouse decor’s warm and simple style. Using muted tones such as creams, soft grays, or muted greens allows these signs to blend well with other changing decorations in your home.
Pairing these phrases with simple symbols like hearts, trees, or farmhouse animals keeps the sign appealing throughout the year. A good size for these signs is roughly 10 by 20 inches, balancing visibility with subtlety. Acrylic paints and a light distressing technique make the signs feel vintage and inviting without appearing outdated as trends change.
Combining Font Styles and Layouts
Mixing fonts improve the uniqueness of your personalized farmhouse signs. Using a combination of script lettering for family names and bold block letters for dates or quotes creates visual interest. For example, the family name in a flowing script at the top, with smaller uppercase letters for “Est. 2020” underneath, balances elegance and farmhouse simplicity.
Arrange your text carefully, leaving consistent margins, so the sign doesn’t look cluttered. Using free online design tools before painting helps plan your layout or allows you to print stencils for clean edges. This design step takes about 15 to 30 minutes and improves the final look significantly without adding much to the cost.
Tips for Lasting Personalization
To keep your farmhouse signs looking great year after year, finish your paintwork with a clear protective sealer suitable for indoor or outdoor use. A matte polyurethane spray costs around $10 per can and dries in about one hour, creating a durable seal against dust, moisture, and fading. For signs you update seasonally, avoid permanent adhesives and choose removable vinyl decals or chalk markers to prevent damaging the wood surface.
Proper storage during off-seasons also preserves your signs. Store them in a dry area away from direct sunlight to prevent warping or colour loss. Well-maintained signs remain cherished decor pieces that tell your family story and welcome guests warmly.
Choosing Fonts and Lettering Styles for Farmhouse Signs
Classic farmhouse signs typically use simple, easy-to-read fonts that evoke a rustic or vintage feeling. Serif fonts like Times New Roman or Georgia work well because their slightly weathered look matches farmhouse style. Script fonts with a hand-lettered appearance can add warmth and personality, but they should be clean and legible rather than overly fancy. Sans-serif fonts such as Futura or Helvetica can fit modern farmhouse signs if combined thoughtfully with rustic elements.
Font choice shapes the mood of your sign. Bold, blocky fonts create a sturdy, no-nonsense impression suited for kitchen or mudroom signs. Delicate scripts and lighter serif fonts give a softer, welcoming feel perfect for guest rooms or living areas. Avoid fonts that feel too formal or ornate, as they can clash with the relaxed farmhouse vibe.
Mixing fonts can improve design by creating visual interest and hierarchy. A common approach pairs a bold serif or sans-serif font for the main message with a script or handwritten font for smaller decorative words. For example, put “Welcome” in a block serif font and “Friends” in a gentle cursive underneath. Keep the number of fonts to two or three max to avoid clutter.
Choosing font sizes depends on where the sign will hang. Larger fonts (2 to 4 inches tall) suit front entryways or above dining tables where you want text visible from a few feet away. Smaller fonts (1 to 2 inches) work for bedside or bathroom signs that are seen up close. Balance font size so your main message stands out, with any supporting text noticeably smaller but still readable.
To combine lettering styles effectively, start by selecting one font that matches your sign’s main theme, serif fonts for traditional farmhouse, script for a softer look, or sans serif for updated farmhouse styles. Then, choose a complementary font with contrasting style or weight. For example, pair a thick serif font like Playfair Display with a light, cursive font such as Great Vibes. Test your choices by printing sample words and holding them up in your space to see how the style and size feel from typical viewing distances.
Limit font mixing to no more than three styles to keep your sign readable and visually pleasing, avoiding confusion or clutter.
Best Placement and Size Tips for Farmhouse Signs
Picking the right size farmhouse sign depends on the room dimensions and the wall space available. A sign should feel balanced rather than cramped or lost. A good rule of thumb is to select a sign sized roughly 10 to 20 percent of the wall space it will hang on. For example, if you have a 6-foot-wide wall, a farmhouse sign between 8 and 12 inches wide fits nicely if it’s part of a gallery or layered arrangement. For a single standalone sign, aim for 20 to 30 inches wide to create a statement without overwhelming the wall. Smaller signs, around 8×10 inches, work well in compact areas like bathroom walls or kitchen nooks.
Space around the sign influences the flow and visual appeal. Leaving at least 6 to 12 inches of clear wall space around the edges helps the sign stand out and avoids a cluttered look. Avoid placing a farmhouse sign too close to furniture edges or light switches; letting it breathe maintains a polished feel. Larger rooms with open wall areas allow for bigger signs or grouping multiple signs together, while tighter or narrow walls call for smaller pieces arranged neatly.
Sign shape impacts the best placement options. Rectangular signs fit well above furniture like buffets, mantels, or headboards, aligning with their horizontal lines. Square or circular signs work beautifully in smaller, more focused wall areas such as narrow hallway sections or bathroom walls. Layering multiple smaller signs or combining different shapes can fill larger wall spaces dynamically, but keep individual sign sizes proportional to the overall layout to prevent visual chaos.
To achieve balance, center the farmhouse sign at eye level, roughly 57 to 60 inches from the floor to the middle of the sign. This height harmonizes with typical sight lines and works for both small and large rooms. If placing a sign above furniture, leave 4 to 6 inches between the top of the furniture and bottom of the sign to create a cohesive grouping. Aligning the sign’s edges with the furniture width or centering it creates a harmonious arrangement that feels intentional.
Consider the room’s function when choosing sign size and placement. For entryways or living rooms where the sign serves as a warm focal point, larger sizes around 20 to 30 inches work well. Dining rooms benefit from heartfelt sayings sized to fit above buffets or sideboards, keeping signs proportional to those pieces. Bathrooms and kitchens often call for smaller signs, around 8 to 12 inches, placed on modest wall sections or near sinks and counters for a subtle farmhouse charm.
Protecting and Maintaining Wooden Farmhouse Signs
Wooden farmhouse signs need proper care to stay attractive and durable over time. Protecting your sign starts with choosing the right finish to shield the wood from moisture, dirt, and wear. A clear matte polyurethane or acrylic topcoat works well for preserving the rustic look while providing a tough barrier. Applying two to three thin coats, allowing each layer to dry fully, usually 4 to 6 hours, creates a long-lasting seal. Use a synthetic bristle brush for smooth coverage, and sand lightly with 220-grit sandpaper between coats to prevent roughness.
For outdoor use, consider finishes designed for exterior protection, such as spar urethane. This finish contains UV blockers and remains flexible during temperature changes, reducing cracking or peeling. Two coats applied similarly to indoor finishes can extend the life of your sign through sun exposure and rain. When placing signs outside, mounting them under a porch or awning will further reduce weathering effects and slow fading or moisture damage.
Regular cleaning is essential to maintain your sign’s appearance. Use a soft, dry cloth to dust frequently. When deeper cleaning is necessary, gently wipe with a slightly damp cloth and mild soap, avoiding harsh chemicals or soaking the wood. Doing this every three months helps prevent dirt buildup and protects any paint or finish from deteriorating prematurely.
Seasonal maintenance involves inspecting the sign for scratches, chips, or signs of wear in the finish. Touch up minor damage with matching paint or a clear protective coat. Reapplying the topcoat every one to two years is recommended, especially for outdoor signs, to renew the protective barrier. This upkeep can cost around $10 to $20 for a small can of finish and usually takes less than an hour when factoring in drying time.
Signs displayed indoors in stable climates generally require minimal maintenance beyond dusting and occasional wiping. However, even indoor signs benefit from a finishing coat to prevent moisture from humidity affecting the wood or paint. If your farmhouse style uses reclaimed or raw wood, sealing it first with a wood conditioner or sanding sealer before painting helps the finish adhere better and last longer.
Careful finishing and regular maintenance preserve the charm and functionality of your wooden farmhouse signs. Protecting them with suitable finishes and gentle cleaning keeps them looking fresh. Outdoor signs demand more durable coatings and shelter from harsh elements to keep their appeal year-round.
Common DIY Farmhouse Sign Mistakes and How to Fix Them
Uneven paint and lettering issues often stem from skipping preparation steps or rushing through the process. A rough or unprimed surface prevents paint from adhering smoothly, causing blotchy or peeling finishes. Fix this by sanding the wood with 120- to 220-grit sandpaper until smooth, then applying a primer suitable for wood. Let the primer dry fully before painting. Using a matte finish improve the vintage look typical for farmhouse signs and helps mask minor imperfections.
Lettering errors usually come from freehand painting without guides or choosing fonts that are hard to replicate consistently. To avoid this, print your chosen design or wording at actual size, then transfer it onto the wood using carbon paper or a light pencil tracing. For mistakes while painting, wait for the paint to dry completely, then gently sand the error away. Touch up with paint applied carefully by a small angled brush or a paint pen for precision.
Beginners often underestimate drying times, leading to smudged paint or bowed wood from moisture. Allow at least 2 to 4 hours of drying between coats in a well-ventilated area with temperatures ideally between 65°F and 75°F. Avoid painting on overly moist wood, which can raise the grain and distort paint coverage. Taking time to plan the layout and practicing lettering on scrap wood before working on the final piece saves both time and money by reducing waste.
- Skip rough surfaces by sanding and priming before painting
- Transfer lettering guides with carbon paper or pencil tracing
- Let paint dry 2 to 4 hours between coats to prevent smudging
- Fix paint mistakes by sanding after drying and carefully repainting
- Use paint pens for small lettering details and touch-ups
- Choose simple fonts and practice on scrap wood first
- Avoid painting or staining wet or unseasoned wood
Take your time applying paint in thin, even layers to prevent drips and allow easier correction of mistakes.
Common issues also include uneven edges or warped boards. For edges, using painter’s tape can help achieve straight lines, while clamping the wood flat during painting and drying reduces warping. Applying a protective sealant after the paint dries will preserve your sign’s finish and prevent fading or moisture damage over time. Expect sealants to cost around $10 to $20 per quart and add about 30 minutes for application and drying. This extra step can keep signs looking great for years.
Quick and Budget-Friendly Farmhouse Sign Projects for Beginners
Simple farmhouse signs are easy to make using basic materials like scrap wood and paint, keeping costs under $20. Focusing on minimal tools such as sandpaper, paintbrushes, and stencils allows for quick projects that deliver charming, rustic results. Beginner projects include small welcome boards or kitchen-themed signs that can be completed in a few hours.
Projects Using Recycled or Scrap Wood
Using recycled or scrap wood is a practical and affordable way to start. Pallet wood is especially popular and often free or very cheap. Cut a piece about 12 inches by 6 inches for a small sign. Sand it lightly to remove splinters, then paint a background color or leave it natural for a rustic look.
Paint simple phrases like “Welcome,” “Gather,” or “Farmhouse” with a small brush or stencil. These signs usually take 1 to 2 hours and materials cost less than $10 if you have paint leftover from other projects. Signs made from scrap wood give authentic texture and character not found in store-bought boards.
Using Stencils and Paint Pens for Fast Results
For quick and beginner-friendly decorating, stencils paired with paint pens or acrylic paint are helpful. Stencils remove the need for advanced freehand lettering skills, which keeps the project budget-friendly and less time-consuming. A basic stencil set ranges from $5 to $15, and paint pens cost about $3 each.
Choose pre-cut phrases or simple farmhouse graphics that fit small wood pieces or canvas boards. Set up your workspace with a scrap piece underneath. Secure the stencil with tape, fill in the letters or images with paint pens, then peel it off carefully to avoid smudges. Allow drying for 30 minutes to an hour. This method can produce a clean, professional look in one or two hours.
- Prepare wood surface with light sanding (120 grit sandpaper)
- Use affordable acrylic paint or paint pens
- Apply reusable stencils for consistent lettering
- Practice spacing on paper before painting
- Seal finished sign with clear matte spray sealant (optional, $5 to $10)
- Work in a well-ventilated room to avoid fumes
Good lighting and patience during stencil removal reduce the risk of paint bleeding. You’ll get clean edges and repeatable designs without advanced tools or skills.
No-Tool Farmhouse Sign Ideas
Creating signs with no tools is possible using materials like pre-cut wooden plaques or thick cardboard combined with adhesive vinyl letters or stickers. This approach costs $10 to $20 depending on vinyl availability and offers immediate results without sanding, painting, or cutting.
Simply buy a ready-made wood plaque or repurpose an old picture frame backer. Apply peel-and-stick farmhouse words or icons using transfer tape for easy placement. Press firmly to avoid bubbles. These signs are great for temporary decor or crafts with children since cleanup is minimal.
What often goes wrong here is poor adhesion due to dusty surfaces or rushed application. Wiping the base first and slowly applying vinyl minimizes those issues and keeps the sign looking crisp and professional.
Step-by-Step Action Plan to Create Your Farmhouse Sign
Follow these simple steps to make a charming farmhouse sign that fits your style and space. Each phase is designed to keep you on track and see progress quickly.
- Before you start: Choose your sign’s message and style. Pick a saying or design that feels personal or seasonal. You’ll know this worked when you have a clear idea and a sketch or template ready.
- Day 1: Gather materials such as wood, paint, brushes, and stencils. Using locally sourced or budget-friendly supplies helps save costs without sacrificing quality.
- Day 2: Cut or select your wood panel to the size you want. Confirm the size fits your intended display area by measuring the spot beforehand.
- Day 3: Paint a base coat and let it dry fully. The color should be even and cover the wood completely to prepare a good background.
- Day 4: Add lettering or stencils with your chosen font. Check the alignment by stepping back frequently to make sure the text is clear and centered.
- Day 5: Seal your sign with a protective layer like polyurethane or wax if it’s for outdoor use. The finish should feel smooth and look consistent once dry.
- Within one week: Hang your sign in the planned spot and adjust placement if needed. The sign should be stable and easy to see from the intended viewing angle.
Frequently Asked Questions
What Size Board Is Ideal for a Farmhouse Sign to Be Seen from Across the Room?
A 24×36 inch board is ideal for a farmhouse sign so messages like “Bless This Home” are legible from across the room, improving cozy vibes. This size balances visibility with space efficiently in living areas.
How Can You Style a Farmhouse Sign to Complement Dining Room Furniture?
Choose a sign with colors and fonts that harmonize with your dining room decor. Using warm, earthy tones often works well to match wood furniture and create a consistent farmhouse look.
What Are Creative Non-Wood Backgrounds for Farmhouse Signs?
Consider materials like metal or canvas for unique farmhouse signs that don’t use wood. These alternatives add texture and interest while keeping a rustic, homey feel.
What Are Quick Ways to Add Seasonal Themes to Farmhouse Signs?
Swap out small, attachable embellishments like wreaths or garlands on your sign. This allows you to update the look easily without making a new sign each season.
How Do Farmhouse Signs Influence Kitchen Atmosphere?
They can boost warmth and make cooking feel more joyful by adding charm and personality. Signs with welcoming sayings or food-themed quotes work especially well in kitchens.
What Font Styles Suit Beginner Farmhouse Sign Makers?
Simple, easy-to-read fonts like block or script work best for beginners. These fonts make painting or stenciling letters easier and create classic farmhouse charm.
Key Points to Remember
Creating a farmhouse sign is a fulfilling way to add a personal touch to your home décor without spending much. Start with a message that matters to you, then follow through with careful craftsmanship and finishing touches. Your next step is to pick the perfect wall or shelf where your new sign can brighten the space and catch the eye.