Floating Frame Sign Ideas: Creative Styles and DIY Tips for Stunning Displays
Floating frame sign ideas help create eye-catching displays by giving artwork or signs a modern, three-dimensional look without bulky frames. This style suspends the sign within the frame, leaving a visible gap that adds depth and highlights the design. Starting with precise measurements and choosing the right gap size ensures the floating effect looks clean and professional.
Key Takeaways
- Use a uniform 1/4 inch gap between the sign edges and frame interior to achieve the classic floating appearance.
- Cut 1×2 wood pieces with 90° miters, adding 1.75 inches to both canvas length and width for proper frame sizing.
- Secure corners with scrap wood braces cut at 6 to 7 inches with opposing 45° angles for strong frame joints.
- Allow glue to dry for at least 24 hours to ensure a sturdy and long-lasting floating frame.
- Maintain consistent 2 to 3 inch spacing between frames when creating a gallery wall for a polished look.
- Measure the full canvas size including folds, not just stretcher bars, to avoid frames that are too small.
What Is a Floating Frame Sign and How Does It Work?
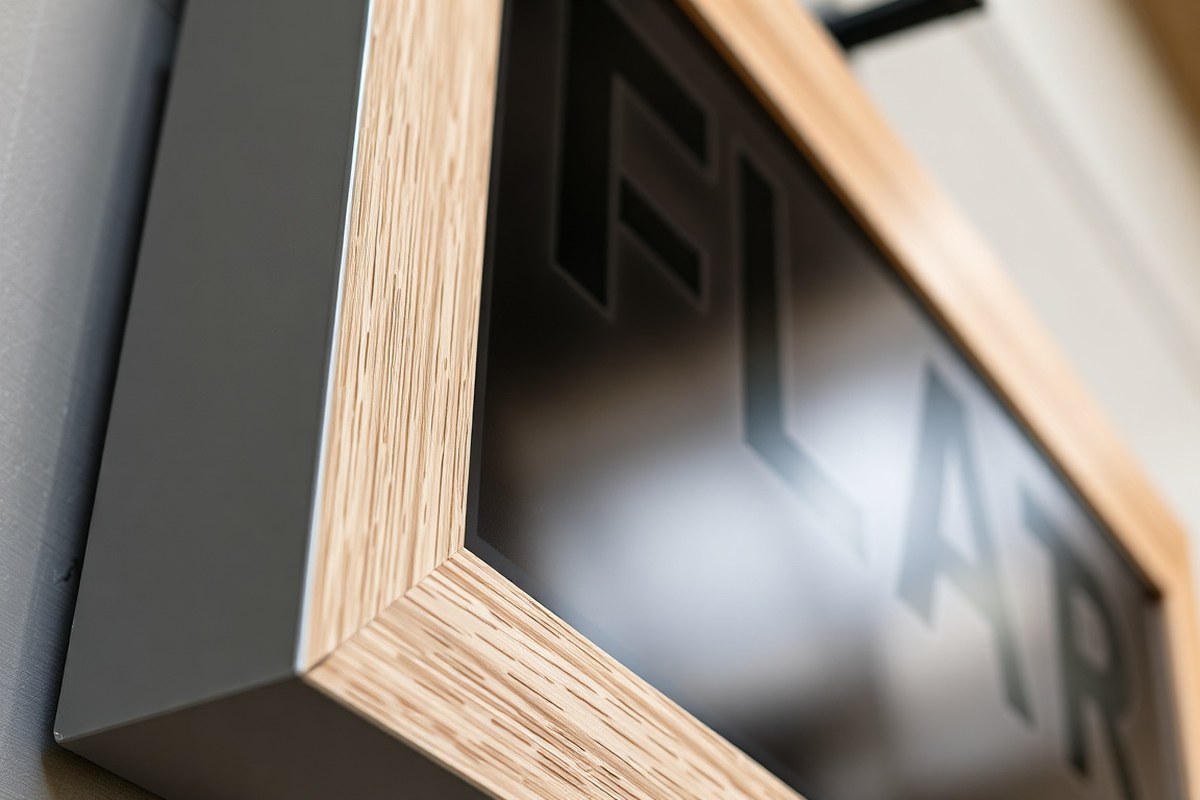
A floating frame sign displays artwork or a sign with a small space between the edges and the inside of the frame. This gap, usually between 1/8 inch and 1/4 inch, makes it look like the piece is suspended within the frame rather than glued or pressed against it. The size of the gap varies based on the frame’s design and the artwork’s dimensions, giving the piece more visual depth and showing its whole edges.
The key to the floating effect lies in how the sign is positioned relative to the frame. Instead of being mounted flush against the back or front of the frame, the sign is secured in a way that leaves space on all sides, often by using a recessed rabbet or dado cut that holds the piece securely while maintaining the gap. The top edge may be fixed firmly, while the other sides might “float” slightly within the frame to allow for natural expansion or contraction, especially important for wood signs. This method prevents stress on the sign’s edges and preserves the clean, modern look by emphasizing the gap.
This spacing not only lends the sign a modern, minimalist aesthetic but also highlights its craftsmanship, as every edge of a gallery-wrapped canvas or wood plank is on display. The frame itself typically features a slim profile and clean lines with neutral finishes, complementing contemporary design styles. Materials are chosen carefully; for instance, a wood frame with a deeper profile is common to accommodate the depth needed for suspension.
The gap size is important for both visual appeal and practical reasons. A wider gap, closer to 1/4 inch or more, creates a more dramatic floating illusion, making the artwork appear as if it’s hovering. Narrower gaps, around 1/8 inch, produce a subtler effect that still showcases the edges while preserving a refined look. Precise measurements are essential to achieve this balance; the frame should be cut so that the inside dimensions allow this gap all around the artwork. For example, a 12-by-16-inch sign would require a frame with inside dimensions that are roughly 12 ¼ by 16 ¼ inches to maintain a 1/8-inch gap on each side.
Good results show your sign clearly separated from the frame, with uniform gaps all around and no visible fasteners from the front. Problems arise if the gap is uneven or too tight, which can press against the artwork and damage it over time, or too wide, which can make the sign look improperly mounted. Securing the sign only at strategic points, like the top edge or back centers, allows for slight movement without stressing the joints or the sign’s edges, a consideration especially important for wooden signs that can swell or shrink with humidity.
Why Choose Floating Frame Signs over Traditional Frames?
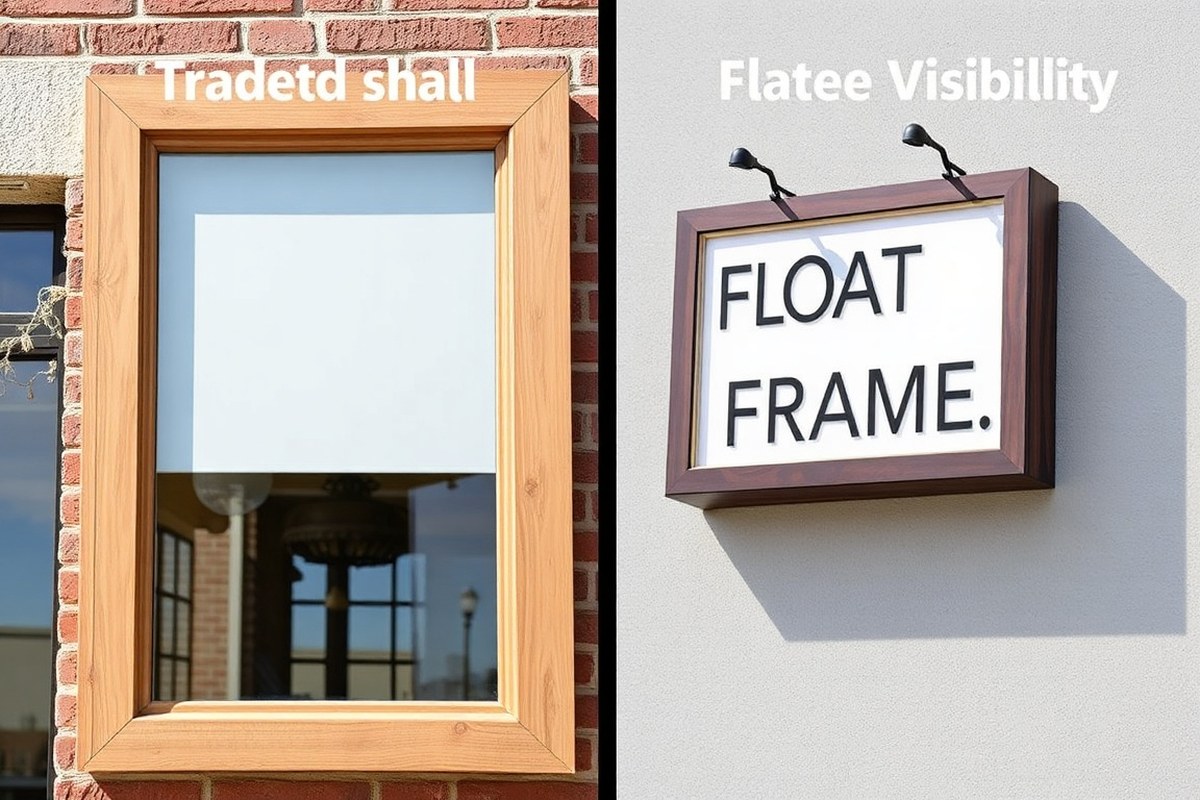
Floating frame signs bring a unique blend of style and functionality that traditional frames often lack. Their minimalist design keeps attention firmly on your artwork or sign without overwhelming it. This open space around the edges offers better visibility of the piece’s borders, especially important for gallery-wrapped canvases or signs with finished edges. Instead of hiding the sign edges, floating frames create a visible gap, allowing the design to “breathe” and draw the eye directly to what matters.
These frames aren’t just about looks. They provide better protection by preventing direct contact between the sign and the frame, reducing the risk of damage from warping or moisture. This also addresses wood movement issues common with wood signs, preserving their shape and longevity. Floating frames suit various materials, from wooden signs to stretched canvas art, and come in a range of styles, natural walnut, black metal, acrylic, or even sustainable options like reclaimed wood and bamboo. Choosing between floating and traditional frames depends on the effect you want and the nature of your sign. Here’s a comparison table to help you weigh the benefits:
| Aspect | Floating Frame | Traditional Frame |
|---|---|---|
| Aesthetic | Minimalist, modern, highlights edges | Ornate, may overwhelm smaller or delicate pieces |
| Edge Visibility | Visible with a gap around the sign | Edges covered by frame molding |
| Protection | Prevents warping and moisture damage by spacing | Direct contact with frame, less space for breathing |
| Material Compatibility | Best for canvas, wood signs, gallery wraps | Works with flat art, photos, paper-based signs |
| Style Options | Wood, metal, acrylic, sustainable materials | Wood, metal, decorative moldings available |
| Installation Complexity | Requires spacers and careful mounting | Typically straightforward with standard glass and backing |
| Cost Range | Varies, premium woods and acrylic tend to cost more | Wider range, often less expensive for simple molding |
A floating frame’s gap is usually created using spacer blocks about 1/2 inch thick, ensuring uniform distance all around your sign. This small detail has a big visual impact, making even a simple wood sign stand out with a refined presentation. The right size frame and gap depend on your sign’s dimensions and thickness, but standard eye-level hanging remains about 57 to 60 inches from the floor to the center of the frame for best viewing.
Use temporary spacers like business cards during mounting to keep the gap even all around before securing the floating frame permanently.
For signs with thick edges or unique materials, floating frames offer flexibility traditional frames don’t. Acrylic floating frames, for example, provide an ultra-modern, high-gloss finish perfect for sleek, contemporary interiors. Walnut or brass frames add warmth and vintage appeal while still keeping the artwork’s edges visible. No matter the style of your home, a floating frame can match and improve your sign in ways a traditional frame may struggle to achieve.
Materials and Tools Needed for Floating Frame Signs
Choosing the right materials and tools is important for crafting a well-fitted floating frame sign that allows your wood panel or artwork to move slightly with changes in temperature and humidity. The best wood options for the frame include hardwoods like oak, maple, or walnut for durability and natural texture. Alternatively, you can use quality plywood or medium-density fiberboard (MDF) if you plan to paint the frame. The thickness of the wood should match the width of the channel cut into the frame, ideally about 0.75 inches deep, which lets the panel fit snugly while allowing slight movement.
For cutting and assembling the frame, you’ll need precise tools to ensure clean edges and strong joints. A miter saw or a table saw is ideal for accurate 45-degree cuts required to create the frame’s corners. A router can be handy to carve the channel where the panel will sit. For joinery, using wood glue combined with 1.25-inch 16 gauge nails or brad nails provides a secure hold without damaging the frame. Nails ranging from 1 to 2 inches in length and 18 to 16 gauge thickness work well depending on the wood thickness and sign size.
- Wood lumber or MDF boards with a thickness matching the panel (around 0.75 inch for the channel)
- Miter saw or table saw for cutting frame pieces
- Router or chisel for creating the channel
- Wood glue to strengthen joints
- 1.25-inch 16 gauge nails or brad nails for assembly
- Measuring tape and square for accuracy
- Sandpaper or sanding block (100-150 grit) for smooth finishes
Selecting high-quality wood affects both the frame’s appearance and durability. Solid hardwood can cost between $3 and $10 per linear foot depending on species, while MDF is usually under $2 per linear foot but lacks natural grain. Look for straight, knot-free boards to avoid warping or difficulty in cutting perfect corners. When handling nails, use a nail gun or hammer carefully to prevent splitting the frame wood. Applying wood glue along the joints before nailing improves stability and reduces the chance of gaps forming over time.
For floating frames intended to hold delicate or flat items like pressed flowers or sketches, glass or acrylic inserts might be part of your materials list. Ensure they fit neatly inside your constructed channel without pressing too tight, which could impede expansion and contraction. The design of the frame should complement the style of your sign or artwork, from natural wood finishes to painted or stained options that match your decor.
Creative Floating Frame Sign Ideas for Different Styles
Floating frame signs adapt well to a variety of decor styles, offering versatility for home, office, and commercial spaces. Tailoring your floating frame to match rustic, modern, vintage, or textured designs helps highlight the artwork or message. You can adjust finishes, materials, and installation techniques to fit the style you want and the environment in which the sign will live.
Rustic and Natural Floating Frames
Using natural wood with visible grain and knots creates authentic rustic floating frames. Opt for reclaimed wood or unfinished cedar and pine for a warm, organic look. The gap between the sign and frame can be wider here to improve the hand-crafted impression, typically around ⅜ to ½ inch. Pair these frames with farmhouse-style signs, hand-painted lettering, or wooden cutouts for a cohesive design.
For extra impact, use distressed finishes that show sanding or chipping. Matte or satin sealers preserve the wood’s natural feel without the gloss. You can also add twine or burlap accents inside the floating gap for texture that complements the rustic theme.
Modern and Minimal Floating Frames
Sleek black or white frames with thin profiles suit modern and minimal decor. These frames typically have a tighter gap, around ¼ inch, to create crisp shadows that add subtle depth without distraction. Aluminum or high-gloss painted wood work well for a clean look. Floating frames in these materials emphasize bold graphics, black-and-white photography, or abstract artwork.
Keep the installation neat by using recessed fasteners or clear spacers that do not interrupt the frame’s lines. Incorporate geometric shapes or monochrome color palettes for a stylish, contemporary effect. To keep costs reasonable, consider prefinished mdf frames or powder-coated metals starting around $40 to $70.
Themed Frames for Seasonal or Event Signs
Floating frames can be customized for holidays, celebrations, or business signage by switching out the frame or sign frequently. Lightweight materials like foam board or thin plywood signs make swapping easy. Choose frame finishes matching your theme, metallic gold for festive events, bright painted wood for children’s parties, or dark walnut for formal occasions.
Using clips or removable mounts inside the frame lets you update graphics or slogans without full reassembly. This flexibility fits retail environments or home spaces that change decor seasonally.
- Use gold or silver frames for holiday celebrations
- Bright-colored frames for birthdays or kids’ events
- Natural wood for autumn or harvest themes
- Black or white sleek frames for corporate announcements
- Custom painted frames matching event branding or colors
- Magnetic mounts inside frames for quick sign changes
Planning the frame to accept easy sign updates lowers maintenance time and increases usability in different settings.
Textured and 3D Sign Floating Designs
Floating frames work well with signs that have three-dimensional elements like layered wood, metal cutouts, or fabric embellishments. To accommodate depth, choose frames with taller rabbet or backing, often 1 inch or more. The gap between the sign and frame can remain standard, but ensure extra clearance if the sign has protruding parts. This prevents damage and shadows that feel too harsh.
Clear acrylic spacers behind the sign provide stability while keeping the floating effect visible. Textured signs like sanded paint, raised lettering, or mixed media become focal points when the floating frame adds clean separation from the wall.
Step-by-Step Process to Make a DIY Floating Frame Sign
Making a DIY floating frame sign requires careful measurement, precise cutting, and attentive assembly for a clean, professional look. Accurate miters and mounting are key to achieving the “floating” effect that lets the artwork stand out. Follow the steps below to build your frame efficiently and avoid common pitfalls such as gaps that are too wide or misaligned corners.
Measuring and Cutting Frame Pieces
Start by measuring your sign or artwork to determine the frame size. Add extra length to account for the miters and the floating gap around the sign. To get precise cuts, use a miter saw set to 45 degrees, and always double-check your measurements before cutting. Precise measuring ensures the frame fits snugly around your sign without unwanted gaps.
Cut each frame piece about 1 inch longer than the inside dimensions of your sign to allow for the 45-degree miters at each corner. For example, if your sign measures 12 inches by 18 inches, cut wood pieces to a length that is 1 inch longer on each side before cutting the miters. Holding scrap wood pieces steady during cutting helps maintain accuracy.
Measure twice and cut once: even small errors in length or angle can cause your frame corners to misalign, ruining the floating effect.
Assembling the Frame with Miters and Braces
After cutting your miters, dry fit all four frame pieces to ensure tight corners. Use a band clamp to hold the frame square while the glue dries. Adding corner braces cut with opposing 45-degree angles (6 to 7 inches long) reinforces the frame and prevents movement over time. These braces fit inside the corners without interfering with the floating gap or artwork placement.
Create a shallow rabbet cut (dado) on the inner edges of the frame pieces before assembly. This groove holds the sign securely and establishes the floating gap by recessing the artwork slightly away from the frame edges, giving it that “hovering” look. Cutting the rabbet on each piece before gluing makes assembly simpler and more precise.
- Cut miters at 45 degrees on each frame piece, ensuring lengths are 1 inch longer than sign edges.
- Create a shallow rabbet groove inside each frame piece to hold the sign.
- Dry fit the frame pieces and check corner alignment.
- Apply wood glue to miters and clamp with a band clamp until dry (about 30-45 minutes).
- Attach corner braces inside corners for extra stability.
Mounting the Sign and Creating the Floating Gap
Before mounting, clean the sign surface and measure the inside space of your completed frame to confirm fit. Place the frame face up and carefully insert the sign into the rabbet groove, centering it to create an even gap all around. This gap typically ranges from 0.25 to 0.5 inches, enough to visually lift the sign while keeping it secure.
Secure the sign with finish nails or tiny screws through the back of the frame or with mounting tape designed for wood. Avoid nailing or screwing through the front to maintain a clean display. Double-check that the floating gap remains uniform, which keeps the design balanced and visually appealing.
Keep the floating gap consistent on all sides; uneven spacing can distract the eye and lessen the impact of your floating frame sign.
Finishing Touches and Protective Coatings
Sand the frame edges smooth, especially around miters and rabbet cuts, to remove any splinters or rough spots. Choose a paint or stain that complements your sign and apply evenly. Let the finish dry completely, typically 2 to 4 hours depending on the product. Applying a clear protective coating like polyurethane helps protect the wood from moisture and wear while improving its appearance.
Apply the clear coat lightly with a foam brush in a dust-free area, allowing thorough drying between coats if multiple layers are needed. A well-finished frame not only lasts longer but improves the floating effect by providing a polished border that frames your sign thoughtfully.
How to Choose the Best Size and Gap for Floating Frame Signs
Selecting the right dimensions and space for floating frame signs requires accurate measuring and knowing how the space impacts the look. The separation between the sign and the frame produces a gentle shadow that adds depth, giving the impression that the artwork is floating. A typical and appealing space size is about 1/8 inch. This small gap creates a subtle shadow without causing the display to seem detached or oddly balanced.
Start by measuring how thick your sign is using a ruler or caliper, including canvas folds or mounting parts. Stretcher bars and folded canvas can increase thickness by up to 1/4 inch, so keep that in mind. For instance, a canvas with 3/4 inch thick stretcher bars plus folds might total nearly 1 inch thick. The frame’s rabbet depth, the inner edge where the sign settles, needs to be just a bit deeper than the sign to fit easily without pressure, but avoid a depth that lets the sign sit too far inside.
To calculate frame dimensions, add twice the desired gap size to the width and height of your sign. For instance, if the canvas measures 30 by 40 inches and you want a 1/8-inch gap, add ¼ inch total (1/8 inch on each side). When your frame boards are 3/4 inch thick on each side, add a total of 1 1/2 inches (3/4 inch times 2) to your size measurement. This method ensures the frame fits perfectly while maintaining the intended floating effect. A 30×40-inch canvas with a 1/8-inch floating gap and a ¾ inch-thick frame would result in an outside frame dimension of about 31 3/4 by 41 3/4 inches.
Gap size can be customized to fit different styles and effects. Smaller gaps, around 1/8 inch, give a refined and light floating impression suitable for fine art or small prints. Larger gaps, up to 1/4 inch or more, create bolder shadows and dramatic depth, better for larger pieces or when you want a standout display. Keep in mind that bigger gaps increase the overall frame dimensions and may require deeper rabbet depths to ensure the sign remains securely in place.
When selecting or building your frame, confirm that the rabbet depth can comfortably accommodate the sign’s thickness plus the gap. Too shallow a rabbet can pinch or damage the edges. Too deep a rabbet risks the sign sitting too far inside, which weakens the intended floating illusion. Test fitting the sign before final assembly helps avoid these pitfalls. Adjusting the gap according to the sign type and style allows you to tailor the floating frame’s impact, from subtle elegance to strong visual drama, while protecting the artwork and ensuring a professional finish.
Common Mistakes and How to Fix Them in Floating Frame Signs
One common mistake in creating floating frame signs is inaccurate measurements. When the frame or the sign is off by even a quarter-inch, it leads to uneven gaps that spoil the floating effect. Use a reliable ruler or measuring tape, and double-check each dimension before cutting. Mark carefully with a pencil to maintain precision. To fix existing uneven gaps, gently loosen the frame clamps if possible, then adjust the sign’s position until the spacing matches uniformly on all sides.
Misaligned corners are another frequent issue. Corners that don’t line up properly make the frame look amateurish and weaken its structure. When assembling, ensure the mitered corners meet precisely at a 45-degree angle by using a miter box or a specialized clamp. If corners are already crooked, disassemble the frame and recut any parts that don’t fit flush. Sand the edges lightly for a clean finish before reassembling.
Material choice also affects the frame’s durability and appearance. Frames made with softwood or low-grade plywood may warp over time due to humidity or temperature changes inside the home, causing the floating effect to diminish or the frame to crack. Select hardwood or moisture-resistant materials like MDF with a laminate finish to minimize warping. Keep the frame away from direct sunlight and high moisture areas like bathrooms to protect it further.
- Maintain a consistent 1/4- to 1/2-inch gap between the sign and frame to prevent rubbing damage.
- Use wall protectors on the frame’s bottom corners to prevent wall marks and support even hanging.
- Apply wood glue along joints before nailing for additional stability.
- Clamp carefully during drying to avoid frame warping or misalignment.
- Check with a level during mounting to ensure the sign hangs straight and is securely attached.
Securing the floating frame to the wall requires careful mounting. Using the wrong hardware or missing anchors can cause the frame to tilt or fall, damaging both the sign and your wall. Mount the frame using appropriate drywall anchors or screws that fit wall studs when possible. A level helps confirm the frame’s alignment during installation. Adding felt or silicone bumpers behind the frame corners prevents direct contact with the wall, reducing marks and helping the frame stay steady.
Lastly, avoid rushing through the assembly and mounting phases. Taking time for accuracy and using quality materials and hardware ensures your floating frame sign looks professional, withstands daily wear, and preserves the distinct floating appearance for years.
Maintaining and Protecting Floating Frame Signs over Time
Cleaning floating frame signs requires a gentle approach tailored to the materials used in your sign. For wooden frames and signs, dust them regularly with a soft microfiber cloth to avoid scratches. Use a damp cloth with mild soap for deeper cleaning, but never saturate the wood with water, as this can lead to warping or swelling. For metal or painted finishes, wipe with a soft cloth and a glass cleaner or a solution of water and vinegar, taking care to avoid abrasive pads that could damage the finish or the sign surface.
Environmental conditions strongly affect the durability of your floating frame sign. Excess moisture and humidity are the main culprits behind warping in wood frames. Keep your signs away from damp basements, bathrooms, or outdoor areas without proper weather protection. Direct sunlight can fade paint and finishes over time, so place signs in locations with indirect light or use UV-resistant coatings to prolong color retention. Temperature fluctuations cause expansion and contraction, which may loosen joints or finishes. Aim to keep signs in a stable indoor environment ideally between 60 and 75 degrees Fahrenheit with moderate humidity between 40% and 60% to minimize stress on the materials.
Applying special finishes or sealants can greatly extend the life of floating frame signs. Wood signs benefit most from a clear polyurethane finish or a penetrating oil finish like tung or linseed oil. Polyurethane creates a hard surface resistant to moisture and wear, typically costing around $15 to $25 per quart and requiring two to three thin coats with 2 to 4 hours drying between coats. Oils require reapplication yearly but maintain the natural wood look and feel. For metal frames or accents, clear lacquer or enamel spray protects against oxidation and fingerprints. Acrylic sealants also work well on painted or printed surfaces, forming a durable, clear barrier. Always choose finishes labeled for interior use unless your sign will be outdoors, in which case, outdoor-rated finishes are necessary.
A straightforward maintenance checklist can help keep floating frame signs in top condition: dust with a microfiber cloth weekly, clean with mild soap and water monthly, inspect for chips or cracks quarterly, and reapply protective finishes annually or as needed. Avoid harsh chemicals or ammonia-based cleaners that strip finishes. If you notice warping starting in a wooden frame, control the humidity or move the sign to a drier area before damage worsens. Tighten any loose joints or hardware promptly to maintain structural integrity.
Always test cleaning products on a small hidden area first to ensure they won’t damage the finish or paint on your floating frame sign.
How to Design a Floating Frame Sign Gallery Wall
Arranging multiple floating frame signs into a gallery wall requires careful attention to spacing, frame size balance, and material harmony. Keeping consistent gaps and aligning frames thoughtfully helps the overall display feel unified and polished. Mixing frame materials works well when done with an eye for color and texture balance.
Choosing Consistent Spacing and Layout
A professional-looking gallery wall usually maintains spacing between floating frames of 2 to 3 inches. This gap is wide enough to keep each sign distinct but close enough to unify the collection on the wall. Measure your wall space first, then sketch your layout on paper or use painter’s tape to mark spots on the wall before hanging.
Align your frames either by their centers, tops, or bottoms depending on your desired look. Center alignment is most common for balanced visual flow. You can also arrange signs in a grid for symmetry or a more casual, staggered layout for visual interest.
- Maintain 2 to 3 inch spacing between each frame
- Choose alignment style: center, top, or bottom
- Use painter’s tape to outline layouts on the wall
- Start with larger frames as anchor points
- Leave enough margin at the wall edges for breathing room
Keep your layout flexible until you finalize positioning. Avoid overcrowding any area because that can make the wall look cluttered and disrupt the floating effect.
Balancing Different Size Frames
Using various-sized floating frame signs adds dynamic interest but requires balance to avoid visual chaos. Larger frames serve as anchors and help organize smaller pieces around them. Place the biggest frames near eye level with smaller ones above, below, or beside them.
Space frames so their edges don’t line up too uniformly unless you want a strict grid look. Instead, overlap margins slightly with varying frame sizes to create an informal, organic flow. This approach optimizes the floating style, emphasizing the gaps between signs while maintaining harmony.
Plan your arrangement on the floor first before committing to wall placement. This allows easy experimentation with frame positioning to achieve the right proportion and flow.
Mixing Frame Materials and Styles
You can combine different frame materials in one gallery wall, but aim for style harmony to keep the display coherent. For instance, pairing wood frames with black metal ones works well if the colors complement each other. Consistent finish tones or similar widths also help unify mixed materials.
Choose materials that reflect your room’s decor and the mood you want the gallery wall to evoke. Warm wood tones offer a cozy, traditional feel, while matte black frames create a sleek, modern look. Avoid mixing too many finishes or frame styles to keep the wall from appearing mismatched.
Mixing frame shapes, like including hexagonal or circular floating frames alongside rectangles, adds visual intrigue and can highlight unique pieces. Just keep consistent spacing and layout rules to maintain overall cohesion.
When to Hire a Professional for Floating Frame Sign Installation
Professional installation is recommended when dealing with custom floating frames that require precise measurements or unique assembly that a typical DIY approach cannot easily replicate. Large or heavy signs present another challenge, since their weight demands strong anchors and level positioning to prevent damage to both the sign and your wall. Complex wall installations, such as those involving uneven surfaces, drywall with potential for damage, or mounting near electrical wiring, also call for expert handling to ensure safety and durability.
To evaluate whether professional help is necessary, consider the size, weight, and material of your floating frame sign. A rough guideline is that items heavier than 15 pounds or larger than 24 by 36 inches are better handled by professionals. Assess the wall texture and condition before installation; fragile or uneven walls can make the mounting process difficult. If your tools or experience do not cover secure mounting, hiring a professional reduces the risk of improper installation that can lead to frame slippage, wall damage, or worse.
DIY installation offers benefits like customization and cost savings, often running a fraction of what professional services charge. For a simple floating frame that fits standard sizes around 11 by 14 inches and weighs under 10 pounds, you might spend under $20 on hardware and materials. In contrast, professional framing and installation for customized or oversized signs typically start at $75 and can go up to several hundred dollars depending on frame complexity and wall conditions.
Here is a checklist to help you decide when to hire a professional: if your floating frame is custom-sized and requires complex mitered corners or special finishes, or if the sign’s weight exceeds 15 pounds, or if your wall surface is plaster, block, or has known wiring and piping issues behind it. Also, if installation must align perfectly within a larger wall arrangement, or if you lack the right power tools and anchoring hardware, a pro is the safer choice.
Good results from professional installations include perfectly level and secure frames, even weight distribution on the wall, and no damage to drywall or other materials. When done incorrectly, floating frame signs can lean, tilt, or fall, which ruins the aesthetic and risks injury. Professionals can also advise on the best mounting hardware based on frame materials like wood, metal, or acrylic, ensuring the longevity of your sign display.
When choosing between DIY and pro installation, keep in mind your comfort with handling power tools like drills and stud finders, your ability to measure precisely to avoid crooked framing, and your access to the necessary fasteners rated for your wall type. Professionals generally offer a warranty or guarantee on their work, which adds value if you’re investing in high-end or sentimental floating frame signs.
Step-by-Step Action Plan for Creating Your Floating Frame Sign
Follow these steps to design, build, and install a floating frame sign that fits your style and space.
- Before you start: Choose the artwork or sign you want to frame and measure its dimensions; successful framing depends on accurate size.
- Day 1: Select your frame materials and tools based on style and durability preferences; check that you have everything before cutting or assembling.
- Day 2: Cut and prepare the frame pieces with your chosen spacing for the gap; test fit the pieces around your sign to ensure the desired shadow effect.
- Day 3: Attach supports or spacing blocks inside the frame to hold the sign securely at the correct gap; confirm stability by gently tapping or shaking.
- Day 4: Install hanging hardware compatible with your frame size and weight; test hanging placement on a wall to check level and spacing.
- Week 2: Clean and maintain the frame and sign surfaces, applying dust-proofing or protective coatings as needed; look for surface clarity and no movement.
- After 1 month: Review your installation for any loosening or damage; adjust or tighten components to keep the floating effect crisp.
Frequently Asked Questions
What’s a Popular Material Choice for Acrylic Floating Frame Signs?
Acrylic is popular for its ultra-modern, high-gloss look, perfect in contemporary interiors where a sleek style is desired.
How Can I Make a Floating Frame Sign Stand Out in a Gallery Wall?
Use varied sizes and complementary colors for balance; spacing also creates an effective visual flow.
Can I Display Three-Dimensional Objects in a Floating Frame Sign?
Yes, shadow box floating frames work well for 3D objects or textured art for added depth.
What’s the Benefit of Using a Walnut Floating Frame Sign?
Walnut frames offer rich, dark tones and durable quality, ideal for a premium look.
Are Floral Designs Suitable for Floating Frame Signs?
Pressed flower floating frames preserve natural beauty elegantly, perfect for organic decor themes.
How Do Black Floating Frames Fit into Home Decor Styles?
Black frames are versatile, popular for modern homes, and provide a striking contrast to artwork.
The Bottom Line
Floating frame signs offer a simple, stylish way to highlight your artwork or messages while adding depth to your space. Start by selecting a piece you love and plan your frame carefully to match your room’s look. Taking the time to measure and prepare will ensure your floating frame sign brings an elegant, modern touch to your decor. Try framing your first piece this weekend, adjusting the gap and hanging for the perfect presentation.