How to Mount a Sign Without Drilling 7 Pro Methods That Really Work
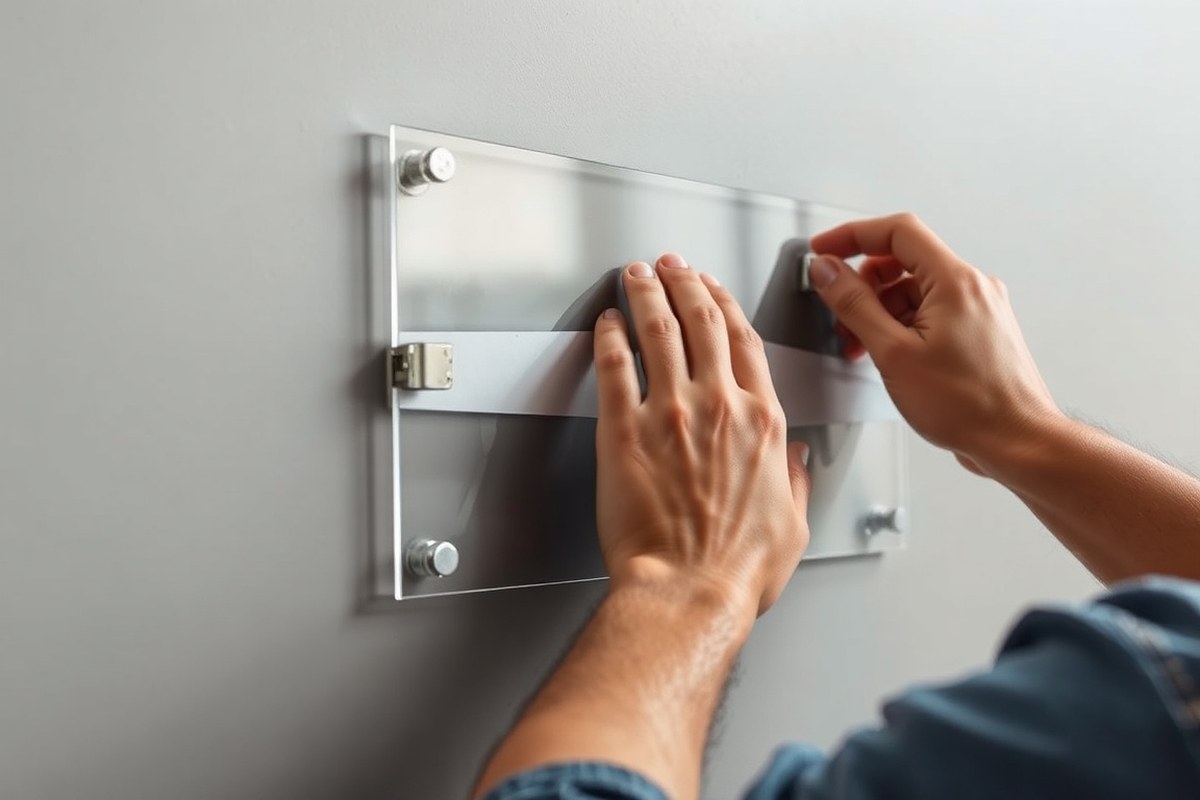
How to mount a sign without drilling is a common challenge that you can solve with several reliable alternatives. Using adhesive hooks, high-bond tapes, or bracket systems provides secure mounting without wall damage. Start by choosing the right mounting option based on your sign’s weight and the surface type.
Key Takeaways
- Use adhesive hooks or strips for signs weighing under 5 pounds, ensuring the product’s weight capacity exceeds your sign’s weight.
- For signs between 5 and 15 pounds, high-bond tape or brick clips provide strong, no-drill mounting options.
- Wait at least 24 hours after applying adhesives before putting full weight on the sign for best results.
- Ensure mounting surfaces are clean, dry, and smooth to maximize adhesive strength and prevent sign failure.
- Transparent acrylic signs require gentle handling and a minimum curing time to avoid damage when mounting without drilling.
- Use bracket systems for heavier signs when no-drill solutions are necessary, keeping weight limits in mind.
1. 8 Effective Ways to Mount a Sign Without Drilling
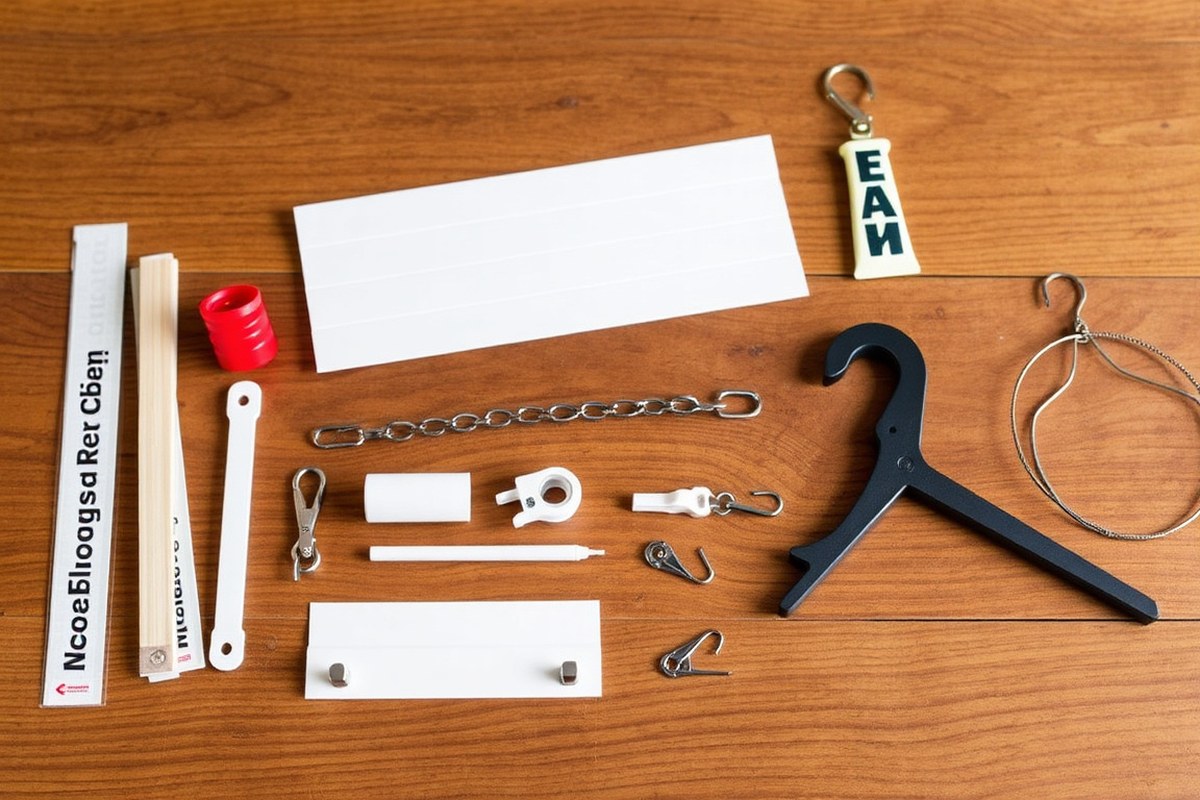
Mounting a sign without drilling is possible using a variety of reliable methods tailored to your sign’s weight, surface type, and permanence needed. The top eight options include adhesive strips and tapes, adhesive hooks, wire hangers, magnetic mounts, suction cups, and a few specialized techniques. Each method showcases benefits and limits based on how much weight it supports, ease of removal, and surface compatibility.
Adhesive Strips and Tapes
Adhesive strips and tapes attach signs directly to walls or smooth surfaces without holes or hardware. Double-sided foam mounting tape and Command strips are popular choices, designed to hold lightweight signs generally under 15 pounds. The success of this method depends on thoroughly cleaning the surface and allowing the adhesive to cure for about an hour before hanging.
Adhesives work best on smooth, non-porous surfaces such as painted drywall, glass, metal, or tile. They resist damage to the wall when removed properly but may fail on rough or textured areas. Signs stay flush against the wall, creating a clean look without protruding hardware.
- Supports signs up to 15 pounds depending on tape quality
- Requires clean, dry, smooth surfaces for best adhesion
- Usually cures within 1 hour for maximum bond strength
- Easy to remove without residue or wall damage
- Not ideal for outdoor use or humid areas
Use two to four strips evenly spaced on the back of the sign for secure mounting. Avoid attempting to hang heavier signs this way, as the adhesive may fail over time, causing the sign to fall.
Adhesive Hooks and Hangers
Adhesive hooks offer a quick option for hanging signs with pre-drilled holes or attached hanging wires. After cleaning the wall, peel and stick the hook’s adhesive backing place it where the sign’s hardware will rest. These hooks can handle medium weights, typically ranging from about 3 to 5 pounds per hook, so using multiple hooks can spread the load of a heavier sign.
They work on smooth, clean surfaces like painted drywall and tile but are less reliable on textured or dusty backgrounds. Hooks give the advantage of easy sign removal or repositioning without damage, and you can easily hang signs with a wire or loop using these.
- Perfect for signs with holes or hanging wires
- Supports 3 to 5 pounds per hook; multiple hooks for heavier signs
- Stick to clean, smooth walls only
- Removes cleanly without peel-off damage
- Simple to hang or adjust sign position
Space the hooks to align with the sign’s mounting points for even weight distribution. Avoid pressing adhesive hooks onto freshly painted walls, as curing paint can reduce adhesion quality.
Using Wire or Picture Hangers Without Drilling
Using picture wire attached to signs combined with adhesive hooks or hangers provides balance and allows easy leveling. You first attach wire to the back of your sign with screws or self-adhesive mounts. Then, hang the wire loop on two adhesive hooks slotted horizontally on the wall. This distributes weight well and minimizes stress on any single hook.
This method suits signs weighing up to about 10 pounds when using strong adhesive hooks rated for that load. Wire hangers allow fine adjustments to sign angle and height and work well on smooth walls and some textured surfaces.
- Attach sturdy wire securely on the back of the sign
- Use two adhesive hooks spaced horizontally for balanced support
- Fits signs weighing 5 to 10 pounds
- Allows easy leveling and repositioning
- Requires clean, smooth wall surfaces for hooks
Make sure wire is taut and hooks are level for a stable, straight display. Test hook strength by gently pulling before hanging the sign fully.
Magnetic Mounting Options
Magnets work well for metal signs or wall surfaces containing steel or iron. Powerful rare-earth magnets can support acrylic or metal signs by clamping them to a magnetic surface with no tools. This method is handy for metallic doors, filing cabinets, or steel beams.
Magnets offer quick, damage-free mounting and easy adjustment or removal. However, effectiveness depends on the strength of magnets and magnetic properties of the surface and sign. They are unsuitable for non-metallic walls or signs with no metal components.
- Ideal for metal signs and ferrous metal surfaces
- Use strong rare-earth magnets for heavier signs
- Allows repositioning without wall damage
- No adhesives or hooks needed
- Cannot be used on non-metal surfaces or non-metal signs
Place magnets behind and in front of the sign’s mounting area if possible to create a secure clamp. Avoid magnets near electronics or credit cards that can be damaged by strong magnets.
Suction Cups for Glass and Smooth Surfaces
Suction cups provide an option for hanging small, lightweight signs on glass, tiles, or other very smooth, non-porous surfaces. They work by creating a vacuum seal and typically hold signs under 5 pounds for appliances, doors, or windows.
This method is easy to install and remove without leaving residue, but suction cups tend to lose suction over time, especially in temperature-fluctuating environments. Signs may fall if suction weakens or if the surface isn’t perfectly smooth and clean.
- Best for signs under 5 pounds on glass or smooth tile
- Requires completely clean, smooth, non-porous surfaces
- Needs occasional retightening or suction renewal
- Easy to remove without damage or residue
- Not suitable for porous or textured walls
Press firmly when installing suction cups and wet the rim slightly to improve suction. Test by gently pulling the sign after mounting to confirm a secure hold.
2. How to Prepare Surfaces for No-Drill Mounting
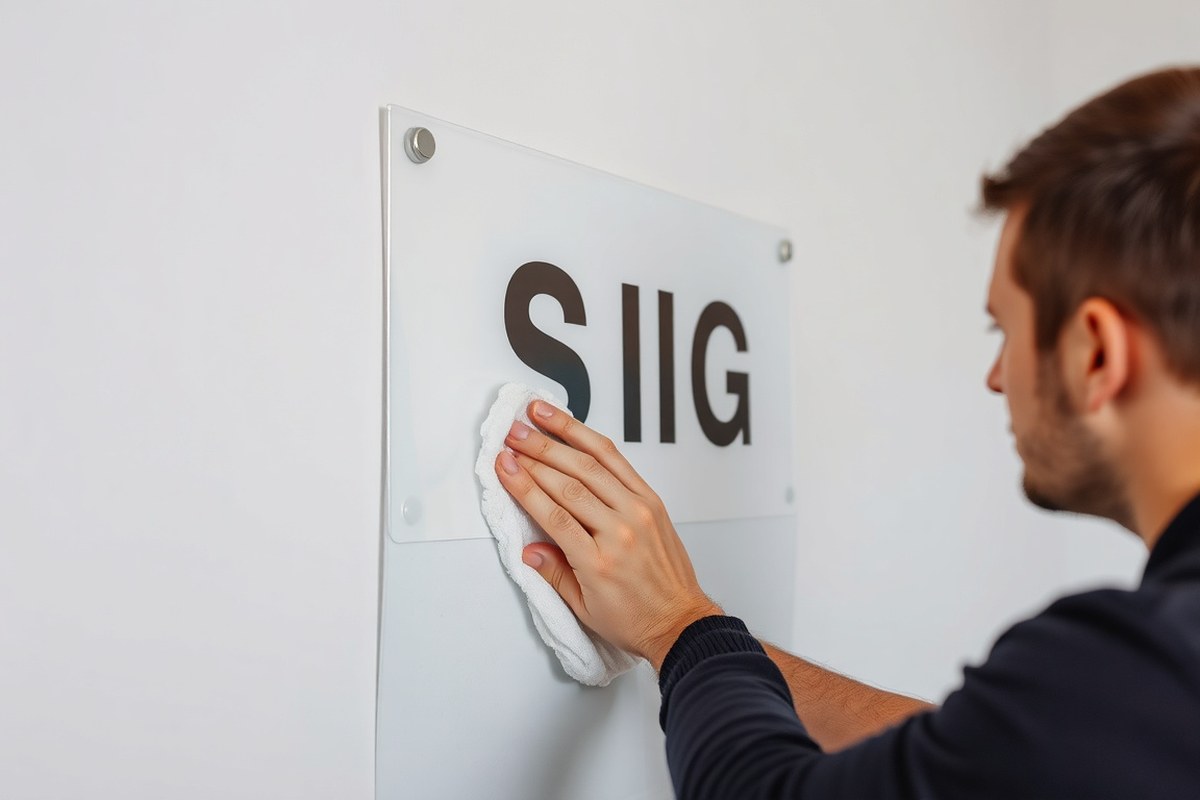
Preparing the mounting surface properly is essential to make sure adhesives and hooks stick well and hold your sign securely over time. Cleaning, drying, and sometimes priming the surface removes dust, grease, and moisture that interfere with adhesion. Doing it right helps your no-drill mounting last longer and prevents the sign from falling.
Cleaning Different Wall Surfaces
Start by identifying your wall material. For painted drywall, wood, or metal, wipe the surface with a damp cloth and mild soap to remove dust and oils. Give it time to dry completely before proceeding. Glass or tile surfaces need a stronger cleaner like isopropyl alcohol to cut through grease and residue, allowing adhesives to bond tightly.
Textured or porous walls usually don’t hold adhesive well, so extra cleaning is critical. After washing, use a lint-free cloth to pat dry the area. For glossy or smooth finishes, avoid abrasive cleaners that can dull the surface, reducing grip.
Steps to Maximize Adhesion
Follow this checklist to prepare your surface effectively before mounting:
- Remove loose dirt and dust with a soft cloth or vacuum brush.
- Wash the surface with mild detergent and warm water; rinse thoroughly.
- Let the surface air-dry or use a clean dry cloth to remove moisture.
- Wipe non-porous surfaces with isopropyl alcohol for better adhesion.
- Avoid touching the cleaned area with bare hands before applying adhesive.
- Work in a room with a stable temperature between 60°F and 80°F for best curing.
Applying adhesive to a properly prepped surface reduces chances of the sign slipping or adhesive failing, which can happen if surfaces remain dirty or oily.
When to Use Primers or Special Cleaners
Primers can improve adhesive grip on tricky surfaces like concrete, brick, or unusual wall paints. Check the adhesive or mounting product’s instructions; some recommend a specific primer for improved bond strength. Primers usually cost around $10 to $20 per small can and require only a thin layer applied with a brush or cloth.
Special cleaners are helpful if walls have contaminants like silicone, wax, or heavy grease. Avoid household spray cleaners that leave residues; instead, use dedicated surface prep products sold at hardware stores. These ensure no residue blocks the adhesive’s contact with the wall, improving durability and reducing sign damage.
Tips for Different Mounting Surfaces
Wall material affects how you prepare the surface for no-drill mounting. For smooth drywall, cleaning as described above is usually enough. Textured walls benefit from adhesive strips or hooks designed with wider contact areas to bridge unevenness. Glass surfaces demand thorough degreasing and drying to avoid smudges under the sign.
Metal walls need both cleaning and possibly a rust-preventive treatment to stop corrosion under the adhesive. Use compatible mounting products designed for metal, as some adhesives fail on slick metals. For painted wood, cleaning and drying followed by a light sanding of gloss finishes can create a better grip.
Always follow the adhesive manufacturer’s instructions exactly, especially surface preparation steps and temperature ranges, to avoid mounting failures.
3. Weight and Size Guidelines for No-Drill Sign Mounting
Selecting the right no-drill mounting method depends mainly on the weight and size of your sign, plus the surface you’re attaching it to. Lightweight signs under 1 to 2 pounds usually do well with adhesive strips or small hooks designed for indoor use on smooth walls like painted drywall or glass. Larger or heavier signs require stronger methods such as heavy-duty adhesive hooks or specialized hanging kits that spread the weight more evenly. The surface type also matters; some adhesives won’t stick well to textured, painted, or porous walls, limiting options.
Adhesive strips have specific weight limits that, if exceeded, can cause your sign to fall and damage walls or the sign itself. Generally, one standard adhesive strip supports about 0.5 pounds. For heavier signs, multiple strips must be used according to the instructions, usually spacing strips evenly along the sign’s length to maintain balance. Adhesive hooks and specially rated strips can handle weights closer to 5 pounds but require clean, dry, non-textured surfaces for best results.
| Mounting Method | Weight Limit | Typical Suitable Sign Size | Surface Compatibility | Notes |
|---|---|---|---|---|
| Standard Adhesive Strips (Command-type) | Up to 0.5 pounds per strip | Small, light signs under 2 pounds | Smooth, dry, non-porous (painted drywall, glass) | Use multiple strips spaced evenly for bigger sizes |
| Heavy-Duty Adhesive Hooks | 3 to 5 pounds per hook | Medium signs, 3-5 pounds | Smooth surfaces but check manufacturer specs | Best for signs up to 12×12 inches; placement critical |
| Specialized Non-Drill Hanging Kits | Varies, often up to 10 pounds | Large or mid-weight signs | Depends on kit; sometimes includes standoffs or suction mounts | Use on compatible surfaces only; follow instructions exactly |
For a sign that weighs more than about 5 pounds or is unusually large (wider than 12 to 16 inches), adhesive-based methods become unreliable. Such signs are generally too heavy or awkwardly shaped for standard no-drill options and may require alternative solutions. The shape of the sign affects how well adhesive methods work, thin, flat signs stay firmly attached easier than thick or curved ones because of even contact with the mounting surface.
To match the right method to your sign, measure the sign’s weight on a kitchen or postal scale, note its dimensions, and check your wall’s texture and material. Divide your sign’s weight by the weight limit per strip or hook to calculate how many are needed. This ensures safe, secure mounting without drilling or accidental drops. Larger or heavier signs risk damage when no-drill options are overused or wrongly applied.
4. Safely Hanging Neon and LED Signs Without Drilling
Mounting neon and LED signs without drilling requires special care to avoid damage to fragile components and prevent electrical hazards. Using strong adhesives or hooks rated for the sign’s weight, managing power cords properly, and choosing an appropriate location are essential. Following clear steps will ensure your sign stays secure and safe while preserving wall integrity.
Selecting Suitable Mounting Materials
Neon and LED signs are often delicate and can weigh between 5 and 15 pounds depending on size. Choosing mounting materials with sufficient strength and designed for fragile electronics matters. Look for heavy-duty Command Hooks or adhesive strips rated beyond the sign’s weight and thickness, typically those rated for 7 to 10 pounds or more per hook. Avoid low-quality tapes, as peeling glue risks sign damage and falls.
Materials such as double-sided mounting tape specifically made for acrylic or glass provide strong bonds without drilling. Use multiple mounting points to distribute weight evenly and reduce stress on a single spot. For very heavy signs, consider mounting clips with cushioned grips to prevent damage to wiring or tubes.
- Measure the sign’s weight and size to determine mounting strength needed.
- Buy adhesive hooks or mounting tape rated at least 25% above the measured weight for safety.
- Clean the wall surface thoroughly with isopropyl alcohol and let dry for 10 minutes to maximize adhesive strength.
- Plan to use at least two mounting points for signs heavier than 5 pounds.
- Choose mounting tape made for hard plastics to keep acrylic signs from slipping.
- Test the hook or tape strength on a small area before applying the sign fully.
Positioning and Leveling the Sign
Hanging the sign level prevents uneven stress that could loosen mounts or crack components. Correct placement also avoids direct sunlight or heat sources that could shorten the life of neon tubes and LED elements. Select an indoor wall away from vents, heaters, and areas with high humidity for best results.
Use a bubble level or smartphone app with leveling features to align the sign precisely. Mark mounting points lightly with a pencil for reference before applying adhesives to avoid repositioning, which weakens bonds.
- Determine the ideal display height, eye-level (around 60 to 65 inches from floor) works well for visibility.
- Hold the sign temporarily against the wall and adjust its position to avoid glare and electrical outlets.
- Use a level tool to align sign edges horizontally and vertically.
- Mark the exact spots for hooks or tape placement on the wall with a light pencil dot.
- Apply adhesives according to marking without removing protective backing before confirming level.
- Check position once mounted and press firmly on mounting points for 30 seconds to secure adhesion.
Securing Power Source and Wiring
Managing cords safely is critical to avoid electric shocks, shorts, or accidental damage to the sign’s power supply. Power cables should have enough slack to prevent strain but not so much they sag or create tripping hazards. Conceal cords neatly along the wall using adhesive cable clips or covers rated for indoor use.
Use outdoor-rated or UL-listed power adapters when plugging in neon or LED signs, and never overload electrical outlets. Plug signs into surge protectors to boost safety and protect from voltage spikes.
- Inspect the sign’s power cord for any signs of wear or damage before mounting.
- Choose a nearby outlet to minimize cable length running across open space.
- Attach adhesive cable clips along the mounting area to secure and route cords neatly.
- Leave a gentle curve in the cord near the sign to reduce tension and protect connectors.
- Plug the sign’s transformer into a surge protector to safeguard against electrical surges.
- Switch off the sign and unplug it before cleaning or moving to avoid electric shock.
Routine Checks and Sign Maintenance
Periodic inspection of mounts and electrical components sustains safety and prevents accidents. Check adhesives each season for signs of peeling or weakening, especially in areas with moisture or heat fluctuations. Replace mounting strips or hooks immediately if you notice the sign loosening or shifting.
Verify that power cords remain undamaged, with no exposed wires or loose connections. Clean glass or acrylic surfaces gently with a soft cloth dampened with water only, avoiding harsh chemicals that could degrade plastic or seals.
- Examine mounting points visually every 3 to 6 months for any signs of detachment or stress cracks.
- Test the sign’s stability by gently nudging it to ensure secure adhesion without movement.
- Inspect cords for cracks or fraying and replace damaged cables promptly.
- Dust and clean the sign with a microfiber cloth, avoiding water on electrical parts.
- Unplug the sign during maintenance to eliminate shock risks.
- Note any discoloration or flickering lights and address these issues with a qualified electrician.
5. How to Remove No-Drill Mounts Without Damaging Walls
Removing no-drill mounts like adhesive strips, hooks, and putty carefully prevents paint peeling and surface damage. Adhesive strips, such as Command strips, are designed for easy removal without residue if handled properly. Velcro-style strips often come off cleanly because they detach with a gentle pull. Putty removal requires a delicate approach to avoid wall marks or leftover debris. Correct technique matters to keep your walls intact and sometimes gives you the option to reuse the mounts. Follow these steps to safely remove your no-drill mounts:
- Prepare the area: Clear the space around the mount to avoid knocking the sign or damaging nearby objects. Have a hair dryer or heat gun handy if the adhesive feels stubborn.
- Heat the adhesive strip: Gently warm the adhesive with a hair dryer on medium heat for 20 to 30 seconds to soften the glue. This reduces the risk of paint peeling during removal.
- Stretch the adhesive strip: For strips like Command, grasp the tab at the bottom and slowly pull straight down, stretching the strip parallel to the wall. Stretch it at least 12 inches to release the bond without damaging paint.
- Peel off hooks or clips: If your mount uses hooks or clips, lift them slowly from the bottom corner. Use a plastic card to help pry them off gently without scratching the surface.
- Remove putty residues: Roll your finger over the putty to lift it away. If residue remains, rub a small amount of rubbing alcohol or warm soapy water on the area and wipe clean with a soft cloth.
- Check the surface: Look for any leftover adhesive or paint damage. Residue can often be removed with mild adhesive removers but always test on a hidden spot first to avoid discoloration.
- Allow mounts to dry and inspect: Clean and dry mounts like hooks or strips can be reused if the adhesive backing remains intact. Replace strips if they have lost stickiness or show visible wear.
Pull adhesive strips slowly and parallel to the wall to avoid peeling paint; never yank them straight out from the surface.
6. Common Mistakes and How to Fix Them When Mounting Signs
Signs often fall or tilt after mounting because the surface wasn’t properly cleaned, the weight exceeded what the adhesive could handle, or the placement of mounting points was uneven. Fixing these issues starts with a close inspection of the mounted sign and the surface it’s attached to. If a sign tilts, check if all adhesive points are level and equally spaced. Uneven spacing causes stress on one side, making the sign lean or pull away over time.
Improper surface preparation is a common mistake that reduces adhesive grip. Surfaces must be clean, dry, and free of dust, oil, or paint flakes. Use rubbing alcohol instead of water and soap, which can leave residues. Wait about 60 seconds after cleaning for the alcohol to evaporate completely. Missing this step is easy but critical to correct. Reclean the surface and press the mounting strips or hooks firmly for at least 30 seconds to activate the adhesive’s strength.
Overloading happens when the sign’s weight is too much for the adhesive or mounting hardware. Each product usually has a maximum weight limit listed, stick to those guidelines. For example, typical command strips hold between 1 to 5 pounds depending on the size and number used. Using too few strips or undersized options compromises holding power and leads to falls.
Misaligned or spaced-apart mounting points create uneven tension that tilts the sign or causes it to detach. Consistent, level placement spreads the load evenly. A level and measuring tape help ensure equal distance between mounts and alignment with the wall. Avoid using a single mount on large or heavy signs; use multiple mounts spaced around the edges.
- Clean the surface with rubbing alcohol, not water or soap
- Press adhesive mounts firmly for at least 30 seconds before hanging
- Check product weight limits and use enough mounts accordingly
- Use a level and measuring tape to space mounts evenly and align the sign
- Replace adhesive mounts after 6-12 months or if signs slide or tilt
- For textured or uneven surfaces, prefer mounting hooks designed for rougher walls
Adhesive errors such as using mounts on dusty, porous, or painted surfaces significantly weaken holding power. For example, command strips stick best on smooth, non-porous surfaces like finished drywall or glass. On brick, wood, or textured walls, adhesive strips often fail. Standoffs or removable hooks designed for those surfaces provide a better hold without drilling. Remember that temperature also affects adhesives, extreme cold or heat can make adhesion brittle or soft, causing slippage.
Uneven or unstable mounts can be corrected by removing the sign gently, cleaning and preparing the surface properly, and repositioning the mounts following even spacing and level lines. This process usually takes about 10 to 15 minutes and only requires simple tools like a level, measuring tape, and rubbing alcohol. The tradeoff is more preparation time, but it improves stability and keeps signs looking professional without damage. Regular inspection of mounts every few months helps ensure continued stability and allows for early fixes before falls or damage occur.
7. When to Choose Professional Help for No-Drill Sign Installation
You should consider professional help for no-drill sign installation if your sign weighs more than 15 pounds or has dimensions larger than 24 by 36 inches. No-drill methods often rely on adhesives or hooks that have limited weight capacity, and exceeding these limits risks the sign falling, damaging property, or causing injury. Professionals have access to stronger mounting solutions and knowledge on distributing weight safely without drilling.
Certain surfaces pose challenges that are better handled by experts. Textured walls like stucco, rough brick, or uneven concrete may not provide a reliable grip for adhesives or removable hooks. Professionals can assess surface composition and recommend surface prep, special adhesives, or alternative mounting strategies that are unavailable in typical consumer kits.
To evaluate if no-drill methods will fail, test the sign’s weight and the surface condition first. Hold the sign temporarily using your chosen no-drill method and check for wobbling or slipping over a few hours. Signs that shift or show weakened hold after this test suggest the adhesive or hook cannot support load long-term.
Also, signs subject to outdoor weather conditions or extreme temperatures over 100°F (38°C) may require professional installation. Heat can degrade adhesive strength and cause failure of no-drill mounts, making expertise in weatherproof solutions valuable.
Cost-wise, hiring a professional for a moderate sign installation typically ranges from $100 to $250, depending on the sign size, surface difficulty, and labor time. This investment reduces risk of repair costs and improves the likelihood of a secure, damage-free mount lasting years. A well-mounted sign remains firmly in place without damaging walls or requiring frequent adjustments.
A practical decision rule is the “weight-to-surface test”: if your sign is under 15 pounds and mounting to a smooth, clean surface like painted drywall or glass, no-drill kits are usually sufficient. For heavier signs or challenging surfaces like masonry or textured walls, reach out to a licensed installer.
Many professionals offer a consultation to inspect your space and recommend customized mounting solutions that respect building codes and avoid wall damage. They can also install specialized hardware like tension cables or wall anchors that provide stable, long-lasting sign display without permanent drilling.
Step-by-Step Action Plan for No-Drill Sign Mounting
Follow these steps to mount your sign securely without drilling and protect your walls.
- Before you start: Choose the right mounting method based on your sign’s weight and surface type. Confirm compatibility by checking product labels or instructions.
- Day 1: Clean the wall surface thoroughly with rubbing alcohol. Wait for it to dry to ensure adhesive sticks properly.
- Day 1 (after cleaning): Apply your chosen no-drill mounting product (such as adhesive strips or hooks) following the manufacturer’s directions carefully.
- Day 2: Hang the sign and gently test if it holds by applying slight pressure without forcing it. Reposition using fresh mounting materials when the sign feels loose.
- After 1 week: Check the stability of the sign, especially if it is neon or LED and heavier than typical decor. Adjust or reinforce mounts if necessary.
- After 2 weeks: Inspect the mounting area for any wall damage or adhesive failure. The sign is secure and the wall looks intact, so you’re set.
Frequently Asked Questions
What Are the Best No-Drill Options for Mounting a Metal Sign?
Magnetic mounts are great for metal signs on steel surfaces. They hold securely without harming the wall or sign and are easy to reposition. Consider the weight of your sign to choose magnets with appropriate strength.
Can You Hang Signs Without Drilling on Textured or Brick Walls?
Yes, but adhesive methods often struggle with rough surfaces. Use heavy-duty hooks designed for uneven textures or consider a freestanding sign holder for brick walls to avoid damage and ensure stability.
How Do Temperature and Humidity Affect No-Drill Adhesive Mounts?
These factors can weaken adhesive bonds over time, especially in damp or hot environments. Choose adhesives rated for the conditions where your sign will hang to maintain a secure hold.
Is It Possible to Weatherproof a No-Drill Mounted Outdoor Sign?
Yes, selecting waterproof adhesives and weather-resistant hooks helps protect your sign. Placing the sign in a sheltered area further reduces exposure to rain and sun damage.
How Do Adhesive Strips Compare to Suction Cups for Glass Sign Mounting?
Adhesive strips generally hold better on smooth glass and resist falling off. Suction cups may lose grip if the glass is dirty or temperature fluctuates, making strips a more reliable choice.
What Safety Precautions Should I Take When Using No-Drill Mounts?
Always check the weight limit of your mounting hardware to prevent falls. Clean your wall properly to ensure a strong hold, and avoid mounting signs in high-traffic areas where they could be knocked loose.
Final Thoughts
Mounting a sign without drilling is practical and preserves your walls when you match the method to your surface and sign type. Take your time with preparation and testing for the best results. Start with cleaning your wall today to get the strongest, safest hold and enjoy your mounted sign without damage.