How to Mount Acrylic Signs: 8 Practical Methods for Perfect Installation
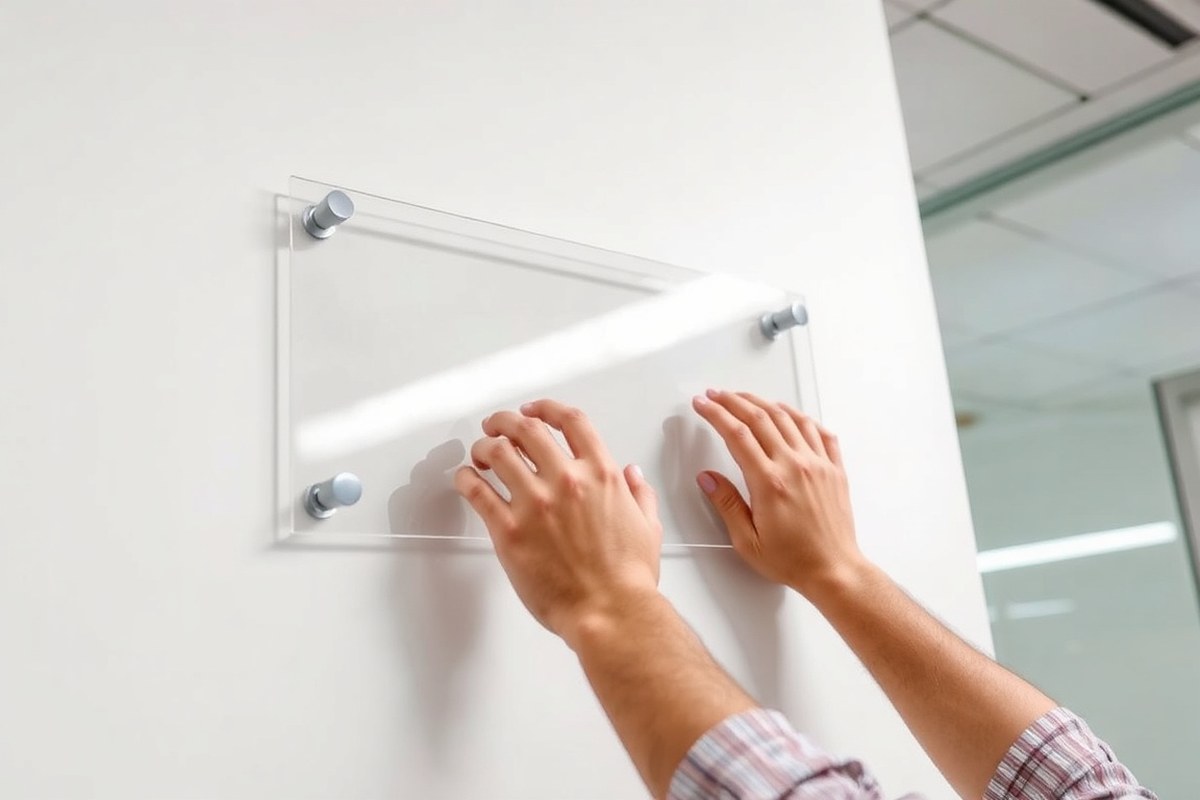
How to mount acrylic signs depends on your sign’s weight, size, and wall surface. For secure installation, choose methods like adhesive strips for lightweight signs or drilled mounts for heavier displays. Start by measuring the sign height between 55 and 65 inches for optimal visibility.
Key Takeaways
- Use strong double-sided adhesive like 3M VHB for acrylic signs under 3 pounds to avoid drilling.
- Select standoffs sized 1/2 to 2 inches to create a floating shadow effect for thicker acrylic.
- Allow adhesive bond strength to develop fully, reaching 90% in 24 hours and 100% in 72 hours.
- Install signs at eye level, ideally 55 to 65 inches from the floor, for best readability.
- Choose heavy-duty wall anchors rated for at least 10 to 15 pounds for sturdier acrylic signs.
- For adhesive mounting, maintain room temperature between 70°F and 100°F to ensure proper bond.
1. 8 Ways to Mount Acrylic Signs for Secure, Stylish Displays
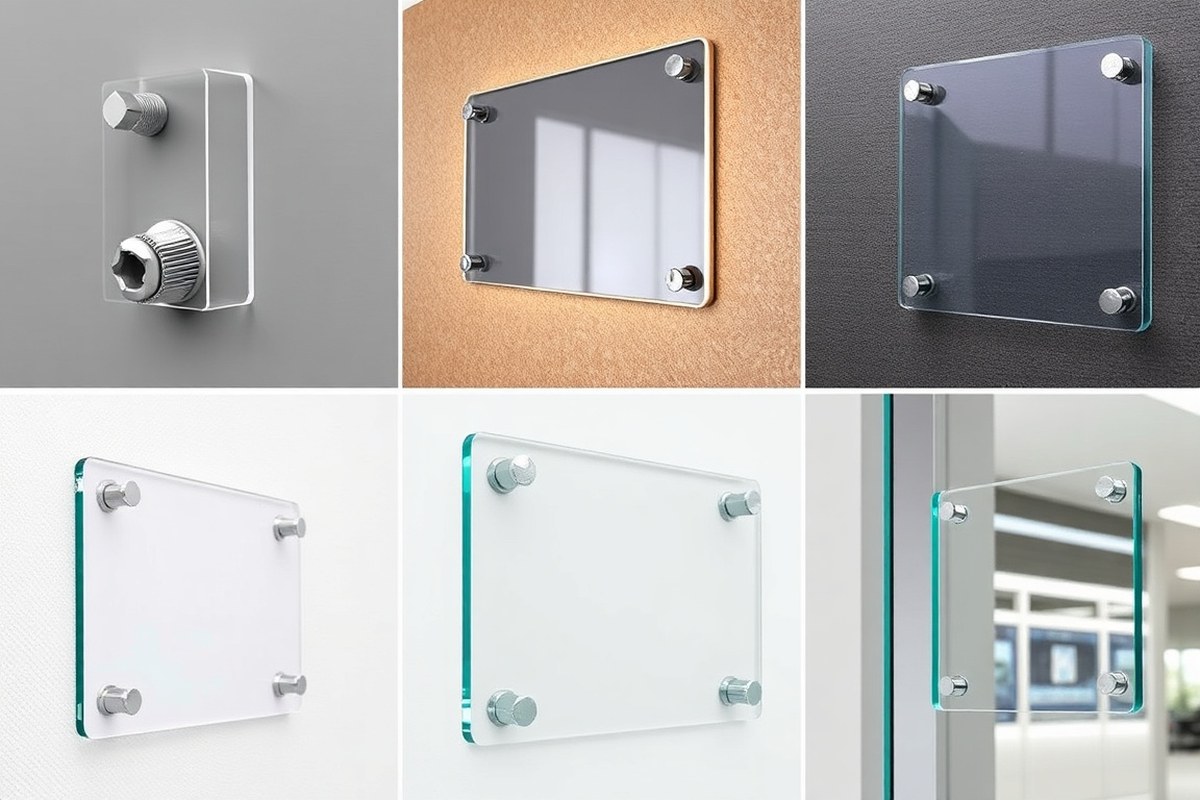
Mounting acrylic signs effectively depends on selecting the right method based on the sign’s weight, size, surface type, and your installation preferences. Eight main installation methods cover a range of tradeoffs between skill, tools, looks, and potential wall damage.
Adhesive mounting uses double-sided tape or strips and is great for lightweight signs, especially those up to 36 inches made from quarter-inch acrylic, which offers enough rigidity while remaining light. It requires a smooth surface, careful cleaning, and precise alignment during application. This approach avoids drilling but typically can’t support heavy signs and may fail on rough or uneven walls.
Command strips and Command hooks provide no-drill, damage-free mounting for similarly lightweight to medium-weight signs. Command strips are sticky strips applied directly to the back of the sign and wall, best for flat surfaces and moderate weights. Command hooks allow hanging signs with a small hole or loop but add a visible mounting piece.
Suction cups attach acrylic signs to glass or smooth metal surfaces without leaving marks or requiring tools. Their weight capacity is limited, making them suitable for small signs indoors, such as window displays. They can lose suction over time, especially if the surface is dirty or textured.
Standoffs or distance holders secure acrylic signs with screws that go through pre-drilled holes in the sign. They work well for heavier, larger signs, providing a professional, floating appearance. Installation requires some DIY skill, tools like a drill and level, and anchors if mounting on drywall.
Frames or rail systems clamp acrylic panels along their edges and avoid drilling through the acrylic. These systems look clean and polished, ideal in office or retail settings where aesthetics matter. Installation depends on the system design but usually involves mounting rails to the wall with minimal holes and sliding the sign in place.
Screw and anchor mounting involves drilling holes through the acrylic and wall, using screws and anchors to hold heavier signs securely. This gives the strongest hold but permanently alters the sign with drilled holes and needs proper tools and wall condition.
Ceiling suspension systems hang acrylic signs from cables or rods, suitable for retail or showroom spaces where wall mounting isn’t practical. This method needs hardware to support the sign weight safely and involves precise measuring and alignment.
| Method | Weight Capacity | Surface Compatibility | Damage Risk | Tools Needed | Aesthetics | No-Drill |
|---|---|---|---|---|---|---|
| Adhesive Mounting | Light (up to ~5 lbs) | Smooth, clean, flat | Low (may peel paint) | None | Minimal hardware visible | Yes |
| Command Strips/Hooks | Light to Medium (up to ~7 lbs) | Smooth, flat surfaces | Low | None | Some hardware visible (hooks) | Yes |
| Suction Cups | Very Light | Glass, smooth metal | Low | None | Minimal | Yes |
| Standoffs/Distance Holders | Medium to Heavy | Drywall, wood, concrete | Medium (holes in acrylic and wall) | Drill, level, anchors | Professional, floating look | No |
| Frame/Rail Systems | Medium | Smooth walls | Low to medium (wall holes only) | Drill, screwdriver | Clean, modern | Partial (no drill in acrylic) |
| Screw and Anchor | Heavy | All wall types | High (holes in sign and wall) | Drill, anchors, screwdriver | Visible hardware | No |
| Ceiling Suspension Systems | Medium to Heavy | Ceilings with mount points | Medium (ceiling anchors) | Drill, measuring tools | Suspended, open look | No |
Choosing the right method means balancing what your sign weighs and where you want to display it. Adhesive and command solutions simplify mounting with no drilling, but they don’t hold heavy signs. Standoffs, screws, and suspension systems require more skill and hardware but provide strong, durable mounts suited for bigger or heavier signs. Frames offer an elegant alternative with some wall drilling but no damage to the acrylic itself. Always prepare mounting surfaces carefully, and follow the hardware instructions to avoid slips and uneven mounts.
2. Choosing the Right Mounting Method for Your Acrylic Sign
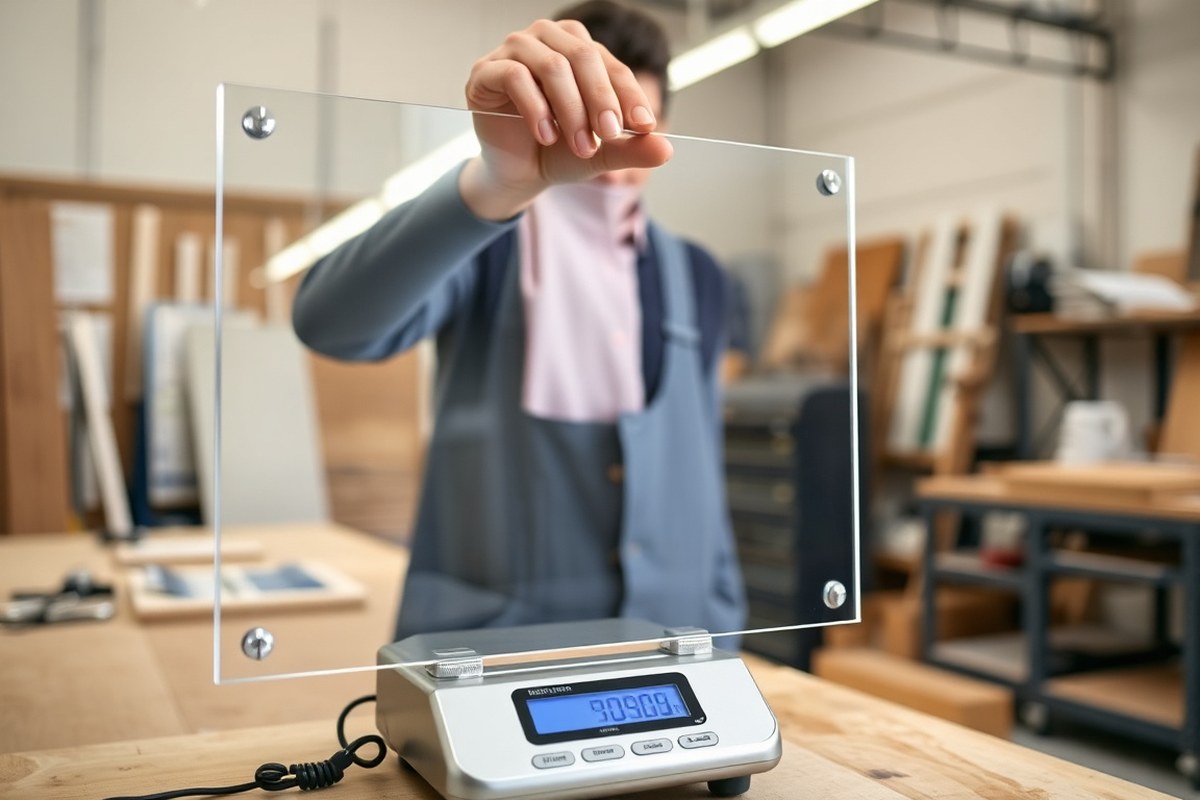
Choosing the right mounting method for your acrylic sign depends mainly on the sign’s weight, the type of wall surface, whether the sign will be indoors or outdoors, and the look or permanence you want. Lighter signs on smooth indoor walls often work well with strong adhesives, while heavier or outdoor signs require mechanical fasteners like standoffs or anchors. Matching your mounting method to these factors ensures your sign stays secure and looks professional.
Matching Mounting to Sign Weight and Size
Signs weighing less than 20 pounds can often be mounted using high-quality, weather-rated adhesives or double-sided tape if the surface is smooth and clean. Adhesives offer a clean look without hardware showing but are usually best for smaller, lighter signs. Signs over 20 pounds, especially those larger than 12 inches by 18 inches, should be mounted with standoffs or anchors. Standoffs support weight safely and create a modern, floating appearance by holding the sign off the wall. For signs heavier than 30 pounds, use wall anchors combined with screws to distribute weight to structural supports and prevent the sign from falling or damaging the wall.
Wall Surface and Environmental Considerations
The type of wall makes a significant difference in mounting choice. Smooth surfaces like tile, glass, or painted drywall often allow adhesives to stick well, provided the wall is clean and dry. Rough or porous surfaces such as brick, stone, or textured plaster do not hold adhesives reliably, so use mechanical fasteners like standoffs or anchors on these walls. For outdoor signs, weather exposure including sun, moisture, and temperature changes greatly reduces adhesive strength. Choose standoffs or anchors rated for exterior use to prevent failure. For indoor signs away from moisture, adhesives provide a neat solution that hides mounting hardware.
Permanent Look Versus Temporary Installation
Decide whether you want a permanent mounting solution or something removable. Adhesive mounting creates a flush, hardware-free look that works well for temporary or semi-permanent installations. However, adhesives can be difficult to remove cleanly and may damage the wall or sign surface during removal. Standoffs and anchors require drilling holes but provide a secure, long-term mounting that looks stylish and professional. Standoffs also space the acrylic away from the wall, which can improve readability and protect the sign’s surface. Use standoffs for business logos or office signs where permanence and presentation matter.
Decision Guide for Choosing Mounting Method
For lightweight signs (under 20 pounds) on smooth indoor walls, clean the wall, then use weather-rated adhesive tape or mounting strips rated for acrylic. Apply the adhesive evenly to the sign’s back, press firmly against the wall for the recommended 30 seconds to 1 minute, and avoid disturbing the sign for 24 hours. For heavier signs (20 to 30 pounds) on drywall or plaster, mark holes using a level and pencil, drill pilot holes, insert wall anchors, and install standoffs sized for the sign’s thickness. Signs over 30 pounds or on rough exterior surfaces require anchors drilled into studs or masonry anchors if studs aren’t available. Then mount standoffs or screws securely. Outdoor mounting also benefits from exterior-grade hardware to resist rust and corrosion.
Tip: Before mounting, always clean and dry the wall surface thoroughly; even the best adhesive won’t hold on dusty or damp walls, risking the sign falling and causing damage.
3. Tools and Materials Needed for Acrylic Sign Installation
Mounting acrylic signs requires specific tools and materials tailored to the chosen installation method. For drilled mounts, you need a power drill with appropriate drill bits, anchors, and standoff hardware. Use a 3/16-inch masonry bit for concrete or brick walls, paired with sleeve or expansion anchors that match the standoff diameter, usually 3/4 inch, to support safe loads up to 50, 60 pounds when secured to studs or solid blocking. To avoid damaging the acrylic, finish tightening with a hand screwdriver rather than a power drill to prevent over-tightening.
Adhesive mounting relies on strong, clear tapes or strips specifically rated for outdoor or indoor use. VHB (Very High Bond) tape is a popular choice because it supports heavier acrylic signs and withstands temperature fluctuations from -40°F to around 200°F without losing adhesion. Command strips offer a no-drill option but choose the strength level based on your sign’s weight and size; lightweight acrylic sheets can use strips rated for 3 to 5 pounds per set, but larger signs need stronger options or multiple strips to distribute weight evenly.
Proper surface preparation improve adhesive performance. Clean the wall with isopropyl alcohol to remove dust, grease, or paint flakes and let it dry completely. This step matters because any residue can reduce bond strength, causing signs to fall prematurely. For drilled mounting, ensure the wall and stud locations are dry and stable.
- Power drill with variable speed and reversed settings
- 3/16-inch masonry or wood drill bits depending on wall type
- Expansion or sleeve anchors sized to standoff hardware (3/4-inch diameter recommended)
- Standoff mounting hardware (3/4-inch diameter recommended for signs up to 60 lbs)
- VHB double-sided tape or heavy-duty adhesive strips rated for your sign weight
- Isopropyl alcohol and lint-free cloth for surface cleaning
- Hand screwdriver for controlled tightening of hardware
Use personal protective equipment to ensure safety during installation. Wear safety goggles to protect your eyes from dust or debris, especially when drilling. Gloves help keep your grip steady and protect from sharp edges on acrylic or hardware. A dust mask may be necessary when drilling into masonry or drywall to avoid inhalation of dust particles.
Costs vary depending on the method and hardware quality. A basic set of standoff mounts and anchors typically costs $10 to $20 for a four-point mount set, while industrial-grade VHB tape can run about $15 to $25 per roll. Hand tools like drills or screwdrivers, if not already owned, range from $20 to $100 for decent models. Proper tool use and preparation increase the chance of a secure, professional-looking installation and reduce costly mistakes, such as cracking the acrylic or causing the sign to fall.
4. Step-by-Step Installation Process for Drilled Acrylic Sign Mounts
Mounting an acrylic sign with drilled standoff hardware requires precise measuring, careful drilling, and correctly securing the sign for a professional and stable installation. Follow these detailed steps to ensure your sign is level, firmly attached, and visually appealing.
Measuring and Marking Mounting Points
Start by deciding exactly where the sign will hang on the wall. Use a measuring tape and level to measure the desired height and width placement. Mark the wall lightly with a pencil at each standoff hole position, matching the acrylic sign’s pre-drilled holes. Accurate marking prevents uneven signs that can look unprofessional and risk falling. Double-check spacing between marks, especially if mounting multiple signs in a row, to maintain consistent alignment.
Drilling and Installing Wall Anchors
Choose wall anchors suitable for your wall type (drywall, concrete, wood) to ensure the screws hold firmly under your sign’s weight. Before drilling the final hole size, drill smaller pilot holes at the marked points to avoid wall damage or misalignment. Installing the proper anchors and screws guarantees secure mounting and prevents the sign from loosening over time, which can lead to damage or safety hazards.
Securing the Acrylic Sign with Standoffs
Standoff bolts create a gap between the sign and wall, adding dimension and sophistication to your display. Align the acrylic sign holes with the installed standoff barrels on the wall, then thread the decorative caps onto the barrels. The caps lock the sign in place and hide mounting hardware, creating a clean look. Tightening the caps firmly without over-tightening avoids cracking the acrylic and ensures a stable hold.
- Measure the wall space to center the sign both horizontally and vertically where you want it displayed.
- Mark the wall with a pencil at each standoff point, matching the sign’s pre-drilled holes exactly.
- Use a level across the marks to confirm even alignment; adjust marks if needed.
- Drill pilot holes smaller than your anchor size at the marked points to prevent wall damage.
- Insert the appropriate wall anchors for your surface into the pilot holes.
- Screw in the standoff barrels, making sure they are tightly secured to the anchors.
- Place the acrylic sign over the barrels, aligning each hole.
- Thread the decorative standoff caps onto the barrels’ ends, tightening them by hand or with a soft tool to avoid damage.
5. Safe No-Drill Mounting Options for Acrylic Signs
Adhesive mounting options offer practical solutions for securing acrylic signs without drilling into walls. The best choices are heavy-duty adhesive tapes like 3M VHB (Very High Bond) tape, adhesive strips rated for the weight of the sign, and Velcro strips designed for mounting. 3M VHB tape can support substantial weight, often up to 7 pounds per inch of tape length, making it suitable for medium to large acrylic signs. Velcro strips are convenient for signs that may need occasional removal or adjustment but generally support less weight, up to around 2 to 3 pounds per pair, depending on the brand.
Adhesive strips and tapes work best on clean, smooth, and non-porous surfaces such as painted drywall, glass, or metal. Proper surface preparation is essential: clean the mounting surface and the back of the sign with isopropyl alcohol and allow both to dry fully. Apply the adhesive tape or strips firmly, pressing evenly to ensure a strong bond. After mounting, allow the adhesive 24 to 72 hours to cure for maximum strength. Avoid placing heavy signs on textured or uneven surfaces since the adhesion will weaken and may fail over time.
For lightweight acrylic signs, adhesive hooks can also provide a no-drill solution. These hooks typically hold between 4 and 10 pounds depending on the product, allowing easy hanging without surface damage. Choose adhesive hooks that clearly state their weight capacity and are suited for your particular wall type. They are ideal for temporary signage or places where you want to avoid permanent installation marks.
Magnetic mounts serve well when the wall surface or mounting area is metal. Strong neodymium magnets or magnetic strips can hold lightweight acrylic signs firmly without adhesives or drilling. Suction cup mounts offer another alternative for smooth, glass-like surfaces, but these are best reserved for very light signs under 1 to 2 pounds. Both options allow quick installation and removal but are sensitive to environmental factors such as temperature changes or humidity, which can reduce their holding power.
The choice between these methods depends on the sign’s weight, the mounting surface, and how permanent the installation needs to be. Use industrial adhesive tapes for heavier signs and permanent setups. Opt for adhesive hooks or Velcro strips for moderate weight and some removability. Magnetic and suction mounts work only for specialized surfaces and lightweight signs. In all cases, check product instructions for weight limits and surface compatibility before installation to avoid damage or failure.
Always test adhesion with a light pull after mounting to make sure the sign is secure, especially before leaving it unattended in a public space.
6. Mounting Acrylic Signs on Different Wall Surfaces
Wall surface type is one of the most important factors when mounting acrylic signs because it affects how securely and neatly the sign will attach. Drywall, brick, concrete, glass, and uneven surfaces each bring challenges that need specific preparation and mounting hardware to maintain durability and aesthetics.
Drywall is common indoors but often requires extra reinforcement. Large or heavy acrylic signs can easily damage drywall without proper anchors. Use toggle bolts or drywall anchors with wood screws for studs to prevent pull-through. Test where studs are first so you can secure the sign where it will hold best. Preparing drywall means cleaning and ensuring it is undamaged before mounting.
Brick and concrete walls are rough and uneven, making standard adhesive mounting unreliable. Drilling pilot holes and using concrete anchors or sleeve anchors provides solid support. These anchors expand inside the hole to grip the masonry tightly. When signs are large or thick, this method adds necessary strength and stops wobbling or sagging. Clean brick and concrete surfaces well but avoid trying to adhere signs directly with tape or glue alone.
Glass walls offer a smooth, non-porous surface that is ideal for suction cups or strong adhesive tapes for lighter signs. Suction cups allow easy removal without drilling. For heavier signs, use specialized adhesives made for glass but check compatibility and curing time carefully. Glass mounting demands gentle handling to avoid cracks or breakage. Ensure the glass is clean and dry before applying adhesives or suction mounts.
Uneven surfaces, like rough brick or textured plaster, need mounts that accommodate variable depth. Screws with anchors work best because adhesive strips cannot form a full bond. Using standoff mounts or distance holders can create a clean, modern look while leveling the sign away from the uneven wall. This method also protects signs from surface irregularities and aids cleaning behind the sign.
The table below summarizes anchor and adhesive recommendations plus preparation tips for common wall types:
| Wall Surface | Recommended Anchors/Adhesives | Preparation Needed | Typical Use Cases |
|---|---|---|---|
| Drywall | Toggle bolts, drywall anchors, wood screws in studs | Locate studs, clean surface, inspect drywall condition | Medium to heavy signs indoors, offices, meeting rooms |
| Brick | Concrete anchors, sleeve anchors, standoff mounts | Drill pilot holes, clean dust and debris | Exterior signs, heavy or large panels, rough brick walls |
| Concrete | Concrete anchors, expansion bolts | Clean surface, drill exact hole size | High-durability mounts for large signs, commercial walls |
| Glass | Suction cups, specialty adhesives for glass | Clean with alcohol, dry completely | Small to medium signs, clean and smooth surfaces |
| Uneven surfaces (textured plaster, rough brick) | Screws with anchors, distance holders, standoff mounts | Assess surface texture, use mounts to level sign | Decorative or directional signs on irregular walls |
Acrylic sign installation takes careful planning to match mounting hardware with wall materials. Good results have the sign hanging level, flush or with refined standoff spacing, and firmly attached with minimal damage to either sign or wall. Avoid using adhesive tape on textured or uneven walls to prevent the sign from falling. Expensive damage and time loss can result from poor anchor choices.
Costs vary by hardware type and sign size. Toggle or drywall anchors run a few dollars per package, while concrete anchors and special adhesives may cost slightly more. Standoff kits designed for aesthetic spacing typically start around $10 to $30 per set depending on size. Consider mounting complexity and wall type when budgeting your project to achieve a professional, durable display.
7. Common Mounting Mistakes and How to Fix Them
Mounting acrylic signs incorrectly can lead to problems like falling, tilting, or wall damage. One key issue is misalignment, which causes the sign to hang unevenly and look unprofessional. Use a level during installation and mark the drill points or adhesive spots carefully before attaching the sign. For suspended signs, make sure the cable tension is even to avoid tilting.
Choosing the wrong hardware often results in poor adhesion or mechanical failure. For lightweight signs on smooth surfaces, strong double-sided adhesive like 3M VHB works well. Heavier signs need bolts and spacers to distribute weight evenly and keep the sign flush against the wall. Avoid overtightening bolts, which can crack the acrylic or damage the wall. Tighten hardware just until secure, then check for sturdiness.
Uneven or dirty surfaces make adhesives fail quickly. Clean walls with alcohol or mild detergent before mounting. Adhesive strips must be pressed firmly to achieve full hold and need at least 24 to 72 hours to cure, depending on product instructions. If adhesive fails or the sign won’t stay level, remove it carefully, clean surfaces again, and apply fresh adhesive. Sometimes switching to mechanical mounts is better for poor surfaces.
- Misalignment: Use a level and pre-mark positions to ensure even placement.
- Wrong hardware: Match mounting method to sign weight; use 3M VHB for lightweight, bolts with spacers for heavier signs.
- Uneven surfaces: Clean and smooth wall area before applying adhesives.
- Overtightening bolts: Tighten bolts until firm but not tight enough to crack acrylic or damage the wall.
- Uneven cable tension on suspended signs: Adjust cables for equal length and tension on all sides.
- Ignoring adhesive curing time: Allow full curing (24-72 hours) before stressing the sign.
- Failing to test adhesion: Press adhesive firmly and check hold before finishing.
Signs fall or tilt over time mostly due to improper mounting technique, such as insufficient support or uneven tension in suspension. Avoid overtightening by tightening bolts just to snug; this prevents cracking or wall damage. For adhesive failure or leveling issues, remove the sign gently and start fresh with cleaned surfaces and proper adhesive bonds. Regularly inspect mounted signs, especially outdoors, to catch problems early and keep your display looking professional and secure.
8. Tips for Outdoor Acrylic Sign Mounting and Weatherproofing
Outdoor mounting of acrylic signs requires durable materials that resist corrosion and protect against weather damage. Choose hardware made from stainless steel or rust-proof metals, and apply UV-resistant coatings and seals to maintain the sign’s appearance over time and prevent moisture infiltration.
Selecting Weather-Resistant Materials
Stainless steel hardware is often the best choice for outdoor acrylic sign mounting because it withstands rain, humidity, and temperature changes without rusting. Aluminum stands up well to weather but can corrode in salty air or industrial environments. Avoid regular steel or iron fasteners unless they are specifically coated for corrosion resistance. For adhesives, outdoor-rated silicone or polyurethane sealants are effective because they stay flexible and waterproof even with temperature swings. These materials typically cost between $5 and $15 per tube and last several years.
Weatherproof mounts and standoffs come in a variety of finishes like brushed nickel or anodized aluminum, combining strength with aesthetic appeal. Using these helps maintain a professional, clean look while ensuring the signs remain securely in place. Confirm the mounting hardware specifications clearly state outdoor use to avoid premature failure.
Protecting Mounts from UV and Moisture
Ultraviolet rays can degrade acrylic over time, causing yellowing and brittleness. Using UV-resistant acrylic reduces damage but does not eliminate the need for protection of attachment points. Apply a clear, outdoor-rated sealant around screw heads and edges where mounts meet the sign to block moisture. This prevents water from seeping behind the sign and causing mold or hardware corrosion.
Cover exposed metal parts with a thin layer of clear silicone or a corrosion inhibitor spray for additional protection. Reapply these coatings annually, especially in humid or coastal locations. Avoid using standard indoor caulk or tapes as they often degrade quickly outdoors and fail to seal properly.
Installing Outdoor Anchors and Seals
Choose anchors rated for exterior use, such as stainless steel expansion anchors or masonry screws for mounting into brick, concrete, or stucco walls. Drill pilot holes slightly smaller than anchor diameter for a snug fit. After inserting the anchor, clean the area thoroughly to remove dust before positioning the acrylic sign.
Seal around the edges where the sign meets the wall and mounts using a high-quality silicone caulk designed for outdoor applications. Apply it generously with a caulking gun, smoothing it with a finger or tool to create a continuous barrier. This step stops water infiltration, which can loosen mounts or damage the wall surface.
Always let sealants cure fully, usually 24 to 48 hours, before exposing the sign to rain or heavy moisture to ensure a strong, waterproof bond.
Step-by-Step Action Plan for Mounting Your Acrylic Sign
Follow this plan to install your acrylic sign safely and ensure it stays secure and looks professional.
- Before You Start: Gather the right tools and materials based on your chosen mounting method. Confirm all parts fit the size and weight of your acrylic sign.
- Day 1: Prepare the mounting surface by cleaning it thoroughly and checking for any damage. The surface should be smooth, dry, and free of dust or grease.
- Day 2: Mark the mounting points on the wall or surface using a level and tape measure. Double-check measurements to ensure the sign will be straight and centered.
- Day 3: Install the mounting hardware such as standoffs, hooks, or adhesive strips according to manufacturer instructions. The hardware should feel securely fixed with no wobble.
- Day 4: Attach the acrylic sign to the hardware carefully, avoiding direct pressure on the sign’s surface to prevent cracking. Verify the sign aligns correctly and sits flush or with the desired spacing.
- After 1 Week: Check the stability of the sign, especially if mounted outdoors or in a high-traffic area. Tighten any loose fittings and clean the sign with a soft cloth to remove fingerprints or dust.
Frequently Asked Questions
What Is the Best Way to Mount Acrylic Signs Without Drilling?
Using heavy-duty double-sided tape or Command Strips offers secure mounting without holes. These methods work well on smooth surfaces and avoid wall damage.
Can I Use Suction Cups to Hang Acrylic Signs?
Yes, suction cups work well for small acrylic signs on smooth surfaces like glass or tile. They provide a removable and damage-free option.
How Do Distance Holders Improve the Look of Mounted Acrylic Signs?
Distance holders create a floating effect by holding the sign off the wall, adding dimension and style. They also provide solid stability for displays.
Is PETG Better Than Acrylic for Outdoor Signs?
PETG is more weather-resistant and durable outdoors, while regular acrylic may fade or crack. Choose PETG for longer-lasting exterior signs.
Can I Mount Large Acrylic Signs Using Adhesive Tape?
Adhesive tape works best for signs up to about 36 inches, especially if the acrylic is a quarter inch thick for rigidity. Larger signs may need mechanical supports.
How Can I Ensure Proper Alignment When Installing Acrylic Signs?
Using a level and measuring carefully before mounting keeps signage straight and visually appealing. Consistent alignment improves professional appearance.
Wrapping Up
Mounting acrylic signs correctly protects your investment and improves your space’s look. Start with clean surfaces and precise measurements to avoid common errors. Pick one mounting method and master it for consistent results. Your next step is to prepare the surface and tools so you’re ready to install confidently.