How to Install House Numbers: A Complete Guide with Smart Placement and Mounting Tips
How to install house numbers starts with selecting the right size and mounting method for visibility and durability. Use tools like a level, drill, anchors, and templates to ensure precise placement and secure attachment. Begin by marking your desired location and verifying alignment before drilling any holes to avoid mistakes.
Key Takeaways
- Choose house numbers at least 4 inches tall for standard home setbacks to ensure easy visibility.
- Use a template first to mark holes accurately, reducing errors during drilling and mounting.
- For a flush mount, use short screws; for floating mounts, use long screws plus spacers to create depth.
- Place solar panels for illuminated numbers in spots with 6 to 8 hours of direct sunlight for optimal charging.
- Install LED house numbers using 12V DC power only; avoid direct connection to household AC power to prevent damage.
- Secure lag bolts tightly to keep numbers flush against the surface and prevent loosening over time.
What Tools and Materials You Need for Installing House Numbers
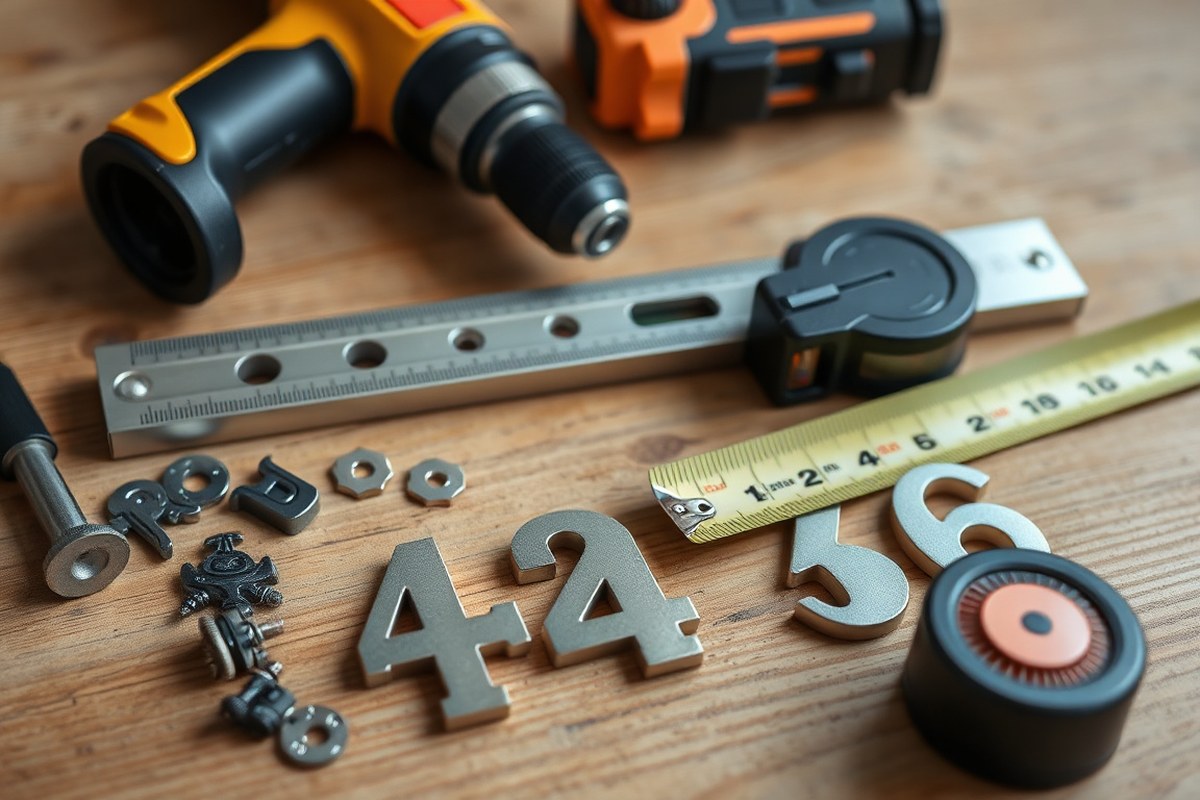
You need specific tools and materials to install house numbers securely on different surfaces such as wood, brick, stucco, or siding. Choosing the right anchors, screws, and adhesives depends on the surface type and the mounting style, whether flush or floating.
Start with a tape measure to mark exact placements and a level to ensure your numbers sit perfectly straight. Drill bits should match the size recommended in the house numbers’ instructions, typically between 1/8 inch and 1/4 inch. Using improper bit sizes may make anchors misalign, weakening the hold.
For installing on wood or siding, standard screws such as 2- or 3-inch lag bolts work well. When mounting on heavier or thicker surfaces like masonry or stucco, specialized anchors are necessary. Plastic expansion anchors suit brick or cement if there’s a solid backing. In the absence of a solid backing behind stucco, toggle bolts offer the strength needed by expanding inside the cavity for secure support.
Adhesives such as construction glue can help attach numbers to masonry without drilling, but screw mounting remains the stronger long-term method. After installation, check the screws yearly to ensure they stay snug inside the anchors, preventing your numbers from loosening or falling.
- Tape measure and pencil for accurate marking
- Level to keep numbers perfectly horizontal
- Drill with bits sized to your house numbers’ specifications
- Screws: 2- to 3-inch lag bolts for wood or siding
- Plastic anchors or toggle bolts for masonry, stucco, or hollow walls
- Construction adhesive to attach to masonry surfaces if preferred
- Spacers for floating mount installations to create consistent gaps
Installing heavy house numbers improperly risks damage to your home and injury. The right anchors prevent numbers from loosening over time. Use long screws and spacers for floating mounts to maintain a 1.5- to 2.5-inch gap between digits. Secure flush mounts tightly with shorter screws for a sleek fit. Consider mounting numbers first on a wood or acrylic plaque with screws before attaching the plaque to siding to simplify alignment. For heavy or difficult materials, a second person can help hold numbers steady during drilling and fastening.
Handling masonry or stucco requires patience and care. Drill slowly with a masonry bit designed to prevent cracking. Insert anchors fully before driving screws. Selecting the proper anchors and verifying drill bit size before starting avoids misalignment and the need to patch extra holes. Following these steps ensures your house numbers hold firm for years, helping visitors and emergency personnel find your home easily.
How to Choose and Plan Placement for Your House Numbers

Choosing the right location, height, spacing, and alignment for your house numbers ensures they are both visible and stylish. Proper placement helps visitors find your home easily while complementing your exterior design. Planning these details carefully also aligns with legal requirements and practical considerations for mounting.
Recommended Height and Visibility Standards
The ideal height for mounting house numbers typically ranges between 4 and 6 feet from the ground, measured from the bottom of the numbers. This height keeps numbers visible from the street or sidewalk without obstructing them with landscaping or steps. For homes with mailboxes or light posts near the street, placing numbers near those fixtures can improve visibility.
Check with your local municipality or homeowner association for any specific height or size requirements. These rules often exist to aid emergency responders and delivery personnel. Your numbers should also contrast strongly with the mounting surface color to boost visibility, especially at night or in bad weather.
Spacing and Alignment Techniques
Plan the spacing so each digit is clearly separate but visually connected. A common rule is to space numbers about the same width as the number itself, generally between 1 to 2 inches apart. Avoid spacing digits too closely, which can make them look cramped, or too far apart, which can reduce readability.
You can arrange numbers horizontally, vertically, or diagonally depending on the available space and architectural style. Horizontal layout is most common for wider spaces like siding or doorways. Vertical or diagonal layouts work well on narrow columns or posts. Keep the alignment consistent, either all numbers flush top, bottom, or centered, depending on which looks best for your wall.
How to Mark Your Wall Using Templates
Using a template makes marking drill holes precise and simple, especially for flush or floating numbers with mounting studs. Templates usually come with cut-off top lines so you can align the top edge of numbers to a horizontal guideline. Here’s a step-by-step process for marking your wall:
- Hold the number template against the wall at the chosen height.
- Use a level to draw a straight horizontal line as a baseline for the numbers’ top or bottom edge.
- If you have an even number of digits, mark the first and last numbers at the edges of your designated mounting area.
- Evenly space the remaining numbers between those edges, using the width of a digit as a guide.
- Mark drill holes or mounting points with a pencil through the template holes.
- Double-check spacing and alignment with the level before drilling.
- Pre-drill holes matching the screw size or mounting rods for floating numbers.
Mark the center line of your entire number grouping first to ensure symmetrical placement, especially if mounting above a door or mailbox.
Comparing Flush Mount and Floating Mount Installation Methods
Flush mount installation means the house numbers sit directly against the mounting surface, creating a smooth, smooth look. Floating mount installation uses spacers and studs to hold the numbers slightly off the wall, giving a subtle shadow and a modern, three-dimensional effect. Choosing between these depends on your surface type, aesthetic preference, and how much effort you want to put into installation.
Flush mounts work well on smooth, flat surfaces such as wood, metal plaques, or walls with minimal texture. They require drilling holes just deep enough for mounting hardware like molly bolts or screws. The numbers attach directly without spacers, which means easier installation but less visual depth. Floating mounts suit uneven or textured surfaces better because the spacer provides clearance. This method uses longer screws and plastic or metal spacers slipped over the studs that you first thread into the number backs. The studs then insert into drilled holes in the surface, often secured with a two-part epoxy adhesive for strength.
Using floating mounts requires more hardware: studs, spacers, molly bolts, and often epoxy. The spacer pushes the number away from the wall by about 1/4 to 1/2 inch, which casts a shadow and makes the numbers stand out, especially on busy or uneven backgrounds. Flush mounts typically cost less in hardware since you only deal with shorter screws or bolts and no spacers. Installation time is usually quicker for flush mounts because you don’t need to position spacers carefully.
| Feature | Flush Mount | Floating Mount |
|---|---|---|
| Appearance | Numbers sit flush against surface, flat look | Numbers held off surface with shadow, 3D effect |
| Hardware Required | Short screws or molly bolts | Long screws, mounting studs, spacers, epoxy |
| Surface Suitability | Flat, smooth surfaces like flat walls or plaques | Uneven or textured surfaces, stone, rough siding |
| Installation Complexity | Lower; drill holes and attach screws | Higher; install studs, slide spacers, use epoxy |
| Cost | Lower hardware cost | Higher due to additional spacers and epoxy |
| Durability | Good if properly secured | Very good; spacers reduce surface contact wear |
Begin by screwing the mounting studs into the back of each floating house number. Next, place the included spacers onto those studs. Carefully drill holes on the chosen surface, following the template layout for accurate placement. Insert molly bolts into the drilled holes, then apply a two-part epoxy to either the stud ends or inside the holes. Press the numbers with studs and spacers into the holes until they fit firmly. Let the epoxy cure per the instructions, usually taking a few hours. For flush mounting, skip the spacers and use shorter screws that go directly through the numbers into the wall, matching the mounting hardware to your wall’s type and weight capacity.
Floating mounts have the advantage of making your numbers more visible and stylish against rough or colorful surfaces, while flush mounts keep a traditional, clean look on smooth walls. Both methods can significantly improve curb appeal if done carefully with the right tools and mounting hardware.
Step-by-Step House Number Installation on Different Surfaces
Installing house numbers requires different approaches depending on the surface. Wood and siding allow for straightforward screwing or nailing, while brick, concrete, and stucco require specialized tools and anchors to avoid damage and ensure stability. Proper drilling technique and suitable fasteners are key to a secure and lasting installation.
Installing on Wood and Siding
Wood and most siding materials like vinyl or aluminum are easier to work with because you can drill directly into the surface without special bits. Screws or nails are typically sufficient to hold house numbers firmly. Avoid placing screws in split or deteriorating wood to prevent damage. Follow these steps for a secure attachment to wood or siding:
- Position the numbers using your template and mark the drill spots with a pencil.
- Drill pilot holes slightly smaller than your screws to prevent the wood from splitting.
- Use corrosion-resistant screws, such as stainless steel, to prevent rust over time.
- Align the numbers and screw them into the pilot holes until snug, avoid overtightening.
Using pilot holes helps keep the wood intact and makes the process cleaner. On vinyl siding, avoid drilling too deeply behind the siding to prevent water intrusion. If fastening to siding with a hollow cavity, use longer screws designed for siding or anchors to ensure a firm hold.
Mounting on Brick and Concrete
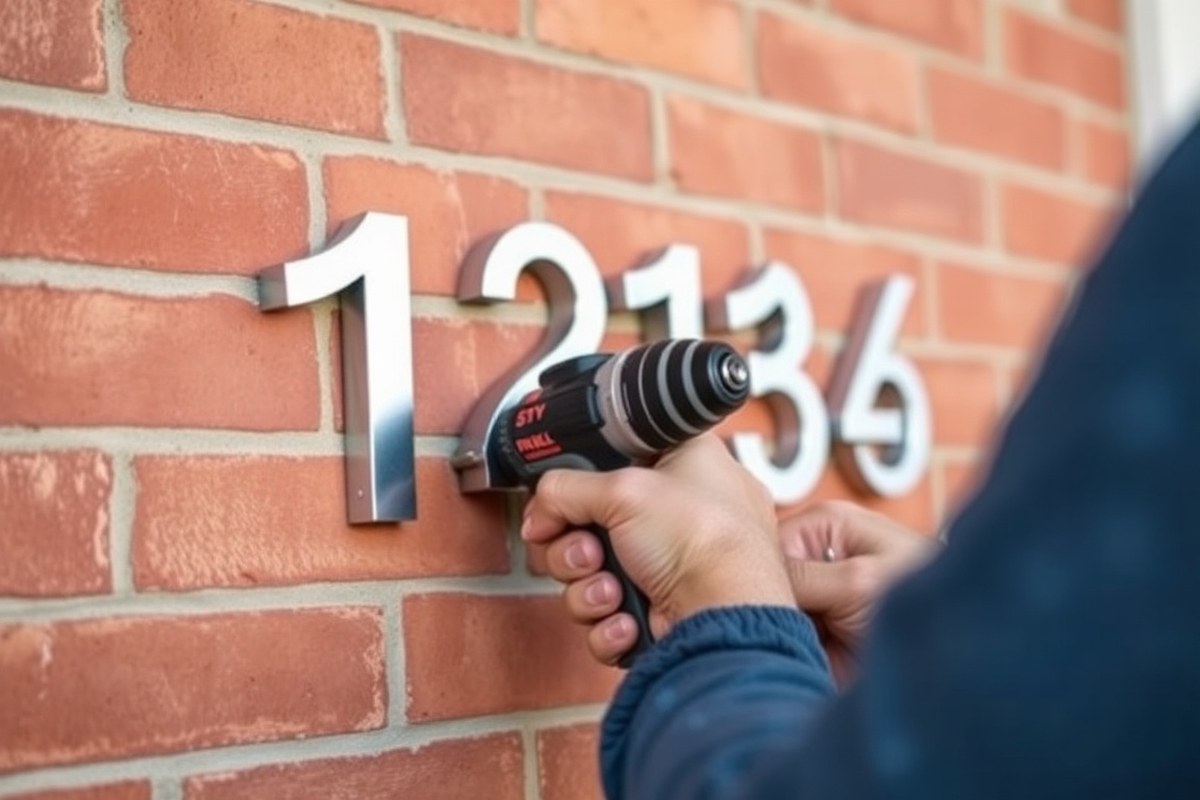
Brick, concrete, and other masonry require a hammer drill with a masonry bit to create clean holes without cracking the material. Using wood or metal bits will quickly dull or break when working with these hard surfaces. Proper anchors like plastic sleeves or sleeve anchors provide the necessary grip. To mount numbers on brick or concrete, take these steps:
- Use a drill template to mark exact holes, avoiding mortar joints to prevent cracking.
- Attach the template securely using tape or a rigid base like cardboard if the surface is uneven.
- Drill holes using a hammer drill and a masonry bit sized to fit the plastic anchors.
- Insert plastic sleeve anchors into the holes until flush with the surface.
- Position the house numbers over the holes and screw them into the anchors.
This technique prevents damage to the masonry and ensures the numbers withstand weather and vibration. Construction adhesive can serve as an alternative when drilling is not an option, but it requires curing time and may not hold as well for heavy numbers. Temporary tape can hold numbers in place until adhesive cures if chosen.
Attaching Numbers to Stucco Walls
Stucco walls are fragile and may crack if drilled incorrectly. Use a hammer drill with masonry bits but keep drills short and steady to avoid over-penetrating. Anchors like plastic sleeves or special stucco fasteners help distribute the load and reduce surface stress. Follow these instructions to protect stucco surfaces:
- Mark holes using your template, avoiding wide mortar cracks or joints.
- Drill pilot holes with care, applying light pressure and backing off frequently to remove dust.
- Insert plastic anchors suitable for stucco into the holes.
- Attach house numbers by driving screws through mounting holes into the anchors.
Choosing lighter numbers or smaller mounting points reduces the risk of cracking. For uneven stucco surfaces, secure your template to a firm base before marking to maintain accurate placement. Take time to drill carefully and check for cracks during and after installation to catch damage early.
How to Use Templates, Levels, and Drills to Get Perfect Alignment
Using templates, levels, and the correct drill bits ensures your house numbers install straight, evenly spaced, and securely mounted. Proper preparation prevents common problems such as crooked placement or holes that are too shallow or wide for anchors. Follow simple steps to tape your template carefully, select drill bits suited to your wall material, and verify alignment with a level before drilling.
Preparing and Placing the Template
Start by creating or using a paper template that matches the mounting holes on your house numbers. If your numbers didn’t come with a template, lay a blank sheet over the back of each number and poke holes where the screws go. Position this template on the wall where you want the numbers to sit, making sure it fits the space and looks balanced.
Use painter’s tape to temporarily hold the template in place. Secure the tape along the edges without wrinkling or bubbling the paper. Press the tape firmly so the template doesn’t move as you mark or drill. Mark the hole locations directly on the wall through the template, avoiding the temptation to guess or freehand measurements afterward.
- Check that the area is clean and dry to promote tape adhesion.
- Place the paper template on the wall at the planned height and position.
- Use painter’s tape to attach the template, smoothing it flat against the wall.
- Mark the drill hole points on the wall through the template holes with a pencil.
- Remove the template carefully without disturbing the tape residue.
- Double-check your marks for proper spacing, ideally 1.5 to 2.5 inches between numbers measured from edges.
Keep the template perfectly still when marking holes; slight shifts can cause crooked numbers or uneven spacing.
Choosing the Right Drill Bits
Select drill bits designed for the material you’re working with. For wood, a standard 3/16-inch bit typically works well for mounting holes. Masonry or brick surfaces require a specialty 3/16-inch masonry bit to drill clean, deep holes without damaging the wall.
Mark your drill bit with tape or a permanent marker at the depth required for your wall anchors. This helps prevent drilling too deep or too shallow, which can cause loose mounts or damage. Keep a few bit sizes on hand in case you need to enlarge holes slightly or accommodate different anchor types.
- Identify your wall material (wood, siding, masonry, etc.).
- Choose a drill bit sized to your anchors; typically 3/16-inch is standard.
- Use a masonry bit if drilling into brick, stone, or concrete.
- Mark the desired drill depth on the bit with tape for accuracy.
- Drill slowly and steadily on marked points, keeping the drill perpendicular to the wall.
Drilling at an angle or too fast can create oversized holes, weakening your mounting; a steady hand and correct bit make a strong installation.
Using a Level for Straight Installation
A level is key to ensuring numbers sit perfectly straight and evenly spaced, which looks professional and improves curb appeal. Place a bubble level on the top or along the template edge before taping it to the wall. Adjust until the bubble centers, then tape securely.
After marking holes, double-check your marks with the level before drilling. You can hold the level between mounting points to confirm horizontal alignment or use a laser level for precision on larger installations. Once numbers are mounted, place the level against them one last time to verify straightness and correct as needed.
- Place the level against the template’s top edge before taping it down.
- Adjust the template until the bubble is centered between the lines.
- Tape the template securely once level is confirmed.
- After marking holes, hold the level between marks to recheck alignment.
- Once mounted, position the level on the numbers to confirm final straightness.
Don’t rely on your eye for straightness; always use a level to avoid crooked house numbers that catch attention for the wrong reasons.
Safety Tips and Common Mistakes to Avoid When Installing
Wearing safety gear is essential when installing house numbers, especially since this task often involves drilling into walls or siding. Protect your eyes with safety glasses to shield against dust and debris. Use gloves to avoid cuts or scrapes from metal edges or rough surfaces. A dust mask helps when drilling into materials like stucco or brick to prevent inhaling harmful particles. Comfortable, closed-toe shoes provide stable footing and reduce injury risk.
Common mistakes can damage your house numbers or the wall and lead to costly repairs. One frequent error is misaligned drilling, which results in crooked numbers that look unprofessional. Another issue is using the wrong drill bit or hardware for the wall type, causing cracks or loose mounting. Over-tightening screws can strip holes or warp metal numbers, while under-tightening leads to unstable fixtures. Scratching the finish of metal numbers during installation spoils their appearance, reducing curb appeal.
- Wear safety glasses, gloves, and a dust mask before starting.
- Use a pencil and level to mark drill holes precisely to avoid misalignment.
- Select drill bits recommended for your wall type: masonry bits for brick or stucco, wood bits for siding.
- Pre-drill holes at the correct size to prevent cracking or splitting the wall material.
- Use anchors or standoffs designed to match your number’s weight and the surface’s firmness.
- Hand-tighten mounting screws gently to avoid stripping holes or bending numbers.
- Cover numbers with painter’s tape when drilling nearby to protect the finish.
Incorrect drilling can cause serious damage to your wall, such as cracking stucco or splitting wood siding. Match your drill bit size to the anchors or screws used, drilling holes that are too large will make fixtures loose, while too small holes risk wall or anchor failure. Anchors improve holding power if mounting on drywall or hollow siding. On hard surfaces like brick, using masonry anchors avoids crumbling around your holes.
Hardware failures often stem from underestimating weight or exposure to elements. For heavier or metal numbers, sturdy steel anchors or stainless steel screws reduce rust and maintain strength. Choose hardware rated for outdoor use to avoid early corrosion. Check that screws and standoffs are flush or slightly recessed to prevent catching or loosening over time. Securing numbers level preserves a neat look and prevents accumulated moisture that causes damage.
Taking these precautions and avoiding typical errors can save money and keep your house numbers looking their best for years. Proper preparation, careful drilling, and using the right tools and hardware all contribute to a professional installation that improve your home’s exterior and withstands weather and wear.
Tips for Installing Illuminated and LED House Numbers Safely
LED house numbers require careful wiring and proper power sources to work safely and reliably. These numbers run on 12V DC power, so directly connecting them to your home’s standard 120V AC wiring can cause damage or create a fire hazard. Always use the transformer or LED driver that comes with your numbers to step down the voltage safely from 120V AC to 12V DC. If you prefer solar-powered options, select a solar panel kit designed to provide consistent 12V output suited for your LED numbers, ensuring it includes a battery or charge controller to stabilize power through varying sunlight conditions.
Start by turning off power to the circuit you’ll work on at the breaker box before handling any wiring. Connect the transformer to your home’s main power using proper junction boxes and wire connectors rated for outdoor use. From the transformer, run low-voltage wiring to your house numbers, keeping the wires protected inside conduit or behind the mounting surface to prevent exposure to weather or physical damage. Use wiring rated for outdoor or low-voltage lighting, which typically means 16 or 18 gauge stranded copper wire. Connect the LED numbers’ positive and negative leads carefully, matching the transformer’s output polarity to avoid malfunction.
After wiring the connections, test the numbers by turning the breaker back on and checking for consistent illumination. Avoid using extension cords or adapters not specified by the manufacturer, and never splice wires with electrical tape alone. Proper connectors and waterproof seals are essential to prevent moisture entry, which can cause shorts and corrosion. Regularly inspect the wiring for signs of wear or damage, particularly if installed in areas with extreme temperatures or high humidity.
Do not install LED house numbers where they can be directly wetted by sprinklers or heavy rain unless the numbers and wiring are rated for wet locations. For installations on metal or conductive surfaces, add an insulating barrier between your numbers and the surface to avoid shorts. When handling the transformer, ensure it’s mounted in a dry, ventilated place following the included instructions; many transformers cost between $20 and $50, but this investment protects your home and device.
Check that your installation complies with local electrical codes, as some areas require a licensed electrician for outdoor wiring work. When in doubt or if dealing with complicated installations, hiring a professional avoids risks and ensures long-term safety. The most common mistakes include skipping the transformer, using incorrect wire size, not sealing connections, and exposing wires to the elements, all of which can lead to electrical failure or fire. Taking the time to plan wiring routes, select proper power supplies, and shield connections results in illuminated house numbers that last for years without hazards.
Maintaining House Numbers and When to Call a Professional
Keeping house numbers clean and in good condition helps them stay visible and attractive. For metal numbers, especially those made of aluminum or stainless steel, wipe them down every few months with a soft cloth dampened with mild soap and water. Avoid abrasive cleaners, which can scratch or damage the finish. Painted numbers should be cleaned gently to prevent peeling or chipping; use a soft sponge and mild detergent. Dry them promptly to avoid water spots or corrosion. Maintaining a regular cleaning routine reduces the need for costly repairs or replacements over time.
You can handle minor repairs yourself if you notice loose screws or fading paint. Tightening screws with a screwdriver or replacing them with corrosion-resistant stainless steel fasteners usually takes 10 to 20 minutes. For touch-up paint, sanding the area lightly and applying a matching exterior-grade paint prevents rust or further peeling. DIY repair makes sense for minor cosmetic issues or simple fastener fixes that do not require changing the mounting method or damaging the wall.
Professional installation is advisable if your house numbers are significantly damaged, if the mounting surface is unstable, or if wiring is involved for illuminated or LED numbers. Structural issues like cracked siding, brick, or stucco near the mounting area may need expert repair to ensure the numbers attach securely and safely. Professionals charge between $100 and $250 depending on complexity, which is worth it to avoid further damage or safety hazards. Electrics always require professionals to ensure compliance with local codes and prevent fire risks.
Check your house numbers twice a year using this simple maintenance checklist: clean surfaces gently; verify all screws remain tight; inspect for signs of rust, fading, or peeling paint; confirm the mounting surface is solid. Repaint and tighten hardware as needed. Signs to transition from DIY to professional help include persistent looseness, visible structural damage to siding or wall, or if you need to upgrade to illuminated numbers that require wiring. Staying on top of small issues prevents costly, time-consuming fixes later.
Use stainless steel screws to prevent rust and ensure your house numbers stay firmly in place, especially if you live in a humid or coastal area.
Step-by-Step Action Plan for Installing Your House Numbers
Follow these steps to install your house numbers cleanly, securely, and with good visibility for visitors and deliveries.
- Before you start: Gather your chosen house numbers, drill, level, template, anchors, and sealant. Ensure these tools and materials match your wall surface type.
- Day 1: Mark your preferred placement using the template and check alignment with the level. Confirm the spot is clear and visible from the street.
- Day 2: Drill pilot holes through the mounting marks, using the correct bit size for your anchors. Test the hole depth with an anchor or screw to ensure a snug fit.
- Day 3: Insert anchors and attach the numbers using screws or adhesive according to your numbers’ mounting type. Check the numbers sit flat and straight before tightening.
- Day 4: For illuminated or LED numbers, follow electrical safety protocols and perform a light test to confirm wiring and bulbs work properly.
- After 1 week: Examine the numbers for stability and touch up caulking or paint to seal around the edges if needed. A tight seal prevents water damage.
- After 1 month: Check the numbers’ condition after exposure to weather. Tighten screws or clean the surface to maintain visibility and durability.
Frequently Asked Questions
Can You Install House Numbers Without Drilling Holes?
Yes, you can use strong adhesive or silicone for a drill-free installation, but this works best on smooth, clean surfaces and with lightweight numbers. Adhesives may not hold as well over time outdoors.
How High Should House Numbers Be Installed?
House numbers should generally be placed about 4 to 6 feet from the ground to be visible from the street. This height makes them easy to spot by delivery drivers and emergency responders.
What Is the Best Paint for Stenciling House Numbers?
Exterior latex paint is best for stenciling house numbers because it resists weather and lasts longer outdoors. Use a foam brush for cleaner edges and apply two thin coats for durability.
Can You Install House Numbers on Brick Without Anchors?
It’s possible by using strong masonry adhesive or construction glue, but anchors ensure a more secure and long-lasting hold. Adhesive alone may fail on uneven or rough brick surfaces.
How Do I Choose the Right Size for My House Numbers?
Choose numbers at least 4 inches tall for good visibility from the street, but adjust size based on distance and the wall space available. Larger numbers improve readability but must fit your home’s style.
What Is the Easiest Way to Remove Old House Numbers?
Use a putty knife and gentle heat (like a hairdryer) to soften adhesive or paint before prying off old numbers. Be careful not to damage the surface underneath.
The Bottom Line
Installing house numbers using careful measurement, proper tools, and secure mounting methods helps ensure they stay visible and last for years. Start with positioning your numbers to achieve clear sightlines from the street, then work patiently through drilling, mounting, and sealing steps. Testing and maintenance keep your numbers looking good and functioning well over time. Your next move should be selecting the style and size that fits your home, then laying out the marks precisely before drilling.