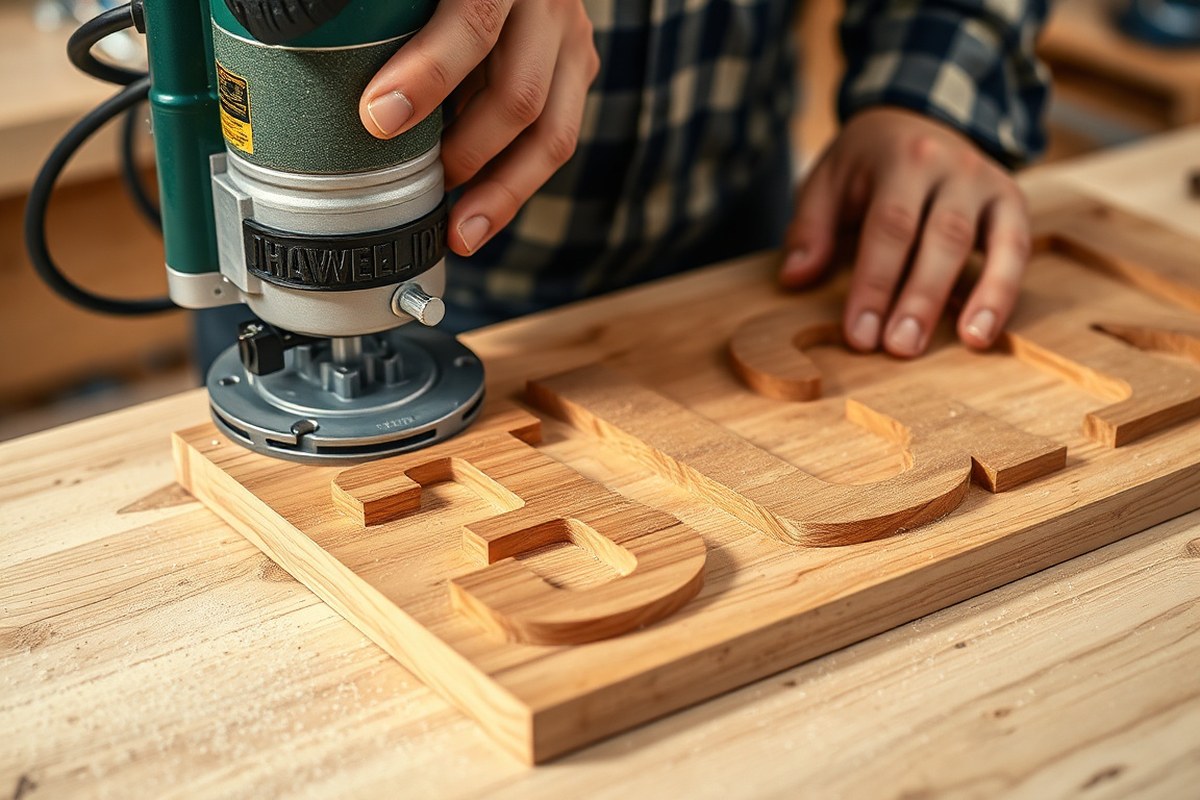
How to Router Letters in Wood: A Complete Guide with Pro Tips
How to router letters in wood starts with choosing the right router bit size and setting a proper cutting depth. Use smaller bits for detailed fonts and larger bits for bold letters, typically routing 1/8-inch to 1/4-inch deep. Begin by securely clamping your piece and making multiple shallow passes rather than one deep cut to avoid tear-out.
Key Takeaways
- Use a router with at least a 1-1/2 horsepower motor for smooth letter carving.
- Select bits with different angles (60°, 90°, 120°, 135°) to match your letter style.
- Transfer your letter designs clearly with a pencil before routing.
- Choose hardwood or softwood based on the router’s power and letter size.
- Sand the wood surface with 120 to 220 grit sandpaper before and after routing.
- Make multiple shallow passes with your router bit set around 1/4-inch depth each pass.
How to Router Letters in Wood Step-by-Step
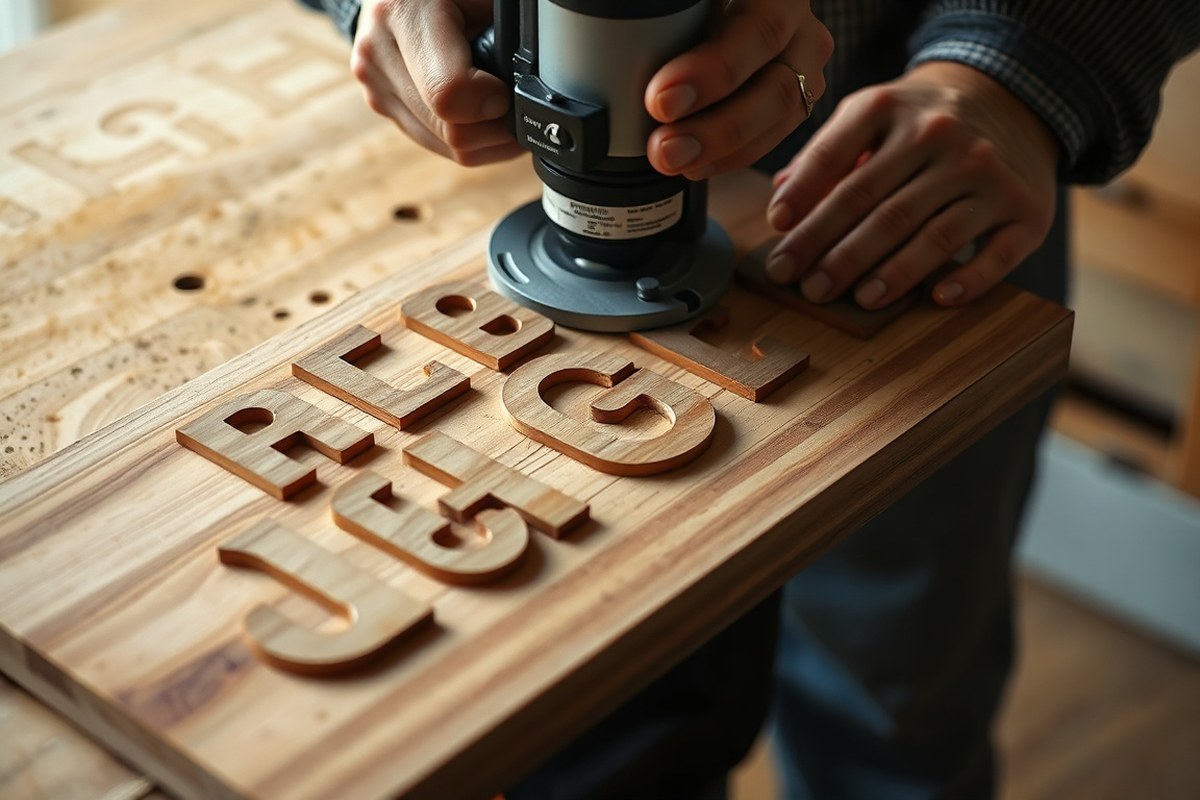
Routing letters into wood requires a careful, step-by-step approach to achieve clean and precise results. Start by setting the router bit depth to about 1/4 inch; this is shallow enough to prevent mistakes but deep enough for clear lettering. Using multiple passes rather than trying to cut the entire depth in one go reduces strain on the tool and helps maintain accuracy. The time routing takes depends on your experience, the size of the letters, and the complexity of the design, but expect each letter to take several minutes. Performing passes in small increments also helps keep edges crisp and avoids burning the wood. Turning the wood 90 degrees during routing may be necessary for detailed letters or different cutting angles.
- Secure the wood piece. Clamp your prepared wood firmly to your workbench or a stable surface to prevent movement during routing. Stable wood ensures cleaner cuts and better control.
- Set the router bit depth. Adjust the router bit so it cuts 1/4 inch deep. This standard depth works well for most letters and woods, offering enough depth for visibility without risking going too deep.
- Trace or position your letter design on the wood. Use a stencil, carbon paper transfer, or a pre-drawn design to guide your route precisely.
- Switch on the router and begin cutting. Start your pass by slowly guiding the router along the letter’s outlines with a firm grip and steady motion. Avoid rushing to keep clean edges.
- Make multiple passes. After the first shallow pass, reset the bit depth a little deeper and route the letters again. Repeat until you reach the full 1/4 inch depth or desired depth for your project.
- Change orientations if needed. For intricate letters or cuts, rotate the wood 90 degrees between passes to maintain the best angle and control over the cut.
- Clean up the routed letters. After finishing, turn off the router and remove any sawdust or debris from the engraving to check your work consistency and clarity.
A well-planned approach and patience during each step will help you create professional-looking letters in wood. This method works for signs, gifts, and decorative projects, letting your woodworking skills grow with each piece.
Choosing the Right Tools and Router Bits

Choosing the right router and bits is key to making clean, crisp letters in wood. A trim router with a bit diameter between 1/4-inch and 1/2-inch is a solid choice for most lettering projects because it offers enough power to cut smoothly while staying easy to control for detailed work. The router bit itself defines the letter style and finish.
V-groove bits carve a sharp, vee-shaped channel ideal for larger, elegant letters that have distinct edges. These bits come in angles like 60°, 90°, 120°, and 135°, each affecting the depth and width of the cut. Straight bits make flat-bottomed, modern-looking letters with crisp edges. Spiral bits behave similarly to straight bits but often provide cleaner cuts and less tear-out, especially in hardwoods. The choice depends on the style you want and the wood type.
Bit diameter and angle impact letter size and detail. Smaller diameters work better for tiny or intricate fonts. If you select a bit too large for your letter size, you risk losing detail or not fitting in tight letter spaces. Larger angles on V-groove bits produce wider carvings, good for bold fonts, while smaller angles suit fine script or delicate fonts. The table below summarizes the main router bit types, their effects on lettering, and typical uses:
| Router Bit Type | Angle / Diameter | Effect on Letter Style | Typical Use |
|---|---|---|---|
| V-Groove | 60°, 90°, 120°, 135° | Creates sharp, vee-shaped cuts. Angle controls width/depth of groove. | Elegant, deep lines for larger letters and decorative fonts |
| Straight Bit | 1/4″ or 1/2″ diameter | Produces flat-bottomed grooves with clean edges | Modern, minimalist letters; best for most basic fonts |
| Spiral Bit | 1/4″ or 1/2″ diameter | Similar to straight bit but cleaner cuts with less tear-out | Hardwoods or detailed fonts needing smooth finish |
Make sure your bit fits securely in the router collet to avoid wobble or uneven cuts. A sharp, high-quality bit also helps reduce splintering and keeps cuts cleaner for a professional look.
Use a smaller-diameter bit for fine, detailed letters and reserve larger bits for bold, simple shapes to avoid losing letter clarity.
When selecting your router, consider a model that offers variable speed control. This feature lets you slow down the bit when working on softer woods or intricate fonts, reducing burn marks and improving control. Lower speeds with a smaller bit often mean cleaner results.
Bit angle matters greatly for style. For instance, a 60° V-groove will cut narrow, deep letters perfect for script fonts, whereas a 135° bit creates wide, shallow grooves better for bold, block letters. For most lettering work, a set of V-groove bits with varying angles can give flexibility to match the font style.
Transferring and Designing Letters on Wood
Designing and transferring letters accurately onto wood sets the foundation for clean, professional routing. Choosing the right font, sizing the letters correctly, and preparing a precise template will prevent mistakes and ensure your routed letters come out looking exactly as planned. Accurate transfer methods help guide your router without guesswork, whether you trace directly or use a stencil.
Selecting a Font and Final Letter Size
Choosing the right font plays a big role in how easy it is to route letters. Simple, bold fonts with clear, rounded edges work best because they reduce the chance of the router slipping and help maintain clean cuts. Avoid fonts with excessively thin lines or complicated flourishes, which are tricky to route by hand and may lead to breakage or uneven edges.
Adjusting the final letter size should match your project’s scale and the router bit size you plan to use. Letters between 2 and 4 inches tall often work well for sign projects, providing enough space for detail without requiring overly small router bits that are prone to snapping. Larger letters make it easier to maintain control, while smaller sizes need steadier hands or additional guides.
Printing and Preparing Templates
Templates serve as your routing roadmap, providing a clear outline to follow. Print your letters on standard printer paper in the final size you need, making sure your design matches your desired scale exactly. Check that margins and spacing remain consistent for uniform appearance on wood.
To prepare the template, trim excess paper around the letters so you can position it precisely on the wood. For sharper edges, consider printing on heavier paper or thin cardstock. If creating stencils, carefully cut out the letters with an X-Acto knife or scissors and remove the inside shapes to expose the wood you’ll route.
Temporarily Attaching Templates to Wood
Secure your paper template lightly but firmly to the wood to avoid slips during tracing or routing. Use removable adhesives such as repositionable spray adhesive or low-tack tape; these hold the template in place without damaging the wood’s surface or tearing the paper when removed. Avoid glues that soak into the wood or leave residue.
When using stencils, hold the edges with painter’s tape or adhesive putty, especially on vertical surfaces, to maintain stability. Ensure the template is perfectly aligned and flat to prevent distortion of the letters when following the guide with your router or cutter.
Using Transfer Paper and Tracing Techniques
Transfer or carbon paper can replicate your printed design onto the wood quickly and clearly. Place a sheet of transfer paper between the printed template and the wood, then use a pen or stylus to trace each letter’s outline firmly. The pressure transfers graphite or ink to the wood surface, creating a visible guide for routing.
After removing the template, inspect the transferred lines. They should be dark and continuous enough to follow easily with a router or cutter but light enough not to interfere with the final finish if some remain after routing. For extra precision, deepen the lines slightly with a pencil or thin marker before routing.
- Choose a simple, bold font with clear edges and adjust the size to fit your project, typically 2 to 4 inches tall.
- Print your letters on standard or heavier paper at the desired final size without distortion.
- Trim or cut out the template to fit the wood layout, making stencil cutouts where needed.
- Attach the template lightly using repositionable spray adhesive or low-tack tape for easy removal.
- Position transfer paper between the printed design and wood, then trace each letter firmly with a pen or stylus.
- Remove the template and check the transferred lines for clarity and completeness.
- Improve faint lines with a pencil or thin marker to ensure they guide your routing accurately.
Preparing Wood and Workspace for Routing Letters
Selecting the right wood significantly affects how easy it is to route clear, crisp letters. Softwoods like pine or basswood are easier to carve but may splinter or dent more easily. Hardwoods such as maple and cherry provide a cleaner finish and durability but require slower, more deliberate routing to avoid burning the wood. Choose wood with a smooth, uniform grain and without knots in the area where the letters will be routed to prevent uneven cuts.
Before using your router, prepare the wood surface for the best results. Start by sanding the area to remove rough spots and unevenness. Use a medium-grit sandpaper like 120-grit followed by finer grit around 220 to create a smooth, flat surface. Whether sanding by hand or with a power sander, make sure the surface is free of dust and debris before starting your lettering work. A clean, smooth surface helps your router bit glide steadily, which improves letter clarity and reduces mistakes.
Securing the wood firmly is essential to maintain accuracy and prevent accidents. Use sturdy clamps to fasten your piece to a stable workbench or table. The goal is to prevent any shifting while routing, as even slight movement can spoil the letter edges. Avoid soft padding that allows flex; instead, clamp directly over the wood or use sacrificial boards for better grip. In situations where the wood piece is small or thin, place it on a flat, solid backing board to distribute the clamp pressure evenly and reduce vibrations.
- Choose straight-grained, knot-free wood for routing letters.
- Sand surface with 120 then 220 grit sandpaper for smoothness.
- Clean surface thoroughly to avoid dust buildup affecting the cut.
- Clamp wood securely to a solid workbench or use a backing board.
- Check stability before routing by attempting gentle movement.
- Keep your workspace clean and well-lit for precise control.
- Arrange your tools within easy reach to maintain focus.
Setting up your workspace correctly improve both safety and precision. Make sure the area is well-lit to see subtle differences on the wood surface and ensure your hands remain steady. Organize your tools, including the router and bits, close by so you don’t lose concentration switching positions. Clearing clutter reduces the chance of catching cords or knocking over tools. The work surface should be at a comfortable height to limit fatigue during detailed routing. Maintaining this setup supports accuracy and helps prevent common issues like uneven letter depth or accidental slips that impact the final appearance.
Common Mistakes When Routing Letters and How to Fix Them
Letters that look uneven or jagged often happen when moving the router too quickly or using a dull bit. Maintain a steady speed and sharp bit to achieve smooth edges. Start with a shallow cut depth of no more than 1/8 inch and make several passes as needed to prevent burning or tear-out. A high-feed rate paired with a slower router speed helps lower heat buildup that leads to burning.
To deepen letters that are too shallow, turn off the router and adjust the bit for a second pass. Avoid going too deep in one go as this can chip the wood or cause tear-out. Letters cut too deeply can be leveled by gently sanding their edges with fine-grit sandpaper, taking care not to harm the surrounding wood. Common mistakes include:
- Burning caused by slow feed speed or dull bits
- Chipped or torn edges from cutting too deep at once or grain direction issues
- Uneven letter depth due to inconsistent router pressure or depth settings
- Jagged edges from moving the router unevenly or unstable workpiece
- Letters that are too shallow or too deep from incorrect depth setting
- Bit wandering due to improper clamping or wrong bit size
Clamp your workpiece firmly to keep it stable during routing and take test cuts on scrap wood to dial in bit depth and speed. Use sharp, quality router bits and clean them regularly. When chipping or tear-out happens, lightly sand the edges with 220-grit sandpaper. Avoid aggressive sanding to preserve crisp letter shapes. In cases of burnt areas, lightly sanding or using fine steel wool can help remove excess discoloration without damaging the wood.
Take several shallow passes rather than one deep cut to minimize burning and tear-out, improving both safety and letter quality.
Fixing errors without ruining the project often comes down to patience and careful sanding. For slight depth inconsistencies, stop routing and sand to even out. Edges that chip can be carefully reshaped using a small file or sanding block. Deep burns may need a light sanding or stain touch-up after finishing. Avoid rushing to re-route over mistakes, which can worsen the problem.
Finishing Routed Letters for a Professional Look
Finishing routed letters properly makes a big difference in the overall look and durability of your project. Sanding smooths out rough edges, cleaning removes dust, and applying paint or stain adds color and style. Sealing the wood protects it from damage, and decorative finishes like color fills or trims can personalize your work further.
Sanding Techniques and Grit Progression
Start sanding the routed letters as soon as routing is complete and the wood is clean of any sawdust. Proper sanding removes rough or fuzzy edges left behind by the router bit, making the letters crisp and smooth. Begin with a medium grit sandpaper, such as 120 grit, and finish with a fine grit like 220 or 320 for a polished surface.
You can use small sanding blocks, detail sanding tools, or folded sandpaper to reach inside curves and corners. Avoid aggressive sanding, which can round off sharp letter edges and distort the design.
Painting and Staining Routed Letters
Painting routed letters allows for bold, vibrant colors, while staining highlights the wood grain with natural hues. Choose acrylic craft paint or wood stain products made for indoor woodworking projects. For painted letters, use a small brush to carefully fill routed areas without spilling onto the surrounding wood.
Stains should be applied evenly with a cloth or brush and wiped off promptly to prevent blotches. Test both paint and stain on scrap wood to ensure color and absorption meet your expectations before applying them to your project.
Sealing Options for Protection
Sealing routed letters protects the wood from moisture, dirt, and wear while improving the finish. Clear polyurethane, lacquer, or water-based sealers are popular choices. Water-based sealers dry quickly and have low odor, making them good for indoor use.
Apply sealers with a fine brush or spray in thin layers, letting each coat dry 2 to 4 hours before adding the next. Two or three coats usually provide sufficient durability. Avoid thick coats that can pool or obscure fine details in your routed letters.
Adding Decorative Elements or Color Fills
Color fills and decorations make routed letters stand out and add flair. You can use epoxy resin mixed with pigments, wood fillers tinted with color, or specialty inks to fill recessed letters. Once cured, these fills provide smooth, durable surfaces that contrast with the wood.
Decorative trims like metallic leaf, glitter, or small embellishments glued on can also improve letters. Select decorations that fit the style of your wood piece and apply them after sealing for best adhesion and protection.
- Sand the routed letters starting with 120 grit sandpaper focusing on edges and curves.
- Progress to 220 or 320 grit sandpaper for a smooth, even surface.
- Clean dust off the wood using a brush or a tack cloth.
- Apply paint or stain carefully with small brushes, allowing drying time per product instructions.
- Seal the entire wood and routed areas with a clear finish, applying 2 to 3 thin coats.
- Add color fills or decorative elements after the sealer dries completely.
- Let the project cure fully before handling or installing.
Safety Tips for Routing Letters into Wood
Wearing the right personal protective equipment is essential when routing letters into wood. Safety goggles protect your eyes from flying wood chips and dust, which can cause injury or irritation. Hearing protection, such as earplugs or earmuffs, helps prevent hearing damage from the router’s loud noise, typically reaching 90 decibels or higher. A dust mask or respirator reduces the risk of inhaling fine wood particles that may trigger allergies or respiratory issues. In addition, sturdy boots and long sleeves can shield your skin from sharp debris scattered during routing.
Setting up your router and workspace correctly reduces risks and improves control. Start by clamping the wood securely to a stable workbench or table. This prevents movement that could cause slips and uneven cuts. Adjust the router depth to a shallow setting for your first pass, usually no more than 1/8 inch deep, depending on the wood type and thickness. This cautious approach helps avoid gouging the wood or forcing the tool. Keep the router bit perpendicular to the wood surface and hold the router firmly with both hands to maintain steady, controlled movements.
- Wear safety goggles, hearing protection, and a dust mask every time you route.
- Clamp the wood firmly to prevent shifting during routing.
- Start with a shallow routing depth and make multiple passes for deeper cuts.
- Use a well-lit area to clearly see your work and avoid mistakes.
- Clear your workspace of scrap wood and dust regularly to maintain visibility and reduce tripping hazards.
- Keep cords organized and out of the routing path to avoid tangling or accidental pulls.
- Check the router bit is sharp and securely tightened before starting.
A clean, organized workspace with good lighting increases both safety and accuracy. Adequate light, whether natural or from bright LED lamps, lets you follow your stencil clearly and notice any wood imperfections early. Remove any clutter or loose wood chips that could cause slips or interfere with the router’s path. Maintain your tools, especially router bits, in good shape; dull bits can cause the router to catch or kick back, posing a serious injury risk. Always unplug the router before changing bits or making adjustments to avoid unintentional starts.
Pro Tips for Perfect Routed Letters Every Time
To get perfect routed letters every time, focus on controlling depth accurately, using guides or jigs for consistency, managing router speed carefully, and practicing before working on your final piece. These factors help you achieve crisp edges, uniform cuts, and clean results that showcase your work well.
Controlling Depth and Multiple Passes
Maintaining a consistent depth of cut is key to smooth, well-defined letters. Typical depths range from 1/8-inch to 1/4-inch depending on the wood type and design. Set your router’s depth stop to this value and don’t try to cut it all in one pass. Instead, make several shallow passes, gradually deepening the cut. This reduces strain on the bit and prevents burning or tear-out on the wood.
For example, if you want a 1/4-inch deep letter, program the router to cut 1/8-inch on the first pass, then go over it again to reach the full depth. This approach also keeps edges clean and crisp, preventing jagged or burnt outlines common with deeper single cuts.
Using Edge Guides and Letter Templates
Edge guides and letter templates help maintain precision, especially if you’re routing multiple letters or curved shapes. An edge guide attaches to your router, allowing you to follow the wood’s edge or a straight line consistently. This tool is valuable when routing around sign borders or framing letters neatly.
Letter templates, often made from acrylic or plywood, can be clamped over your workpiece. You guide the router along the template edges using a bearing bit that matches the template’s contours. This method guarantees uniform letter shapes and spacing. Templates may cost around $10, $30 depending on materials but pay off in accuracy and repeatability.
Router Speed and Pressure Control
Router speed impacts how clean your letter edges turn out. Higher speeds can cause burning or melting on soft woods, while lower speeds reduce heat build-up and improve control. Aim for a medium speed setting and adjust based on the wood species: hardwoods benefit from speeds near 20,000 RPM, while softer woods work better around 15,000 RPM.
Feed rate, the speed of moving the router along the cut, also matters. Move too fast and the bit won’t remove enough material, causing splintering or uneven depth. Moving too slow risks burning. A steady, moderate feed rate combined with several passes balances the two. Apply gentle pressure toward the cut but avoid forcing the router, which can cause unexpected shifts and rough edges.
Practice with Scrap Wood
Testing your setup on scrap wood before starting your project helps you dial in depth, speed, and guides perfectly. Using an identical wood piece lets you see how the router bit interacts with grain and density. Practice routing the exact letters you plan to cut on the final piece, taking note of any adjustments needed in speed or depth.
Repeat your test passes until the edges are smooth and free of burn marks or tear-out. Building muscle memory and visual familiarity with the router’s behavior is important for consistently sharp, clean lettering. This practice can save time and material by preventing mistakes on your main workpiece.
Make multiple shallow passes instead of one deep cut to avoid burning wood and dulling bits quickly.
Step-by-Step Action Plan for Routing Letters in Wood
Follow this simple plan to start routing letters in wood confidently and efficiently. Each step builds on the last to help you get clear, sharp letters every time.
- Before you start: Choose your wood and gather the right router bits and tools. Verify you have a steady workspace with good lighting and safety gear ready.
- Day 1: Transfer your letter design clearly on the wood using carbon paper or stencils. Ensure the layout looks balanced and centered.
- Day 2: Set up your router with the correct bit size for the font style. Test the depth on a scrap piece of wood to get clean, even cuts.
- Day 3: Practice routing on scrap wood to build comfort with router control. Check that edges are smooth and consistent before moving to the project piece.
- Day 4: Route the letters on your final piece slowly, using a guide if needed. Confirm each letter is cleanly cut and adjust speed or depth if you notice rough edges.
- Day 5: Sand inside the routed letters gently to remove any remaining roughness. Check that letter shapes remain sharp and defined.
- Day 6: Apply finish or paint to highlight your routed letters. Test finishes on scrap wood first to confirm desired look and adhesion.
Frequently Asked Questions
Can I Use a Stencil to Router Letters in Wood?
Yes, using a stencil helps guide the router accurately to shape letters. Secure the stencil properly to prevent shifting during routing for clean results.
What Wood Types Work Best for Routing Letters?
Softwoods like pine or cedar are easier for routing letters because they cut smoothly. Hardwoods require sharper bits and slower routing to avoid tear-out.
How Deep Should I Route Letters in Wood?
Depth depends on the project but 1/8 to 1/4 inch is typical for clear, visible lettering. Deeper cuts need careful control to avoid weakening the wood.
Can I Route Cursive or Script Letters in Wood?
Yes, but cursive letters are more challenging to route due to tight curves and thin lines. Use small-diameter bits and take your time for precision.
How Do I Avoid Burning Wood While Routing Letters?
Burn marks occur from slow feed rates or dull bits. Keep your router moving steadily and use sharp, high-quality bits to reduce burning.
Should I Seal Wood Before or After Routing Letters?
Seal after routing to protect and highlight the carved letters. Pre-sealing may clog wood pores, affecting the router’s performance.
Before You Go
Routing letters into wood is a skill you can develop by following clear steps and practicing patience. Focus on steady guidance and correct tool setup to avoid common issues. Your next step is to pick a simple font, transfer it onto scrap wood, and practice routing the letters before starting your main project.