
How to Sand Wood for Signs: Simple Steps for Smooth, Flawless Surfaces
How to sand wood for signs starts with using the right grit sandpaper, moving from coarse to fine to achieve a smooth surface. Begin with 80-grit sandpaper to remove roughness, then progress to 120 and 180 grits, finishing with 220 grit for the best results. Always sand with the grain to avoid scratches that mar the final finish.
Key Takeaways
- Start sanding with 80-grit sandpaper if your wood has rough patches or splinters to remove major imperfections.
- Use 100-grit paper as a starting point only if the wood surface is already smooth without deep marks.
- Always sand in sequence, 80, 120, 180, then 220 grit, never skipping intermediate grits for a flawless surface.
- Sand along the wood grain, never against it, to prevent visible scratching on your sign’s surface.
- After wetting the wood to raise grain, let it dry fully and lightly sand again with the finest grit before finishing.
- Keep sanding dust cleaned off regularly to avoid spotting or roughness in your paint or stain finish.
How to Sand Wood for Signs Step-by-Step
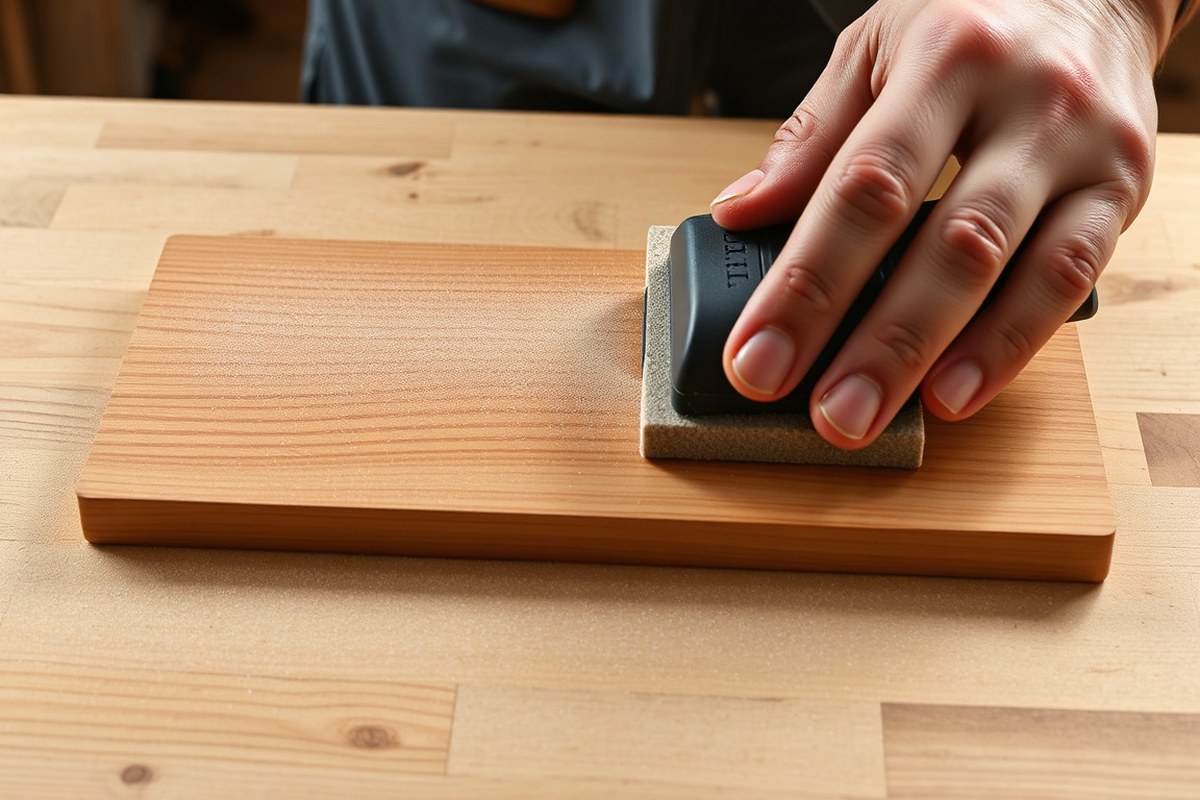
Sanding wood signs involves progressing through increasingly finer sandpaper grits to create a smooth surface free of scratches. Always sand following the wood grain to avoid marks that show through stains or paint. You’ll know the wood is ready when it feels uniformly smooth with no rough patches or visible scratches, and the surface looks even. Preparing the wood before applying your finish includes thoroughly removing dust without raising the grain again.
Selecting Your Sandpaper Grits
Start sanding based on the condition and type of your wood. Rough or machine-marked hardwood generally begins at 80 grit, while planed hardwood or softer woods start at 100 to 120 grit. The goal is to remove surface imperfections and scratches from saw blades or tools.
Follow a progression through grits to gradually smooth the wood rather than skipping ahead, which can leave deep scratches visible after finishing. For most softwoods like pine or cedar, a sequence of 120, 150, and finishing at 180 grit works well. Hardwoods intended for clear finishes often end with 220 grit for a finer surface. Always end with the final grit suitable for your finish type to avoid closing the grain too early.
- Select a starting grit based on wood roughness: 80 grit for rough hardwood, 120 grit for softwoods or planed wood.
- Sand the whole surface evenly with the starting grit to remove roughness and major defects.
- Move up to a medium grit such as 120 or 150 to smooth out scratches from the previous step.
- Progress to finer grits like 180 and then optionally 220 if you want a clear, polished finish.
- Use lighter pressure with finer grits to avoid sanding through the wood surface.
- Stop sanding when the surface looks even and smooth, without larger scratches or rough spots.
Sanding with the Grain Direction
Sand in the direction of the wood grain to prevent noticeable scratch marks that go across the grain. These scratches become more visible after staining or painting and are hard to remove. Applying steady, even pressure while sanding along the grain helps create a smooth, consistent surface.
Avoid sanding against or across the grain. Sand against the grain by mistake? Fix this by sanding again with a finer grit in the right direction until the scratches disappear. This step can take extra time but ensures a clean finish free of marks.
Checking Surface Smoothness
Run your hand over the wood after each sanding step to feel for roughness, bumps, or scratches. The wood should feel uniformly smooth with no raised fibers or gouges. Use good lighting to look across the surface at a shallow angle to spot any remaining scratches or uneven areas.
Sand more in problem spots as needed, then re-check by touch and sight. The wood is ready for the final sanding stage when it feels smooth and looks evenly sanded with no visible imperfections.
Final Surface Prep Before Finish
Remove all sanding dust with a tack cloth or a dry microfiber cloth between sanding steps and before applying any finish. Avoid using a damp cloth for dust removal unless you plan to lightly raise the grain again, as moisture can lift wood fibers and create a rough texture after drying.
Raising the wood grain works well when painting or applying water-based finishes: lightly wipe the surface with a damp cloth, allow it to dry completely, then sand again with a fine grit like 220. This process results in a smoother, more receptive surface for paint or stain absorption.
Choosing the Right Sandpaper Type and Grit for Wood Signs
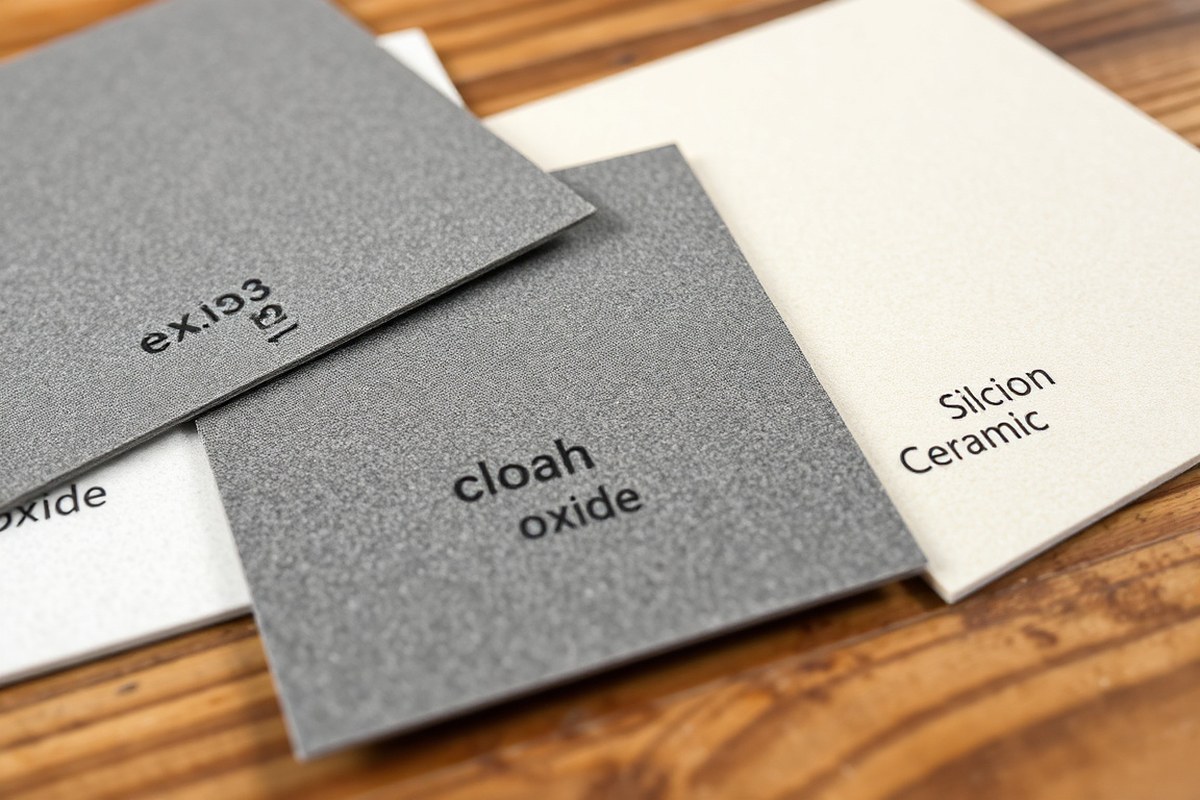
Choosing the right sandpaper type and grit size depends on the wood species and the sanding stage you are at. For softwoods like pine, aluminum oxide sandpaper works well due to its durability and general-purpose use. Hardwood species such as oak or maple benefit from ceramic sandpaper, which cuts faster and lasts longer on dense surfaces. Silicon carbide is best reserved for sanding between finish coats or working with very soft or MDF board, as it performs well on non-wood materials and wet sanding.
Grit size directly influences how quickly you remove material and how smooth the surface becomes. Coarse grits (40-60 grit) remove rough layers or old finishes but can leave visible scratches, so they are ideal for the first sanding pass on rough wood. Medium grits (80-120 grit) smooth out these scratches and prepare the wood for finer sanding. Fine grits (180-220 grit and higher) provide a smooth surface ready for staining or painting, reducing the chance of blotches or peel-off finish problems.
| Sandpaper Type | Wood Species | Best Use Stage | Notes |
|---|---|---|---|
| Aluminum Oxide | Softwoods (pine, cedar) | All sanding stages | Durable, general-purpose, cost-effective |
| Ceramic | Hardwoods (oak, maple) | Rough sanding to medium smoothing | Faster cutting, longer lifespan but more expensive |
| Silicon Carbide | Soft woods, MDF, finish sanding | Fine sanding, wet sanding, finish prep | Good for between coats; not for aggressive wood removal |
When selecting grits, avoid skipping too many steps. Jumping from a coarse 60 grit directly to finer than 180 grit can leave scratches that still show through the finish. Starting coarse and moving gradually through 80, 120, then 220 grit often results in the best finish for wooden signs. If your wood is already smooth or already partially finished, start at 120 grit or higher to save time and preserve details.
For water-based finishes, gently sanding with 220 grit or higher right before applying helps prevent raised grain problems later. After finishing, always clean sanding dust thoroughly to prevent any interference with paint or stain adhesion, which is a common cause for peeling or uneven finishes.
Use sandpaper labeled “no-clog” if possible; it lasts longer by preventing buildup of resin or paint that reduces sanding effectiveness.
Power Sanders vs. Hand Sanding for Wooden Signs
Choosing between power sanders and hand sanding depends largely on the size and detail of your wooden sign. Power sanders excel on large, flat surfaces, making quick work of removing planer marks or smoothing wide tabletops. However, these tools tend to round over edges and corners if used too aggressively, which is a problem on signs with intricate details or curves.
Hand sanding provides unmatched control for edges, curves, and tight spots. It allows you to follow contours closely without taking off too much material or damaging delicate edges. This method is slower and more tiring but important for detailed areas that a power sander cannot reach effectively. Hand sanding also leaves fewer scratches, resulting in a smoother finish, especially important before applying stain or sealer.
Among power sanders, the random orbital sander is the most versatile for wooden signs. It sands quickly and evenly across flat surfaces without leaving deep scratch marks. Palm sanders are smaller and lighter but apply less aggressive sanding, which may require more time on large surfaces. The Dremel rotary tool, equipped with sanding attachments of various shapes and sizes, is excellent for tiny corners, crevices, and detailed work where other sanders cannot fit.
- Random orbital sander: fast, smooth on flats, can round edges if held too long
- Palm sander: lightweight, slower, better for smaller surfaces
- Dremel rotary tool: precise, ideal for tight details and corners
- Hand sanding: best control, essential for curves and edges, slower and tiring
- Power sanding caution: avoid lingering near edges to prevent rounding over
- Use hand sanding for the final pass to remove swirl marks from power sanding
- Always wear an N95 respirator during both hand and power sanding to protect from fine dust
A good approach combines both methods: start with a power sander on the flat, easy parts to save time, then switch to hand sanding for edges and detailed sections. This blend prevents damage to delicate shapes and ensures a smooth, professional finish. Avoid pressing down on the sander; let its weight do the work and keep it moving to prevent uneven sanding and low spots.
Over-sanding with power tools commonly causes rounded edges or thin spots, especially on smaller or delicate signs. When working near corners, reduce sanding time and finish by hand. Always finish the last grit by hand, sanding gently with the grain, to eliminate faint swirl marks left by power sanders and secure an even, stain-ready surface.
Techniques for Sanding Edges, Corners, and Detailed Areas
Sanding edges, corners, and detailed areas on wood signs requires careful technique to preserve sharp profiles and avoid damaging finishes. Using specialized tools and controlled pressure helps maintain crisp edges while smoothing rough spots. Switching between sanding blocks, folded sandpaper, and detail tools lets you clean tight spaces without rounding off edges by mistake.
Using Sanding Blocks for Flat Edges
Sanding blocks provide firm, even pressure that helps keep flat edges smooth and prevents accidental rounding. The block keeps the sandpaper flat against the surface, so you remove material evenly across the edge instead of digging in at spots. This method works best on straight edges or large flat profiles where you want to maintain a defined corner.
You can buy sanding blocks from hardware stores or easily make one at home by wrapping sandpaper around a small scrap of wood. Stick to a medium grit like 120 for finishing edges after rough sanding. Always move the block along the edge in the wood grain direction, avoiding curved motions that can wear the profile unevenly.
Most important is maintaining light to moderate pressure. Pressing too hard can create flat spots or round the edge unintentionally. Replace sandpaper frequently to avoid scratch buildup. Keep your sanding block clean and dry to ensure smooth operation while working.
Folding Sandpaper for Curves and Corners
Hand folding sandpaper lets you reach tight corners and curved edges where blocks won’t fit. This method offers high control over sanding pressure and direction, preventing damage to delicate profiles on carved or shaped signs. Folding sandpaper by hand keeps the abrasive surface as small as needed for precise sanding.
- For tight corners, fold the sandpaper into a narrow point or wrap it around a small dowel or pencil to create a sanding tool that fits the radius.
- Use gentle, consistent strokes inside curves, always following the grain direction to avoid creating scratches on adjacent flat surfaces.
- Adjust grit as the wood smooths: start with 80 to 100 grit and finish with 120 grit or finer for a polished look.
Be patient with this process; slow, delicate movements avoid rounding the edges or removing too much material. Hand sanding helps control pressure and reach spaces electric sanders cannot without risking damage.
Detail Sanding Tools to Use
Specialized sanding tools like sanding sticks, rubber sanding sponges, and micro abrasive pads simplify work on intricate or carved sign areas. These tools fit neatly into crevices and contours better than standard sandpaper and reduce risk of rounding edges.
Sanding sticks are thin, rigid strips with abrasive surfaces, ideal for smoothing corners and letter depths. Rubber sanding sponges conform to curves and offer a gentler touch, perfect for irregular edges. Micro pads or detail sanders powered by oscillating multi-tools can clean carved letters faster while maintaining precision.
For detailed sanding, use light pressure and follow wood grain directions carefully. Replace pads as they clog to avoid uneven sanding, and test on less visible sections first. These tools generally cost between $5 and $30 but save time and help protect sign details.
- Start with a sanding block wrapped in 120 grit sandpaper to smooth long flat edges, moving along the grain with light pressure.
- Fold a piece of 80-100 grit sandpaper around a small dowel to reach inside tight curves and corners, using gentle strokes following the grain.
- Use sanding sticks or rubber sponges to access carved letters and small details, working slowly to avoid rounding corners.
- Switch to finer grit (120-150) sandpaper on all areas for the final pass to remove scratches and prepare for finish.
- Check edges frequently to maintain sharp profiles, reshaping your sanding tools or sandpaper folds as needed.
- Keep sanding tools clean, replacing abrasive paper or pads to ensure effective, even sanding without marks.
- Finish by lightly hand sanding edges with a fine-grit sponge to smooth any roughness while preserving shape.
Setting Up Your Workspace for Efficient Sanding
Proper lighting is essential to spot imperfections while sanding your wooden signs. Position bright, adjustable lights that cast shadows across the surface to reveal dents, scratches, or uneven areas. Daylight-balanced LED work lights provide clear, consistent illumination without altering the wood’s color perception. Aim for at least 1,000 lux of light over your sanding area, which you can check using inexpensive light meters or smartphone apps designed for this purpose.
Dust control must be a top priority because wood dust poses health risks like respiratory issues and skin irritation. Set up local exhaust ventilation to capture dust where sanding occurs. A dust extractor or shop vacuum attached directly to power sanders removes most airborne particles. For hand sanding, use a downdraft table or place a portable vacuum hose nearby. Open windows and fans help maintain airflow, but should complement, not replace, dust extraction.
- Use LED shop lights positioned at low angles to highlight surface defects.
- Attach a dust collection system to your electric sander or use a vacuum with a HEPA filter for hand sanding.
- Keep a respirator with NIOSH rating for wood dust handy and wear safety goggles.
- Arrange sandpapers, tools, and wood pieces within arm’s reach to avoid constant movement or stretching.
- Set up a workbench at waist height (around 36 inches) for comfortable sanding posture.
- Use an anti-fatigue mat to reduce strain if standing long periods.
- Store used sandpaper separately from clean sheets to speed task flow and prevent cross-contamination.
Organizing your sanding station helps improve both efficiency and comfort. Keep tools and materials grouped by function and ready to access quickly. Dedicate zones for sanding, dust cleanup, and finishing prep to avoid clutter and minimize dust spread. Prioritize a bench height that matches your body size to prevent back pain and wrist strain during longer projects. An adjustable stool or chair with good back support is useful if you prefer sitting for detailed work.
Wear a properly fitted respirator rated for fine wood dust every time you sand, even in well-ventilated spaces, to safeguard your lungs from exposure.
Good dust control and a well-lit, ergonomic workspace let you sand more precisely and safely. Expect smoother finishes with fewer reworks when you can clearly see imperfections and avoid fatigue. Ignoring these setup steps might leave you with hidden flaws on your sign’s surface and potentially cause health issues from inhaling wood dust. Equipment costs vary: basic LED lights start around $30, while dust extractors range from $150 to $400 depending on capacity. Investing in these tools improves quality and protects your health over time.
Common Sanding Mistakes and How to Avoid Them
Skipping grit progression is one of the most common sanding mistakes that leads to poor results on wood signs. Moving directly from a coarse grit like 80 to a very fine grit such as 220 leaves deep scratches unremoved. These scratches show clearly after staining or sealing, spoiling the smooth finish you want. The rule is to step through grits gradually, 80, then 120, 150, and finally 220, so each successive grit removes the scratches left by the previous one. This costs only a bit more time but makes a big difference in surface quality.
Sanding against the grain causes visible scratches and roughness that can ruin the wood’s appearance. This happens because the abrasive cuts across the wood fibers instead of smoothing along them. For example, if you accidentally sand against the grain with an 80 grit paper, you may see grooves and gouges that no amount of finer sanding will completely erase. To fix this, gently sand again with a finer grit and in the correct grain direction to blend out the damage. Prevention is better: always identify the grain direction under good light and sand along it.
Applying uneven pressure or pressing too hard can cause pressure marks or gouges that appear as dents or uneven patches on your sign’s surface. Use steady, moderate pressure and let the sandpaper do the work. Moving your hand or tool evenly in long, smooth strokes helps maintain consistent sanding. When you spot dents or gouges, stop sanding and assess the damage. Light scratches can be smoothed out by fine sanding, but deeper gouges may require filling with wood putty, drying, and re-sanding before continuing.
- Start with the coarsest grit needed but do not skip to fine grits abruptly.
- Always sand with the grain direction, especially for final passes.
- Use steady, gentle pressure to avoid creating pressure marks.
- Examine your work under raking light after each grit to catch flaws early.
- Redo sanding steps from the first scratch or mark visible to the touch or eye.
- Avoid stopping the sander abruptly on the wood surface to prevent swirl marks.
You can recognize sanding mistakes by looking closely for swirl marks, visible scratches, or uneven dull patches after each step. Checking under raking light helps reveal minor flaws before they worsen. Notice coarse scratches or uneven surfaces after moving to a finer grit? Go back to the previous grit and sand carefully again, focusing more on pressure and grain direction. Repairing mistakes early saves effort and avoids finishing over imperfections that become permanent once stained or sealed.
Safety Gear and Dust Control When Sanding Wood
Wood dust can be harmful to your health because it contains tiny particles that irritate your lungs and eyes. Even small amounts can cause respiratory issues or allergic reactions, making protection essential. You should plan on using a properly fitted respirator or dust mask rated for fine dust when sanding wood, especially if you’re working indoors or for extended periods. N95 masks are a common choice and cost about $10 to $20 for a pack of several. Make sure to wear it snugly over both your nose and mouth to block most dust particles.
Protecting your eyes and ears is just as important as shielding your lungs. Fine wood dust can cause eye irritation or injury, so always wear safety glasses that meet ANSI Z87.1 standards. Glasses with side shields offer the best coverage. If you’re using power sanders, the noise can reach 85 decibels or higher, which may damage your hearing over time. Use foam or silicone earplugs that reduce noise levels comfortably by 20 to 30 decibels. These typically cost around $5 to $15 per pair.
To reduce dust inhalation and keep your workspace clean, use dust management techniques. Attach a vacuum system to power sanders whenever possible to capture dust right at the source. Alternatively, work in a well-ventilated area, or use a portable air purifier with a HEPA filter nearby. Sweeping can spread dust into the air, so consider a vacuum designed for fine dust cleanup instead. Cover surfaces and floors with a drop cloth to make post-work cleaning easier.
- Wear an N95 or better dust mask correctly every time you sand
- Use ANSI Z87.1-rated safety glasses with side shields to protect your eyes
- Wear earplugs if sanding with noisy power tools for hearing protection
- Use vacuum attachments on power sanders to capture dust at the source
- Sand in well-ventilated spaces or outdoors to dilute airborne dust
- Place drop cloths under your work area to catch dust and debris
- Clean up with a vacuum equipped for fine dust, not just a broom
Following this checklist helps you avoid common mistakes like underestimating airborne dust or ignoring hearing safety during noisy sanding sessions. Without proper protection, wood dust can cause coughing, sneezing, eye redness, or long-term respiratory problems. Effective dust capture and wearing the right personal protective gear let you work comfortably and safely. For example, sanding on your porch with a mask and glasses while using a vacuum dust collector on your power sander cuts exposure drastically. Staying safe means your DIY wooden sign projects won’t cost you your health.
Preparing and Inspecting Wood Before Sanding
Before sanding wood for signs, thoroughly inspecting and preparing the wood ensures a smoother finish and protects the quality of your project. Address defects such as cracks, nails, and splinters, then clean and mark the surface to guide your sanding. Proper preparation reduces sanding time, prevents damage, and improves paint or stain adhesion.
Visual and Tactile Inspection
Begin by visually scanning the wood for visible defects like cracks, holes, and embedded nails. Run your hand gently over the surface; you should feel for rough spots, splinters, dents, or raised grain that may interfere with an even sanding. Look closely at edges and corners where damage often occurs. Check the wood’s moisture content if possible, as damp wood sands differently than dry wood.
This inspection step highlights any repairs needed. It also helps decide your sanding starting grit and technique. Failing to spot a nail before sanding can wreck sandpaper or your sander, and ignoring cracks may cause them to worsen under finish.
Repairing Defects
Fixing defects before sanding makes the surface uniform and avoids uneven finishes. Remove all nails, staples, or fasteners carefully using a claw hammer or nail puller. Fill holes, cracks, or deep dents with a wood filler suited to outdoor or indoor use, depending on your sign’s location. Use a putty knife to press filler into voids and smooth it level with the wood. Allow it to dry completely, dry time varies by product but usually lasts 1 to 4 hours.
Repair smaller splinters by sanding them carefully or gluing loose wood pieces with a wood glue and clamping if necessary. Large cracks might require clamps with glue to stabilize before filler is applied. Preparing defects properly eliminates dips or blemishes that show through stains or paint.
- Remove nails or staples carefully with a nail puller or claw hammer.
- Mix wood filler as directed on the package if needed.
- Apply wood filler into cracks, holes, or dents using a putty knife.
- Smooth the surface of the filler level with the wood grain.
- Allow filler to dry completely as per manufacturer’s instructions.
- Sand the dried filler lightly to make it flush with the wood.
- Glue and clamp any large splinters or cracks requiring stabilization.
Check for hidden nails by tapping the wood or using a magnet before sanding to avoid damaging your equipment or surface.
Cleaning and Marking
After repairs are complete, clean the wood to remove dust, dirt, and any residue left from filling. Use a tack cloth or lightly dampened rag to wipe the entire surface. This step prevents dust from clogging your sandpaper and smooths the wood for better sanding.
Mark the wood surface with a pencil or light marker to outline areas needing special attention, such as edges, corners, or sections with repaired spots. These marks guide your sanding sequence and help track progress. Removing previous paint, stain, or finish in problem areas beforehand also helps achieve a consistent result.
- Wipe the wood surface thoroughly with a tack cloth or damp rag.
- Inspect the surface for remaining dust or debris and re-clean if needed.
- Lightly mark areas needing extra sanding with pencil or charcoal for visibility.
- Plan your sanding sequence, starting with rougher grit on high spots or repairs.
Clean the wood after repairs and before sanding; overlooked dust will scratch the finish and reduce adhesion of stains or paints.
Step-by-Step Action Plan for Sanding Wood Signs
Follow these key steps to sand your wooden signs effectively and get a smooth surface ready for paint or stain.
- Before you start: Inspect the wood for knots, cracks, or rough spots and gather the right sandpaper grits (start with 80 or 120, finish with 220 or higher). Clear your workspace and set up dust control.
- Initial sanding: Use coarse grit (80 or 120) to even out the surface. Stop when the wood feels level and rough patches are gone.
- Detail sanding: Switch to a medium grit (150-180) and sand edges, corners, and any carved details by hand or with a detail sander until smooth to the touch.
- Final sanding: Use fine grit (220 or above) for a smooth finish. Run your hand over the surface; it should feel silky with no raised grain.
- Clean up: Wipe down the surface with a damp cloth or tack cloth to remove dust. Inspect for any missed rough spots and sand them lightly if needed.
- Safety check: Make sure your dust collection is off only after cleanup and wear a mask whenever sanding to reduce inhaled dust.
- Ready for finish: Your wood sign should be smooth, free of scratches, and clean enough for paint or stain. Test a small area with your finish to confirm.
Frequently Asked Questions
How Do I Prevent Swirl Marks When Sanding Wood Signs?
Sand always with the grain, not against it. Swirl marks usually happen when you sand in circular motions or against the grain, especially with power sanders.
Can Sanding Wood Signs Too Much Cause Damage?
Yes, over-sanding can thin the wood and round edges excessively. Stop sanding once all imperfections and mill marks are gone to avoid weakening the sign.
What Grit Sandpaper Is Best for Sanding Painted Wood Signs?
Start with a finer grit like 180 to avoid removing paint layers. Use light pressure for repainting or touch-ups and progress to 220 if needed for smoothness.
How Do I Fix Sanding Burn Marks on Wood Signs?
Lightly sand the area immediately with a finer grit, like 220. Burning happens from too much friction or pressure, so slow down and don’t press too hard.
Can I Sand Wood Signs Without Removing Knots?
Yes, but knots absorb finish unevenly and can bleed. Consider sealing knots first or sanding around them for better results.
Is It Necessary to Sand Between Coats of Finish on Wood Signs?
Lightly sanding between coats helps adhesion and smoothness. Use very fine grit (320 or higher) for best results without removing the previous layer.
Wrapping Up
Sanding wood signs well shapes the success of your final finish by creating a smooth, clean surface that holds paint or stain evenly. Take your time on details and finish sanding thoroughly. Your next step should be choosing and applying your stain or paint to bring out the best look in that well-prepared wood.