How to Install Floating House Numbers: A Complete Guide for Easy, Professional Results
How to install floating house numbers is simple when you use the right tools and follow a clear process. Start by choosing a visible location and securing the numbers with standoff hardware for that clean, modern look. Using a level and template helps ensure your numbers are straight and evenly spaced for easy viewing.
Key Takeaways
- Select house numbers between 4 to 8 inches tall for optimal visibility from the street.
- Dark numbers on light walls create contrast, making the address easy to read.
- Space each number about 1.5 to 2.5 inches apart for a balanced appearance.
- Use a level and tape a paper template to mark drill holes precisely before installation.
- Choose long screws and spacers for floating mounts to create that raised effect.
- Drill to a depth of 1 to 1.5 inches when anchoring into studs to secure hardware firmly.
What Are Floating House Numbers and Why Use Them?

Floating house numbers are individually mounted numbers that stand off from your home’s exterior surface, creating a three-dimensional effect. Unlike flush-mounted numbers which lay flat against the wall, floating numbers use standoff hardware to “hover” about a half-inch to an inch away from the surface. This design adds depth and shadows, making the numbers more visible and distinctive. The effect is clean and modern, lending a contemporary flair to your home’s curb appeal.
The aesthetic benefit of floating house numbers comes from their ability to catch the light and cast subtle shadows, which significantly improve visibility from the street. For example, on a light-colored wall, bold floating numbers in dark metal or acrylic stand out with a striking contrast. The standoff space also gives a sense of dimension that flush-mounted numbers lack, contributing to a polished, upscale look that suits many modern architectural styles. This makes floating numbers a preferred choice for homeowners who want their address visible yet stylish.
Choosing floating numbers involves selecting hardware like standoffs, which are small metal or plastic spacers included with many modern house number sets. These standoffs attach the numbers to the wall using anchors or screws, allowing for secure installation on diverse surfaces such as brick, wood, or stucco. The depth created by standoffs typically ranges from 0.5 to 1 inch, enough to produce that clean floating appearance without the numbers feeling disconnected from the home’s facade.
Floating house numbers also allow for flexible placement and font choices that emphasize style without sacrificing function. Numbers sized between 6 to 8 inches tall balance readability and aesthetic appeal well on typical home exteriors. For Craftsman or modern homes, using sharp, geometric fonts like Neutraface can complement architectural lines and overall design. The combination of size, font, and depth ensures your numbers make a confident statement and remain easy to read from the street, especially when paired with good lighting.
One consideration when selecting floating numbers is the wall material and weather exposure. Installing on brick or stone requires durable anchors and possibly longer standoffs, while on wood siding, standard screws with spacers are usually sufficient. Weather conditions matter too; some floating number styles that use hooks or ropes for mounting are less suitable for high-wind areas. The proper hardware and installation ensure the numbers stay firmly attached over time despite weather changes.
The cost for floating house numbers varies by material and size but generally starts around $30 to $100 for a set of post-mounted metal or acrylic numbers, including standoffs. This price includes the hardware necessary for the floating look, which makes installation straightforward for DIY enthusiasts. The result should be a set of numbers that look professionally fitted and last years without fading or damaging the wall.
Tools and Materials Needed for Installation
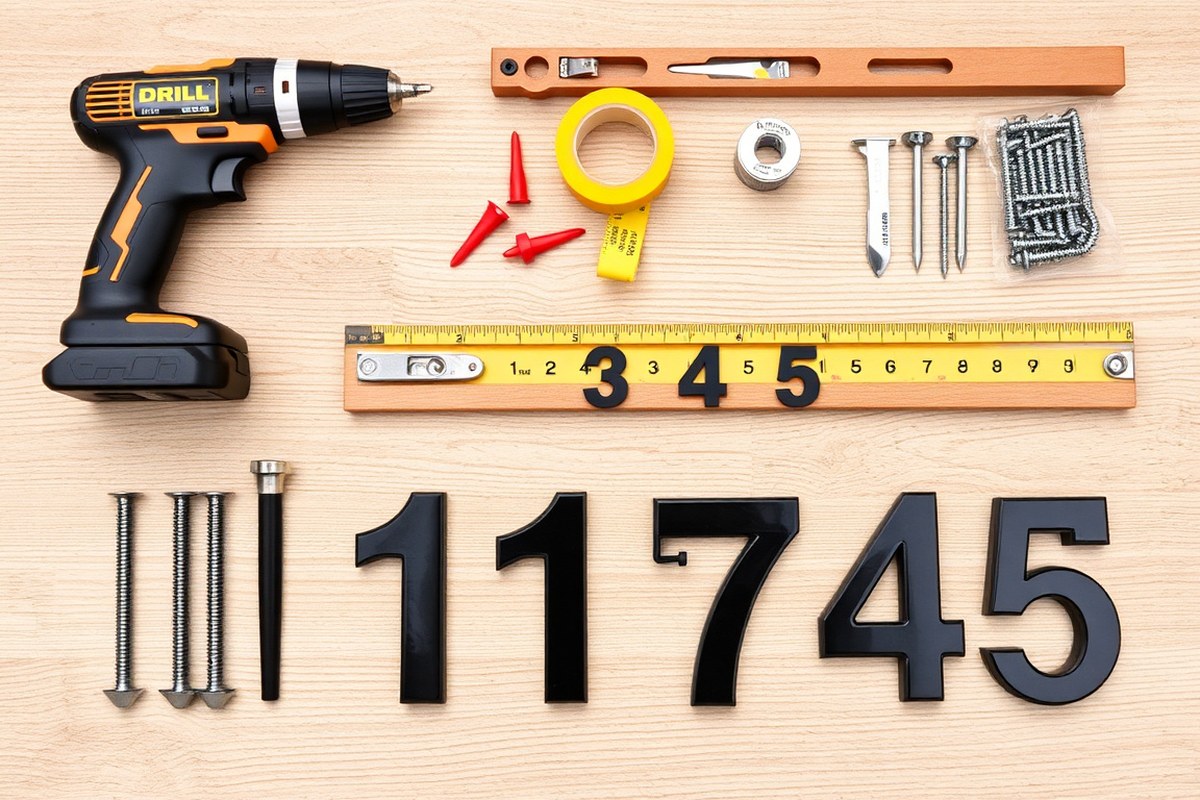
Before you start installing floating house numbers, gather all necessary tools and materials to ensure a smooth process. You’ll need a drill equipped with the correct drill bit size, check the instructions that come with your numbers to match the bit to the anchors supplied. Typically, floating numbers use long screws combined with spacers to create the “floating” effect, so your hardware package should include these components along with the mounting bracket.
The mounting bracket is an essential part of the installation. It should be rigid enough to avoid flexing and securely support the numbers. The bracket attaches to the wall first, using anchors suitable for the surface you’re working on, whether it’s brick, wood, or vinyl siding. Because vinyl siding presents a challenge, choose a mounting bracket designed specifically for this surface to avoid damage and achieve a secure fit. Spacers slide over the screws or studs after the bracket is mounted; they keep the house numbers set away from the surface by about 1.5 to 2.5 inches.
The house numbers themselves typically measure between 4 and 6 inches tall and 1 to 3 inches wide. The hardware must align with these dimensions to hold the numbers firmly. Using the included template, you will mark and drill holes precisely where the anchors need to go. This step is critical; if the holes don’t line up correctly, the mounting bracket won’t fit, and the spacing will look unprofessional.
- Drill with a masonry or wood bit matching the anchor size provided
- Anchors suitable for your wall surface, plastic for drywall, masonry for brick, or specialized fasteners for vinyl siding
- Mounting bracket made from a rigid, non-flexing material
- Long screws and spacers included with the floating number set
- Template for marking drill holes accurately
- Level or measuring tape to ensure proper alignment and spacing
- Soft cloth or gloves to handle and protect the finish on metal numbers
After drilling holes and inserting anchors, attach the mounting bracket firmly with long screws. Then slide the spacers over the studs or screws before pushing the numbers into place. Each number should fit snugly into the bracket and align for easy street-side reading.
Always verify your drill bit size and anchor type before drilling; using the wrong size can weaken the hold and damage your exterior wall.
How to Choose the Best Location and Layout for Your Numbers
Choose a location for floating house numbers where they are clearly visible from the street without obstructions. Position the numbers at a height that a person standing on the sidewalk can easily see, usually above eye level but within reach for installation. Align numbers using a layout that suits your home’s orientation and available wall space, with spacing that balances readability and aesthetics.
Optimal Height and Visibility Guidelines
Mount floating house numbers at least 5 to 6 feet above the ground for optimal visibility to drivers and pedestrians. Numbers should be tall enough to read from a distance; 6-inch tall numbers are recommended to ensure street readability. Avoid placing numbers too low where landscaping or parked cars can block them. Consider the direction your house faces, if it looks south, mounting numbers on the right side of the door or facade improves sight lines for oncoming traffic from the street.
Choose a flat, uncluttered background for mounting so the numbers stand out. Avoid excessive glare by not placing numbers under overly bright lights or reflective surfaces. Visibility matters most during the day and at night, so adequate lighting near your chosen spot can boost readability after dark.
Layout Styles: Horizontal, Vertical, and Diagonal
Horizontal layouts suit most front doors, walls, or porch facades by placing numbers side by side. This format is easy on the eyes and matches street numbering patterns familiar to most people. Vertical layouts become ideal when mounting space is narrow or tall, such as on a column, mailbox post, or narrow siding. Arranging numbers top to bottom can also fit better with modern architectural styles or minimalistic designs.
Diagonal layouts are less common but useful near angled surfaces or corners that face a street diagonally. They can improve sight lines where a flat approach is impractical. In some neighborhoods, alternating the side of the house numbers helps improve address visibility due to unique property orientations. Consider your house’s angle toward the street and choose a layout that prevents numbers from obscuring architectural details or windows.
Spacing for Balance and Readability
Allow at least 1.5 to 2 inches of space between each number to maintain clarity and prevent crowding. For longer numbers, increase spacing slightly to ensure digits don’t blend visually. Your spacing should factor in wall space and any nearby features like windows or door frames; avoid placing numbers too close to these elements where readability may suffer.
Spacing also depends on how many digits your address has, three or four-digit addresses need more total space to avoid looking cramped. Don’t hesitate to adjust spacing for uneven layouts where numbers wrap vertically or diagonally. Maintain consistent spacing throughout the sequence for a professional, balanced appearance that improve curb appeal and ensures passersby can quickly read your address from the street.
How to Use the Template and Mark Drill Holes Accurately
Using the template that comes with your floating house numbers makes marking drill holes straightforward and accurate. Carefully aligning and leveling the template ensures your numbers sit perfectly straight and even. Mark drill holes precisely by following the template’s holes with a pencil, paying close attention to spacing and level lines to avoid any mistakes.
Leveling and Centering the Template
Positioning the template correctly is key to making sure your house numbers look balanced and neat. Start by finding the center of your intended location, usually at eye level or just above. For sets with an odd number of digits, center the middle number template exactly over this point. If your numbers come separately, measure the entire length and mark the midpoint.
Use a reliable bubble level to hold the template perfectly horizontal. Hold the level across the top edge of the paper template and adjust it until the bubble is centered. For brick or rough surfaces, tape the template securely with painter’s tape to prevent shifting during marking. Confirm the level several times before proceeding with marking to avoid crooked installation.
Marking Holes Precisely
Accurate hole marking means your numbers will mount flush and evenly spaced. Use a pencil to poke marks through the template’s designated drill holes. Make light yet clear pencil dots to avoid confusing multiple markings. After marking, remove the template carefully without smudging your dots. Follow these steps to ensure precise marking:
- Double-check your level mark on the wall and tape the template securely.
- Use a pencil to mark the center of each standoff hole visible through the template.
- For multiple numbers, space them evenly by measuring distances to keep consistent gaps.
- Remove the template gently to avoid erasing the marks.
- Use painter’s tape to cover marks if your wall surface flakes easily.
Set your drill bit with tape or a Sharpie mark matching the depth of your wall anchors before drilling. This helps keep holes consistent and prevents drilling too deep or too shallow.
Common Alignment Mistakes to Avoid
Not using a level or rushing the marking process can lead to crooked or uneven numbers. Skipping the tape step on uneven surfaces often causes the template to shift during marking, resulting in uneven holes. Double-check that the template’s top edge matches your level line and confirm the center point to avoid misaligned installations.
A common issue is failing to account for spacer length included with floating numbers, which usually creates a gap between ½ and 1 inch from the wall. Forgetting this can make numbers appear off or inconsistent in depth. Use the included spacers so your numbers float perfectly without guesswork.
Correct Drilling Techniques for Different Wall Surfaces
Choosing the right drill bit size and hole depth depends on the wall material and the type of anchors used for your floating house numbers. Masonry walls require specific masonry bits and deeper holes for anchors, while wood and siding allow for smaller bits and shallower holes. Correct drilling ensures a secure fit and prevents damage to your wall or the mounting hardware.
Drilling into Masonry and Brick
Use an 11/64-inch or 3/16-inch masonry drill bit when drilling into brick, concrete, or stucco surfaces. Drill holes slightly deeper than the length of your wall anchors, usually about 2 to 2.5 inches deep, to allow room for the anchor and epoxy adhesive if used. Slow and steady drilling with a hammer drill is essential to avoid cracks in masonry and to create clean holes for a secure fit.
After drilling, clean out dust from the hole before inserting anchors or epoxy. Apply a two-part epoxy adhesive either inside the hole or on the stud ends for extra strength, especially in exposed or high-vibration areas. Let the epoxy cure fully before mounting the numbers, which can take several hours depending on the product.
Drilling into Wood and Siding
For wood surfaces, a standard drill bit sized to match the anchor or screw diameter works best, commonly between 1/8 inch and 3/16 inch. Drill holes just slightly deeper than the total length of the screw or stud, about 1 to 1.5 inches, to ensure the fastener fully seats without splitting the wood. When installing on vinyl or metal siding, drilling through the siding and optionally into the sheathing or studs behind improves stability.
Carefully avoid drilling too deep into siding to prevent water intrusion or damage to underlying materials. Use anchors designed for the siding type, plastic expansion anchors for vinyl or metal, and wood screws directly into wood. If mounting on hollow siding like vinyl, use toggle anchors or screws designed for hollow walls to maintain a strong hold.
Anchor Installation and Tips
Match the anchor size to the drill bit; if the anchor’s outer diameter is 3/8 inch, drill holes exactly that size for a snug fit. Insert anchors flush with or slightly below the surface to avoid protruding hardware that affects the floating number’s appearance. When using epoxy, coat the anchor’s exterior lightly before insertion for added adhesion.
Secure anchors completely before attaching the floating numbers. For masonry, hammer the anchors gently into place after drilling and cleaning holes. In wood or siding, screw anchors or fasteners directly into pre-drilled holes but do not overtighten, which can strip the hole or warp the siding.
Drill pilot holes before installing anchors in wood or siding to prevent cracks or splits, and always clean dust from drilled holes to improve anchor grip.
Step-by-Step Installation of Floating House Numbers
Installing floating house numbers requires careful attention to attaching studs and spacers correctly, securing the numbers firmly, and leveling the final placement for a polished look. The threaded studs on the back of each number fit into pre-drilled holes in your mounting surface, spaced precisely to ensure visibility and aesthetic balance. Using spacers creates the signature floating effect by holding each number slightly off the wall, adding depth and shadow without complicated hardware.
Start by placing the studs and spacers onto the numbers and aligning them with your marked drill holes. Press the numbers onto the wall so the studs slide into their holes smoothly. Secure the numbers by tightening screws from inside the wall space if accessible, or use a specified adhesive for surfaces where screws can’t be concealed. Proper leveling and consistent spacing between digits help achieve the professional, modern look floating numbers are known for.
- Secure the threaded studs into the holes on the back of each house number. These studs usually come with floating numbers and need to be tightened either by hand or with pliers. Handle them carefully to avoid scratching the finish.
- Place spacers onto the studs if they aren’t pre-attached. Spacers create the gap between the number and the wall. Be sure they sit evenly to keep each number parallel to the surface.
- Insert the studs into the drill holes on your wall. Line up each number with your pre-marked holes and gently push the studs through. Some resistance is normal as the spacer holds the digits slightly away from the wall.
- Secure the studs from behind the wall. Access the backside of the wall cavity, or use mounting nuts if included, turning clockwise until snug. When access to the wall’s backside is limited, using a durable outdoor-rated adhesive suitable for your surface provides a reliable way to fasten the numbers.
- Check the level and spacing between numbers. Use a small bubble level to confirm horizontal alignment. Adjust the numbers by loosening and retightening studs or repositioning spacers if needed.
- Final inspection for a stable, clean finish. The numbers should sit flush with consistent gaps and not wobble. Visibility should be clear from the street, ensuring compliant placement if required by local codes.
Using screws to secure the numbers offers durability, especially in areas with harsh weather. Adhesive works best on smooth, sheltered surfaces but may require curing time of 24 to 48 hours before subjecting the numbers to strong winds. Proper installation generally costs between $10 and $50 in materials, depending on the number size and spacer style chosen. Misaligned or loose numbers not only look unprofessional but also risk falling and damage, so taking your time to level and tighten is essential.
Common Mistakes to Avoid and How to Fix Them
Misaligned floating house numbers are one of the most common installation errors. This happens when the template isn’t straight, or the measurements between holes are off. To fix misalignment, first double-check that your level is correctly placed before drilling. Numbers mounted crooked need removal first, then fill old holes with exterior-grade filler before drilling new, level holes. Use a pencil and a carpenter’s level or laser level to mark exact positions for drilling each time.
Using the wrong drill bit size can lead to loose numbers or damage to the mounting surface. Anchor screws that wobble in oversized holes require removing the number, filling the hole with proper filler, or switching to a larger anchor. For masonry walls, a masonry drill bit sized correctly for your anchors is essential to ensure a snug fit. When numbers feel loose after installation, check that you used the right anchors for your wall type, plastic sleeve anchors for siding or brick anchors for stone walls, and tighten screws firmly but not so much that you risk cracking the numbers or wall.
- Measure twice, drill once using a level to ensure even spacing and alignment.
- Match drill bit size to anchors and screws; use masonry bits for brick or stucco.
- Protect the finish on numbers with painter’s tape before drilling to avoid scratches.
- Use silicone sealant behind mounting brackets to prevent water damage and secure attachment.
- Scratched or chipped numbers benefit from a fine-grit sanding pad and touch-up paint matching their finish.
- Fill old or misplaced holes with exterior filler to prevent moisture intrusion.
- Allow filler or paint touch-ups to cure according to manufacturer instructions, typically 24-48 hours.
Scratches or damage to the numbers often occur during drilling or handling. To avoid this, apply painter’s tape on the number’s surface where screws will be placed. This tape protects the paint or metal finish from the drill bit’s friction. When damage occurs, gently sand the spot with 220-grit sanding pad and apply touch-up paint made for metal or plastic, based on your number’s material.
Numbers that loosen over time might signal that the mounting hardware is inadequate or the wrong type was used for the wall. Regular checks every six months can help you spot loose attachments early. Adding a thin bead of silicone sealant on the back of the mounting bracket can also improve adhesion and create a watertight seal, preventing moisture from compromising the wall or mounting hardware.
Maintenance, Removal, and When to Call a Professional
To keep your floating house numbers looking sharp and ensure they last, clean them every few months using a soft cloth and mild soap with water. Avoid abrasive cleaners or harsh chemicals that can damage finishes, especially on metal or painted numbers. For tougher dirt or bird droppings, gently scrub with a soft-bristle brush. Dry completely to prevent moisture buildup that could cause rust or fading. Inspect the numbers at least once a year to check for loose screws or mounting studs and tighten them as needed to avoid wobbling or falling.
Removing floating numbers is generally straightforward but depends on how they were attached. Acrylic or metal numbers fixed with silicone will require carefully sliding or prying them off, using a rubber mallet to tap the studs gently can help ease them out without damage. Removing numbers sealed with strong adhesive or epoxy may require extra effort and could damage the wall surface. For repainting, remove the numbers fully, sand or clean them, and let them dry before applying new paint to maintain a crisp appearance.
Hiring a professional is wise if your exterior wall is made of fragile or unusual materials like thin glass, decorative tile, or stone veneer, which can crack or chip with DIY drilling. Also, call an installer if you notice electrical wiring or plumbing near the intended holes. Unsure about the mounting hardware compatibility or concerned about large holes or damage from previous installation? A pro can secure the attachment and provide a clean finish. Professional installation costs vary but typically start around $100, which may prevent costly repairs from incorrect placement or damage.
As a maintenance checklist, clean with mild soap every 3 to 6 months, inspect mounts annually, tighten fasteners if loose, and remove and repaint if paint peels or fades. Avoid applying silicone if you want easy removal later; opt for mechanical mounts instead. Use a rubber mallet gently when reinstalling to protect both the numbers and wall.
To avoid damaging your wall during removal, use a rubber mallet to gently tap the studs; never force the numbers off as this could break the mounting holes or the numbers themselves.
Step-by-Step Action Plan
Follow these clear steps to ensure your floating house numbers are installed straight, secure, and stylish.
- Before you start: Gather all necessary tools and materials, including a drill, level, measuring tape, template, anchors, and floating numbers. Double-check you have everything to avoid interruptions.
- Day 1: Select the ideal location with good visibility and space. Use the template to mark drill holes precisely and verify alignment with a level.
- Day 2: Drill holes carefully according to your wall surface type, using the right drill bit and anchors. Test each anchor for a snug fit before proceeding.
- Day 2 (after drilling): Attach mounting hardware to the numbers and secure them firmly to the wall using the drilled holes. Confirm each number feels solid and does not wiggle.
- Day 3: Clean the area around the installation and inspect your work from different angles to ensure even spacing and a professional look.
- After 2 weeks: Check all numbers again for stability and tighten any loose mounts to maintain durability through weather changes.
Frequently Asked Questions
Can I Install Floating House Numbers on Brick or Stone Surfaces?
Yes, you can install them on brick or stone using masonry drill bits and anchors for secure attachment. Ensure you use a hammer drill if needed for harder surfaces to avoid damaging your wall or numbers.
Do Floating House Numbers Work Well in All Weather Conditions?
Floating house numbers are generally weather-resistant but check the product’s material and finish. Avoid hook-type numbers outdoors in harsh climates to prevent damage or loosening over time.
How Far Should Floating House Numbers Stand Off from the Wall?
Typically, standoffs space numbers about 1/2 to 1 inch from the surface, creating a floating effect. This gap provides shadowing and depth, improving visibility and curb appeal.
Is It Necessary to Use a Level When Installing Floating House Numbers?
Yes, using a level is essential for a straight, professional look. It helps the template align properly, ensuring numbers don’t appear crooked or uneven on your exterior wall.
Can I Paint Floating House Numbers After Installation?
Painting is possible but best done before installation to avoid drips on your wall. Choose paint suitable for metal or plastic surfaces, depending on your number’s material.
What Do I Do If My Floating House Numbers Don’t Stick Well to the Wall?
Check if the anchors and screws are tight and appropriate for your wall type. You may need stronger anchors or professional help for uneven or porous surfaces.
The Bottom Line
Floating house numbers add a sleek, modern touch to your home’s exterior while improving visibility. Getting the installation right hinges on careful measurement, using the correct tools, and securely mounting the numbers to your wall type. Start by gathering your materials and mapping your layout today to give your curb appeal an easy upgrade that lasts.