How to Install a Sign Post: A Complete Guide with Practical Steps
How to install a sign post starts with setting the right depth and choosing the proper material for durability and stability. Most posts should be buried at least 2 to 3 feet deep, depending on their height, with careful site preparation to ensure a level and secure installation. Starting by marking the post location and digging a hole one-third the post length plus 6 inches creates a strong foundation that resists shifting.
Key Takeaways
- Set sign posts 2 to 3 feet deep for standard soil conditions to ensure stability.
- For posts taller than 8 feet, bury at least 3.5 feet deep to maintain strength and visibility.
- Use gravel in the hole bottom to improve drainage and extend post lifetime, especially in wet climates.
- Concrete foundations provide extra stability and allow shallower digging, usually 1 to 2 feet deep.
- Choose material based on environment: metal posts resist rust, while wood offers easy customization.
- Posts for signs wider than 48 inches require two posts to prevent swaying and maintain visibility.
What Depth and Position Should a Sign Post Have?
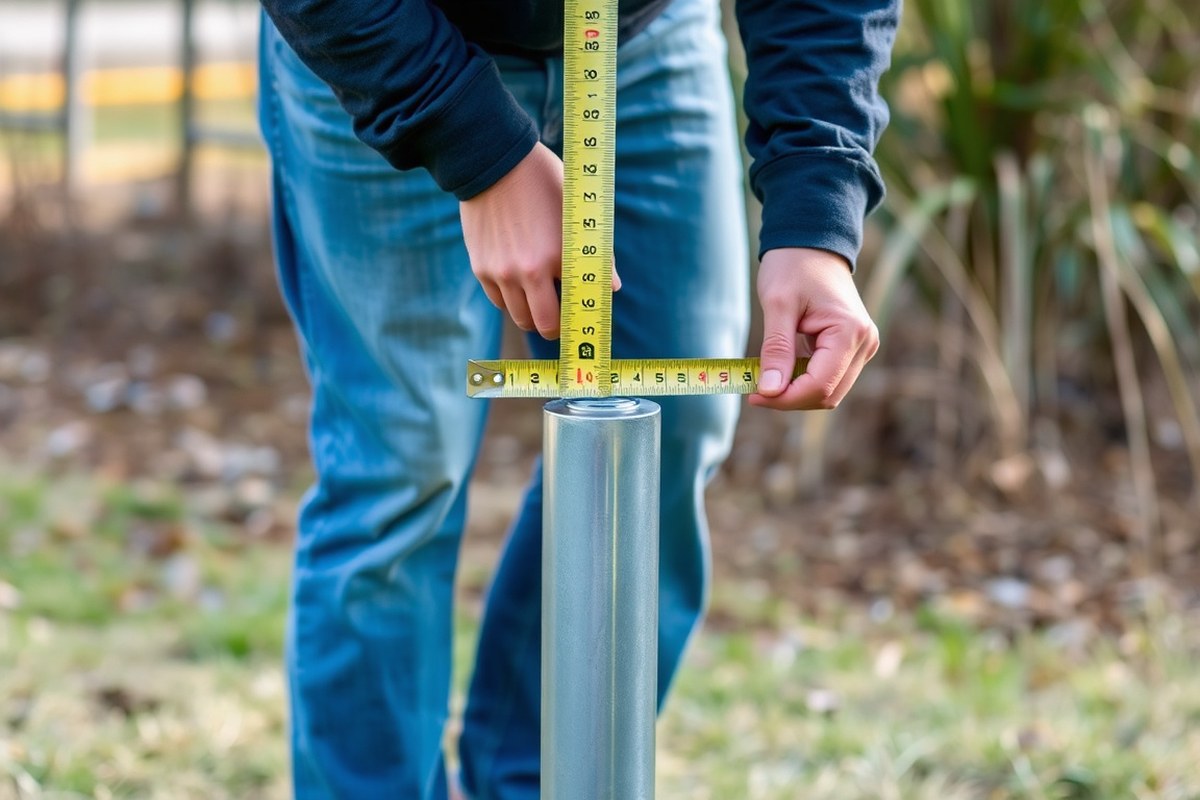
Sign post depth is critical for ensuring stability and meeting typical installation standards. The key rule is to bury one-third of the post length plus an extra 6 inches, which prevents leaning or damage from wind and ground pressure. For example, a 6-foot post should be set about 2.5 to 3 feet deep, leaving roughly 3 to 3.5 feet visible above ground to support standard signage height and visibility.
Different post lengths require different burial depths. A 4-foot post normally needs 1.5 feet buried, so about 2.5 feet stays above ground. Posts 8 to 10 feet tall require at least 3.5 feet underground, leaving 4.5 to 6.5 feet clear for visibility. U-channel posts often require a minimum 2-foot embedment regardless of length. This ensures the post withstands external forces without excessive movement.
Soil and climate greatly influence the ideal depth. In freeze-thaw areas, some installers advise digging slightly deeper and setting a 2- to 3-inch gravel layer below the post to aid drainage and reduce frost heave. High-rainfall locations also benefit from a similar gravel base, minimizing water saturation around the post base that could lead to corrosion or rot in wood posts.
Calculating the burial depth works like this: for a 9-foot post, one-third is 3 feet, plus 6 inches gives 3.5 feet to bury. You mark this depth on the post before digging the hole. The hole diameter should be about three times the post width to allow enough space for concrete if used, increasing stability. Keep a small 2-3 inch gap just below grade for water to collect and drain rather than saturate the soil.
Following these depth rules helps balance stability with practicality. Posts set too shallow risk shifting or falling over time due to wind or soil erosion. Posts buried deeper than 3.5 feet are harder to remove or repair, which may create added costs if future changes are needed. Using gravel and concrete in the hole may add $30 to $50 in materials but improves lifespan, especially in challenging soil or wet climates.
Precisely measuring and marking the post before installation avoids mistakes. Use a post-hole digger to get an even hole depth aligned with your mark. Carefully tamp gravel at the base if needed, then set the post so your visible height matches local standards, ensuring your sign remains clearly seen and properly fixed.
How to Choose the Right Type of Sign Post Material
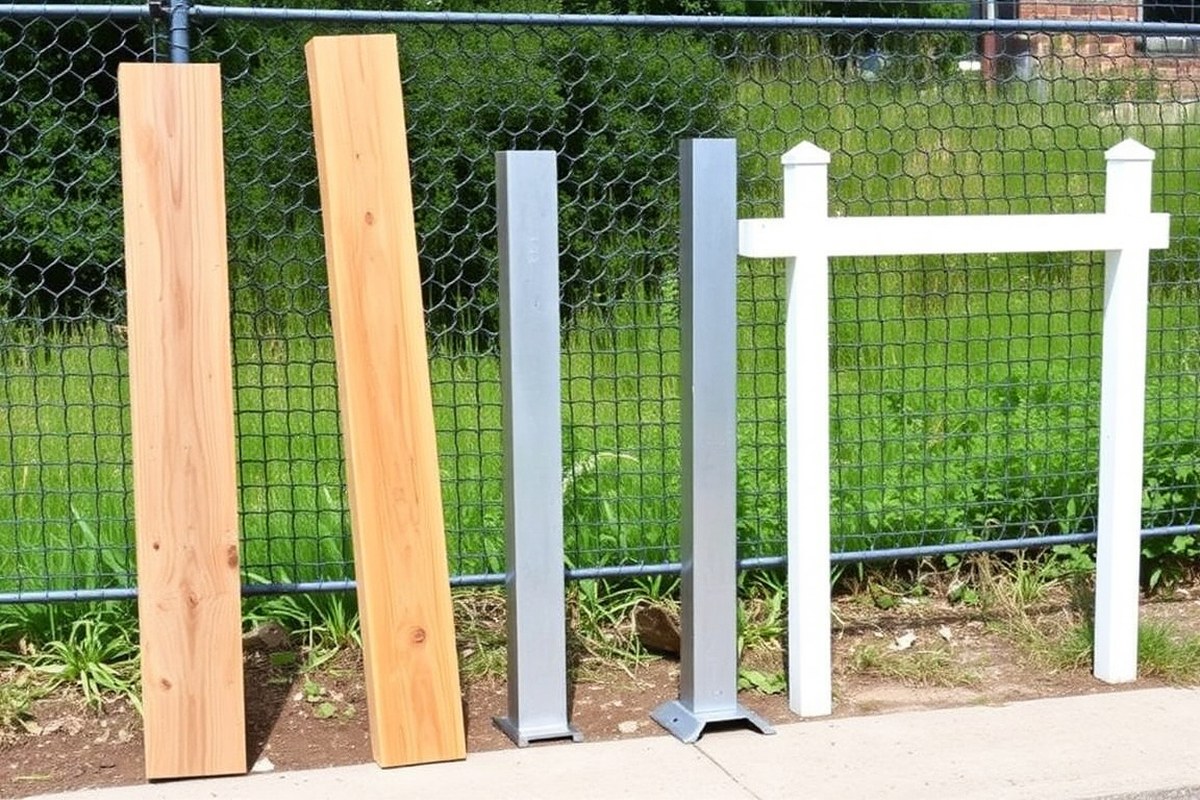
Choosing the right sign post material depends mainly on your sign’s size, the local environment, and your budget. 4×4 wood posts work well for signs less than 10 square feet and offer an economical and easier installation option. Steel posts, especially galvanized or heavy-duty U-channel types, provide superior durability and impact resistance, essential for areas with strong wind or potential vehicle impact.
Wood posts are popular because they are affordable and straightforward to install. Treated wood resists rot and insect damage but still may degrade faster in wet or humid environments. Steel posts, often made from heavy-duty 12-gauge rail steel or galvanized to resist corrosion, flex under high wind loads to avoid shearing. Some steel posts meet federal breakaway standards, meaning they bend or break away upon impact to reduce harm in roadside situations. Below is a table comparing common sign post materials, their advantages, disadvantages, and typical use cases.
| Material | Pros | Cons | Recommended Uses |
|---|---|---|---|
| 4×4 Treated Wood | Low cost, easy to install, widely available | Less durable in moist or termite-prone areas, may warp or rot over time | Small to medium signs under 10 sq ft, low to moderate wind regions |
| Galvanized Steel U-Channel | High durability, corrosion resistant, meets breakaway specs, flexes under wind load | Higher initial cost, heavier to handle and install | Larger signs, high wind zones, roadside signs requiring breakaway safety |
| Heavy-Duty Steel (12-Gauge Rail) | Strong impact resistance, absorbs kinetic energy, very durable | Most expensive, requires tools like a post driver, heavier | High-impact areas, repeated impact zones, permanent installations |
When deciding between wood and steel, size and exposure matter most. For a sign under 10 square feet in a low-impact area, 4×4 wood posts usually suffice and keep costs down. For signs exposed to heavy winds or near roadways where impact is possible, galvanized or heavy-duty steel posts are better. They maintain integrity longer and align with safety requirements such as those set by the Federal Highway Administration for breakaway posts near roads.
Always check the local weather and impact conditions before choosing steel over wood to avoid over- or underbuilding your sign support.
Keep in mind that steel posts weighing about 3 pounds per foot or less meet breakaway standards, a key consideration for roadside safety. While steel requires more effort and equipment for installation, its extended lifespan and strength can reduce maintenance and replacement costs over time. Treated wood offers an easier and cheaper start but expect potential repairs or replacements in harsher climates.
Preparing the Site and Tools Before Installation
Before you start installing your sign post, gather the right tools and materials based on the surface you’ll be working with. For soil or grass, you’ll need a post-hole digger, a level, a tamper, concrete mix, and your sign post. For harder surfaces like asphalt or concrete, you’ll add a drill with masonry bits, anchor bolts, and possibly a hammer drill. Having everything ready avoids delays and helps maintain accuracy throughout the project.
Check for underground utilities by calling the free service at 811 at least a few days before digging. This call ensures utility companies mark their lines, reducing the risk of striking electrical, gas, or water pipelines. Digging without this step is unsafe and can lead to costly damages or injury.
Once you’ve confirmed the site is safe, use a tape measure and marker to find and mark the exact location for your sign post. Place the post holder or flange centered over your mark to help guide your work. The marked spot should provide clear sightlines to avoid blocking views or violating sight distance rules.
- Post-hole digger or drill with masonry bits, depending on the surface
- Level (magnetic alignment level recommended for accuracy)
- Tamper for compacting soil or gravel around the post base
- Concrete mix suitable for outdoor use
- Marker or spray paint to outline hole location
- Protective gear such as gloves and safety glasses
- Measuring tape for precise depth and placement measurements
Begin site preparation by clearing debris and vegetation at the installation point to ensure the ground is level and stable. Mark exactly where the post will stand, double-checking measurements to maintain proper alignment. Use a tamper to compact soil or gravel if needed before digging the hole. This preparation ensures the post base remains firm and stable once installed.
Dig holes with straight, smooth walls to the correct depth, generally around one-third of the post length plus 6 inches for gravel drainage. Confirm depth and vertical alignment continuously with the level. Proper hole preparation extends the life of your sign post by preventing shifting or tilting caused by poor soil conditions or improper backfill. Take your time with these steps, and avoid rushing through site prep for lasting results.
Installing a Sign Post in Soil or Grass
Installing a sign post in soil or grass involves either driving it directly into the ground or digging a hole deep enough to secure it firmly. Direct drive works best for lightweight posts in softer soils, while digging a hole suits heavier or taller posts requiring better stability. Proper bracing and leveling during installation prevent shifting and ensure the post remains vertical and secure.
Digging the Hole and Preparing the Base
Digging a hole to the right size is essential for post stability. A good rule is to dig to at least one-third to one-half of the post’s total height. The hole should be wide enough, typically about three times the width of the post, to allow for proper backfill and avoid soil heaving. Preparing the base of the hole with gravel improves drainage and reduces the risk of water damage to the post or concrete.
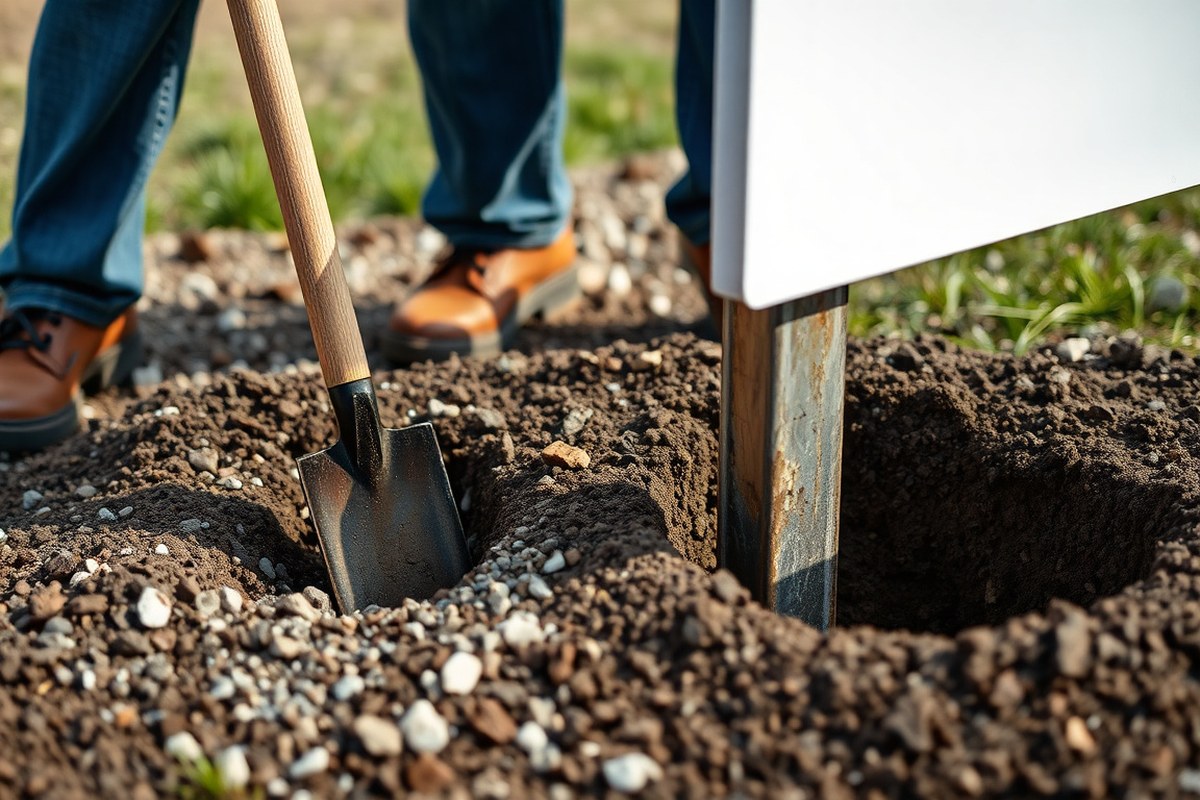
Start by removing grass and topsoil. Use a post hole digger or shovel to reach the required depth. At the bottom of the hole, add 3 to 4 inches of compacted gravel to promote drainage. This gravel layer prevents water from pooling around the base, which can weaken both the post and any surrounding concrete.
Setting and Aligning the Post
You can drive some sign posts directly into soft soil using a manual or pneumatic post driver. This method suits U-channel or similar lightweight posts. Before using a post driver, clear the ground around the desired spot and mark the exact vertical line. Use safety gear like gloves and eye protection, and ensure no bystanders are nearby.
For hole installations, set the post upright in the gravel-lined hole. Use a carpenter’s level to check the post’s vertical alignment (plumb). Brace the post immediately by installing temporary supports or stakes angled against the post and secured with straps or wire. This keeps the post steady during backfilling or concrete curing.
Adding Gravel and Backfill for Stability
Backfilling the hole solidifies the post installation. After placing the post and confirming it is level, begin by adding more gravel around the post base to maintain drainage. This helps prevent water-related deterioration. Then fill the rest of the hole with compacted soil or concrete, depending on stability needs.
For soil backfill, add soil in layers, tamping down each layer to eliminate air pockets. For concrete, pour it evenly, ensuring it fills the hole completely without gaps. Avoid disturbing the post position while backfilling. Keep bracing in place until the concrete cures fully, usually 24 to 48 hours. Proper bracing prevents wind or impacts from causing lean or loosening.
- Clear the installation site of grass, roots, and debris.
- Dig a hole at least one-third the height of the post and three times its width.
- Place and compact 3-4 inches of gravel at the bottom for drainage.
- Select direct drive if soil is soft and the post is lightweight; use a post driver carefully with safety gear.
- Set the post vertically in the hole or direct into the ground; use a level to ensure it is plumb.
- Brace the post with stakes and straps to keep it steady before backfilling.
- Backfill with gravel, compacted soil, or concrete as required, tamping in layers if using soil.
- Allow concrete to cure 24, 48 hours while maintaining braces; remove braces when dry and stable.
Using Concrete Foundations for Permanent Stability
Setting sign posts in concrete offers permanent stability, with recommended depths between 1 and 2 feet depending on soil conditions. To avoid water damage, a gravel base should be laid for drainage before pouring concrete. Concrete needs at least 24 to 48 hours to cure before the post can handle weight, and waiting 72 hours before mounting the sign ensures maximum strength.
Mixing and Pouring Concrete Correctly
Begin by mixing a standard concrete blend in a 1:2:4 ratio of cement, sand, and aggregate. Add water gradually until you achieve a workable consistency, avoiding excess water that can weaken the mix. In colder climates, using a concrete accelerator helps speed up curing time.
Pouring concrete over a gravel layer about 3 to 6 inches deep is essential. This gravel base improves drainage, preventing water accumulation that causes concrete deterioration. The gravel also acts as a stable foundation that limits ground movement around the post.
- Mix cement, sand, and aggregate in a 1:2:4 ratio in a wheelbarrow or mixing tub.
- Add water slowly while mixing until the concrete is thick but pourable.
- Excavate the hole to the required depth and add 3 to 6 inches of gravel for drainage at the bottom.
- Place the post into the hole on top of the gravel bed.
- Use a form tube around the post if needed to shape the concrete properly.
- Pour the concrete mix evenly around the post, filling the hole up to ground level.
- Tamp down the concrete to eliminate air pockets and ensure full contact with the post.
- Slope the top surface slightly away from the post for water runoff.
Keep the concrete mix dry enough to hold shape but moist enough to cure properly over time.
Positioning and Aligning the Post in Wet Concrete
After pouring concrete, hold the post vertical using braces or supports. Alignment is critical for sign visibility and structural integrity. Check the post’s plumb with a level on at least two sides. Adjust braces as needed while the concrete sets.
Maintaining a small gap between the post base and the hole sides can promote drainage and reduce water trapping. Avoid embedding the post too deep; for breakaway posts, burial should not exceed 42 inches and avoid using concrete to maintain breakaway function. For permanent signs, 1 to 2 feet is typical depending on soil firmness and local conditions.
Curing Time and Final Checks
Concrete begins setting within 24 to 48 hours but gains strength gradually. Remove braces and apply weight or mount the sign only after at least 48 hours. For maximum durability, wait 72 hours before attaching the sign to allow the concrete to fully cure.
During curing, keep the concrete moist, especially in hot or dry conditions, to avoid cracking. Use a plastic sheet or water spray to maintain moisture if needed. Inspect the post and concrete for signs of cracking or shifting after curing. Proper curing ensures the post endures weather and mechanical stress for years.
| Soil Condition | Recommended Concrete Depth | Notes |
|---|---|---|
| Loose or sandy soil | 18 to 24 inches | Deeper hole with gravel base recommended for stability |
| Firm, clay, or rocky soil | 12 to 18 inches | Shallower depth often sufficient due to soil strength |
| Asphalt installation | Use an anchor sleeve system within concrete | Prevents asphalt damage and rebar corrosion |
Installing Sign Posts in Asphalt or Hard Surfaces
Installing sign posts on asphalt or other hard surfaces requires solid anchoring to keep the post stable and plumb. Expansion anchors are the best choice for asphalt because they provide strong holding power in the drilled holes. Drilling holes to the correct depth, cleaning them of debris, and carefully mounting the post base will help ensure long-term durability and alignment.
Marking and Drilling Anchor Holes
Start by precisely marking the locations where the anchor holes will be drilled. These marks should correspond to the post base’s bolt pattern. Use a measuring tape and chalk or paint to outline the exact spots on the asphalt.
Next, use a heavy-duty rotary hammer drill fitted with a masonry bit sized for the expansion anchors you’ll be using. Drill each hole to the recommended depth, generally between 3 to 4 inches, depending on the anchor length. It’s important to drill straight down and avoid widening the hole, which can reduce anchor effectiveness.
Inserting Anchors and Positioning the Post
After drilling, thoroughly clear each hole of dust and debris with compressed air or a brush. Insert the concrete expansion anchors so their heads sit flush against the asphalt surface. Some anchors require tapping with a hammer for a snug fit.
Position the sign post base over the anchors and slide it down until it firmly rests on the pavement. To keep the post vertical and stable, use braces or temporary supports. Check that the post base sits flat without rocking before proceeding to the final step.
Final Bolting and Vertical Alignment Checks
With the post base properly seated, place washers and heavy hex nuts over each expansion anchor bolt. Use an impact wrench or torque wrench to tighten the nuts evenly and securely. Proper torque will expand the anchors inside the asphalt, locking them in place.
Use a spirit level to check the post’s plumb in both north-south and east-west directions. Adjust the post alignment by loosening the nuts slightly if needed before retightening. Tighten the nuts fully once the post is perfectly vertical. Final torque values depend on anchor specifications but typically require a firm, consistent effort to avoid loosening under wind or impact.
- Mark bolt hole locations on the asphalt using the sign post base as a template.
- Drill holes with a rotary hammer and masonry bit to the depth recommended for the anchor sleeves (usually around 3 to 4 inches).
- Clear all drilled holes of dust and debris using compressed air or a brush.
- Insert concrete expansion anchors into each hole until they are flush with the surface.
- Set the post base over the anchored bolts, ensuring it rests flat without rocking.
- Temporarily brace the post to hold it vertical and check plumb with a spirit level.
- Install washers and hex nuts on the anchors and tighten gradually with an impact or torque wrench.
- Verify the post remains plumb during tightening, making small adjustments if necessary.
Tools checklist: rotary hammer drill, masonry drill bits, chalk/paint marker, compressed air blower or wire brush, hammer, impact wrench or torque wrench, adjustable wrench, spirit level, braces or supports for temporary post stabilization.
Mounting the Sign and Ensuring Proper Visibility
To securely attach your sign to the post, use a complete mounting hardware kit that includes 5/16-inch stainless steel hex head bolts, nuts, and lock washers. These provide rust protection and maintain a firm hold against weather and vibration. Torque the bolts to around 12 to 15 foot-pounds for tightness without damaging the sign or post. Using pre-drilled U-channel posts simplifies alignment and fastening because the holes match standard sign dimensions. For wider signs exceeding 48 inches, mount them on two posts spaced evenly to reduce swaying and maintain visibility.
A critical factor is setting the correct height for the sign face. The Federal Highway Administration recommends a minimum mounting height of 7 feet from the bottom edge of the sign to the ground in urban areas for clear visibility over parked vehicles and pedestrian traffic. In rural or limited-access highways, this can increase up to 10 feet to ensure visibility at higher speeds and avoid vegetation interference. Avoid mounting signs lower than 7 feet except for temporary use or special circumstances. These height guidelines help keep the sign visible to drivers at the right line of sight as they approach.
Aligning the sign orthogonally, or square to the direction of traffic flow, is essential so drivers can easily read the message without slowing down or changing their viewing angle. Before final mounting, adjust the post or sign bracket so the sign face is perpendicular to the roadway centerline. This reduces glare and reflection issues and improves reaction time. For multiple-post sign faces, ensure all signs line up on the same vertical plane and maintain consistent height to avoid confusing drivers.
- 5/16-inch stainless steel hex head bolts, nuts, and lock washers are standard mounting hardware
- Tighten bolts to 12-15 ft-lbs torque to secure signs without damage
- Minimum post mounting height: 7 feet at the bottom of the sign for urban settings, up to 10 feet for rural highways
- Use two posts for signs wider than 48 inches to prevent sway
- Align sign faces perpendicular to traffic flow and ensure bolt holes match sign and post
- Check sign height and angle before tightening hardware for final installation
- Replace damaged mounting clips or hardware as part of regular maintenance
Proper torque and corrosion-resistant hardware give your sign a lasting hold even under snowplow strikes or wind. Standardising the mounting height reduces variability that can confuse drivers or obscure signs. Correct alignment also lessens wear on the hardware because wind pressure hits the sign evenly. If the post or sign becomes loose, inspect hardware for damage and retighten as needed. Avoid over-tightening bolts, which can strip threads or bend the post. Taking these steps preserves sign function and safety for years.
Common Installation Mistakes and How to Fix Them
Signs of improper sign post installation include leaning posts, wobbling, uneven heights, and posts that move easily when pushed. These issues often stem from errors like shallow holes, poor alignment, or skipping essential steps such as adding a gravel base. Posts that are too shallow risk shifting under wind or soil movement, while uneven posts can reduce visibility and durability.
Leaning or unstable posts usually result from holes that are too wide or shallow, or concrete that was poured without proper consolidation. Fix these by digging around the post carefully, straightening it with a level, and refilling the hole with soil, gravel, or fresh concrete to secure it. Make sure to pack materials tightly to eliminate gaps that allow shifting.
Placing gravel at the bottom of the post hole provides drainage to prevent water buildup, which can accelerate rot or rust depending on the post material. Without gravel, water collects and leads to quicker decay or frost heaves that disturb the post’s position. Use 3 to 6 inches of clean gravel before setting the post and backfill gradually for added stability.
- Incorrect hole depth: Ensure at least 1/3 of post length is underground to resist wind forces.
- Poor vertical alignment: Use a carpenter’s level when placing the post to keep it straight.
- Skipping gravel base: Always add 3-6 inches of gravel for drainage and stability.
- Overburial or overuse of concrete on breakaway posts: Follow manufacturer guidelines to avoid losing breakaway function.
- Failing to compact backfill: Use a tamper or hand pack soil/gravel tightly around the post to eliminate air gaps.
- Ignoring seasonal checks: Inspect annually for looseness or tilting and adjust or re-secure as needed.
- Using excessive concrete in soft soils: Instead, compact soil well and use moderate concrete to prevent shifting.
Do not bury a breakaway post too deeply or fully encase it in concrete, as this can disable its safety mechanism designed to bend on impact.
Seasonal maintenance helps maintain post integrity. Freeze-thaw cycles can loosen the soil, so retamping or adding gravel each spring supports longevity. Avoid excessive concrete depth with breakaway posts to maintain safety and replace any damaged components promptly to avoid costly repairs. These steps typically add minimal cost, gravel runs about $10 to $20 per bag, while annual inspection requires only basic tools like a level and tamper.
Step-by-Step Action Plan for Installing Your Sign Post
Follow these key steps to install a sign post securely and ensure it meets visibility and stability standards.
- Before you start: Gather your tools and materials, including the sign post, concrete mix (if needed), and measuring tools. Confirm the local regulations for post depth and positioning to stay compliant.
- Day 1: Prepare the site by clearing vegetation and debris around the chosen location. This lets you work safely and assess soil or surface conditions.
- Day 1: Dig the hole to the correct depth and width, usually one-third the post’s total length and wide enough for concrete if used. Measure to make sure the hole matches these dimensions.
- Day 1: Set the post in the hole. For soil or grass, compact soil tightly around it. For hard surfaces, use anchors or concrete as specified. Check that the post is plumb with a level.
- Day 1 (if using concrete): Pour concrete into the hole around the post, making sure no air pockets remain. Smooth the surface and allow it to cure for at least 24-48 hours.
- After 2 days: Once the concrete has cured or soil is firmly packed, mount the sign on the post at the proper height and orientation to ensure clear visibility from all necessary angles.
- After installation: Inspect the post regularly during the first few weeks for signs of movement or leaning. Adjust or reinforce as needed to maintain stability.
Frequently Asked Questions
How Do You Remove a Damaged Sign Post Without Digging Up Too Much Soil?
Loosen the soil around the post with a digging bar or post puller to avoid excessive digging. This makes removal easier if the post is set no deeper than 3.5 feet.
Can You Install a Sign Post in Rocky or Compacted Soil?
Yes, but you may need specialized tools like a post driver and gravel to improve stability. Adding gravel helps with drainage and extends the post lifespan.
What Is the Best Way to Mark the Exact Spot for a Sign Post?
Use a measuring tape and spray paint or stakes to mark location precisely. Accuracy ensures clear sightlines and proper alignment before digging.
How Do Weather Conditions Affect Sign Post Installation?
Wet or freeze-thaw environments require gravel and proper drainage to prevent shifting. This preparation can extend your post’s lifespan by 5 to 10 years.
Are U-Channel Sign Posts Easier to Install Than Wooden Posts?
Generally yes, U-channel posts are lighter, lower cost, and easier to maintain. They require about 2 feet of ground depth for stability.
What Tool Is Most Helpful to Ensure Proper Post Depth?
A post hole digger or a sign post driver is indispensable for correct hole depth and diameter. Proper depth increases sign stability and durability.
The Bottom Line
Successfully installing a sign post means focusing on proper positioning, secure anchoring, and ensuring visibility. Taking the time to prepare and follow steps carefully will provide long-lasting stability. Start by checking local regulations for your installation site to ensure your post meets all requirements before you dig. This step saves time and keeps your sign compliant from day one.