How to Weed Small Letters in Vinyl a Complete Guide with Pro Tips
Weeding small letters in vinyl requires patience and precision because tiny cuts are easy to lose or tear. The best approach is to use sharp tools, firm transfer tape, and slow, deliberate peeling to keep letters intact. Starting with the right vinyl and stabilizing your cut design helps prevent issues before you begin.
Key Takeaways
- Use Oracal 651 or similar adhesive vinyl for sharp, clean cuts on small letters.
- Apply transfer tape over the entire cut area if letters are ½ inch or smaller to keep them in place.
- Employ a sharp, pointed weeding tool for tiny pieces and a hook weeder for lifting larger sections.
- Freeze your vinyl after cutting to stiffen material, making it easier to weed delicate letters.
- Peel slowly and at a sharp angle to avoid tearing or losing small letter parts.
- Reverse weeding can save accidentally torn letters by carefully removing excess vinyl around them.
What Is Weeding and Why Is It Challenging for Small Letters?
Weeding in vinyl crafting means removing the excess vinyl around your design after it’s been cut. This step is critical because only the intended shapes or letters remain on the backing sheet, ready to transfer onto your project surface. When working with vinyl, you cut the design into the vinyl sheet, then peel away the unwanted bits, which is what weeding refers to.
Small letters add complexity to weeding because their tiny shapes and thin lines make it easy to accidentally tear or lose parts. Unlike large letters that give you more surface area to grab, small letters require gentle precision and sharp tools. Their small size means they can stick weakly to the backing or catch on your fingers and fall off without notice, especially if you rush or don’t use the right technique.
Many beginners treat small letter weeding the same as larger designs, which causes common mistakes. For example, pulling the vinyl too quickly or using dull tools can rip the letter edges or strip away entire sections. Another frequent error is not securing the vinyl properly before peeling, letting tiny pieces shift or disappear. Some also underestimate the time small letter weeding takes, causing rushed, sloppy results.
The process generally involves cutting your vinyl with a sharp blade and then carefully peeling away the surrounding vinyl using precision tools like a pointed weeding hook. For small letters, a tool that can reach into tight spaces helps pick out little bits without damaging the letter itself. Sometimes placing your vinyl in the freezer for a short time before weeding can firm it up, making small pieces less sticky and easier to handle without tearing.
Good weeding leaves your letters fully intact, with clean edges and no leftover vinyl bits inside letter openings. If parts tear or go missing, you’ll see ragged edges or incomplete letters, which lowers the quality of your project. Because small letters are fragile, taking your time and using the right equipment matters most.
While the challenge of small letter weeding can feel frustrating, practicing steady, careful removal with sharp tools and appropriate techniques improves your skill and results. Expect it to take longer than weeding large shapes, and prepare for some trial and error before finding what works best for your vinyl type and design size.
Choosing the Right Vinyl and Transfer Tape for Small Letters
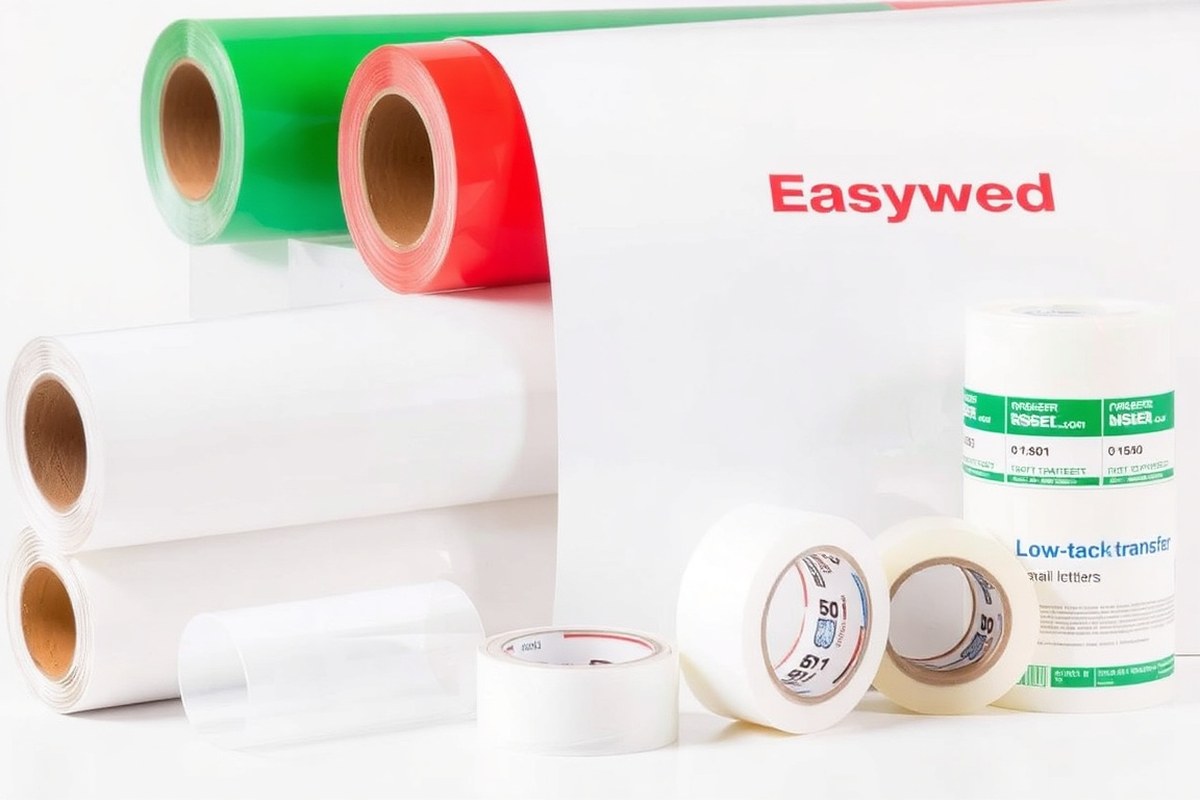
Choosing the right vinyl and transfer tape makes all the difference when weeding small letters for vinyl projects. For adhesive vinyl, premium brands like Oracal 651 are widely recommended because their medium thickness, approximately 2 mils, offers a perfect balance. It’s thin enough for detailed cuts yet thick enough to prevent tearing. Heat transfer vinyl (HTV) for fabric projects should be something like Siser EasyWeed, which is designed for easy cutting and weeding of intricate designs. Avoid very thick vinyl over 5 mils, as it can become difficult to cut cleanly and weed, especially for small, detailed letters. Conversely, vinyl too thin, under 1 mil, can tear or distort during the weeding and transfer process.
Transfer tape selection also matters significantly. You want tape with a moderate tack level: strong enough to lift small letters without peeling them off the backing or distorting the design but not so strong it damages delicate parts when removed. Paper-based transfer tape often works best for tiny letters because it is easier to see the design through and has balanced adhesion. Clear plastic transfer tape is popular too but look for versions labelled “low-tack” or “medium-tack.” Using transfer tape designed specifically for detailed vinyl, like application tape from Cricut or Oracal, can improve success rates. Cost ranges from about $5 to $15 for a 12-inch by 10-yard roll, depending on brand and type.
| Vinyl Type | Thickness (mils) | Recommended Brand | Transfer Tape Match |
|---|---|---|---|
| Adhesive Vinyl | 2 to 3 | Oracal 651 | Paper-based or Clear Medium Tack |
| Heat Transfer Vinyl (HTV) | 1.8 to 3 | Siser EasyWeed | Heat Resistant Transfer Tape (Carrier Sheets) |
| Bulk Vinyl | Over 5 | Not Recommended for Small Letters | Not Applicable |
Applying the transfer tape before weeding is a key technique for tiny letters and intricate designs. Place the transfer tape evenly over the vinyl sheet first, rubbing gently but thoroughly to ensure all small details adhere well. This approach keeps the tiny letters on the tape during the weeding process, reducing loss and accidental pulling. Weed out the negative space, removing excess vinyl, while the transfer tape holds the small letters in place. This saves time and limits frustration.
For very complex fonts with flourishes or very thin lines, consider reverse weeding, which involves removing the background while leaving the letters intact on the backing paper before applying transfer tape. This method can be more time-consuming but can prevent damage to delicate details.
Costs vary but generally, a high-quality vinyl roll will cost between $15 to $30 for a 12-inch by 12-yard size. Transfer tape prices depend on size and brand but factor in at a few dollars per project. Using the right materials pays off by reducing waste and saving time wasted on damaged letters or repeated attempts.
Focus on the tack level of transfer tape and thickness of vinyl; too strong tape or too thin vinyl are the main reasons small letters get lost or torn during transfer.
Tools and Workspace Setup for Successful Small Letter Weeding
For small letter weeding, precise tools and a well-organized workspace make all the difference. Using the right weeding tools along with proper lighting and an uncluttered surface helps reduce mistakes and speeds up your project. Setting up your area with care improve your control and minimizes frustration when dealing with tiny vinyl pieces.
Essential Weeding Tools
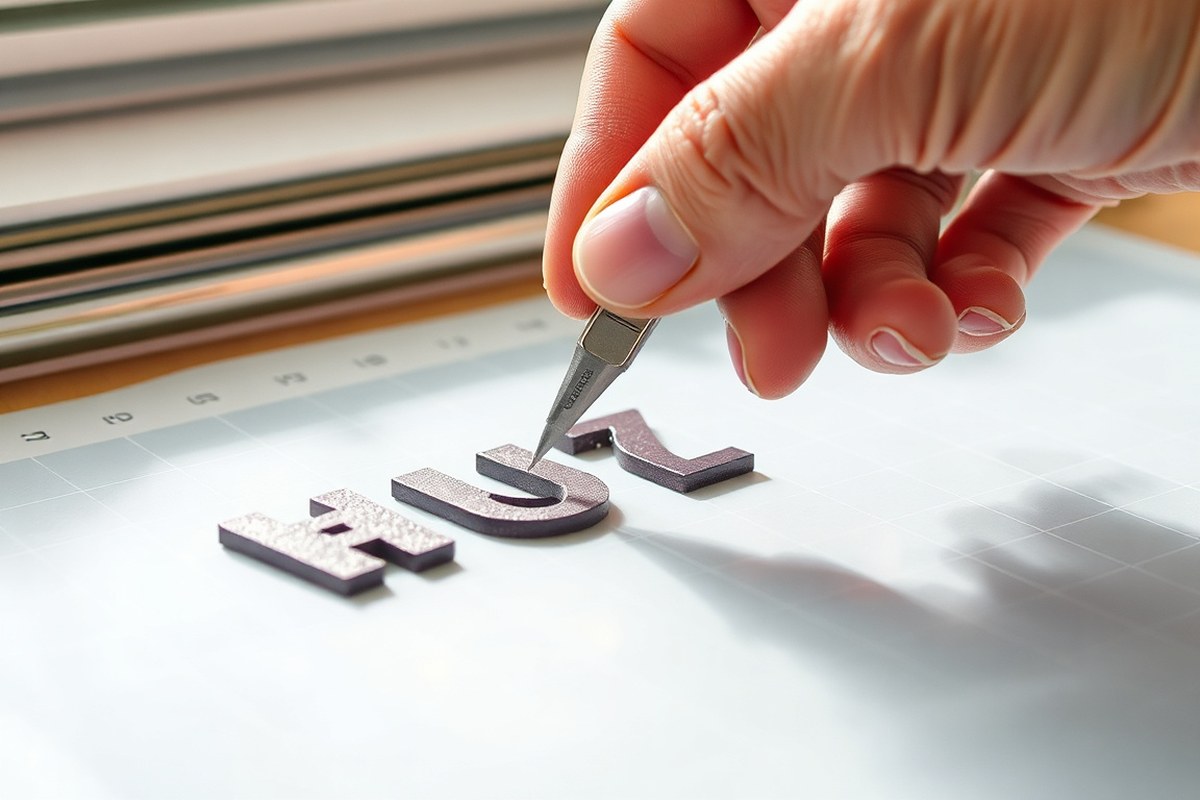
A sharp, pointed weeder is a must-have for removing small vinyl bits with accuracy. This tool allows you to pick out tiny centers of letters like A, E, and O easily. Hook weeders work well for lifting larger sections gently without damaging the vinyl. While some crafters use sewing needles or pins, specialized weeding tools provide better ergonomics and reduce hand fatigue.
High-quality weeding sets typically cost between $10 and $20 online or at craft stores. Investing in a good tool helps avoid tearing your vinyl or losing tiny pieces, which are common issues without proper equipment.
Helpful Optional Accessories
In addition to the main weeding tools, a few accessories can improve your precision and comfort:
- A pair of fine tweezers to handle small pieces without touching adhesives
- A magnifying glass or magnifying lamp for improve detail visibility
- Low-tack painter’s tape to secure your vinyl and prevent shifting
- A self-healing cutting mat for protecting surfaces while you work
- A baking mat or parchment paper to place tiny weeded bits and avoid losing them
Household items like pins or sewing needles can substitute for weeding tools but may cause more errors or require more care. Adding magnification and good tape significantly increases your accuracy, especially on letters smaller than 1/2 inch.
Recommended Workspace Conditions
Good lighting is critical for spotting small cuts and detailed pieces. Use a bright desk lamp with a daylight or cool white bulb around 5000K to reduce eye strain and show true vinyl colors. Position the light to eliminate shadows across your work surface.
Organize your workspace with a clean, flat surface about 18 by 24 inches to spread out materials comfortably. Keep all tools within arm’s reach to avoid interruptions. Sit in a comfortable chair at a table where your forearms can rest, preventing hand fatigue while you weed.
Take breaks every 20 to 30 minutes to rest your eyes and hands. This breaks up the tedious nature of weeding small letters and helps maintain precision.
Step-by-Step Method for Weeding Small Vinyl Letters
Start by preparing your vinyl and cutting machine to ensure clean, clear cuts for small letters. Carefully weed the excess vinyl to prevent damage or loss of tiny pieces. Finish by applying transfer tape to move your design smoothly without gaps or lifts.
Preparing and Setting Your Machine
Begin by choosing a high-quality vinyl suitable for fine details, as thinner vinyl often tears with small letters. Make sure the blade in your cutting machine is clean and sharp, removing any vinyl residue. Adjust your machine’s cut settings carefully: set blade depth shallow enough to cut through the vinyl layer but not the backing, and use moderate pressure to avoid cutting too deep or too light. Test on a scrap piece first to confirm clean cuts without cutting the backing liner, this usually means a blade depth around 1-2, with pressure adjusted based on your vinyl brand.
Proper settings matter because over-cutting makes weeding harder, while under-cutting causes incomplete cuts and stuck letters. Clean your cutting blade regularly using manufacturer-recommended methods, like a soft cloth or blade cleaning solution, to keep cuts precise.
Weeding Small Letters Properly
Removing excess vinyl from small letters can feel tricky but following these steps helps maintain all the tiny parts intact. Use fine-tipped tweezers or a precision weeding tool to gently lift and pull away vinyl pieces. Work in good light and magnify your project if needed to see tiny details clearly.
To avoid losing pieces, weed on a flat, clean surface and collect scraps in a small container so nothing blows away. Remove larger surrounding vinyl first, then carefully weed out smaller elements inside and between letters. Patience is key; work slowly to prevent tearing or snagging delicate cuts.
- Place your cut vinyl on a clean, flat work surface.
- Use a weeding tool or fine-tipped tweezers to lift one edge of the vinyl excess starting from a corner.
- Slowly peel away the excess vinyl at a low angle (about 45 degrees) to reduce stress on small letters.
- Weed around each letter carefully, removing vinyl from inside loops and thin lines last.
- When a piece resists, use the tweezers to lift it gently instead of pulling hard.
- Collect all removed vinyl bits in a container to avoid losing them.
Applying Transfer Tape for Small Letters
Select transfer tape that is designed for intricate vinyl work; low-tack tape helps avoid lifting small pieces with the backing. Cut a piece slightly larger than your design. Place it sticky-side down onto your weeded vinyl using a squeegee or a credit card to press firmly and evenly.
Apply pressure starting from the center outward to push out air bubbles that can cause gaps or lifting during transfer. Slowly peel the backing paper away at a 45-degree angle, making sure all small letters stick to the transfer tape. When any pieces stay on the backing, press the tape back down and squeegee again. This process secures all tiny parts for clean placement onto your project surface.
Reverse Weeding Technique: What It Is and When to Use It
Reverse weeding flips the usual process by removing everything except the small letters. This technique is ideal for intricate designs with tiny details, providing better control and preventing damage to delicate letters. It takes more patience but increases the chance of clean, precise results.
Understanding Reverse Weeding Basics
Reverse weeding means peeling away the surrounding vinyl instead of the letters themselves. You leave the small or detailed letters stuck to the transfer tape while removing the excess material around them. This method works well when letters are tiny or have thin flourishes that are easy to lose or tear during traditional weeding.
Because you handle the background first, you reduce stress on the small letters during removal. This approach often requires a magnifying glass or a bright light to see intricate details clearly. It suits projects where tiny script or delicate shapes might otherwise rip or stick to the backing paper.
Step-by-Step Reverse Weeding Process
The key to successful reverse weeding is going slowly and working from the outside toward the letters themselves. Use a pointed weeding tool designed for vinyl crafts to lift and pull away the unwanted parts without disturbing the letters.
- Cut the vinyl design and apply transfer tape smoothly over the top, pressing down firmly.
- Flip the entire design upside down so the vinyl backing faces up; this exposes the backing paper for easier removal of the outside areas.
- Start removing the vinyl from the edges first, working inward carefully. Use a fine-tipped weeding tool or tweezers for precise control.
- Slowly peel away the surrounding material while leaving the small letters and intricate details firmly attached to the transfer tape.
- Use good lighting or magnification to check for any small bits still stuck where you want to remove them, and carefully pluck those out.
- Once the background is gone, flip the design back to its original position. Gently remove any remaining small vinyl pieces that still need clearing.
- Apply the design to your surface by pressing and smoothing with a scraper tool, then slowly lift the transfer tape, keeping the small letters in place.
Patience is essential in reverse weeding since it takes longer than traditional methods but helps avoid tearing small letters.
Benefits and Drawbacks of Reverse Weeding
Reverse weeding offers clear advantages for small lettering. It lowers the risk of ripping fine lines or losing tiny pieces during removal. This technique provides extra control, especially for designs with narrow flourishes or closely spaced letters.
On the downside, reverse weeding takes more time and demands focus. It can feel tedious on larger designs or thick fonts where traditional weeding is quicker. Also, beginners might find managing the flipped vinyl confusing at first.
Choose reverse weeding when your project has very small letters or intricate details that need careful handling. For bigger, bolder fonts, regular weeding will usually suffice and save time.
Troubleshooting Common Small Letter Weeding Issues
Tearing or lifting of small letters during weeding usually happens because the vinyl is too thin, the cut depth is incorrect, or the backing paper is removed too quickly. Thin vinyl layers, like some heat transfer vinyls, are delicate and can rip if you pull the weeded piece off the backing at the wrong angle. Setting your blade too deep may cut into the backing paper, causing letters to detach prematurely.
Handle a letter gently if it tears or lifts, and try repositioning it back onto the backing paper if you want to reuse it. Use tweezers to maneuver small pieces. When the damage is severe and the letter is lost, recut just that portion of the design and weed it separately. For future cuts, double-check blade settings on test vinyl to avoid too shallow or deep cuts.
Poor adhesive on the vinyl or transfer tape can cause letters to not stick well to the surface or shift during transfer. This happens if the transfer tape is too strong or too weak, or if the surface was not cleaned thoroughly before application. Using transfer tape with too much tack may pull small vinyl letters off the backing or tear the design when removed.
- Use a fine-point weeding tool and hold the vinyl flat during weeding
- Adjust blade depth to cut through vinyl, not backing
- Work slowly and lift weeded pieces at a low angle
- Keep tweezers handy for repositioning tiny letters
- Use transfer tape with medium tack for small letters
- Clean the application surface with isopropyl alcohol and let it dry
- Apply pressure evenly with a scraper tool during transfer
Transfer tape problems include partial lifting of letters or leaving residue. This often happens if the transfer tape and vinyl aren’t compatible, or if the tape sits on the vinyl too long before applying to the surface. For best results, cover the design with transfer tape immediately after weeding and press firmly. Avoid stretching the tape or peeling it off too quickly. Some users find low-tack transfer tape works better when working with thin or fragile small letters. The cost of quality transfer tape ranges from $5 to $15 per roll, but investing in the right one can save you time and ruined projects.
Tips to Prevent Tearing and Losing Small Letters While Weeding
Handle small letters with care to avoid tearing or losing them during weeding. Start by ensuring your vinyl sits flat and is well-adhered to the backing liner. Use a sharp weeding tool with a fine pointed tip, applying a slight angle to gain better use under the vinyl edges. This reduces the risk of lifting or ripping tiny pieces. Work slowly and steadily, removing the inner parts of letters first, such as the centers of “a,” “e,” or “o”, before tackling the surrounding excess. This approach helps keep each letter intact and in place.
Blade maintenance plays a key role in preventing vinyl tearing. Replace your blade regularly to maintain sharpness; a dull blade requires more pressure and increases tearing risk. Check your cutting machine’s depth and pressure settings before you start. The blade should cut through the vinyl smoothly without cutting into the backing liner. For thin or delicate vinyl, reducing blade pressure and increasing blade offset slightly can preserve details. Test cuts on scrap pieces help you dial in the best settings for the specific vinyl you’re using, which saves material and headaches.
Freezing vinyl can make weeding easier by stiffening the material, making small letters less prone to bending or tearing. Place your cut vinyl in a sealed plastic bag to prevent moisture contact, then chill it in the freezer for about 10 to 15 minutes. Keep it cold while weeding by placing it on a cool surface. This technique works best for thinner or softer vinyl. However, avoid freezing vinyl too long or repeatedly, which can cause brittleness or adhesive weakening. Handle frozen vinyl gently, as it can become fragile if overstressed.
Before weeding, ensure your workspace is clean and well-lit to spot tiny pieces easily. Good lighting reduces mistakes that lead to tearing. Keep your tools in good condition; clean the blade and tool tips regularly to remove residue. A dull or sticky tool can catch vinyl and tear delicate letters. Use tweezers to help pick up and reposition small letters during transfer, reducing direct finger contact that might stretch or deform the vinyl.
Experienced crafters advise cutting vinyl designs slightly larger or spacing small letters wider apart to minimize handling issues during weeding. This simple adjustment reduces the risk of losing letters while you work. If you struggle with particularly tiny fonts, try the reverse weeding technique, which involves removing the letters and then the background, to keep elements aligned.
How to Apply and Transfer Small Letters Correctly to Surfaces
Applying small vinyl letters to surfaces needs a careful approach to make sure they stay put, look smooth, and align perfectly. Positioning them right on the transfer tape before sticking helps avoid shifts, which can mess up your design. For curved or textured surfaces, stretching the transfer tape slightly or using smaller pieces can prevent wrinkles. Getting rid of air bubbles and peeling depends on good pressure and timing, so following a clear, step-by-step method is key. Here’s a step-by-step way to apply your small letters correctly with transfer tape and achieve a sleek finish on flat, curved, or textured surfaces:
- Clean the surface thoroughly. Use rubbing alcohol and a lint-free cloth to remove dust, oils, and moisture. This helps the vinyl stick better and last longer.
- Remove the vinyl backing carefully. After covering your letters with transfer tape, peel off the backing paper at a sharp angle slowly to keep the letters attached to the tape.
- Align the letters on the surface. Hold the transfer tape at the corners and place the letters lightly on the desired spot. Use a ruler or level if you need precise alignment.
- Apply firm, even pressure. Use a squeegee or a credit card to press the letters onto the surface, starting from the center and moving outward to push out air bubbles.
- Handle curves or textures carefully. For curved surfaces, gently stretch or cut the transfer tape into manageable sections so it conforms without wrinkling. For textured areas, press with a squeegee multiple times to ensure good contact.
- Wait a few minutes for adhesion. Let the vinyl settle on the surface for 2-5 minutes before removing the transfer tape. This waiting period helps prevent peeling.
- Remove the transfer tape slowly. Pull it back at a low angle, moving close to the surface and watching for any letters lifting. If needed, press the letter down again and pull slower.
Use low-tack transfer tape when working with small letters to avoid tearing or losing pieces during application.
Step-by-Step Action Plan for Weeding Small Vinyl Letters
Follow this plan to weed small letters with confidence and avoid common mistakes. Each step builds on the last to keep your design intact and sharp.
- Before you start: Gather your fine-tipped weeding tools and a clean, well-lit workspace. Ensure you have quality vinyl and transfer tape chosen specifically for small details.
- First pass: Carefully peel away the excess vinyl slowly, checking if the small letters remain firmly attached. Stop if a letter lifts prematurely and use the weeding tool to secure it back.
- Detail work: Use the hook end of your weeding tool to lift out inner parts (like letter holes) gently. Confirm the letters keep their shape with minimal stretching or tearing.
- Reverse check: If you encounter difficulty, apply the reverse weeding method: remove letters first, then try lifting the background. Verify none of the small letters detach unexpectedly.
- Apply transfer tape: Lay transfer tape smoothly over the design with firm pressure. Rub firmly but gently so all small letters stick evenly to the tape.
- Transfer test: Slowly peel the backing away at a sharp angle to check if small letters lift cleanly on the tape, stop and adjust pressure if some parts stay behind.
- Final application: Place your design on the target surface and smooth out any bubbles or wrinkles with a scraper. Make sure every small letter adheres fully before peeling off transfer tape.
- Cleanup: Keep your tools clean and store leftover vinyl properly for your next project to avoid adhesive build-up or damage.
Frequently Asked Questions
What Is the Best Way to Store Vinyl Sheets to Avoid Damage Before Weeding Small Letters?
Store vinyl sheets flat in a cool, dry place away from sunlight to prevent curling and adhesive damage. Proper storage keeps your vinyl smooth, making small letter weeding easier and more precise.
Can I Reuse Transfer Tape After Applying Small Vinyl Letters?
Transfer tape can be reused but usually loses its stickiness after one use. For small letters, fresh tape ensures better adhesion and cleaner transfers.
How Do Temperature and Humidity Affect Weeding Small Vinyl Letters?
High humidity and heat can cause vinyl to stretch or stick, complicating weeding small letters. Work in a cool, dry environment for better results.
Is It Better to Weed Small Letters Immediately After Cutting or Wait Some Time?
Waiting a few minutes after cutting can help the vinyl cool and stabilize, reducing tearing risk. This rest time improves the ease of weeding small letters.
How Does Blade Sharpness Influence Cutting Small Letters?
A sharp blade ensures clean, precise cuts in small vinyl letters, preventing jagged edges. Replace blades regularly to maintain quality cuts for intricate designs.
What Is the Recommended Speed Setting for Cutting Small Vinyl Letters?
Use a slower cutting speed with small letters to allow the blade to cut precisely without dragging or tearing the vinyl. Adjust speed according to your machine’s guidelines.
Key Points to Remember
Weeding small vinyl letters takes patience and a steady hand, but mastering these steps helps you create crisp, precise designs without damage. Start with the right tools and take your time at each stage to reduce frustration. Your next project will benefit from the care you put into these critical steps. Try weeding a simple small-letter design today to practice these techniques and build your skill.