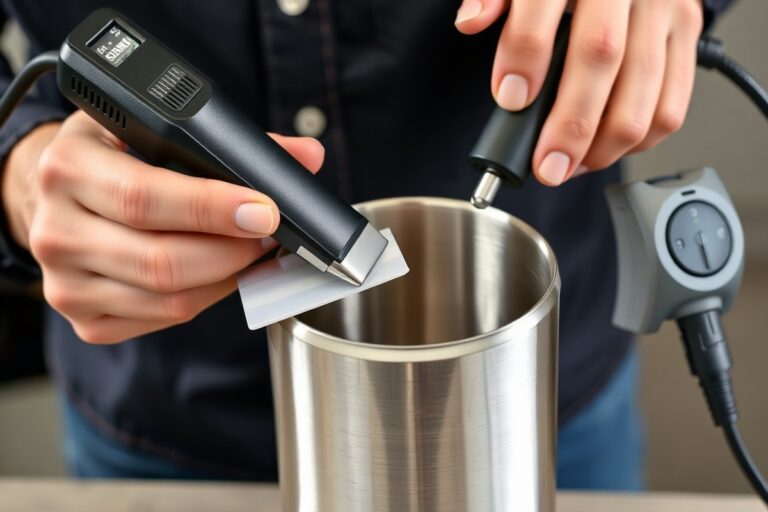
How to Apply Vinyl Lettering Wet Method: Complete Guide for Perfect Decals
How to apply vinyl lettering wet method starts with wetting the surface where you want your decal. The moisture lets you reposition the vinyl easily before it sticks permanently. Applying vinyl this way reduces bubbles and wrinkles on nonporous surfaces, improving the final look.
Begin by spraying a mist of water mixed with a small amount of soap on the application area. This keeps the vinyl movable and ensures a smooth, clean placement.
Key Takeaways
- Use a spray bottle with water and a drop of dish soap to wet the surface before applying vinyl lettering.
- Apply vinyl lettering between 15°C and 30°C, always in the shade for best adhesion.
- After placing the vinyl, use a squeegee to push out water and air bubbles gently.
- Wait 30 to 45 minutes for the vinyl to dry before carefully removing the transfer tape.
- Peel transfer tape at a 180-degree angle, flat against the surface, to avoid lifting the vinyl.
- If the vinyl lifts with the tape, squeegee it down again and wait 30 minutes before retrying.
What Is the Wet Method for Applying Vinyl Lettering?

The wet method of applying vinyl lettering involves using a mixture of soapy water sprayed onto the surface before placing your vinyl decal. This technique allows you to slide and reposition the decal easily before the adhesive fully bonds with the surface. By applying water with a few drops of dish soap, about 1 to 2 drops of dishwashing liquid in 500 milliliters of water, you create a slippery layer that reduces immediate stickiness and helps prevent air bubbles from getting trapped underneath the vinyl.
This method differs from dry application, where the vinyl is pressed directly onto a clean, dry surface without any moisture. Dry application works best for small decals under 12 inches (300 millimeters) on firm, flat surfaces where repositioning isn’t necessary. On the other hand, the wet method is particularly useful for larger vinyl lettering, curved surfaces, or any application where you want the flexibility to shift the decal to the perfect spot before letting it set.
To use the wet method, first mix soapy water with the precise ratio mentioned above. Spray or mist the surface lightly until it is wet but not dripping, then place the vinyl lettering or decal on top. The soapy water acts as a lubricant, preventing the adhesive from immediately locking to one spot. You can then adjust the vinyl’s position accurately and smooth it down by moving a squeegee or credit card from the center outward, gently pushing out water and air bubbles to ensure a clean, firm attachment.
This method works best on nonporous surfaces such as glass, metal, or plastic. Porous surfaces like wood require dry application since water can interfere with the adhesion. After smoothing the vinyl, allow it to dry for at least 30 to 45 minutes; this lets the adhesive bond well as the water evaporates. For certain types of vinyl, like white matte, avoid exposing the decal to water for 24 hours after application to ensure durability.
The wet method requires a bit more preparation and patience compared to dry application, including mixing soapy water and waiting for drying, but it greatly reduces the risk of air bubbles and misalignment. When done correctly, the vinyl lettering lays down smoothly and looks professionally applied. Problems can arise if too much water is used, causing the decal to slide excessively or if the surface isn’t clean before application, leading to poor adhesion.
Essential Supplies and Materials for Wet Vinyl Application

For a successful wet vinyl application, you need specific supplies designed to keep the vinyl and surface moist during placement. Use pressure-sensitive vinyl labeled for outdoor use or indoor durability, avoiding air-egress types that can malfunction with the wet method. Also, a transfer tape made for wet application, like Cricut vinyl transfer tape, works best because it maintains adhesive strength even when wet.
The soapy water mixture is critical. Mix one drop of liquid dish soap with about 8 ounces (1 cup) of clean tap water in a spray bottle. This ratio helps the vinyl slide easily on the surface without losing stickiness. Avoid using too much soap, which can leave a white haze or residue on the vinyl after application.
Essential tools include a spray bottle for the water mixture, a scraper or squeegee, transfer tape or paper, and a lint-free cloth to wipe the surface before starting. You’ll also need scissors or a craft knife to cut the transfer tape slightly larger than your decal to protect every edge without excess material.
- Vinyl: Use outdoor-grade pressure-sensitive vinyl, avoid air-egress types
- Transfer Tape: Cricut vinyl transfer tape or similar water-resistant transfer tape
- Soapy Water Mix: 1 drop of liquid dish soap per 8 ounces of water in a spray bottle
- Scraper or Squeegee: For pressing vinyl onto the surface
- Lint-Free Cloth: To clean and dry the application surface
- Scissors or Craft Knife: To trim transfer tape slightly larger than decal
- Spray Bottle: To wet the vinyl and surface for slipperiness
These materials help you control the decal movement during placement without losing adhesion. Keep both your vinyl decal and the application surface wet to permit sliding and position adjustment. After placing the decal, run the scraper firmly over the vinyl to squeeze out water and air bubbles.
Peel transfer tape at a 180-degree angle, folding it back on itself close to the surface to prevent lifting the vinyl off your project.
Using older vinyl or vinyl stored in temperatures below 10°F can cause adhesive failure or vinyl lifting. Make sure to apply decals within a temperature range recommended by the vinyl manufacturer to avoid bonding problems.
Preparing Your Vinyl and Surface for a Flawless Wet Application
Proper preparation of the vinyl and the application surface is key for a smooth and lasting wet method application. Make sure the surface is spotless and dry, cut and weed the vinyl carefully, and apply transfer tape accurately. Also, watch the environmental conditions like temperature and humidity to avoid issues with adhesion or peeling.
Cleaning and Preparing the Surface
Cleaning the surface goes beyond removing visible dirt. Oils, dust, and residues can prevent vinyl from sticking well. Use a mild, non-abrasive cleaner or isopropyl alcohol with a lint-free cloth to wipe the area. Allow the surface to dry completely before wetting it for the wet method.
Avoid cleaners with wax or silicone, as these can create a barrier. Ideal surfaces include glass, metal, and smooth plastics. The surface temperature should be between 50°F and 85°F (10°C to 29°C) for best results. If it’s colder, warm the surface gently with a hairdryer from about 12 inches away, focusing on edges for about 10 seconds each.
Cutting and Weeding the Vinyl Decal
After designing and printing your vinyl decal, precise cutting and weeding are essential. Use a sharp craft knife or a vinyl cutting machine to cut the outlines cleanly. Weeding means removing excess vinyl, leaving only the letters and designs you want to apply.
Work slowly and use a weeding tool or tweezers for small or intricate sections. Test peeling a small corner to ensure the vinyl holds in the right spots. Mistakes in weeding can cause gaps or incomplete transfers during application.
- Place your vinyl sheet on a clean, flat cutting surface.
- Cut out your design using a cutting machine or craft knife with steady pressure.
- Start weeding by removing large background pieces first.
- Use a weeding hook or pin to gently remove smaller vinyl bits inside letters or shapes.
- Check the decal for any leftover vinyl bits and remove them completely.
- Keep the cut vinyl flat and avoid creasing it before applying transfer tape.
Applying Transfer Tape Correctly
Transfer tape keeps your vinyl decal parts together during handling and placement. Choose transfer tape with an adhesive suitable for wet applications, as some adhesives may leave a milky residue if misused.
To apply, cut the tape slightly larger than your decal, peel its backing paper away, and carefully lay it over the vinyl. Use a squeegee or a plastic card to press the tape from the center outward to remove air bubbles.
- Cut transfer tape to cover the entire vinyl decal with extra margin.
- Peel away the backing paper from the transfer tape.
- Place the sticky side of the tape evenly over the vinyl decal.
- Firmly press the tape onto the vinyl with a squeegee, moving from center to edges.
- Turn the vinyl and tape over to remove the backing paper from the vinyl.
- Confirm that all vinyl pieces stick to the transfer tape and none lift off.
In humid conditions, allow extra drying time after application before peeling the transfer tape, at least 15 minutes longer than usual. This helps avoid lifting or cloudiness in the vinyl.
Step-by-Step Guide to Applying Vinyl Lettering Using the Wet Method
Applying vinyl lettering using the wet method requires a controlled process of wetting, positioning, squeegeeing, and tape removal. This approach gives you more time to align your design and helps avoid air bubbles. Follow these steps carefully to ensure strong adhesion without damaging the vinyl.
Wet the Surface and Vinyl Adhesive Side
Begin by spraying a mist of soapy water on the application surface and the sticky side of the vinyl decal. Use a spray bottle filled with water mixed with a few drops of mild dish soap. This wet film prevents the adhesive from bonding immediately, allowing you to reposition the decal easily.
Apply a generous but even layer; a fine spray mist covering the entire surface and the vinyl’s adhesive side is ideal. Too much water can cause slipping, and too little limits your adjustment time. Spraying the vinyl’s adhesive side is especially important when working with large or complex decals.
Position and Slide the Decal Carefully
After wetting both sides, hold your decal over the surface and slowly lower it from a predetermined hinge point, such as a taped edge, letting the water layer keep the vinyl from sticking prematurely. Position the decal by sliding it gently into its exact spot. The wet surface lets you shift the decal around without creating wrinkles or bubbles.
Take your time to align the lettering perfectly. The soapy water film works as a lubricant, so you can adjust until it looks right. Avoid lifting and repositioning excessively, which can weaken the adhesive over time.
Squeegee Water Out from Center Outwards
Once the decal is in place, use a squeegee at about a 45-degree angle to push out water from the center toward the edges. The pressure should be firm enough to remove trapped fluid but not so strong that it stretches or tears the vinyl.
Start squeegeeing from the middle and work outwards in overlapping strokes. This technique avoids bubbles and ensures that the edges stick well. Pay special attention to the perimeter where water often pools and adhesion is critical. Insufficient pressure here is a common cause of lifting or peeling later.
Peel Off Transfer Tape at 180 Degrees
Wait until the decal feels mostly dry to the touch before removing the transfer tape. You can test this by carefully lifting a corner of the tape. Pull the tape back slowly and evenly at a 180-degree angle, keeping it close and parallel to the surface.
When the vinyl begins to peel away with the tape, pause and press that spot again using the squeegee before moving on. Pulling too quickly or at an incorrect angle risks lifting the decal. The slow and even peel reduces stress on the vinyl and ensures it stays firmly adhered.
- Spray a fine mist of soapy water over the target surface and the adhesive side of the vinyl decal.
- Lower the decal onto the surface from a hinge edge, allowing it to float on the wet layer.
- Slide the decal gently into final position for alignment.
- Use a squeegee at a 45-degree angle to push water out evenly from the center toward the edges.
- Press firmly along all edges, especially the perimeter, to secure adhesion.
- Wait for the decal to become mostly dry, then test by lifting a small corner of the transfer tape.
- Remove the transfer tape slowly, pulling it back at 180 degrees and close to the surface.
- Any lifted section means you should pause peeling and squeegee the area again before you continue.
Temperature, Timing, and Environmental Factors for Successful Application
For the best results with the wet method of applying vinyl lettering, aim to work in temperatures between 60°F and 80°F. This range ensures the adhesive activates properly without drying too quickly or remaining too tacky. Surfaces should be clean and at roughly room temperature to help the vinyl settle and bond securely.
Lighting is important because it helps you see air bubbles and alignment clearly. Apply your vinyl in bright, indirect daylight or under a strong artificial light source. Avoid direct sunlight on the surface during application, which can cause premature drying of the application fluid and make repositioning difficult.
After applying the vinyl with the wet method, you should wait at least 24 to 48 hours to let the vinyl dry and fully cure before exposing it to water or heavy use. For extra durability, especially on outdoor signage or surfaces that might be pressure-washed, wait 72 hours before cleaning with high-pressure water jets.
| Condition | Recommended Range | Reason / Notes |
|---|---|---|
| Temperature | 60°F to 80°F (16°C to 27°C) | Ensures adhesive sets without drying too fast or remaining tacky |
| Surface Temperature | Match ambient temperature (room temperature) | Helps vinyl bond and prevents warping or bubbling |
| Lighting | Bright, indirect daylight or strong artificial light | Allows clear visibility for bubble removal and alignment |
| Dry Time Before Use | 24 to 48 hours | Prevents vinyl lifting or peeling when exposed to moisture |
| Cure Time Before Pressure Washing | 72 hours | Ensures strong adhesion for high-pressure cleaning |
| Weather Conditions to Avoid | Direct sun, extreme heat, rain, freezing temperatures | These can cause bubbles, poor adhesion, or damage from moisture |
Cold temperatures below 60°F slow down the adhesive’s curing. Hot temperatures over 80°F may cause premature drying of the application fluid, reducing reposition time. Avoid applying vinyl wet on acrylic surfaces when dry application is recommended for their high tack film, as this can create adhesion problems.
Do not expose your vinyl lettering to water or heavy cleaning for at least 24 hours after applying it wet; early exposure can cause peeling or bubbling.
Troubleshooting and Common Issues When Using the Wet Method
Bubbles and lifted edges usually happen when water or application fluid gets trapped under the vinyl. This prevents the adhesive from sticking properly. To fix this, carefully lift one corner of the transfer tape just enough to squeeze out the water, then use a squeegee to push it back down from that corner toward the opposite edge. Make sure to press firmly, smoothing the tape from the center outward. This method helps drive out trapped air and fluid, reducing bubbles and preventing the vinyl from tenting or cracking over time.
Water spots and milky residue, often called “ghosting,” appear when too much application fluid remains between the vinyl and the surface. This residue usually evaporates within 24 to 48 hours, but you can speed up the process by gently blotting the decal with a soft, lint-free cloth. Avoid rubbing, as this can lift the vinyl or damage the lettering. Using the right amount of fluid during application, just enough to allow repositioning but not so much that it pools, is key to preventing this issue.
Tears in the vinyl or trouble releasing the transfer tape often come from applying too much pressure too soon or using tape that’s not suitable for wet application. To reduce stress on the vinyl, lift the tape slowly at a 45-degree angle when the decal tears or the tape won’t release. For delicate or intricate lettering, wait several minutes after applying before removing the tape to allow the adhesive to set. Using transfer tape designed for wet application also helps avoid sticking problems.
Vinyl that starts peeling up is a sign of poor adhesion, often caused by an unclean surface or too much water left behind during application. Clean the surface thoroughly with isopropyl alcohol before applying the vinyl. After positioning the decal with the wet method, use a firm squeegee from the center outwards to push out all excess moisture and secure the edges. Gently lift the vinyl, rewet the surface lightly, reposition, and squeegee firmly again when edges lift later.
- Lift a corner of the transfer tape and squeegee out water when bubbles are visible
- Use just enough application fluid to allow repositioning but avoid pooling
- Blot milky residue gently with a soft cloth to speed drying
- Remove transfer tape slowly at a 45-degree angle after letting adhesive set
- Use transfer tape designed for wet applications to prevent sticking problems
- Clean surface thoroughly with isopropyl alcohol before applying vinyl
- Squeegee firmly from the center outward to secure edges and remove moisture
Application fluid trapped underneath rivet heads or textured surfaces can build up residue that seeps out and causes vinyl to lift or crack. Pay special attention to smooth these areas with a squeegee during and after application. Regularly checking for small bubbles or lifting edges within the first 24 hours allows you to gently readjust the decal before the adhesive fully sets, improving the final bond and appearance.
When to Use the Wet Method and When to Avoid It
The wet method works best on smooth, nonporous surfaces like glass, acrylic, plastics, tumblers, and mugs. These surfaces allow the vinyl and application fluid to slide easily for precise positioning before the adhesive sets. Applying vinyl wet helps prevent bubbles and crooked placement on these slick materials. Porous surfaces such as wood, uncoated paper, or textured fabrics do not work well with the wet method because the application fluid can be absorbed or trapped, interfering with adhesion and causing uneven bonding.
This method suits most standard vinyl films with permanent adhesives designed for smooth surfaces. Avoid wet application with reflective or metalized vinyl films, especially on unpainted metal. The aggressive adhesive on these films can bond too quickly or irregularly when combined with fluid, leading to poor results. Also, air-egress vinyls made to allow bubbles to escape during dry application usually do not respond well to fluid-based methods. Fleet graphics over rivets or heavily embossed powder-coated textures require special care as well. On textured surfaces, lightly press the vinyl with gentle, repeated passes to avoid pushing adhesive into low spots or trapping air.
Deciding whether to use the wet or dry method begins by identifying your surface and vinyl. When the surface is smooth and nonporous, and you’re using standard permanent vinyl, the wet method helps you control placement and cut down on air bubbles. On porous or textured surfaces, or when applying reflective, metalized, or air-egress vinyl, dry application works best to ensure proper adhesion and prevent lifting or bubbles. The wet method requires preparing and mixing your application fluid, typically a mixture of water with a drop of baby shampoo or a commercial application fluid, to provide enough slip without making the surface too slick. The vinyl must be positioned and squeegeed out carefully while wet, then allowed to cure before removing transfer tape.
Wet application costs a little more time and effort due to fluid preparation and cleanup but usually results in smoother, bubble-free installations on suitable surfaces. Expect to spend an extra 5 to 10 minutes per decal for wet applications compared to dry methods. Good results show evenly adhered vinyl with no trapped air or wrinkles, clean edges, and precise alignment. Problems arise if you attempt the wet method on porous or rough surfaces, where the fluid soaks in unevenly, causing patchy adhesion or vinyl lifting. With tricky textures, reduce pressure and make more passes with a squeegee to gradually set the vinyl without sealing in air pockets.
Tips for Perfect Vinyl Lettering Placement and Removal of Transfer Tape
Proper alignment and removal of transfer tape are essential for clean, bubble-free vinyl lettering. Using the hinge method helps position your decal exactly where you want it without guesswork. Peeling the transfer tape correctly prevents vinyl from lifting off the surface. Applying the right pressure with your squeegee ensures the vinyl sticks well. Repositioning is possible during wet application but requires care to avoid damage.
Using the Hinge Method for Alignment
The hinge method lets you place vinyl lettering precisely by creating a temporary pivot point. First, tape one edge of the vinyl with painter’s tape or masking tape to the surface. This taped edge acts as a hinge. Position the decal where you want it while holding the other side off the surface. Once aligned, flip the vinyl up away from the surface to spray or apply the wet mix underneath. Slowly lower the vinyl back onto the surface using the taped edge as a guide. This ensures the lettering maintains perfect alignment without shifting.
This method is critical for large or detailed decals where repositioning after sticking is difficult. The tape hinge also reduces contact with the wet surface, allowing you to reposition the decal smoothly before final squeegeeing. Costs are minimal since standard painter’s tape costs about $3 to $5 per roll, enough for many projects.
Peeling Transfer Tape at the Correct Angle
Peeling the transfer tape properly prevents lifting your vinyl letters from the surface. After applying and smoothing the vinyl onto the wet surface, wait for about 1 to 3 minutes to allow some adhesive contact. Peel the transfer tape back slowly at a low angle, close to 45 degrees, pulling it back over itself rather than straight up. This angle minimizes stress on the vinyl layers.
Pulling too quickly or at a steep angle can cause vinyl letters to lift or curl with the tape. In situations with complex or delicate lettering, peel the tape very slowly to ensure all edges stay firmly attached. When any letters start to lift, stop peeling, press that area back down, and warm it slightly with your hand before continuing. This step is important for clean edges and preventing tearing or bubble formation along your design.
Repositioning Decals During Wet Application
Wet application provides some flexibility to reposition vinyl if it shifts or isn’t perfectly aligned on first placement. The water and mild soap solution reduces the adhesive’s immediate bonding, allowing gentle sliding or lifting. To reposition, lift the decal carefully from one edge and shift it slightly with your fingers or a squeegee until it’s positioned correctly. Avoid aggressive pulling, which can stretch or damage the vinyl.
Repositioning works best within the first few minutes before the wet adhesive begins to set. Letting the water dry too much can cause the vinyl to stick firmly and make it hard to move without damage. Don’t apply excessive pressure before confirming placement; instead, slide lightly. To loosen the decal again, spray a small mist of the wet solution behind it as needed. This method is best for standard adhesive vinyl decals but less effective with specialty or permanent adhesives.
Applying Proper Squeegee Pressure and Angle
Applying even, firm pressure with your squeegee bonds the vinyl to the surface and forces out excess water and air bubbles. Hold the squeegee at about a 45-degree angle and push from the center of the decal outward toward the edges. This technique ensures water escapes while pressing the vinyl firmly down. Use moderate pressure, enough to feel resistance but not so hard that you stretch or wrinkle the vinyl. Too light pressure leaves bubbles; too much pressure risks distortion.
Notice bubbles after the initial pass? Gently lift that area, respray if needed, and squeegee again with steady, consistent strokes. Use a squeegee with a firm plastic edge rather than a soft rubber one for vinyl decals. Apply pressure in multiple directions: vertically, horizontally, and diagonally to fully adhere all edges. Proper technique takes only a few minutes but dramatically improves adhesion and appearance.
Keep the transfer tape close to the surface and peel it back slowly at a 45-degree angle to avoid lifting vinyl letters during removal.
Step-by-Step Action Plan for Wet Method Vinyl Lettering
This quick-start plan helps you apply vinyl lettering with the wet method smoothly and confidently.
- Before you start: Gather all supplies including spray bottle with water and a few drops of dish soap, a squeegee, paper towels, and your vinyl lettering. Having everything ready keeps the process efficient.
- Prepare the surface: Clean the application area with rubbing alcohol and allow it to dry completely. A clean surface improves adhesion.
- Prepare the vinyl: Spray the adhesive side of the vinyl lightly with the soapy water mixture. The vinyl should feel slick but not soaked, ensuring repositioning is possible.
- Apply the vinyl lettering: Position the decal on the surface and slowly slide it into place. Use a squeegee to remove air bubbles by pushing from the center out, confirming the decal is flat and even.
- Remove transfer tape: Let the vinyl settle for a minute, then peel the transfer tape off slowly at a sharp angle. The lettering should stay in place without lifting.
- Final touch: Use a dry paper towel or squeegee to press the vinyl firmly, pushing out remaining water and bubbles. Check that edges are fully stuck without peeling.
- After application: Avoid moisture and direct cleaning on the decal for at least 24 hours. This waiting ensures a stronger bond to the surface.
Frequently Asked Questions
Can I Use the Wet Method on Porous Surfaces?
No, the wet method works best on nonporous surfaces like glass or plastic because porous surfaces absorb water and vinyl adhesive. Using it on porous surfaces will result in poor adhesion and possible bubbling.
How Much Dish Soap Should I Add to Water for the Wet Method?
Add about 1 to 2 drops of dish soap per 500 ml of water. This makes the surface slippery enough to reposition your vinyl without affecting adhesion once dried.
Can I Reuse the Transfer Tape After Wet Application?
Transfer tape usually cannot be reused because it loses tackiness after the wet application process. For best results, use a fresh piece of transfer tape each time you apply vinyl decals.
Is It Necessary to Use a Squeegee When Applying Vinyl with the Wet Method?
Yes, use a squeegee to remove air bubbles and excess water, pressing from the center outward. This ensures the vinyl adheres smoothly without wrinkles or bubbles.
How Long Should I Wait Before Peeling Off the Transfer Tape?
Wait until the vinyl and surface are mostly dry to the touch, typically 15 to 30 minutes, to prevent vinyl lifting. Drying time depends on temperature and humidity.
What’s the Best Surface Temperature for Applying Vinyl Using the Wet Method?
Aim for surfaces between 50°F and 85°F. Too cold or hot can affect vinyl adhesion and drying time. Room temperature conditions work best.
Before You Go
Applying vinyl lettering using the wet method gives you more control over placement and fewer air bubbles on challenging surfaces. Follow the steps carefully and take your time with positioning and squeegeeing. Start your next project by gathering your supplies and preparing your surface to get professional-quality results you can be proud of.