How to Vectorize a Logo for Vinyl: Simple Steps for Clean Cuts
How to vectorize a logo for vinyl means converting your design into a clean, scalable graphic made of paths instead of pixels. This process ensures sharp edges and perfect cuts on your vinyl, avoiding blurry or jagged results. Start with a high-resolution image, preferably at least 1500 pixels wide, for the best tracing quality.
Key Takeaways
- Choose a high-resolution source image (1500 pixels or more) to improve vector tracing accuracy and detail.
- Use vector graphic software like Adobe Illustrator or free tools with automatic trace features to speed up the process.
- Keep your logo simple with 5 to 20 paths for easier cutting and cleaner vinyl results.
- Remove design elements smaller than 3mm by 3mm to prevent vinyl cutting errors and wasted material.
- Convert your logo colors into 2 to 4 high-contrast shades for sharper and more effective vinyl cutting.
- Save your final vector file in vinyl-friendly formats such as SVG, EPS, or PDF with clean layers.
What Does Vectorizing a Logo for Vinyl Mean?

Vectorizing a logo for vinyl means converting a raster image, like a JPG or PNG, into a vector graphic composed of lines, curves, and shapes defined by mathematical points. Unlike raster images, which use pixels and lose quality when scaled up, vector graphics maintain crisp edges and detail at any size. This quality is essential for vinyl cutting, where machines follow precise vector paths to slice the design cleanly from vinyl sheets.
Vinyl cutting machines require vector files such as SVG or DXF formats because they rely on these files’ paths to guide the blade. A properly vectorized logo uses connected dots to outline shapes and colors, allowing the vinyl cutter to produce sharp, smooth edges on decals, signs, or custom labels. Without vectorization, your vinyl projects might come out with jagged edges or pixelation, especially if resizing is needed.
Vector graphics differ from raster images primarily in scalability and editability. A raster image consists of a fixed grid of pixels; enlarging it makes the image blurry and pixelated. A vector logo, however, contains instructions for drawing lines and curves. You can resize a vector design from a small sticker to a large wall decal without losing quality. This flexibility also lets you easily adjust colors and shapes without starting over.
To vectorize a logo for vinyl, you start by importing your raster image into vector-editing software like Adobe Illustrator or free tools such as Inkscape. The software traces the image to create paths that match your design. The tracing process may be automatic or manual: automatic tracers save time but can carry over imperfections like blurry edges or faded colors. Manual tracing offers higher precision, ideal for logos with fine details or multiple layers. Keep in mind that professional software may require subscriptions, while some free options have steeper learning curves.
Once vectorized, the logo should consist of clean, stacked layers with clear edges, ready for screen printing or vinyl cutting. Good results show smooth outlines without pixelation or jagged lines. If your logo file still appears blurry or pixelated after vectorizing, it might be a raster image embedded in a vector file type, which won’t work for precise cutting. Norms like exporting to SVG ensure compatibility with most vinyl cutting machines.
The cost of vectorizing varies from free DIY tools to subscription-based software or paid services. Choosing the right approach depends on your comfort with design software, the complexity of your logo, and your budget. Simplifying your logo to 2, 3 high-contrast colors can also improve the cutting process and final look on vinyl, as some details do not translate well into cuttable shapes.
Owning a clean vector logo simplifies every vinyl project, whether cutting small stickers or large signage. The vector file ensures your logo will cut cleanly on any recommended vinyl type and can be easily edited or recolored without losing quality. This precision and flexibility make vectorization a necessary step before sending your logo to a vinyl cutter.
Choosing and Preparing Your Source Image for Best Results
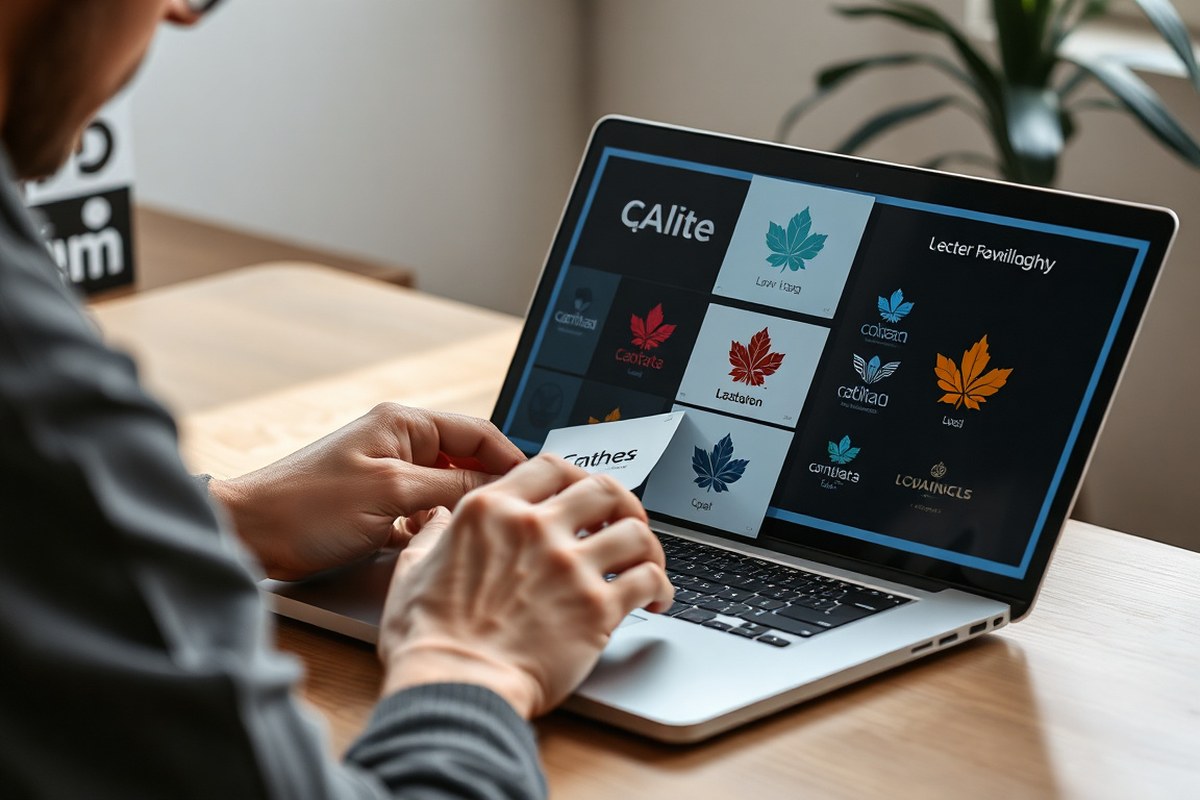
Start with the highest quality source file you can find to ensure clean vectorization for vinyl cutting. Ideal files include flat, high-resolution PNGs or original vector files like AI, EPS, SVG, or PDF. These provide crisp edges and solid colors that translate well into clean, cuttable paths. If your logo includes geometric shapes or wordmarks in common fonts, use the original vector or redraw those elements instead of tracing them to maintain precision.
Image resolution directly affects the quality of your vector output. A low-resolution or blurry image, especially one below 300 pixels in width or height, will produce fuzzy or inaccurate vectors. This compromises cut edges, causing problems when weeding vinyl or applying the decal. You want your source to be at least 1000 pixels wide for auto-tracing tools to work effectively, though larger and sharper images produce better results.
Preparing an image before tracing reduces cleanup time and improves your final vector. Clean up any background noise, simplify colors to solid fills, and adjust contrast to define edges sharply. Avoid logos with gradients or photographic elements without first separating flat color areas, since gradients trace poorly. Low-res or blurry logos require manual redrawing of details to get smooth, precise cut paths. Finding a better source or recreating the logo from scratch often saves time compared to fixing a poorly traced vector.
- Choose a flat, high-resolution PNG or the original vector file if available
- Avoid JPEG-compressed or blurry images to prevent fuzzy vector edges
- Simplify and clean the image: remove backgrounds, noise, and smooth colors
- Redraw geometric or typeface-based elements for exact accuracy
- Separate gradients into clear color blocks before tracing
- Prefer at least 1000 pixels on the shortest side for auto-tracing
- Consider manual tracing or hiring a professional for low-res or complex logos
Tracing a low-resolution or blurry logo will reproduce those imperfections in your vector, which can cause cutting errors and wasted vinyl.
High-quality source images create vectors that can be scaled and cut cleanly, no matter the final size of the vinyl decal. The vector paths should be closed and color-separated with smooth, deliberate edges to minimize cutting mistakes. The better your starting image, the less manual correction you need and the faster you get a production-ready vector file. This upfront effort avoids rework and material waste downstream in the vinyl crafting process.
Tools and Software Options for Vectorizing Logos
Vectorizing your logo for vinyl cutting means converting pixel-based images into paths that vinyl cutters can accurately follow. You don’t always need expensive software like Adobe Illustrator, though it remains a popular choice due to its advanced image tracing features and precise control over vector paths. Illustrator’s Image Trace tool allows you to adjust settings like threshold and path complexity to produce clean cut paths optimized for vinyl designs.
For many small business owners and hobbyists, free or lower-cost tools can also do the job. Online vectorizers and open-source programs are capable of automatically tracing logos, especially when your logo is flat-color and simple in design. These tools often produce files compatible with vinyl cutting software like Cricut Design Space or Silhouette Studio.
The most important features in vectorizing software include the ability to handle multiple colors separately, control over path smoothness to reduce excess nodes, and output to common vector formats such as SVG or EPS. Logos for vinyl cutting should have distinct color areas without gradients or blends, because vinyl comes in solid sheet colors. The software should allow you to break down your logo into clear layers or groups of colors for multi-layer cutting.
When your source is a low-resolution PNG or AI-generated image, automated tracers can approximate the shapes but might create complex or imperfect paths. For logos that really matter, a manual redraw by a designer can produce crisper, simpler vectors that cut cleaner. However, this takes time and skill and typically costs more than the automatic options.
| Format | What it Is | Best For |
|---|---|---|
| SVG | XML-based vector format, native to the web | Master files you can edit and recolor; compatible with Cricut and Silhouette cutting software |
| EPS | PostScript vector format, standard for print | Print shops, sign makers, embroidery firms needing vector files |
| Portable vector container readable everywhere | Sharing vectors with clients or vendors for easy opening and printing | |
| AI | Adobe Illustrator’s native format | Designer workflows inside Adobe; often paired with EPS or PDF |
| PNG (raster) | Fixed-pixel bitmap image | Not suitable for vinyl cutting; source format requiring vector conversion |
Adobe Illustrator requires a subscription that can cost hundreds annually but offers powerful options for path editing, node reduction, and color separation. Vector Magic is a paid alternative specializing in accurate automatic tracing. Free tools, including browser-based tracers, work well for simple logos and quick projects when you have a clean, flat-color image. In all cases, ensure your final vector has smooth, continuous paths with minimal nodes to cut cleanly on vinyl machines.
Step-by-Step Process to Vectorize Your Logo for Vinyl
Vectorizing your logo for vinyl cutting involves converting a raster image into clean, scalable vector paths that your cutting machine can follow precisely. The process includes importing your image, tracing it automatically or manually, cleaning up the paths to avoid errors, and exporting the file in a format compatible with vinyl cutters. This transforms logos into sharp shapes free from pixelation and prepares them for smooth cutting and weeding.
Importing and Preparing the Image
Begin by selecting your source artwork, ideally a high-resolution PNG or JPEG with clear lines and minimal noise. Import this image into vector design software such as Adobe Illustrator. Position it on an artboard sized to your vinyl project to preview the final scale. Before tracing, remove any distracting background elements or unwanted colors using the software’s selection and masking tools. Ensuring a clean, simple image minimizes errors during tracing.
Once imported, convert your image to grayscale if it contains multiple colors and reduce detail that is smaller than the typical vinyl cutting threshold, usually around 1/8 inch (3 mm). Tiny details can result in fragile cuts that are hard to weed. Simplify shapes and flatten complex color gradients into solid, distinct areas to create a more vinyl-friendly design.
Using Auto Trace and Manual Cleanup
Use the Image Trace function to convert the raster image into vector paths. Choose a preset like ‘Black and White Logo’ for sharp contrast and adjust the threshold slider to capture essential details without excess noise. The software will convert your image into outlines composed of anchor points and curves.
After tracing, enter outline mode to inspect individual paths. Check for open paths where lines don’t close properly, avoid overlapping paths that can confuse your vinyl cutter, and look for unnecessary tiny anchor points that increase complexity. Use path editing tools to close gaps by snapping endpoints together, delete duplicate or overlapping shapes, and smooth curves by reducing anchor points while preserving essential form. Simplification tools can lower the node count by about 30%-50%, improving cut quality and cutting time.
For logos with fine strokes or sketch-style features, consider manually redrawing segments or the entire logo using pen or shape tools. Manual tracing offers full control, producing cleaner paths suited to vinyl cutting and avoids fuzzy edges common in automatic traces of low-quality images.
Saving and Exporting for Vinyl Cutting
Before exporting, hide or remove any non-essential background shapes and check that all paths intended for cutting are closed and correctly layered. Assign proper stroke weights or convert strokes to filled shapes since some vinyl cutters require filled paths instead of strokes.
Export your cleaned vector as an SVG or EPS file, formats that maintain scalability and path integrity prized by vinyl cutting machines like Cricut, Silhouette, and commercial cutters. Confirm with your vinyl shop or machine manual which format and settings they prefer regarding color mode (RGB or CMYK) and decimal precision for path coordinates.
Save a backup copy of your original traced file in the native format of your design software. This enables easy future edits to line weights or detail levels as project needs evolve. The exported vector should report a clear count of vector paths, not zero, indicating the image is no longer embedded raster data but clean, editable vector art.
- Import your high-resolution logo image into vector software and scale it to project size.
- Clean up the image by removing backgrounds and reducing complex detail below 3 mm.
- Run Image Trace using an appropriate preset to convert to vector outlines.
- Inspect the paths for any open shapes, overlaps, or excess anchor points.
- Close gaps, delete duplicates, and simplify paths to reduce node count.
- Manually redraw fine or sketchy parts if needed for better cutting quality.
- Remove background objects and convert strokes to fills if required.
- Export your vector as SVG or EPS, confirming compatibility with your vinyl cutter.
Managing Colors and Layers for Multi-Color Vinyl Logos
Handling multi-color logos for vinyl cutting involves separating your design into individual solid color layers, then cutting and assembling each layer accurately. You must create a layered vector file where each color is a distinct, stackable shape. Proper color separation lets you cut each color from its own vinyl sheet and align them precisely during application using registration marks.
Why Color Separation Matters
Separating colors cleanly is essential to multi-color vinyl logos because each vinyl color comes from a different sheet and requires a separate cutting pass. Without clear separation into flat, solid color areas, the cutter cannot distinguish one layer from another, and gradients or blends won’t reproduce correctly. This process ensures the colors line up exactly when stacked, preventing overlaps or gaps.
Color separation also simplifies weeding, the process of removing excess vinyl from each layer. Each layer must be a closed vector shape with intentional holes and counters clearly defined to avoid cutting errors. Also, using 2 to 8 color layers keeps the cutting manageable while maintaining the design’s detail and vibrancy.
Techniques to Separate and Simplify Colors
Start by examining your logo and counting the distinct solid colors to decide the number of layers. Software like Adobe Illustrator or tools integrated with Cricut Maker and Silhouette can automate color separation by tracing and grouping colors into layers. This creates a layered SVG file where each color is isolated as a vector shape. When working in Photoshop, use the Magic Wand tool to select individual colors and copy them into separate layers, but remember only solid flat colors work well for this method.
Manually simplify colors by removing gradients or complex blends before separation because vinyl cutters cannot reproduce smooth color shifts. Convert photo-like details into fewer, solid blocks of color. High-contrast, flat shapes with well-defined edges make cutting and layering easier and produce better final results.
Creating Layers and Registration for Assembly
Once color layers are separated, each becomes a stackable element representing one sheet of vinyl. Organize these layers in your vector software so the bottom layer is the base vinyl color, with subsequent colors stacked above in order. Add registration marks, small matching shapes or lines outside the main design area that appear on every color layer. These marks help align layers precisely when applying the vinyl to avoid misregistration.
Use consistent spacing for registration marks, and keep them clear of the logo’s cut shapes. When cutting, run each color layer separately to produce vinyl pieces that you layer physically in the same order as the vector file. Registration marks let you line up the layers to ensure sharp edges and correct color positioning, important for multi-color decals or signs.
Registration marks must be visible on all color layers and spaced evenly to guarantee precise alignment during vinyl layering.
Best File Formats and Settings for Vinyl Cutting Machines
Vinyl cutting machines require vector files because they use mathematical paths to guide the blade. These paths consist of points, lines, and curves that form closed shapes. A blade can only cut along these defined outlines, so the logo must be accurately converted into closed vector paths. Files that use pixels, like JPG or PNG, won’t work directly since they don’t provide clear paths for cutting.
Vector formats such as SVG, EPS, PDF, and AI (Adobe Illustrator) store your logo with these necessary paths. This allows the cutter to follow the exact shape with clean cuts. The quality of the original logo matters too; you should start with a high-resolution image, ideally 1500 pixels or more, to ensure smooth, precise tracing into vectors. Lower resolution images tend to produce jagged or incomplete paths that can complicate cutting.
Popular vinyl cutters including the Cricut and Silhouette machines are compatible with specific file formats. Cricut, for example, works best with SVG files, which support scalable vectors and transparency, making it ideal for one-color or multi-layer projects. EPS and PDF files are widely accepted by professional print shops and vinyl suppliers because they maintain vector data effectively. Adobe Illustrator’s AI files are preferred in professional settings but may require special software to open.
| File Format | Compatibility | Advantages | Best Use |
|---|---|---|---|
| SVG (Scalable Vector Graphics) | Cricut, Silhouette, most vinyl cutters | Scalable without loss of quality, supports transparency | Small to large projects, multi-layer designs |
| EPS (Encapsulated PostScript) | Professional print shops, vinyl suppliers | Widely accepted in production, supports complex vectors | Large-scale signage, commercial vinyl cutting |
| PDF (Portable Document Format) | Professional print shops, some vinyl cutters | Maintains vector paths, easy sharing | Proofing, collaborative design review |
| AI (Adobe Illustrator) | Professional designers and print shops | Editable vector masters, professional features | Full logo design and editing workflow |
| PNG/JPG (Raster images) | Not compatible | Easy to create but lacks vector paths | Source for vectorization only |
Before uploading your vector file to the vinyl cutter software, check that the paths are closed; open paths prevent proper cuts, causing incomplete or connected shapes. The cutter’s blade follows these paths exactly, so precision in your file influences the quality of the final vinyl decal. Vinyl cutters typically can only cut one color at a time, so prepare multi-color logos in separate layers or files.
Vector files also protect your brand’s confidentiality since the design is mathematically defined and can be vectorized offline without uploading to cloud services. This can be important when working on unreleased logos or rebranding projects under non-disclosure agreements.
Common Vectorization Mistakes and How to Fix Them
Poor vinyl cuts often result from common vectorization mistakes such as open paths, excess nodes, or unclear color edges. Open paths occur when shapes that should be closed leave gaps. This confuses the cutting machine because it follows the path outline and expects a continuous shape to cut. Fix open paths by zooming in on your vector file and using the software’s “close path” or “join nodes” tool. This creates a sealed edge that the cutter can reliably follow.
Excessive nodes increase cutting time and reduce smoothness. Every extra node causes the blade to stop or change direction, leading to rough edges. Simple logos typically need between 5 and 20 paths; cluttering with more nodes than necessary complicates the process. Use path simplification tools in your vector program to reduce unnecessary points, smoothing curves without losing important detail. Check your software’s “simplify path” or “reduce nodes” feature, adjusting parameters to balance detail preservation with node reduction.
- Check for and close all open paths or gaps in the shapes.
- Simplify paths to remove excess nodes, aiming for the fewest needed for smooth curves.
- Merge adjacent paths with the same fill color to create clean, solid color blocks.
- Avoid gradients or fading colors; use solid, distinct colors that vinyl cutters can detect easily.
- Despeckle stray pixels or tiny shapes left by anti-aliasing around edges.
- Inspect the vector image at 300% zoom to catch tiny edges or gaps the machine might miss.
- Use software tools to give your vector a clean viewBox and file structure.
Blended or gradient colors cause cutting issues because vinyl cutters rely on solid color borders and curves to determine cut lines. Replace gradients with flat colors or solid color fills in your vector file. This ensures that each color panel stands out with a clear edge for cutting. Removing halos or anti-aliasing artifacts is important as they can appear as stray tiny paths, confusing the cutter. Use a despeckle or cleanup filter to remove these while preserving small but important details like dots or accents in text.
For optimal results, work on a 300 DPI or higher raster version before vectorizing to give your vectorization software enough pixel information for clean boundaries. After vectorization, manually inspect and adjust the file by joining paths that share the same color and removing any small specks missed by automatic cleanup. A clean file structure not only improves cut accuracy but also speeds up production and reduces wear on your machine. This attention to detail in vector preparation directly translates to a cleaner, faster, and more reliable vinyl cutting process.
When to Draw Your Logo Manually or Hire a Professional
Manual redrawing your logo often delivers clearer, sharper results essential for vinyl cutting, especially when the original image is low quality or complex. Auto-tracing can be faster but may miss fine details and produce uneven lines. Hiring a professional makes sense when the design includes complex shapes, text, or when you require a precisely accurate file for commercial use.
Auto-Trace vs Manual Redraw: Pros and Cons
Auto-tracing software quickly converts bitmap images to vector format by detecting edges and colors automatically. It works well for simple logos with clean lines and high-resolution images, reducing the time needed to prepare files for vinyl cutting. However, auto-trace often struggles with low-resolution screenshots or photographic logos, resulting in jagged edges, unwanted artifacts, or loss of detail.
Manual redraw means recreating the logo by hand using vector tools, ensuring each curve and line is precise. This method is better when working with hand-drawn designs, complex lettering, or logos with subtle artistic touches that auto-tracing can’t replicate accurately. Manual vectorization guarantees cleaner paths better suited for the precision vinyl cutters require, but it takes more time and a higher skill level.
Signs Your Logo Needs Professional Vectorization
Consider a professional if your logo features intricate or overlapping design elements, custom typefaces, gradients, or very fine details that vinyl cutting can highlight. Professionals can recreate these complexities while maintaining trademark accuracy and respecting copyright concerns. Another sign is when the original artwork is unavailable in native vector formats like EPS or AI, and the best quality source is a low-resolution bitmap or photo.
You should also hire a vector artist if your purpose is commercial, such as producing window graphics, car decals, or shop signage, where every contour must remain crisp at different sizes and on various materials. Professionals often ensure that color separations, layers, and paths are properly organized for multi-color vinyl projects. They also provide final files that comply with vinyl cutter software requirements, saving you time and preventing costly errors.
Typical Vectorization Timelines and Costs
Manual vectorization timing ranges widely from 1 to 6 hours depending on the design’s complexity. Simple logos with basic shapes might take just an hour, but logos with complex illustrations may require multiple revisions and careful adjustments that extend the time. Professionals usually quote hourly rates anywhere from $40 to $100 per hour, sometimes offering flat fees for standard logos.
Choosing to redraw the logo on your own means you should expect to spend several focused hours practicing accurate path creation and testing on your vinyl cutter to ensure smooth cuts. Keep in mind that rushing this process could result in production issues or suboptimal cut quality. The tradeoff between cost and quality usually justifies hiring a professional for intricate logos, especially if the logo is a critical element of your brand identity.
Avoid auto-tracing low-resolution or photographic logos for vinyl cutting; manual redraws or professional help yield cleaner results that avoid wasted materials and time.
Step-by-Step Action Plan to Vectorize Your Logo for Vinyl Cutting
Follow these steps to create a clean, cut-ready vector file that works perfectly with vinyl cutting machines.
- Before you start: Gather your logo file in the highest quality possible. Ensure it is clear and well defined so your vector will be accurate.
- Day 1: Choose your vector software, such as Adobe Illustrator or free options like Inkscape. Open your source image there to prepare for tracing.
- Day 2: Clean up your source image by removing background noise and adjusting contrast. This ensures your vector trace captures only the logo shape.
- Day 3: Use the auto-trace or pen tool to convert your logo into paths. Confirm that paths align well with your logo’s edges to avoid cutting errors.
- Day 4: Simplify and smooth paths, removing unnecessary anchor points. Check that curves remain smooth and shapes stay true to the original logo.
- Day 5: Separate colors onto different layers if working with multi-color vinyl. Verify each layer corresponds to one vinyl color for clean cutting.
- Day 6: Save your file in cutting-friendly formats like SVG or EPS. Test the file in your cutter’s software to check for errors or misalignments.
- Day 7: Do a small test cut on vinyl to see how well your vector performs. If cuts are clean and shapes accurate, your vectorization is ready for full production.
Frequently Asked Questions
How Do I Clean Up Jagged Edges After Vectorizing a Logo for Vinyl?
Use the node-editing tools in your vector software to smooth curves and remove extra points. Clean paths ensure the vinyl cutter produces sharp, crisp edges in your final decal.
Can I Vectorize a Hand-Drawn Logo Using Only Free Software?
Yes, free programs like Inkscape offer powerful vector tracing and editing capabilities. They let you manually trace or auto-trace your drawings to create clean vinyl-ready paths without costly licenses.
What’s the Best Way to Test My Vector File Before Cutting Vinyl?
Print your vector design on paper at actual size to check details and colors. This helps spot issues before wasting vinyl sheets on an imperfect cut.
Should I Simplify Complex Logos Before Vectorizing for Vinyl?
Simplifying reduces small details that won’t cut well in vinyl and improves weeding. Focus on bold shapes and remove fine gradients or shadows to ensure clean cuts.
How Do I Handle Overlapping Colors in Multi-Layer Vinyl Logos?
Separate each color into distinct shapes with no overlap to prevent unwanted vinyl sticking together. Use layers in your software to organize colors by cut.
Can I Use a Bitmap Image from the Web to Create a Vinyl Logo?
Yes, but high-resolution, simple images work best. Low-res or complex photos make vectorizing harder and may produce poor-quality cuts.
Wrapping Up
Vectorizing your logo for vinyl is all about precision and clarity. Taking the time to cleanly convert your logo into smooth paths ensures your vinyl cuts will reflect your brand’s exact design. Try opening your logo in a dedicated vector program today, trace it carefully, and prepare your first test cut. This hands-on step will bring you closer to making professional vinyl graphics that stand out.