Lake House Sign Ideas: A Complete Guide to Styles, Materials, and DIY Tips
Lake house sign ideas can transform your lakeside space with personalized charm and rustic appeal. Choose from styles like paddle, arrow, or vintage signs, each offering a unique look that reflects your lake lifestyle. Start by selecting durable, weather-resistant materials to ensure your sign stays vibrant against humidity or coastal conditions.
Key Takeaways
- Wood signs provide a classic lake house look but need regular sealing to resist moisture damage.
- High-density urethane (HDU) signs combine durability with detailed carvings for lasting outdoor display.
- Aluminum composite signs offer 10 to 15 years of substrate life and 5 to 10 years of graphic longevity in humid areas.
- Measure your display space; typical lake house mantel or sofa areas suit signs 36 to 48 inches wide.
- Consider custom signs with lake-themed artwork to personalize your décor and make a statement.
- DIY lake house signs allow for creative control but require proper tool use and weatherproof finishing.
What Are Lake House Signs and Popular Types?

Lake house signs serve as decorative markers that add charm and personality to your waterfront retreat. They often identify the property by name, welcome guests, or display lake-themed imagery that connects your home to its natural surroundings. Installing a lake house sign helps define your outdoor space, giving it a cohesive style and making your property feel inviting and memorable to visitors.
Choosing the right type of lake house sign depends on your style and where you plan to place it. Entryway signs are the most common; these often feature your family name or a warm greeting like “Welcome to our Lake Life” to set the tone as guests arrive. Personalized signs with carved or sandblasted details, including your lake house’s name and local scenery such as pine trees, mountains, or sailboats, improve this effect and typically cost between $70 and $250 depending on size and complexity. Many designs incorporate artwork like canoes or lakeside docks to emphasize the lakeside theme.
Dock or boathouse signs represent a second popular type, perfect for marking your property’s waterfront access. These signs can be customized with nautical elements and often display the house or boat name. Using weather-resistant materials like HDU (high-density urethane) or treated wood helps ensure they withstand humidity and temperature variations common near lakes.
Rustic and vintage-style signs appeal to owners who want a casual, cozy look. These often use distressed wood and feature simple phrases related to lakeside living or family traditions. They can cost around $70 to $90 for smaller pieces and make excellent accents in exterior or interior spaces. Arrow signs, which direct guests to the lake house or amenities, add a functional and decorative touch while reinforcing the theme.
Adding a personalized touch is possible with custom designs that reflect your family name, house nickname, or even favorite lake activities. Some offer mock-ups or templates to visualize the sign before ordering, helpful if you want to stay within a budget or match existing décor. Typically, investing in a custom sign ranges from $100 to $250 plus installation time. For a reasonable budget, focus on key areas like the main entry and dock, which provide the biggest visual impact for guests.
Overall, lake house signs serve both practical and aesthetic purposes. Selecting one that fits your desired style, location, and budget ensures your lake house feels uniquely yours and improve the atmosphere for family and visitors alike.
Choosing the Best Materials for Lasting Lake House Signs

Choosing the best material for your lake house sign depends on durability needs, style preferences, and maintenance willingness. Wood, metal, and canvas each offer unique strengths and weaknesses in an outdoor setting by the water.
Wood signs provide a warm, rustic look, often preferred for cabins and lakeside retreats. High-quality cedar or HDU (high-density urethane) mimics wood grain while resisting moisture better. Wood signs usually last around 5 to 10 years outdoors but require periodic sealing or repainting to protect against humidity, sun exposure, and insect damage. They may warp or crack over time without care.
Metal signs, especially powder-coated aluminum or steel, stand up well to humidity and direct sunlight without fading. They fit modern or mixed-material designs. Metal signs can last 10 years or more outdoors with minimal maintenance, usually just a wash to remove dirt and prevent rust spots. However, metal may dent on impact and typically costs more upfront than wood.
Canvas signs offer lightweight and customizable options but have the shortest outdoor lifespan, generally less than 2 years in direct weather. They need to be treated with waterproof coatings and stored or covered during heavy rain or winter months to avoid mold and tearing. The following table compares key factors to help you decide which material suits your lake house sign best:
| Material | Durability (Outdoor) | Maintenance Needed | Typical Lifespan | Style Fit | Cost Range (USD) |
|---|---|---|---|---|---|
| Cedar Wood | Moderate; prone to warping if unsealed | Annual sealing or painting | 5-10 years | Rustic, classic lake cabin | $50 – $200 |
| HDU (Wood Grain Pattern) | High resistance to moisture and insects | Minimal; occasional cleaning | 10+ years | Rustic look with improved durability | $150 – $300 |
| Powder-Coated Metal | Very durable; resists rust and sun fading | Low; occasional washing | 10+ years | Modern, industrial, or mixed materials | $100 – $400 |
| Canvas | Low; vulnerable to weather damage | Waterproof treatment; store when not in use | < 2 years | Temporary or indoor decor | $30 – $100 |
Use a sealant designed for outdoor wood to extend your wooden sign’s life and keep colors vibrant under sun and moisture exposure.
Your decision can follow a simple rule: choose wood or HDU for a traditional warm look that blends with nature but expect more maintenance; choose metal for a low-maintenance, long-lasting sign that fits a sleek lakeside aesthetic; pick canvas only for indoor spaces or short-term events. Combining materials also works well, like a metal frame with a wood panel inside, balancing durability and style.
How to Choose the Right Size and Style for Your Space
Choosing the right size and style for your lake house sign depends on the space where it will hang and the decor already in place. Measure your wall or display area carefully and pick a style that complements rustic, nautical, or modern lake house themes. Selecting suitable lettering and graphics ensures your sign is readable and visually appealing.
Measuring Wall and Display Areas
Start by measuring the width and height of the wall or surface where you plan to hang the sign. Consider how much empty space you want around the sign to avoid overcrowding or a lost look in a large area.
Signs that are too large can overwhelm a small wall, while very small signs may look insignificant on expansive spaces like a big entryway or living room wall. Outdoor areas such as a dock post or above the front porch usually call for medium to large sizes for visibility from a distance. Use painter’s tape to create a temporary outline on the wall to visualize the sign’s footprint.
- Measure the width and height of the intended wall or display space in inches or feet.
- Mark the area lightly with tape to represent different sign sizes you are considering.
- Leave at least 3 to 6 inches of space between the sign edges and other wall features like picture frames or windows for balance.
- Note obstacles such as lighting or furniture that might obscure a sign.
- Choose a sign size that fits neatly within your marked area without crowding.
- For outdoor signs, consider visibility from typical viewing distances; 18 to 24 inch height signs work well from 10 to 15 feet away.
Matching Style with Lake House Decor Themes
Your sign’s style should complement the overall feel of your lake house. Rustic decor favors weathered wood textures, distressed paint finishes, and natural tones. Nautical themes lean toward clean lines, anchors, compasses, or paddle motifs with navy blue and white colors. Modern lake houses often use polished metals, minimalist typography, and subtle coordinate details.
Consider the sign material as part of the style, wood fits rustic cabins, powder-coated metal suits outdoor or modern spaces, and gallery-wrapped canvases work well indoors for a warm texture. Matching your sign style to existing decor makes it feel integrated and improve the room’s character.
Think about where you want the sign displayed: a rustic sign with rough edges may be perfect near a wood stove or porch but feel out of place in a sleek kitchen. A modern metal sign is ideal for clean, open-plan living rooms or bathrooms with contemporary finishes.
Choosing Lettering and Graphics for Readability
Effective lettering and graphics improve both the look and functionality of your sign. Choose fonts that are easy to read from a distance, bold sans serif or simple serif fonts are popular for lake house signs. Avoid overly intricate or condensed scripts unless used sparingly for accents like family names.
Graphics like lake outlines, fish, or boating symbols add charm but should not clutter the design. Balance text size and imagery so the main message stands out. White or light-colored letters on darker backgrounds increase clarity outdoors, while dark letters on pale indoor walls work well.
Pick styles that suit your message style: Established year or family name signs often use clean, classic fonts to emphasize tradition. Modern decor signs use minimalistic typefaces and simple shapes for a sleek look.
Personalized and Custom Lake House Sign Design Ideas
You can absolutely personalize a lake house sign to make it uniquely yours. Many custom signs allow you to add your family name, an “Established” date, or even the exact GPS coordinates of your dock or property. These details add a layer of meaning and help guests immediately connect with your space. Including the family name or a special phrase like “Welcome to the Lake” creates a warm and inviting feel.
When choosing what to include on your sign, think about the story you want it to tell. A popular template might read: “The Johnson Family
Est. 2015
45°12’30” N 89°45’10” W
Lake Waconia” Combining family name, established date, coordinates, and your lake’s name can make your sign completely one-of-a-kind. The established year pays homage to when your family started enjoying the lake house, while the GPS coordinates offer a precise, personal touch that’s both decorative and functional.
Adding GPS coordinates to your sign offers a practical benefit; it can serve as a navigational marker for guests arriving by boat. Coordinates placed either beneath or along the side of the sign should be formatted clearly, degrees, minutes, and seconds work best for accuracy. Latitude and longitude coordinates take up little space but add significant character, especially if your dock or lake house is in a less obvious spot.
The choice of artwork also plays a key role in customization. Common designs include rustic scenes like loons on the water, mountain outlines, or classic lake symbols such as oars or fish. Select artwork that resonates with your lake’s environment or your family’s style. Some custom sign makers offer sandblasted 2.5-D high-density urethane options, creating textured, durable signage that looks great year-round. Prices for personalized wooden signs often start around $100 and can increase depending on size and detail.
For a smooth design process, use a sign template from your vendor. Most suppliers will ask you to provide specifics like the exact text, a preference for font style, and whether you want artwork or symbols included. It’s important to review a digital proof before finalizing the order to avoid mistakes. Taking time to ensure your family name is spelled correctly and the coordinates are accurate will prevent costly delays.
In different situations, customization varies. For example, a sign on your porch entryway might focus on a warm welcome message with family name and established date. A dock sign might highlight GPS coordinates more prominently to help visitors navigate by boat. If the sign is a gift, consider adding a phrase like “Our Happy Place” to make the present feel more personal and thoughtful.
Keep your design balanced; avoid overcrowding the sign with too many details or generic phrases without personalization. An overly busy sign can be hard to read and loses the charm that comes from meaningful, clear information. Aim for simplicity combined with your personal elements to create an inviting, memorable sign that complements your lake house perfectly.
Step-by-Step DIY Lake House Sign Making Guide
Creating your own lake house sign lets you personalize your space while ensuring durability against the elements. The process includes selecting and cutting the right wood, painting your design clearly, sealing the surface to protect against weather, and preparing it for mounting. Each of these steps guarantees your sign will look great and last for seasons by the lake.
Cutting and Shaping the Base Wood
Begin with choosing a wood that withstands outdoor conditions, such as cedar or redwood, which naturally resist rot and insects. Measure your desired sign size, commonly between 12 to 24 inches wide and 6 to 12 inches tall, to fit your available wall or post space. Use a saw to cut the wood to size and sand all edges smooth to prevent splinters and improve paint adhesion.
Shape the edges or add curves if desired, using a jigsaw or router for a personalized touch. Make sure to work in a well-ventilated area and wear safety gear during cutting and sanding.
Painting and Detailing the Design
Choose exterior-grade paint or acrylics for vibrant colors and resistance to fading. Use a pencil to lightly sketch your design or stencil the name and images. Painting first with a primer layer improve coverage and paint longevity. Apply your base color and allow it to dry completely, usually 24 hours under typical temperatures (70°F, 50% humidity).
Add details with smaller brushes, layering colors carefully to prevent bleeding. For a clean look, consider using painter’s tape to outline letters or shapes. Allow each paint layer to dry fully before proceeding to the next.
Applying Weatherproof Sealant for Durability
Seal the painted surface with a clear, waterproof outdoor varnish or polyurethane with UV protection. This layer guards against moisture, sun damage, and fading. Apply at least two coats, allowing 4 to 6 hours drying time between coats at moderate temperatures (around 65-75°F). Make sure the sealant covers the entire sign, including edges and the back for full protection.
Use a foam brush or spray applicator for an even, smooth finish without brush marks. Inspect for drips or pooling, smoothing them out immediately to avoid uneven sealing.
Mounting Preparation and Tips
Drill pilot holes for screws or hooks if you plan to hang the sign. Choose stainless steel or coated hardware to prevent rust. Consider attaching mounting brackets or a frame for extra stability. When mounting on a post or fence, use weatherproof adhesive or heavy-duty screws that fit your surface material.
Make sure the mounting location avoids direct harsh sunlight all day and allows for air circulation around the sign to extend its life. Hanging outside requires checking local guidelines to make sure you follow rules about external signage.
- Select durable wood such as cedar or redwood and measure to size.
- Cut and sand edges smooth, adding shapes with a jigsaw if desired.
- Prime the wood surface and paint your base color.
- Sketch or stencil your design, and paint details with layered drying.
- Seal the entire sign with two coats of outdoor clear varnish, drying between coats.
- Drill pilot holes and attach appropriate mounting hardware.
- Install the sign securely in a spot protected from extreme weather.
Use outdoor-rated paint and sealant to prevent peeling and fading under sun and moisture exposure.
Mounting, Display Locations, and Installation Tips
Choosing the right spot to mount your lake house sign can make all the difference in both its visibility and longevity. The best locations are high-traffic areas where the sign catches the eye but also remains protected from harsh weather. Common placements include near the front door, on a garden fence, facing the driveway, or above a porch. These spots let guests and passersby easily notice your sign, improving the welcoming lake house feel. Keep in mind direct sun exposure and prevailing wind directions; placing the sign under an eave or porch roof can reduce wear, especially if it’s made of wood or painted surfaces.
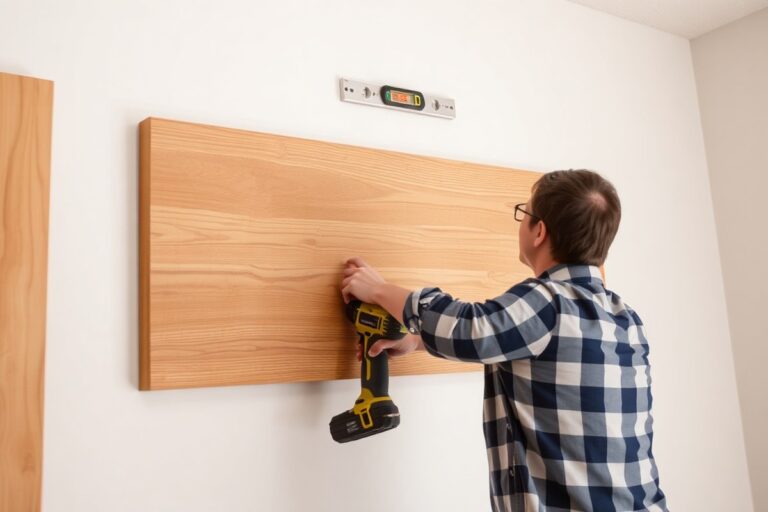
Installation times vary mainly by sign size and mounting type but typically take between 30 minutes to an hour. Essential tools include a drill with the right bits, a level to keep your sign straight, anchors suited for the mounting surface (wood, plaster, stone), screws, and a measuring tape. If mounting on wooden siding or a post, wood screws with anchors often suffice. For masonry walls, you’ll need a masonry bit, anchors, and screws designed for brick or stone.
Start by holding the sign against the chosen surface where you want to install it. Use a level to make sure the sign sits perfectly horizontal. Mark the spots for screws through the mounting holes on the sign, ensuring they align with studs or solid anchoring points behind the surface if possible. Drill pilot holes slightly smaller than your anchors to avoid cracking the surface. Insert wall anchors if you’re not drilling directly into wood. Then, line up the sign and secure it with screws. Tighten until snug but avoid overdriving screws, which can damage the sign or wall.
Outdoor signs generally require periodic inspection to tighten fasteners or reapply protective finishes, especially in lake environments with humidity and occasional storms. Some lake house signs come with pre-drilled mounting holes and detailed instructions, which can reduce installation time and errors. For freestanding options, consider mounting on stakes or posts sunk into the ground; shade the base to limit moisture damage.
Signs made of high-density urethane, wood, or metal vary in weight, so adjust mounting hardware accordingly. Heavier signs might require lag bolts and anchors rated for 50 pounds or more. Weather-resistant hardware such as stainless steel or coated screws extends the installation’s durability. Avoid using nails or ordinary screws, which may loosen with temperature changes or wind. Protect your hands with gloves and wear eye protection when drilling.
Placement should also consider sightlines and lighting. Position your sign where natural light highlights it during the day and consider adding solar or low-voltage lights for evening visibility. For renters, removable mounting options like heavy-duty outdoor adhesive strips or hooks can display signs without wall damage. These tend to hold well for signs up to 10 pounds and are a quick, tool-free solution.
Cost Ranges and Timing for Custom and Ready-Made Signs
Lake house signs vary widely in price depending on size, material, and customization. Small, ready-made signs typically start around $20, while large custom wooden signs can exceed $200. Materials like cedar, pine, or metal influence cost, with metal and hand-carved wood generally costing more due to durability and craftsmanship. Adding personalized text, logos, or special finishes often adds $25 to $75 to the base price.
Production and shipping times are another consideration. Ready-made signs usually ship within 3 to 5 business days. Custom signs take longer because they require design approval, material preparation, and hand finishing. Expect a timeline of 2 to 6 weeks for most custom orders, depending on complexity and shop workload. Shipping adds 3 to 10 days, depending on your location and the selected carrier.
The table below breaks down estimated costs and timeframes for various lake house sign options. This should help you plan your purchase or project based on timing and budget.
| Sign Type | Size Range | Material | Base Price | Customization Cost | Production Time | Estimated Shipping Time |
|---|---|---|---|---|---|---|
| Small Ready-Made | 8″ x 12″ | Wood or Metal | $20 – $50 | None | 1 – 3 days | 3 – 5 days |
| Medium Custom | 12″ x 24″ | Cedar or Pine | $80 – $150 | $25 – $50 | 2 – 4 weeks | 5 – 7 days |
| Large Custom | 24″ x 36″ or larger | Hand-Carved Wood or Metal | $150 – $250+ | $50 – $75+ | 4 – 6 weeks | 7 – 10 days |
When ordering a custom sign, start by selecting your preferred size and material. Then plan your design details carefully to minimize revisions that add production time. Confirm the estimated ship date before finalizing to ensure it matches your schedule, especially for seasonal lake house openings or gift giving. For faster delivery, some sellers offer rush options at an extra fee.
Maintaining and Caring for Outdoor Lake House Signs
Outdoor lake house signs need regular care to stay attractive and durable against weather. Cleaning and inspecting the signs routinely helps spot any problems early. Following maintenance tips extends the life of wooden or metal signs, maintaining their charm for years.
Routine Cleaning and Inspection
Regular cleaning removes dirt, algae, and debris that can wear down the surface. For wooden signs, use a soft brush or cloth with mild soap and water to gently scrub without damaging the wood fibers. Rinse with clean water and let it dry completely before applying any treatments.
Metal signs can handle a similar approach but might benefit from a cloth dampened with a mixture of water and vinegar to remove corrosion or rust spots. Check your signs every two to three months for loose screws, fading paint, or any signs of cracking or chipping. Early observation allows you to fix issues before they worsen.
Reapplying Sealants or Coatings
Most wooden lake house signs benefit from a protective sealant, such as a clear outdoor wood varnish or a water-repellent stain. Applying a coat every 12 to 18 months helps shield wood from moisture, UV rays, and temperature changes, which can cause warping or splitting. Before sealing, sand the surface lightly to remove rough spots or peeling finish.
Metal signs may require a rust-resistant clear spray or enamel paint touch-up. Reapplying these coatings every year, especially after harsh winters or rainy seasons, prevents corrosion. Always apply sealants in dry weather with temperatures between 50°F and 85°F for best adhesion.
Repairing Paint Chips or Weather Damage
Small paint chips or scratches on wooden signs can be repaired by lightly sanding the damaged area, cleaning off dust, and applying matching outdoor paint or stain. It helps to blend the spot into the surrounding surface for a neat look. Allow sufficient drying time, usually at least 24 hours, before mounting the sign again.
Metal signs with rust spots should be sanded down to bare metal, wiped clean, and coated with rust-inhibiting primer before repainting. For dents or bends, gently tap the metal back into shape with a rubber mallet, taking care not to crack paint layers. Repair kits for outdoor signs typically cost $10 to $30 and can save replacement costs.
Always follow the manufacturer’s guidelines on cleaning products and sealants to avoid damaging your lake house sign.
Step-by-Step Action Plan for Your Lake House Sign
Follow these steps to create or choose a lake house sign that matches your style and stands up to the elements.
- Day 1: Measure your outdoor space where the sign will hang. This ensures the sign size fits well and looks balanced.
- Day 2: Pick your preferred material based on durability and style, such as cedar for rustic charm or metal for longevity. Confirm it suits your climate to avoid damage.
- Day 3: Decide on personalization options, like family name or lake coordinates, to make the sign unique. Sketch or use an online tool to visualize your design.
- Week 1: If DIY, gather tools and materials, then cut and prepare your sign base according to your design. Check alignment and smooth edges before painting or staining.
- Week 2: Apply weather-resistant paint or sealant on your DIY sign. Let it dry thoroughly; test its finish by touching to make sure it feels dry and firm.
- Week 3: Install mounting hardware suitable for your chosen location, like rustproof hooks or anchors. Verify stability by giving the sign a gentle tug after installation.
- Monthly: Inspect your sign for signs of wear or damage from weather. Clean with mild soap and water to keep it vibrant and intact.
Frequently Asked Questions
What Are Some Unique Themes for Lake House Signs Beyond the Usual Lake and Cabin Motifs?
Unique themes can include nautical elements, local wildlife, or vintage fishing gear. These add personality and can reflect your specific lake area’s character, making your sign stand out.
How Can I Incorporate Family History or Names into a Lake House Sign Design Effectively?
Use custom lettering with family names or established dates integrated into the sign’s artwork. This not only personalizes the sign but creates a warm, meaningful focal point for visitors.
What Are the Best Weather-Resistant Finishes for Lake House Signs?
Marine-grade polyurethane or exterior epoxy coatings offer excellent protection against moisture and UV rays. Applying these finishes extends the life of your sign in harsh lake environments.
How Should Lighting Be Arranged to Highlight a Lake House Sign at Night?
Use soft LED spotlights angled to avoid glare but highlight the sign’s details. Solar-powered lights can be an eco-friendly option with easy installation near driveways or docks.
Can Lake House Signs Be Made Eco-Friendly?
Yes, choosing sustainably sourced wood or recycled materials and non-toxic paints help minimize environmental impact. This aligns well with a nature-focused lake lifestyle.
What Are Good Gift Ideas Involving Lake House Signs for New Homeowners?
Custom signs with the home’s name or family name are thoughtful options. You might also consider smaller decorative pieces themed around the lake house, like paddles or plaques.
Final Thoughts
Your lake house sign adds a personal touch while welcoming guests with style and charm. Start by measuring your space right now to set your project on the right path. Taking the time to choose the right materials and design ensures your sign will last many seasons by the water.