How to Make Door Hanger Signs: A Complete Guide with Materials & Tips
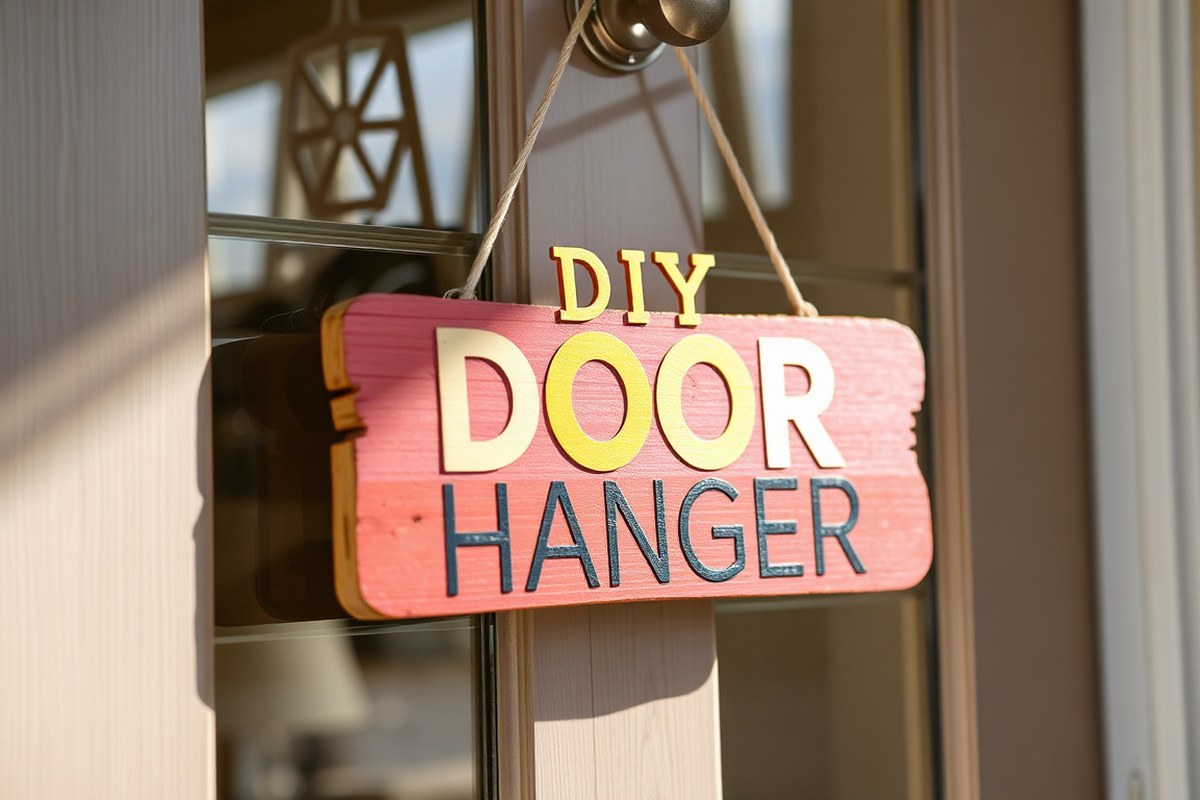
How to make door hanger signs starts with choosing the right materials and size for your project. Use unfinished wood rounds or standard-sized boards (3.5 by 8.5 inches) that fit over a doorknob, typically with a 2-inch-wide hole at the top. Preparing your base carefully ensures your door hanger will be sturdy, attractive, and easy to hang.
Key Takeaways
- Choose a door hanger size that fits your door; 12-inch wood rounds or 3.5 by 8.5 inches are common options.
- Ensure the hole at the top is roughly 2 inches wide to slide easily over most doorknobs.
- Expect material costs between $10 and $20 for most DIY door hanger projects.
- Allow paint coats to dry for 2-3 hours between colors for clean, crisp stripes or designs.
- Cut the ribbon strips to lengths ranging from 10 to 14 inches, adjusting the size based on how big you want the loops for hanging.
- Larger door hangers around 18 to 24 inches attract more attention but are heavier and harder to hang.
How to Make a Door Hanger Sign Step-by-Step
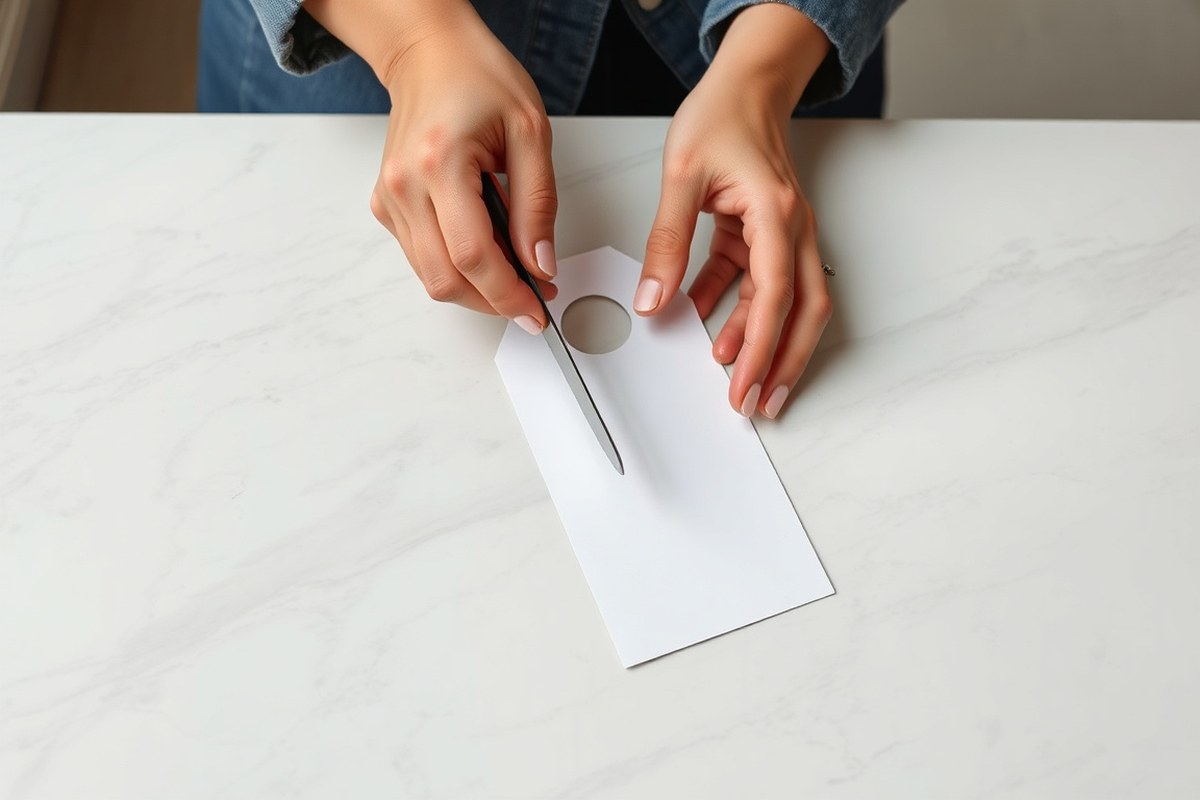
Making a door hanger sign involves several clear steps, from preparing the base to adding finishing touches that help your design stand out. The process begins with selecting or creating your door hanger blank, which is often a wood round about 12 inches in diameter for a balanced and visible size on most front doors. After securing the material, you will move through designing, cutting, painting, and assembling your sign to achieve a polished, custom look. Follow these steps to create your own door hanger sign from scratch:
- Choose and prepare your base. Start with an unfinished wood circle or a pre-cut door hanger blank that matches the typical size, such as 11.8 to 12 inches in diameter. Sand the surface to remove any rough edges or splinters. Clean off dust with a dry cloth to ensure paint and decorations adhere well.
- Mark and cut the hanging hole. Measure and mark the spot for the hole to hang your sign, usually about 1 inch from the top center. The hole should be around 1.25 inches in diameter to fit most over-the-door hooks. Use a drill with a spade bit or hole saw sized appropriately, making sure to keep the hole neat for easy hanging.
- Design your sign layout. Print or sketch your design beforehand, matching the door hanger size (about 3.5 x 8.5 inches for classic templates or full-round sized graphics). Transfer the design onto your sign with a pencil or carbon paper. Planning your text and imagery ensures even placement and a professional result.
- Paint your base coat. Apply a primer or base paint color suited to your design. Use acrylic or outdoor-grade paint for durability. Let it dry for at least 1 hour at room temperature (about 70°F). This base coat helps colors pop and protects the wood.
- Paint or apply your design. Use paint pens, stencils, or brushes to add details and lettering. For intricate designs, stencils help maintain crisp lines. Allow paint to dry fully between layers, typically 30 to 60 minutes. This prevents smudging and ensures clean colors.
- Add decorative elements. Attach ribbon, bows, or small embellishments with hot glue or craft adhesive. Ribbon works well at the hanging hole or as a border. Keep decorations weather-resistant if the sign will be outdoors.
- Seal and protect your sign. Spray or brush on a clear acrylic sealer to protect your paint and decor from moisture, dirt, and fading. Apply 1 to 2 coats, allowing 30 minutes drying time between coats. This step improve longevity and keeps your door hanger looking fresh.
- Attach your hanging hardware. Thread a ribbon, rope, or metal ring through the hole for easy hanging. An adjustable over-the-door hanger can also be used, especially if the sign is for a rental or temporary display. Ensure the hanger fits securely but is simple to remove.
Essential Supplies and Materials for Door Hangers

Your choice of materials for door hanger signs depends on the look, durability, and function you want. Wood offers sturdy and reusable options, ideal for decorative or long-term use. Cardstock suits quick, colorful, and lightweight projects best, often for marketing or temporary notices. Vinyl is great for waterproof, flexible hangers that can handle outdoor exposure or frequent handling.
Gathering the right tools before starting saves time and improves your results. For wood door hangers, you’ll need a small saw or pre-cut wooden blanks, sandpaper for smoothing edges, acrylic paints or wood stain, paintbrushes, and a drill if you want to add a hole for hanging with ribbon or string. Expect to spend $10 to $20 for a basic set of wooden blanks at craft stores, plus $5 to $15 for paints and brushes.
For cardstock projects, prepare heavyweight cardstock paper (at least 80 lb for durability), scissors or a craft knife, a hole punch, markers or acrylic paints for decoration, and optionally stickers or stamps. Packs of 50 cardstock sheets cost about $10 to $15. Markers or paint sets suitable for paper range $5 to $20. Using a cutting mat can prevent accidental damage.
Vinyl door hangers require adhesive vinyl sheets or rolls, a craft cutting machine (like a Cricut or Silhouette) or a sharp craft knife for manual cutting, transfer tape for applying designs, and a ruler or cutting mat. Rolls of vinyl cost about $15 to $25, cutting machines range from $150 upward but can be shared tools in craft groups for cost savings. Transfer tape runs around $5 to $10.
- Wood door hanger: wooden blanks ($10, $20), sandpaper, acrylic paints ($5, $15), paintbrushes, drill or hole punch
- Cardstock door hanger: heavyweight cardstock ($10, $15 per pack), scissors or craft knife, hole punch, markers or paint
- Vinyl door hanger: adhesive vinyl ($15, $25 per roll), craft cutting machine or craft knife, transfer tape ($5, $10)
- Optional supplies: ribbons or strings for hanging, stencils, stickers, cutting mats
- Storage: a door hanger organizer keeps materials tidy and accessible
Costs vary with project size and complexity, but simple sets for each method start around $20. Pre-made kits, which include all materials and tools, range from $15 for basic cardstock kits to $40 or more for wooden kits with paint and brushes. These kits can be useful for beginners who want convenience over sourcing individual supplies.
Secure your materials on a stable surface before cutting or painting to avoid slips that can damage your project or cause injury.
Matching your door hanger size to the door’s hardware helps the hanger fit right and look professional. Typically, 3.5 x 8.5 inches works for standard doorknobs. Larger hangers of 5 x 11 inches suit bigger doors and gain more visibility, which is useful if your door hanger carries detailed messaging.
Choosing the Right Size and Shape for Your Door Hanger
Choosing the right size and shape for your door hanger sign depends mainly on the type of door, how visible you want it to be, and the purpose you have in mind. Standard door hangers are usually about 4 by 9 inches, which fits most residential doors without being cumbersome. This size offers a balance between visibility and weight, so your hanger won’t overwhelm the door or be too heavy for the doorknob.
The size of your door hanger directly affects how noticeable it is and how it complements the door. Larger door hangers, around 18 to 24 inches, can make a bold statement and work well on very large or commercial doors, but they might feel heavy or look out of place on smaller doors. Smaller or medium sizes are better for promotional events or welcome signs where quick readability is key without obstructing the door.
Different shapes can also suit specific types of doors or events. Traditional rectangle or oblong shapes with a cut-out for the knob are the most common and easy to hang. Round wooden door hangers are gaining popularity for adding a more decorative or rustic look, especially for seasonal or personalized messages. If your door does not have a traditional knob, using an outdoor-rated adhesive hook lets you hang flatter shapes securely without slipping and keeps the appearance neat.
The following table compares common door hanger sizes with their best use cases. This will help you decide what fits your needs and door type best.
| Size | Shape | Best Use Case | Notes |
|---|---|---|---|
| 4 x 9 inches | Rectangle/Oblong | Standard residential doors, marketing flyers, clear messaging | Most common; lightweight and fits most doorknobs |
| 6 x 12 inches | Rectangle/Oblong | Larger messages, small business promotions, seasonal decor | More visible but slightly heavier; suits medium doors |
| 18 – 24 inches (height) | Oblong or custom shapes | Large front doors, porch decorations, personalized wooden signs | Better for big doors; heavier and requires sturdy hanging method |
| 6 – 10 inches (diameter) | Round | Rustic or modern décor, seasonal themes, boutique business signs | Popular trendy choice; pairs well with wood or craft materials |
| Custom shapes | Varies (wooden, adhesive-backed) | Non-standard doorknobs, creative displays, adhesive hook hangers | Use for unique doors or creative projects; requires more effort to cut or source |
To select the best size and shape, first measure the width and type of your doorknob or handle. Pick a hanger width narrow enough to hang without slipping but wide enough to resist wind or movement. For door types without knobs, consider adhesive hooks and flatter designs that rely on sticky backings. The purpose should guide your height choice: longer signs hold more info but get heavier, while smaller hangers keep a compact look for quick notices.
Keep in mind the weight and ease of hanging. Large wooden signs around 18 inches or bigger add warmth and personality but need secure attachment with sturdy ribbons or hooks. Lightweight cardstock or printed flyers at 4 by 9 inches are cost-effective for bulk marketing and easy to produce with free design tools. The shape you choose can add character or keep things simple, so base that on the door style and your message’s tone.
Designing Effective and Attractive Door Hanger Signs
Designing an effective door hanger sign hinges on combining eye-catching visuals with clear, concise text. Focus on a harmonious color scheme, readable fonts, and a straightforward message that grabs attention quickly. Balancing these elements creates a sign that’s both attractive and easy for viewers to understand.
Choosing Color Combinations
Start by selecting colors that reflect the mood or purpose of your sign while maintaining high contrast for readability. Bright, bold colors like reds, blues, or yellows can grab attention from a distance, but pairing a dark background with light text or vice versa ensures your message stands out clearly. For example, white letters on a navy background offer strong contrast that’s easy to read in daylight. Limit your palette to two or three main colors to avoid visual clutter, and consider your setting, colors that pop against typical door hues increase visibility.
Use a color wheel or design tools such as Canva or Adobe Illustrator to test complementary or analogous color schemes. Personal touches like metallic or pastel tones might suit seasonal themes or business branding but check how they look printed or painted on your chosen material. Laminating the finished sign can help protect colors and keep them vivid over time, especially for outdoor use.
Picking Fonts and Images
Choose fonts that are bold and simple. Sans-serif fonts like Arial, Helvetica, or Futura improve readability from a distance better than ornate or script fonts. Keep font sizes large enough, around 48 points or higher depending on your door hanger size, to ensure passersby don’t have to squint. Avoid overcrowding your sign by limiting yourself to two font styles at most, such as one for your headline and another for additional information.
Images or graphics should support your message without dominating the space. Use a clear, relevant image or a simple logo placed strategically to draw the eye but leave room for text. For a DIY project, basic graphics created with software like Microsoft Word or Canva can work well, especially layered designs that add dimension. Planning the hole placement for hanging in advance helps prevent obscuring important parts of your design.
Crafting Clear Messages
The message on your door hanger must be direct and compelling. Use short phrases or single sentences that quickly convey your purpose, a special offer, greeting, or announcement. Calls to action such as “Call Now,” “Visit Today,” or “Free Estimate” prompt immediate response. Avoid long paragraphs or complicated wording; aim for fewer than 25 words in total to keep your sign uncluttered.
Design your text layout so the most important information, like your key message or phone number, is at eye level and in the largest font. Centering your headline and placing secondary details below in smaller type guides the reader naturally. For a business door hanger, include your logo, a brief tagline, and contact info arranged neatly. Planning your design a day in advance gives you time to adjust and ensure every element contributes to clear communication and strong visual appeal.
Techniques for Cutting and Preparing Your Door Hanger
To cut door hanger signs safely and effectively, choose the right tools based on your material, wood or cardstock, and the design complexity. Cutting precise shapes and doorknob holes ensures your sign hangs neatly and looks professional. Both hand and power tools work well, but beginners should follow simple, step-by-step methods to avoid mistakes and injuries.
Cutting Shapes from Wood and Cardstock
Wood door hangers often require jigsaws, scroll saws, or bandsaws for clean shapes, while cardstock can be cut with scissors, craft knives, or paper cutters. Use wood pieces between ¼ inch to ½ inch thick for manageable cutting and durable results. For cardstock, heavier weights like 80-110 lb ensure the hanger holds up without bending or tearing.
When cutting, trace your design on the material first using a pencil or light marker. For wood, clamp the piece firmly to a work surface to prevent movement. For cardstock, place it on a clean, flat cutting mat. Use smooth, steady strokes with scissors or a craft knife to follow your traced lines carefully. Power tools demand slower, controlled cutting with appropriate safety equipment.
Drilling the Doorknob Hole
The hole for the doorknob should be about 2 inches wide, enough to slip over standard knobs comfortably. Its placement matters: position the hole centered 2 to 3 inches from the top edge of the wood or cardstock. Use a hole saw bit for wood or a circle cutter for cardstock to create clean, accurate openings. Follow these steps for drilling or cutting your doorknob hole:
- Measure 2 to 3 inches down from the top edge and mark the center point for the hole.
- Select a hole saw bit matching the 2-inch diameter for wood or an adjustable circle cutter for cardstock.
- Secure your material firmly to a stable surface to avoid slips.
- For wood, drill slowly at a steady speed to avoid splintering the edges.
- Clean rough edges with sandpaper or a craft blade after drilling or cutting.
Always double-check hole placement before cutting to avoid waste or misalignment.
Safe Cutting Practices for Beginners
Start with simpler tools like scissors, craft knives, or hand saws if you’re new to cutting shapes. Always wear safety goggles when using power tools and keep your fingers clear of blades. Make sure your workspace is well-lit and clutter-free to maintain control over your cuts.
Practice on scrap pieces before cutting your final door hanger. When using power tools, follow the manufacturer’s instructions carefully and unplug tools when changing blades or making adjustments. Keep tools sharp to reduce effort and minimize accidents caused by slipping or snagging.
Painting, Decorating, and Adding Finishing Touches
To paint, decorate, and protect your door hanger sign, start with selecting the right type of paint and finish to ensure durability and style. After painting, add ribbons, vinyl decals, or other decorations that complement your design. Finally, seal the entire piece to keep your work looking fresh and to withstand daily wear.
Best Paints and Finishes
Chalk paint is highly recommended for DIY door hangers because it offers excellent coverage and a matte, vintage look without needing a primer. Acrylic paint is another good choice, especially if you want bright, vibrant colors and a glossy finish. Acrylic dries faster, usually within an hour, but chalk paint typically needs at least 2 hours to dry between coats. For outdoor durability or high-use door hangers, consider a water-based exterior paint designed to resist weather and fading.
For finishing, a clear acrylic sealer or polyurethane can protect your painted surface. Acrylic sealers dry quickly and keep colors vibrant without yellowing, while polyurethane provides a tougher, longer-lasting protective layer but may alter the base color slightly with a glossy or satin sheen. Applying two coats of sealer spaced 30 to 60 minutes apart improves durability. Expect to pay around $5 to $15 for a small can of paint and $8 to $12 for a quality clear finish, enough for multiple projects.
Adding Ribbons and Embellishments
Decorations like ribbons, vinyl decals, buttons, sequins, or lace add personality and charm to your door hanger. Attach ribbons through the top hole or glue them for ties and bows using craft glue or a hot glue gun for better hold. Vinyl decals can be cut with a craft cutter or purchased pre-made; smooth them out carefully on the dry painted surface to avoid bubbles. Small embellishments like buttons or sequins work best when glued on after the base paint and sealer are fully dry to prevent smearing or lifting.
Choose decorations that match your style and the season. For example, rustic jute ribbon complements farmhouse designs, while colorful satin ribbons add a pop for spring or holiday styles. A decorating checklist includes securing all items well, avoiding heavy decorations that may cause warping, and spacing embellishments evenly to maintain balance in your design. Adding a small glue dab to the back of heavier items reinforces attachment and prolongs use.
Drying and Sealing Process
Allow each coat of paint to dry fully before applying another, following the manufacturer’s recommended drying times, usually 1 to 2 hours for acrylic and 2 to 3 hours for chalk paint. Sand lightly between coats with fine-grit sandpaper if you want a smoother finish. After painting, wait at least 24 hours before applying acrylic sealer or polyurethane for best adhesion and protection.
Apply sealers in thin, even layers, preferably outdoors or in a well-ventilated space to avoid inhaling fumes. Let each sealer coat dry for 30 to 60 minutes before applying the next. Two or three sealant layers ensure resistance to moisture, light wear, and color fading. Proper drying and sealing improve the finished product’s durability, especially if the door hanger will hang outdoors or in a high-traffic area.
Safety Tips and Common Mistakes to Avoid
Wearing safety gear is essential when making door hanger signs to protect yourself from tools and materials. Always use safety goggles to shield your eyes from dust and paint splatters. Gloves can prevent cuts or splinters, especially when working with wood or sharp cutting tools. A dust mask helps avoid inhaling fine sanding particles or paint fumes, which can irritate your lungs. Make sure you work in a well-ventilated space or outdoors when using paints or adhesives that emit strong odors.
New makers often make mistakes that affect the sign’s durability and appearance. One common error is drilling or punching holes that are too large or off-center, causing the door hanger to hang unevenly. Measure carefully using a ruler and mark the hole location with a pencil before cutting or drilling. Start with a smaller hole and enlarge it gradually if needed. Another typical problem is paint peeling or fading shortly after finishing the sign. This usually happens when surfaces are not cleaned or sanded properly before painting, or when the paint is applied too thickly or without a protective sealant.
- Wear goggles, gloves, and a dust mask for protection
- Work in a well-ventilated area when painting or using adhesives
- Measure and mark holes precisely; start with smaller holes
- Sand and clean surfaces before painting for better adhesion
- Apply thin layers of paint and allow drying between coats
- Seal the finished sign with a clear protective finish like polyurethane
- Store door hangers away from direct sunlight and moisture to extend life
To avoid paint peeling, lightly sand your door hanger surface using 120- to 220-grit sandpaper to create a better grip for paint. Clean off dust with a damp cloth and let it dry fully before painting. Thin, even coats of paint dry faster and last longer; wait at least 1 hour between coats or follow the paint manufacturer’s instructions. After the final coat dries, apply a clear sealant designed for outdoor use if your sign will hang outside. This adds a protective layer that guards against sunlight, rain, and temperature changes.
Check the hole size and placement before starting your project by aligning the proposed door hanger on a door handle or knob with a scrap piece of wood. Adjust as needed to ensure it hangs straight and fits the intended door hardware. If you notice any rough edges after cutting or drilling, smooth them with fine sandpaper to avoid splinters and give the sign a polished look. Regularly inspect your door hangers for loose parts, chipped paint, or water damage. Small touch-ups and cleaning with a soft cloth can keep them looking good longer.
Customizing Door Hangers for Seasons and Marketing Use
Personalizing door hanger signs for holidays or events makes your decorations or marketing efforts stand out. To customize for seasons, use relevant colors and symbols like red and green with holly leaves for Christmas, or pastel shades and eggs for Easter. Adding messages like “Happy Holidays” or “Spring Sale” in a clear, bold font helps deliver your theme instantly. For business promotions, include your logo, a special offer such as “20% Off This Week Only,” and contact details. Be sure to keep text concise and legible from a short distance to catch attention quickly.
Creative ideas for seasonal and marketing design include incorporating glitter or textured paint for festive appeal or adding QR codes for easy access to your website or promotions. Small DIY decorations like ribbons or miniature ornaments can improve holiday door hangers without raising costs significantly. When promoting a business event, focus on clarity and call-to-action phrases such as “Visit Us Today” or “Exclusive Deals Inside.” You can sketch your design by hand or use online templates, then transfer it onto your door hanger material by printing or hand-painting.
Marketing effectiveness improves by targeting the right audience and timing your distribution. Distribute door hangers shortly before an event or sale to create urgency and relevance. Using bright colors and large fonts increases visibility. To maximize response rates, include incentives like discounts or free samples, and ensure your contact information is easy to find. Tracking response can be done by including a unique promo code or asking customers where they heard about your offer.
Choosing between making door hangers yourself or using professional printing depends on volume, budget, and desired finish quality. DIY suits small batches and personalized designs when you want immediate results and hands-on control. It typically costs less but requires more time and effort, especially for large quantities. Professional printing is ideal for larger runs, offering polished finishes like glossy or matte surfaces and consistent quality. Many companies, such as SN HANGER, offer templates and design assistance to simplify the ordering process. Professional options typically take a few days and may be more cost-effective per unit if you need hundreds or more.
The following chart summarizes these points: DIY door hangers cost little for small amounts, allow unlimited customization, generate a homemade look, and need more hands-on effort. Professional printed door hangers cost less per unit when ordered in bulk, offer templates-based but high-quality results, come with polished finishes, and require limited effort after initial design is set.
For best results, avoid overcrowding your door hanger with too much text or decoration, as this makes it hard to read and less likely to grab attention quickly.
Step-by-Step Action Plan
Follow these clear steps to create your door hanger sign efficiently and with good results.
- Before you start: Gather all necessary supplies like wood or sturdy cardstock, paint, brushes, and cutting tools. Confirm materials fit your chosen size and shape to avoid delays.
- Day 1: Sketch your design on paper or use simple software. Check that the design is readable from a distance and fits the door hanger’s dimensions.
- Day 2: Cut your door hanger base carefully using the outlined shape. Measure twice and cut once to ensure clean edges and proper fit.
- Day 3: Paint the base layer, allowing adequate drying time, usually 2 to 4 hours depending on paint type. You’ll know it’s ready when the surface feels dry to touch and shows no smudging.
- Day 4: Add design details like lettering or decorations. Use stencils or freehand carefully. Let paint dry fully before moving on.
- Day 5: Apply a protective clear coat or sealant to preserve the finish. Confirm it’s dry by touch and that the surface has a consistent sheen.
- Day 6: Attach hanging accessories, such as ribbons or hooks, securely. Test by gently pulling to ensure it will hold on a door handle safely.
- Day 7: Hang your finished sign on a door and view from different distances. Adjust details next time if visibility or aesthetic needs improvement.
Frequently Asked Questions
How to Make Door Hanger Signs?
Start with a wooden base or cardstock, decorate it with paint, decals, or vinyl, and add a ribbon or hole to hang it on a doorknob. Choosing the right size and secure hanging method is key for a polished look.
What Materials Do I Need Besides Wood for Door Hanger Signs?
You’ll also need paint, brushes, sealant, ribbon or string, and optional embellishments like stencils or stickers. These items improve appearance and protect your sign from wear.
How Do I Hang a Door Hanger Securely?
Use sturdy ribbon or twine and knot it tightly through the hanger’s hole; make sure the width fits your doorknob for stability. Durable hanging methods prevent slips and damage.
Can Door Hanger Signs Withstand Outdoor Weather?
Use weather-resistant paint and sealant to protect wooden or cardstock hangers from moisture and sunlight. Proper finishing extends their lifespan outside.
What’s the Typical Cost to Make a Door Hanger Sign?
Materials usually cost between $10 and $20 per sign, depending on size and decoration complexity. Pre-made kits can be pricier, usually around $30 or more.
Is It Better to Paint or Use Vinyl Decals on Door Hangers?
Both work well; paint offers a handmade look but takes longer, while vinyl decals provide sharp designs and quicker application. Choose based on your style and time.
The Bottom Line
Making your own door hanger sign gives you full control over style and message. Starting with clear steps helps avoid common mistakes and keeps your project manageable. Try creating a small practice piece next to refine your technique before tackling a final design.