How to Make a Memorial Plaque: A Complete Step-by-Step Guide
How to make a memorial plaque involves selecting durable materials, crafting a meaningful inscription, and using clean engraving or printing techniques. Start by choosing a size and shape that fits your intended location, then design the text and any images to reflect the memory respectfully. The first practical step is to gather all necessary information, including names, dates, and any special wording or symbols you want to include.
Key Takeaways
- Choose materials like HDU foam or metal that resist outdoor elements for long-lasting plaques.
- Keep inscriptions under 200 letters to maintain clarity and legibility over time.
- Select a plaque size up to 12 inches wide per garden stake, using two stakes for wider plaques.
- Use finishes such as brushed, polished, or light oxidized, noting oxidized finishes max out at 29 by 29 inches.
- Add logos or photos as etched or UV printed inserts up to 10 inches, factoring in extra costs.
- Proof all designs digitally before production to ensure accuracy and satisfaction.
How to Make a Memorial Plaque Step by Step
Making a memorial plaque involves a clear set of actions, from planning the design to producing the final piece. Handling this in an organized way helps you create a lasting tribute that truly honors your loved one. The entire process can take anywhere from a few days to a few weeks, depending on the materials chosen, design complexity, and whether you’re doing it yourself or working with a professional service. You’ll need basic tools and materials such as:
- Material for the plaque (metal, stone, wood, or acrylic)
- Stencil or template for the inscription
- Engraving tools or access to an engraving service
- Paint or sealant (optional, depending on your method)
- Measuring tape or ruler
- Protective gloves and eyewear
Here is a straightforward step-by-step checklist to follow when creating your memorial plaque:
- Choose the plaque material and size. Consider where the plaque will be displayed and select a material like bronze or granite that suits outdoor durability. Measure the space to determine the best size, keeping in mind that wider plaques may require more mounting supports.
- Design the inscription. Decide on the wording, typically including the full name, birth and death dates, and a brief tribute or meaningful phrase. Prepare a clear layout to space these elements evenly. Sketch it on paper or use digital tools for accuracy.
- Transfer the design onto the plaque. Use a stencil or template to outline your inscription. This helps prevent mistakes during engraving and keeps the layout balanced.
- Engrave or carve the plaque. Use engraving tools if doing it yourself, or send the design to a professional engraver. This step requires patience and precision. Expect this process to take several hours for manual engraving, less if using automated machines.
- Apply paint or sealant. If your design includes painted letters or decorative features, apply them carefully after engraving. Use a weather-resistant sealant to protect the plaque’s surface and text, especially for outdoor placement.
- Mount the plaque securely. Depending on the location, use appropriate hardware like garden stakes or wall mounts. For plaques wider than 12 inches, plan on two stakes for outdoor stability.
This process naturally varies based on your skills, tools, and the plaque’s complexity. For example, DIY projects with hand tools take longer and can increase the risk of errors compared to professional engraving machines. Careful planning and patience will help avoid common problems like uneven text or premature weather damage.
Choosing the Best Material for Lasting Memorial Plaques
Choosing the right material for a memorial plaque depends largely on where it will be displayed, how long you need it to last, and your budget. Bronze is one of the most durable options for outdoor memorials, resisting weather and corroding slowly over decades. Stone, especially granite, also lasts exceptionally well outdoors and provides an elegant appearance. Wood offers a natural look but tends to weather faster, requiring periodic sealing or treatment. Composite materials like high-density polyurethane foam are lighter and easier for DIY engraving but may not hold up as long outside.
Engraving suitability varies by material. Metals like bronze allow for deep etching that creates a rich texture, ideal for detailed inscriptions. Stone can be sandblasted or etched, giving sharp, long-lasting results but often needing professional equipment. Wood works well with handheld engraving tools or laser engraving, making it appealing for beginners. Composites are especially easy for at-home engraving with standard tools but may lack the same visual impact or longevity as natural materials.
| Material | Outdoor Durability | Engraving Ease (DIY) | Weather Resistance | Cost Range (USD/sq ft) |
|---|---|---|---|---|
| Bronze | High (50+ years) | Moderate (requires metal etching tools) | Excellent (resists corrosion) | $70 – $120 |
| Granite Stone | High (50+ years) | Low (needs professional sandblasting) | Excellent (resistant to weathering) | $50 – $100 |
| Wood | Low to Moderate (5-15 years outdoors) | High (easy with handheld or laser tools) | Moderate (requires sealing to resist moisture) | $10 – $40 |
| Polyurethane Foam Composite | Moderate (10-20 years, depending on finish) | High (very easy to engrave DIY) | Good (lightweight, moisture resistant) | $15 – $35 |
Climate impacts the choice significantly. In humid or rainy environments, bronze or granite handles moisture better and avoids warping or decay common with untreated wood. For dry climates, wood can last longer if sealed properly. Consider the exposure to sunlight as well, since UV rays can fade wood and composite materials over time. Selecting a bronze or granite plaque offers peace of mind if the plaque faces harsh weather, while composites and wood allow for more accessible DIY options if you want to engrave at home.
Protect wood plaques outdoors with a weatherproof sealant applied every year to prevent rot and fading.
The price difference reflects both material costs and required engraving methods. Bronze and granite are pricier but offer low maintenance and decades of durability. Wood and composite materials cost less and provide more flexibility for DIY engraving but may require more upkeep or have a shorter lifespan outdoors. Matching the material to your environment, budget, and ability to customize will help your memorial plaque honor your loved one’s memory for years to come.
Deciding the Right Size and Shape for Your Plaque
Choosing the right size and shape for your memorial plaque depends largely on the location where it will be displayed, the number of words you want to include, and how easily people will be able to read it. Cemeteries usually have strict rules about plaque dimensions. For example, many cemeteries allow bronze plaques that measure around 7 by 9 inches for headstones, while larger memorial vaults might permit plaques as big as 12 by 18 inches or more. Checking these local or cemetery-specific guidelines is essential before deciding because plaques outside the allowed sizes may not be accepted or installed.
The amount of inscription space needed plays a big role in selecting size. A small plaque roughly 5 by 7 inches can fit a name and dates with a short phrase, but longer inscriptions or multiple lines require a larger plaque to maintain readability. As a rule, your text should not be crowded or squeezed. For example, a plaque smaller than 8 by 12 inches might support up to 30 words comfortably, using font sizes around 18 to 24 points. Larger plaques allow you to include more text without making letters too small, which can hinder visibility, especially outdoors or in shaded areas. It’s wise to write the full text first, then consult the plaque provider to see if the words fit well on your desired size with balanced font scaling.
Shape can sometimes be customized to reflect the deceased’s personality or the setting of the plaque. While rectangles and squares are the most common and usually the easiest to fit within standard cemetery rules, some locations allow oval or arched plaques. Choosing a shape that matches the memorial site, such as an arch for a chapel wall or a softer oval for a garden bench, can add a personal touch. Before ordering, confirm that the selected shape complies with the location’s restrictions, as some cemeteries only permit traditional shapes. Decorative borders or embellishments that accompany your plaque design will also affect the overall dimensions, so account for some extra space around your inscription.
To decide on exact measurements, start by contacting your cemetery or memorial site manager to get their rules on plaque size and shape. Next, determine how many words and lines your inscription will have. Use this information to select a plaque size that allows at least 1 inch of space on all sides for margins and a legible font size. Avoid overcrowding by keeping text well spaced and consider larger plaques if you want to include images or symbols alongside the words. Prices generally increase with size and complexity; a bronze plaque around 8 by 12 inches might cost anywhere from $200 to $500 depending on design details and finish. Larger or custom-shaped plaques can cost significantly more.
Good results mean your memorial plaque fits the location without issues, the inscription is readable from a reasonable distance (about 3 to 5 feet), and the overall appearance feels balanced. Avoid choosing a plaque too small for your message or a shape that conflicts with the setting’s rules to prevent delays or reorders. Confirming the text fits before finalizing the plaque order saves time and ensures the tribute feels meaningful and clear to visitors. Customizing size and shape carefully based on these factors helps create a lasting and respectful memorial.
Crafting a Meaningful Inscription: Wording and Layout Ideas
Choosing wording for a memorial plaque that honors your loved one’s personality and legacy means combining heartfelt messages with clear, concise text. The inscription should reflect who they were, what mattered most to them, and how you want others to remember them. Using thoughtful layout and precise wording keeps the message both meaningful and easy to read.
Core Inscription Elements to Include
A memorial plaque typically includes the full name of the loved one, their birth and death years, and a phrase that captures their essence or how they impacted those around them. Personal touches, such as titles like “Beloved Mother” or “Cherished Friend,” add warmth and connection. You might also add a short tribute sentence or an inspiring line that reflects their character.
Try to keep the inscription between 50 and 150 characters per line, depending on the plaque’s size. Three to five lines generally fit well on a standard plaque and maintain readability. For example, an inscription could say: “John A. Smith
1925, 2018
Loving Father and Devoted Veteran
Forever in Our Hearts”. This approach balances name, dates, relationship, and a meaningful phrase.
Examples of Religious and Secular Quotes
Adding a meaningful quote can convey feelings that simple words do not fully capture. Religious sayings like “Blessed are the pure in heart” or “Rest in God’s loving arms” can reflect faith and provide comfort. For a secular option, expressions like “Forever remembered, forever missed” or “Gone from our sight, but never from our hearts” serve as gentle and widely appreciated tributes.
Choose quotes that resonate with your loved one’s beliefs or personality. Keep them brief enough to fit comfortably on the plaque while still delivering a powerful message. Longer quotes risk overcrowding the space and reducing legibility, especially on smaller plaques.
Tips for Balancing Text Size and Readability
Text size depends on the plaque’s dimensions and the number of characters. Too many words force small fonts that are hard to read, while too few leave empty space. Aim for fonts sized around 18 to 24 points for main text on plaques 8 by 10 inches. Larger plaques can accommodate bigger fonts or more text lines.
Use clean, classic fonts like serif or sans-serif styles to maintain readability. Avoid overly decorative fonts that become difficult to decipher, especially in outdoor lighting or from a distance. Center text alignment often looks balanced, but left alignment can suit longer messages better.
Double-check the character count per line and total inscription length before engraving. When the inscription is too long, try using shorter phrases or common abbreviations to fit the available space. You may also exclude less essential elements like middle names or years if needed.
How to Incorporate Symbols and Images
Symbols add a layer of personal meaning to your memorial plaque. Common choices include religious icons like crosses or stars, nature symbols like trees or flowers, or hobby-related images such as musical notes or sports logos. These help communicate the individual’s passions or beliefs without extra words.
Images can be engraved or printed, depending on the plaque’s material. For example, stainless steel plaques may incorporate UV-printed photos for a full-color portrait effect. Smaller plaques might only allow a simple etched symbol next to the text. Choose symbols that complemented your loved one’s life to make the memorial unique.
Keep visual elements simple and size-appropriate. Overcrowding can distract from the inscription’s message. Place symbols either above the text or in a corner where they improve without overpowering the wording. This balance ensures a respectful and memorable tribute.
Designing and Customizing Your Plaque’s Appearance
Choosing the right fonts, finishes, and images shapes the memorial plaque’s style and impact. Thoughtful design creates a lasting tribute that honors your loved one with clarity and warmth.
Font Styles and Readability Tips
Fonts for memorial plaques should balance elegance with legibility. Serif fonts add a traditional, timeless feel, while sans-serif fonts offer a clean, modern look. Script fonts can express personality but must remain clear when carved. Some popular fonts that work well for engraving include:
- Times New Roman, classic serif font, highly readable
- Garamond, elegant with a softer finish
- Arial, simple sans-serif for clarity
- Helvetica, clean and modern sans-serif
- Lucida Calligraphy, stylish script if carefully sized
- Georgia, warm serif with strong readability
Choose font sizes that keep lettering legible from a distance of at least 3 feet. Avoid overly bold or thin styles that can blur when engraved. Use all caps for emphasis but limit their use to names or headings for easier reading.
Types of Finishes and Their Effects
Finishes influence both the look and durability of the plaque. Finishing options include brushed, polished, and light oxidized surfaces. Brushed finishes feature subtle texture, reducing glare and softening the metal’s appearance. Polished finishes are shiny and reflective, creating a formal and striking look. Light oxidized finishes emphasize the engraving by darkening the recessed areas and are typically capped at 29 by 29 inches for size. Consider these common finishes:
- Brushed, matte with soft texture, hides fingerprints
- Polished, smooth and shiny, highlights materials like bronze
- Light oxidized, darker tone emphasizing engraved text
Finishes affect how text and images stand out, so factor that into your design. Polished plaques may require more frequent cleaning to maintain shine. Brushed and oxidized finishes mask dust and weathering better outdoors.
Incorporating Photos and Logos
You can add photos or logos to a memorial plaque through laser engraving or printing techniques. Laser engraving uses a beam to etch images directly on the plaque’s surface, producing detailed grayscale images that pair well with text.
Allow extra space for photos or logos to avoid overcrowding. Aim for a balanced layout where text and imagery complement each other. Common placements include a small portrait beside the inscription or a symbolic emblem below the main text.
Photo engraving typically costs around $30 to $60 extra, depending on complexity, and requires a high-resolution image file. Make sure logos or pictures have clear contrast to maintain sharpness after engraving.
Leave at least 10% of the plaque surface free from text or images to ensure the design doesn’t look cluttered.
Symbol Suggestions and Meanings
Symbols can add personal or cultural significance to the plaque. Choose emblems that resonate with your loved one’s beliefs, personality, or hobbies.
- Religious symbols like crosses, the Star of David, or Om denote faith
- Nature motifs such as doves, trees, or flowers represent peace and life
- Hearts symbolize love and remembrance
- Military insignias or badges reflect service and honor
- Hobbies can be noted with items like musical notes or sports icons
- Artistic flourishes like laurel wreaths or geometric borders add elegance
Flat or raised emblems are available in different sizes, allowing you to customize the three-dimensional effect. Consider the plaque’s material and finish to ensure the symbols remain visible and durable over time.
Engraving, Printing, and DIY Techniques for Plaques
Custom memorial plaques can be created through professional engraving, UV printing, or do-it-yourself methods. Each option differs in durability, cost, and the level of skill required. Choosing the right one depends on where the plaque will be displayed, how much you want to spend, and your comfort with crafting tools.
Professional Engraving Methods Explained
Professional engraving typically uses laser or rotary techniques. Laser engraving uses a focused beam to etch fine details directly into metals like bronze or aluminum. It produces precise, permanent markings that resist weathering, making it ideal for outdoor plaques. Rotary engraving uses a spinning cutting tool to carve the design. This method can create deeper cuts but may be less detailed. Both offer a professional finish with sharp edges and clear fonts.
Engraved plaques are prized for their durability. The markings do not fade or peel because they are cut into the material, not merely applied to the surface. This permanence makes engraving the preferred method for lasting memorials. Professional services often include design assistance and proofs before production to ensure the inscription and graphics meet your expectations.
UV and Color Printing for Memorial Plaques
UV printing applies ink cured by ultraviolet light, allowing full-color images, photos, and complex designs on plaque surfaces. This method is suitable for plaques with intricate artwork or photos of your loved one. While UV printing produces vibrant colors, its durability depends on the plaque material and UV protective coating. Outdoors, exposure to sunlight, rain, and temperature changes may cause gradual fading over 5 to 10 years.
UV printing works best on smooth, non-porous surfaces such as acrylic, glass, or coated metals. Adding a clear laminate or sealant can extend the print’s life. It’s a good option if you want a colorful, detailed memorial and plan to display it in covered or indoor areas. Consult the printing service about weather-resistant coatings if you choose UV printing for outdoor plaques.
DIY Approaches and Required Tools
For hands-on memorial crafting, manual engraving kits or stencil and paint methods are common. Manual engraving uses handheld rotary tools with diamond or carbide bits to etch metal or stone directly. Start by cleaning the plaque surface, then trace your inscription with a pencil or transfer a printed stencil using carbon paper. Slowly follow the lines with the rotary tool, keeping steady pressure.
- Secure the plaque on a stable work surface.
- Use stencils or transfer letters carefully to avoid mistakes.
- Work in well-lit conditions and wear eye protection.
- Test your tool on scrap material before engraving.
Painting over stenciled letters on wood or metal is another simple DIY way. Use weather-resistant outdoor paint and multiple thin coats. Placing tape around the stencil edges helps prevent smudges. DIY options can cost $20 to $50 for tools and materials but require patience and steady hands for best results.
Cost and Quality Trade-Offs
Professional engraving usually costs between $100 and $400 depending on plaque size, material, and design complexity. It guarantees a polished, durable product with a service warranty. UV printing ranges from $80 to $300 and offers vibrant, detailed images but less permanence outdoors. DIY methods cost $20 to $50 for basic tool kits or paints but take more time and may lack precision or longevity. A comparison helps clarify which method suits your needs:
| Aspect | Professional Engraving | UV Printing | DIY Engraving/Painting |
|---|---|---|---|
| Durability | Very high; permanent markings | Moderate; color fades in sun over 5-10 years | Variable; less durable, depends on material and skill |
| Cost | $100 – $400 | $80 – $300 | $20 – $50 |
| Skill Required | None; fully professional | None; service handles all | Moderate; needs steady hand and patience |
| Customization Options | Text, logos, symbols; limited color | Full color, photos, gradients | Primarily text and simple designs |
| Outdoor Suitability | Excellent for all environments | Good with protective coatings; less so in harsh sun | Depends on material and paint quality |
Choosing between these methods involves weighing how long you want the plaque to last, your budget, and how much you want to create yourself. Professional services provide quality and peace of mind. DIY can be satisfying and budget-friendly but requires care to avoid errors such as uneven carvings or paint smudges.
Mounting and Displaying Your Memorial Plaque Securely
Properly mounting your memorial plaque ensures it remains visible, stable, and respectful over time. The method you choose depends on whether the plaque will be indoors or outdoors and the surface where it will be displayed. Common mounting options include screws or bolts, adhesive mounting, stand or easel display, and embedding in concrete or stone bases. Screws and bolts provide strong, weather-resistant support, ideal for outdoor plaques attached to walls, benches, or stone surfaces. Adhesive mounting offers a cleaner look and is best for lightweight plaques indoors but may fail outdoors due to weather exposure.
Benches and wall plaques require careful installation to stay secure. For bench plaques, use stainless steel screws and anchors drilled into the bench material, ensuring no sharp edges remain exposed. Wall plaques need anchors appropriate to the wall type (masonry, drywall, or wood). Pre-drill holes, insert anchors, then attach the plaque with matching screws. Always check that the plaque is level for neat presentation.
When installing outdoors, selecting a location protected from direct heavy rain or intense sunlight can extend the plaque’s lifespan. A peaceful garden nook, the side of a monument, or near a shaded bench are suitable spots. Indoor plaques benefit from placement at eye level in quiet areas where visitors can pause and reflect. Also, verify cemetery or community regulations before installation; some locations require plaques to be flush with benches or stones, while others allow free-standing displays.
- Screws or bolts: sturdy and weather-resistant; need drilling; best for benches and stone walls
- Adhesive mounting: clean look; best indoors; risk of failure outdoors
- Stand or easel display: portable; no wall damage; less secure outside
- Embedding in concrete or stone base: permanent; requires professional help; ideal for large plaques
- Magnetic mounts: rare; only on compatible metal surfaces; easy removal
Tools and hardware required include a drill with masonry or wood bits as appropriate, screwdriver, stainless steel screws or bolts, level, anchors matched to the surface material, and adhesive rated for outdoor use if chosen. Protect your hands and eyes during installation. A checklist for mounting your plaque:
- Choose the mounting type based on plaque size, material, and display surface.
- Check local site or cemetery rules for allowed mounting methods and locations.
- Select a secure, visible spot protected from extreme weather when possible.
- Gather suitable tools and hardware, prioritizing rust-resistant materials.
- Mark and level installation points carefully before mounting.
- Install anchors if needed, then attach the plaque firmly.
- Inspect the fixture regularly for looseness or damage and maintain as needed.
Properly mounted memorial plaques stay secure, resist weather damage, and provide a lasting tribute that remains easy to read and appreciate. Neglecting mounting details can cause plaques to loosen, tilt, or deteriorate prematurely, diminishing their meaning and memorial value.
Maintaining and Preserving Your Memorial Plaque Outdoors
Cleaning your memorial plaque regularly helps keep it readable and maintains its respectful appearance. Most plaques benefit from cleaning every three to six months, depending on the local climate and exposure to dirt or pollution. A soft cloth slightly dampened with mild dish soap and warm water is a safe starting point for most materials. Avoid harsh chemicals, as they can erode or discolor finishes, especially on metals and stones.
For bronze plaques, use a gentle cleanser like a mixture of water and a small amount of vinegar or lemon juice to remove oxidation. Rinse thoroughly with clean water and dry with a soft cloth. A clear wax or specialized bronze protector applied once a year can reduce tarnishing. Aluminum plaques require mild soap and water only; abrasive pads or solvents might scratch the surface. Stainless steel plaques also respond well to soap and water but can be polished with a dedicated stainless steel cleaner to restore shine.
Stone plaques such as granite or marble need careful attention. Use a soft brush and a pH-neutral stone cleaner to prevent etching or staining. Avoid acidic cleaners like vinegar on marble, as they can damage its surface. After cleaning, rinse completely and dry to avoid water marks. A sealant designed for stone applied every few years provides extra defense against water and sun damage.
Sunlight and weather can cause fading, corrosion, or cracking over time. Position plaques where they receive some shade or install a protective covering if possible. Hardware like screws and brackets should be rust-resistant stainless steel or brass to prevent staining or weakening. Check these fasteners annually to tighten or replace them as needed.
If a plaque shows signs of damage such as fading inscriptions, surface tarnish, or minor scratches, restoration may be possible. Lightly polish metal plaques with a metal polish designed for the material, and reapply protective coatings afterward. For stone plaques, professional cleaning or resealing can restore the original color and prevent deeper damage. Deep cracks or severe corrosion might require replacement to preserve the memorial’s dignity.
Regular seasonal care includes removing leaves, dirt, or bird droppings promptly and drying the plaque after rain or snow melts. Avoid pressure washers, which can chip or wear down delicate surfaces. Winter salt and de-icing chemicals can stain or erode plaques near sidewalks or driveways, so rinse the plaque if exposed.
Use only soft cloths or brushes and mild, pH-neutral cleaners on memorial plaques to avoid permanent surface damage.
Step-by-Step Action Plan for Making Your Memorial Plaque
Follow these clear steps to create a durable and meaningful memorial plaque that honors your loved one respectfully.
- Before you start: Choose the material and size that will best withstand your plaque’s location. Confirm it feels right for your memorial purpose.
- Day 1: Draft your inscription carefully, focusing on clear, heartfelt wording. Review it aloud to ensure it honors your loved one meaningfully.
- Day 2: Finalize the design and layout, including fonts and any images or symbols. Visualize how it will look at the display site to be sure.
- Day 3: Decide on the engraving or printing technique that fits your budget and skills. Test on a similar material to check quality.
- Day 4: Complete the engraving or printing process following manufacturer instructions or use professional services to ensure precision.
- Day 5: Prepare the mounting site by cleaning and leveling it. Check that your fixtures match both the plaque and mounting surface.
- Day 6: Securely install or mount your plaque using the recommended hardware. Give it a gentle shake to verify it is firmly attached.
- After 1 week: Inspect your memorial plaque for any early signs of weathering or damage. Apply additional protective coatings if needed.
Frequently Asked Questions
What Materials Are Best for Outdoor Memorial Plaques to Resist Weather Damage?
Bronze and granite are excellent for outdoor use because they resist rust and fading. These materials ensure your memorial plaque stays legible and attractive for many years despite weather exposure.
How Can You Personalize a Memorial Plaque Without Professional Engraving Tools?
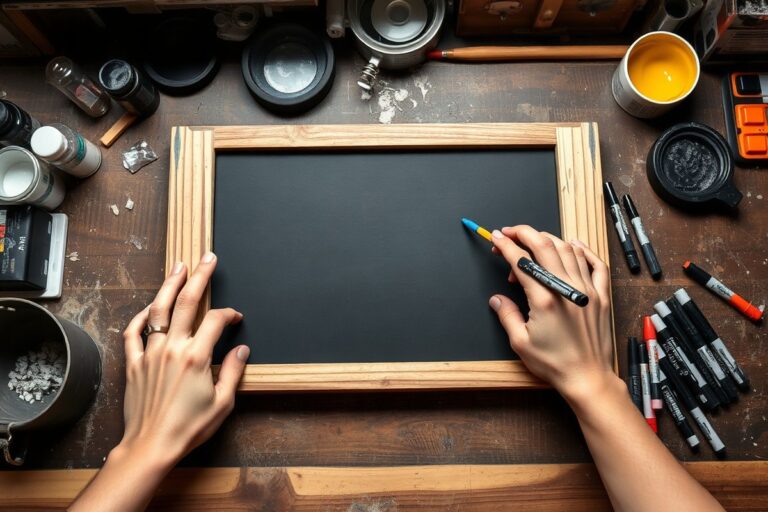
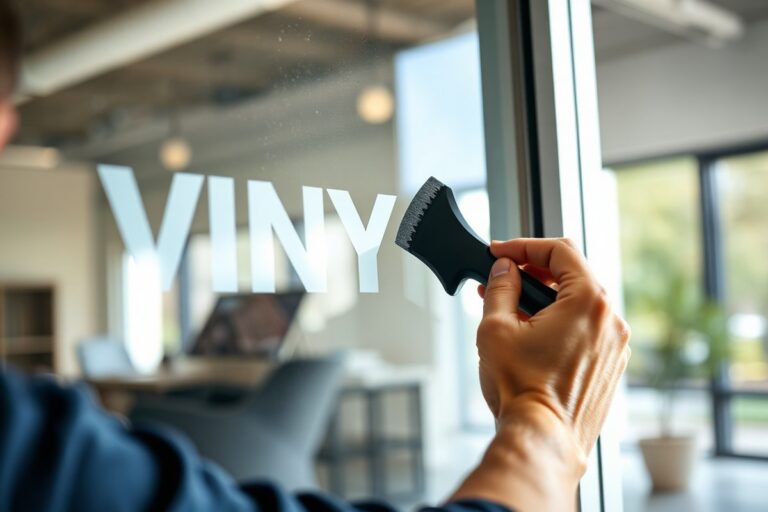
Use low-cost methods like decals, stencils with permanent markers, or vinyl lettering for custom texts and designs. These options allow you to add a personal touch at home without needing special engraving equipment.
What Size Memorial Plaque Is Appropriate for a Small Backyard Garden?
A plaque around 6 by 8 inches balances presence and subtlety well in garden spaces. This size is visible without overwhelming the area or requiring a large mounting surface.
How Do You Choose Wording That Balances Formality and Personalization on a Memorial Plaque?
Combine respectful phrases with personal touches like nicknames or favorite quotes. This approach honors the person’s memory warmly while maintaining dignity.
What Is the Recommended Method to Secure a Plaque to a Wooden Surface?
Use stainless steel screws with wall anchors to avoid wood splitting and rust issues. This provides a firm hold while protecting both the plaque and mounting area from damage.
Can You Include Photographs on Memorial Plaques, and How?
Yes, laser etching or ceramic printing allows including detailed photos on plaques. These techniques produce durable images that resist fading outdoors.
Before You Go
Creating a lasting memorial plaque combines thoughtful choices and careful work to honor your loved one’s memory in a durable way. Take the next step today by drafting your inscription to capture their story with meaning and respect. From there, you’ll build a tribute that stands the test of time and offers a place for remembrance.