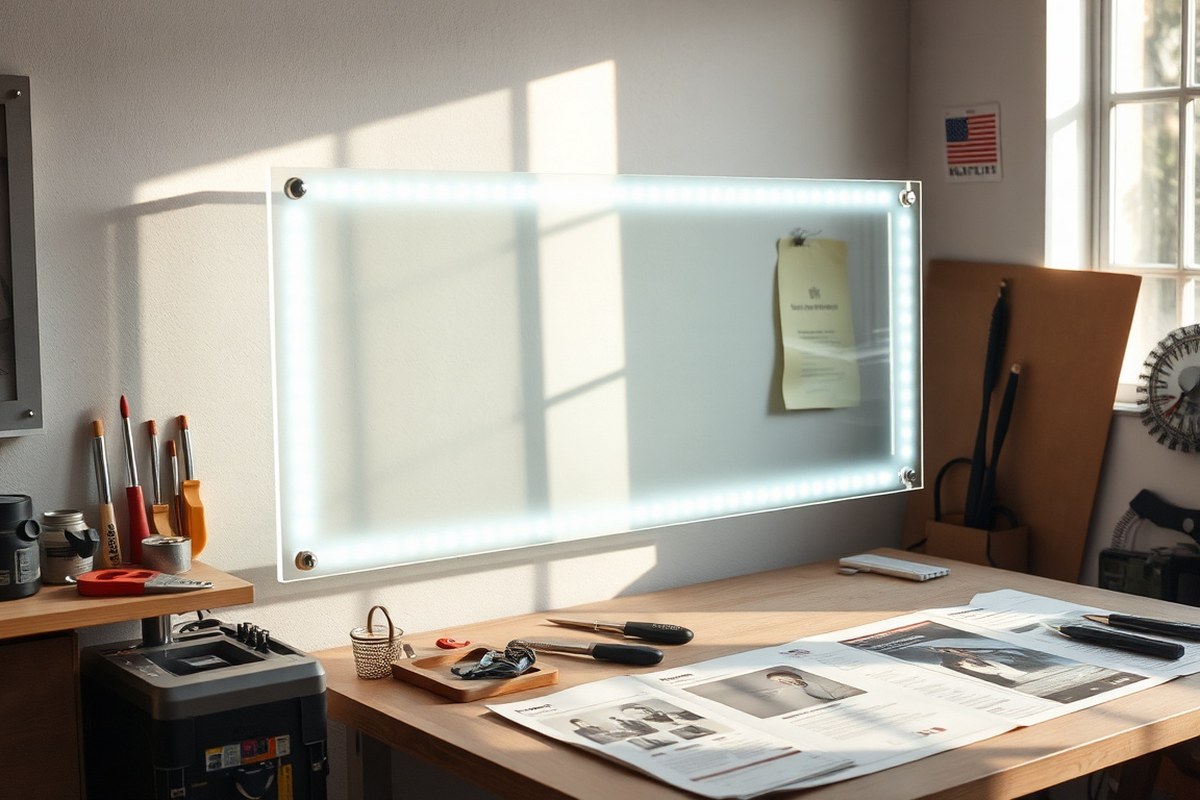
Diy Acrylic Sign Guide: Materials, Design, Lighting & Assembly Tips
A DIY acrylic sign offers an affordable, customizable way to create eye-catching displays using clear or colored acrylic sheets. You can craft a variety of designs, from simple light-up signs powered by coin batteries to larger mounted pieces with LED backlighting. Starting with the right thickness of acrylic and basic tools like a laser cutter or engraving machine helps ensure clean cuts and professional-looking results.
Key Takeaways
- Use 1/4” thick acrylic for sturdy signs, with clear sheets sized around 12” x 24” for manageable crafting.
- Laser cut or engrave acrylic around 4mm thick at 80% power and 10mm/s speed to balance speed and precision.
- For LED lighting, recess strips underneath the sign and power with replaceable CR2032 coin batteries for simplicity.
- Maple or walnut wood strips routed with a groove allow the acrylic to rest securely and hide wiring effectively.
- Expect material costs between $30 and $60 for a 12-inch sign; under $5 for simple battery-powered light-up versions.
- Don’t worry if cuts aren’t perfectly aligned or trimmed; slight imperfections often don’t affect the final look.
What Is a DIY Acrylic Sign and How Does It Work?

An acrylic sign is a display made from clear or colored acrylic sheets, often laser-cut or engraved to shape or etch a design. Acrylic, also called plexiglass, is a lightweight, shatter-resistant plastic that provides a glass-like clarity but is easier to work with. It usually comes in sheets that are 1/8 inch to 1/4 inch thick. You can create letters, logos, or patterns by cutting the sheet with a laser cutter or engraving the surface to produce frosted or etched effects. These methods let you customize signs precisely and cleanly, which is why hobbyists use tools like the xTool P2 or similar cutters to make wedding signs, business logos, or home décor pieces.
The illuminated effect of an LED acrylic sign comes from lighting the edges of the clear acrylic panel. Small LED strip lights or individual diodes are attached to the edges, sending light through the acrylic. Because the engraving scatters the light, those etched or cut areas glow brightly, creating a striking contrast with the rest of the clear panel. The LEDs are typically installed along the back edges or the edges of the cutouts, and placement needs to be even to avoid spots that look too dim or overly bright. Good results require spacing the LEDs about every 1 to 2 inches for even illumination, and using diffusion material can help soften hotspots where light tends to concentrate. Power is supplied by a low-voltage LED driver, usually 12 volts, which makes these signs energy-efficient and safe for indoor use. A small dimmer or switch can be added for adjustable brightness, often for less than $5 extra in materials.
DIY acrylic signs are commonly used for decorative and functional purposes in homes, events, and small businesses. Wedding welcome signs, bar menus, table numbers, and cocktail signs are popular projects because acrylic offers a modern, clear design that fits various themes and styles. You can also create personalized signs for offices, shops, or craft spaces that feature logos or motivational quotes. Large sizes like 2 feet by 3 feet are achievable, giving your sign presence without heavy weight. These signs work well indoors but need careful sealing if you plan to use them outdoors to protect the LEDs and wiring from moisture.
Creating your own acrylic sign involves several steps: selecting a clear acrylic sheet, designing the image or text with software, then using a laser cutter or engraving tool to shape or etch the acrylic. Adding LED strips is where the illumination happens; you’ll cut shallow channels or work with the edges to attach the lights securely. Wiring should be neat, with checks for voltage drop or loose connections to prevent dim or flickering areas. With proper LED placement and engraving depth, your sign will glow evenly and attract attention. Common problems like uneven lighting or hot spots are fixable by adjusting LED spacing or adding diffusers. The combination of acrylic’s clarity and LED edge lighting gives you a vibrant, professional look without expensive equipment or materials.
Choosing Materials and Essential Tools for Your Project
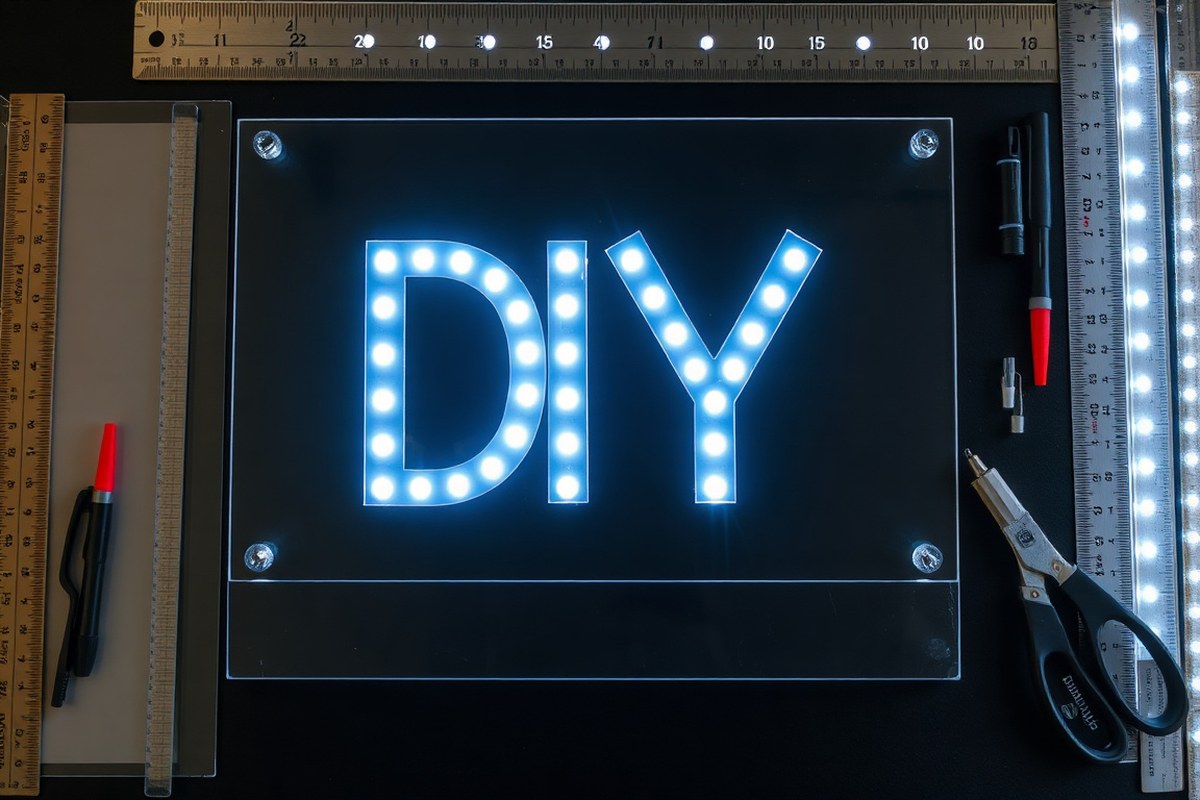
Choosing the right materials and tools sets the foundation for a clean, attractive acrylic sign. A 1/4-inch thickness of acrylic offers the best balance between durability and ease of cutting. Budget-friendly LED strips powered by 12V work well for small- to medium-sized signs. Basic hand tools can replace advanced cutters if you plan carefully.
Ideal Acrylic Sizes and Thickness
For most signs, acrylic sheets around 12 by 24 inches or 24 by 24 inches fit well and allow enough space for custom designs. Using 1/4-inch thick acrylic is a popular choice because it offers good rigidity without being too heavy or difficult to work with. Thinner sheets below 1/8 inch risk cracking during cutting or handling, while thicker acrylic over 1/2 inch can be expensive and harder to shape.
Buy pre-cut sheets online or from local hardware stores to reduce waste and cost. Packs of standard sizes often run between $10 and $25 per sheet. If your sign will sit inside a frame or shallow groove base, measure carefully to select an acrylic size and thickness that fits securely without too much pressure.
Choosing LED Strips and Electrical Parts
Use 12-volt LED light strips for easy wiring and affordability on signs up to around 2 feet long. These strips typically cost $10 to $20 for a 16-foot roll, which is enough for several small projects. Pick LED strips with adhesive backing for simple mounting on acrylic edges or grooves. Essentials you’ll need for the lighting setup include:
- 12V LED strip lights cut to the sign’s perimeter length
- A compatible 12V power adapter or battery pack
- Wires for connecting strips if you use multiple sections
- Optional switch for turning the sign on/off
- E6000 or hot glue to secure strip ends and prevent peeling
Choosing LED strips with a high number of LEDs per foot creates brighter, more even illumination. Testing your electronics before full assembly helps avoid troubleshooting after the acrylic is in place.
Basic Tools for Beginners Without Advanced Cutters
Acrylic cutting and engraving typically require specialized machines, but you can manage with hand tools if you keep the design simple. Use a plastic scoring knife to cut thin acrylic by repeatedly scoring and snapping along a straight edge. For engraving or scratch details, try a diamond-tipped engraving pen or stencil with a vinyl cutter if available. Other helpful hand tools include:
- Fine-toothed hacksaw or mini jigsaw for rough shaping thicker sheets
- Sandpaper (starting at 220 grit) for smoothing edges after cutting
- Ruler, measuring tape, and pencil for layouts
- Clamps or weights to hold acrylic steady during scoring and cutting
- Drill with acrylic-specific bits if holes are needed for mounting
- Vinyl cutter machine (budget models start around $150) for more precise letters
Bearing down hard with hand tools risks cracking the acrylic, so maintain gentle, even pressure and make multiple passes. A steady workspace and patience produce the best results.
Materials Checklist Divided by Type
Gathering everything before you start helps keep the project organized and reduces mistakes. Group items by material and tool type to check off easily:
- Acrylic Sheets: 1/4-inch thick, size chosen to fit your design (12×24 or 24×24 inches recommended)
- Lighting: 12V LED strip lights with adhesive backing, power adapter (12V), wiring, on/off switch
- Cutting Tools: Plastic scoring knife, fine-toothed hacksaw or mini jigsaw, clamps
- Sanding and Finishing: Sandpaper (220 and 400 grit), polishing cloth
- Design and Decoration: Vinyl cutter or pre-cut vinyl letters, adhesive spray, paint or glitter heat transfer vinyl (htv)
- Assembly: E6000 glue or hot glue gun for securing LEDs and acrylic edges
Use patience when scoring acrylic; multiple light passes prevent cracks better than one heavy cut.
Budget and Quality Tradeoffs
Expect to spend $30 to $60 on materials for a 12-inch acrylic sign, depending on your design and lighting needs. Higher-quality LED strips with strong adhesive and dense LED placement cost more upfront but last longer and produce cleaner light. Acrylic sheets from reputable brands resist yellowing and warping better than generic options.
For beginners, start with a straightforward design and economical materials. Upgrading tools like adding a vinyl cutter or laser engraver can come after mastering the basics. Quality glue and proper drying time avoid bubbling or peeling of decorations on your sign.
Methods for Cutting and Engraving Acrylic
Cutting and engraving acrylic for your sign can be done using laser cutting, CNC routing, or hand tools. Laser cutting offers clean, precise edges and detailed engraving but requires the right settings and equipment. CNC cutting and hand methods provide flexibility for those without laser access but need more skill and finishing work.
Laser Cutting Tips and Settings
Laser cutting offers the cleanest and most accurate results on acrylic sheets, ideal for detailed designs. It works by melting through the acrylic with a focused beam, producing smooth edges that often don’t need further sanding.
For typical 1/8-inch (3 mm) acrylic, set the laser power to about 50-60 watts with a cutting speed near 5-10 mm/sec. Slower speeds and higher power are needed for thicker sheets. Use multiple passes instead of high power in one pass to avoid discoloration or melting damage. Always check acrylic thickness and type for exact settings.
Engraving with lasers requires lower power (around 10-20 watts) and faster speeds (20-40 mm/sec) to etch the surface without cutting through. Test on scrap pieces to perfect settings.
Hand and CNC Cutting Alternatives
CNC routers can cut acrylic with a sharp bit, usually a single-flute end mill designed for plastics, but edges may need sanding after. Speeds vary, but around 10,000-20,000 RPM and feed rates of 0.002-0.005 inches per tooth work well. CNC is good for large or repeat projects but requires machine access and programming skills.
Hand cutting with a scoring knife or rotary tool suits thin acrylic sheets (under 1/8 inch). Scratch the desired line multiple times with a utility knife or rotary cutter, snap the sheet along the score line, and sand the edge smooth. Hand cutting is low cost but less precise and time consuming for complex shapes.
| Method | Pros | Cons | Cost Range |
|---|---|---|---|
| Laser Cutting | Precise, smooth edges, fast engraving | Requires laser cutter, risk of melting | $20-$40 per project with service |
| CNC Router | Good for large, repeat cuts, no melting | Edges need sanding, needs skill and machine | Varies, machine cost $2,000+ |
| Hand Cutting | Low cost, accessible tools | Less precise, labor intensive, limited thickness | $10-$50 for basic tools |
Follow these steps to complete a clean cut on acrylic using a laser cutter:
- Verify acrylic thickness and choose compatible laser settings.
- Secure acrylic sheet flat on the cutter bed to avoid movement.
- Set the laser speed and power according to material specs (e.g., 60 W, 5-10 mm/sec for 1/8 inch thickness).
- Run test cuts on scrap material to adjust settings as needed.
- Engrave details separately at lower power and higher speed.
- Complete the cutting and allow acrylic to cool before removal.
- Clean dust or residue off the acrylic surface.
Post-Cut Finishing and Safety
After cutting, smooth edges remove sharpness and improve appearance. For laser cuts, minimal sanding is often needed. For CNC and hand cuts, use fine-grit sandpaper (320 grit or higher) and polishing compounds for a glossy finish.
Always wear safety glasses and gloves when cutting acrylic to prevent injury from shards or dust. Work in a well-ventilated area since both laser and CNC cutting can release fumes or small particles. Handle chemicals like acrylic polish with care and follow product instructions.
Keep your work area clean and power tools properly maintained to avoid accidents. A dust mask comes in handy during sanding to protect your lungs from fine acrylic particles.
Designing Your Acrylic Sign: Software and Techniques
Designing your acrylic sign starts with choosing the right software and preparing your design with precise measurements to ensure perfect alignment. The transfer technique you pick will depend on your tools and preferred finish, with digital printing, stenciling, and vinyl transfer being popular options.
Recommended Design Software Options
For beginners, user-friendly software like Canva (free with paid options) offers simple tools to create custom designs with preset templates at no cost. Adobe Illustrator suits advanced users who need vector precision and full control, costing about $20.99/month. Inkscape is a free, open-source alternative with powerful vector capabilities, ideal for budget-conscious projects.
| Software | User Level | Cost | Key Features |
|---|---|---|---|
| Canva | Beginner | Free/$12.95/month (Pro) | Templates, drag-and-drop, text tools |
| Adobe Illustrator | Advanced | $20.99/month | Vector editing, precision tools, layers |
| Inkscape | Intermediate to Advanced | Free | Vector editing, open source, customizable |
Preparing and Scaling Your Design
Accurate sizing is key for your acrylic sign to fit perfectly and appear professional. If your acrylic base is 12″ x 24″, limit your design length to about 120mm (roughly 4.7 inches) for optimal engraving. Center your design precisely since the image will be placed on the back of the acrylic sheet and viewed through the front. Follow these steps to prepare your design file:
- Open your software and set the canvas or artboard to match the acrylic sheet size (e.g., 12″ x 24″).
- Create your design using vector shapes and text for clean edges during cutting or engraving.
- Scale the design to fit within your 120mm length limit or desired size while maintaining proportions.
- Ensure the design is horizontally and vertically centered on the artboard.
- Flip the design horizontally (mirror image) since it will be placed on the back side for engraving.
- Remove any background layers or colors unless they are part of your design.
- Export the file as a vector format such as SVG, EPS, or PDF for laser cutting or as a high-resolution PNG for printing.
Transferring Design Onto Acrylic
There are several methods to apply your design to the acrylic, depending on available tools and desired finish. Digital printing transfers ink directly and is ideal for multi-color signs but requires a UV printer. Stenciling or tracing is budget-friendly and good for single-color designs and hand-painting details.
Vinyl transfer involves cutting your design from adhesive vinyl using a vinyl cutter or craft machine, then applying it to the acrylic’s back side. This allows for clean edges and durability. Remember to tape your design only to the acrylic’s back side so the front stays scratch-free and polished. For transferring by hand, use the following tips:
- Trace method: Tape printed design behind acrylic, trace with a fine marker before engraving or painting.
- Stencil method: Cut the design from stencil material, secure it on the acrylic, then paint or etch.
- Vinyl transfer: Weed out excess vinyl, use transfer tape to pick up design, then press firmly onto the acrylic back and remove tape carefully to avoid bubbles.
Adding LED Lighting: Wiring, Placement, and Power Choices
Routing and installing LED strips in your acrylic sign begins with planning a proper channel for the lights. Use a router or a CNC like the X-Carve to carve a groove about 0.5 inches narrower than the overall width of your sign, centered along the area where you want illumination. This groove will hide the LED strips flush with the acrylic, preventing any snagging and ensuring even light distribution. Clean the groove to remove dust and debris before adhering the strips with the built-in adhesive backing or a clear silicone adhesive for a stronger hold.
When selecting voltage and power supplies, your choice depends on the size and complexity of the sign. 12V LED strips are common and easier to source, but they suffer from voltage drop over longer distances, which leads to dimmer ends and possible flickering. For signs longer than 3 to 4 feet, 24V strips perform better because they reduce voltage drop, maintaining consistent brightness throughout. The power supply should match the total wattage of your installed LEDs plus a 20% buffer to prevent overload. For example, if your LED strips consume 36 watts in total, choose a power supply rated for at least 43 watts or 3.6 amps at 12V or 1.5 amps at 24V.
Wiring multiple LED strips requires wiring them in parallel rather than in series to avoid voltage drop and flickering. Connect all positive terminals to the positive output of your power supply and all negative terminals to the negative output. Use appropriate gauge wire, 18 or 20 AWG is sufficient for most hobby-sized signs. Avoid daisy-chaining long strips end to end without additional power injection points; instead, feed each section from the power source or a well-planned distribution point to keep voltage even.
Below is a typical wiring setup: Begin with the DC power supply output terminals, then feed wires split to each LED strip segment with a positive and negative pair each. Include an inline fuse rated just above your total current to protect against shorts. Use connectors or solder joints covered in heat shrink tubing to secure and insulate connections thoroughly.
Ensure the power supply voltage matches your LED strip voltage exactly; using a higher voltage supply risks damaging the LEDs, while a lower voltage will cause insufficient brightness and uneven lighting.
Before installation, run a checklist: Verify your power supply voltage and wattage; clean and dry installation surfaces; route strips within the groove without sharp bends; check polarity carefully when wiring; use solid, insulated connections; and test the LEDs with the power supply before final assembly. Expect some trial and error in placement to reduce shadows or hot spots. A well-lit acrylic sign has smooth, continuous glow without flicker or dim areas, which comes from consistent, correct wiring and powering of the LED strips.
Step-by-Step Assembly and Finishing Techniques
The final assembly of your acrylic sign involves building or attaching a frame, applying finishing touches to improve durability, and weatherproofing for outdoor use. A secure frame not only protects the sign but also offers a clean and professional look. For outdoor signs, sealing and weatherproofing extend the lifespan by protecting against moisture, UV rays, and temperature changes.
Building a frame around your acrylic sign typically involves wood or metal, depending on your style preference and environment. For a clean finish, use acrylic that is at least 6mm thick, especially outdoors. Finishing the back with oil-based paint markers like Uni POSCA improve the appearance and prevents color bleed, given the smoothness of acrylic surfaces. Follow these steps to assemble and finish your acrylic sign with framing and weatherproofing:
- Measure and cut frame materials. Select wood or metal strips matching the dimensions of your acrylic sheet. Cut the pieces to create a frame slightly larger than the acrylic for a snug fit. For example, if your acrylic is 24 by 18 inches, cut frame pieces about 24 ½ by 18 ½ inches to accommodate the edges.
- Sand and prepare frame edges. Smooth rough edges with fine-grit sandpaper to prevent damage to the acrylic and create a clean finish. Wipe with a damp cloth to remove dust.
- Attach frame corners. Join the cut pieces with wood glue or metal corner brackets. Use clamps to hold the frame tightly while the glue dries or screws are set. Allow at least 30 minutes for wood glue to cure.
- Insert the acrylic sheet. Slide your prepared acrylic into the frame. If the fit is tight, slightly flex the frame or use rubber spacers to avoid cracking the acrylic. The acrylic should sit flush without gaps.
- Secure the acrylic. Use clear silicone sealant or small corner clips inside the frame to hold the acrylic in place without visible fasteners. Apply sealant in a thin bead around the edge and let it cure for 24 hours.
- Seal edges for weatherproofing. Apply a UV-resistant clear coat or acrylic sealer designed for outdoor use to all exposed edges and surfaces. Products like polyurethane or acrylic spray sealers cost about $10 to $20 and require 2 to 3 coats, drying 1 hour between layers.
- Add protective backing if needed. For extra durability, adhere a waterproof backing material, such as vinyl, to the sign’s rear surface. This helps prevent warping from moisture.
- Allow full cure time. Let your sign dry and cure in a dust-free environment for at least 48 hours before outdoor installation or handling. Proper curing ensures long-lasting adhesion and protection.
Outdoor weatherproofing is critical because acrylic can discolor or degrade under sunlight and moisture. Avoid frames that trap water by choosing raised or slotted designs that allow airflow. Regular maintenance includes wiping down the sign with mild soapy water and inspecting for cracks or sealant wear. Signs that are not sealed or framed properly may show peeling paint or clouding, especially after harsh weather exposure.
Common Problems and Troubleshooting Your DIY Acrylic Sign
Uneven or dim lighting in your acrylic sign usually results from rough edges or poorly positioned LEDs. Rough cuts scatter the LED light unevenly, causing dark areas that reduce the overall brightness. In some cases, flickering or hot spots appear because of loose wiring, low-quality LEDs, or inconsistent power supply. Paint fading happens when the acrylic paint isn’t sealed properly or UV-protected, causing the sign to look worn over time.
To fix uneven lighting, first inspect the cut edges. Smooth them with fine-grit sandpaper (around 320 to 600 grit) until they feel polished to the touch. This step helps the LED light spread more evenly, eliminating dark spots. For flickering or hot spots, check your LED connections for tightness and secure any loose wires. Use a steady 12V power supply recommended for most LED strips used in DIY signs to avoid inconsistent brightness. Replacing cheap LED strips with higher-quality ones often improves performance and lifespan.
When dealing with fading or peeling paint, clean the surface thoroughly and apply a UV-resistant clear coat to protect your design. Acrylic paint specifically designed for plastics will last longer but must be sealed properly. Avoid harsh cleaning chemicals; a damp cloth with mild soap usually suffices for maintenance. Below is a troubleshooting table to diagnose common problems and practical fixes for your acrylic sign:
| Problem | Cause | Practical Fix |
|---|---|---|
| Uneven or dim lighting | Rough or unfinished acrylic edges | Sand edges with 320-600 grit sandpaper to smooth surface for better light diffusion |
| Flickering LEDs | Loose wiring or low-quality LED strip | Check and tighten all wire connections; replace with high-quality 12V LED strip |
| Hot spots on sign | LEDs too close or no diffuser used | Space LEDs evenly; add a diffuser layer like frosted acrylic or vinyl |
| Fading paint | Poor paint adhesion or lack of UV protection | Use acrylic paint suitable for plastic and seal with UV-resistant clear coat |
| Peeling paint | Improper surface preparation before painting | Clean and lightly sand surface before painting; apply primer if needed |
Maintaining your acrylic sign’s lighting quality means keeping edges smooth and wiring tidy. Regularly clean the sign with a soft cloth to prevent dust build-up that can reduce light diffusion. Avoid placing the sign in direct sunlight without UV protection to limit paint fading. Checking connections and power supply every few months helps spot flickering issues before they worsen. These practices add to the sign’s durability and keep the lighting vibrant.
Mounting, Display Options, and Care for Longevity
Choosing the right mounting method depends on where you want to display your acrylic sign and the surface you’re working with. For smooth, flat walls, double-sided foam tape or strong adhesive strips work well and avoid drilling holes. On drywall or wooden surfaces, drill-mounted standoffs provide a secure, professional look by holding the sign slightly off the wall. For glass or mirrors, suction cup hooks or adhesive strips designed for glass avoid damage and allow easy repositioning.
When mounting outdoors or in damp areas, consider weatherproof anchors and stainless steel hardware to resist rust. Keep in mind that heavier or larger signs require sturdier mounts to prevent falling or warping. For example, a sign larger than 24 by 36 inches will need at least four mounting points spaced evenly.
- Double-sided foam tape for smooth indoor walls under 10 pounds
- Plastic or metal standoffs for thicker mounting and a floating effect
- Command adhesive strips for temporary indoor displays without damaging paint
- Suction cup hooks for glass surfaces where drilling is not an option
- Concrete anchors and stainless steel screws for masonry or outdoor walls
- Velcro strips for lightweight, removable signs in event spaces
- Hinged brackets for signs that may need periodic adjustments or removal
Cleaning and maintaining acrylic signs helps retain their clarity and color vibrancy. Avoid abrasive cleaners or rough cloths, as these can scratch the surface. Use a soft microfiber cloth with a solution of mild soap and water to gently wipe the sign. Wipe in a circular motion and dry thoroughly to avoid water spots. Avoid ammonia-based cleaners like window sprays; they may cause clouding. For outdoor signs, inspect them every few months for signs of UV fading and consider applying a UV-resistant acrylic sealant to extend brightness and prevent yellowing.
Use only soft, non-abrasive cloths and mild soap to clean your acrylic sign; harsh chemicals and scrubbing can cause irreversible scratches and clouding.
Knowing when to call in professional help or consider upgrades can save you time and frustration. Have a professional handle electrical wiring if you add LEDs, especially if unfamiliar with electricity or building codes. Large or complex signs may require a structural engineer’s input to ensure safe mounting. Also consider upgrading to thicker acrylic or protective coatings if your sign is in a high-traffic area or exposed to extreme weather. These materials cost more, roughly $50 to $100 extra for custom sizes, but improve durability and longevity. Maintenance checklist for your DIY acrylic sign:
- Check mounting hardware every 6 months for loosening or corrosion
- Clean monthly with mild soap and a microfiber cloth
- Apply UV-protective sealant annually if outdoors
- Inspect LEDs and wiring yearly, consult a professional if repairs are needed
- Store removable signs flat and avoid stacking heavy items on top
Following these mounting and care tips will maximize the life and appearance of your acrylic sign, keeping it vibrant and secure for years.
Step-by-Step Action Plan
Follow these steps to create your DIY acrylic sign with confidence from start to finish.
- Before you start: Gather all materials and tools, including acrylic sheets, cutting tools, engraving equipment, LEDs, power sources, and design software. Confirm you have every item to avoid interruptions.
- Day 1: Create your design using vector-based software like Adobe Illustrator or free options like Inkscape. Make sure the design fits your acrylic size and includes space for LED placement.
- Day 2: Cut and engrave your acrylic using a laser cutter or rotary tool, following safety guidelines. Check the cuts are clean and engravings are clear before proceeding.
- Day 3: Wire and install the LED lights behind or around the sign. Test the lighting to ensure even illumination and that all LEDs function properly.
- Day 4: Assemble the sign by attaching any mounting hardware and securing LED components. Confirm the assembly is sturdy and wiring is neat for safety and durability.
- Day 5: Mount your sign on the chosen surface using screws, adhesive, or stands suitable for your environment. Verify the sign is level and firmly attached.
- After 1 week: Clean your sign with a soft cloth and mild cleaner, and check the LED wiring and power source for steady operation to maintain longevity.
Frequently Asked Questions
What Thickness of Acrylic Is Best for a DIY Sign?
Choose acrylic between 1/8 inch and 1/4 inch thick; thinner sheets bend easily, thicker ones hold shape and last longer. Thicker acrylic also allows for deeper engraving and better light diffusion when using LEDs.
Can I Make a Waterproof Acrylic Sign for Outdoor Use?
Yes, by sealing edges with waterproof paint or silicone and using UV-resistant acrylic sheets. This protects against weather and fading, ensuring your sign lasts longer outdoors.
How Can I Attach Vinyl Letters to an Acrylic Sign Without Bubbles?
Use transfer tape and a squeegee to apply vinyl smoothly. Press firmly and remove bubbles by pushing them toward the edges carefully. This method results in a clean, professional look.
What Type of LED Lights Work Best for Illuminating Acrylic Signs?
Flexible LED strip lights are best as they fit along edges and provide even lighting. Choose bright, cool white LEDs for clarity or RGB for color options. Be sure to use a power supply matching the LED voltage.
Can I Reuse Materials from Old Acrylic Signs for New Projects?
Yes, you can cut and repurpose clear acrylic pieces from older signs if they are not scratched or damaged. Cleaning and smoothing edges before use helps maintain quality and appearance.
Is It Safe to Laser Cut Acrylic at Home?
Laser cutting acrylic is safe with proper ventilation and protective measures. Always follow your laser cutter’s guidelines and never leave it unattended during operation to avoid fire hazards.
Wrapping Up
Your DIY acrylic sign is a rewarding project that lets you personalize your space with custom lighting and design. Start by focusing on a simple design and quality materials to gain experience with cutting and wiring. Next, fine-tune your technique on a practice piece before building your final sign to ensure a polished result you’ll enjoy for years to come.