How to Make Layered Laser Signs with Ease: A Complete Step-by-Step Guide
How to make layered laser signs starts with carefully choosing materials you can cut cleanly and stack evenly. Using a laser cutter with the right speed, power, and frequency settings lets you create precise, repeatable layers. Begin by designing a clear pattern that suits your sign’s depth and detail for easy assembly.
Key Takeaways
- Select hardwood or 1/8-inch thick PatternPly® MDF for durable, easy-to-cut layered signs.
- Set your Fusion Edge 24 laser to 20% speed, 100% power, and 10% frequency for clean cuts on wood layers.
- Use software like LightBurn or Adobe Illustrator to create separate vector layers for each sign component.
- Cover open laser bed areas to maximize smoke extraction during cutting and protect edges with air assist to reduce flaming.
- Apply masking tape on wooden sheets before cutting to prevent scorch marks and improve edge quality.
- Sand and paint individual layers before assembly for a smooth, professional finish on your sign.
What Are Layered Laser Signs and How They Work

Layered laser signs consist of multiple cut pieces stacked to create depth and a three-dimensional look. Each layer is cut separately, often from different materials or colors like wood and acrylic, then assembled to build a sign that rises off the surface. This technique gives the sign a striking appearance that single-layer signs can’t easily achieve, making text or images pop visually and catching the eye with shadow and contrast created by the layers.
The appeal of layered signs lies in their customizability and the visual depth that draws attention. By using two or more layers, you can combine colors or textures for a richer design. For example, layering a bright acrylic piece over a natural wood base adds dimension and durability, making the sign suitable for indoor or covered outdoor use. These signs work well for personalized gifts, shop signs, or home decor because the 3D effect stands out more than flat, one-piece signs.
The basic principle behind layered laser signs is cutting each design component from thin sheets, commonly 1/8 to 1/4 inch thick, from materials like plywood, MDF, or acrylic. Laser cutting machines precisely slice each shape with smooth edges, eliminating the need for sanding or shaping after cutting. Once cut, the layers align by stacking and securing them with glue or small pins to keep the pieces in place. The spacing between layers can vary, sometimes with thin spacers to increase the depth. This physical separation creates shadows and highlights that simulate a three-dimensional effect.
Producing these signs requires accurate design files to ensure layers fit perfectly. You’ll prepare separate vector files for each layer that your laser cutter reads. The precision of laser cutting makes this workflow efficient, with clean cuts costing surprisingly little per piece when materials are modest. For instance, basic wood or acrylic sheets suitable for layering generally range from $10 to $30 depending on thickness and size. Good results show even edges, tight layer alignment with no visible gaps, and a solid feel. Problems arise when layers aren’t aligned or the material warps, which can spoil the 3D effect and make the sign look uneven or fragile.
Your choice of materials, cut thickness, and assembly method affect the final depth and look. Thin layers produce subtle relief, while thicker or multiple layers create more pronounced dimension. Some creators experiment by using two lasers or combining engraving with cutting to add textures on layers, improving the sign’s visual complexity. This method is versatile enough for seasonal designs like summer door signs or year-round business branding, allowing you to customize style, scale, and materials based on your skills and equipment.
Selecting Materials for Durable Layered Signs
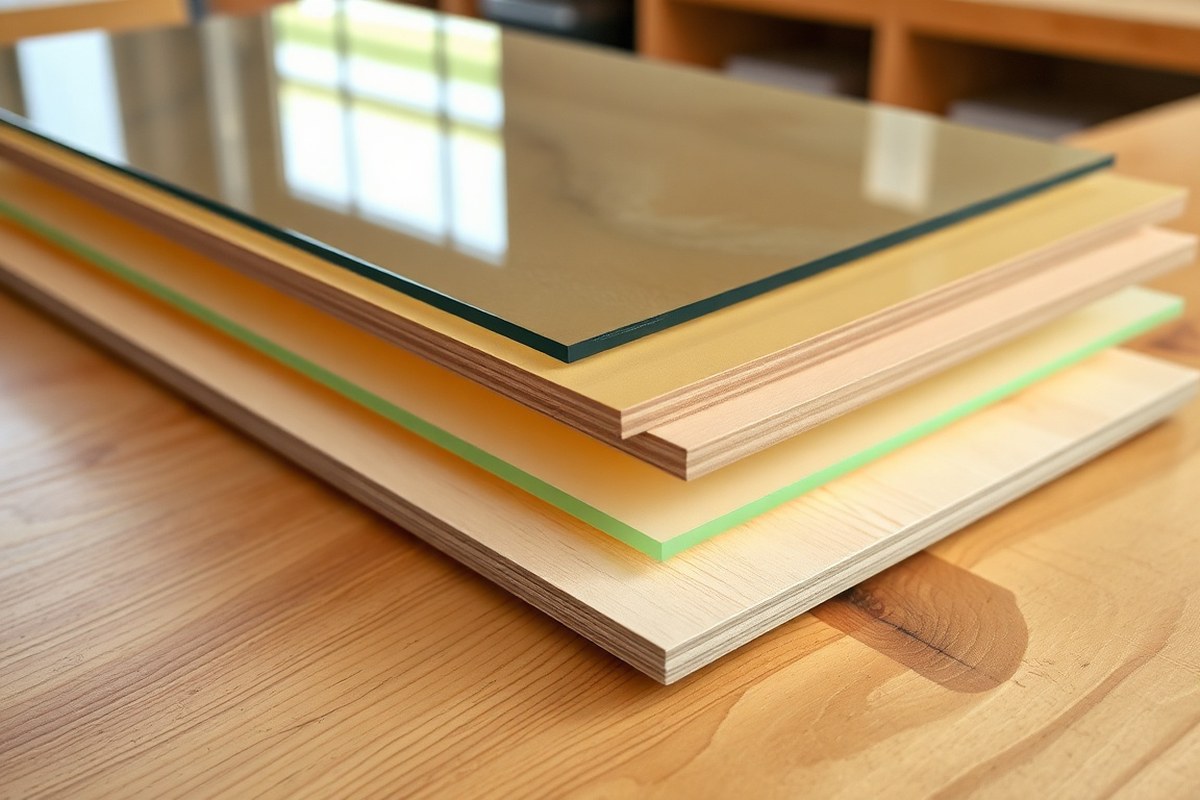
Selecting the right materials is important for making durable layered laser signs that look professional and last. Wood and acrylic are the most common materials for layered signs because they cut cleanly and stack well. Wood such as 1/8″ plywood or PatternPly® MDF offers a natural look and is affordable, but it may warp outdoors unless sealed properly. Acrylic, available in various thicknesses like 1/8″ or thicker, gives sharp colors and smooth edges and handles humidity better, making it suitable for both indoor and outdoor signs.
Material thickness affects how many layers you can stack and how detailed your cuts can be. Thinner layers (around 1/8″) allow more precise small details and cleaner layering, while thicker layers add dimension but require stronger laser power and slower speeds to cut properly. For example, slowing the cut speed slightly when going through taped MDF ensures the laser can slice through without rough edges.
Outdoor signs often combine metal for resilience with either acrylic or sealed wood for visual appeal. Metal engravings last longest outside, especially in public spaces exposed to weather. For indoor signs, untreated wood or lower-cost acrylic can work since they don’t face harsh conditions. Dual-laser systems, such as LaserPecker LP5, make cutting thick acrylic or wood layers more consistent and precise.
| Material | Thickness (in) | Pros | Cons | Suitable For |
|---|---|---|---|---|
| PatternPly® MDF | 1/8 | Affordable, natural wood look, stacks well | Needs sealing for outdoor use, can warp | Indoor layered signs, detailed cuts |
| Acrylic (cast or extruded) | 1/8 to 1/4 | Sharp edges, smooth finish, weather resistant | More expensive, can chip if thin | Indoor and outdoor signs, vibrant layers |
| Metal (engraved) | Varies (thin sheets) | Highly durable outdoors, lasting finish | Requires specialized cutting setups, costly | Outdoor public signs, combined material layers |
| Wood plywood | 1/8 to 1/4 | Affordable, easy to cut, natural finish | Warping outdoors, less detailed edges | Indoor signs, rustic layered designs |
Use the laser cutter’s presets as a starting point, especially for cutting 1/8″ wood or acrylic layers. Adjust power and speed to match the material thickness and density. Measure the material thickness on your machine’s focus gauge (e.g., P2 or S1) before cutting to ensure clean results. Applying masking tape to wood layers can reduce burn marks but may slightly slow your cut, so slow the speed accordingly.
Always name your layer files clearly before laser cutting to avoid confusion during multiple layer preparation and assembly.
Consistent laser cutting settings are key to achieving tight fits between layers. Using thicker acrylic or wood layers can create standout 3D letters, but requires more power, slower speeds, and careful alignment. Mixing materials like wood and metal or acrylic adds dimension and unique visual appeal, especially for durable outdoor signs. For best results, match material properties with sign environment and design goals to balance cost, durability, and appearance.
Designing Your Layered Laser Sign: Software and Workflow
To create an effective layered laser sign, you need software that can handle vector graphics and layer management. Separating your design into distinct layers ensures each piece cuts cleanly and fits together neatly. Optimizing your design layout saves material and simplifies the cutting process.
Choosing the Right Design Software
Popular software options for designing layered laser signs include Adobe Illustrator, Inkscape, and CorelDRAW. These programs support vector files (SVG, DXF) which are essential for precise laser cutting. Adobe Illustrator offers advanced features but comes with subscription costs, whereas Inkscape is a free, open-source alternative suited for beginners.
Look for software that allows grouping, layering, and color coding. This helps organize different parts of your design and assign cut or engraving settings in the laser software. A program with good compatibility for your laser cutter’s control software simplifies file transfer.
Separating and Color Coding Layers
Each physical layer of your sign should be a separate object set on its own layer within the design file. This separation lets you apply distinct cutting or engraving parameters per layer and ensures accurate stacking when assembling the sign.
Color coding layers according to the cutter’s settings, for example, red for cutting and blue for engraving, streamlines the job preparation. This coding also influences how the cutter interprets the file. You’ll want to create as many layers as your design requires but avoid excess complexity that can confuse the laser software.
- Import or create your artwork in vector format.
- Create a new layer for each visual element that will be cut separately.
- Assign each layer a distinct color matching the intended laser process.
- Use grouping or locking features to prevent accidental edits.
- Double-check paths and intersections to avoid cut errors or fragile pieces.
- Test layer visibility by toggling on and off to confirm separation.
Optimizing Layout for Material Efficiency
Arrange your layers and individual pieces on the virtual material sheet to minimize waste. For example, fitting four layers of a 4×6 inch sign on a 12×12 inch plywood sheet reduces material costs. Keep in mind the laser’s cutting area and place designs near the center for the best cut quality.
Use the close view camera or material alignment aids on your laser machine to position your material precisely on the cutting bed. This ensures your design fits the sheet and the laser cuts exactly where intended without overlaps or off-sheet errors.
- Measure your material size and enter those dimensions in the design software.
- Scale your design layers to fit within the sheet size, leaving a small margin (around 0.1 inch) for cutting tolerance.
- Arrange layers nested closely together without overlapping.
- Group related pieces when possible to make assembly easier.
- Preview the complete layout before export to verify fit and spacing.
Exporting Files for Laser Software
Once your layers are organized and layout is optimized, export the file in a format your laser machine supports, typically SVG or DXF. Using vector formats maintains crisp lines and accurate cuts. Verify the export settings keep layers intact and do not merge colors unintentionally.
Load your design into the laser’s control software, such as Laser Dashboard. Position your artwork on the virtual bed, confirm the process types (for example, setting cutting lines to “Vector”), and adjust the material thickness and type. This preparation ensures the laser behaves as expected for each layer and material.
Setting Up Laser Cutting: Machine Settings and Safety
Setting the right laser power, speed, and frequency ensures clean cuts and crisp edges on layered signs, especially with common 3mm wood and acrylic sheets. These settings vary by the material’s thickness and type, demanding adjustments for optimal results. Following proper safety steps protects you from fumes, fire risk, and eye damage while working with lasers.
Recommended Settings for Common Materials
For 3mm thick wood and acrylic, try setting an 80-watt laser cutter like the Fusion Edge 24 to 20% speed, full power, and 10% frequency. This setup usually cuts through the material smoothly in one pass while keeping charring and melting low.
Adjusting settings depends on your material’s thickness and density. Thicker wood requires reducing speed or increasing power slightly to maintain cut-through while thinner or softer materials may need faster speeds or lower power to avoid burning or melting edges. Frequency controls pulse rate; higher frequency can smooth cuts on acrylic but may cause more charring on wood. Follow this decision rule:
- Thicker material: decrease speed by 5%-10% and/or increase power by 5%-10%
- Thinner material: increase speed by 5%-10% and reduce power slightly
- Hardwoods vs. Softwoods: use slightly more power on hardwoods
- Acrylic: keep power high, adjust speed moderate, increase frequency to reduce melting
- Test cut on scrap pieces before running final job
For layered signs made from MDF or acrylic up to 3mm, these settings typically create smooth edges with no post-processing needed. Cutting thicker layers up to 20mm wood or 15mm acrylic requires dividing the job into passes or deeper cuts.
Using Air Assist and Extraction
Air assist blows a constant stream of air onto the laser’s cutting zone, reducing the risk of open flames on the material’s edge and improving cut quality. It also clears smoke and debris away from the laser path, preventing re-deposition on cuts.
Extraction systems are essential for removing toxic fumes created during cutting, especially with wood and acrylic. Cover any open areas of the laser bed to maximize airflow for efficient fume removal.
- Always turn on air assist during cutting
- Ensure your extraction system is on and vented outdoors or through a suitable filter
- Seal or cover gaps in the laser bed to improve extraction efficiency
- Maintain the air assist nozzle clean and correctly aligned
- Replace filters in extraction regularly as per manufacturer’s recommendation
Failing to use air assist or proper extraction risks flaming, smoke stains on your layers, and health hazards from inhaling fumes.
Essential Safety Precautions
Laser cutting emits intense light and potentially hazardous fumes. Proper safety gear and procedures are required to prevent injury and ensure a safe workspace.
Wear laser safety glasses that match the wavelength of your cutting laser to shield your eyes from reflected beams. Gloves help avoid splinters when handling cut wood or acrylic pieces. Use a respirator or work in a well-ventilated area to avoid inhaling fumes.
- Wear laser-specific safety glasses during operation
- Keep a fire extinguisher rated for electrical and wood fires nearby
- Never leave the laser cutter unattended while running a job
- Ensure ventilation or extraction is active before starting
- Follow the laser machine manufacturer’s operating instructions strictly
Good housekeeping reduces risk: keep the area free of combustible materials and clean dust from the laser bed regularly.
Setting Focus and Material Placement
Correct focus height is critical for sharp, clean cuts on layered signs. Most laser machines have a focus tool or auto-focus feature, set the focus so the laser beam’s smallest point is exactly on the material’s top surface.
Place the material securely on the laser bed to prevent shifting during cutting, which can cause layer misalignment. Use clamps or weights if needed. Ensuring the layers are flat helps maintain consistent focus and cut quality across the entire piece.
Check that your material lies flush and covers the laser bed’s sensor area if applicable, avoiding any exposure that could confuse the machine’s height detection. Confirm the origin point is set correctly in software before starting the job to align cuts precisely.
Preparing and Running the Laser Jobs Efficiently
Preparing and running your laser jobs efficiently means getting your artwork positioned correctly and your materials prepped well before cutting or engraving. Masking or backing tape helps protect surfaces and keep pieces aligned. Planning the sequence of engraving and cutting layers avoids damage, and arranging multiple layers in your laser dashboard saves time on batch jobs.
Applying Masking or Backing Tape
Masking or backing tape protects your material’s surface from scorch marks and debris during cutting or engraving. It also helps keep delicate layers in place, especially when handling fragile wood, acrylic, or layered veneers. For layered signs, applying tape before running the laser cuts reduces chipping and tearing, which improves the edges and overall finish quality.
To apply backing tape correctly, clean the material surface, then apply the tape smoothly without bubbles or wrinkles. Use painter’s tape or a low-tack transfer tape designed for laser materials. You can cover the entire panel or just the areas where engraving and cutting will occur. After the laser job, remove the tape carefully once all layers have fully dried to avoid pulling up edges or damaging fine details.
Positioning Artwork in Laser Dashboard
Arranging your laser files and positioning them on the cutting bed efficiently cuts production time and material waste. Organize your artwork by layer and size in the laser software’s dashboard, matching the physical layout of your materials on the bed. Align your design files so the start points correspond exactly to where the material is placed, minimizing repositioning and reducing wasted cuts.
Using origin markers or laser bed grids helps keep the artwork aligned. For multilayer signs, group each layer’s pieces close enough to fit on the sheet but spaced enough to avoid heat damage between layers. Double-check that each design file uses the correct settings for material thickness and laser power before starting the run.
Cutting vs Engraving Order
Running engraving steps before cutting out your layers generally produces cleaner edges and more precise results. Engraving first lets the laser mark details without the material shifting, which can happen once pieces are cut free. After engraving fully dries, cutting along the outlines ensures crisp edges and less chance of warping or misalignment.
For layered signs, start by engraving all layers in sequence. Let any inks, paints, or sealants dry completely before removing the masking tape. Then proceed with cutting the layers, so the structure remains stable. This method also reduces dust and residue that engraving can deposit on cut edges, improving the final assembly quality.
Batch Processing Tips
Batch processing helps you finish many signs quickly by running all layers and copies in one laser job. Arrange all parts to maximize the use of the material sheet while maintaining safe spacing of at least 1/8 inch between pieces to prevent heat overlap. Group similar layer thicknesses together for consistent laser settings and quality. Follow these steps for efficient batch processing:
- Clean and prep all material sheets, applying backing tape if needed for each.
- Import and arrange all design layers in the laser software in the order of engraving then cutting.
- Set proper laser power, speed, and frequency for each layer according to material specifications.
- Align your physical materials on the laser bed to match the artwork layout in the dashboard.
- Run a test cut on scrap material to verify settings and alignment.
- Start the job, monitoring the first few layers closely for any adjustments.
- After completion, peel off the backing tape carefully once the layers have cooled and dried fully.
- Stack and assemble the cut layers immediately or store them flat to avoid warping.
Clean your laser bed regularly and avoid stacking materials too closely to prevent heat buildup that can distort cuts in batch jobs.
Cleaning, Finishing, and Painting Laser-Cut Layers
Removing burn residue and soot from laser-cut layers is key to a professional finish. After cutting, gently wipe the edges and surfaces with a soft cloth dampened with isopropyl alcohol or a mild soap solution. This cleans off dark marks without damaging the material. Do this within 24 hours of cutting to prevent residues from settling. For wood layers, lightly sanding edges with fine-grit sandpaper (220 grit) can smooth scorch marks and raise the finish quality. Avoid aggressive sanding, which can change layer dimensions and interfere with fit during assembly.
Painting is a popular finishing step to add color and protect your laser signs. Use spray paint for an even coating on thin layers, holding the can 6 to 8 inches away and applying several light coats rather than one heavy coat. Acrylic paint also works well when applied with a foam brush, letting you control coverage and avoid drips. Allow paint to dry completely for at least 20 minutes between coats. For multi-layer signs, paint each layer separately before assembly, keeping colors distinct and preventing smudging. Mask off edges with painter’s tape for clean lines if the design demands crisp borders.
Protecting layered laser signs for outdoor use requires sealing. After painting and drying, apply a clear polyurethane spray to guard against moisture and UV damage. Outdoor polyurethane costs around $15 to $25 per spray can and typically covers about 25 square feet per coat. Apply two to three light coats, waiting 30 minutes between each. This finish will extend the life of wood and painted acrylic signs exposed to rain and sunlight. For metal layers, light sanding before painting improves paint adhesion, and powder coating provides durable protection but requires professional equipment.
- Wipe layers with isopropyl alcohol or mild soap within 24 hours of cutting to remove soot
- Sand wood edges lightly with 220 grit sandpaper to smooth scorch marks
- Spray paint layers separately using multiple light coats, drying 20 minutes between coats
- Use acrylic paint with foam brushes for controlled application on smaller areas
- Seal painted layers with 2-3 coats of outdoor polyurethane spray, waiting 30 minutes between coats
- Mask edges with painter’s tape for sharp color borders
- Consider powder coating metal layers for outdoor durability, using a professional service
Quality finishes look smooth and even, with vibrant paint colors and crisp edges. Poor results include peeling paint from inadequate drying, uneven coating from heavy spraying, or blurred edges without taping. Take your time finishing individual layers before assembly to ensure each stands out and holds up over time. Cleaning, painting, and sealing are small investments that make layered laser signs look polished and last longer in any setting.
Assembling and Aligning Layers for a Clean Finish
Choosing the right adhesive and ensuring precise alignment are key to creating a layered laser sign that looks professional and lasts. For wood layers, a wood glue or PVA glue designed for wood-to-wood bonding works best. It dries clear and provides a strong bond. Acrylic layers require a special acrylic cement like Weld-On 3 or 4, which chemically bonds the surfaces for a smooth finish. Mechanical strength and neatness depend on how you align and clamp the layers during drying.
To get clean edges and perfect stacking, take your time aligning each layer before applying glue. Use registration marks from your design if possible; these small notches or holes help you line up pieces exactly. Clamping pressure should be firm enough to hold layers without warping or squeezing out too much glue. You can use bar clamps or even heavy books for uniform pressure. Let wood glue dry for at least 30 minutes before handling and a full 24 hours to cure completely. Acrylic cements usually set in a few minutes but check the product instructions.
- Prepare your workspace by cleaning surfaces and gathering all layers. Ensure edges are smooth and free of dust.
- Dry-fit all layers by stacking them without adhesive. Check alignment and fit, and mark registration points if needed.
- Apply adhesive sparingly to avoid squeeze-out. Spread an even, thin layer with a brush or applicator on the bonding surface.
- Stack layers carefully using registration marks to align edges and cutouts perfectly. Press down gently to seat the layers.
- Clamp or secure layers with bar clamps or weighted flat objects, applying even pressure across the surface. Avoid over-tightening.
- Allow adhesive to set following product instructions, 30 minutes minimum for wood glues, longer for full cure. Acrylic cements may require less time but ensure no movement.
- Remove clamps and inspect the sign. Clean any glue residue immediately with a damp cloth for wood glue or a suitable solvent for acrylic cement.
Following these steps reduces gaps and misalignment, which often cause shadows or an uneven appearance. For signs combining wood and acrylic layers, tack the wood parts first, then carefully add acrylic with acrylic cement for the best hold and finish. Using too much adhesive can cause visible bulges, while too little weakens the bond and may cause layers to separate over time. Proper drying time and secure clamping improve durability and give your layered sign a crisp, polished look that stands out.
Avoiding Common Mistakes in Layered Laser Sign Projects
Burned edges and chips happen mostly because the laser power, speed, or focus isn’t adjusted correctly for the material. Burn marks show the laser is too powerful or the speed is too slow, causing overheating. Chips or splinters occur when the laser moves too fast or the cut isn’t clean, especially on fragile wood or acrylic. To correct this, start by lowering the power and increasing the speed slightly, then run a test cut on a scrap piece. Keep the laser’s focus sharp by checking it before every job, an out-of-focus beam cuts less cleanly and can cause charring.
Misalignment between layers results when the cut pieces don’t fit perfectly or when assembly isn’t precise. This often occurs because layers weren’t designed with alignment guides or because small warps in the material cause shifts. Prevent it by including registration marks in the design, such as small holes or notches at consistent points on each layer. When assembling, use these guides to line up layers before gluing or fastening. Also, store materials flat before cutting to minimize warping.
Small pieces breaking or dropping out happen if they are too thin, not properly held by tabs during cutting, or handled roughly after release. To avoid losing these parts, add micro-tabs in your design, tiny uncut bridges holding delicate pieces in place during the cutting process. Remove these tabs carefully with a craft knife and tweezers to reduce breaking. Consider using thicker material or combining small parts into a bigger piece that you separate by hand after assembly for better control.
Cuts that don’t go completely through the material usually mean the laser’s power is too low, the speed is too high, or the focus is off. For tougher materials like hardwood or thick acrylic, increasing laser power by 5% to 10% and slowing down the speed in small increments works best. Use the machine’s preview mode to verify the design layout and cut path first. Watch the first pass closely; multiple passes might be necessary for thicker signs, but too many raises the risk of charring. Adjust settings based on the is material thickness and type.
- Test cut on scraps to dial in power, speed, and focus before main cuts
- Add registration marks to each layer for precise alignment
- Include micro-tabs to keep small parts attached until assembly
- Store materials flat to prevent warping and misalignment
- Use multiple passes carefully on thick materials to ensure full cuts without burning
Always keep a close eye on the first few cuts to spot incomplete cuts or burning early, this saves time and material in the long run.
Step-by-Step Action Plan for Your Layered Laser Sign Project
Follow this plan to design, cut, assemble, and finish your layered laser sign with confidence and efficiency.
- Before you start: Choose your materials and gather software. Confirm your chosen materials are compatible with your laser cutter, and install design software that supports layers.
- Day 1: Create your layered design file. Ensure each layer is separated and sized correctly to maintain alignment during assembly.
- Day 2: Test laser settings on scrap material. Adjust power and speed until cuts are clean without burning or warping, then note these settings for your actual project.
- Day 3: Run the laser jobs for all layers. Monitor cutting progress to catch any misalignment or errors early.
- Day 4: Clean and finish each cut layer. Remove debris and apply paint or finishes evenly, checking for complete coverage and smooth drying.
- Day 5: Assemble layers carefully using alignment guides or pins. Verify tight fits and even spacing to prevent gaps or shifting over time.
- After assembly: Inspect the sign from multiple angles under good lighting. Look for rough edges or loose layers, addressing any issues before final display or sale.
Frequently Asked Questions
What Tools Do I Need Besides a Laser Cutter to Make Layered Signs?
You’ll need design software, masking tape, clamps, and finishing supplies like paint. These tools help keep layers aligned and add professional-looking details to your sign.
Can I Use Different Thicknesses of Wood for Layered Signs?
Yes, mixing thicknesses adds depth and visual interest. Just adjust laser settings for each wood thickness to ensure clean, precise cuts.
How Do I Prevent Warping in Layered Wooden Signs?
Use stable wood like MDF or hardwood and seal edges to prevent moisture absorption. Clamping layers while drying helps keep everything flat.
Can I Make Layered Signs with Metal Using a Laser?
You can cut thin metals like brass or aluminum up to 1 mm using a fiber laser. Layered metal signs require precise handling and often a different design approach than wood or acrylic.
How Do I Apply Paint Evenly on Laser-Cut Layers?
Use light coats and allow drying between layers to avoid drips or pooling in engraved details. Spray paint or airbrush gives a smoother finish than brushes for intricate designs.
What Assembly Methods Work Best for Multi-Layered Signs?
Use wood glue combined with clamps or pins for alignment. Avoid excessive glue to prevent squeezing out and staining edges.
Wrapping Up
Layered laser signs offer a versatile way to create detailed, professional-looking projects that stand out. Prioritize precise design, material choice, and careful assembly to achieve the clean, polished finish this craft demands. Start by experimenting with a simple multi-layer design to build your skills and confidence for more complex signs.