What Is a Vehicle Wrap: A Complete Guide with Key Benefits Explained
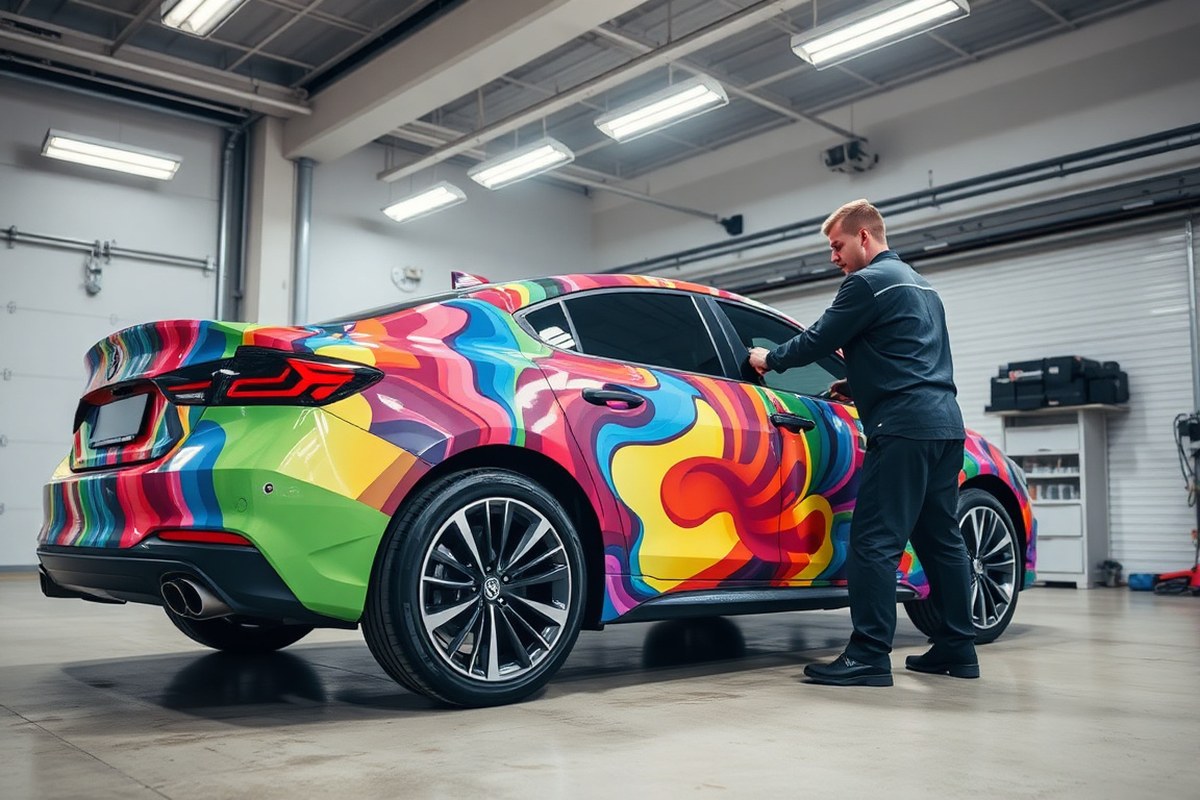
A vehicle wrap involves covering a car’s exterior paint with a large vinyl graphic or decal. This method allows you to transform your vehicle’s look entirely without altering the original paint, providing a flexible and removable option for both style and protection.
Vehicle wraps work by adhering a thin, flexible vinyl film to the car’s surface, conforming closely to contours and curves for a smooth, paint-like finish. This allows you to update your vehicle’s look quickly and with less expense than repainting.
Key Takeaways
- The price for a full vehicle wrap generally ranges from $2,500 to $6,000, influenced by the vehicle’s size and the complexity of the wrap design.
- High-quality vinyl wraps can last 5 to 7 years with proper maintenance.
- Wrap films are about 0.09 mm thick, enabling them to fit complex vehicle shapes closely.
- The installation process typically takes 3 to 5 days for a full wrap.
- Wraps are 100% removable, making them ideal for leased or owned vehicles.
- Allow 24 to 48 hours before washing a newly installed wrap to ensure proper adhesion.
What Is a Vehicle Wrap and How Does It Work?

A vehicle wrap is a vinyl film laid over your car’s original paint that changes its appearance or shields the surface. It covers painted areas and can display solid shades, images, or detailed designs to modify the vehicle’s look without affecting the paint permanently. Since the wrap can be taken off, you can update the style or restore the car’s original finish without harm.
Vehicle wraps are made from high-quality polyvinyl chloride (PVC) vinyl film, usually 3 to 4 mils thick. This flexible material can conform to curves and details on your vehicle’s body, such as door handles, bumpers, and side mirrors. The vinyl sheet often includes a UV protection laminate layer to help prevent fading and damage from sunlight, weather, and road debris, increasing its lifespan outdoors.
The vinyl film adheres to your vehicle’s surface using a pressure-sensitive adhesive backing. This adhesive is designed to stick firmly but also to peel away cleanly without harming the underlying paint. Just like plastic wrap you might use in the kitchen, the film sits on the surface and secures itself through this specialized adhesive rather than soaking into the paint.
Before installation, the vehicle is thoroughly cleaned and dried to remove any dirt, wax, or grease that could prevent proper adhesion. Some installers may remove bumpers, headlights, or tail lights to wrap the vinyl into crevices and edges, ensuring a smooth and complete coverage without wrinkles or lifting edges. The vinyl sheet is carefully aligned, heated, and stretched to fit tightly over the contours of the vehicle’s panels.
Good application results in a smooth, smooth finish without bubbles, wrinkles, or gaps. Quality vinyl and expert installation reduce the chance of lifting or peeling over time. Poor preparation, extreme surface damage, or using cheaper vinyl materials can lead to bubbles, tears, or peeling that shortens the wrap’s useful life.
Vehicle wraps let you significantly change a car’s color or design quickly and often at a lower cost than a full paint job. The wrapping process typically takes a few days, with professional services priced from around $2,500 to $6,000, depending on the vehicle size and design complexity. For commercial vehicles, wraps also serve as effective mobile advertising that can be removed or updated easily.
Types of Vehicle Wraps and Popular Finishes
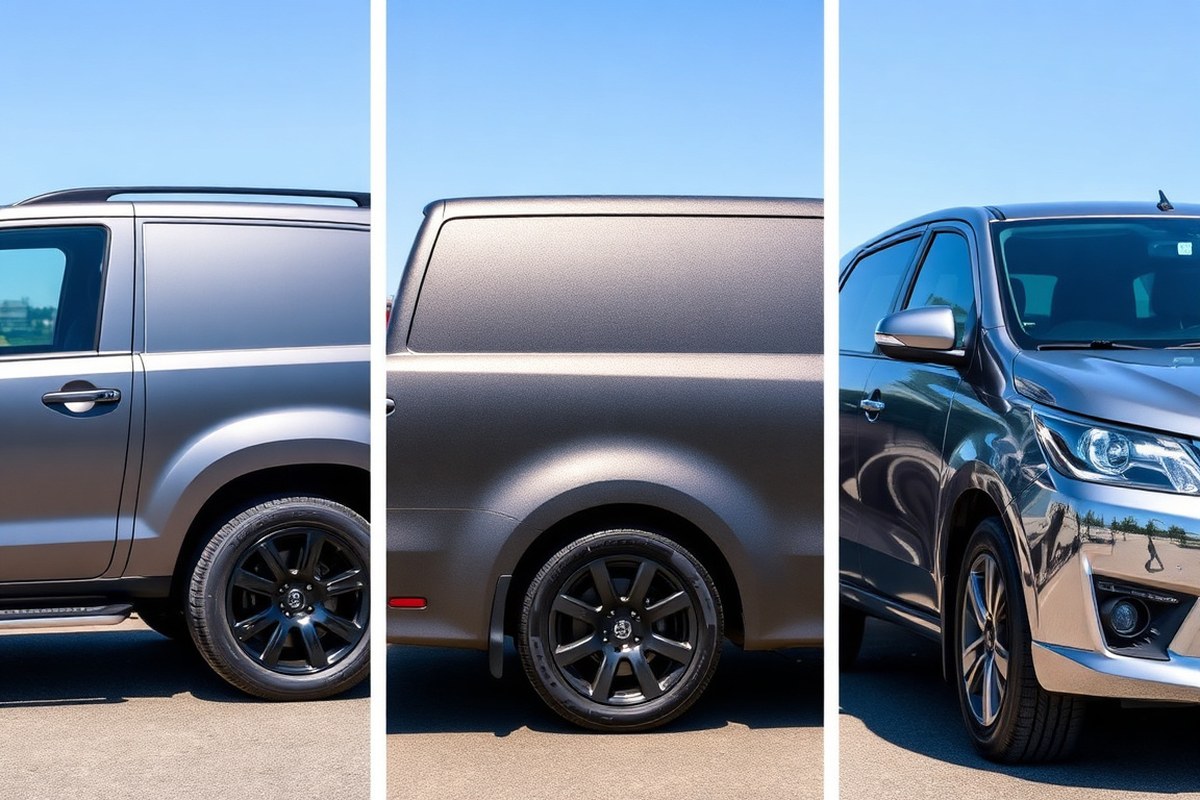
Vehicle wraps come in several types tailored to different needs, ranging from full coverage to partial applications and commercial branding. The finishes available vary widely, allowing for customization in color, texture, and visual effect. Understanding these options helps you pick the right style and coverage for your vehicle and budget.
Full Wraps
A full wrap covers every exterior panel of your vehicle, including the bumpers, doors, pillars, mirrors, and often the roof. This type of wrap provides a complete color change or design overhaul without altering the original paint underneath. It’s ideal when you want a dramatic transformation or to protect the paint from environmental damage.
Typically, full wraps take between 3 to 5 days to complete depending on vehicle size and design complexity. Pricing usually falls between $2,500 and $6,000, but costs can rise with premium finishes like chrome or metallic or if the work requires intricate disassembly for a smooth installation. A well-applied full wrap offers a visually uniform surface that can be removed later without damaging the paint.
Partial Wraps
Partial wraps cover specific areas of a vehicle rather than the entire exterior, such as the hood, roof, mirrors, or side panels. This option costs less because it uses less vinyl, starting in the low hundreds but increasing with square footage and design complexity. It’s a practical choice for adding accent colors, protective layers on high-impact areas, or branding elements without the investment of a full wrap.
You can also combine partial wraps with paint protection film on the most vulnerable areas for additional durability. Partial wraps allow for customization while preserving some original paint finishes and are a good fit when you want a subtle look or limited branding.
Finish Options Explained
Vehicle wrap finishes come in a variety of textures and appearances. Matte wraps offer a flat, non-reflective surface that hides fingerprints and minor scratches. Satin finishes blend gloss and matte qualities, delivering a soft sheen with subtle reflections. Gloss wraps create a shiny, polished look similar to traditional automotive paint, making colors appear vibrant.
Chrome and metallic finishes add depth and reflectivity, with chrome generating mirror-like surfaces. Metallic wraps often contain metal flakes to simulate a sparkling or shimmering effect. Also, color-shift or chameleon wraps change hue depending on viewing angle and lighting, offering a striking, dynamic visual. Popular colors range from blacks and grays to bright greens, blues, and many custom shades. Choosing the right finish is essential for your desired style and how much maintenance you’re willing to perform, as matte and satin tend to be more forgiving than high-gloss or chrome surfaces.
Glossy finishes can highlight imperfections if the vehicle surface isn’t perfectly smooth, so proper prep before wrapping is critical for best results.
Commercial & Advertising Wraps
Commercial wraps focus on branding and advertising, often using full coverage on business vehicles, including fleets. This approach combines vinyl films with printed graphics, logos, slogans, and contact details for maximum visibility while on the road. The vinyl used is durable enough for long-term exposure and helps protect the vehicle’s paint underneath.
Prices for commercial wraps range from $1,500 to $4,000 and usually take 2 to 4 days to complete, depending on vehicle size and design detail. These wraps provide a cost-effective way to turn company vehicles into mobile billboards, boosting brand recognition beyond static signage or digital ads. Partial graphics or lettering packages are also popular, allowing smaller budgets to gain brand presence.
Cost Factors and Typical Pricing for Vehicle Wraps
Expect to pay between $2,200 and $3,200 for a full vehicle wrap on a medium-sized car in 2025. Prices vary based on vehicle size, the extent of coverage, the complexity of the design, and the film type chosen. Small cars typically cost $1,800 to $2,500 for full wraps, while larger vehicles like SUVs or vans can cost from $2,800 up to $5,000 or more. Partial wraps, covering selected sections like side panels, usually cost between $500 and $1,500. Simple graphics or lettering start around $200 and can go up to $800 depending on size and detail.
The main factors influencing vehicle wrap cost include the size and shape of your vehicle, the type of vinyl film used, and how much of your vehicle you want covered. Vinyl films come in various qualities; premium cast vinyl films offer better conformability around curves and tend to last longer, which increases costs. Complex designs requiring precise cuts, special finishes such as matte or metallic, or multi-layered graphics will also raise the price because they take more time and skill to install.
Installer expertise plays a critical role in the final cost. Highly experienced professionals charge more but reduce the chances of bubbles and wrinkles, which leads to a better-looking and longer-lasting wrap. A typical installation for a full wrap takes about 3 to 5 days. Partial wraps or simple graphics usually need only 1 to 2 days. The location of the installer can also affect price due to regional cost differences.
Additional costs arise if the vehicle’s paint is damaged or if the wrap has adhered tightly to the surface, making removal difficult later on. Professional removal might cost around $500 or more to avoid paint damage. Waiting 24 to 48 hours before washing the newly wrapped vehicle is recommended to ensure proper film adhesion. Here’s a cost overview for 2025 based on vehicle size and wrap type:
| Wrap Type | Small Car ($) | Medium Car ($) | Large Vehicle ($) |
|---|---|---|---|
| Full Wrap | 1,800 – 2,500 | 2,200 – 3,200 | 2,800 – 5,000+ |
| Partial Wrap | 500 – 1,000 | 500 – 1,500 | 700 – 1,800 |
| Simple Graphics / Lettering | 200 – 600 | 250 – 800 | 300 – 900 |
Choosing between a full or partial wrap depends on how much of your vehicle you want customized or protected and your budget. Full wraps provide uniform coverage and the most customization but cost more. Partial wraps offer a cost-effective way to highlight specific areas, commonly used for branding or accent designs. Adding specialized finishes and complex designs will increase both material and labor costs.
How Long Does a Vehicle Wrap Last and What Affects Its Lifespan?
A vehicle wrap typically lasts between three and seven years, depending largely on the quality of the vinyl material, the conditions it faces, and how well you maintain it. High-quality wraps made from premium vinyl and printed with advanced technology often last on the upper end of that range. Some can even endure nine years when exposed to ideal care and mild climates. The exact lifespan hinges on several factors shaping its durability.
Climate exposure plays a major role in how long a wrap remains intact and visually appealing. For example, vehicles regularly exposed to harsh sun, extreme heat above 90°F, or severe cold below freezing may see quicker fading, cracking, or peeling. UV rays break down the vinyl’s pigments and adhesives, and temperature swings stress the material’s flexibility. Snow, ice, and road salt can also contribute to premature wear. In contrast, vehicles kept indoors or in shaded areas often enjoy longer wrap life.
Material quality is another key element. Premium vinyl films designed specifically for wraps usually have protective layers like UV inhibitors and stronger adhesives. Cheaper materials lack these features and tend to degrade faster. Choosing a proven brand that offers warranties can give you peace of mind about durability. Installation quality also matters since incorrect application can leave air bubbles or poor adhesion, which reduce lifespan significantly.
Maintenance directly influences how long your wrap lasts. Dirt, grime, and chemical buildup can degrade the vinyl surface over time. Washing your wrapped vehicle regularly using gentle, pH-neutral soaps and avoiding high-pressure washers will help preserve the adhesive and print. Using a soft cloth or sponge instead of abrasive tools prevents scratches. Applying a wrap-approved protective coating or sealant can further extend lifespan by shielding the surface from contaminants and UV damage.
Poor care shortens wrap life noticeably. Letting dirt accumulate, exposing the wrap to harsh cleaners, or leaving the vehicle in direct sunlight without protection accelerates fading and peeling. Repairing any chips, tears, or lifting edges promptly stops further spread of damage. Storing the vehicle in a garage or under cover reduces exposure to weathering factors that age the wrap. Consistent proper care combined with choosing high-quality materials and skilled installation ensures your vehicle wrap stays vibrant and intact for as long as possible.
The Vehicle Wrap Installation Process Step-by-Step
Installing a vehicle wrap involves a detailed process that requires careful preparation, precise measuring, and skilled application. Full wraps typically take two to five days, while partial wraps might only require one day. Proper surface preparation and professional techniques ensure the vinyl adheres smoothly and lasts as intended.
Pre-Installation Preparation
Before applying any vinyl, the vehicle must be thoroughly cleaned and decontaminated. Dirt, grease, wax, and any residues can prevent the vinyl from bonding properly. This step usually involves washing the vehicle with soap and water, followed by a wipe-down with isopropyl alcohol or a specialized cleaning solution. Inspect the paint for damage, chips, or rust, as these imperfections should be repaired before wrapping to ensure a smooth finish.
Preparation also includes removing or taping off parts like antennae, mirrors, and trim pieces that may obstruct the vinyl application or lead to bubbling. This attention to detail helps avoid complications during installation and improves the final appearance.
Measuring and Cutting the Vinyl
After preparing the vehicle, the installer takes precise measurements of each panel to be wrapped. This ensures the vinyl sheets cut fit the contours and size of the vehicle parts, which is critical for clean edges and a professional look. The vinyl material is cut slightly larger than the measured panel, allowing room to stretch or trim during application.
For complex shapes such as bumpers or door recesses, installers often practice cutting or scoring techniques to prevent tearing. Advanced tools like plotters or digital cutters may be used for large orders to ensure accuracy and repeatability.
Applying the Wrap Vinyl
The vinyl is carefully applied by starting at one edge of the panel and slowly pressing it down while smoothing out air bubbles with a felt squeegee. Heat guns help stretch and conform the vinyl to curves and contours. Installers work in small sections, gradually removing backing paper and repositioning the vinyl to avoid wrinkles or trapped air.
Edges and seams receive extra attention; installers use a knife to trim excess vinyl precisely along the body lines. A second pass with a heat gun often seals the edges and ensures a tight fit. Wrapping areas with complex geometry may involve cutting small relief slits to allow the vinyl to lay flat without overstretching.
Applying too much heat can warp or discolor vinyl; keep the heat moderate and move the gun continuously over the surface.
Post-Installation Checks and Waiting Time
Once the vinyl is applied, installers inspect the surface for trapped air bubbles or imperfections and use a pin or knife to gently remove any air pockets. The vehicle is usually kept in a warm environment for a few hours to let the adhesive cure properly. This curing phase improves the vinyl’s bonding strength and flexibility.
It is recommended to avoid washing or exposing the vehicle to harsh weather for at least 48 hours after installation. This wait time prevents premature failure of the adhesive and helps the wrap settle firmly onto the paint. Full curing can take up to a week, during which time you should handle the vehicle gently to maintain the wrap’s integrity.
Comparing Vehicle Wraps, Paint, and Paint Protection Film
Vehicle wraps, traditional paint, and paint protection film (PPF) each serve different purposes and come with distinct advantages and costs. A vehicle wrap is a large vinyl decal applied over your car’s original paint. It offers a quick, versatile way to change your vehicle’s appearance without permanent alteration. Wraps usually last between 3 to 7 years and cost around $2,000 to $5,000 depending on size and complexity. They allow you to customize colors or finishes easily and are removable without damaging the paint, making them ideal if you want flexibility or want to protect the paint underneath from light UV exposure and minor abrasion.
Traditional paint alters your vehicle permanently, requiring more time and labor, typically costing $1,000 to $10,000 based on quality and coverage. High-end paint jobs can last 10 or more years but may require touch-ups or polishing to maintain the finish. Painting is best if you want a long-term look without the risk of edges peeling or fading that sometimes happens with wraps. However, painting doesn’t offer the reversibility or quick style changes wraps provide.
Paint Protection Film is a clear, thick urethane layer installed over your existing paint to guard against rock chips, scratches, and UV damage. PPF can last up to 10 years, offering superior durability compared to wraps. Sometimes called a ‘clear bra,’ it’s often applied only to high-impact areas like bumpers, hoods, and side mirrors. PPF can be combined with wraps for improve protection, apply a wrap for style and PPF on vulnerable zones to extend overall durability.
| Feature | Wrap | Paint | Paint Protection Film (PPF) |
|---|---|---|---|
| Appearance Options | Wide variety of colors, finishes, textures; easy changes | Permanent colors and finishes; full surface coverage | Clear, transparent; some colored PPF options |
| Durability | 3-7 years; protects against UV, minor scratches | 10+ years; prone to chips, scratches; requires maintenance | Up to 10 years; high resistance to rock chips, scratches |
| Cost (Average) | $2,000, $5,000 | $1,000, $10,000 | $2,000, $6,000 depending on coverage |
| Protection | Light abrasion, UV | None inherent; requires clear coat care | High protection against chips, scratches, UV |
| Reversibility | Removable without damage | Permanent | Permanent but clear |
Use a wrap if you want to change your vehicle’s appearance often or want non-permanent customization without repainting. Wraps work well for advertising, seasonal styles, or protecting the paint from light wear. Opt for paint if you want a classic, long-lasting finish and don’t plan to change the look for many years. Choose paint protection film if your priority is preserving the original paint against severe road hazards, especially in vulnerable areas. Applying PPF professionally on high-impact zones while wrapping the rest of the car combines style with strong protection.
Follow local regulations and always use licensed professionals for paint, wrap, or PPF installation. Improper installation can cause bubbling, peeling, or damage. Good results include smooth edges, consistent finish, and tight adhesion. A wrap’s lifespan shortens if exposed to harsh chemicals or improper washing. PPF needs careful cleaning to maintain its self-healing properties. Painting requires curing time and proper environment to avoid defects. These factors affect cost, durability, and when you should pick one method over the others.
How to Choose a Professional Installer and Avoid Common Wrapping Mistakes
Finding the right professional installer ensures your vehicle wrap looks smooth and lasts longer. Check for certifications and warranties, and understand common installation problems so you can avoid costly fixes. Asking detailed questions upfront helps you choose an installer who matches your needs.
Key Certifications and Experience
Look for technicians certified by well-known brands such as 3M, Avery Dennison, or XPEL. These certifications indicate that the installer has received training on proper application techniques and knows how to handle different types of vinyl. An installer’s experience with specific wrap materials and vehicle types shows they can manage challenges like curved surfaces or delicate paint finishes. You can ask to see examples of their past work or request references to confirm quality.
Reputable installers often provide a warranty covering installation issues for 1 to 3 years. This warranty protects you against lifting edges, bubbling, or peeling caused by improper application. Make sure the warranty is in writing and clearly explains what is covered, including any conditions like avoiding car washes for 48 to 72 hours after installation to let adhesives set fully.
Common Installation Mistakes
Poor surface preparation is a frequent mistake. Dirt, wax, or grease on the vehicle can prevent the vinyl from adhering properly, leading to bubbles or peeling. The surface should be thoroughly cleaned and dried before wrapping. Wrapping over old paint damage or uneven areas without addressing them first can also cause the wrap to fail prematurely.
Incorrect temperature control during installation often causes problems. Vinyl performs best when applied in temperatures between 60°F and 80°F, allowing it to stretch properly without tearing or wrinkling. When the surface is too cold, the adhesive won’t bond well. Installers should also avoid stretching the wrap beyond manufacturer recommendations to prevent distortion and loss of color integrity over time.
Failing to properly finish edges or trim excess vinyl can create lifting edges that trap dirt and moisture. Good installers use specialized heat guns and squeegees to ensure edges are sealed tightly and corners are smooth. Spotting lifting edges after installation means you should contact your installer right away to avoid damage that could lead to costly rewrapping.
Red Flags and Questions to Ask
Avoid installers who do not have documented experience or hesitate to show certifications. Also, be wary of those who cannot provide a written warranty or make unrealistic promises about wrap longevity without proper care. Ask about their preparation process, including what cleaning products they use and how they handle paint imperfections before wrapping.
Inquire about post-installation care instructions and support. A reputable installer will advise you to avoid washing your vehicle for at least 48 hours to let the adhesive bond fully and will provide tips for regular cleaning and avoiding damage. Find out how they handle warranty claims and whether repairs or touch-ups are included.
Discuss cost clearly upfront and ask for a detailed estimate that includes any additional fees for complex shapes or extra prep work. Comparing quotes from multiple installers can help you find a fair price without sacrificing quality. Accepting an unusually low quote might mean lower-grade materials or shortcuts in installation.
Vehicle Wrap Care and Maintenance for Longevity
Proper care and maintenance keep your vehicle wrap looking fresh and protect its finish over time. Avoid washing your wrap for at least 72 hours after installation so the adhesive can fully set. After this waiting period, you can clean the wrap regularly, but doing so correctly matters. Use only mild soaps, such as car wash detergents that are specifically formulated for vinyl surfaces. Harsh chemicals, abrasive cleaners, or automatic car washes with stiff brushes can damage the vinyl’s gloss and durability.
Cleaning the wrap by hand with a soft cloth or sponge is best. Always rinse off dirt and debris before wiping to prevent scratching. Water temperature should be lukewarm; temperatures above 120°F might weaken the adhesive bond. For dried insects or stubborn residues, soak the area with water first to soften before gently scrubbing. Take care to avoid high-pressure water jets close to edges, as this can cause lifting or peeling over time.
Protecting your wrap from the elements also extends its life. Park in shaded areas or use a breathable car cover to limit UV exposure, which can cause fading or discoloration. Some vinyl wraps have additional UV protective coatings, which help maintain color and gloss, but even these need routine care. Avoid letting bird droppings, tree sap, or road salts sit on the vinyl too long because they contain chemicals that can degrade the material.
If you want to preserve the wrap’s shine, use products made specifically for vinyl wrap care. These might include vinyl-safe detailing sprays or silicone-based protectants that add a layer of protection without leaving residues. Avoid waxes or sealants meant for painted surfaces, as they may not bond properly with the wrap. Ideally, wash and protect your wrap every two to four weeks, depending on driving conditions and climate.
Regular inspections are important. Look for any lifting edges or small tears early so you can have them repaired to prevent further damage. Keeping your vehicle wrap in good shape not only improves its appearance but also helps you get the expected longevity, which for many premium vinyl wraps ranges from 5 to 7 years under normal conditions.
Do not use abrasive brushes or ammonia-based cleaners on your wrap, as they can dull the finish and reduce the adhesive strength over time.
Step-by-Step Action Plan to Get Your Vehicle Wrapped
Follow these clear steps to start your vehicle wrap project with confidence and ensure a smooth process.
- Before you start: Research local installers and ask for quotes to compare prices and services. Choose one with good reviews and a portfolio that matches your style preference.
- Week 1: Decide on the wrap type and finish you want, such as full, partial, or custom designs, and confirm material quality with your installer to match your budget and durability needs.
- Week 2: Schedule your installation date and prepare your vehicle by thoroughly washing and drying it to remove dirt and wax; this helps the wrap adhere properly.
- Installation day: Drop off your vehicle at the installer. Confirm they will clean the surface again and check for any damage that could affect the wrap.
- After installation (Day 1): Inspect the wrap with the installer for any bubbles or edges lifting. Ask about initial care, such as how long to avoid washing the car.
- After 2 weeks: Follow the recommended cleaning routine using gentle soap and water to maintain the wrap’s appearance and adhesion.
- Monthly: Inspect the wrap for signs of wear, like peeling or fading, and contact your installer if you notice any issues to address them before they worsen.
Frequently Asked Questions
Can I Remove a Vehicle Wrap Myself or Should I Hire a Professional?
Removing a vehicle wrap can be done yourself but often requires patience and the right tools. Hiring a professional reduces the risk of damaging your vehicle’s paint during removal.
Does a Vehicle Wrap Affect My Car’s Resale Value?
A vehicle wrap usually does not harm resale value and can protect the original paint underneath. Make sure the wrap is in good condition and professionally installed.
Can I Park My Wrapped Car in Direct Sunlight?
Yes, but prolonged exposure to direct sunlight can fade the wrap over time. Parking in shade helps maintain the wrap’s color and longevity.
Are Vehicle Wraps Safe for All Types of Vehicle Paint?
Vehicle wraps are safe for most paint types if properly installed and removed. Paint in poor condition may be at risk during wrap removal, so check with a professional first.
How Long Does It Take to Install a Full Vehicle Wrap?
Installation typically takes 1 to 3 days depending on vehicle size and wrap complexity. Preparation and curing times add to the overall process.
Will a Vehicle Wrap Protect My Car from Scratches and Dings?
Wraps offer some protection against minor scratches and UV rays but do not prevent dents or heavy damage. Paint protection film is better for impact resistance.
Before You Go
A vehicle wrap transforms your car’s look while offering paint protection. This practical option lets you customize your vehicle with flexible design choices and removability. Start by contacting a reputable installer to discuss your ideas and get a detailed quote that fits your plans.