How to Hang a Sign Outside: 8 Proven Methods for Secure Outdoor Mounting
How to hang a sign outside securely depends on choosing the right mounting method and hardware for your sign’s weight and the surface. Use screws and anchors for heavy wooden signs on solid surfaces, and adhesive strips or cable clips for lighter signs on smooth walls. Start by preparing the sign properly, sanding wood and pre-drilling holes ensures stronger, safer hanging.
Key Takeaways
- Match the mounting method to the sign’s weight and the surface, like screws for masonry or adhesive strips for glass.
- Prep wooden signs by sanding smooth and adding spines on signs taller than 8 inches for extra strength.
- Use 1/4-inch pre-drilled holes in the sign’s corners to prevent splitting and create secure attachment points.
- Let adhesive strips cure for 24 hours before hanging signs under 4 pounds to maximize hold on smooth surfaces.
- Install clear cable clips every 8 to 12 inches to support and secure metal signs on fences or wire racks.
- Check the surface texture, as signs rated for 5 pounds on smooth drywall may hold only 2-3 pounds on textured walls.
1. Best Ways to Hang a Sign Outside Securely

Hanging a sign outside securely depends on the sign’s weight and the surface where you’ll mount it. For heavier signs, drilling holes to use screws or masonry anchors offers the most reliable hold. Lighter signs can often hang well with strong adhesives or damage-free hooks, especially on smooth surfaces. Consider the weather too, wind and moisture affect how well your mounting method lasts.
Screws directly into studs or masonry anchors on brick and concrete create a durable, long-lasting hold. Use a drill with the right bit, carbide bits for brick or concrete, and spade or wood bits for wooden fences or posts. Pre-drilling holes in heavier wooden signs prevents wood splitting and makes installation easier. Exterior-grade screws resist rust, which helps maintain security over time in wet conditions. Expect to spend $10 to $30 on quality anchors, screws, and drill bits depending on your setup.
For metal signs without pre-drilled holes, adhesive options work well on smooth surfaces like metal siding or painted drywall. Industrial-strength adhesive strips or double-sided foam tape rated to hold up to 5 pounds can secure lightweight signs without damaging walls. Adhesion depends on surface cleanliness and temperature; surfaces should be clean, dry, and between 50°F and 100°F for best results. Removing adhesives gently later helps avoid surface damage. This method suits renters, dorms, or temporary setups but doesn’t support heavy or large signs, especially in windy outdoor areas.
- Screws into studs or masonry anchors: Best for heavy signs on wood, brick, or concrete. Secure and weather-resistant but requires drilling.
- Exterior-grade screws into wood posts or fences: Good for moderate-weight signs; consider seasonal wood movement.
- Adhesive strips or double-sided foam tape: Ideal for lightweight metal signs on smooth surfaces; damage-free and no drilling needed.
- Damage-free hanging hooks: Support up to a few pounds and avoid wall damage; limited to small signs.
- Magnets: Work only on metal doors or siding; can hold light signs without drilling.
- Zip ties: Suitable for metal signs on fences or posts when drilled holes are present; simple and effective.
Attempting to hang signs without considering weight or surface strength can lead to damage or sign loss. Avoid hanging heavy wooden signs with adhesives alone; they require mechanical fasteners for safety. On brick or concrete, use a hammer drill with masonry anchors and carbide bits for secure installation. For signs without backboard holes, first attach suitable hanging hardware compatible with your mounting method. Make sure to check weight limits on adhesives or hooks on the packaging before use.
2. Choosing Materials and Tools for Different Sign Types

Selecting the right materials and tools depends on your sign’s material and the surface you want to mount it on. Wood signs need heavy-duty screws and anchors rated for their weight, especially if they are large or thick. For metal signs like aluminum, lighter screws or wall anchors work well, but avoid overtightening to prevent warping. Vinyl signs on smooth surfaces often rely on adhesives that handle outdoor conditions without damaging the material.
For metal signs weighing under 4 pounds, outdoor-rated Command strips or similar adhesive strips can hold well if applied on a clean surface. However, heavier metal signs require screws and anchors designed for masonry, wood, or siding. Using a drill press rather than a handheld drill produces cleaner holes in thin metal panels, reducing the risk of bending.
| Sign Material | Best Mounting Surfaces | Recommended Tools | Hardware or Adhesives |
|---|---|---|---|
| Wood | Wood framing, drywall with anchors, masonry | Drill, screwdriver, level | Heavy-duty wood screws, wall anchors rated for sign weight |
| Metal (Aluminum, Dibond) | Wood, masonry, smooth walls | Drill press (preferred), screwdriver, level | Powder-coated screws, wall anchors, outdoor-rated adhesive strips (lightweight only) |
| Vinyl | Smooth surfaces: glass, painted doors, metal posts | Rubbing alcohol, adhesive strips, level | Command strips or similar outdoor-rated adhesive strips |
| Neon (special case) | Brick, masonry, ceilings | Drill, wall anchors, ceiling hooks (for hanging) | Masonry anchors or ceiling hooks designed to support neon sign weight |
Matching anchors and screws to the surface is critical. For brick or concrete, masonry anchors and screws prevent signs from falling. On drywall without studs, use drywall anchors sized to support the sign’s weight. Avoid adhesives on rough or dirty surfaces because they lose grip quickly. Cleaning the surface with rubbing alcohol and letting it dry is essential for adhesive strips to stick properly.
Stop tightening screws as soon as washers contact the metal to prevent warping your aluminum sign.
Choosing mounting hardware rated above your sign’s actual weight ensures extra security, especially outdoors where wind and weather add stress. Use at least two mounting points for stable support, and avoid hanging heavy metal signs solely with adhesive. The right combination of tools and materials makes all the difference in achieving a long-lasting, neat installation.
3. Prepping Your Sign for Outdoor Hanging
Getting your sign ready for outdoor hanging means protecting it from weather, preventing damage during installation, and making sure it stays securely mounted. Proper preparation extends the sign’s life and avoids costly repairs or replacements. This involves sanding and sealing wood, carefully drilling holes when needed, and reinforcing heavy or large signs to prevent warping or breaking.
Sanding and Sealing Wood Signs
Sanding smooths the wood surface to remove splinters and rough patches that can peel paint or cause injury. Sealing protects the wood from moisture, sun damage, and insects. Both steps help your wooden sign last for years outdoors.
Start by lightly sanding all sides with 120-grit sandpaper. Focus on edges and corners where splinters often form. After sanding, wipe the surface with a damp cloth to remove dust. Choose an exterior-grade sealant like spar urethane or an oil-based clear coat. Apply two coats, allowing 24 hours to dry between coats. Sealing usually costs $15 to $25 for a pint, enough to cover multiple signs.
Pre-Drilling Holes Safely in Metal Signs
Metal signs often come without holes, so you may need to drill holes for hanging hardware. Using the right drill bit and method prevents bending, cracking, or chipping the metal. This step also ensures the holes align with mounting points for a secure hold.
Mark hole positions with a permanent marker and secure the sign on a flat, sturdy surface. Use a center punch to create a small dent where each hole will be drilled; this stops the drill bit from slipping. For metal, use a high-speed steel (HSS) or cobalt drill bit sized for your hardware. Start drilling at a slow speed with steady pressure, and lubricate the drill bit with cutting oil to reduce heat and wear. Drill 1/4-inch holes at the corners to hang with wire or zip ties if your sign is large.
Adding Structural Reinforcements to Large Signs
Large or heavy signs, especially wooden ones, benefit from added reinforcements like spines or battens to prevent sagging, warping, or splitting. Reinforcements take some load off the mounting hardware and keep the sign flat and stable.
Attach a wooden spine or backboard around 1 inch wide and as long as the sign’s height. Use screws or waterproof wood glue to secure it perpendicular to the sign’s face, centered for even support. For extra strength, add multiple thinner battens horizontally across the back, spaced evenly. Reinforcements should be made from the same type of wood and sealed for weather resistance.
- Sand all surfaces of a wooden sign with 120-grit sandpaper until smooth.
- Wipe off sanding dust with a damp cloth and let the sign dry completely.
- Apply a coat of exterior-grade spar urethane or oil-based sealant; let dry 24 hours.
- Repeat the sealant application for a second coat; allow to dry fully before drilling or hanging.
- Mark hole locations on metal signs and create center punch dents to guide drilling.
- Use a cobalt or HSS drill bit with cutting oil, drilling at slow speed to make 1/4-inch holes.
- Attach wooden reinforcements like spines or battens to large or heavy signs using screws and waterproof wood glue.
- Seal reinforcement wood with the same outdoor sealant to prevent moisture damage.
4. How to Mount Signs on Common Outdoor Surfaces
Mounting signs outdoors requires choosing the right anchors and fasteners for each surface type. Brick and concrete need masonry anchors, while drywall often works with hooks or small nails. Metal siding and fences call for clamps, screws, or zip ties depending on the sign weight and permanence desired.
Drywall and Wood Surfaces
Small, lightweight signs under 5 pounds attach best with adhesive strips or push-in hooks on smooth, primed drywall. For signs over 5 pounds, metal wall anchors combined with screws provide a secure hold. Use screw length that fits the drywall thickness, typically 1 to 1½ inches for ½-inch drywall. Avoid hanging heavy signs on textured drywall, as grip strength drops significantly.
Wood surfaces can often hold screws directly, but pre-drilling pilot holes helps prevent splitting. For hardwood signs, pair screws with wall anchors or use a French cleat mounting system. This two-piece system allows easy sign removal and redistribution of the sign’s weight.
Brick, Concrete, and Masonry Walls
Brick and concrete demand masonry anchors driven into mortar lines for safety and durability. Use a carbide-tipped drill bit sized to your anchor’s sleeve diameter. Plastic sleeve anchors fit lighter signs, but heavy signs need metal anchors or bolts.
Mounting a smooth wooden board to the brick before hanging your sign is an effective approach. It reduces direct drilling into brick, allows for easier adjustments, and prevents damage to the brick’s surface. For very lightweight decorations, adhesive hooks designed for outdoor masonry can work but fail on rough or wet brick.
| Surface | Anchor/Fastener Type | Sign Weight Range | Notes |
|---|---|---|---|
| Drywall (Smooth) | Adhesive strips, push-in hooks | Under 1 lb | 2-4 strips, one per corner |
| Drywall (Smooth) | Adhesive strips | 1-3 lbs | 4-6 strips, corners plus center |
| Drywall (Smooth) | Adhesive strips | 3-5 lbs | 6-8 strips, corners, center, mid-edges |
| Drywall (Any) | Anchors, studs, screws, French cleat | Over 5 lbs | Permanent; use anchors or professional mounting |
| Brick, Concrete | Masonry anchors, carbide drill bit | Heavy signs | Drill mortar lines; use metal anchors for safety |
| Brick | Plastic sleeve anchors | Lighter signs | Less permanent, may fail on rough brick |
Signs mounted directly on masonry must use the right drill bits and anchors to avoid cracking. Fastening into mortar lines is safer and easier to repair than drilling the brick itself. Secure signs look flush and stay straight without sagging over time.
Fences, Poles, and Metal Siding
Wooden or metal fences let you use screws, nails, or zip ties depending on the sign’s weight and the fence’s thickness. For thin metal siding or poles, use self-tapping metal screws with rubber washers to prevent leaks and rust. Clamps and brackets can provide non-damaging mounting options for rental properties or temporary signs.
Standard street signposts and mailbox poles use U-bolts or metal straps for stability. Attach the bolts so the sign sits flat without bending the pole or sagging under wind load. For lightweight signs, outdoor-rated zip ties combine simplicity and strength, especially on chain link fences.
5. No-Drill and Renter-Friendly Hanging Options
You can hang signs outside without nails or screws using no-drill, damage-free solutions suited for renters or temporary displays. Options like adhesive strips, magnetic hooks, and suction cups offer varying levels of durability depending on surface type and weather conditions. These methods avoid wall damage but often have weight and environmental limits to consider.
Using Adhesive Strips and Tapes Outdoors
Adhesive strips such as 3M Command Strips are popular for hanging signs without nails. They attach to smooth, clean surfaces like painted wood, glass, or metal and usually support signs up to 4 or 5 pounds. Outdoor versions of these strips resist moisture and temperature changes better but still perform best in mild weather.
Preparing the surface is essential for good adhesion. Clean the area with rubbing alcohol and let it dry completely, avoid using cleaners with oils or waxes. Press the adhesive strip firmly for at least 30 seconds to secure it before hanging your sign. Allow the strip’s adhesive to cure for an hour before adding weight. Signs exposed to direct sunlight, rain, or temperatures below 50°F may experience reduced hold time.
- Use outdoor-rated Command Strips or hooks designed for heavy-duty use.
- Limit the sign’s weight based on the package, typically under 5 pounds.
- Clean surfaces fully and dry before applying strips.
- Apply strips at room temperature for best adhesion.
- Remove strips slowly to avoid paint or surface damage.
- Replace strips every few weeks if signs are kept outdoors long-term.
Adhesive strips lose strength with repeated exposure to rain or heat; they’re best for short-term or seasonal use.
Magnetic Hooks and Clamps for Metal Surfaces
If you have metal siding, a metal door, or metal posts, magnetic hooks are a strong, no-drill way to hang signs. High-strength magnets can hold signs weighing up to 10 pounds, depending on magnet size and the thickness of the metal surface. These hooks attach instantly and leave no marks when removed.
Make sure the metal surface is clean and dry before attaching magnets for the best grip. Magnetic mounts work well for temporary signage such as business promotions or event advertisements and are unaffected by rain or direct sun. Avoid placing very heavy signs on magnets as high winds could dislodge them.
Hooks, Zip Ties, and Suction Cups on Different Structures
Suction cups with hooks can hold lightweight signs (under 2 pounds) on glass windows or smooth plastic surfaces. They attach by creating a vacuum seal, so the surface must be flawlessly clean. Avoid suction cups on rough or porous surfaces because they fail quickly.
Zip ties offer flexible hanging options when there are existing fixtures like fences, railings, or gutters. Tie your sign using zip ties or rope through pre-drilled holes or grommets. This method works well for semi-permanent installations but requires a structure strong enough to bear the sign’s weight and resist wind.
- Use suction cup hooks on clean glass or smooth plastic for signs up to 2 pounds.
- Choose heavy-duty zip ties rated for outdoor use and UV resistance.
- Secure signs to fences, porch railings, or poles with zip ties.
- Check ties periodically for wear and replace annually.
- Ensure holes or grommets in signs are reinforced to prevent tearing.
Zip ties provide a damage-free option only when you have something stable to attach to; they don’t work on bare walls.
6. Finishing Touches: Hiding Hardware and Securing the Sign
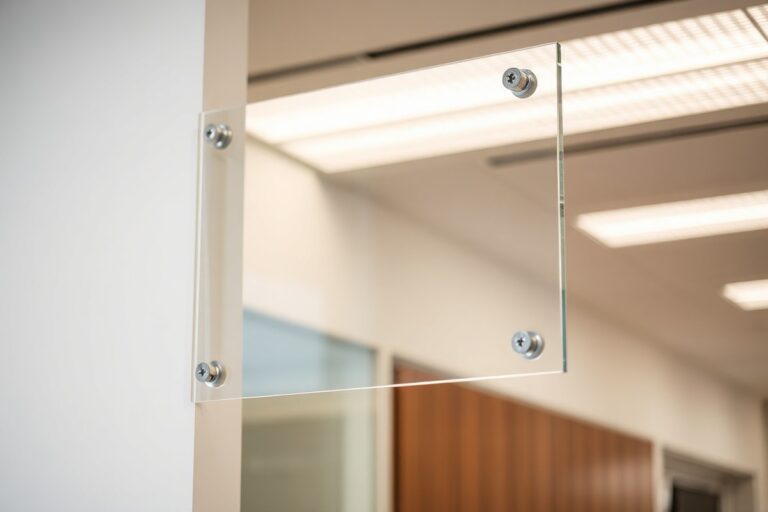
Concealing screws and anchors gives your outdoor sign a clean, polished look and protects the hardware from weathering. One effective approach is using screw caps or decorative plugs that match your sign’s color or material. These caps slide over the screw heads after installation. For example, plastic or metal caps cost around $5 to $15 for a pack of 20 and are easy to apply once you’ve tightened the screws securely. Another option is covering hardware with exterior-grade wood filler or putty if your sign is wooden. After drying, sand the surface smooth and paint over it to blend with the sign. Avoid putting too much filler, which can crack over time with temperature changes.
Preventing rattling and movement ensures your sign stays securely mounted, especially in windy areas. Small rubber bumpers or felt pads placed on the backside where the sign contacts the wall can reduce vibrations. These pads cost less than a dollar each and are straightforward to attach using adhesive backing. When tightening screws, ensure the sign fits flush against the surface without gaps. Over-tightening can damage the sign or wall, while under-tightening causes looseness. Check the sign’s level several times during installation to maintain proper alignment and avoid shifting over time.
Protecting hardware from corrosion is important to keep mounts strong for years. Use screws and anchors made of stainless steel or coated with a rust-resistant finish. Applying a clear coat sealant like a waterproof polyurethane spray or marine-grade varnish on metal hardware and exposed edges extends durability. These sealants cost between $10 and $25 per can and require 24 to 48 hours to cure depending on temperature and humidity. Reapplying sealant every one to two years is a good maintenance practice, especially in humid or coastal environments. For signs exposed to direct sunlight, choose UV-resistant coatings to prevent fading or cracking of plastic or paint over the hardware.
Regular maintenance includes inspecting hardware annually for looseness, rust, or damage. Tighten any loose screws and replace rusty components immediately. Cleaning mounts with a mild detergent and rinsing with water helps avoid buildup that accelerates wear. If decorative trim or molding surrounds your sign, ensure it is securely fastened and also sealed to prevent water infiltration. Keeping mounting elements well-maintained not only improves the sign’s appearance but also maintains its safety against unexpected detachment.
7. Common Hanging Mistakes and How to Avoid Them
Overtightening screws is a common mistake that can cause the sign material to crack or the mounting surface to weaken. Screw heads pressed too tightly against wood or plastic signs may cause splitting. Avoid this by hand-tightening screws until snug, then give a quarter turn more at most. Using a drill with a clutch setting can prevent overdriving. Signs that crack or have loose screws often need new hardware or gentle repair using filler products if the surface is damaged.
Signs fall off outdoor surfaces primarily because the surface is dirty, greasy, or dusty. Dirt prevents adhesives and tapes from sticking firmly, and screws or hooks may not bite into loose materials. Always clean the mounting area thoroughly before installation. Use a shop vacuum to remove dust or a rag with isopropyl alcohol for grease. Let surfaces dry fully, ideally in temperatures above 50°F (10°C), as cold conditions reduce adhesion and wood can contract and loosen fasteners.
Crooked or rattling signs usually result from uneven surfaces or improper mounting hardware. Signs hung only by the top corners tend to tilt or catch wind, causing movement. The solution is to add stabilizing supports like braces or additional hooks midway along the sign’s bottom edge. For chain or cable suspension, adjust chain lengths to level the sign exactly. Checking with a level tool before tightening prevents crooked placement.
- Hand-tighten screws carefully to avoid cracking or stripping threads
- Clean mounting surfaces with isopropyl alcohol, wait for full drying
- Use multiple mounting points to prevent sign tilt and vibration
- Adjust suspension chain or cable lengths precisely for leveling
- Avoid hanging adhesive signs on rough or porous surfaces outdoors
- Inspect all hardware after a week to retighten or correct alignment
Preventing damage during installation means following a simple checklist. Confirm you have the correct screws or hooks for your surface and sign weight. Prepare surfaces by removing peeling paint or loose debris before mounting. Check weather forecasts, hanging signs before rain or freezing temperatures can weaken fasteners or adhesives. Always support the sign’s weight evenly and test stability by gently shaking before finishing your work.
8. Safety Tips and When to Get Professional Help
Wear protective gear such as safety glasses to shield your eyes from dust and debris, gloves to protect your hands while handling sharp tools and rough materials, and a sturdy hard hat when working under overhead hazards. Non-slip footwear will keep you steady on ladders or uneven ground. Use a stable, well-positioned ladder or scaffolding to avoid falls, and never overreach while securing your sign.
Heavy signs, especially those made of dense wood or metal, pose structural risks if not mounted correctly. The mounting surface must handle the sign’s full weight plus factors like wind load. Signs over 20 pounds or larger than 3 feet by 4 feet usually require strong anchors such as lag bolts into studs or concrete anchors in masonry. Watch for warning signs like wall cracking, anchor movement, or signs leaning away from the surface, which are clear indicators of unsafe mounting. Over time, weather exposure can weaken fasteners, so inspect your signage regularly.
Hiring a professional installer is advisable if your sign exceeds 30 pounds, involves complex mounting on uneven or fragile surfaces, or requires electrical components such as lighting. Professionals have the right tools and knowledge to safely handle heavy equipment and ensure compliance with local building codes. Costs for professional hanging range from $100 to $400 depending on size and location complexity. Investing in a pro helps prevent property damage, injury, and legal issues from improperly mounted signs.
Follow this safety checklist to protect yourself: wear all recommended gear, inspect your ladder and tools before use, ensure mounting points are solid and level, and test the sign’s stability after hanging. If you feel unsure about the mounting surface’s strength or your ability to reach securely, call a professional. A well-installed sign stays secure through wind, rain, and time, while a poor installation can fall, causing injury or damage.
A secure mounting point must be able to bear at least twice the sign’s weight to account for wind stress and avoid unexpected failure.
Step-by-Step Action Plan for Hanging Your Outdoor Sign
Follow these steps to securely hang your outdoor sign and ensure it stays put.
- Before you start: Choose the right sign material and mounting hardware based on your surface type and sign size. Confirm it’s weather-resistant to avoid frequent replacements.
- Day 1: Prepare the sign by sealing edges or coating surfaces if needed. You’ll know it’s ready when protective layers are dry to the touch.
- Day 2: Mark the mounting points on the wall or post using a level to ensure the sign will hang straight. Check alignment visually and with a level tool.
- Day 3: Drill pilot holes or set anchors if drilling is required for your surface. Test by gently inserting screws or hooks to verify stability.
- Day 4: Hang the sign using your chosen hardware, screws, hooks, or no-drill alternatives, making sure it’s firmly in place. Give the sign a gentle pull to test security.
- Day 5: Conceal mounting hardware with caps, paint, or trim for a polished look. Verify that hiding the hardware does not affect the sign’s stability.
- After 2 weeks: Inspect the sign for any loosening or wear. Tighten hardware if needed and reapply sealant on edges to maintain protection.
Frequently Asked Questions
What’s the Best Way to Hang a Heavy Wooden Sign Outside?
Use strong anchors and hardware rated for the sign’s weight. Pre-drill holes, attach hardware securely, and hang it from sturdy beams or walls using chains or hooks.
How Do You Hang a Neon Sign Outside Without Drilling?
Use adhesive or suction hooks designed for outdoor use. Position hooks on clean, dry surfaces and ensure the sign has holes or grommets for hanging.
Can You Hang an Outdoor Sign on an Arch?
Yes, tie the sign directly to the arch frame using durable cords or zip ties. Make sure the ties are tight to prevent movement or wind damage.
What Should I Do If I Can’t Drill into My Rental’s Exterior Wall?
Use no-drill options like strong adhesive hooks or existing structures such as beams for hanging. Avoid damage by choosing removable hardware.
How Do I Hide Hardware When Hanging a Sign Outside?
Paint the hardware to match the sign or wall color, or use decorative caps to cover screws and hooks. This keeps a clean look while keeping hardware secure.
When Is It Better to Hire a Professional to Hang an Outdoor Sign?
Hire professionals for very heavy or large signs, or when mounting on tricky surfaces. They ensure safety, comply with codes, and reduce risk of damage.
The Bottom Line
Securely hanging a sign outside depends on proper preparation, choosing the right mounting method for your surface, and finishing with care to protect it over time. Start by selecting hardware that matches your sign’s weight and surface type, then take the time to set it up carefully. Your next step is to gather the necessary tools and materials and pick the best spot to showcase your sign where it will get noticed without risking damage.