How to Use Graphite Paper on Wood: Simple Steps for Clean Transfers
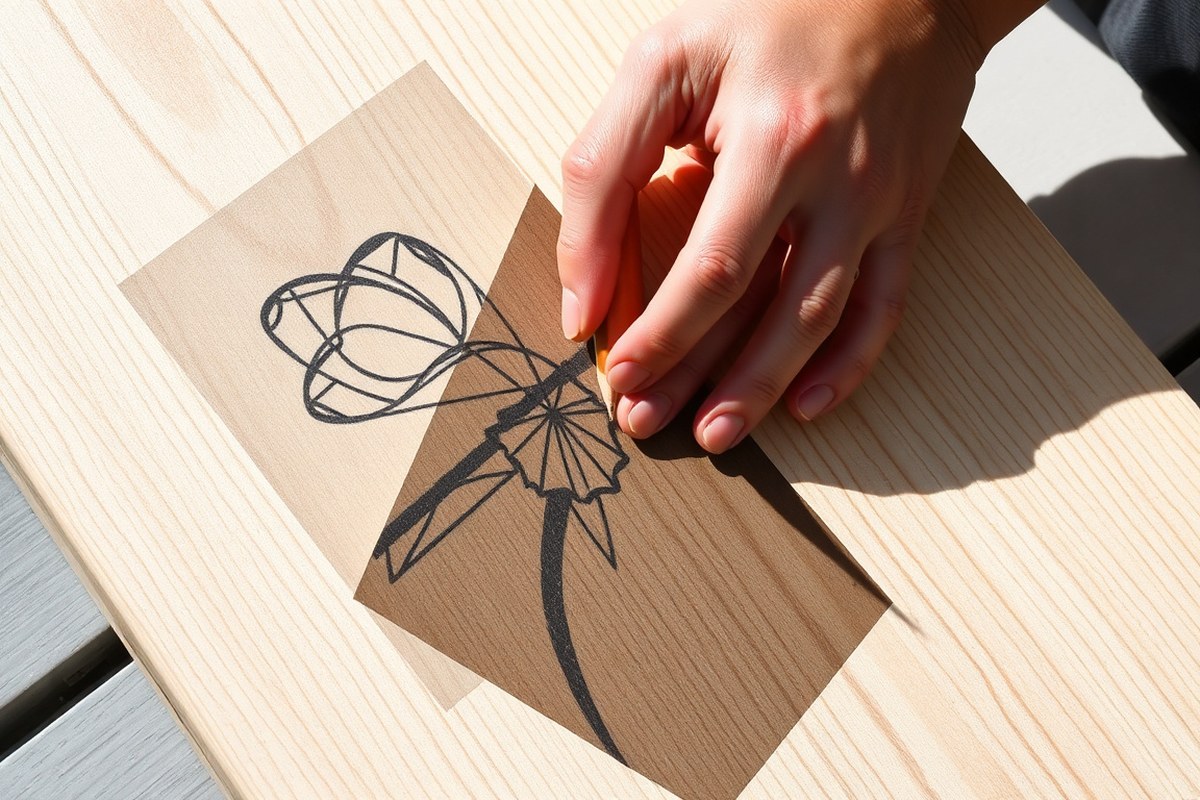
How to use graphite paper on wood starts with choosing the right side of the paper, the graphite coated side goes face down onto the wood. Place your printed image on top, tape both layers securely, then trace your design to transfer crisp, bold lines. Prepping your wood by sanding smooth helps the graphite adhere cleanly for sharp, clear transfers.
Key Takeaways
- Sand wood progressively, increasing grit by no more than 50% each time for a smooth surface without scratches.
- Use graphite paper with around 8% wax content for bold lines that resist smudging and smearing.
- Secure graphite paper face down on wood and tape your image on top facing up to align your design.
- Lift a corner of the paper after a few tracing strokes to confirm the image is transferring well.
- Reuse graphite paper several times until the graphite coating wears down, saving supplies and money.
- If staining after, sand wood up to 220 grit to minimize the appearance of scratches improve by the stain.
How to Use Graphite Paper on Wood Step-by-Step
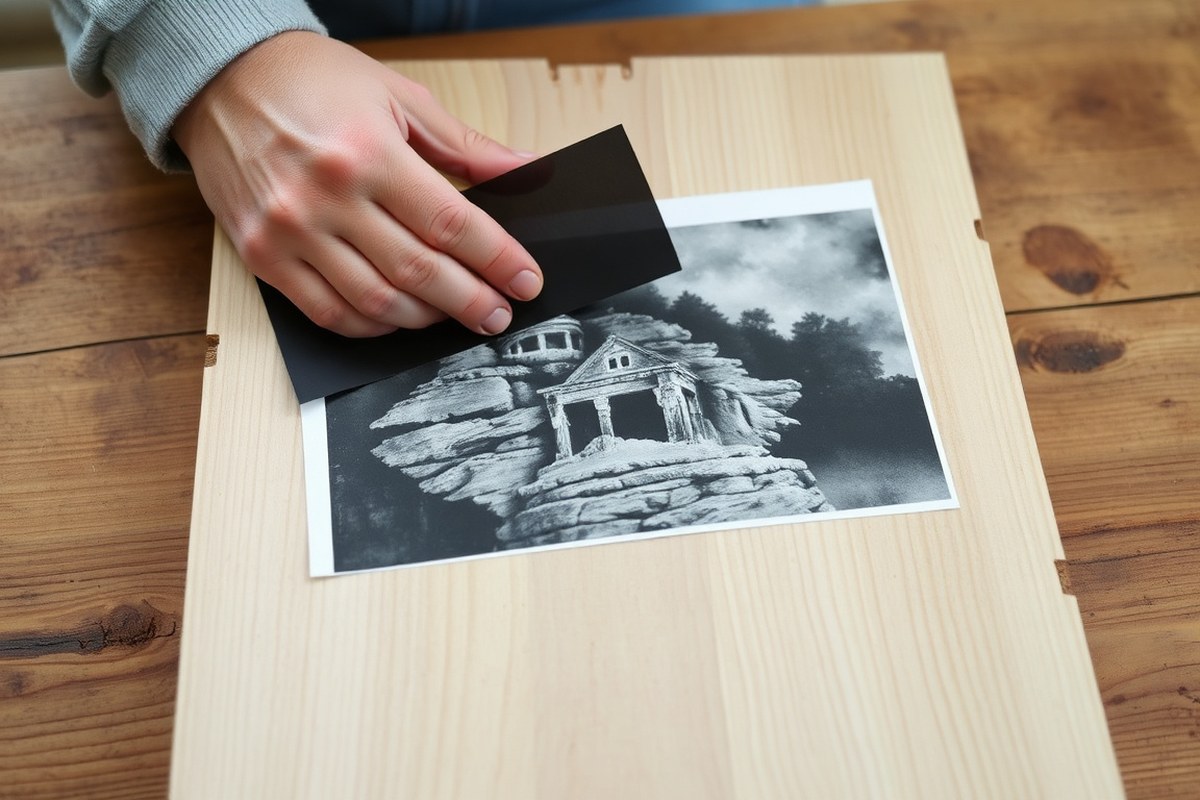
Using graphite paper to transfer an image onto wood involves a few careful steps. The key is to ensure the graphite side faces the wood so the lines transfer clearly when pressure is applied. Keeping the printed image and graphite paper aligned and securely taped prevents shifting during tracing, resulting in a crisp design.
- Prepare your workspace. Lay your wood surface on a stable table with good lighting. Make sure the wood is clean and dry to avoid smudging or uneven transfers.
- Position the graphite paper. Slide the graphite paper underneath the printed image with the coated (dark) side facing the wood. The wax content in the graphite makes the lines bold and steady on wood surfaces, so it matters which side touches the wood.
- Align and tape your papers. Use painter’s tape or low-residue masking tape to secure the graphite paper and printed image on the wood. Tape one side first, press down, then tape the opposite side to prevent movement while tracing.
- Check alignment. Before tracing the whole image, lift a corner gently after a few traced lines to check the transfer. This helps avoid wasted effort if the pressure or placement is off.
- Trace the design. Use a sharp pencil or pen to carefully trace over the printed image lines. Firm, consistent pressure ensures the graphite layer transfers onto the wood clearly. Avoid pressing so hard that the graphite paper shifts or tears.
- Remove the tape and papers. Carefully pull the tape off and lift the printed image and graphite paper to reveal your transferred design on the wood. If any lines are faint, you can retrace lightly over the image on the wood.
- Inspect and adjust. Check the wood for clear, crisp lines. Because wood grain and surface texture influence transfer quality, re-tracing or lightly shading may be necessary for intricate details.
For larger images, use bigger sheets of graphite paper like 20 x 26 inches to cover the entire design area without seams. Smaller sheets work well for detailed projects or wood panels around 5 x 7 inches. Graphite paper typically costs around $10 to $20 for multi-sheet packs, which can be economical since you can reuse sheets multiple times if handled gently.
Preparing Wood Surfaces for Graphite Transfers
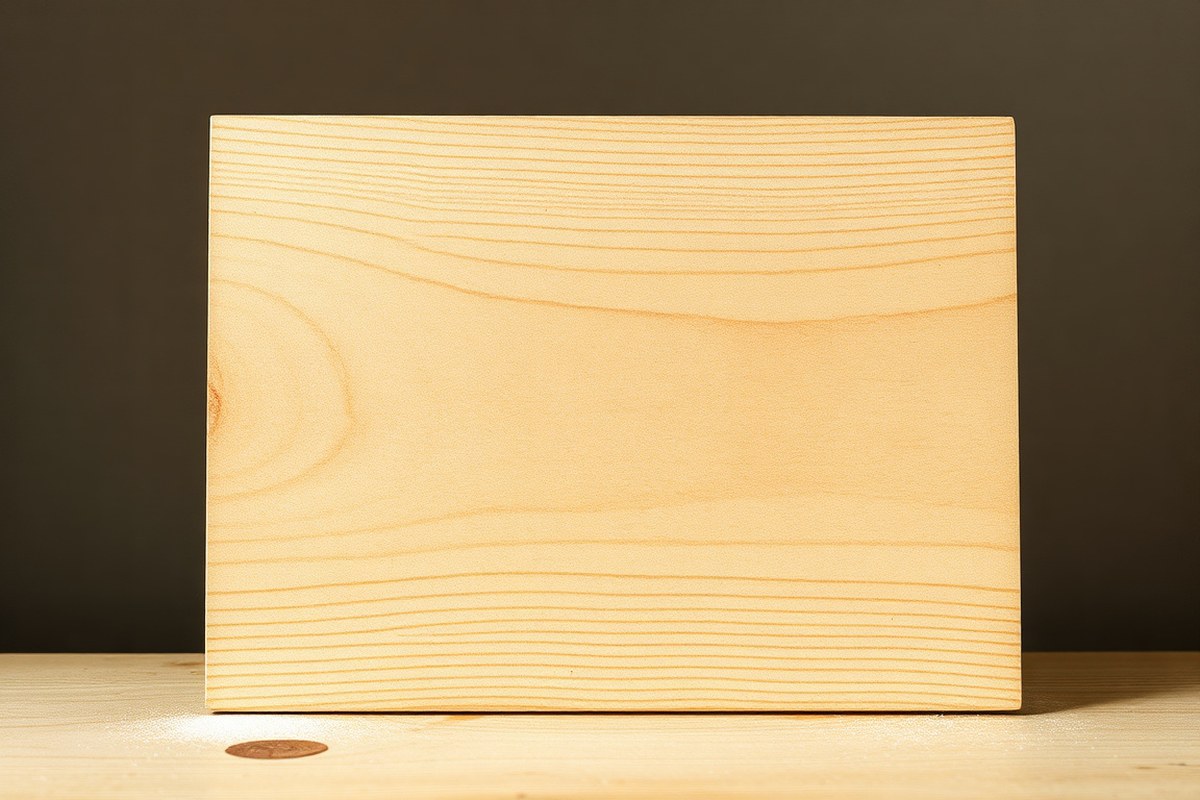
Preparing wood surfaces before using graphite paper is essential for clear, long-lasting transfers. Smooth, clean wood helps graphite adhere evenly, while the wood’s type and finish influence the transfer’s visibility and durability. Adjust your prep steps based on the wood’s texture and color for the best results.
Sanding for Smooth Surface
Sanding creates a smooth, even surface that allows graphite to transfer clearly without gaps or smudges. Begin with medium-grit sandpaper (around 120 grit) to remove any rough spots, then finish with fine-grit sandpaper (220 grit or finer) for a silky smooth finish. Avoid sanding too aggressively, as uneven surfaces or deep scratches can disrupt the transfer lines.
On rough or reclaimed wood, sanding is especially important. Rough wood will produce incomplete or broken lines, making your transferred design hard to follow or paint over. For plywood, which often has uneven layers, sanding helps reduce texture differences that can cause blotchy transfers.
Cleaning and Dust Removal
After sanding, thoroughly clean the wood surface. Dust particles can create gaps under the graphite paper, resulting in faint or patchy transfers. Use a vacuum or compressed air to remove sanding dust, then wipe the wood with a slightly damp cloth to lift fine particles. Let the surface dry completely before placing the graphite paper.
Cleaning also removes oils or residues from handling that may repel graphite. For stained or oily wood, a mild detergent solution followed by drying can improve adhesion. Avoid using harsh solvents, which can damage the wood or interfere with later finishing steps.
- Sand wood with 120 to 220 grit sandpaper for smoothness
- Vacuum or blow off sanding dust thoroughly
- Wipe wood with a damp cloth and let dry fully
- Use mild detergent for oily or stained wood
- Avoid harsh chemicals that damage wood fibers
- Check for rough spots after cleaning, sand if needed
- Handle wood with clean hands to prevent oil transfer
Do not place graphite paper on damp wood; moisture can cause the paper to tear or the graphite to spread unevenly.
Considering Wood Color and Grain
Wood type and color affect how well graphite transfers show up and how easy they are to work with. Light-colored woods like pine or maple provide great contrast with standard graphite paper, making lines clear and easy to see. Dark woods like walnut or stained surfaces may require white or light-colored graphite paper designed for darker backgrounds to make the design visible.
Wood grain orientation can also affect transfer quality. Grain lines running perpendicular to your design’s main strokes can cause slight interruptions in transferred lines. Adjust the pressure and your tracing technique accordingly to maintain consistent lines over pronounced grains.
On stained or finished wood, ensure the finish isn’t too glossy or sealed tightly; highly sealed surfaces may resist graphite adherence. Light sanding or using a transfer paper compatible with sealed surfaces will improve results. Remember that some transfer papers designed for darker woods may not work well on porous or rough surfaces.
Choosing the Right Graphite Paper for Wood Projects
Graphite paper comes in two main varieties: waxed and wax-free. Both types serve to transfer designs onto wood, but their characteristics affect how well they perform for different woodworking projects. Waxed graphite paper leaves darker, bolder lines due to a thin wax layer that transfers easily, making it ideal for detailed designs you want clearly visible for tracing or painting. Wax-free graphite paper transfers a lighter, softer line, preferred by artists who plan to erase or adjust lines frequently without wax residue interfering.
Choosing the right type depends on the wood’s texture and the project’s needs. Smooth, sanded wood surfaces show graphite lines more distinctly, so lighter wax-free paper might suffice. For rougher or porous wood, the bolder marks from waxed paper offer better visibility. Waxed paper’s transfer can be more durable during handling but might require careful removal of any wax residue before finishing. Wax-free paper tends to be cleaner but might need stronger pressure during transfer to be clearly visible.
| Feature | Waxed Graphite Paper | Wax-Free Graphite Paper |
|---|---|---|
| Line Boldness | Bolder, darker transfer lines | Lighter, more subtle lines |
| Ease of Erasing | Less easy; wax residue can complicate erasing | Easy to erase without residue |
| Suitability for Wood Surfaces | Best for rough or porous wood where visibility matters | Best for smooth, planed wood or artistic, fine detail work |
| Transfer Durability | More durable during handling and tracing | May require extra care; lines can smudge or fade |
| Price Range (per pack) | Approximately $5 to $10 for 10 sheets | Approximately $6 to $12 for 10 sheets |
| Recommended Brand | MyArtscape (noted for strong, erasable waxed paper) | No widely dominant brand; often found in artist supply stores |
Waxed graphite paper is generally recommended for woodworkers wanting bold and permanent transfer lines. Using a brand like MyArtscape can give clearer and more reliable results on wood. Wax-free paper suits crafters focusing on lighter pencil work or multiple adjustments before finalizing a design. Buying a small sample pack to test on your specific wood can help find the best match.
When using graphite paper on wood, place the paper graphite side down between your design and the wood. Apply steady yet gentle pressure with a pencil or stylus to transfer the image. For waxed paper, firm but smooth strokes prevent wax build-up, which can affect wood finishing. For wax-free, you may need to press slightly harder or repeat the tracing process for a deeper impression. Avoid moving the paper mid-transfer to keep lines clean and avoid smudging.
Ensuring Clean and Smudge-Free Transfers on Wood
To get clean and smudge-free transfers on wood, start by placing your graphite paper between the wood surface and your design with the graphite side facing the wood. Align everything carefully to avoid shifting, as even a small movement can blur the lines. Using steady, firm pressure ensures that enough graphite deposits onto the wood, so trace your design with a pen or stylus that has a rounded, firm tip rather than a sharp point. This pressure transfers the graphite cleanly without tearing the paper. Check progress periodically by lifting a corner of the paper, but avoid pulling it too quickly to keep lines crisp.
Protecting your design during transfer matters because graphite on wood can smudge easily if touched or if your hands are oily or wet. Keep your hands clean and dry while working. Wearing latex gloves can help prevent graphite residue from spreading both on your hands and the wood. Avoid resting your palm or fingers directly on freshly transferred areas. Letting the wood sit undisturbed for a few minutes after transferring allows the graphite to settle before you continue working or applying finish.
- Use a pen or stylus with a rounded tip for even pressure
- Apply firm, consistent pressure without pressing so hard that the paper tears
- Keep hands dry and clean; wash hands regularly to prevent smudges
- Lift the paper slowly and check your progress often
- Work on a clean, dust-free surface to avoid unwanted marks
- Use gloves to prevent graphite from transferring to your skin and back onto the wood
- Allow graphite lines to settle before handling the wood further
Using too much pressure or a very sharp tool can puncture or tear the graphite paper, which might leave holes or uneven patches. Too little pressure leads to faint lines that are hard to see. On darker woods or those with uneven grain, you might need to increase pressure slightly or go over the lines twice to achieve good contrast. On lighter woods like pine or maple, dark gray lines from standard graphite paper show clearly, aiding detailed work. Remember, graphite is erasable on wood, so gentle smudges can sometimes be removed with a soft rubber eraser, but avoid scrubbing too vigorously as this can damage the wood surface.
Fixing Common Problems When Transferring Designs to Wood
Common mistakes when using graphite paper on wood include applying uneven pressure, using too light a tracing tool, or working on wood with rough or dirty surfaces. These errors often result in faint, patchy, or incomplete outlines that make it hard to follow your design during painting or carving. Identifying the cause helps you fix the problem effectively.
Faint or incomplete transfers usually happen when the pen or pencil pressure isn’t firm enough or the graphite paper shifts during tracing. To fix this, place the graphite paper securely using low-tack tape on all edges to prevent movement. Then retrace the design with a ballpoint pen applying steady, medium pressure to ensure a clear, consistent outline. Harder woods with tight grain may need extra pressure compared to softwoods.
Another issue arises if the wood surface has dust, oils, or uneven texture, which can block graphite from transferring properly. Clean the area with a tack cloth or lightly sand it with 220-grit sandpaper before transferring again. Avoid overly sanding as that can smooth the surface too much, making the graphite harder to hold.
- Secure graphite paper edges with tape to prevent shifting
- Use a ballpoint pen with medium pressure for clear lines
- Clean or lightly sand the wood surface before transfer
- Replace graphite paper if it becomes worn or patchy
- For faint areas, retrace over existing marks rather than starting fresh
- Test your transfer on scrap wood to adjust pressure and technique
If you want to clean or erase graphite marks after transferring, a soft eraser like a vinyl or kneaded eraser works best on unfinished wood. Rub gently to avoid damaging the wood surface or leaving smudges. Some light sanding with a fine grit (320 or higher) can help remove stubborn graphite, but use this sparingly to prevent altering your design lines.
Always secure graphite paper firmly before tracing to avoid smudged or incomplete outlines that require time-consuming fixes later.
Techniques for Reusing and Maintaining Graphite Paper
Graphite paper can be reused multiple times before its graphite layer is completely worn off. Since each sheet is capable of transferring hundreds of images, especially on projects like wood signs or furniture panels, you should save and reuse your sheets as much as possible. Reusing graphite paper helps reduce waste and cuts down on the cost of art supplies, making it a practical choice for hobbyists and woodworkers.
Proper care extends the life of graphite paper and maintains clean, vibrant transfers on wood surfaces. Store unused sheets flat and separate them from other materials to avoid smudging or damaging the graphite layer. Keep the paper dry and away from direct sunlight or heat sources, as moisture or excessive heat can degrade the surface and reduce its effectiveness. Once you cut a piece for a specific project, handle it carefully to prevent wrinkles or folds, which can affect transfer quality.
- Store graphite paper flat in a dry, cool place
- Avoid touching the graphite side with oily or dirty hands
- Cut pieces slightly larger than your design to prevent handling damage
- Use light to moderate pressure when tracing to preserve the graphite layer
- Allow the paper to air dry if it gets slightly damp, never use heat
- Separate reused sheets from each other to avoid unwanted graphite transfer
You can tell it’s time to replace graphite paper when the transferred lines become faint or incomplete despite applying ample pressure while tracing. This usually happens after many uses, as the graphite coating thins out. Frequent tearing or multiple wrinkles in the paper could indicate it is past its prime. Using worn-out sheets leads to uneven or missing details on your wood projects, which can cost time fixing or cause poor final results.
For best outcomes, track how many times you’ve reused a sheet depending on the size and detail of your projects. Large and detailed transfers will naturally wear the paper faster. Consider buying packs of graphite paper to always have fresh sheets on hand when needed. Gentle handling, proper storage, and timely replacement help keep your graphite paper an efficient, cost-effective tool in your woodworking and crafting projects.
Adjusting Transfer Methods for Wood Grain and Finish
Achieving a clear graphite transfer on wood depends on adjusting pressure and understanding how the wood’s texture and finish affect the graphite’s adherence. Softer grain wood may need lighter pressure, while rough or stained wood requires extra care to avoid uneven lines or smudging. Knowing how to test and adapt your technique ensures the image comes through sharply and stays put.
Pressure Tips for Smooth vs. Rough Grain
Smooth-grain woods like maple or birch tend to hold fine graphite lines well with moderate pressure. Applying consistent, medium pressure across the design transfers the graphite evenly without tearing the paper or indenting the wood. Use a firm hand or a burnishing tool to gently press, focusing on maintaining even contact.
Rough-grain woods like oak or pine have more surface texture that can cause gaps in the transfer. Increase pressure in areas where the grain dips but avoid excessive force that might damage the paper or wood surface. Work slowly and consider multiple light passes rather than one heavy press to fill in grain valleys without causing smudges.
- Use a firm pencil or stylus for better control over pressure
- Apply consistent pressure, adjusting by wood grain type
- For rough grain, try multiple light passes instead of one heavy press
- Test pressure on a scrap piece before transferring on your main project
- Use a smooth, flat backing under the wood for more even results
Using these pressure strategies closely matches the wood’s surface texture and prevents weak or spotty lines in the transferred image.
Testing Transfers on Sample Pieces
Before working on your main wood piece, test graphite transfers on scrap wood of the same species and finish. This practice allows you to see how the graphite paper reacts with the particular grain and surface, guiding your pressure application and transfer time. Testing also highlights any need for sanding or sealing adjustments.
Try different pressures, speeds, and typing or tracing methods to find what yields the sharpest lines without smudges. Mark your test results to track what works best. Doing so avoids wasted time and materials on the final piece and improves transfer success.
Effects of Wood Finish on Transfer Quality
Wood finish significantly impacts graphite adhesion. Raw or lightly sanded wood with no finish absorbs graphite well, creating crisp, dark lines. Heavily stained or glossy finishes can repel graphite, causing faint or patchy transfers.
Sanded but sealed wood with matte or satin finishes generally works if the surface isn’t too slick. For glossy finishes, lightly scuffing the surface with fine sandpaper (320 grit) creates enough tooth for the graphite to stick. Avoid heavily lacquered or oily finishes that prevent graphite from adhering at all.
In some cases, applying a thin coat of clear matte spray sealer before transferring can improve results, but test this ahead of time. After transferring, a fixative spray might help preserve the lines before painting or staining.
Finishing Transferred Designs on Wood Before Painting
After transferring your design onto wood with graphite paper, it’s essential to clean up any excess graphite without erasing the lines you want to keep, seal the surface properly, and prepare it for painting or carving. These steps protect your work, ensure crisp paint application, and prevent smudging or bleeding.
Erasing and Cleaning Graphite Residue
Graphite lines made with artist-grade graphite paper tend to be softer and lighter, which helps prevent bleeding but means they might smudge or fade with handling. Use a soft, clean artist’s eraser to gently remove unwanted marks without disturbing the main design. Avoid harsh erasing or scrubbing since this can remove essential guideline lines or damage the wood surface.
After erasing, lightly wipe the wood with a dry, lint-free cloth to remove graphite dust. Use a barely damp cloth only when needed, but avoid soaking the wood since moisture can raise the grain and impact how the paint absorbs. Let the wood dry completely before proceeding.
- Use a soft pencil eraser instead of a hard rubber one
- Erase gently along unwanted smudges or stray marks
- Wipe graphite dust off with a dry microfiber cloth
- Avoid moisture except for very light wiping if needed
- Wait for the wood to dry fully before sealing or painting
To prevent smudging, minimize touching the transferred lines until you seal or paint over them.
Sealing the Wood Surface
Sealing after transferring your design secures the graphite lines and creates a barrier that helps paint or finish adhere evenly. Apply a clear, thin sealant such as shellac, acrylic spray, or a sanding sealer suitable for wood before adding paint or carving.
Use a foam brush or spray can to apply one or two even coats. Allow each coat to dry fully, check product labels, but most sealers dry in 30 minutes to an hour. Lightly sanding between coats with 220-grit sandpaper can help attain a smooth finish without removing the graphite lines.
- Choose a clear, non-yellowing sealant compatible with your paint
- Apply thin, even coats to avoid blotching or runs
- Allow sealant to dry before applying paint or carving
- Lightly sand between coats if applying multiple layers
- Test sealant on scrap wood to check for graphite line visibility
Sealing first also prevents the wood grain from absorbing uneven amounts of paint or stain, yielding cleaner details and sharper lines in your finished project.
Painting Tips over Transferred Designs
The graphite lines, when properly sealed, will not interfere with your paint or finish. Use acrylic or oil-based paints suitable for wood. Applying thin layers of paint minimizes risk of lifting the underlying graphite or sealant. Notice any line smudging during painting? Let the paint dry, then apply a light coat of clear sealer.
For carving projects, don’t paint right after transferring; carve first to avoid dulling tools or smearing graphite. Lightly seal the carved design before adding paint or stain to protect the edges and improve longevity.
- Use thin coats of paint for best control and sharp detail
- Test paint compatibility with your sealant on scrap wood
- Re-seal if graphite lines lift or smudge during painting
- Carve before painting to prevent tool dulling or smudges
- Patience between each step ensures cleanup-free results
Step-by-Step Action Plan for Using Graphite Paper on Wood
Follow this simple plan to transfer your design onto wood with confidence and accuracy.
- Before you start: Choose a smooth, clean piece of wood and the appropriate graphite paper grade (medium for most wood types). Confirm the wood surface is sanded and free of dust by wiping with a dry cloth.
- Day 1: Position your design on the wood and place the graphite paper shiny side down beneath it. Tape both securely to prevent slipping. Press lightly with a pencil or stylus, verifying the graphite transfers evenly through the paper.
- Immediately after transfer: Carefully lift the paper and check that the entire design has transferred. If areas are faint, retrace with the pencil using the original paper still taped in place.
- After transfer: Fix any smudges by gently erasing with a fine eraser and avoid pressing hard to not damage the wood surface.
- Next day: Apply a clear fixative spray or light sanding sealer to protect the graphite lines before painting or carving. Make sure the lines remain visible after drying.
- Weekly maintenance: Store unused graphite paper flat and away from humidity to preserve its surface quality and ensure crisp transfers next time.
- For future projects: Adjust pressure and pencil type depending on wood grain, use lighter pressure on smoother woods, and a softer pencil for rougher or darker finishes to maximize transfer visibility.
Frequently Asked Questions
Can I Use Graphite Paper on Finished or Sealed Wood Surfaces?
Graphite paper works best on unfinished or lightly sanded wood. Sealed surfaces may prevent the graphite from adhering properly, resulting in faint or incomplete transfers. Lightly sanding the seal can improve the transfer quality if you need to work on finished wood.
Is It Necessary to Tape the Graphite Paper to the Wood to Prevent Shifting?
Taping the graphite paper helps keep it in place and prevents smudging or misalignment. Use painter’s tape or masking tape along the edges for a secure hold while tracing your design. Removing tape carefully avoids tearing the paper.
Can I Use Colored Graphite Paper on Wood Instead of the Traditional Black?
Colored graphite paper exists but is less common for wood projects. Black graphite paper provides the boldest, most visible lines on wood, especially with the wax content improving transfer clarity. Colored paper might produce fainter or less consistent results.
How Much Pressure Should I Apply When Tracing over Graphite Paper on Wood?
Apply firm but controlled pressure with a pencil or stylus to ensure clear transfer without tearing the graphite paper. Too light pressure causes faint lines, while too much may damage the wood surface or paper. Test pressure on scrap wood first.
Is Graphite Paper Reusable After One Transfer on Wood?
Graphite paper can be reused several times if undamaged and not overly worn. Each transfer lightens the coating, so successive uses might produce fainter lines that require darker tracing or fresh paper for precision.
Can I Erase Graphite Lines on Wood If I Make a Mistake?
Light graphite lines can often be gently sanded off unfinished wood or wiped with a slightly damp cloth before finishing. Deeper or smudged lines are harder to remove, so test your erasing method on a scrap piece first.
Before You Go
The right technique makes transferring designs onto wood both clean and precise, setting a solid foundation for painting or carving. Start by preparing your wood carefully and choosing the right graphite paper for your project. Testing your transfer on a scrap piece of wood can save time and materials before working on your final piece.