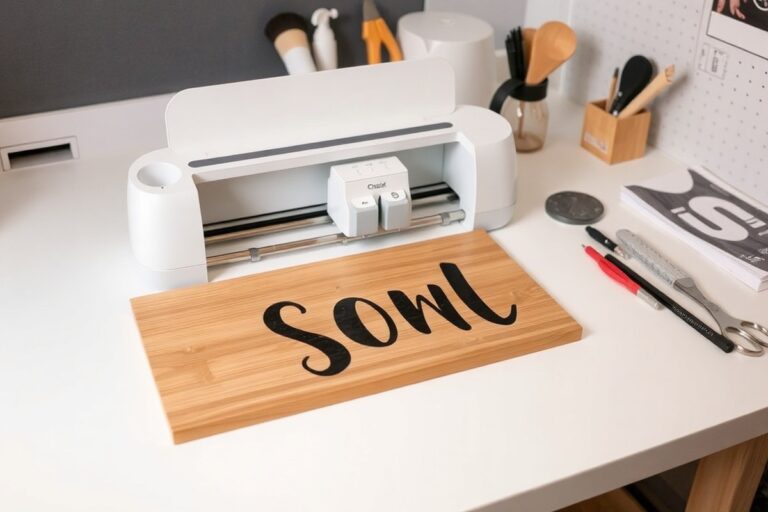
How to Apply Vinyl to Painted Wood: A Complete Guide for Perfect Adhesion
Preparing painted wood for vinyl requires the paint to cure fully, ensuring a smooth, strong base. Vinyl applied before the paint dries risks poor stickiness and bubbling issues. Allow 24 to 48 hours after painting for the paint to set completely before adding vinyl.
Key Takeaways
- Sand the wood smooth before painting to create an even surface for better vinyl adhesion.
- Use acrylic paint, polycrylic, or wood stain and let it cure for 24 to 48 hours before applying vinyl.
- Allow the vinyl to sit on the painted wood for 24 hours before exposing it to water or handling extensively.
- Remove transfer tape slowly at a 45-degree angle after applying vinyl to avoid lifting the decal.
- Let the vinyl sit on the painted wood surface for about 10 to 20 minutes if it resists peeling off the transfer tape easily.
- Apply a sealant only after the vinyl has cured on the painted wood for at least 24 hours to protect the decal.
Can You Apply Vinyl Directly to Painted Wood?
Yes, you can apply vinyl directly to painted wood, but success depends on key surface conditions. The painted wood must be fully cured, clean, and smooth for the vinyl to stick properly. Vinyl adhesives bond best when the paint underneath has hardened completely, usually this means waiting at least 2 to 4 weeks after painting to ensure all solvents and chemicals have evaporated. Applying vinyl to a surface that’s still curing can cause bubbling, lifting, or peeling, as residual solvents continue to off-gas and degrade the adhesive bond.
Smoothness of the painted wood surface plays a major role in vinyl adhesion. Vinyl will not stick well to rough, porous, or textured wood because the adhesive can’t form a solid contact. Sanding the painted surface with fine 220-grit sandpaper before application helps create an even, flat surface. After sanding, you must remove all dust and debris using isopropyl alcohol or another appropriate cleaner. This step also removes oils or residues that could block the vinyl adhesive. Skipping proper cleaning allows dirt or waxy residues to remain, causing the vinyl to lift or peel prematurely.
The type of paint and finish also affects how vinyl adheres. Paints with satin, semi-gloss, or gloss finishes typically provide better adhesion than flat paint because they dry to a harder, less porous surface. Avoid applying vinyl over stain-resistant or oil-based finishes that are not fully dry, as these may repel the adhesive. Applying vinyl over fully cured water-based paint works well if the surface is clean and smooth.
Before applying vinyl, confirm the paint is at room temperature, ideally between 60°F and 85°F, since colder or hotter conditions can weaken adhesive bonds. Use transfer tape to position your vinyl carefully, then smooth it with a squeegee to push out air bubbles and ensure full contact. Peel the transfer tape slowly at a 45-degree angle after application to avoid lifting the vinyl.
Allow the vinyl to bond undisturbed on the painted wood for at least 24 hours before exposing it to water or heavy use. This curing time lets the adhesive fully set into the paint’s surface. While you can apply vinyl directly to painted wood, following these steps ensures a strong, lasting hold and avoids common problems like bubbling, peeling, and lifting that occur when the painted surface isn’t properly prepared or cured.
Choosing the Right Vinyl for Painted Wood Projects
You’ll want to choose vinyl that works well on painted wood to ensure your design sticks and lasts. Permanent adhesive vinyl, like Oracal 651 or 751, is best for painted wood because it has a strong, pressure-sensitive adhesive that bonds well to smooth, sealed surfaces. Heat transfer vinyl (HTV) can be used but tends to give inconsistent results since it’s made for fabric. It may not adhere evenly to wood unless the surface is perfectly prepared and sealed.
Adhesive vinyl is easier for beginners. It applies with transfer tape and a squeegee, allowing you to place decals or signs quickly and remove the tape cleanly after pressing the vinyl down. Heat transfer vinyl requires an iron or heat press to activate its adhesive, which can be tricky on wood due to uneven heat distribution and the surface’s texture.
| Vinyl Type | Adhesive | Works on Painted Wood? | Application Method | Best Uses |
|---|---|---|---|---|
| Permanent Adhesive Vinyl (Oracal 651, 751) | Strong, pressure-sensitive | Yes, on smooth sealed or painted wood | Peel-and-stick with transfer tape and squeegee | Signs, lettering, decals, frames |
| Removable Adhesive Vinyl | Weak, repositionable | Poor adhesion, tends to lift | Peel-and-stick, temporary use | Temporary wall decals, painting stencils |
| Heat Transfer Vinyl (HTV) | Heat-activated | Inconsistent, test first | Iron or heat press application | Fabric primarily, some smooth painted wood |
| Vinyl Sheet/Wrap Film | Varies, often needs added adhesive | Not ideal without extra adhesive | Clamp or adhesive required | Vehicle wraps, large surfaces |
Always use permanent vinyl for wood projects because removable vinyl will likely peel off and ruin your design.
Durability is key, especially for outdoor projects or surfaces with some texture. Oracal 751 is better for rough or outdoor wood because of its stronger adhesive and weather resistance. Acrylic paint with a semi-gloss or high-gloss finish also improves vinyl bonding and should be fully dry for at least 24 to 48 hours before application.
Applying vinyl on painted wood involves making sure the surface is smooth, clean, and fully cured to maximize adhesion. Adhesive vinyl requires firm burnishing with a squeegee to remove air bubbles and ensure a solid seal. Heat transfer vinyl demands precise heat and pressure; uneven heating can cause poor adhesion or peeling.
Preparing Painted Wood Surface for Vinyl Application
Properly preparing painted wood before applying vinyl ensures the adhesive sticks well and the design lasts. This includes waiting for the paint to fully cure, sanding the surface to smooth imperfections, cleaning to remove oils or dust, and applying a clear sealant to create an ideal base. Following these steps reduces the chance of vinyl edges lifting or bubbling later on.
Sanding Techniques and Grit Recommendations
Sanding painted wood smooths out the surface and removes any gloss that could prevent the vinyl adhesive from gripping properly. Use fine sandpaper, around 220 grit, to avoid scratching through the paint while creating enough texture for adhesion. Coarser grit like 150 can be used if the paint surface is rough or uneven, but always finish with a finer grit for smoothness. Sand lightly until the surface feels even to the touch, focusing on edges or spots where paint might be thicker.
For wood with deep grain that might cause vinyl tenting, fill the grooves with a wood filler or sanding sealer first, then sand again to maintain smoothness. Avoid over-sanding or exposing raw wood unless you plan to repaint, since uneven texture affects vinyl’s appearance and longevity.
Cleaning Painted Wood with Alcohol for Adhesion
Cleaning the painted surface removes dust, oils, and contaminants that interfere with vinyl sticking. Use isopropyl rubbing alcohol on a lint-free cloth rather than soap and water, which can leave residues. Lightly wipe the entire area where you’ll apply the vinyl, allowing the alcohol to evaporate completely before moving on. This ensures a clean, dry surface ready for bonding.
Perform this cleaning step after sanding and before sealing or applying vinyl. Avoid touching the cleaned surface with bare fingers, as natural oils can transfer and reduce adhesion quality.
Applying Sealants and Waiting for Proper Curing
Applying a thin layer of a water-based clear coat or sealant creates a sealed, smooth barrier between the paint and vinyl adhesive. This reduces risks like vinyl edges peeling off paint or paint transferring onto transfer tape. Use a clear acrylic or polycrylic specifically designed for painted wood surfaces. Brush on a thin, even coat and allow it to dry fully, which typically takes several hours.
Allow your painted wood to dry fully for 24 to 48 hours before sanding, cleaning, or adding any sealant. The paint should be fully cured, not just dry on the surface, to prevent problems like bubbling or vinyl peeling caused by trapped solvents. You can use fans or open windows to speed up drying, but it’s best to wait a full day to ensure complete curing.
After sealing and before applying vinyl, let the clear coat cure fully according to product instructions. This step solidifies the surface and helps create a lasting bond when applying vinyl. Handle the wood minimally until after the vinyl has also cured for at least 24 hours post-application. Follow these surface preparation steps for optimal results:
- Wait 24 to 48 hours after painting for full curing before starting any prep work.
- Sand the painted surface lightly using 220 grit sandpaper until smooth but not through the paint.
- Clean the sanded surface with isopropyl rubbing alcohol on a lint-free cloth; let dry completely.
- Apply a thin coat of water-based clear sealant or polycrylic; brush evenly over the entire design area.
- Allow the sealant to dry and cure completely as per manufacturer instructions (usually several hours).
- Clean the sealed surface again with rubbing alcohol before placing the vinyl to ensure no dust or oils remain.
- Apply vinyl only once the surface is fully prepared and dry to the touch.
How to Apply Vinyl to Painted Wood Without Bubbles or Wrinkles
Applying vinyl to painted wood without bubbles or wrinkles requires careful preparation, precise positioning, firm and even pressure, and attention during the transfer tape removal. Following a clear step-by-step process lets you smoothly press the vinyl onto the painted surface and achieve a clean, professional look.
Preparing and Positioning the Vinyl Decal
Begin by ensuring the painted wood surface is fully dry and clean to improve adhesion. Peel back a small section of the vinyl’s backing paper at a 45-degree angle to expose the adhesive. Position the exposed edge of the vinyl carefully onto the wood to align your design exactly where you want it.
Use transfer tape over the entire vinyl design to lift and place it precisely. After applying the transfer tape firmly over the vinyl, peel the vinyl backing away, leaving the vinyl stuck to the transfer tape. This method keeps the vinyl intact and correctly placed on the painted wood when you apply it.
Using a Squeegee to Apply Even Pressure
A squeegee or flat-edged tool is essential to press the vinyl onto the painted wood and remove air bubbles. Start by pressing the vinyl gently with the squeegee from the center outward. Maintain consistent pressure, aiming to smooth out air pockets and avoid any wrinkles.
Apply firm, even pressure across the entire surface, working slowly and methodically. Using gentle but firm strokes helps the vinyl fully adhere without trapping air. Tilt the squeegee slightly to remove any small bubbles you feel under the vinyl, pushing air out toward the edges.
Removing Transfer Tape at the Ideal Angle and Timing
Let the vinyl sit for 10 to 20 minutes to adhere properly to the painted wood before taking off the transfer tape. Taking it off too soon might lift the vinyl or create bubbles. Slowly peel back the tape at a low angle, keeping it close to the surface to prevent any vinyl from lifting.
If you see tiny sections lifting as you remove the transfer tape, stop and firmly press those spots back with the squeegee. Doing this slowly helps the vinyl adhere well and keeps it smooth on the wood surface.
- Clean and dry the painted wood surface thoroughly.
- Cut your vinyl design and apply transfer tape firmly over it.
- Peel back a small section of the vinyl’s backing paper at a 45-degree angle.
- Align and place the exposed edge of the vinyl onto the painted wood.
- Use the squeegee to press the vinyl from center outward, removing air bubbles.
- Smooth the entire vinyl piece with firm, even squeegee pressure.
- Wait 10 to 20 minutes for adhesion before peeling off the transfer tape slowly at a low angle.
- Press down any lifted sections with the squeegee as you remove the transfer tape.
How Long to Wait Before and After Applying Vinyl
Allow paint to dry at least 24 to 48 hours before applying vinyl, depending on the type of paint used. Let vinyl adhesive set fully by waiting at least 24 hours after application before handling or sealing. Following these timelines helps ensure strong vinyl adhesion and long-lasting results on painted wood.
Typical Paint Curing Times by Paint Type
Paint drying and curing times vary with the paint formula. Latex or acrylic paint typically dries to the touch within 1 hour but requires at least 24 to 48 hours to cure sufficiently for vinyl application. Oil-based paints take longer, often needing 48 to 72 hours to cure before adding vinyl. You need to allow a curing period of one to two weeks for the finish to harden completely after applying a clear sealant or polyurethane over the paint.
Waiting for full curing is essential because vinyl adhesive might not bond well to paint that is still soft or tacky. Applying vinyl too soon can cause lifting or bubbling as the paint shifts during curing.
Vinyl Adhesive Bonding and Handle Time
After applying vinyl to painted wood, the adhesive starts to bond immediately but can take up to 24 hours to fully adhere. This curing period is necessary before handling or exposing the surface to moisture, cleaning, or stress. Without this wait, the vinyl may peel, wrinkle, or fail to stick firmly.
Heat setting the vinyl with a heat gun or iron can speed up bonding and help smooth wrinkles and bubbles. After heating, still wait the full bonding time for best adhesion strength, especially for outdoor or high-traffic projects.
When to Apply Sealer or Finish over Vinyl
To protect your vinyl and wood project further, apply a clear sealer once the vinyl has bonded fully for a minimum of 24 hours. Use a water-based, clear matte finish to avoid altering the vinyl’s color or texture. Applying sealer too soon can trap moisture under the vinyl or cause lifting.
Apply sealer in thin, even coats and allow each coat to dry fully before applying the next. Sealing protects the vinyl from sun, water, and wear but requires patience and proper timing to avoid damage.
- Paint or stain your wood surface according to instructions.
- Allow the paint to dry for a minimum of 24 hours, or longer as needed based on type (up to 72 hours for oil-based).
- Sealing the paint requires waiting 1 to 2 weeks for full cure before applying vinyl.
- Apply vinyl carefully, avoiding bubbles or wrinkles.
- Heat set the vinyl with a heat gun or iron to improve adhesion.
- Wait at least 24 hours for vinyl adhesive to cure before touching or cleaning.
- Apply a water-based clear sealer over the vinyl only after the adhesive is fully bonded and cured.
- Allow sealer coats to dry thoroughly before handling the finished project.
Do not rush applying vinyl to freshly painted wood; even if surface dry, paint may still cure underneath, weakening the adhesive bond.
Sealing and Protecting Vinyl on Painted Wood
Sealing vinyl applied to painted wood helps protect it from wear, moisture, and UV damage, extending the life of your craft or sign. You should seal the vinyl if your project will face exposure to moisture, frequent handling, or sunlight. Without a protective topcoat, vinyl edges can lift or peel, and dirt or moisture can damage both the vinyl and painted surface over time.
Polycrylic is a popular clear sealant for painted wood crafts with vinyl. It dries quickly, usually within 30 minutes to one hour, and provides a hard, durable finish. Polycrylic is water-based and non-yellowing, which keeps colors vibrant. Apply it with a synthetic brush or a foam brush using even strokes. Avoid applying too thickly, or you risk bubbles or streaks. After the first coat dries, wait about two hours before adding a second coat if needed. Polycrylic is moderately priced, often around $10 to $15 per quart, and covers roughly 300 square feet per quart.
Clear acrylic sealants offer good UV protection and moisture resistance. You can find acrylic finishes in spray or brush-on forms. Spray acrylic is convenient for sealing vinyl edges and larger surfaces. Hold the can 8 to 12 inches away, applying several light coats, allowing 10 to 15 minutes to dry between each. Acrylic sprays tend to dry faster than brush-on products but may require multiple light layers to avoid runs or drips. Brush-on acrylic is thicker and may provide a tougher finish but needs careful application to prevent bubbling. Acrylic sealants generally resist yellowing and keep the vinyl flexible. Prices vary but expect around $7 to $12 per spray can.
Some hobbyists prefer spray finishes for sealing vinyl on painted wood because sprays cover edges smoothly and don’t disturb the vinyl’s position. It’s best to use light, even coats and to spray in a well-ventilated area with dust-free conditions. Applying two to three coats typically suffices for good protection. Wait at least two to four hours after sealing before handling the piece, especially if it will be outdoors.
Avoid using oil-based varnishes or sealants that yellow over time, as this can discolor your vinyl and painted wood. Also, sealants that remain too tacky or flexible may fail to protect edges properly. When selecting a sealant, check the product label for compatibility with vinyl and painted surfaces. Conducting a patch test on a scrap board with your vinyl type can show how the finish behaves before committing to your project.
Applying the sealant is best after letting your vinyl fully cure on the painted wood, which usually means waiting 24 to 48 hours. Start by cleaning dust off your piece, then apply your chosen topcoat as described. Avoid heavy brush strokes that might lift the vinyl edges. For outdoor projects or pieces exposed to high moisture, consider extra protective measures like multiple coats or specialized UV-resistant acrylic sprays.
Common Mistakes When Applying Vinyl to Painted Wood
Vinyl often peels off painted wood because of poor surface preparation and premature application. The wood surface must be smooth and clean before applying vinyl. When the paint is rough, peeling, or dirty, the vinyl won’t stick well. Also, applying vinyl before the paint fully cures causes adhesion problems, which usually means waiting at least 24 to 48 hours after painting.
Bubbles and wrinkles typically happen when you stretch the vinyl too much or apply it too quickly. Pressing the vinyl firmly but slowly with a squeegee helps avoid trapping air pockets. Starting in the center and working outward pushes air out, minimizing bubbles.
Damaging the paint happens if you use harsh tools or force the vinyl onto a chipped or flaking surface. Use a soft squeegee and avoid scraping. When the paint isn’t fully cured or is slightly loose, the vinyl can peel off paint along with it.
When vinyl doesn’t stick properly even after cleaning and sanding the wood, the issue often comes down to the surface not being smooth enough. Vinyl prefers very smooth surfaces. Lightly sanding painted wood with 220-grit sandpaper and then cleaning the dust off with a vacuum or mild detergent will improve adhesion. Avoid rough sanding that opens wood pores; vinyl sticks best on sealed, smooth paint.
- Applying vinyl on dirty or dusty surfaces: fix by thoroughly cleaning with mild detergent and letting it dry.
- Rushing application on uncured paint: wait 24 to 48 hours before applying vinyl.
- Using aggressive sanding: lightly sand with 220-grit for smoothness without exposing raw wood.
- Stretching vinyl too much when applying: apply slowly from center outward with a squeegee to prevent air bubbles.
- Using hard or sharp tools during application: use a soft squeegee or plastic card to avoid paint damage.
- Not drying the surface fully after cleaning: always let the painted wood dry completely to ensure good vinyl adhesion.
- Ignoring temperature conditions: apply vinyl between 60 and 80°F for optimal sticking, avoiding very cold or hot surfaces.
Checking these factors before you start each project will help prevent vinyl from peeling, bubbling, or damaging the underlying paint. Achieving a smooth, clean, and fully cured painted surface combined with gentle, steady application techniques will give your vinyl the best chance to last on your painted wood crafts or signs.
Environmental Factors Impacting Vinyl Adhesion on Painted Wood
Maintaining the right environment is key when applying vinyl to painted wood. The ideal temperature for vinyl application ranges from 65°F to 85°F. This range keeps the vinyl flexible enough to stick well without becoming too soft or too brittle. Below 65°F, vinyl can become stiff, making it harder to adhere smoothly. Above 85°F, the vinyl may stretch or warp during application, increasing the risk of bubbles or wrinkles.
Humidity also plays a significant role in adhesion quality. Aim for a relative humidity level between 40% and 60%. High humidity or damp conditions can cause moisture to get trapped under the vinyl. This leads to poor adhesion and a greater chance of peeling or bubbling over time. Applying vinyl on wood that feels slightly damp or in a foggy room usually results in these problems. On the other hand, very dry air helps the vinyl stick and allows the adhesive to cure properly.
Cold or damp workspace conditions slow down the adhesive bonding. For example, working in a garage on a cool, rainy day may cause the vinyl to lift or not stick at all. To create the best setting, work indoors where temperature and humidity are controlled. Using a heater or air conditioner can help maintain consistent conditions. A portable space heater delivering about 1500 watts can raise the room temperature quickly if needed, often costing under $0.10 per hour in electricity.
Smoothing the wood surface before application helps too, but an even environment improves the vinyl’s performance on properly prepared wood. Avoid applying vinyl near open windows where drafts can fluctuate temperature or humidity. Set up your workspace away from air vents that blow cold or hot air directly on the painted surface. This prevents rapid temperature swings during application, which might cause vinyl contraction or expansion.
Once the vinyl is applied, allow it to rest undisturbed in the same environment for at least 24 hours. This lets the adhesive fully cure and bond with the painted wood. Avoid moving or exposing the vinyl to moisture or extreme temperatures during this period. Proper environmental control during and after application leads to a smooth vinyl finish with a durable, long-lasting bond.
Work in a comfortably warm room with low humidity and avoid applying vinyl on damp wood to prevent adhesion issues and bubbling.
Step-by-Step Action Plan for Applying Vinyl to Painted Wood
Follow these clear steps to apply vinyl successfully and achieve a smooth, lasting finish on your painted wood project.
- Before you start: Clean the painted wood surface thoroughly with a mild cleaner and ensure it is completely dry. A clean surface improves vinyl adhesion and prevents bubbles.
- Day 1: Lightly sand the painted wood with fine-grit sandpaper to create a slightly rough surface. Wipe off any dust with a tack cloth to keep the surface smooth but ready for vinyl.
- Day 1, after sanding: Position your vinyl design on the wood without removing the backing. Use masking tape to hold it in place and confirm alignment.
- Day 1, apply vinyl: Peel off the vinyl backing slowly and use a squeegee or credit card to press the vinyl onto the wood from the center outward, eliminating bubbles and wrinkles as you go.
- Day 1, after application: Carefully remove transfer tape if your vinyl uses one, pulling at a sharp angle to avoid lifting the vinyl.
- After 24 hours: Check adhesion by gently pressing on the edges; if any edges lift, press again with the squeegee. Avoid getting the surface wet during this period to allow full bonding.
- After 1 week: Consider applying a clear sealant compatible with both paint and vinyl to protect your project from wear and environmental effects.
- Ongoing: Keep your vinyl clean by wiping gently with a damp cloth and avoid harsh cleaners that could degrade the adhesive or damaged paint.
Frequently Asked Questions
Can You Use Heat Transfer Vinyl (HTV) on Painted Wood Effectively?
HTV can work on smooth, sealed painted wood but results may vary. Always test on a small area first to check adhesion and finish quality.
Does Vinyl Damage Painted Wood When Removed?
Vinyl may peel paint if removed too soon or on poorly cured paint. Wait at least 24 hours after applying vinyl before removal to reduce risk.
Can You Apply Vinyl to Textured Painted Wood Surfaces?
Textured painted wood can reduce vinyl adhesion and cause bubbles or lifting. Sanding smooth before painting helps create a better surface for vinyl.
How Do You Fix Vinyl Bubbles That Form After Application on Wood?
Small bubbles often disappear within 24-48 hours as adhesive settles. Larger bubbles can be smoothed with a pin puncture and pressing the vinyl down.
Is It Necessary to Use a Sealant over Vinyl on Painted Wood?
Using a sealant after vinyl cures at least 24 hours improve durability and protects against water and weather damage.
Can Vinyl Be Reused or Repositioned on Painted Wood Surfaces?
Permanent adhesive vinyl is not designed for repositioning once applied on painted wood. Removable vinyl lifts more easily but has weaker adhesion.
Wrapping Up
Applying vinyl to painted wood takes attention to surface prep and careful application to avoid bubbles and ensure strong adhesion. Taking your time with cleaning, sanding, and applying pressure pays off with a professional look that lasts. Start today by cleaning your painted wood surface well, and you’ll set a solid foundation for your vinyl craft project.