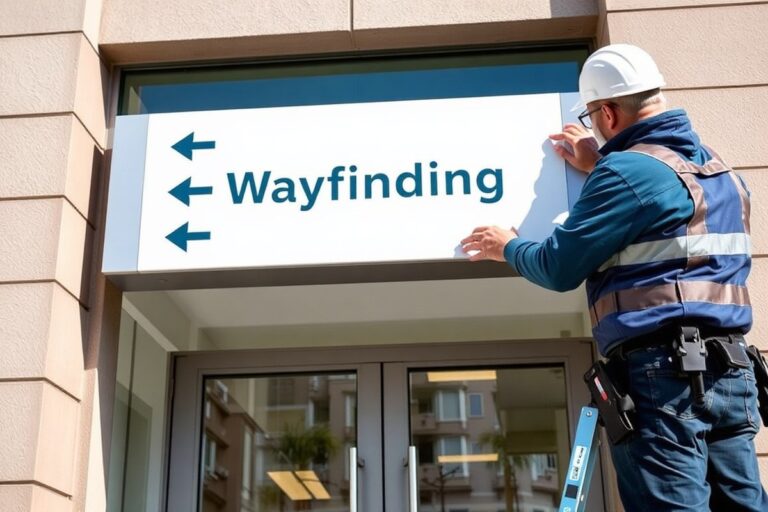
How to Install a Sign on a Wall: A Complete Guide with Proven Methods
How to install a sign on a wall starts with choosing a suitable surface and mounting method based on the sign’s size and weight. Use anchors or brackets for heavier signs and adhesives or stand-off fixings for lighter ones. Accurate measuring and marking ensure the sign is level and secure. Always begin by measuring the height from the floor to meet placement standards, like the ADA’s 60-inch center guideline for visibility and compliance.
Key Takeaways
- Mount signs at 60 inches from the floor to the center for ADA compliance and clear visibility.
- Use hollow wall anchors for signs weighing between 2kg and 5kg on drywall or plasterboard.
- Install stand-off fixings for wall signs that weigh between 2kg and 8kg for a professional look.
- For signs heavier than 5kg, avoid using plasterboard alone; add structural support or brackets.
- Place signs near doors on the latched side, 2 to 3 inches from the jamb, per ADA rules.
- Firmly press adhesive-mounted signs for at least 30 seconds to ensure they stick properly.
How to Properly Mount a Wall Sign Step-by-Step

Installing a sign on a wall securely and evenly requires careful measuring, the right tools, and precise mounting techniques. Accuracy in marking and leveling ensures your sign looks professional and stays firmly in place over time. Follow these key steps to get the job done right.
Measuring and Marking Your Wall
Start by measuring the wall area where the sign will hang. Account for the size of the sign and any nearby objects to ensure it fits well and is visually balanced. Use a tape measure to find the exact center or preferred position on the wall, then lightly mark the outline of the sign with a pencil.
Check the alignment by placing a level horizontally at the marks to make sure they are perfectly straight. This avoids a crooked sign after installation. When using common hangers like a sawtooth hanger, measure the distance from the top edge of the sign to the hanger, often about 7/8 inch, and transfer this measurement onto the wall from the top mark. This additional mark will guide where to place your drill holes or anchors.
Selecting the Right Drill Bit and Anchors
Proper drill bits and anchors depend on your wall’s material and the sign’s weight. Use masonry drill bits and anchors for brick or concrete walls. For drywall or plaster, choose drywall anchors rated for the sign’s weight. The drill bit should match the size of the anchors to ensure a snug fit that holds securely.
Before drilling, verify your drill bit’s diameter matches the anchor requirements. Confirm your screws and anchors can bear the sign’s weight for safety and durability. Wearing safety glasses is essential during drilling to protect your eyes from debris. Having the correct tools on hand makes this process smoother and reduces risk of damage to your wall or sign.
Attaching and Securing the Sign
Follow these steps to mount the sign securely and evenly:
- Place painter’s tape over the marked spots on the wall to prevent paint from chipping.
- Drill holes at the marked points where your anchors will go.
- Insert anchors firmly into the drilled holes, tapping lightly if needed.
- Line up the sign’s mounting hardware (such as sawtooth hangers or brackets) with the anchors.
- Screw the mounting screws into the anchors, tightening until secure but not over-tightened to avoid damage.
- Use a level to check the sign’s alignment again; adjust screws if necessary for perfect leveling.
- Wipe the sign clean with a soft cloth to remove any fingerprints or dust from installation.
Ensure you use screws and anchors designed to hold the specific weight and size of your sign. Secure installation prevents the sign from loosening or falling over time, maintaining both safety and appearance. Signs installed too loosely can become crooked or fall, while over-tightening can damage the wall or mounting hardware.
Choosing the Right Wall and Surface for Your Sign
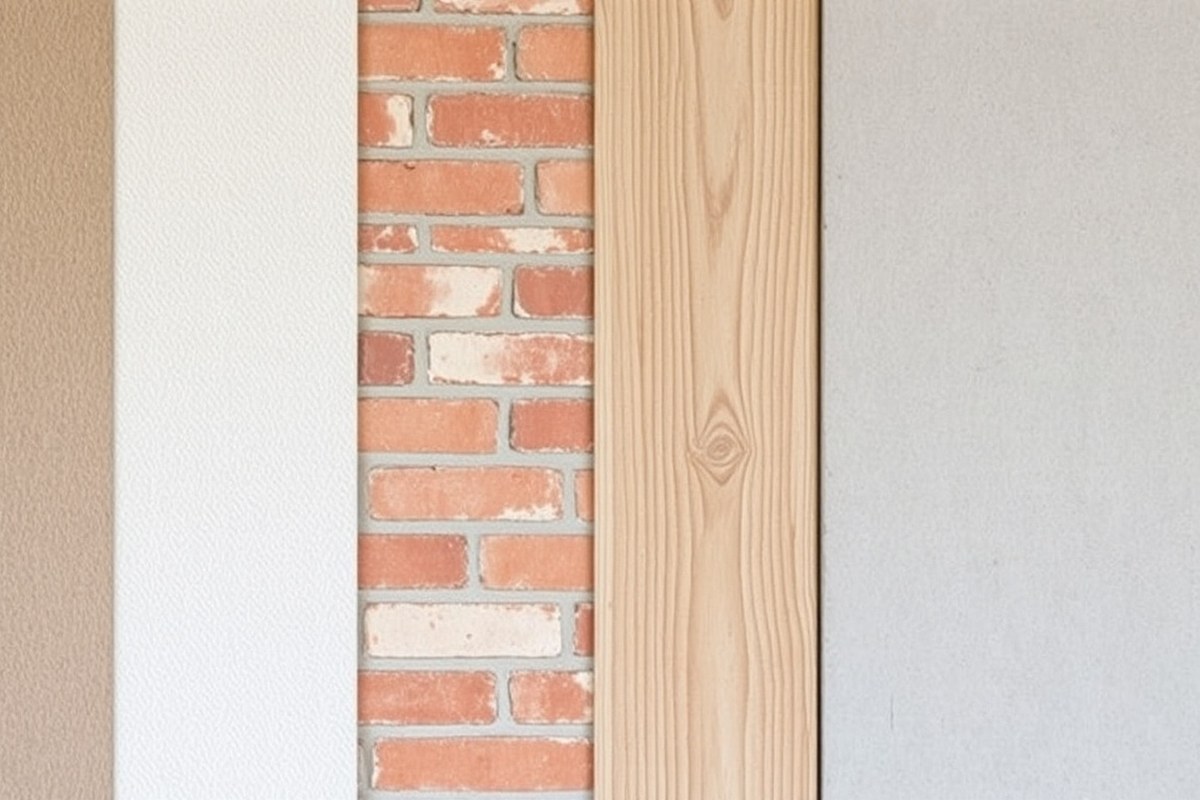
The type of wall where you plan to install your sign strongly affects how you should mount it, the tools you’ll need, and the safety measures to follow. Brick and concrete walls offer the most secure fixing points and are excellent choices for both indoor and outdoor signs. Wood walls also provide solid support but require different drill bits and fasteners than masonry. Plasterboard (drywall) is the least strong and should only hold lightweight signs under 5 kilograms unless additional support is provided.
Using incorrect fixings or tools can lead to damaged walls, a sign that is poorly aligned or unstable, or plugs that either stick out too much or are too loose. Preparing the surface is key: ensure the area is clean, dry, and free of loose paint or dust to help adhesives or screws hold properly. For plasterboard, find and use wall studs or employ anchors designed for drywall to prevent damage.
| Wall Type | Recommended Fixing Method | Tools Needed | Weight Limit & Notes |
|---|---|---|---|
| Brick / Concrete | Expansion plugs with masonry screws, standoffs for heavy or illuminated signs | Masonry drill bit, hammer drill, screwdriver | Supports any weight; ideal for exterior and heavy signs |
| Wood | Wood screws | Wood drill bit, screwdriver | Supports heavy signs; check for wall studs |
| Plasterboard (Drywall) | Lightweight adhesive for under 2kg; drywall anchors or toggle bolts with screws for 2, 5kg | Drywall drill bit, screwdriver, anchors or toggle bolts | Do not exceed 5kg without stud support or brackets |
| Smooth Paint or Tiles | Double-sided tape for very light signs under 1kg | Cleaning supplies | Not recommended for heavy or outdoor signs |
For signs heavier than 10 kilograms or illuminated types, brackets or structural supports are essential to distribute the weight evenly and prevent strain on individual fixing points. Aligning the sign carefully before drilling or applying adhesives helps avoid crooked installation and places stress evenly on the wall and fixing hardware.
Tip: Avoid using adhesive fixing on plasterboard for signs heavier than 2 kilograms, as it may fail and damage the wall surface.
Make sure drill bits and plugs match the wall type and the screws don’t protrude, allowing the sign to sit flush. Check that the surface you choose complements the sign’s material and design to maintain visual impact and safety. Proper surface prep, accurate fixing selection, and secure mounting methods keep your sign aligned and stable for years.
Fixing Methods for Different Weights and Sign Materials
Selecting the right fixing hardware depends primarily on the sign’s weight and material to secure it long-term without loosening or damage. Signs weighing up to 2kg can generally be mounted using adhesive tapes or standard wall plugs and screws. For signs between 2kg and 5kg, hollow wall anchors, also called cavity fixings, provide better support, especially in drywall or hollow walls. Stand-off fixings suit signs in the 2kg to 8kg range and add a modern style by holding the sign slightly away from the wall. Heavier signs over 5kg, such as many illuminated metal signs, require screws anchored into wall studs or the use of wall mollies to handle the load safely. Here’s a table summarizing appropriate fixing methods by sign weight, including the advantages and drawbacks of each option.
| Sign Weight | Recommended Fixing Hardware | Pros | Cons |
|---|---|---|---|
| Up to 2kg | Adhesive tapes, standard wall plugs and screws | Simple install, no drilling for tapes, low cost | Adhesive may fail outdoors or on uneven surfaces; plugs less secure on hollow walls |
| 2kg to 5kg | Hollow wall anchors (cavity fixings) | Better support in drywall, less chance of loosening | Requires drilling and proper wall condition |
| 2kg to 8kg | Stand-off fixings | Professional look, holds sign away from wall, sturdy | More expensive, installation takes longer |
| Over 5kg | Screws anchored in wall studs or wall mollies | Most dependable for heavy or illuminated signs | Must locate studs; installation requires power tools and care |
To install using screws and plugs, first mark the hole positions by holding the sign in place. Use a drill to create holes matching the size of plugs or anchors. For hollow wall anchors, insert the anchor fully before screwing in. When using stand-offs, mount the base pieces to the wall first, ensuring they align with holes on the sign. Then secure the sign to the bases using the provided fittings. Securing heavy signs involves locating studs with a stud finder. Drill directly into the stud or use wall mollies that expand behind the drywall for extra support. Always confirm the wall material can handle the combined weight of sign and hardware. Outdoor adhesive tapes must be weatherproof but still may not suit signs over 2kg or rough surfaces.
Signs removed seasonally should have their hardware stored carefully in labeled bags, preferably wrapped softly to protect finishes. Good results show no tilting or loosening after installation and maintain the intended appearance, whether flush or standoff. Poorly chosen fixings risk causing damage to the wall or sign, leading to costly repairs or unsafe conditions.
ADA-Compliant Placement and Height Guidelines
ADA rules require mounting signs so the bottom edge sits between 48 and 60 inches above the floor. For signs near doors, place them on the latch side within 12 inches of the door frame to ensure they are visible and easy to reach. Projecting signs must have at least 84 inches of clearance from the floor to avoid head bumps.
Standard Mounting Height for Wall Signs
ADA recommends mounting signs with tactile characters and Braille 48 to 60 inches above the floor, from the baseline of the lowest tactile character to the finished floor. This range ensures that people in wheelchairs and standing users can read the signs comfortably. Staying within this height band helps maintain clear lines of sight in hallways and near doorways.
For your installation, measure from the floor upward to mark 48 inches and 60 inches on the wall. Place the bottom edge of the sign anywhere between those marks. Use a level to keep the sign straight, which is important for readability and appearance. Mounting outside this range may cause noncompliance and result in obstructed viewing.
Positioning Signs Near Doors
Place signs on the latch side of doors, centered horizontally next to the handle or latch mechanism. The sign should be within 12 inches of the door frame to ensure it is the first thing people see when approaching. This location makes the sign easier to locate and read, particularly for individuals with limited mobility or visual impairments.
Limited or no wall space next to the door allows for mounting the sign on the closest adjacent wall instead. Always confirm there are no obstacles in front of the sign and that it is clearly visible from all approaches.
Clearance Requirements for Projecting Signs
Projecting signs, which extend outward from the wall perpendicular to the surface, must maintain at least 84 inches of bottom clearance from the floor. This prevents accidental head injuries by allowing enough overhead space. Signs mounted lower than 84 inches should protrude no more than 4 inches from the wall.
Overhead signs should also comply with this 84-inch clearance. This standard applies primarily in corridors, lobbies, and other public spaces where people walk beneath the signs. Verify this clearance by measuring from the finished floor to the bottom edge of the sign before permanently mounting it.
ADA Signage Compliance Checklist
Use this checklist to confirm your sign placement meets ADA requirements:
- Mount tactile signs 48 to 60 inches above finished floor (measured to the bottom of characters)
- Install signs on the latch side of doors within 12 inches of the frame
- Ensure clear, unobstructed view of the sign from all approach directions
- Maintain at least 84 inches vertical clearance under projecting signs
- Keep signs level and securely fastened to prevent shifting or tilting
- Confirm that signs do not protrude more than 4 inches if mounted below 84-inch clearance
- Use appropriate mounting hardware compatible with wall surface and sign weight
Adhering to these basic rules reduces the risk of noncompliance penalties and improves usability for all visitors.
Installing Illuminated and Heavy Wall Signs Safely
Installing heavy or illuminated signs requires secure support systems and careful electrical work to ensure safety and durability. Proper hardware, mounting into structural supports, and following wiring safety steps minimize risks of damage or injury.
Supporting Heavy Signs with Structural Anchors
Signs weighing more than 10 kilograms should never rely solely on drywall or surface fasteners. Locate studs behind drywall using a stud finder to anchor heavy signs securely. For very heavy signs, fasten metal brackets to wall studs spaced to match the sign width for even load distribution. Use lag bolts or heavy-duty screws rated for structural loads rather than standard drywall anchors.
Concrete or masonry walls require expansion anchors or sleeve anchors sized for the sign weight. The correct hardware and support prevent sagging and falling. Accurately measuring the sign width helps position two solid posts or brackets to align perfectly with the mounting points.
Electrical Safety for Illuminated Signs
Ensure electrical connections meet local codes and regulations. Power off the circuit before installing or servicing signs. Use UL-listed wiring components and rated connectors designed for outdoor or commercial use. Weatherproof junction boxes and conduit protect wiring from moisture and physical damage.
Check voltage and amperage requirements of the sign’s lighting elements. Match cables and breakers to these specifications to prevent overheating or electrical faults. Ground the sign’s metal frame to reduce shock risks. After installation, test the circuit for shorts or loose connections before restoring power.
Step-by-Step Installation for Heavy and Illuminated Signs
Begin by marking mounting locations on the wall, ensuring alignment and level placement using a level and tape measure. Use a stud finder or drill test holes to confirm support positions inside the wall. Attach brackets or posts securely using appropriate anchors or bolts into studs or masonry.
Next, if the sign is illuminated, run electrical wiring through conduit to the junction box. Connect wires using waterproof connectors, matching wire colors to circuit standards. Carefully secure wiring to prevent strain or pinching when mounting the sign. Finally, hang the sign on brackets and tighten all fasteners.
Recommended Hardware for Heavy Loads
Choose lag screws or expansion bolts of at least 3/8 inch diameter for signs weighting 20 kilograms or more. Metal corner brackets with multiple screw holes provide extra stability for wide, heavy signs. For illuminated signs, use stainless steel screws and corrosion-resistant anchors suitable for outdoor conditions.
Picture hangers rated for over 10 kilograms may suffice for lighter signs but check their weight limitations carefully. Custom-fabricated steel frame supports offer the best long-term durability for oversized or very heavy illuminated units.
Common Risks and How to Avoid Them
Mounting a heavy or illuminated sign without anchoring into a structural support may cause the sign to fall, risking injury and damage. Improper wiring installation can cause short circuits, electrical fires, or shocks. Avoid attaching heavy signs only with drywall anchors unless specifically rated for heavy loads.
Verify that brackets and anchors are rated above the actual sign weight to account for additional forces like wind or vibration. Avoid over-tightening screws on fragile sign materials to prevent cracking. Inspect all wiring connections periodically for wear or corrosion.
Always switch off power at the breaker before starting any electrical wiring work to prevent shocks or electrical fires.
Damage-Free Mounting Options Without Drilling
You can install a sign without drilling holes by using damage-free mounting options like adhesives, tapes, magnetic mounts, and removable hooks. These methods help protect delicate surfaces such as painted drywall, glass, or tile from damage while still holding your sign securely.
Heavy-duty double-sided tape is one of the most popular choices for hanging acrylic or lightweight signs without drilling. Look for tapes specifically designed for mounting, which can hold weights from 1 to 5 pounds per inch of tape length. Before applying tape, clean the wall surface thoroughly with rubbing alcohol to remove dust, dirt, and oils, this ensures better adhesion. Press the tape firmly along the edges or back of the sign, then press the sign against the wall for at least 30 seconds to set it.
Magnetic mounts work well if you have metal surfaces or a sign with a metal backing. Strong magnets or magnetic sign frames allow you to quickly swap signs, making them ideal for seasonal promotions or frequently updated information. However, magnetic mounts require compatible surfaces and generally aren’t suitable for heavy or large signs.
Removable adhesive hooks or strips such as those from brands like Command™ provide an easy way to hang smaller signs on surfaces that cannot be drilled. These hooks come with removable strips that peel off cleanly without leaving residue or damaging paint. They can support weights ranging from a few ounces up to 5 pounds, depending on the product.
- Clean the mounting surface with isopropyl alcohol before applying adhesive products
- Choose tapes or hooks rated for the sign’s weight for reliable hold
- Press firmly and hold for at least 30 seconds to set adhesives
- Use magnetic mounts on ferrous metal surfaces for easy sign swaps
- Remove adhesive hooks slowly at a 180-degree angle to avoid wall damage
- Store spare adhesives in a cool, dry place to maintain stickiness
- Test mounting method on an inconspicuous wall area before full installation
These no-drill mounting methods offer the benefit of fast installation and damage-free removal, but they have limits. Adhesives can fail on rough, uneven, or very porous surfaces or when exposed to high humidity or heat. Signs that weigh more than 5, 10 pounds usually need mechanical support like screws or anchors for safety. Always check product weight ratings and instructions carefully. For heavy, outdoor, or permanent signage, drilling is often the more reliable choice.
Common Installation Mistakes and How to Fix Them
Signs often end up crooked because the mounting points are not level or the installer didn’t check alignment carefully before securing the sign. Use a spirit level or laser level to mark perfectly horizontal lines on the wall before drilling. Double-check measurements between mounting holes to confirm symmetry. Marking these with a pencil lets you adjust before any holes are made.
Using the wrong anchors can cause signs to become loose, fall, or damage the wall. For example, lightweight plastic anchors won’t hold signs weighing more than 5 pounds securely, especially on drywall. Heavy signs require anchors that expand firmly behind the surface or screws going directly into timber studs. Without the right anchor, the sign won’t stay stable. Verify your wall type and sign weight, then match appropriate anchors designed for those conditions.
Poor wall prep such as dust, grease, or uneven texture prevents anchors from gripping properly. Clean the wall by wiping with mild detergent, and let it dry thoroughly before beginning mount preparation. For textured or drywall surfaces, smooth the area if needed to create flat contact points. Always apply firm, even pressure when setting anchors or screws to ensure they expand or embed fully and securely.
- Use a level to mark drill points and verify horizontal alignment
- Match anchor type and size to the sign’s weight and wall material
- Clean and dry the mounting surface before installation
- Ensure hollow wall anchors expand completely before tightening
- Locate and fasten into timber studs for signs over 5 kg (11 pounds)
- Apply firm pressure and avoid overtightening screws to prevent damage
To fix a sign that’s loose or falling, first remove it carefully and inspect the mounting holes and anchors. Replace oversized or damaged anchors and consider using larger or stronger types if the current ones are inadequate. For hollow walls, switch to toggle or molly bolts that offer better hold by expanding behind the drywall. If the sign is heavy, locate timber studs using a stud finder and reinstall using wood screws directly into the studs for increased stability.
Signs that remain secure with no wobble after installation show that anchors are properly seated and the mounting surface was prepared adequately. For outdoor signs, check periodically for loosening caused by temperature changes or vibrations. Promptly tighten any screws showing movement to prevent damage or falling hazards.
When and Why to Hire a Professional Installer
Signs larger than 3 feet in any dimension or heavier than 50 pounds generally require professional installation. Handling such signs safely demands specialized tools and techniques to avoid wall damage, personal injury, or improper mounting that reduces the sign’s stability. Professionals have experience with various wall types and know how to select proper fasteners and anchors, ensuring the sign stays secure over time.
Permits or local building codes often necessitate professional installation for commercial signage, especially if the sign is illuminated, mounted on a load-bearing wall, or requires electrical connections. These regulations exist to ensure safety, compliance with fire codes, and accessibility. For example, sign placement must meet local zoning laws and often requires inspections, which a professional installer understands and can navigate. Certain signs must comply with ADA guidelines for visibility and reach, and installers certified in compliance can guarantee your installation meets these standards.
Hiring a professional offers benefits beyond safety. They can manage complex installations where signs are mounted on uneven or fragile surfaces, or where heavy or illuminated signs present electrical or structural challenges. Professionals also source the right materials, such as corrosion-resistant anchors for outdoor signs, and handle any additional permitting or documentation. This reduces the risk of damage to your walls or sign and prevents costly rework or fines from failed inspections.
Cost varies depending on size, complexity, and location but expect professional installation fees between $150 and $500 for standard installations. Larger or more complex jobs may cost more. Professional installers bring liability insurance, giving you protection if accidents occur during installation. This coverage is often required by property owners or municipalities.
To decide whether to call a pro, assess size, weight, wall type, and regulatory requirements. If your sign exceeds 3 feet or 50 pounds, involves wiring, or requires compliance with local codes, professional help is recommended. Example scenarios include installing a 6-foot illuminated metal sign on a brick facade subject to zoning ordinances, or mounting a heavy wooden sign on a concrete wall needing anchors drilled at specific depths and locations. In these cases, professional installers will handle permits, provide warranties, and deliver a secure, code-compliant installation.
Always check your local building and electrical codes before installing large or illuminated signs; failing to comply can result in fines or having to remove the sign.
Step-by-Step Action Plan for Installing Your Wall Sign
Follow these clear steps to mount your sign securely and correctly the first time. Use this checklist to confirm each step is done right before moving on.
- Before you start: Choose the appropriate wall and mounting method based on your wall type and sign weight. Confirm compatibility by checking the mounting surface’s condition and weight limits.
- Day 1: Prepare your tools and materials, including anchors, level, drill, and safety gear. Verify tool readiness by testing the drill and measuring tools for accuracy.
- Day 2: Mark the sign placement carefully using a level and measuring tape. Check your markings by holding the sign in place to ensure alignment and height match ADA guidelines if required.
- Day 3: Install anchors or mounting hardware appropriate for your wall type. Confirm stability by gently pulling on the anchor or hardware before attaching the sign.
- Day 4: Attach the sign securely using screws or mounting brackets. Make sure the sign is flush against the wall and firmly fixed with no wobble.
- Day 5: For illuminated or heavy signs, double-check electrical connections and support brackets. Test illumination safely by powering the sign and inspecting for loose parts or electrical hazards.
- After 1 week: Inspect the mounting again for any shift or looseness. Tighten any fasteners if needed and verify the sign remains straight and secure.
Frequently Asked Questions
How Do I Ensure My Sign Is Perfectly Level When Mounting It?
Use a level during installation to ensure your sign hangs straight, which affects both its appearance and stability. Checking the level before securing the sign prevents crooked placement and reduces adjustment later.
Can I Install a Metal Sign Without Drilling into the Wall?
Yes, you can use strong adhesive or damage-free hooks, but these methods suit lighter signs. For heavier metal signs, mechanical fasteners like screws or anchors offer better long-term security.
What Should I Do If My Wall Surface Is Uneven or Textured?
Installing on uneven walls requires longer or adjustable fasteners to ensure a flush mount. You might also consider mounting a flat backboard first, which can make sign installation easier and more stable.
Can I Reuse Screws and Anchors from a Previous Sign Installation?
Reusing screws is possible but not recommended if they show signs of wear or rust. Anchors generally lose holding power once removed; fresh anchors improve stability and reduce risk of the sign falling.
How Do I Protect My Sign from Weather Damage When Mounting Outdoors?
Use weather-resistant materials and sealants when mounting outdoors to protect against rain and UV damage. Position your sign under some cover or shield it with a clear protective layer for added durability.
Is a Stud Finder Necessary for All Wall Sign Installations?
A stud finder is valuable when mounting heavy or particularly large signs to ensure secure anchoring. Lighter signs or those using adhesive options may not require locating studs.
Before You Go
Installing a wall sign safely and effectively requires careful planning, choosing the right mounting method, and verifying your work step by step. Taking time to prepare and check each stage gives you a stable, professional result that lasts. Start your project today by confirming your wall type and gathering the correct tools for your specific sign installation.