Nursery Sign Ideas: Complete Guide to Styles, Sizes, Safety & DIY
Nursery sign ideas can instantly personalize your baby’s room while adding a decorative touch that complements your style. Choosing the right style, size, material, and placement ensures the sign looks balanced and safe. Start by selecting a design that suits your nursery theme and fits the wall space, especially above the crib or dresser.
Key Takeaways
- Order cutout nursery signs at least 36 inches wide for a balanced statement piece above furniture.
- Keep sign letters under 10 inches tall in an 8-foot ceiling room to avoid a heavy look.
- Position the bottom edge of the sign at least 6 to 8 inches above the crib rail or dresser top for proper anchoring.
- A sign should span 50 to 75 percent of the width of the furniture below it for visual harmony.
- Natural wood, neon, and printable framed signs cover a broad range of styles and budgets.
- DIY nursery sign projects often take under 2 hours, making for quick, personalized decor.
Popular Nursery Sign Styles and Themes
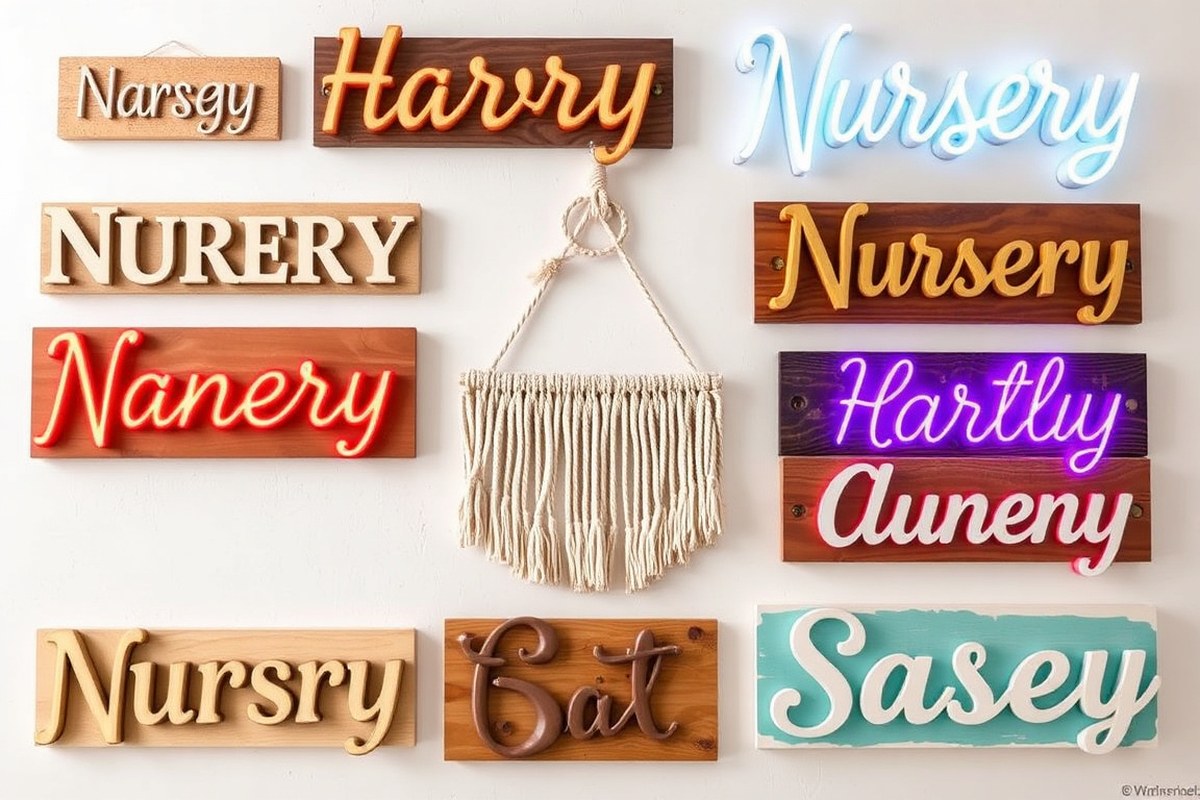
Choosing a nursery sign that matches your room’s theme helps tie the space together while adding a personal touch. Popular styles range from the warm and natural to sleek and modern, each bringing a different vibe to your baby’s room. Understanding some common styles can guide you toward a sign that feels right.
Rustic nursery signs often feature natural wood, sometimes engraved or with a distressed finish. These fit well with nature-inspired, woodland, or farmhouse themes. Their textured look pairs nicely with soft lighting or greenery nearby. Boho signs lean on materials like cotton rope or macramé, adding softness and a handmade feel. They often use earth tones and work well layered with other decor, such as woven wall hangings or potted plants. This style suits eclectic or relaxed nurseries aiming for a cozy atmosphere.
Minimalist signs use simple fonts, geometric or sans-serif, and materials like acrylic or metal in neutral colors. Their clean lines improve modern or Scandinavian-inspired nurseries. Complement these signs with uncluttered walls and monochromatic palettes. Whimsical signs shaped like animals or featuring playful colors add energy to vibrant or themed rooms. These signs may be wood or acrylic, thriving in spaces that celebrate fun and imagination.
- Engraved Wooden Signs: use sustainable wood with soft lighting for warm, rustic charm.
- Boho Macramé Signs: made from cotton rope, best stacked with woven decor for a textured look.
- Minimalist Acrylic Signs: choose clear or matte acrylic with geometric fonts for a modern look.
- Whimsical Animal Shapes: crafted from wood or acrylic, use bright colors for playful themes.
- Colorful Mix-Font Signs: combine fonts and sizes on durable materials for vibrant nursery art.
- Nature-Inspired Painted Signs: use earthy tones on wood or canvas to complement natural themes.
- Felt Letter Boards: place on dressers or shelves for a functional, changeable name display.
Matching the material and style to your nursery’s theme is key. For rustic or nature-themed nurseries, wood signs with earthy colors and simple designs create a grounded atmosphere. The boho style benefits from handcrafted textures and neutral palettes, adding warmth without overwhelming the space. Modern nurseries look best with minimalistic signs in acrylic or metal that emphasize clean lines and subtle colors. If you want a lively or storybook feel, whimsical and colorful signs with engaging shapes bring personality and charm.
Prices vary widely, depending on materials and customization. A standard 18” to 24” wooden sign can range from $30 to over $100, especially when personalized with names or special fonts. Macramé signs and felt boards may cost less but require time and skill if you make them yourself. Good results mean the sign stands out as a focal point without clashing with other decor. Avoid signs that use overly busy fonts or colors that overwhelm the theme, as they can distract rather than complement.
Choosing the Best Material for Your Nursery Sign
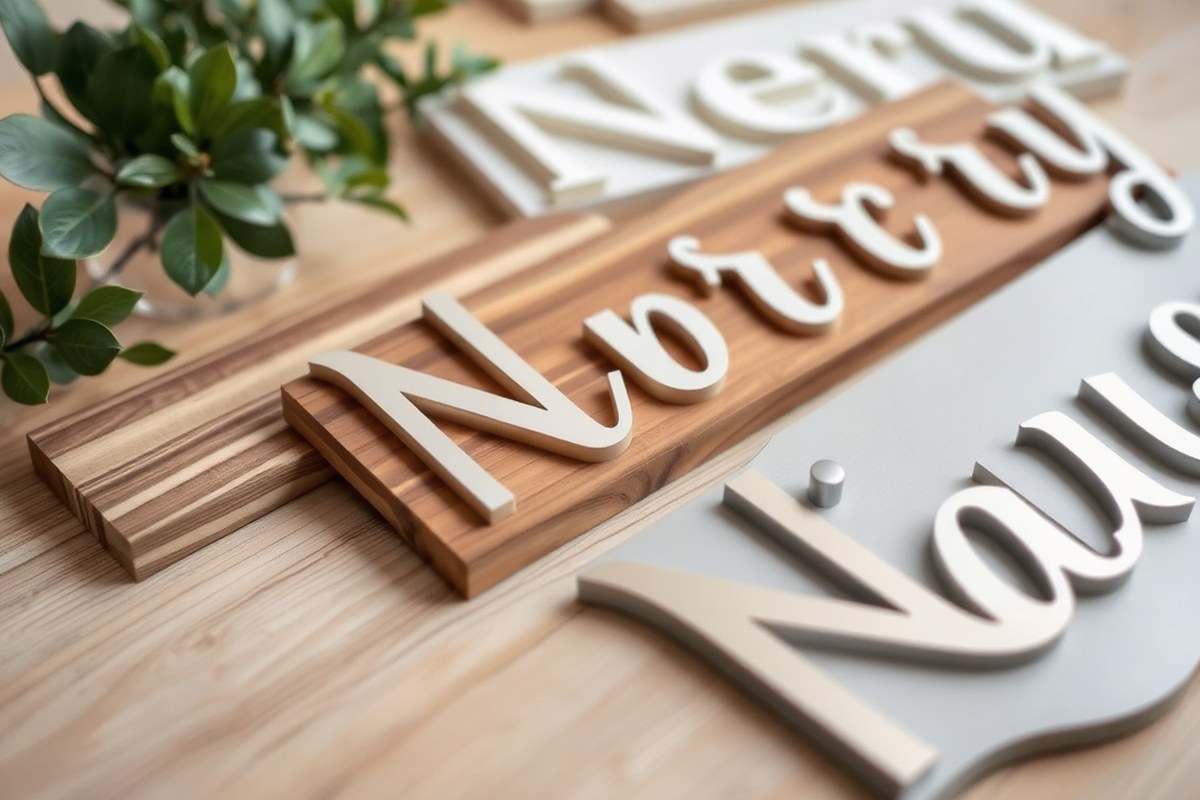
Choosing the right material for a nursery sign affects safety, style, cost, and how long the sign lasts. Solid wood and matte acrylic tend to age well and provide a classic look that suits long-term nursery decor. These materials often cost between $30 and $150 depending on size and craftsmanship. Wood, especially hardwood, offers durability and a natural finish but may need occasional dusting and protection against moisture. Acrylic signs require minimal upkeep and resist scratches, yet lower-cost options might look less premium.
PVC and aluminum signs stand out for durability and are easy to clean, lasting many years with minimal maintenance. These materials are heavier, so secure mounting using wall studs or rated anchors is critical for safety, especially when hanging above cribs. Chalkboard signs provide a practical and interactive option, allowing you to update the name or add messages frequently. However, they tend to be less decorative and need regular cleaning to avoid dust build-up.
| Material | Safety | Cost Range | Style and Finish | Maintenance Needed |
|---|---|---|---|---|
| Solid Wood (Hardwood) | High (natural, non-toxic finishes preferred) | $50, $150 | Classic, warm; can be painted or stained | Dust regularly; avoid moisture exposure |
| Matte Acrylic | High (smooth edges, lightweight) | $30, $100 | Sleek, modern; often available in bright or neutral colors | Wipe with damp cloth; resist scratches |
| Aluminum | Medium (requires secure mounting) | $60, $150 | Durable, can have painted or sandblasted finish | Minimal; wipe clean |
| PVC | Medium (lightweight but can be brittle) | $40, $100 | Matte finish, can imitate wood | Wipe clean; avoid sharp impacts |
| Chalkboard | High (non-toxic chalk; frame safety varies) | $30, $80 | Functional, versatile; rustic to modern | Clean chalk dust often |
Prices often vary by seller type. Marketplace sellers generally offer lower entry prices but vary in quality and consistency. Independent artisans may charge more but usually guarantee proofing and previews before manufacturing, which can prevent costly errors and ensure color and font match your nursery theme. Choosing materials and finishes that fit your nursery style without following short-lived trends will keep the sign looking intentional and fresh for years.
Make sure to mount heavier materials like wood or aluminum using studs or rated anchors, especially above the crib, to avoid any risk of falling objects.
How to Size and Place a Nursery Sign Perfectly
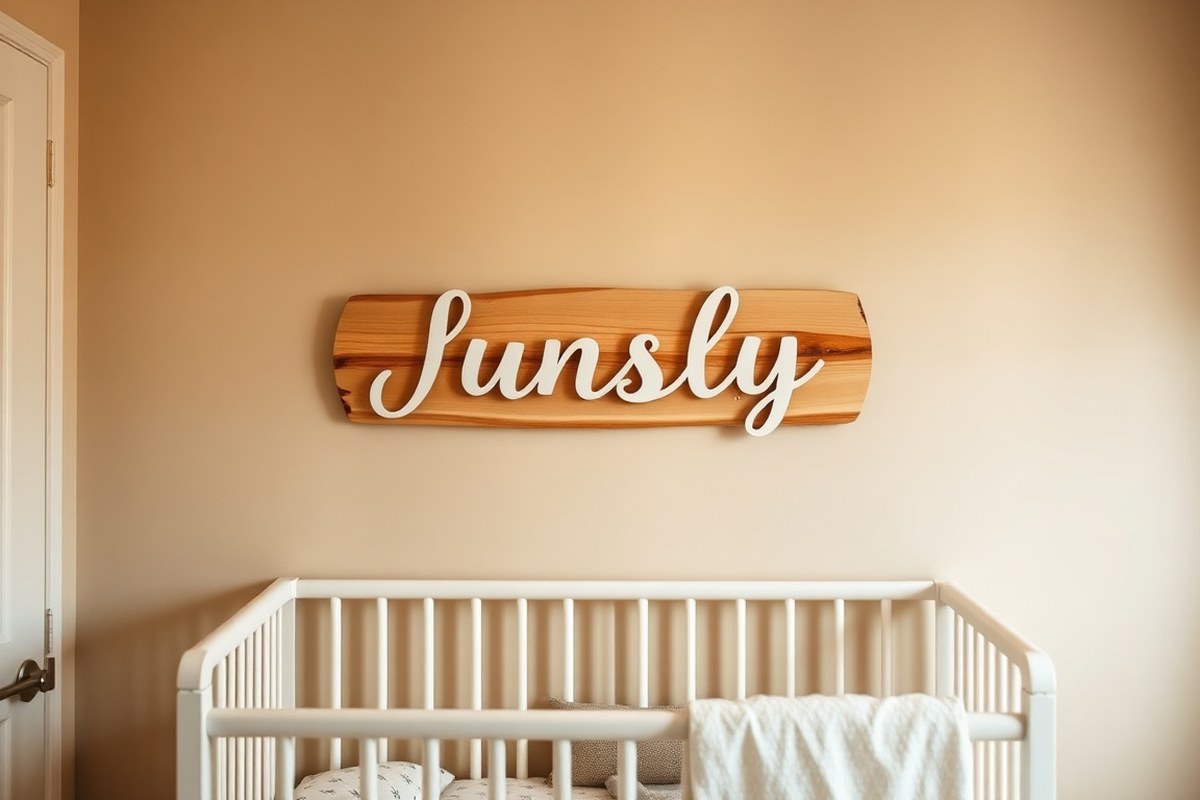
Choose a nursery sign size that fits well with your furniture and leaves enough space for safe and attractive placement. Typically, the sign should be 50 to 75 percent of the width of the piece below it, centered above the crib or dresser. Leave about 6 to 8 inches of vertical clearance above furniture and position the sign high enough to avoid contact or reach from your baby.
Width Guidelines Relative to Furniture
Base the size of the nursery sign on the width of the crib, dresser, or nearby furniture. Choosing a sign that covers about 50 to 75 percent of the furniture’s width helps maintain a balanced look without dominating the space. For instance, a crib 52 inches wide pairs best with a sign between 26 and 39 inches. This range ensures the sign remains easy to read and well matched to the piece below it.
Signs that are too narrow can feel lost on a large wall, while those that are too wide can crowd the furniture and look out of place. Center the sign horizontally over the furniture. A 24-inch wide sign suits a dresser that measures 36 inches across, keeping the attention centered on the dresser’s wall space.
Height and Clearance Recommendations Above Crib
Keep the bottom edge of the nursery sign at least 6 to 8 inches above the top rail of the crib or dresser. This spacing creates a sense of being anchored to the furniture while avoiding a cluttered look. A minimum of 12 inches above the crib rail is recommended for safety to prevent a child from grabbing the sign or pulling it down.
For example, if the crib rail height is 36 inches from the floor, position the sign so its bottom edge is at least 42 inches high, but keep it no higher than eye level when you’re sitting or standing by the crib. This placement ensures your sign remains a cozy, glowing feature, especially for neon or lighted signs. Planning your sign placement before painting or finishing the nursery walls helps you nail the perfect height.
Balancing Sign Size with Room Scale
Consider the overall room size and wall space beyond furniture dimensions. A large nursery often benefits from a sign that’s closer to 75 percent of the furniture width or slightly larger to fill the space well. For smaller rooms, stick with the lower end of the range to avoid overwhelming the wall.
Keep at least 6 to 12 inches of space on each side of the sign from nearby wall edges or other decorations. This breathing room prevents the sign from feeling cramped and helps maintain a clean, styled look. When the nursery walls include extra decorations or shelves near the sign, change its size or position to keep the overall look balanced. Checklist for sizing and spacing nursery signs:
- Sign width should be 50 to 75 percent of the furniture width below it
- Center the sign horizontally over the crib, dresser, or shelf
- Leave 6 to 8 inches of vertical clearance above the furniture surface
- Ensure at least 12 inches of clearance above crib rails for safety
- Maintain 6 to 12 inches of horizontal space from wall edges or nearby items
- Consider room size when choosing toward the upper or lower width range
- Plan placement before finalizing wall finishes for best results
Styling Your Nursery Sign: Fonts, Colors, and Decorative Details
Selecting fonts, colors, and decorative elements on your nursery sign should reflect the room’s overall style and mood. The choices you make influence how well the sign fits the space, improving the nursery’s theme while maintaining clear readability. Thoughtful design here makes the sign a comforting feature rather than a distraction.
Choosing Readable and Stylish Fonts
Fonts on nursery signs need to balance readability with personality. Select simple sans-serif or rounded serif fonts for modern and minimalist nurseries to keep the name clear and accessible. For playful or whimsical themes, choose fonts with soft curves or childlike shapes that match the joyful atmosphere. Avoid overly intricate fonts that could be hard to read from a distance or for little eyes getting familiar with letters.
Fonts also set the tone: retro or distressed fonts fit vintage and farmhouse styles, adding warmth and nostalgia. Script fonts with flowing lines work well with floral or boho-themed nurseries but should be used sparingly and kept large enough to read easily. A good rule is to pick one font style and stick with consistent letter spacing to avoid clutter.
Matching Color Palettes to Nursery Design
Colors should harmonize with your nursery’s existing decor to create a cohesive look. Soft pastels like blush pink, light blue, mint, and lavender often create a soothing environment suitable for calm nurseries. For lively or gender-neutral spaces, vibrant colors such as sunny yellow, teal, or coral can add a cheerful tone. Choose either complementary or analogous colors to maintain visual balance. Following a color harmony checklist helps keep choices intentional:
- Pick two to three primary colors from the room’s palette
- Use one neutral color to balance brightness (white, beige, or gray)
- Match the sign’s color intensity to the nursery’s lighting (brighter colors in naturally lit rooms)
- Avoid clashing colors that compete with other wall elements
- Consider your child’s personality when selecting bold or soft hues
This approach avoids overwhelming the eye and helps the nursery sign complement furniture, bedding, and wall art.
Incorporating Details: Florals, Lights & Textures
Adding decorative touches like florals, macramé, and LED lighting can make nursery signs more engaging and match specific themes. For a tranquil and natural vibe, macramé signs with woven textures bring softness and connect well with boho or nature-inspired rooms. Pair these with natural wood accents or greenery to amplify the peaceful feel.
LED lights can improve a sign’s visibility and add warmth during nighttime. Use soft, warm LEDs instead of harsh bright lights to keep the nursery cozy. Position lights behind or around the sign for a gentle glow without distractions.
Floral decorations, real or painted, complement classic and feminine nursery styles. Choose flowers that match the room’s color palette to tie everything together. For tactile engagement, incorporating different textures like soft fabric flowers or raised wood carvings can make the sign feel personalized and inviting.
DIY Nursery Sign Projects You Can Make at Home
You can create charming nursery signs at home using simple materials and basic tools, making the process both safe and affordable. Taking your time and following clear steps helps ensure good results without experience. Typical projects take one to three hours from start to finish.
Basic Painted Wooden Name Sign
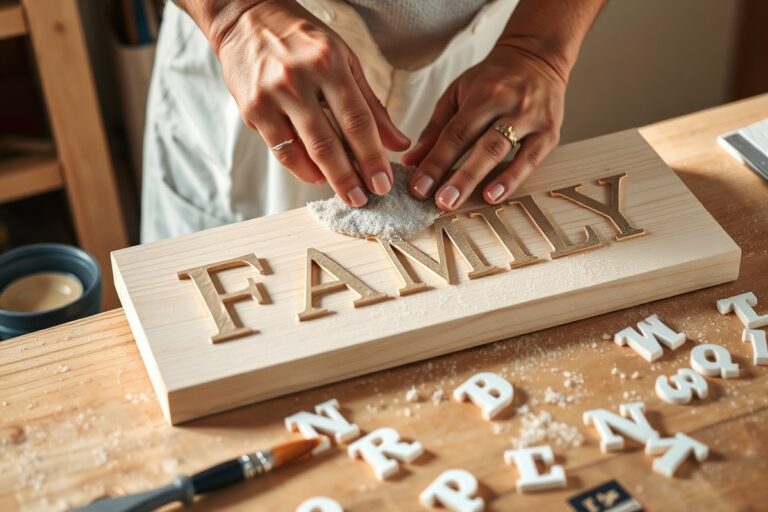
This project uses pre-cut wooden letters and a wooden base, which you can find at craft stores for $10 to $20 total. It’s a straightforward way to personalize your nursery with your child’s name using paint and simple finishing touches.
- Gather materials: pre-cut wooden letters for the name, a wooden plaque or board (about 12 by 6 inches), acrylic paint, paintbrushes, sandpaper, wood glue, and a clear matte sealant spray.
- Sand all wooden pieces lightly to smooth any rough edges and help paint adhere better.
- Paint the wooden plaque in a base color that matches your nursery décor and let it dry for 30 to 60 minutes.
- Paint each letter in a contrasting color. Use two thin coats, allowing 20 minutes drying time between coats.
- Attach the letters to the wooden plaque using wood glue. Press firmly and let dry for at least one hour.
- Spray the entire sign with a clear matte sealant to protect the paint and finish. Let it dry completely according to product instructions (about one hour).
- Add hanging hardware on the back if you plan to mount it on the wall.
Make sure to glue the letters on a flat, clean surface, and allow full drying time to avoid peeling or shifting letters later on.
Easy Fabric or Canvas Lettering
Using fabric or canvas offers a soft-textured alternative to wood. This project requires fewer tools and can be quicker, taking about one to two hours. It’s perfect if you want a sign with a handmade look and may require just glue and scissors instead of paint.
- Collect your materials: canvas or sturdy fabric cut to your preferred size (e.g., 12 by 8 inches), fabric letters or letter stencils, fabric glue or hot glue gun, scissors, and optional fabric paint.
- Plan the layout by arranging letters on the canvas before attaching.
- Use fabric glue or a hot glue gun to stick letters firmly to the canvas, ensuring even spacing.
- If you want extra color accents, paint around the letters with fabric paint and wait 30 minutes for drying.
- Trim any uneven edges on the fabric or canvas.
- Attach a ribbon or small hooks to the back for hanging.
Fabric glue works best on cotton and canvas but check if your fabric needs pre-washing to prevent shrinking or color bleeding.
Simple Macramé Name Wall Hanging
Macramé adds texture and rhythm to nursery decor. Creating a name sign using basic knotting techniques takes around two to three hours and involves minimal tools but more focus on technique. Use cotton cord and wooden beads for a natural look consistent with many woodland or boho nursery themes.
- Gather materials: 3-5 mm cotton macramé cord (about 20 feet), wooden or painted letter beads spelling your child’s name, a wooden dowel (12 to 18 inches), scissors, and tape.
- Cut cords to desired length, about 30 inches each, and attach them folded over the dowel using a lark’s head knot.
- String letter beads onto cords where you want the name to appear, securing them with small knots before and after each bead.
- Create simple square knots or spiral knots below the beads to add decorative patterns.
- Trim the bottom edges evenly and optionally brush out the cord ends for a soft fringe.
- Make a hanging loop at each end of the dowel or attach a longer cord for wall mounting.
Practice basic macramé knots on scrap cord before starting your project to ensure neatness and avoid frustration.
Safety Tips for Hanging Nursery Signs Above Cribs
Hanging nursery signs above cribs requires careful attention to safety to prevent any risk of falling objects or injuries. Signs should be securely mounted with the right hardware and placed at a safe height that balances decoration with your baby’s safety and curiosity. Avoiding common mistakes like hanging signs too high or using inadequate wall anchors helps create a safer environment for your baby while making the sign accessible for them to explore as they grow.
For starters, hang your nursery sign about 12 to 18 inches above the crib’s top rail. This distance ensures the sign is out of the baby’s direct reach to avoid pulling it down but close enough to be a charming part of the nursery decor. Signs deliberately hung too high lose their impact and often disrupt the room’s balance, while signs too low may pose a hazard as your baby grows and begins to stand.
Choosing the right hardware will keep your sign firmly in place. Wall anchors designed for the weight and type of your sign are essential. For wood signs, heavy-duty picture hanging hooks with anchors go a long way in preventing falls. If the wall is drywall without studs, use toggle bolts or plastic anchors rated for two to three times the sign’s weight. Avoid using nails alone, as they usually don’t provide sufficient support.
Many parents make the error of neglecting to secure the sign properly or relying solely on adhesive strips. These methods may look clean but rarely hold long term, especially as babies start moving. Also, avoid mounting signs with cords or wires that can become loose or create strangulation hazards. For signs that hang by a wire, make sure the wire is tightly secured and checked regularly. Follow this checklist to safely hang your nursery sign above the crib:
- Measure the height: Mark a spot on the wall 12 to 18 inches above the crib’s top edge to ensure the sign is visible yet out of reach.
- Check the wall type: Identify if your wall is drywall, plaster, or studs to determine the right mounting hardware.
- Choose suitable anchors: Use heavy-duty picture hooks with anchors or toggle bolts for drywall; screws are better for studs.
- Drill pilot holes: Make small pilot holes to avoid cracking the wall and to ensure anchors fit securely.
- Attach hardware: Fix the hooks or mounts firmly, making sure they are rated for at least twice the weight of the sign for safety.
- Hang the sign: Use solid mounting points on the sign itself, avoid thin strings, and ensure the sign sits flush against the wall.
- Test the fit: Gently tug the sign after hanging to confirm it is secure and won’t loosen with vibrations or movement.
- Inspect regularly: Every few months, check for loosening hardware or damage and retighten or replace as needed.
Installing your nursery sign this way costs little beyond standard mounting kits, usually under $10, but offers peace of mind knowing your baby’s sleep and play area is safe. Proper installation supports the long life of your sign and protects your little one from avoidable accidents.
Budget and Customization Options for Nursery Signs
Nursery signs vary widely in price depending on the material, size, and level of customization. Simple wooden or acrylic name signs typically start around $30, while more elaborate designs with added birth details or metallic finishes can exceed $100. Pricing usually reflects the craftsmanship and whether the sign is handmade or mass-produced.
Customization options for nursery signs include adding the baby’s name, birth date, weight, length, and sometimes even a special motif like animals, stars, or floral elements. Many retailers offer online tools where you submit your details, choose colors and fonts, and review a digital proof before production starts. Custom signs provide a unique touch that fits your nursery’s theme and creates a keepsake that lasts beyond infancy.
Timing your order is important. Standard production and shipping take around 4 to 5 weeks. Some makers offer a 2-week rush option, usually for an extra fee. Ordering early helps ensure your sign arrives before the nursery setup is complete or the baby comes home.
| Sign Type | Price Range | Customization Features | Typical Turnaround Time |
|---|---|---|---|
| Basic Wooden or Acrylic Name Sign | $30 – $50 | Name, font style, color | 4-5 weeks standard; 2 weeks rush available |
| Personalized Birth Stats Sign | $60 – $90 | Name, birth date, weight, length, custom fonts, color options | 4-5 weeks standard; 2 weeks rush available |
| Metallic or Gold Finish Signs | $80 – $120+ | All above plus metallic paint or foil, special motifs | 4-5 weeks standard; 2 weeks rush available |
| DIY Vinyl Wall Decal | $10 – $25 | Name, color, size (via cut vinyl sheets) | Immediate (after purchase) |
Choosing a sign that fits your budget starts with deciding how much detail you want. Simple signs cost less and arrive faster but offer limited personalized options. More customized signs cost more and need extra lead time for proofing and production. A DIY vinyl decal on a cutting machine can save money and allow quick personalization but requires some hands-on work to apply properly.
Make sure to plan your order before the nursery is finished so the sign complements the overall design. Consider whether your style will grow with your child to keep the sign relevant for several years. Late orders might mean relying on rush fees or settling for less customization, so allow time for review and any needed changes before final production starts.
Common Mistakes and How to Avoid Them with Nursery Signs
Choosing the right nursery sign involves more than picking a cute design or fun font. Many people make the mistake of selecting signs that are too large or too small for the space. A sign overpowering a small nursery wall can feel cluttered, while a tiny sign on a large blank wall won’t have the desired impact. Aim for a sign that takes up about one-third to one-half of the wall space directly above or near the crib or changing table. This balances the room visually and avoids overwhelming other décor.
Another common error is neglecting the ease of installation and maintenance. Poor mounting can cause signs to fall, risking injury or damage. Use sturdy hooks, anchors, or brackets that fit the nursery wall type, such as drywall anchors rated for at least 10 pounds. Avoid fragile adhesives unless the sign is very light and located well away from the crib. Check regularly for loosened screws or hooks, especially in homes with active toddlers who may tug at the sign.
Materials also affect how a nursery sign ages. Choosing untreated wood or painted acrylic without a proper seal can lead to fading, chipping, or warping due to humidity or temperature changes in the nursery. Applying a clear non-toxic sealant can protect the sign and extend its life. This takes about 30 minutes to apply and needs to dry fully before rehanging to avoid damage. The following list highlights common mistakes paired with simple fixes to keep your nursery sign safe, stylish, and lasting:
- Picking oversized signs for small walls, measure wall space first and choose proportionate sizes.
- Using weak mounting hardware, opt for wall anchors or heavy-duty hooks rated for the sign’s weight.
- Hanging signs directly above the crib without secure fastenings, install signs safely away from where babies can reach them or use extra secure fixings.
- Ignoring environmental factors, apply a clear sealant to protect wooden or painted acrylic signs from humidity.
- Choosing complicated fonts or colors that clash with existing nursery décor, test colors and lettering styles in the room lighting first.
- Neglecting regular inspection, check hanging hardware every three months for looseness or damage.
- Using signs with small detachable parts or movable letters without supervision, pick designs with secure attachments to avoid choking hazards.
Always test mounting hardware on a small, hidden area of the wall to ensure it can hold the sign weight without damaging paint or drywall.
Mistakes in selecting the style, size, or placement of a nursery sign often come down to overlooking the room’s scale and safety needs. Careful measuring, choosing appropriate mounting methods, and regular maintenance checks prevent many common problems. These steps typically only require basic tools, under $20 for anchors or hooks, and a little time invested in routine checks. A well-chosen, securely installed sign can last throughout early childhood, brightening the nursery safely for years to come.
Step-by-Step Action Plan for Creating Your Perfect Nursery Sign
Follow this plan to design, make, and safely install a charming nursery sign that fits your space and style. Check each step to ensure your sign looks great and stays secure.
- Before you start: Choose a style and theme that matches your nursery’s décor, from classic wooden signs to colorful painted designs. Confirm your choice by visualizing it on your nursery wall or shelf.
- Day 1: Select the right material, such as lightweight wood or acrylic, keeping safety and durability in mind. Test how it feels and weighs to decide if it suits your installation plan.
- Day 2: Measure the wall or space above the crib to pick the perfect sign size. Use a tape measure and mark the spot with painter’s tape for position and proportion accuracy.
- Day 3: Design or pick your fonts and colors with legibility and nursery colors in mind. Try printing or sketching the design at scale before committing to the final product.
- Week 1: Create your DIY sign or order a customized one online. Confirm that no sharp edges or heavy parts could pose a hazard.
- Week 2: Use proper hanging hardware suited for the wall type and weight of your sign. Test the mount with gentle tugs to ensure it’s firm and safe.
- Week 3: Step back and evaluate the sign’s position and look during different times of day to check for glare or shadows. Adjust if necessary for best visibility and style.
Frequently Asked Questions
What Are Unique Materials to Use for Nursery Signs Beyond Wood and Acrylic?
Consider fabric, canvas, or neon as unique nursery sign materials that add texture and a modern feel to the room. These options can soften the look or bring in vibrant color, helping your nursery stand out.
How Can I Coordinate Nursery Signs with Other Room Decor Without Matching Exactly?
Use complementary colors or shared themes rather than exact matches to create a cohesive look. This approach lets your nursery sign pop while tying everything together naturally.
What’s a Clever Way to Personalize a Nursery Sign Without Using the Child’s Name?
Use meaningful quotes, birth stats, or favorite animals on the sign instead of just a name. This keeps the décor personal and timeless, perfect if you want something less typical.
Are There Nursery Sign Ideas Suited for Smaller Spaces or Shared Rooms?
Choose vertical or small-sized signs like round plaques or hanging embroidery hoops that save space. These options fit well in compact nurseries or shared sibling rooms.
How Do I Maintain a Handmade Look for Nursery Signs Without Appearing Dated?
Stick to clean, simple designs and avoid overly fussy details. Materials like natural wood with minimalist fonts or grouped embroidery hoops achieve a fresh handmade look.
Can Nursery Signs Be Part of Educational Décor?
Yes, signs featuring alphabets, numbers, or simple words can combine decoration with early learning elements. This helps stimulate your child’s development while beautifying their space.
Before You Go
Your nursery sign will add personality and comfort to the room while keeping safety at the forefront. Start by choosing a style that reflects your taste and nursery theme, then carefully size, design, and secure the sign. Taking one step at a time ensures your nursery sign is both a beautiful and safe addition.