How to Make Light Up Signs: A Complete Guide with Proven Tips
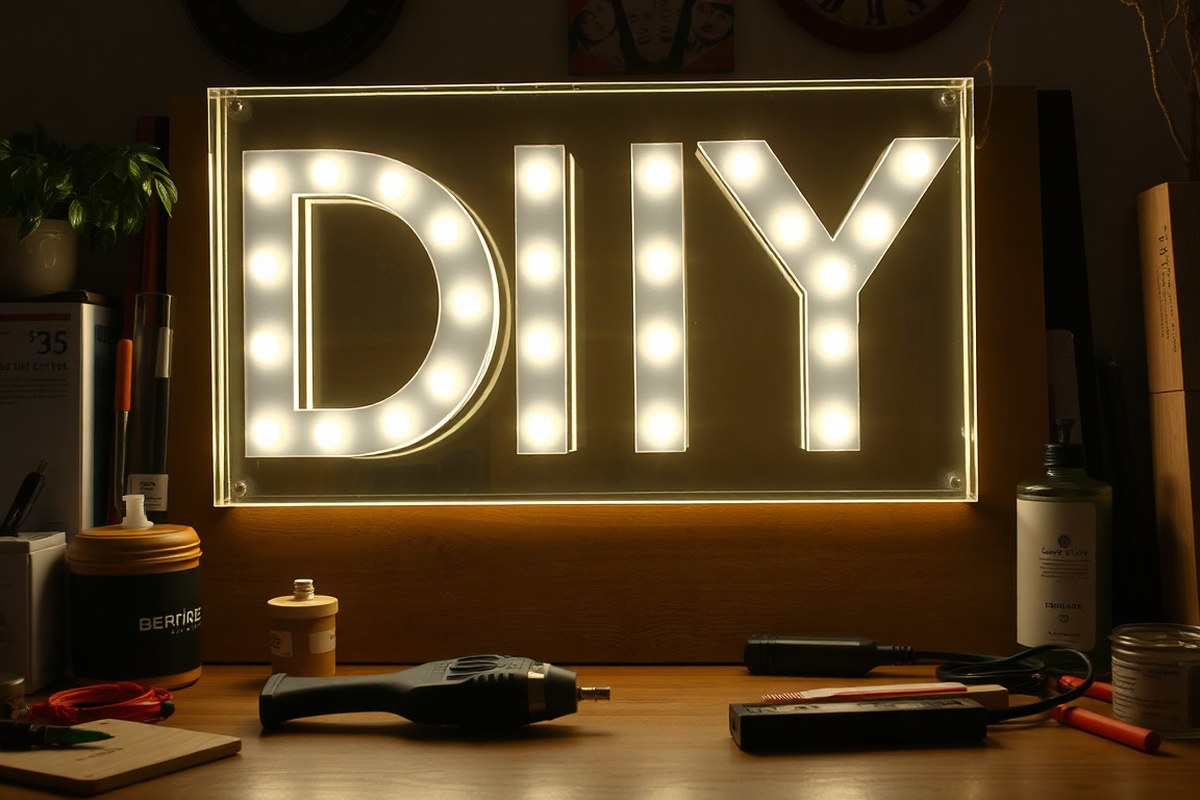
How to make light up signs starts with choosing the right materials and understanding simple wiring techniques. Use acrylic panels paired with LED strips or electroluminescent (EL) wire for clear, bright illumination. Starting with a basic design and gathering affordable materials lets you create custom light up signs efficiently and on budget.
Key Takeaways
- Use 4mm acrylic panels cut at 80% laser power and 10mm/s speed for clean edges and easy shaping.
- Choose simple, bold fonts with letters at least 3-4 inches tall for best visibility and wiring ease.
- Install LED strips or EL wire carefully, matching drill bit size to wire for neat wiring channels.
- Include a dimmer and power switch to control brightness and extend LED lifespan during use.
- Protect wiring with white hardware tape to secure connections and conceal wires cleanly behind the sign.
- Plan your design dimensions considering costs of $30-60 for materials and $20-40 for laser cutting.
What Are Light Up Signs and How Do They Work?

Light up signs are illuminated displays designed to catch attention and convey messages, commonly used in homes, small businesses, or craft projects. These signs stand out by lighting up letters, shapes, or designs, making them visible in low light and adding a decorative glow. You can create your own by using materials like acrylic sheets, wood, LED strips, or electroluminescent (EL) wire, depending on the look and function you want.
LED strips are one of the easiest ways to illuminate signs. These flexible strips have small LEDs spaced evenly, often every 1 inch or so, and come with an adhesive backing that peels off like a sticker. You simply stick the strip along the edges or behind your sign’s acrylic or wooden frame. The strips can be cut between marked sections, usually every 3 LEDs, to fit your design. Power comes through a 24V power supply connected with wiring, which you solder or clip on. LEDs light up by electricity flowing through tiny diodes, which glow without getting too hot. Proper spacing and adding diffusion material help prevent bright spots or uneven lighting.
EL wire works differently; it’s a thin, flexible wire coated in phosphor that glows when an alternating current runs through it. EL wire is great for creating continuous, smooth light lines that resemble neon but use less heat and power. To use EL wire, you’ll need a small inverter to convert DC power to the required alternating current. Drill holes or use tape to shape and attach the EL wire onto boards or frames. EL wire is often less bright than LEDs but gives a soft, even glow with flexible design options.
DIY light up signs come in various forms. One popular type is the acrylic LED sign, where clear or frosted acrylic is laser cut or etched to create letters and shapes, then edge-lit with LED strips for a crisp, even glow. Another type is the light box sign, which uses a wood frame backing combined with acrylic panels and LED backlighting to create a glowing display. EL wire signs offer a neon-like effect that’s good for rounded shapes, outlines, or script fonts. Depending on whether your sign will be indoors or outdoors, materials and power supplies may differ; outdoor signs require weather-resistant materials and sealed wiring to protect against moisture.
Cost-wise, EL wire starts around $12 for a basic kit, including wire and inverter, while LED strips can range from $10 to $30 per 16-foot roll depending on LED density. Additional supplies include plywood or PVC sheets, screws, wiring, and power supplies that may add $20 to $50 extra. Making a sign can take a few hours to several days, depending on the design complexity and drying or curing times for paints or adhesives. The right combination of materials and lighting technology ensures your sign is bright, evenly lit, and safe to use.
Choosing Materials and Tools for Light Up Signs
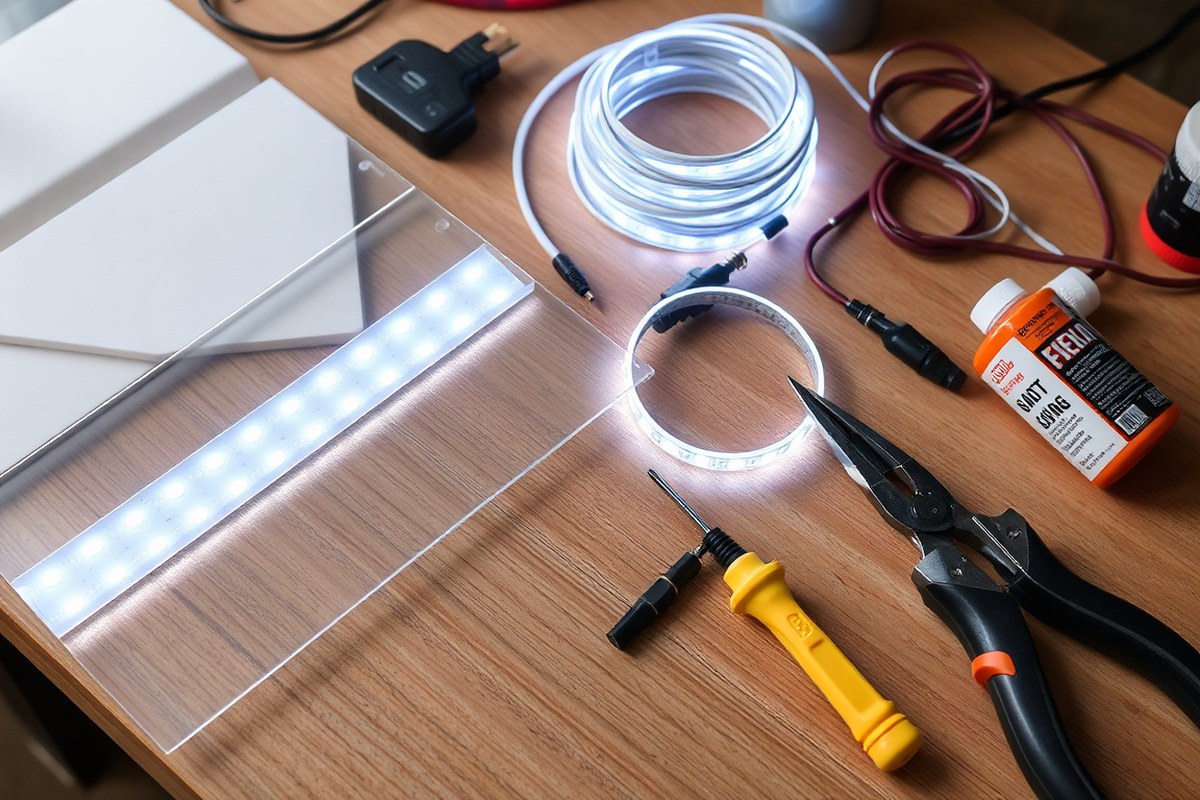
Choosing the right materials and tools is key to creating a quality light up sign. Acrylic thickness impacts durability and light diffusion, while LED choices affect brightness and power needs. Essential tools help you cut, assemble, and wire your sign efficiently.
Acrylic Sheet Options and Thickness
Acrylic sheets come in various thicknesses, typically ranging from 3mm to 6mm for light up signs. Thinner sheets around 3mm are easier to cut and bend if needed, but they are less durable and may flex or crack if handled roughly. Thicker sheets like 5mm or 6mm provide more rigidity and a more professional look but require stronger tools for cutting and shaping.
The thickness you choose also affects light diffusion. Thinner acrylic diffuses light softly, which works well for subtle glows or smaller signs. Thicker sheets tend to channel light more directly, often creating brighter edges or sharper illumination effects. Choosing between clear and frosted acrylic impacts diffusion as well: frosted surfaces scatter light evenly for a smoother look but reduce brightness slightly.
A standard choice for DIY light up signs balances ease of use and quality at about 4mm thick. This thickness fits well into grooves cut for LED strips, ensuring a snug fit to keep the sign stable and reduce light leakage.
LED and EL Wire Selection Guide
LED strips are the most common lighting option for acrylic signs. They come in 12V and 24V varieties. Twelve-volt strips are widely available and suitable for smaller signs, while 24V strips support longer runs without voltage drop but usually cost more. Look for LED strips with good adhesive backing to attach inside the acrylic groove and ensure even lighting behind your design.
Waterproof ratings matter if your sign will be outdoors or in humid environments. IP65-rated strips resist water splashes, while IP67 and IP68 withstand full immersion. Most indoor signs can use non-waterproof strips to save cost.
Electroluminescent (EL) wire is another option, offering a flexible, neon-like glow that works well for creative outlines or smaller details. EL wire runs on low voltage (around 3V), is easy to shape, and consumes little power, but it produces less brightness than LEDs and requires inverters, adding complexity.
- Choose 4mm thick clear or frosted acrylic for medium durability and good light diffusion
- Use 12V LED strips for typical indoor signs up to 16 feet in length
- Consider waterproof LEDs (IP65 or higher) for outdoor signs
- Use EL wire for thin, flexible neon-like effects, especially on smaller signs
- Match your power supply voltage to your LED strip to avoid damage
Stick to the correct voltage LED strip for your power supply to avoid overheating or dimming issues.
Essential Tools and Accessories
Preparing and assembling a light up sign requires several tools. For cutting acrylic, laser cutters provide clean, precise edges but can be expensive or inaccessible. Many hobbyists use a rotary tool or fine-toothed saw blades designed for plastics. Drills with 1/4 inch bits help create holes for wiring or mounting hardware. A soldering iron is often necessary for joining LED strip connections securely.
Adhesives like E6000 glue or hot glue guns are useful for fixing LED strips, wires, and acrylic parts. Wire strippers and pliers aid in preparing and bending wiring. Always include protective gear such as safety glasses and gloves when cutting or soldering to avoid injury. Here’s a checklist of the most commonly needed tools:
- Laser cutter or rotary tool for acrylic cutting
- Drill with appropriate bits (e.g., 1/4 inch)
- Soldering iron and solder
- Glue gun or strong adhesives (super glue, E6000)
- Wire strippers and pliers
- Measuring tools (ruler, tape measure)
- Protective glasses and gloves
Using the right tools reduces errors and speeds up your workflow. It also helps achieve precise grooves and clean edges essential for a tight LED strip fit and a polished final product.
Always wear protective glasses when cutting acrylic to protect your eyes from chips and dust.
Designing Your Light Up Sign for Best Results
Creating a clear and attractive light up sign begins with a solid design. You want software that handles vector graphics, fonts and layouts with precision. The font and size need to ensure readability from a distance. Planning how the light spreads in your design also directly impacts visibility and aesthetic quality. Below are practical tips and steps to help you develop an effective design for your LED or EL wire sign.
Selecting the Right Design Software
Vector-based programs are essential because they allow you to create sharp, scalable outlines for your sign’s lettering and shapes. Adobe Illustrator is a powerful paid option widely used by professionals for its extensive tools and reliability. If you prefer free software, Inkscape is a strong alternative with many similar capabilities. CorelDRAW is another popular paid choice favored by some sign makers for its user-friendly interface.
Choosing the right software depends on your comfort level, budget, and the complexity of your sign. Vector files created here can be used to guide the cutting and engraving machines or printed templates that you use as stencils.
Planning Size and Font for Visibility
Letter height and font weight matter greatly for a sign’s readability. For simple, non-cursive fonts, plan on a minimum letter height between 3 to 4 inches. Cursive fonts need to be slightly taller, around 4 to 5 inches, due to their thinner strokes and flowing shapes.
Choosing fonts with clean lines and avoiding overly intricate designs makes your sign easier to read when lit. Line thickness should be suitable for engraving and light diffusion, so a minimum stroke width of 4 millimeters for engraving is advisable.
Consider your sign’s distance from the viewer to adjust letter size. Also, keep the spacing between letters and lines wide enough to avoid cramped, hard-to-read text. For example, longer signs often require denser LED spacing to maintain an even glow across all letters.
Design Tweaks for Even Lighting
Properly distributing light across your sign requires careful design and wiring considerations. LED strips should be spaced evenly, especially on longer signs, to eliminate dark spots or overly bright areas.
When working with EL wire or LED trim, maintain consistent 4mm-wide channels or grooves for the wiring. Avoid tight bends in the LED or EL wiring to prevent breaks and uneven lighting. This design consideration also helps maintain the longevity of your lighting components.
Matching the engraving depth to the acrylic’s light diffusion qualities achieves a uniform glow. Adjusting the depth of your engraving lines helps scatter the light evenly and prevents harsh shadows or overly bright edges. Follow these steps to create a well-designed light up sign:
- Open your chosen vector design software and create a new document sized to your desired final sign dimensions.
- Design your text or logo using fonts that meet the minimum height and stroke thickness recommendations.
- Outline your text or shapes to convert fonts into editable paths for engraving or cutting.
- Plan the placement and length of LED strips or EL wire channels ensuring consistent 4mm-wide grooves and avoiding sharp turns.
- Adjust the engraving line depth in your design to optimize light diffusion across the acrylic surface.
- Save your design as a vector file compatible with your cutting or engraving machine, such as SVG, AI, or CDR.
- Print a full-size paper layout to verify readability, spacing, and proposed lighting paths before cutting.
- Make any necessary tweaks in the software based on your test print and prepare the final file for production.
Cutting and Preparing Acrylic and Other Materials
Cutting and preparing acrylic for light up signs involves precise techniques to ensure clean edges and proper fit for LEDs. Using laser cutting produces smoother edges that improve light distribution, while manual cutting methods require careful handling to avoid roughness. Creating grooves or channels for LED strips ensures they stay securely in place and maintain an even glow.
Safe Acrylic Cutting Techniques
Laser cutting acrylic is the preferred method for light up signs due to its accuracy and smooth finishes. Manual cutting with saws is possible but often leaves rough edges that scatter light unevenly. Always use proper ventilation to avoid inhaling fumes when cutting acrylic, especially with lasers. Wearing safety goggles and gloves protects your eyes and hands from debris and heat.
For manual cutting, use a fine-toothed saw designed for plastics and cut slowly to reduce chipping. Make sure your workspace is well-lit and stable to keep cuts straight. When using a laser cutter, ensure the machine is clean and the acrylic is securely clamped to prevent movement during cutting.
Optimizing Laser Cutter Settings
Setting the correct power and speed on your laser cutter is important to prevent acrylic melting or forming cloudy edges. For 3 to 5 mm thick acrylic, start testing at about 80% power combined with a speed near 10 mm per second. These settings generally produce clear cuts without roughness, but small adjustments may be necessary depending on your specific laser model and acrylic brand.
Watch for any cloudiness or uneven spots on edges after cutting. When you notice melting, lower the power or increase the speed a bit. When edges are rough, lower the speed or raise the power slightly. Always test cuts on scrap pieces of the same acrylic to dial in the best combination before cutting your final sign parts.
Routing and Channeling for LEDs
Channels carved or routed into acrylic help hold LED strips snugly and keep the lighting uniform. Aim for channels about 4 mm wide to match most LED strip widths. Avoid sharp bends in the grooves by curving corners or cutting segmented turns to prevent LED damage and maintain consistent light flow around corners.
Create straight and consistent grooves using a small router bit or an engraving machine, depending on your tools. Measure the length of LED strips and beads first to ensure channels are the right size and placement. To reduce installation errors, mark grooves clearly before cutting and clean any debris afterward.
- Measure your LED strips to determine channel length and width requirements.
- Mark the acrylic surface where channels will be routed or engraved.
- Set your router or engraving machine to carve a 4 mm wide groove.
- Cut channels slowly to avoid cracking or melting the acrylic edges.
- Check groove depth to ensure LEDs sit flush but not too tight.
- Smooth any roughness inside channels with fine sandpaper or a file.
- Clean the acrylic piece to remove dust and debris before LED installation.
Installing and Wiring LED Strips or EL Wire
Properly installing LED strips or EL wire ensures your light-up sign works well and lasts long. Position the lights evenly to highlight your design, and secure them so they don’t shift over time. When wiring multiple LED strip segments, keep in mind each must be at least 3 cm long to access the soldering pads. Large signs benefit from 24V LED strips because they minimize voltage drop, helping keep the brightness consistent across the whole surface.
Dimmers and controllers let you adjust brightness and create effects, which is particularly helpful for RGB LED strips. Place the remote receiver between the LED strip and the power adapter to enable remote control. Use soldered joints or proper connectors to keep wiring secure and prevent loose connections. Follow the step-by-step instructions to place, wire, and add controls correctly.
- Prepare the mounting surface: Clean the acrylic or backing board thoroughly and plan the placement of your LED strips or EL wire, following the layout of your design.
- Attach LED strips or EL wire: Peel off the adhesive backing of the LED strips and press them firmly onto the surface, keeping them straight and allowing for any necessary bends or curves. For EL wire, use sticky tape and thin wire or yarn to secure it without damage.
- Drill access holes: Make small holes at connection points to route wiring cleanly from one strip segment to the next, minimizing visible wire across the sign.
- Solder connections: Use a soldering iron to connect wires at solder pads, matching red to positive (+) and black to negative (, ). For multiple segments, solder wires between each segment to maintain electrical continuity.
- Add dimmers or controllers: Insert any remote dimmer or RGB controller module between the LED strip and its power source, following manufacturer instructions for wiring and placement.
- Test the lighting: Before final installation, plug in your power supply and control system to confirm all segments light up correctly and respond to dimmers or remotes as expected.
- Secure all wiring: Once tested, fasten wires neatly along the sign’s backside using clips or adhesive cable holders. This prevents strain on connections and keeps the installation tidy.
- Finalize installation: Assemble any remaining mechanical parts of the sign, ensuring wires are hidden and connections are protected from moisture and physical damage.
Always test each LED section for proper lighting before fully securing wires or completing assembly to avoid troubleshooting complex faults later.
Hiding Wiring and Finishing Mechanical Details
Concealing wires, power supplies, and mounting hardware is essential to creating a clean, professional light up sign that looks polished from all angles. Exposed wires and bulky adapters ruin the sleek effect of the illuminated design and can make the sign appear unfinished. A tidy finish also protects the electrical components from damage and makes maintenance easier over time.
Start by selecting a frame or enclosure that has enough depth to house your power supply and wiring. Frames around 1-1/16 inches thick provide enough room to hide the mechanics while still keeping the sign visually thin when viewed straight on. You can build a shadow box style frame from wood or use premade LED sign frames that include grooves for wiring channels. This approach hides wiring inside the frame, preventing it from being seen from the front or sides.
Power adapters and transformers are often the bulkiest parts. Mounting these behind the sign or inside the frame works best to keep them out of sight. Use double-sided tape or velcro strips to secure adapters inside a corner of the frame. For wall-mounted signs, you can create a recessed backing board recessed by about ¾ inch so the adapter sits flush behind the sign rather than sticking out. When placing your wires, run them neatly along the frame edges and secure them with cable clips or hot glue to keep them from sagging or tangling.
- Choose a hollow frame at least 1-1/16″ deep to contain wires and power supplies.
- Attach power adapters inside the frame with double-sided tape or velcro.
- Run wires along frame edges and clip them in place for a neat route.
- Create a recessed back panel for wall mounts to hide bulky transformers.
- Use cable sleeves or tubing for extra protection and a clean look.
- Secure mounting hardware inside or behind the frame, avoiding visible screws from the front.
- Label wires for easier troubleshooting and maintenance access.
Mount your sign using brackets or French cleats hidden behind the frame to keep the attachment points invisible. Hanging the sign slightly off the wall allows space for cords to run behind without pinching or showing. When wiring outdoors, seal inside the frame with silicone caulk to guard against moisture and corrosion. Double-check all connections for tightness to reduce the risk of loose wires causing flickering or shorts.
Spending time on hiding wiring and mechanical parts guarantees your light up sign looks professionally made and keeps functioning well over time. The light will evenly highlight your design without distractions, especially in dim or dark rooms where the sign’s glow catches the eye.
Troubleshooting and Maintaining Your Light Up Sign
Dim or flickering sections in your light up sign usually come from loose connections, damaged LEDs, or inconsistent power supply. Check wiring first, especially solder joints and connectors, since a cold or broken solder joint can interrupt current flow. You can identify problematic areas by gently pressing on the wiring or LED strip and watching if the light flickers or goes out. Multimeters are helpful here to test voltage continuity; any portion of the circuit showing open loop or low voltage needs repair.
Fixing loose or broken LED connections often means resoldering joints or replacing small segments of LED strip. Heat up the soldering iron to around 700°F (370°C), clean the connection points, and apply a fresh solder bead to ensure firm metal contact. Use a precision soldering tip if you’re working with narrow strips or close LED spacing. Avoid excess solder that can short adjacent pads. When a wire is disconnected, strip about ¼ inch of insulation and twist the strands before soldering them back on or using a quality connector. For EL wire signs, check for any kinks or cuts that break the internal conductor and replace those sections if necessary.
Maintaining brightness starts with controlling power, as voltage drop increases along longer LED runs, causing dimming at far sections. Using a dedicated 5V or 12V power supply rated slightly above your total LED current will keep consistent brightness. A simple dimmer circuit with a 10K potentiometer and a 22K resistor lets you adjust output voltage safely to manage brightness without damaging LEDs.
Proper sealing and regular cleaning extend your sign’s lifespan. For outdoor signs, apply silicone sealant to all exposed wiring and connectors to prevent moisture intrusion and corrosion. Indoors, wipe LED surfaces monthly with a soft, dry cloth to remove dust that reduces light diffusion. Ensure your acrylic or plexiglass thickness supports strong light transmission; 3-5 mm acrylic is common for balancing durability and brightness without overshadowing engravings.
| Common Problem | Likely Cause | Fix Method |
|---|---|---|
| LED flickering intermittently | Loose solder joint or connector | Resolder connection or clamp wire securely |
| Entire section dim or off | Broken LED strip segment or power drop | Cut and replace damaged section or upgrade power supply |
| Brightness uneven | Voltage drop along long wiring | Use multiple power injection points or thicker gauge wire |
| Faded or yellowed acrylic | UV damage or dirt buildup | Clean regularly and use UV-resistant acrylic |
You can keep your sign running longer by doing some simple checks twice a year. Inspect the wiring for corrosion or wear, test the power supply output voltage during operation, and make sure the dimmer circuit components hold calibration as resistors and potentiometers can drift. Your sign may have a flush-fitting frame, so access internal parts carefully to avoid damage during maintenance. Keep a spare LED strip or replacement parts on hand to swap out failing components quickly, saving time over full rebuilds.
- Use a multimeter to check continuity before troubleshooting LEDs
- Maintain power supply voltage slightly above LED strip’s nominal voltage
- Resolder connections before replacing LED sections
- Seal outdoor wiring with silicone to prevent corrosion
- Clean acrylic surfaces monthly with a microfiber cloth
- Adjust brightness with a 10K pot and 22K resistor dimmer circuit
- Store spare parts for quick repair turnaround
Safety Considerations and When to Call a Professional
Handling electrical components safely is essential when making light up signs. Always work with power turned off and unplugged before connecting or adjusting wires. Use a power adapter with the correct voltage rating for your LED strips or EL wire to avoid overheating or damage. Protect exposed connections with heat-shrink tubing or electrical tape to prevent short circuits and shocks. Avoid overloading circuits by calculating the total wattage of your lights; most LED strips use about 4-5 watts per foot. Double-check polarity before powering up your sign since reversing connections can damage LEDs.
Cutting materials like acrylic requires steady hands and sharp tools to prevent injury and jagged edges. Wear safety goggles and gloves to protect your eyes and hands from shards or splinters. Use clamps or a non-slip surface to secure pieces while cutting. When wiring, avoid working near water or in damp conditions, and keep all tools grounded to reduce electric shock risk. Store tools properly and unplug soldering irons or hot glue guns when not in use to prevent accidental burns or fires.
Recognizing when to call a professional can save time, money, and reduce safety risks. Large signs with complex wiring or commercial power needs require licensed electricians to ensure code compliance and safe installation. Neon signs, which operate at high voltage and are fragile, often need experts for manufacturing and repairs. If you feel uncomfortable troubleshooting electrical problems, hire a professional to avoid potential hazards. Complex custom shapes or designs might also benefit from a skilled sign maker’s experience and tools to achieve quality results.
- Always disconnect power before working on wiring
- Use proper PPE: gloves, goggles, and dust masks
- Secure materials firmly before cutting to prevent slips
- Check all electrical connections are insulated and secure
- Do not exceed the recommended power supply wattage
- Consult professionals for high voltage neon or large-scale signs
- Work in a dry, well-lit area to minimize accidents
Test your sign with a low voltage setting first to catch wiring errors safely before full power.
Investing in the right safety equipment and following these steps helps prevent injuries and damage. Professional sign makers typically charge from $50 to $150 per hour but can guarantee a code-compliant, durable installation. This upfront cost helps avoid costly repairs or hazards from DIY errors, particularly for commercial or outdoor signage. Stick to basic DIY projects if you have limited experience, and reach out for expert help when electrical or material complexity exceeds your comfort level.
Step-by-Step Action Plan
Follow these steps to build your light up sign with confidence and see it glow.
- Before you start: Choose your sign design and gather materials like acrylic, LED strips, and wiring. Confirm you have tools such as a drill, wire strippers, and a soldering iron ready.
- Day 1: Cut your acrylic and other materials using your chosen tools. Check that all pieces fit your design by assembling them dry, without adhesives.
- Day 2: Install and wire your LED strips or EL wire carefully, following polarity and wiring diagrams. Test the lights with a power source to make sure every section lights up.
- Day 3: Hide your wiring inside channels or behind the sign frame, securing cables and connections tight. Switch on the sign to ensure no wires interfere with the lighting.
- Day 4: Finish details such as sanding edges and attaching mounting hardware. Verify the sign looks clean and sturdy from all angles.
- After 1 week: Inspect and clean the sign, checking for any dim lights or loose wires. Repair or tighten as needed to keep your sign glowing brightly.
Frequently Asked Questions
How Can I Make My Light Up Sign More Energy Efficient?
Use LED strips with lower voltage, like 12V or 24V, which consume less power and produce less heat. They last longer, reducing replacement frequency and electricity costs.
What Types of Power Sources Are Best for DIY Light Up Signs?
Battery packs, plug-in adapters, or USB power banks work well depending on sign size and location. Choose one that matches your light’s voltage and intended use for safety and convenience.
Can I Customize the Colors of My Light Up Sign?
Yes, using RGB LED strips allows you to change colors with a remote or controller. This makes your sign versatile for different moods or events, but it can add to the cost and complexity.
How Do Weather Conditions Affect Outdoor Light Up Signs?
Moisture and extreme temperatures can damage wiring and LEDs, so seal components properly with waterproof materials. Use outdoor-rated LEDs for durability and safety in different weather conditions.
What Are Common Causes of Flickering in LED Light Up Signs?
Flickering often comes from loose connections, incompatible dimmers, or voltage fluctuations. Check wiring and use dimmers rated for LEDs to maintain steady illumination.
Is It Possible to Repair a Damaged LED Strip on a Light Up Sign?
Yes, you can cut out damaged sections and reconnect the strip using solder or clip connectors. Proper sealing after repair prevents moisture issues.
Key Points to Remember
Making your own light up sign combines creativity with practical skills and can brighten any space or business. Begin with a simple design and focus on each step carefully to build your confidence. Start by selecting your materials this weekend and sketching your design so you’re ready to cut and assemble soon after.