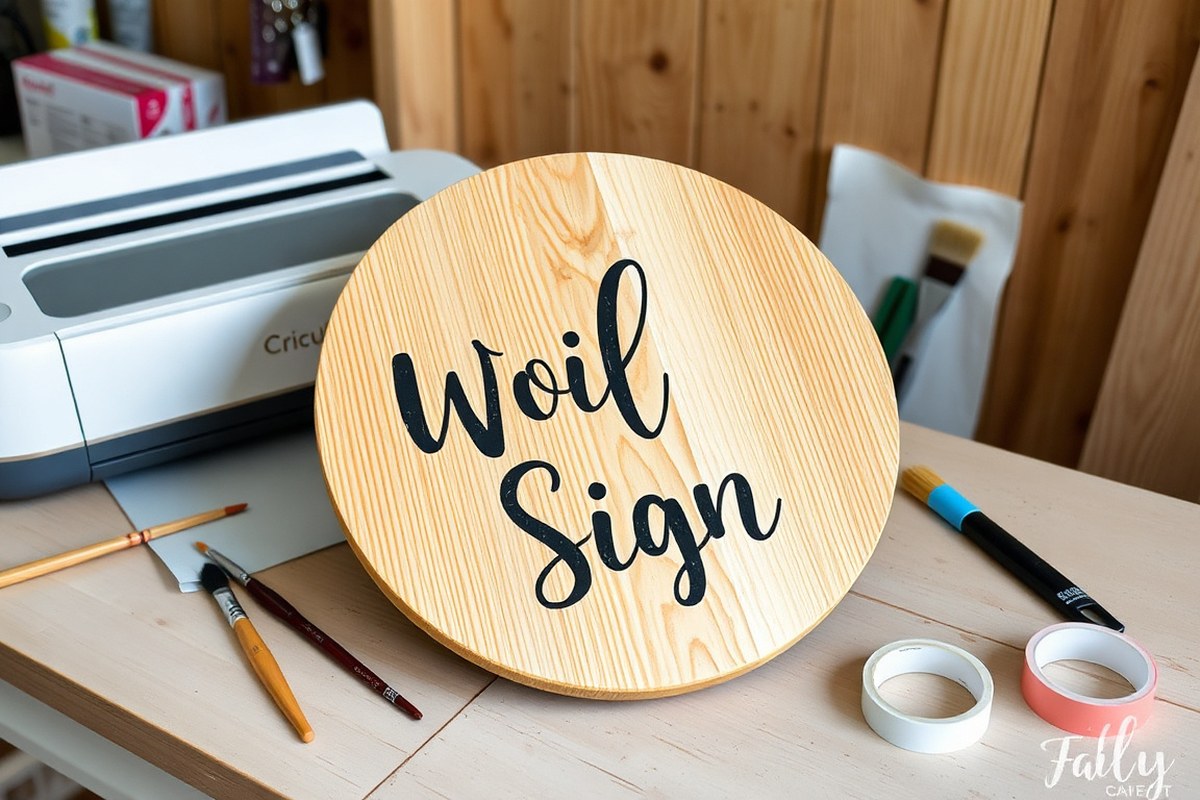
How to Make a Round Wood Sign with Cricut: Complete Step-by-Step Guide
Learning how to make a round wood sign with Cricut starts by selecting the right size wood round and preparing your design in Cricut Design Space. Use a 12″ to 16″ round edge-glued pine or spruce board for best results and design your lettering with fonts like Cricut Access’s Avenida Com. Begin by measuring your wood carefully to size your design properly before cutting vinyl or stencils.
Key Takeaways
- Choose a 12″ to 16″ round pine or spruce wood panel for easy handling and good durability.
- Design your sign in Cricut Design Space using fonts like Avenida Com and adjust size to fit your wood.
- Decide between permanent vinyl decals or painted stencils based on your desired finish and outdoor use.
- Sand the wood surface smooth before applying paint or vinyl for better adhesion and professional looking results.
- Let paint fully dry, usually 2-3 hours, before applying vinyl with transfer tape to avoid lifting or smudging.
- Seal your finished sign with a clear outdoor sealant to protect against weather and wear.
Materials and Tools Needed for Making a Round Wood Sign
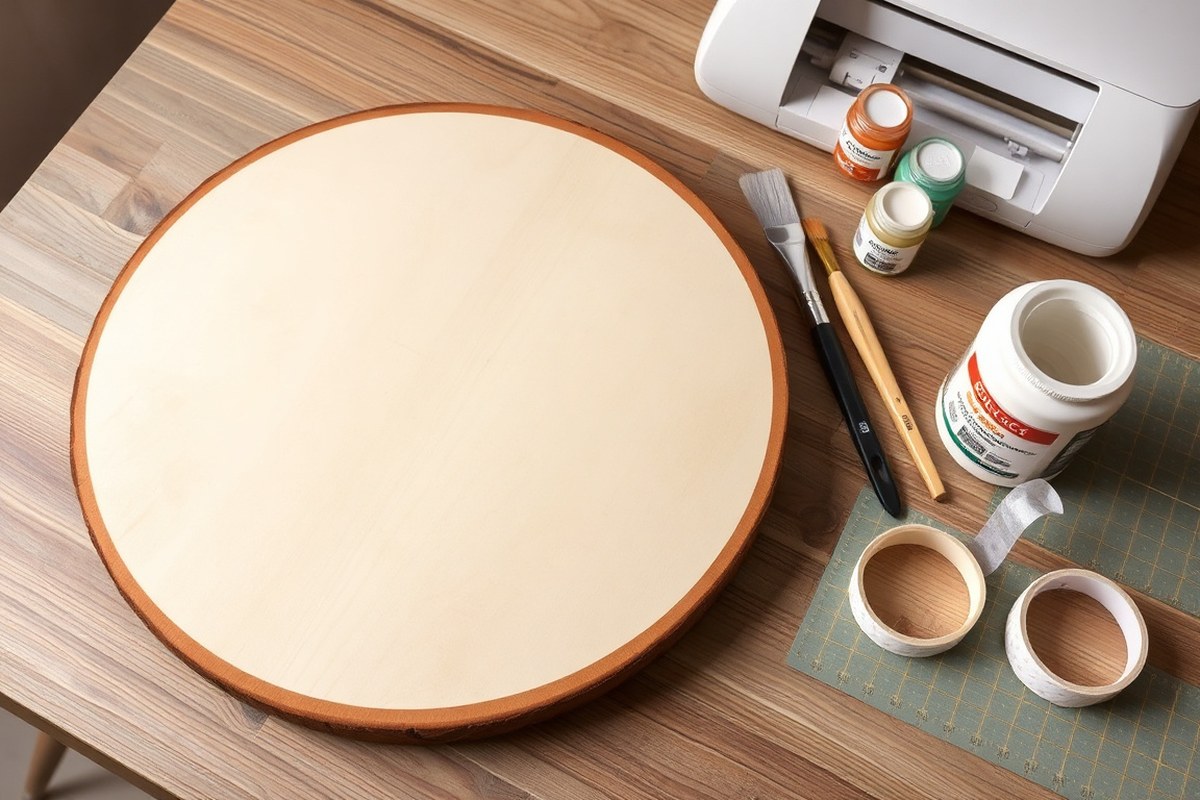
Choose a wood circle between 12 and 15 inches in diameter for an ideal size that’s easy to work with and displays well on a wall or door. Edge-glued pine wood panels work best because they are relatively smooth, affordable, and widely available at home improvement stores for around $7.78. Choose a piece with minimal knots or cracks to ensure a smooth painting or vinyl application surface.
For cutting your design, a Cricut Maker or Cricut Explore Air 2 machine is suitable. Both can cut through vinyl and stencil materials cleanly. Use a StandardGrip cutting mat sized to your machine (usually 12″x12″ or 12″x24″) to hold your vinyl or stencil sheets firmly while cutting. If you prefer, you can use permanent vinyl for decals or stencil vinyl to paint through.
When selecting vinyl, permanent adhesive vinyl is recommended for wood signs displayed outdoors or handled frequently, as it sticks better and lasts longer. Removable vinyl can peel off more easily but works well for indoor signs or temporary projects. For paints, acrylic craft paints are best suited for wood because they dry quickly and offer vivid colors. Matte or satin finishes generally give the most professional look without glare.
- 12″-15″ diameter edge-glued pine wood circle, available at hardware stores like Home Depot or Lowe’s
- Cricut Maker or Cricut Explore Air 2 cutting machine
- StandardGrip cutting mat (12″x12″ or 12″x24″) compatible with your Cricut model
- Permanent adhesive vinyl for decals or stencil vinyl for paint stencils
- Transfer tape for applying vinyl decals smoothly
- Acrylic craft paints, preferably matte or satin finish
- Sponge brushes or small angled paint brushes for stencil painting
Picking quality materials affects how well your project holds up over time. For example, using permanent vinyl helps your lettering resist peeling caused by weather or frequent touching. Quality pine wood panels avoid warping and provide a sturdy surface for both paint and vinyl. Home improvement stores carry all the basics, while craft stores may offer more color and finish options for paints and vinyl. Budget $15 to $25 for a complete round wood sign kit, considering wood, vinyl, paint, and transfer tape. Less expensive materials might save money upfront but risk peeling vinyl or uneven paint.
How to Design Your Round Wood Sign in Cricut Design Space
Designing your round wood sign in Cricut Design Space involves sizing the design to fit your wood perfectly, choosing fonts that show well on wood, and adding registration marks to align your cuts accurately. Taking the right steps ensures your design looks balanced and cuts cleanly for a professional finish.
Preparing the Project Canvas
Start by measuring your wood round sign, common sizes are 12 to 16 inches in diameter. In Cricut Design Space, create a canvas that matches these dimensions to visualize your layout accurately. Use a circle shape scaled to your wood sign’s size as a reference on your canvas. This helps you keep all elements within the boundaries of your round wood. Remember that Cricut’s canvas zoom isn’t strong enough to see the entire design at once, so work on segments or zoom carefully to check details. Using a shape as a boundary prevents your text or images from running off the edges, which can cause issues when applying the design.
Adding and Arranging Text and Images
Select fonts and images that are clear and bold since fine details might get lost on wood. Cricut’s fonts designed for signs, like sans-serif or scripts with easy-to-read letters, work best. If you want a curved text effect that wraps around the round sign, use the curve text tool in Design Space and adjust the curve radius carefully to fit the circle. Keep spacing even so the text doesn’t bunch up or stretch too far.
To add extra design elements, upload SVG files or use Design Space images. Resize and position all parts so they balance neatly inside your boundary circle, usually leaving around a half inch margin to avoid crowding the edges.
- Open a new project and create a circle shape that matches your wood sign diameter as a canvas guide.
- Add text using the Text tool and select a bold, clear font suited for wood signs.
- Use the curve text option for circular text, adjusting the curve radius to fit your round design.
- Insert any images or SVG designs and resize them to maintain balance inside the circle.
- Position all elements inside the circle, leaving at least 0.5 inch from the edges.
- Select all layers and use Attach to keep their positions fixed for cutting.
Adding Cutting and Registration Marks
Registration marks help align your stencil or vinyl accurately on the wood. Design Space does not add these automatically, so create small shapes or lines just outside your main design and attach them before cutting. These marks serve as guides when applying the vinyl or stencil so your design stays centered and level on your round sign. Avoid placing registration marks too close to the design to prevent cutting issues or confusion during application.
Adding offsets is helpful for stencil cuts. It creates a slightly larger outline around letters or images to hold the stencil pieces connected. Use the Offset tool to add about 0.05 to 0.1 inches around your design. This ensures delicate parts do not fall out during weeding and application.
Check your design measurements against your actual wood diameter before cutting, misaligned registration marks or oversized designs can waste materials and time.
Choosing Between Vinyl Decals or Painted Stencils for Your Sign
Vinyl decals and painted stencils are the two main methods to add lettering or designs to your round wood sign, each with distinct benefits and drawbacks. Vinyl decals involve cutting a design from permanent vinyl and applying it directly to the wood surface. Painted stencils use a stencil cut from stencil vinyl to mask the design area, which you then fill with paint. Choosing the right method depends on your project’s timeframe, where the sign will be displayed, and the look you want to achieve.
| Aspect | Vinyl Decals | Painted Stencils |
|---|---|---|
| Application Speed | Faster; apply decal after paint dries (wait 48 hours before applying vinyl) | Slower; requires careful painting and multiple drying steps |
| Durability | Durable when sealed with a topcoat like Polycrylic; good for outdoor use | Durable if using exterior paint and sealed well; paint may chip over time |
| Material & Tools | Permanent vinyl, transfer tape, scraping tool | Stencil vinyl, paint (interior/exterior), stencil brush or sponge |
| Ease for Beginners | Easier to get crisp edges and clean design | Requires steady hand and patience for even paint application |
| Design Flexibility | Limited to vinyl colors and layering capabilities | Can use any paint color; blend or distress for rustic effects |
| Cost | Vinyl sheets cost about $2-$3 each; re-usable on multiple projects | Paint and stencil vinyl roughly similar cost; paint is consumable |
| Sign Appearance | Smooth, sharp lettering with solid fill | Textured, hand-painted look that can feel more custom |
Applying vinyl decals is usually faster. After staining and painting your wood round, wait at least 24 hours for paint to dry, then another 24 hours before applying vinyl. Place the vinyl design material-side-up on a LightGrip mat and cut it with your Cricut. Transfer the vinyl carefully onto the wood, then seal with a light coat of Polycrylic for outdoor use. This method works well if you want precise, clean lettering that stands up to weather when sealed properly.
Creating painted stencils takes more time but allows more design freedom. Use stencil vinyl to cut your phrase or image and apply it onto the dry, sealed wood surface. Paint inside the stencil using a small brush or sponge, applying light coats to prevent bleeding. To protect the paint and the wood, finish with a clear Polycrylic sealant once paint is dry. Paint stenciling suits users who want a handcrafted look or multiple paint colors with blending effects.
Choose vinyl decals when you want a quick, durable sign with clean edges that can withstand outdoor exposure once sealed. Opt for painted stencils if you prefer a more textured, artistic style, want to use multiple paint effects, or don’t mind longer drying times. Signs made with vinyl often look more polished, while stenciled signs have a charming, rustic feel that fits farmhouse or vintage decor styles.
Step-by-Step Process to Prepare and Paint the Wood Round
Preparing your round wood sign correctly ensures smooth paint or vinyl application and a professional finish. Start by sanding the wood to remove rough spots and create an even surface for stain or paint to adhere well. Choosing the right stain or base coat adds color and protects the wood, while letting each layer dry completely avoids peeling or bubbles in your paint. Taking the time to do these steps thoroughly will save you frustration and improve your final sign’s look.
- Sand the wood surface. Use medium grit (around 120-150) sandpaper or a fine grit sanding block. Sand the entire front of the wood circle in circular motions, applying even pressure. This removes splinters and smooths the surface. After this, switch to a fine grit (220) to get an extra smooth finish, especially if you’re applying vinyl decals. Wipe away dust with a tack cloth or damp rag and let dry.
- Apply wood stain (optional). Pick a wood stain that matches your desired base color. Use a foam brush or clean cloth to apply the stain evenly, following the wood grain. Avoid overloading with stain to prevent runs. Let it soak in for 5 to 15 minutes, then wipe off excess with a clean cloth. Dry times vary by brand, but most stains take 4-6 hours to dry fully at room temperature (70°F). Check your stain label for exact drying times before proceeding.
- Apply a paint base coat. Choose a paint type suited for wood, such as acrylic or latex. Use a high-quality foam brush or small roller to apply 1-2 thin, even coats. Let the first coat dry completely, usually 1-2 hours. Apply the second coat for full coverage. Avoid thick coats to prevent drips and bubbles. The base coat creates a smooth, consistent background for your design.
- Sand between paint coats (optional). Lightly use fine grit sandpaper (320 grit) after the first coat dries if the surface feels rough or you see brush marks. This keeps the surface smooth for the next layer. Wipe clean before adding another coat.
- Let the base coat cure. Allow paint to cure for at least 24 hours at room temperature before applying vinyl decals or stencils. This ensures the paint is hard enough to handle the next steps without smudging or peeling.
These steps typically take 1 to 2 days, factoring in drying and curing times, depending on your choice of stain and paint. Sanding well and applying thin coats helps avoid paint bubbles and uneven surfaces. Skipping sanding could make it hard for vinyl to stick or paint to spread evenly, causing a rough or incomplete look. Avoid rushing drying times to prevent wet layers from mixing or decals peeling off later.
Cutting and Applying Vinyl or Stencil to the Wood Sign
Cutting vinyl or stencil designs on your Cricut requires precise settings and careful handling to achieve clean edges and strong adhesive transfer. Proper weeding removes unwanted vinyl around your design, and preparing and applying transfer tape helps position the design smoothly on the rounded wood surface without bubbles or misalignment.
Setting Cricut Machine for Vinyl and Stencil Cuts
Using the “Custom” setting on your Cricut machine allows you to select the best material type for cutting. In Design Space, search specifically for “Stencil Vinyl” to get the correct blade pressure and speed for cutting stencil or adhesive vinyl. Both Cricut Maker and Explore Air 2 machines are suitable for this task and work well with premium vinyl designed for easy weeding. Ensuring the blade is sharp and clean improves cut quality, especially for intricate details.
Before cutting, position your vinyl on a 12×12 cutting mat, making sure it’s smooth and well-adhered to the mat surface to prevent shifting. This setup helps create clean lines and crisp edges, which are essential when transferring vinyl or stencil to a round surface to avoid gaps or tears in the design.
Weeding and Transfer Tape Preparation
Weeding is the process of removing excess vinyl from your cut design. Use a hook tool or weeding pick to carefully lift away the outer vinyl and small pieces inside letters or shapes. Take your time to avoid tearing thin sections.
After weeding, cut a piece of transfer tape slightly larger than the design. Peel the backing from the tape and lay it over the vinyl. Use a scraper tool, craft stick, or even a credit card to burnish the transfer tape onto the vinyl firmly. This step ensures that the vinyl sticks to the transfer tape and will release cleanly from its original backing for precise placement.
Applying Design Smoothly on Wood
Applying vinyl or a stencil onto a curved wood sign requires alignment and careful smoothing to avoid air bubbles or wrinkles. Start by lightly positioning the design on the wood without pressing down firmly. You can use registration marks like small stars to line it up properly if your design includes them.
Use painter’s masking tape to hold the transfer tape in place temporarily. Then, from the center outward, smooth the transfer tape with a scraper tool or credit card to press the vinyl firmly onto the wood surface. This motion helps release trapped air and ensures good adhesion, especially around the curved edges.
- Choose the “Custom” cut setting in Cricut Design Space and select “Stencil Vinyl” material.
- Place your vinyl on your Cricut mat and load it into your machine for cutting.
- Weed away all the excess vinyl carefully using a weeding tool.
- Cut a piece of transfer tape slightly larger than your design.
- Apply the transfer tape over the vinyl and burnish well with a scraper or credit card.
- Peel the backing paper off the vinyl, keeping the vinyl attached to the transfer tape.
- Position and lightly place the design on your round wood sign, using registration marks or masking tape to secure alignment.
- Smooth out the vinyl from the center toward the edges with a scraper tool to release bubbles.
- Slowly and carefully peel away the transfer tape, leaving the vinyl design on the wood.
For best results on curved wood, smooth with a firm but gentle pressure and pause frequently when peeling transfer tape to catch and flatten any bubbles immediately.
Sealing and Finishing Your Round Wood Sign for Longevity
Sealing your round wood sign is essential to protect it from weather, wear, and fading, especially if it will hang outdoors. Polycrylic is a popular sealant for this purpose because it dries clear, offers a durable finish, and is easy to clean up with water. Other common options include polyurethane, which is more heavy-duty and water-resistant but can yellow over time, and outdoor-specific spar varnishes that are formulated to handle UV exposure and moisture but take longer to dry.
Apply a protective coat only after all paint or vinyl work is completely dry. This usually means waiting at least 24 hours. Use a high-quality synthetic brush or a foam brush to apply thin, even coats. Thick layers lead to bubbles or drips, which ruin the finish. Lightly sanding with fine-grit sandpaper (220 grit) between coats improves adhesion and smoothness. Plan on applying two to three coats for good coverage and weather resistance. Allow each coat to dry according to the product instructions, generally about 2 hours for polycrylic and more for oil-based finishes.
Choosing the right sealant depends on where the sign will be displayed. For indoor signs, a single coat of polycrylic can be enough. Outdoor signs benefit from a marine-grade spar varnish or a high-quality polyurethane designed for exterior use. These hold up better against rain, sun, and temperature changes. Keep in mind that spar varnishes usually need reapplication every 1 to 2 years, depending on exposure. Polycrylic is less durable outdoors and may require resealing once a year to maintain protection.
Maintenance for outdoor signs includes gently washing the surface with mild soap and water to remove dirt and debris, which helps the sealant last longer. Avoid harsh chemicals or power washing. Before resealing, check the sign for any cracked or peeling areas and lightly sand those spots to ensure the new sealant bonds properly. Costs for sealants vary: polycrylic typically runs around $10 to $15 for a quart, enough for multiple signs, while marine varnishes can be $20 or more per quart.
Good results show as a smooth, clear finish with no cloudiness or brush marks. The sign should feel slightly hard and slick when fully cured. If you notice sticky surfaces, uneven texture, or peeling within days after sealing, it might be due to applying too thick a layer, sealing over wet paint, or using an incompatible product. Always test your sealant on a scrap piece of wood prepared like your project to avoid surprises.
Adding Decorative Elements and Hanging Your Wood Sign
Adding decorative elements like ribbons, hooks, or 3D accents can give your round wood sign a personalized touch. Choosing the right hanging hardware ensures your sign stays secure on doors or walls. Customizing decorations by season or theme lets you refresh your design throughout the year.
Types of Decorative Add-Ons
Simple ribbons and bows work well to add color and texture to your wood sign. Use a glue gun to attach these embellishments securely without damaging the surface. For a raised look, consider 3D elements such as small wooden shapes, flowers, or metal accents that match your sign’s design.
Frames or border trim around the edge can add a finished feel and make your sign stand out more. Pine is a popular and affordable wood choice for frames, but you can choose other woods depending on your budget and style preference. Cut and paint the frame before gluing it around your sign with wood glue or a hot glue gun for a strong hold.
Hanging Hardware Options
Selecting hardware depends on where and how the sign will hang. For lightweight signs, sawtooth hangers nailed to the back are easy and inexpensive. Larger or heavier signs benefit from D-ring hooks paired with picture wire for added security.
Command strips provide a damage-free option if you want to avoid nails or screws, though they might not support heavier signs. Ensure any hooks or hangers are screwed or nailed into sturdy parts of the wood to prevent slipping. Always check the weight rating on hardware packaging to match your sign’s weight.
- Sawtooth hangers for easy, lightweight hanging
- D-ring hooks with picture wire for heavier signs
- Adhesive Command strips for damage-free mounting
- French cleats for very secure wall mounting
- Glue gun to attach small hooks or decorations
Installing hanging hardware involves measuring the sign’s backside for balance. Attach hooks or hangers evenly spaced about one-third down from the top edge for best support. When using wire, leave slight slack so the sign hangs flat against the surface.
Seasonal and Themed Decorating
Customizing your round wood sign with seasonal decorations is simple and fun. Swap out elements like ribbons, wreaths, or small accents to match holidays or weather changes. For example, add a red and green plaid bow and miniature pine cones for winter, or bright floral accents for spring and summer.
Use velcro strips or small removable glue dots to make decorations easy to exchange without damaging your sign. Changing decorations regularly keeps your sign fresh and suitable for every occasion. Consider these creative ideas for seasonal customization:
- Pumpkin and leaf embellishments for fall
- Snowflakes and faux fur ribbon for winter
- Flower garlands or butterflies for spring
- Seashells and starfish accents for summer
- Colors and icons tied to specific holidays or events
Avoiding Common Mistakes When Making Cricut Wood Signs
Vinyl bubbling or lifting on wood usually happens when the surface isn’t clean, dry, or smooth enough. Wood grain and rough texture create small air pockets that cause bubbles under the vinyl. To avoid this, sand the wood thoroughly and wipe off dust with a dry cloth before applying vinyl. Press the vinyl down firmly with a scraper tool starting from the center outwards to remove trapped air. When bubbles appear after application, use a pin to carefully prick the bubble and press out the air.
Paint bleeding occurs when paint seeps under the edges of stencils, especially on porous or uneven wood surfaces. Applying a thin layer of paint in all directions helps seal the stencil edges and minimize bleeding. Avoid slapping on thick coats of paint. Instead, use multiple thin coats, allowing each to dry completely between applications. Staining the wood before painting creates a smoother base that also reduces bleed risk. When bleed occurs, gently scrape off excess paint before it dries or touch up with the base color after drying.
Sizing errors often come from misunderstanding the actual sign area or overlooking the wood shape. For round signs, measure the widest and narrowest points where the design will go. One example showed a main design width of about 9 inches on a 13-inch wood sign to keep the spacing balanced and visually appealing. Using Cricut Design Space’s measurement tools and preview helps avoid making the design too large or too small. Always double-check measurements against your physical wood piece before cutting vinyl or painting stencils.
Waiting the right amount of time between project steps is essential to achieving clean results. After staining wood, wait at least 24 hours before painting or applying vinyl. Paint coats should dry 1 to 2 hours each, depending on temperature and humidity. Vinyl usually bonds best after the surface is fully dry for at least a few hours. Rushing can cause smudges, bubbles, or lifting. A proper timeline keeps your work crisp and long-lasting. The table below summarises common mistakes and how to fix or prevent them:
| Common Mistake | Cause | How to Prevent or Fix |
|---|---|---|
| Vinyl bubbling/lifting | Uneven, dusty wood surface or trapped air | Sand/smooth wood, clean dust, press vinyl from center out; prick bubbles with a pin |
| Paint bleeding under stencil | Porous wood, thick paint coats, poor stencil seal | Apply thin paint coats in all directions, multiple layers, stain wood first |
| Sizing errors in design | Ignoring wood dimensions, bad measurements | Measure sign width and height carefully; keep design smaller than sign; preview in software |
| Paint or stain not dry between steps | Insufficient drying time, humid or cold environment | Wait 24 hrs after staining, 1-2 hrs after each paint coat, ensure full dryness before next step |
Always test your stencil and vinyl on a scrap piece of wood before working on your final sign to catch bleeding or sizing issues early.
Following this checklist during your project helps you avoid common pitfalls that turn clean signs into frustrating mistakes. Taking the time to prepare the wood surface properly, apply materials with care, and wait for full drying creates professional-looking results without frustration or wasted supplies.
Step-by-Step Action Plan
Follow these steps to create your personalized round wood sign with your Cricut, ensuring a smooth process and a professional finish.
- Before you start: Gather all materials and tools, including your round wood piece, Cricut machine, vinyl or stencil supplies, paint, brushes, and sealant. Confirm everything is clean and ready to use.
- Day 1: Design your sign in Cricut Design Space. Use your chosen text and graphics, then measure your wood to ensure the design fits perfectly.
- Day 2: Cut your vinyl decal or stencil using the Cricut machine. Make sure the cut lines are clear and your design pieces weeded properly.
- Day 3: Prepare the wood surface by sanding lightly and applying a base coat if needed. The surface should feel smooth and dry before applying decals or stencils.
- Day 4: Apply your vinyl or paint the stencil on your wood round. Check for clean edges and even paint coverage to confirm good application.
- Day 5: Let your sign dry completely, then apply a clear sealant to protect the design and wood. The finish should feel smooth and dry to the touch.
- Day 6: Add any decorative elements, such as ribbons or hooks, and attach hanging hardware suitable for your wall type.
- After 1 week: Inspect your sign for any wear or peeling; touch up sealant or paint if needed to maintain longevity.
Frequently Asked Questions
What Is the Best Size for a Round Wood Sign with Cricut?
Most crafters choose 12 to 15 inches diameter, fitting standard wood rounds that balance visibility with ease of handling during crafting.
Can I Use Different Paint Types on My Cricut Wood Sign?
Yes, acrylic and exterior latex paints work well; choose paints suited for indoor or outdoor use based on where the sign will hang.
How Do I Transfer Intricate Cricut Designs Onto Wood?
Use vinyl decals for detailed designs; they apply neatly and reduce paint bleed compared to stenciling complex patterns.
Is It Possible to Reuse Stencils Made with Cricut?
You can reuse stencils if cleaned carefully after use, but they may wear out after several applications.
What Safety Measures Should I Take When Crafting with Wood and Paints?
Work in a well-ventilated area and wear gloves and a mask when sanding or using paints to avoid inhaling dust or fumes.
How Long Does It Take to Complete a Round Wood Sign Project?
Most projects take a few hours including drying time, but fast-drying paints and sealants can speed up the process.
The Bottom Line
Making a round wood sign with a Cricut allows you to create a unique decoration that fits your style. Starting with a clear plan helps avoid mistakes and keeps your project on track. Pick a visible spot to hang your finished sign and admire your handiwork. Your next step is to open Cricut Design Space and start sketching your perfect design.