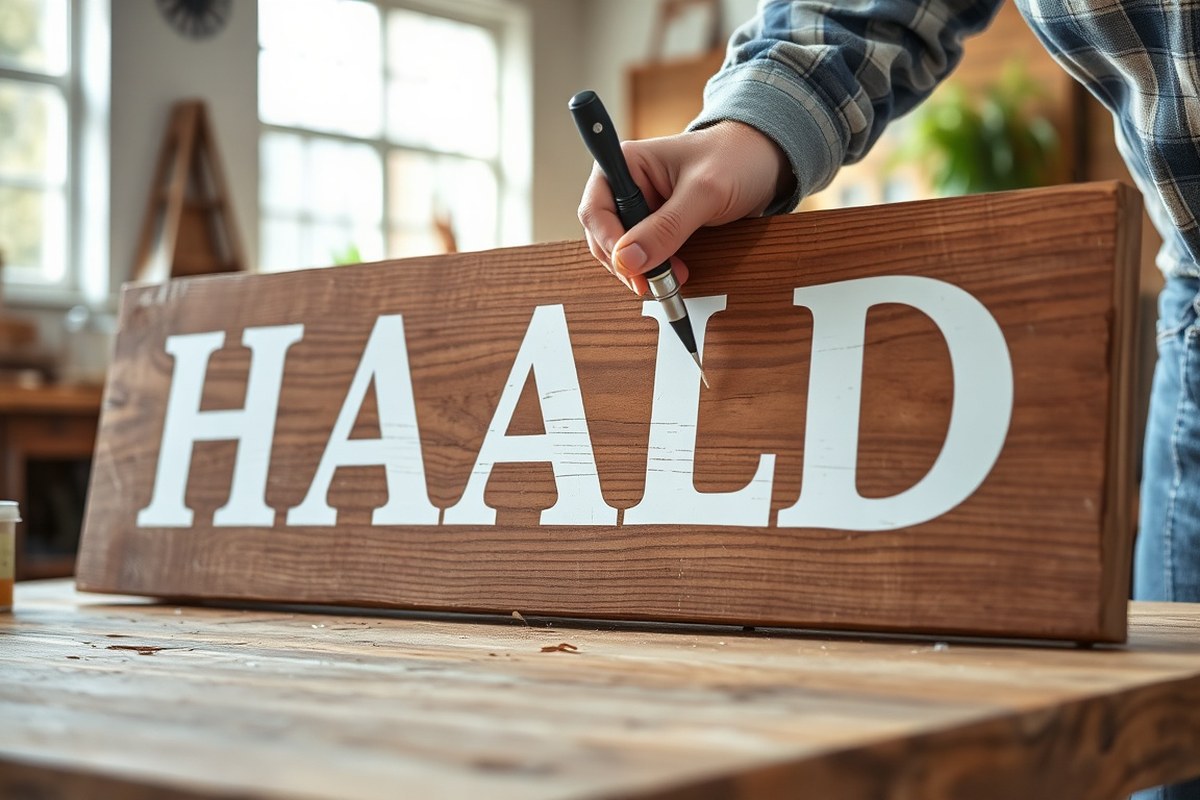
How to Make a Rustic Sign by Hand: Complete Step-by-Step Guide
Knowing how to make a rustic sign by hand starts with selecting the right wood and simple tools. Staining the wood properly and using basic techniques to distress the surface gives it that authentic vintage look. Begin by picking wood pieces like 2×4 boards or plywood that suit your desired sign size and style.
Key Takeaways
- Choose wood with natural knots and grain for an authentic rustic appearance.
- Use foam brushes to apply stain evenly, letting it soak for 5-10 minutes before wiping off excess.
- Allow glue and stain to dry at least 24 hours before painting or sealing the wood.
- Distress wood edges and surfaces with sandpaper or simple tools to create weathered textures.
- Transfer lettering by hand using stencils or chalk to maintain a handcrafted charm.
- Use clear sealers to protect your sign while keeping the rustic look intact.
What Defines a Rustic Sign and How to Start

A rustic sign captures a natural, worn, and often handcrafted appearance. It usually features raw or lightly treated wood with visible grain, knots, and imperfections, which add character and a vintage or farmhouse vibe. The lettering is typically painted by hand, with brush strokes showing, and may have a slightly faded or distressed look to suggest age. These signs avoid shiny finishes or overly polished surfaces. Instead, they embrace rough textures and earthy tones, giving off a warm, nostalgic feel that fits well in casual, country, or cottage-style decor.
Starting a rustic sign project involves both creativity and planning. Begin by deciding what message or design you want on your sign, keeping it simple to maintain the rustic charm. Think about the size and shape of the sign based on where you’ll hang it. Sketch your layout on paper first, including how the letters and any decorative elements will be arranged. This step ensures your design fits the wooden board you choose and helps avoid costly mistakes.
Choosing the wood comes next, but be sure to pick a board with natural character like pine, cedar, or reclaimed pallet wood. Look for boards with texture, grain variation, and some imperfections such as small cracks or rough edges. These traits make the sign visually interesting without extra work. Before any painting, lightly sanding the surface smooths out splinters while keeping texture intact. This prep usually takes 15 to 30 minutes per board depending on the size.
Cost-wise, many rustic sign projects run around $3 to $10 if you already own basic supplies like brushes and paint. The wood might be free if using pallet scraps or around $5 for a new pine board at a hardware store. Acrylic paint is affordable and effective, lasting nicely on wood if sealed afterward. Planning your project also means gathering all materials beforehand: wood, paint, paintbrushes, possibly adhesive vinyl letters for transfer, and sealers. Preparing everything avoids delays and ensures smooth progress.
Adopting a relaxed mindset is important when making a rustic sign. Imperfections like uneven paint lines, slight smudges, or light wear are desirable and give your sign an authentic handmade look. Trying to make every stroke perfect can reduce the rustic effect. Expect your sign to look slightly rough around the edges and resist the urge to over-sand or over-paint in pursuit of a flawless finish. Remember, rustic style celebrates the beauty of natural wear and handiwork.
Choosing Wood for Authentic Rustic Signs
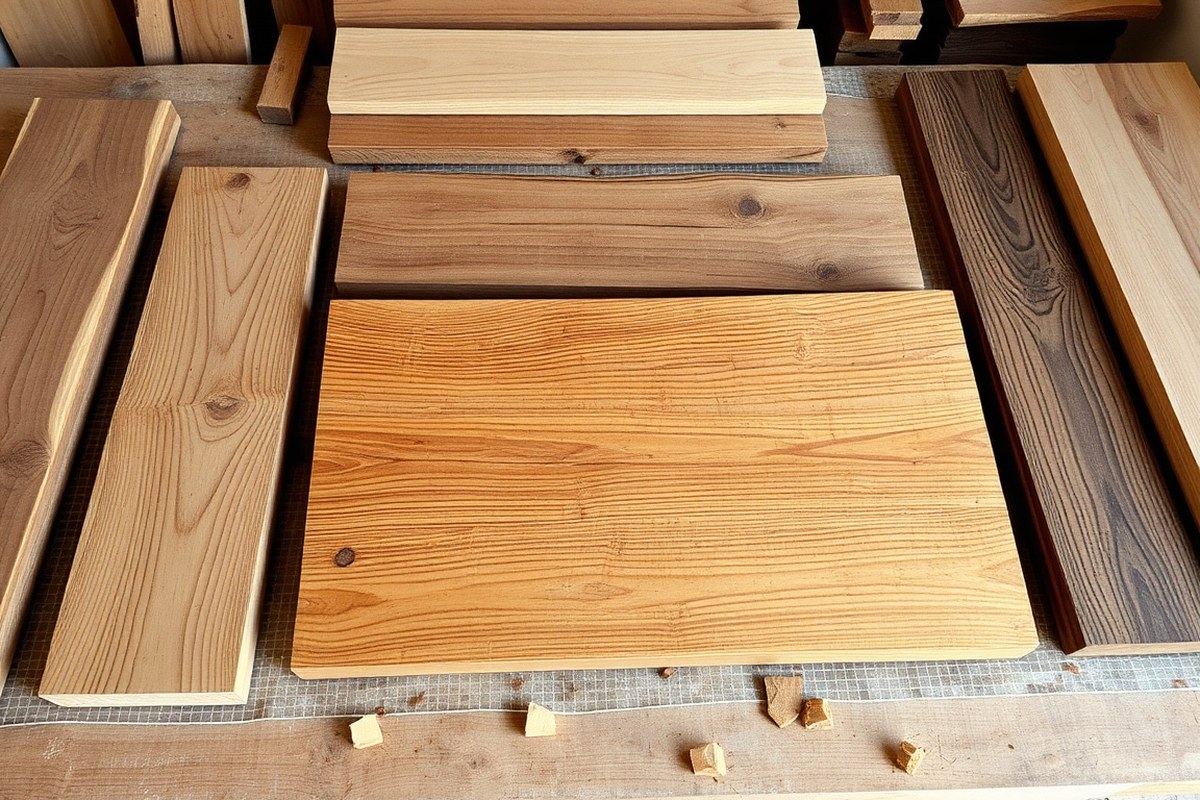
Choosing the right wood is key to achieving an authentic rustic sign that lasts. Softwoods like pine and cedar offer affordable options that take distressing well, making it easy to get that weathered look. Hardwoods such as oak or maple bring more durability but can be tougher to distress and cost more. Pallet and scrap wood are popular for rustic signs because they often already show wear and character, but it’s essential to check for chemicals, nails, and roughness before use.
Wood type influences both how your sign will look and how long it lasts outdoors or in humid spaces. Softwoods absorb paint and stain well but prone to dents and moisture damage. Hardwoods resist wear better but might require additional sanding and priming for paint. Reclaimed pallet wood can give your project a unique, naturally aged texture and is budget-friendly, but prepare for extra prep work to remove contaminants and smooth splinters.
| Wood Type | Rustic Look | Cost (per board foot) | Ease of Distressing | Durability | Availability |
|---|---|---|---|---|---|
| Pine | Good natural grain, light knots | $2, $3 | Easy to distress with hand tools | Moderate, can dent easily | Widely available at lumber yards |
| Cedar | Rich color with aromatic qualities | $3, $5 | Medium, soft enough but resists deep gouges | Good, naturally rot-resistant | Common in home centers |
| Oak | Strong grain, classic rustic | $5, $8 | Harder, needs power tools or extra effort | Excellent, very durable | Specialty hardwood suppliers |
| Maple | Fine grain, less rustic | $6, $10 | Challenging to distress by hand | Excellent durability | Specialty hardwood suppliers |
| Pallet Wood (Reclaimed) | Varied, weathered, unique character | Usually free or under $1 | Very easy, naturally distressed | Varies; check for rot or damage | Common, often free |
Use the table to balance aesthetics, budget, and project needs. If you want a true rustic feel with minimal effort, pallet or scrap woods are excellent. You’ll spend less but need to measure, clean, and sand thoroughly to avoid splinters or contaminants. For more polished, durable signs, go for pine or cedar. Save hardwoods like oak for pieces that must last longer or require strong structure, keeping in mind these require more work and cost.
Always inspect reclaimed or pallet wood for signs of chemical treatment, nails, or mold before use to keep your project safe and stable.
Essential Tools and Supplies for Rustic Wood Signs
Crafting a rustic wood sign by hand requires just a few essential tools and supplies. Basic woodworking equipment helps you prepare and distress wood, while painting and lettering materials bring your design to life. Choosing the right safety gear protects you during every step of the process.
Basic Woodworking Tools
Begin with a simple set of woodworking tools. A handsaw or a jigsaw ($15 to $40) lets you cut fence pickets, wood stakes, or paint stirring sticks to size. Sandpaper (medium to fine grit, around $5 per pack) smooths rough edges and prepares the wood’s surface for staining or painting. You may also want inexpensive clamps ($10 to $20) to hold pieces steady while you work.
For distressing wood, a hammer and screwdriver can create dents and scratches to improve the rustic look without needing power tools. If you want to use a wood stain, pick a staining brush ($5 to $10), which absorbs and applies the color evenly, instead of a rag that can leave streaks. These tools balance affordability with functionality for beginners and intermediate crafters.
Painting and Lettering Supplies
Lettering is key to achieving the rustic sign’s charm. Vinyl stickers ($5 to $15 for basic letter sets) offer quick, neat lettering but limit customization. Stencils ($5 to $20), in contrast, allow hand-painting for a more authentic, hand-made effect even if your brush skills are developing. For hand-lettering, trace your design with a pencil before painting.
Use acrylic craft paints ($3 to $8 per bottle) because they dry quickly, adhere well to wood, and come in many colors. White, black, or earth tones suit rustic aesthetics best. Seal your work with a matte or satin polyurethane ($10 to $20 per can) to protect against moisture and fading without adding shine that can lessen the rustic feel.
- Printer for design templates ($50 to $100, optional but helpful)
- Vinyl letter stickers for quick lettering ($5, $15)
- Paint stencils for custom hand-painted fonts ($5, $20)
- Acrylic craft paints in rustic colors ($3, $8 each)
- Wood stain and staining brushes ($5, $15)
- Clear matte or satin polyurethane sealant ($10, $20)
Using multiple lettering methods is fine: start with vinyl letters for uniformity, then add stenciled or freehand details for character. Allow paint and sealants to dry for at least 24 hours in a well-ventilated area for best results.
Safety Gear and Workspace Setup
Wear safety glasses to protect your eyes from sawdust and paint splatters. Use gloves (rubber or leather) when handling stain or polyurethane to prevent skin irritation. A dust mask or respirator is important if sanding outdoors is restricted or if you’re sensitive to dust and fumes.
Work in a well-ventilated space, ideally outdoors or near an open window, to avoid inhaling paint fumes and dust. Keep your tools organized to prevent accidents. Clear your workspace of clutter before you begin cutting or painting.
Preparing and Distressing Wood for a Rustic Finish
Preparing wood properly is essential to achieve a rustic finish that looks weathered yet feels smooth to the touch. Distressing wood creates character and age, and you can do it through controlled sanding, staining, and mechanical methods. Each technique changes the wood’s look in different ways, so using a combination helps build depth and an authentic rustic vibe.
Sanding and Surface Preparation
Start with sanding to get a smooth surface that’s safe and ready for distressing and painting. Proper sanding removes rough spots and splinters while leaving some texture to maintain a rustic feel. Avoid over-sanding, which can make wood look too new and flatten natural patterns.
Use medium-grit sandpaper (around 120 grit) to smooth the surface first. Then, follow with a finer grit (180-220) on areas where you want a soft finish. Sand edges and corners more aggressively to mimic natural wear. Be sure to wipe off all dust with a tack cloth or damp rag before staining or painting.
Applying Stain for Aging Effects
Staining adds color and highlights the wood’s grain, making the sign look aged and worn. Choose a stain color like walnut or dark oak for a classic rustic tone. Use a foam brush to apply the stain evenly, letting it soak into the wood for 5 to 10 minutes, depending on how dark you want the finish.
Wipe off excess stain with a clean cloth to avoid blotches. The longer the stain sits before wiping, the richer and deeper the color becomes. This step also seals the wood slightly, preparing it for any additional distressing or painting. You can repeat staining after distressing for more dimension.
Mechanical Distressing Techniques
Mechanical distressing creates physical texture and imperfect marks that give wood an aged character. You can achieve this without sanding, using tools like a hammer, metal chains, or wire brushes to imitate natural wear and tear.
Try tapping wood gently with a hammer to create small dents or dragging a wire brush along the grain to roughen specific spots. For a chipped paint effect, apply Vaseline to areas before painting and brush it off after drying to reveal uneven patches. Combining these methods makes each sign unique.
- Sand your wood board with 120-grit sandpaper to smooth the surface, then use 180- or 220-grit sandpaper on edges and flat areas for softness.
- Wipe dust off thoroughly with a tack cloth or slightly damp rag to prepare for stain.
- Apply stain evenly using a foam brush, allowing it to penetrate for 5-10 minutes depending on desired darkness.
- Wipe off excess stain with a clean cloth to avoid blotching and let it dry completely.
- Use mechanical tools like a hammer or wire brush to add dents, scratches, or worn spots for weathered texture.
- Optionally, coat spots with Vaseline before painting for a chipped look once paint dries and is rubbed away.
- Repeat stain application after distressing if you want richer color contrast in worn areas.
Avoid heavy sanding after staining, as it can remove layers unevenly. Test distressing techniques on a scrap piece of the same wood to preview results. Costs mainly include sandpaper (around $5 for a pack), a small can of stain ($10 to $15), and basic tools you may already own. Each step improve the look but requires patience for drying and careful application to prevent damage.
Designing and Transferring Lettering by Hand
Creating a balanced and clear layout before transferring your design is essential for a professional rustic sign. Use simple tools like rulers and printed templates to space your lettering evenly. Transferring your design can be done by tracing with pencil or using stencils, both methods helping to avoid mistakes. Painting crisp letters by hand requires the right brushes and careful brushwork for sharp edges without bleeding.
Planning Your Layout and Spacing
Start by measuring the wood surface to find the center point and margins. Use a ruler to mark light guide lines in pencil for where the letters will sit. Design your lettering on a computer with programs like Microsoft Word or PicMonkey to visualize the spacing and size before printing. Aim for consistent letter height, and allow equal spacing between letters and words to avoid crowded or uneven text.
Templates are very helpful for achieving balance. Pre-made sign templates for phrases like “Welcome” or “Farmers Market” ensure letter size and placement that fit common sign dimensions. Print your chosen design full size to use as a guide on your wood surface. Position the printed lettering centered horizontally and vertically before transferring, checking measurements carefully to maintain symmetry.
Transferring Designs with Pencil and Stencils
Transferring your lettering can be done manually with pencil or by using stencils, both effective for beginners and intermediate wood sign makers. For pencil transfer, print your design on regular paper and flip it over. Trace over the letter outlines with a dark pencil on the back so a carbon layer forms. Lay the paper, pencil side down, on the wood and firmly trace over the letters with a pen or stylus. This leaves faint pencil marks on the wood to follow during painting.
Stencil transfer works well for repeated designs or complex fonts. Secure the stencil to your wood with painter’s tape to avoid shifting. Use transfer tape to pick up vinyl letters or shapes, then place them carefully centered on your wood. Both methods demand patience and pressure to ensure clear lines for your painting stage. Avoid smudging the pencil marks or lifting the stencil during the process.
- Print your design at full size after finalizing the layout.
- Flip the printout over and shade heavily with pencil around the lettering.
- Place the printout pencil side down on the wood where you want the design.
- Trace over the letters firmly with a pen or stylus to transfer pencil marks.
- Remove paper and check for clear outlines on the wood surface.
- If using stencils, tape the stencil in place and use transfer tape to position vinyl letters.
- Pounce paint carefully over stencil openings to avoid bleeding.
Trace designs gently with pencil to avoid deep marks that are hard to cover later; faint lines are easier to hide with paint.
Brush Techniques for Hand-Painting Letters
Choosing the right brush size is key for neat lettering. Smaller flat or artist brushes work best for detail, typically ¼ inch to ½ inch wide for average sign lettering. Avoid large, thick brushes that cause uneven edges or excess paint buildup. Load your brush with a small amount of paint to prevent drips and control strokes.
Use a pouncing technique instead of sweeping brush strokes to reduce paint bleeding under stencils or over pencil lines. This means tapping the brush lightly onto the wood rather than dragging it side to side. For a rustic look, apply one base coat with a smooth brush and then layer on texture by dabbing with a stencil brush or dry brushing.
Paint slowly, following your pencil or stencil outlines closely. Allow each letter to dry before adding any layering or second coats to avoid smudging. Clean brushes promptly after use to maintain good control and sharp edges on future projects.
Finishing Your Rustic Sign with Sealers and Protection
Sealing your rustic wood sign is essential to protect it from moisture, UV rays, and everyday wear, especially if you plan to hang it outdoors. A good sealer preserves the rustic look while preventing damage like fading, chipping, or water stains. Choosing the right finish depends on the sign’s location and the type of rustic finish you want to maintain.
Popular sealing options include polyurethane, wax, and spray sealers. Polyurethane offers strong, durable protection for outdoor signs, can handle temperature changes, and shields against UV damage. Wax keeps the natural, matte rustic texture but works best indoors because it doesn’t resist moisture well. Spray sealers provide a quick, even coat and are good for delicate hand-painted details, but may require multiple layers for strong protection.
| Sealer Type | Best For | Finish | Durability | Application |
|---|---|---|---|---|
| Polyurethane | Outdoor & indoor signs | Clear, satin/gloss options | Excellent moisture and UV protection | Brush on, 2-3 coats with light sanding between |
| Wax | Indoor signs, preserving rough texture | Matte, natural wood feel | Low moisture resistance | Rub in with cloth, buff to desired sheen |
| Spray Sealers | Hand-painted and detailed signs | Clear, light finish | Moderate; multiple coats needed for durability | Spray evenly, hold can 6-8 inches away |
Start by cleaning your finished sign of dust or debris. For polyurethane, use a high-quality synthetic brush to apply the first thin coat along the wood grain. Let it dry for 4-6 hours at 70°F and lightly sand with 220-grit sandpaper to smooth the surface without removing the finish. Apply 2-3 total coats for full protection, allowing the same drying and sanding time between each. Avoid putting on thick layers to prevent runs and bubbles.
To apply wax, use a clean, soft cloth to rub a thin layer over the sign, covering the entire surface. Let it dry for a few minutes, then buff with a clean cloth to reveal a soft, matte sheen that maintains the sign’s rustic charm. Reapply wax seasonally or if water spots appear.
For spray sealers, choose a well-ventilated space and hold the can about 6 to 8 inches away from the surface. Spray in smooth, even strokes to avoid drips. Let each coat dry 30 minutes to 1 hour, adding 2-3 thin coats. Spray sealers work well for sealing delicate painted details without changing the rustic look drastically.
Careful application paired with the right sealer type ensures your rustic sign remains beautiful and protected. For outdoor signs, polyurethane is usually the best choice despite a slightly shinier finish. Wax preserves a more natural look for indoor décor. Spray sealers balance ease and protection, especially on detailed artwork. Regular maintenance like a quick dusting or occasional reapplication of wax or polyurethane keeps the sign looking fresh without losing its hand-crafted charm.
Budget-Friendly Tips and Common Mistakes to Avoid
Keeping costs low while making a rustic wood sign starts with smart material choices and careful use of supplies. Choose affordable wood such as pine or repurposed pallet wood, which often costs under $10 per board at local lumber yards or home improvement stores. Avoid buying large quantities of paint by using sample-size jars or mixing leftover paints. Use basic brushes and sandpaper rather than specialized tools when starting out; plain foam brushes are often under $5 and work well for painting and sealing. Learning to prepare your wood properly with sanding and distressing avoids costly mistakes that can waste materials or force repainting.
Common mistakes beginners make often stem from uneven paint application, paint smudges, and inconsistent distressing. Paint runs usually happen when you apply thick layers too quickly. To prevent this, use thin coats and let each layer dry fully, typically 1 to 2 hours depending on humidity. Blotchy paint or blotches happen if the surface isn’t clean or sanded enough. Always wipe the wood surface with a damp cloth before painting and sand lightly with 120-grit sandpaper after each dry coat to ensure smoothness and prevent blotchiness.
- Buy small amounts of paint or use paint samples to reduce waste and cost
- Repurpose scrap wood or pallets to avoid buying new lumber
- Sand wood between paint layers using 120- to 220-grit sandpaper for smooth finishes
- Apply paint in thin coats and wait 1 to 2 hours between layers to avoid runs
- Test lettering placement on scrap wood before applying on the sign
- Use a damp cloth to clean dust before painting or sealing
- Seal the sign with a clear matte spray sealer for around $10 per can to protect paint and avoid extra sealing coats
Fixing paint smudges or blotches is possible if you act quickly. Lightly sanding the affected area with fine sandpaper and repainting in thin layers can restore a clean look. For runs or drips, wait for the paint to dry fully, then sand the thick spots gently and repaint with less paint on your brush. If the distressing looks uneven, add extra sanding in problem areas or use a wire brush to blend the texture. Protect your work with a clear sealer after correcting mistakes to prevent future damage and make cleaning easier.
Hanging and Displaying Your Rustic Wood Sign Safely
Choosing the right hardware to hang your rustic wood sign depends mostly on its size and weight. Small signs under 5 pounds often hang securely with simple picture hooks or adhesive strips rated for the weight. For medium signs weighing between 5 and 15 pounds, use sturdy D-rings or sawtooth hangers attached with screws into the back of the sign. Heavy or large signs over 15 pounds require wall anchors or toggle bolts drilled into studs to safely support their weight and prevent falls.
Secure mounting matters to avoid damage to walls or your sign. Screw-mounted hooks or metal brackets work well for heavier pieces. Installing two hooks spaced evenly across the top edge improves balance and reduces wobbling. When handling signs that are wider than 24 inches, consider mounting a French cleat system on the back to distribute weight and simplify hanging and removal.
- For signs under 5 pounds: use self-adhesive hooks or small picture hooks.
- Signs 5, 15 pounds: attach D-rings or sawtooth hangers with screws into wood.
- Signs over 15 pounds: mount with anchors or toggle bolts into wall studs.
- Large signs: use two hooks or a French cleat hanging system for stability.
- Rope hanging: tie decorative knots and secure ends through drilled holes or eye screws.
- Framing: add a rustic wood frame to support edges and use frame wire with eye hooks for hanging.
- Outdoor use: choose galvanized or stainless steel hardware to resist rust and corrosion.
Rope is a popular feature that adds rustic charm and a practical hanging method. Use natural fibers like jute or sisal in about ½ inch diameter for strength and style. Drill holes near the top corners of your sign, thread the rope through, and tie secure knots inside the back. For extra security, you can glue the rope ends before knotting to prevent slipping. Rope also works well as a loop over a single hook or nail, which is easier for quick removal. Just make sure rope length keeps your sign level when hanging.
Frames protect your rustic sign edges and offer another way to hang with frame wire attached to eye hooks on the back. Frames can be assembled from scrap wood stained or distressed to match your sign’s look. When hanging framed signs, use heavy-duty hooks or wall anchors since frames add weight. Adding decorative elements like a small seasonal wreath, greenery, or metal accents around the sign can improve its display whether indoors or on a covered porch.
Always confirm your hanging hardware’s weight rating exceeds your sign’s weight by at least 50% to ensure safety.
Step-by-Step Action Plan for Making Your Rustic Wood Sign
Follow these clear steps to create your rustic wood sign confidently. Each phase helps you stay on track and see progress.
- Day 1: Choose and prepare your wood. Select rough or reclaimed wood, then sand and distress it. Your wood should feel smooth in some spots and show natural wear in others.
- Day 2: Gather your tools and supplies. Check you have paint, brushes, sealers, and transfer paper. Organize everything nearby for easy access.
- Day 3: Design your lettering on paper, then transfer it by tracing or using carbon paper. Confirm the design is centered and clear on the wood surface.
- Day 4: Paint your design carefully, using thin coats. Let each layer dry so colors stay vibrant and edges crisp.
- Day 5: Apply a sealer or protective finish. Make sure the wood feels dry and has a consistent sheen without sticky spots.
- Day 7: Attach hanging hardware securely. Test the sign by gently hanging it to ensure it won’t fall or tilt.
- After 2 weeks: Inspect your sign for any needed touch-ups or re-sealing. This keeps it looking good and lasting longer.
Frequently Asked Questions
What Materials Work Best for a Hand-Painted Rustic Sign?
Wood like old pallet boards or repurposed 2x4s work great for hand-painted rustic signs. They provide a natural, textured surface that helps your paint and distressing stand out authentically.
How Long Does It Usually Take to Make a Rustic Wood Sign by Hand?
Making a rustic wood sign by hand typically takes a few hours, depending on your design complexity and drying times. Simple designs or smaller signs can come together faster, giving you creative flexibility.
Can I Add Rope or Other Natural Elements to improve My Rustic Sign?
Yes, incorporating rope or natural elements like twine adds to the rustic charm and texture of your sign. These details create a unique look that pairs well with the distressed wood surface.
Is It Necessary to Seal a Rustic Wood Sign If It’s Only for Indoor Use?
Sealing is recommended even for indoor signs to protect your paint and wood from dirt and moisture. It helps maintain the rustic look over time, especially in kitchens or bathrooms where humidity varies.
What’s the Cheapest Way to Source Wood for Rustic Signs?
Using reclaimed pallet wood or leftover 2×4 lumber from previous projects is often the cheapest way to get wood. These materials can cost little to nothing and naturally have that rustic texture and character.
How Do I Fix Mistakes Made While Hand-Painting Letters on My Sign?
Light sanding or painting over mistakes with the base color before repainting letters works well. Take your time, and fix small errors gently to keep the rustic aesthetic without damaging the surface.
The Bottom Line
Creating your own rustic wood sign by hand is rewarding and personal. Start with a solid design and quality materials, then add your own distressed style. Your next step is to pick the wood and tools today so you can begin crafting soon.