How to Store Vinyl Rolls Properly: 8 Essential Tips for Lasting Quality
How to store vinyl rolls properly is important for keeping them in good condition and ready to use. Store rolls in a cool, stable environment between 60°F and 80°F with moderate humidity to prevent warping and adhesive issues. Starting with temperature control helps avoid damage like cracking or sticking.
Key Takeaways
- Keep vinyl rolls in temperatures between 60°F and 80°F to avoid adhesive softening or vinyl stiffening.
- Maintain humidity around 35% to prevent vinyl from becoming brittle or overly sticky.
- Store vinyl rolls vertically with adequate core support for rolls longer than 15 feet to prevent deformation.
- Protect rolls from direct sunlight and UV exposure to avoid fading and weakening.
- Use racks or cabinets with enough depth and width to accommodate various roll sizes without bending.
- Label low-stock rolls under 3 feet with colored tags to manage inventory efficiently.
1. How to Store Vinyl Rolls to Prevent Damage
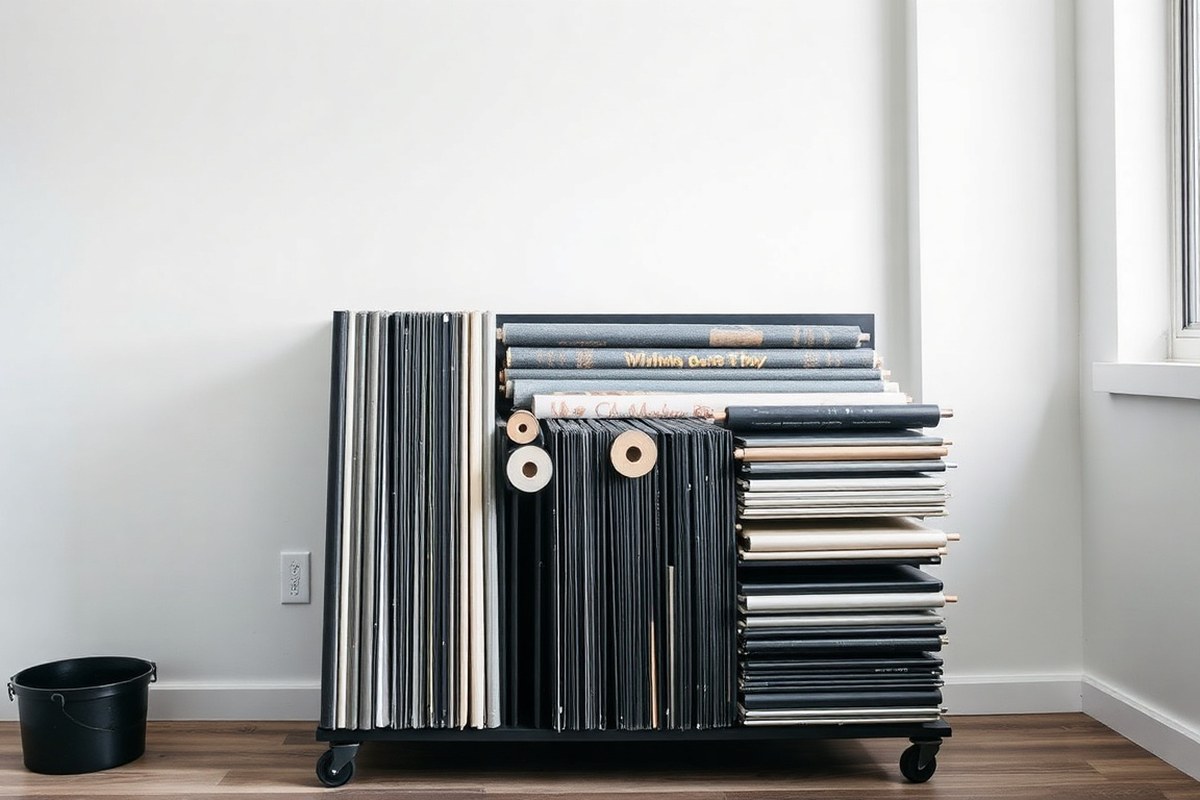
Storing vinyl rolls correctly preserves their shape, adhesive quality, and overall usability. The best practice for full or long-term storage is laying the rolls horizontally on racks or dowels. This orientation prevents gravity from compressing the adhesive layers and avoids permanent deformation of the roll cores, which can happen if stored vertically for extended periods. For shorter-term use or partial rolls, vertical storage may work if the rolls are positioned securely, but avoid stacking or leaning rolls in unstable positions to prevent warping or crushing.
Keeping the vinyl in its original packaging helps maintain adhesive quality by protecting it from dust and contamination. However, if the packaging is damaged or bulky, you can rewrap the roll with clean, smooth paper or plastic wrap that allows some airflow, preventing moisture buildup. Avoid tightly wrapping rolls with non-breathable materials that can trap humidity and degrade adhesive performance.
The diameter of the roll core is also important. Rolls with very small cores or very large diameters should be supported properly to maintain their round shape and prevent oval distortion, which can compromise smooth application later. Using dowels or adjustable racks designed for vinyl storage ensures each roll is evenly supported across its length and circumference.
- Choose a storage location that is clean, dry, and away from direct sunlight or heat sources to prevent adhesive breakdown.
- Use a horizontal storage rack such as a dowel system or pipe rack wide enough to support the entire length and width of each roll.
- Keep vinyl rolls in their original packaging whenever possible. Wrap vinyl rolls loosely in a smooth, breathable fabric to keep dust away while still letting air circulate slightly.
- Place each roll flat on the horizontal rack, ensuring full contact with the support to maintain core shape and adhesive layer integrity.
- For short-term or partial rolls, store vertically but secure rolls firmly against a wall or inside a rack to prevent tipping or bending.
- Avoid piling vinyl rolls directly on top of one another to prevent flattening, creases, or pressure marks that might harm the material.
- Check rolls periodically for signs of adhesive oozing, core deformation, or curling and rotate or rewrap as needed to maintain quality.
Following these steps helps protect your vinyl rolls from common storage problems like adhesive sticking in unwanted places, curling edges, or deformed cores. Good storage requires some initial investment in racks or dowels that typically cost between $20 and $100, depending on size and material. These costs are minor compared to the expense of wasted vinyl rolls or difficult application issues caused by poor storage.
2. Ideal Temperature and Humidity for Vinyl Storage
Vinyl rolls require stable temperature and humidity to maintain their flexibility and adhesive strength. Keeping the temperature between 60°F and 80°F and relative humidity between 40% and 55% preserves the vinyl’s quality and extends the adhesive’s lifespan. Avoid wide temperature swings that can cause vinyl to warp or adhesives to fail.
Safe Temperature Ranges for Vinyl Rolls
Temperature greatly impacts vinyl stability. Vinyl stored below 60°F can become brittle, while temperatures above 80°F may cause the material to soften, warp, or stick together. Frequent fluctuations, especially in garages or unheated spaces, accelerate deterioration and degrade adhesive performance.
Maintaining a consistent temperature within the 60°F to 80°F range is the best way to protect your vinyl rolls. This range aligns with typical indoor climate controls and prevents damage caused by cold or heat extremes. For example, in regions with seasonal swings exceeding 50°F, climate control or insulated storage is recommended to avoid harm.
Recommended Humidity Levels and Why
Humidity affects both the vinyl film and the adhesive layer. When humidity exceeds 55%, vinyl rolls can absorb moisture, causing adhesive breakdown and potential curling or sticking of layers. Very low humidity may lead to brittle vinyl edges, making the material prone to cracking when unrolled.
Optimal relative humidity between 40% and 55% balances moisture without promoting adhesive damage. Keeping humidity steady within this range helps the adhesive remain tacky and the vinyl flexible. A digital hygrometer costing around $15 can monitor humidity in your storage area, providing alerts to excessive moisture or dryness.
Effects of Common Storage Environments
Typical home environments with controlled heating and air conditioning usually maintain suitable temperature and humidity levels. However, garages, basements, and unventilated closets may experience large daily and seasonal swings, risking damage. For instance, garages in seasonal climates can swing more than 50°F, stressing the vinyl and adhesive.
Adding a dehumidifier in humid spaces or ensuring ventilation can help maintain ideal conditions. Use dust-free containers with lids to shield rolls from environmental moisture changes and chemicals that can deteriorate adhesive or vinyl. Organizing vinyl rolls in racks or storage carts keeps them off floors where dampness is common.
| Storage Condition | Temperature Range | Relative Humidity Range | Effects on Vinyl Rolls |
|---|---|---|---|
| Ideal Indoor Climate | 60°F, 80°F | 40%, 55% | Maintains adhesive tackiness and vinyl flexibility |
| Cold Storage (Basement, Garage in Winter) | Below 60°F | Varies | Brittle vinyl, adhesive weakness |
| Hot Storage (Unventilated Garage in Summer) | Above 80°F | Often high humidity | Vinyl warping, adhesive softening or sticking |
| High Humidity Area (Basement, Bathroom) | 60°F, 75°F | Above 55% | Moisture absorption causes adhesive failure and curling |
| Dry Area (Heated Room in Winter) | 65°F, 75°F | Below 40% | Dry, brittle vinyl edges prone to cracking |
The table shows common storage conditions and their impact on vinyl rolls. Checking temperature and humidity regularly helps prevent common issues like adhesive failure or vinyl curling.
Tip: Use a small digital hygrometer to monitor your craft room’s climate, the $15 investment can save hundreds of dollars in ruined vinyl rolls.
3. Protecting Vinyl Rolls from Light, Dust, and UV Damage
Protecting vinyl rolls from light, dust, and UV damage is essential because exposure weakens both the vinyl film and its adhesive. Direct sunlight and even prolonged indirect light through windows or fluorescent bulbs cause fading and adhesive breakdown over months, reducing the material’s effectiveness for crafting projects. Dust and dirt accumulation also interfere with the vinyl’s surface and adhesive, which can make applying the vinyl difficult and reduce its durability.
One of the best ways to guard vinyl rolls is by storing them in protective coverings that block UV rays and dust. Plastic sleeves or tubes designed specifically for adhesive vinyl are a practical choice; they shield the vinyl from debris and accidental damage while preventing light from reaching the material. For those storing vinyl where sunlight exposure is unavoidable, opt for UV-blocking storage bins or cabinets placed in darker areas away from windows. These solutions cost anywhere from $10 for basic sleeves to $50 or more for UV-resistant cabinets but save money in the long run by preserving your supplies.
Dust settles quickly on exposed surfaces, so choosing a fully enclosed storage option is better than open shelves. Vinyl rolls stored uncovered often collect dust on adhesive edges, which can cause sticking issues and attract more debris. Transparent sleeves let you identify your vinyl without opening them, but enclosed bins with lids provide stronger dust and light protection. For high-volume or client-facing workshops, keeping vinyl rolls in neat, covered racks reduces visual clutter and dust exposure.
Handling vinyl rolls carefully when ready to use also limits damage. Avoid stacking heavy items on top of rolls, which can flatten and crease the vinyl. After removing a roll from a protective sleeve, return it promptly to prevent dust buildup. If your workspace is prone to dust, considering a small air purifier or regular cleanings can protect your vinyl over time.
When implementing light and dust protection for vinyl rolls, begin with these steps: choose sleeves or tubes that fit your roll sizes, place storage bins away from direct and indirect light sources, and keep all vinyl covered when not in use. Monitor your storage conditions seasonally, especially if you notice fading or adhesive changes after several months. Keeping vinyl in controlled, protected environments dramatically extends its usability and maintains clean, crisp application results for your projects.
4. Choosing Between Vertical and Horizontal Vinyl Roll Storage
Choosing between vertical and horizontal vinyl roll storage depends mostly on the size of your rolls and the space you have available. Vertical storage works well for longer rolls, as it keeps them upright and prevents flattening or deforming. Horizontal storage suits shorter rolls or those with smaller diameters, but rolls must be supported evenly to avoid squashing and creasing.
Vertical storage lets you access individual rolls without disturbing others, making it easier to organize by color or brand. However, taller storage racks require vertical space and a sturdy base to prevent tipping. Horizontal racks or shelves can be lower and wider, fitting under counters or in smaller rooms. A key risk with horizontal storage without adequate support is the roll sagging or the vinyl edges getting crushed, which can ruin the finish and usability.
The best approach depends on how many rolls you have, their widths, and your craft room’s layout. For rolls around 12, 24 inches wide, vertical racks often optimize space. If your rolls are shorter or less than 12 inches, horizontal shelving or containers might offer more convenience. Sometimes, combining both methods works well: vertical racks for your most-used or large rolls and horizontal solutions for smaller or backup inventory.
| Storage Type | Best Roll Size | Space Needed | Capacity Example | Risks |
|---|---|---|---|---|
| Vertical Storage Racks | 12″ to 24″ wide rolls | Requires vertical clearance, less floor space | Up to 20 rolls (2″ x 27″ rolls) | Potential tipping without sturdy base |
| Horizontal Shelves or Racks | Up to 12″ rolls or small rolls | More floor or counter space | Varies by shelf; can hold many rolls if supported evenly | Squashing, rolling flattening if unsupported |
| Clear Plastic Storage Bins | Any size, better for short rolls | Stackable, uses vertical and horizontal space | Depends on bin size; multiple rolls per bin | Risk of crushing if overfilled or compressed |
| DIY Roll Holders (Mixed) | Any size, customizable | Flexible based on design | Holds 12 to 100 rolls with good organization | Must ensure proper support and balance |
To decide on the best storage method, measure the vinyl roll widths and the room’s available vertical and horizontal space. Then compare your inventory size to the typical capacities of racks or bins. For instance, if you have mostly 2″ x 27″ rolls and limited floor space, a vertical rack holding up to 20 rolls is efficient. On the other hand, if the rolls are smaller and you can dedicate some shelf space, horizontal storage with sturdy shelving might prevent rolls from deforming.
Make sure racks or shelves are solid enough to hold your vinyl weight without warping. Label every roll with its brand, color code, and finish to speed up retrieval. Keeping your vinyl rolls organized by storage type and size will save time and prevent damage, ultimately protecting your investment in crafting materials.
5. Effective Storage Solutions: Racks, Cabinets, and DIY Options
Vinyl roll storage solutions vary from commercial racks to DIY setups, each with distinct advantages and costs. Commercial racks often come ready to use with strong materials and design, offering durability and specific features like UV protection through enclosed cabinets or covered systems. They tend to cost substantially more, sometimes 5 to 10 times the price of DIY options. DIY racks, such as wall-mounted wooden dowel holders, provide an affordable means to organize and protect your vinyl while using basic materials under $30. These are customizable and perfectly suitable for crafters and small business owners alike.
Choosing the right storage system depends on your space, budget, and how much vinyl you need to store. Commercial cabinets are best when protecting vinyl from UV exposure is a priority. Wall racks or pouches excel in accessibility and space-saving. DIY projects let you build a solution tailored to your workshop, giving you control over size and configuration without a significant financial investment.
| Storage Type | Cost Range | Protection | Accessibility | Customization | Ideal For |
|---|---|---|---|---|---|
| Commercial Cabinets | $150, $500+ | High (closed, UV-protected) | Moderate | Low | Long-term, UV-sensitive vinyl storage |
| Commercial Wall Racks | $50, $150 | Low to Moderate (open racks) | High | Low | Quick access, limited space |
| DIY Wooden Dowel Wall Rack | Under $30 | Low (can add coverings) | High | High | Budget-conscious, customizable storage |
| DIY Pegboard & Curtain Rod System | Under $40 | Low | High | High | Flexible, adaptable roll sizes |
You can build your own storage by selecting a suitable wall space, cutting dowels to fit your vinyl roll diameter, and mounting supports at intervals to hold each roll separately. Using a pegboard with chains and curtain rods offers a versatile alternative that adjusts as your inventory grows or changes. Adding opaque covers or storing in closed cabinets meantime will help shield your vinyl from UV damage, an important factor for preserving color integrity over time.
Tip: Ensure your DIY rack supports the entire length of each roll to avoid sagging, which can damage the vinyl edges.
6. Organizing Vinyl Rolls by Color, Size, and Usage
Organizing vinyl rolls by color, size, and usage streamlines your workflow by making it easier to find the materials you need quickly and keep track of inventory. Sorting rolls into logical groups and using clear labels reduces wasted time and the chance of selecting the wrong vinyl. Managing partial rolls and low stock helps ensure you know what’s available and when to reorder.
Sorting Vinyl Rolls by Color and Size
Sorting rolls first by size and then by color offers an efficient way to organize your collection. Size-based sorting ensures rolls fit properly in storage racks or cabinets and prevents damage caused by overcrowding. Grouping by color within those size categories lets you spot specific hues quickly when working on projects.
Arrange the rolls from smallest to largest diameter or width, depending on your rack or container dimensions. Then, visually group rolls by main color families such as reds, blues, greens, and neutrals. For multi-color projects or seasonal use, you might also keep frequently used colors in more accessible spots.
Labeling Tips and Tools
Clear, consistent labels save time and reduce frustration when you need to find or replace vinyl rolls. Labels should include at least the size, color, and vinyl type or finish if relevant. Using a label maker with durable, adhesive label tape prevents peeling and fading over time.
Label each roll’s end or the storage spot where it rests, so you can scan your collection at a glance. Consider using a color-coding system for quick identification by eye; for example, adding a small colored dot sticker matching the roll’s color family on the label. Writing the vinyl’s width in inches or feet helps with quick measurements during planning.
Portable label makers range from $20 to $60 and are a worthwhile investment for crafting spaces with 20 or more rolls. For smaller collections, printed paper labels in clear plastic sleeves or simple masking tape labels work well.
Managing Inventory Levels and Partial Rolls
Tracking partial rolls and low stock is key to maintaining a ready supply and avoiding project delays. Store partially used rolls on a designated shelf or compartment, keeping the cut end protected and secured with tape or a retractable vinyl clip.
Use a simple inventory log, either paper-based or digital, to record roll color, size, vinyl type, and remaining length. Update this log whenever you use or add vinyl. This helps you identify when stock runs low and when to reorder.
Store smaller leftover pieces in labeled bags or containers organized by color or project type to minimize waste. Keeping partial rolls visible but separate avoids mixing them with full rolls and makes it easier to use up scraps before opening new vinyl rolls.
- Gather all vinyl rolls and clear your workspace.
- Sort rolls first by width or diameter to fit your storage setup.
- Within each size group, arrange rolls by color families for easy visual access.
- Label each roll with size, color, and vinyl type, using a label maker or durable tape.
- Apply matching colored dot stickers or tags for quicker visual sorting.
- Designate specific storage spots or compartments for partial rolls and mark them clearly.
- Keep a detailed inventory log that notes quantities, sizes, colors, and leftover length for each roll.
- Regularly update your labels and inventory list after using or adding vinyl materials.
7. Common Vinyl Storage Mistakes and How to Fix Them
Improper temperature, humidity, and handling are common reasons vinyl rolls end up curled, cracked, or with sticky adhesive issues. Vinyl stored above 65% relative humidity often develops liner curl and can even grow mold, especially on paper-backed types. Heat spikes, like those in a non-climate-controlled space during summer, cause vinyl to expand and contract unevenly, leading to permanent warps or adhesive failure. Mechanical damage, such as dropping rolls or crushing them under heavy items, also causes cracks and creases. Vinyl rolls damaged this way may be impossible to fully recover and could ruin small projects if used.
To fix vinyl rolls with adhesive problems, start by re-taping the leading edge before returning them to storage to prevent further adhesive contamination and curl. If the adhesive has prematurely released or become tacky, gently rolling the vinyl in the opposite direction of the curl can help flatten it out. This needs to be done slowly and carefully to avoid cracking. Allow vinyl to acclimate in a stable, climate-controlled environment for 24 to 48 hours before use. Avoid using heat guns or hair dryers to try restoring flexibility; excessive heat worsens damage.
Poor handling or stacking rolls too tightly applies pressure causing creases in vinyl sheets that never fully smooth out. Using shelves or racks designed specifically for vinyl rolls avoids this issue. Store rolls horizontally with enough space to prevent crushing or vertically with a support that maintains the roll shape. Label rolls clearly to keep the use order and prevent unnecessary unrolling or repetitive handling.
Checklist for avoiding mistakes includes: confirming storage space maintains steady 65°F to 75°F temperature and 40% to 60% humidity; minimizing exposure to direct sunlight and dust; using re-tape on partial rolls; supporting rolls without tight compression; and keeping an organized system where rolls can be accessed without rough handling. Recovery steps for curled or adhesive-troubled rolls involve slow reverse winding, acclimation in a climate-controlled room, and gentle flattening on a flat surface weighted evenly if slightly warped. Avoid aggressive attempts to remove adhesives or heat treatments, which often cause irreversible damage.
Permanent damage usually comes from wide temperature swings, prolonged humidity above 65%, or physical breaks in the vinyl layer. Such vinyl often shows cracks or adhesive that won’t stick properly again. Rolls exposed to these conditions for extended periods may need to be replaced to avoid wasting project materials. Since most adhesive and heat-transfer vinyl carries a shelf life of 2 to 5 years under correct conditions, discarding seriously damaged rolls and investing in proper storage pays off over time by protecting your supplies.
8. Maintaining and Replacing Vinyl Rolls over Time
Vinyl rolls can be stored safely for several years when kept in proper conditions. Rotate your stock every 6 to 12 months to ensure the oldest rolls are used first and do not degrade. Replace rolls that show clear signs of wear, loss of adhesive tack, or physical damage rather than storing them indefinitely.
Average Shelf Life of Vinyl Rolls
Vinyl rolls typically last 2 to 5 years in storage, but this depends heavily on environmental factors. Adhesive vinyl manufacturers often cite a shelf life around 3 years when rolls are stored in a clean, dry place away from sunlight. Temperature and humidity control help extend this period; consistent conditions around 70°F and 50% relative humidity are ideal. Shelving and storage solutions that keep rolls upright and prevent crushing will maintain their shape and usability.
The synthetic polymer in vinyl itself does not degrade quickly, but the adhesive backing can dry out or lose effectiveness over time. Storing rolls in sealed containers or cabinets can provide additional protection and slow down aging caused by exposure to air. Specialty or archival vinyl products sometimes have slightly shorter recommended storage times due to additives or thinner coatings.
Signs Vinyl Rolls Need Replacing
Monitor rolls regularly for physical and performance changes. Wrinkling, cracking, or brittle edges on the vinyl surface indicate aging or damage. Loss of adhesive tack or uneven stickiness are signs the roll should be replaced rather than stored further. Also watch for discoloration or mold spots, which mean it’s time to discard the roll for both quality and safety reasons.
Testing a small piece before a project can save time and materials by confirming that the adhesive still functions well. Rolls stored improperly, such as in extreme temperatures or humidity, often fail sooner. Avoid storing vinyl rolls that have been opened and left unused for over 1 year without proper resealing, as prolonged air exposure weakens adhesive properties.
Best Practices for Inventory Rotation
Set up a regular cycle to use older vinyl rolls first, ideally every 6 to 12 months depending on your project volume. Label rolls with the date of purchase or opening to track age easily. Maintain an “active” rack for rolls currently in use and a separate cabinet or box for less frequently used or specialty rolls to protect them from unnecessary exposure.
Rotate stock by moving the oldest rolls to the front or top of your storage system, so you naturally select them first. Establish a reminder system to review inventory every quarter, checking condition and expiry indicators. Keeping a purchase and usage log helps identify trends in how fast you consume materials and when to reorder or replace supplies.
Store vinyl rolls with the label and purchase date clearly visible to avoid accidentally using expired or degraded material.
Step-by-Step Action Plan for Storing Vinyl Rolls
Follow these steps to keep your vinyl rolls in top condition and your workspace organized.
- Before you start: Clean your vinyl rolls and storage area to remove dust and debris, ensuring no particles can cause scratches or damage.
- Day 1: Set up a storage system using racks or cabinets that support vertical storage if space allows. Check that rolls stay upright without squeezing or bending.
- Week 1: Organize rolls by color and size to speed up your workflow. Label each roll or section clearly for quick identification.
- Week 2: Monitor the storage room temperature and humidity, aiming for 65, 75°F and 40, 60% humidity. Use a hygrometer and adjust with a dehumidifier or air conditioner as needed.
- Day 15: Install UV-blocking window covers or store your rolls in opaque cabinets to protect against light and UV damage. Check that light exposure remains low.
- Monthly: Inspect rolls for any signs of curling, discoloration, or dust buildup. Rotate rolls if stored horizontally to prevent flattening or deformation.
- Every 3 months: Replace any rolls starting to lose stickiness or showing damage. Remove old or unused rolls to keep inventory fresh and manageable.
- Ongoing: Avoid stacking heavy items on vinyl rolls and clean storage racks regularly to prevent dust accumulation.
Frequently Asked Questions
What Is the Best Way to Prevent Adhesive Damage to Vinyl Rolls During Storage?
Store vinyl rolls horizontally on dowels or pipe racks because vertical storage can cause adhesive compression and core deformation over time. This method helps maintain the vinyl’s shape and adhesive quality longer.
How Can I Maximize Storage Space for a Large Vinyl Roll Collection at Home?
Use a stacking DIY structure that can hold up to 300 rolls or a double-sided vinyl roll holder for up to 24 rolls. These options save space while keeping your rolls organized and accessible.
Is It Safe to Store Vinyl Rolls in PVC Tubes?
Yes, storing 4-5 vinyl rolls in a single PVC tube keeps them protected from dust and damage. Just make sure the tube is clean and stored in a cool, dry place to maintain vinyl quality.
Can Storing Vinyl Rolls in Direct Sunlight Ruin Them?
Yes, exposure to sunlight can cause UV damage and fading. Keep vinyl rolls in a dust-free container away from windows and bright lights to preserve color and adhesive.
How Often Should I Inspect or Replace Stored Vinyl Rolls?
Inspect vinyl rolls every few months to check for adhesive issues or damage. Replace any rolls that show sticking, brittleness, or discoloration to avoid quality problems in your projects.
What Is the Advantage of Organizing Vinyl Rolls by Color and Size?
Organizing by color and size makes it easier to find the right roll quickly, speeding up your workflow. It also prevents unnecessary unrolling or damage when searching for materials.
Key Points to Remember
Properly storing your vinyl rolls protects their quality and makes your crafting process smoother. Start by creating a clean, organized space with controlled temperature and minimal light exposure. Taking this one step today will keep your vinyl rolls ready and extend their usable life for all your projects.