How to Make a Farmhouse Sign with Cricut: A Complete Step-by-Step Guide for Beginners
How to make a farmhouse sign with Cricut starts with choosing the right wood and design materials. Cutting your design precisely with Cricut makes the process easy and accurate. Preparing the wood base before applying your stencil or vinyl ensures a clean, professional-looking sign.
Key Takeaways
- Use plywood at least 1/2 inch thick for a sturdy farmhouse sign base.
- Tape multiple wood pieces to your Cricut mat for efficient cutting of several designs at once.
- Apply 2-3 coats of paint evenly and wait 20-30 minutes between coats for best coverage.
- Use transfer tape for vinyl designs to place them smoothly on wooden surfaces without bubbles.
- Consider adding a stained wood frame for a polished farmhouse look using thin wood strips and E6000 glue.
- Begin with small, simple designs under 30 minutes to build your confidence and skills.
What Materials and Tools You Need to Start Your Farmhouse Sign
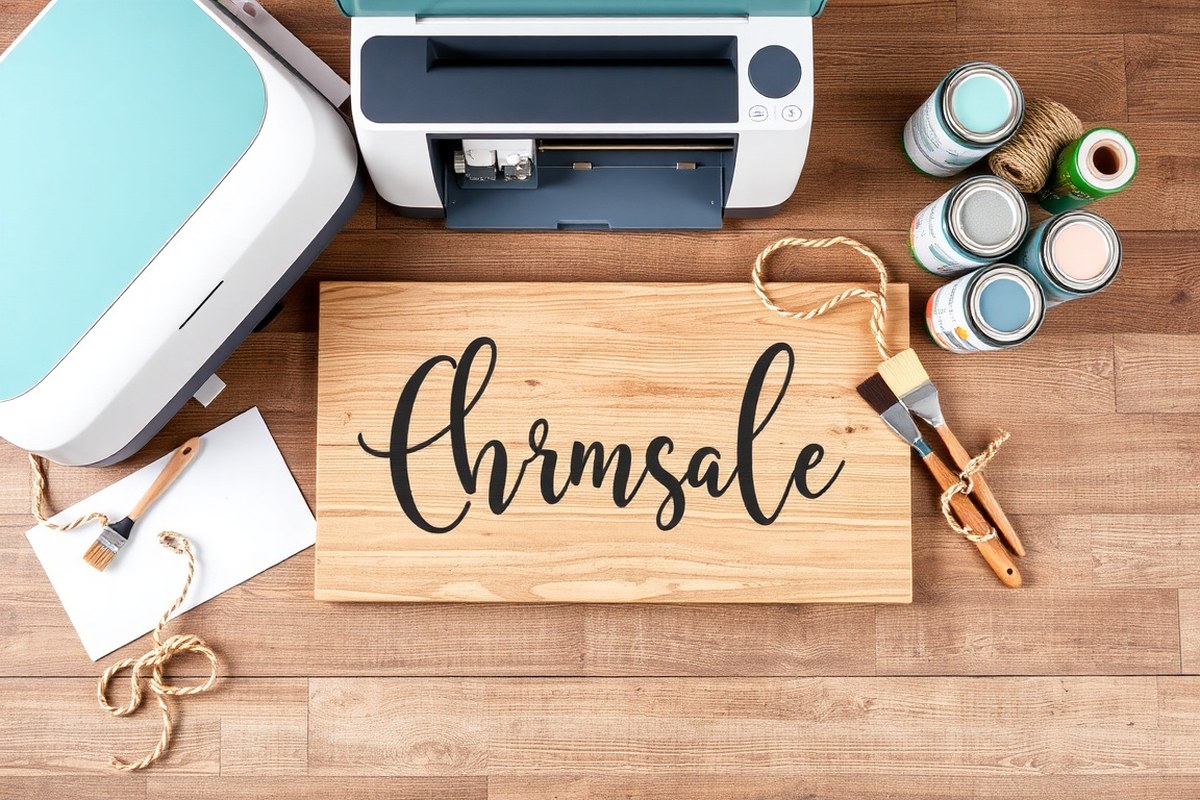
To create a farmhouse sign with your Cricut machine, start by selecting the right wood base. Pine, cedar, or reclaimed pallet wood work well because they have a natural, rustic look and take paint or stain nicely. Choose a piece roughly 12 by 24 inches for a classic size. The wood should be smooth enough to apply vinyl or paint without peeling yet sturdy enough to hold up as decor. A 1/2-inch thickness usually offers enough durability without being too heavy.
For your Cricut machine, models like the Cricut Explore Air 2 or Cricut Maker are ideal since they can cut detailed vinyl decals used in farmhouse signs. Use a fine-point blade for precise cuts on adhesive vinyl, which comes in standard 12-by-24-inch sheets costing around $3 to $5 each. Select outdoor or permanent vinyl if the sign will hang outside, as it resists fading and moisture better than regular vinyl.
Paint is essential if you plan to stencil or add hand-painted elements. Chalk paint in white, black, or muted tones fits the farmhouse style and typically costs $5 to $10 per small jar. Use a foam brush or a small stencil brush for even coverage. Adhesive transfer tape, about $6 per roll, helps move vinyl decals smoothly onto the wood surface without bubbles or damage.
- Wood plank or pallet piece, 12×24 inches, around $5-$15 depending on type
- Cricut machine (Explore Air 2 or Maker recommended), $150-$350 new
- Fine-point blade for vinyl cutting (comes with machine or $10 replacement)
- Adhesive vinyl sheets, $3-$5 each, outdoor vinyl for sheltered outdoor use
- Transfer tape roll, about $6
- Chalk paint and foam brushes, $5-$10 per color jar
- Optional twine and hanging hardware, around $3-$8 for hooks and nails
In addition to the above, keep scissors, weeding tools (to remove vinyl excess), and a ruler or measuring tape handy. These tools help ensure crisp designs and proper alignment. Light sanding tools may be needed if the wood surface is rough or has splinters. Using these materials carefully results in clean, lasting farmhouse signs. Avoid cheap wood or indoor vinyl only if your sign will be exposed to the elements, weather can cause peeling or fading within months.
Preparing and Assembling the Wood Base for Your Sign
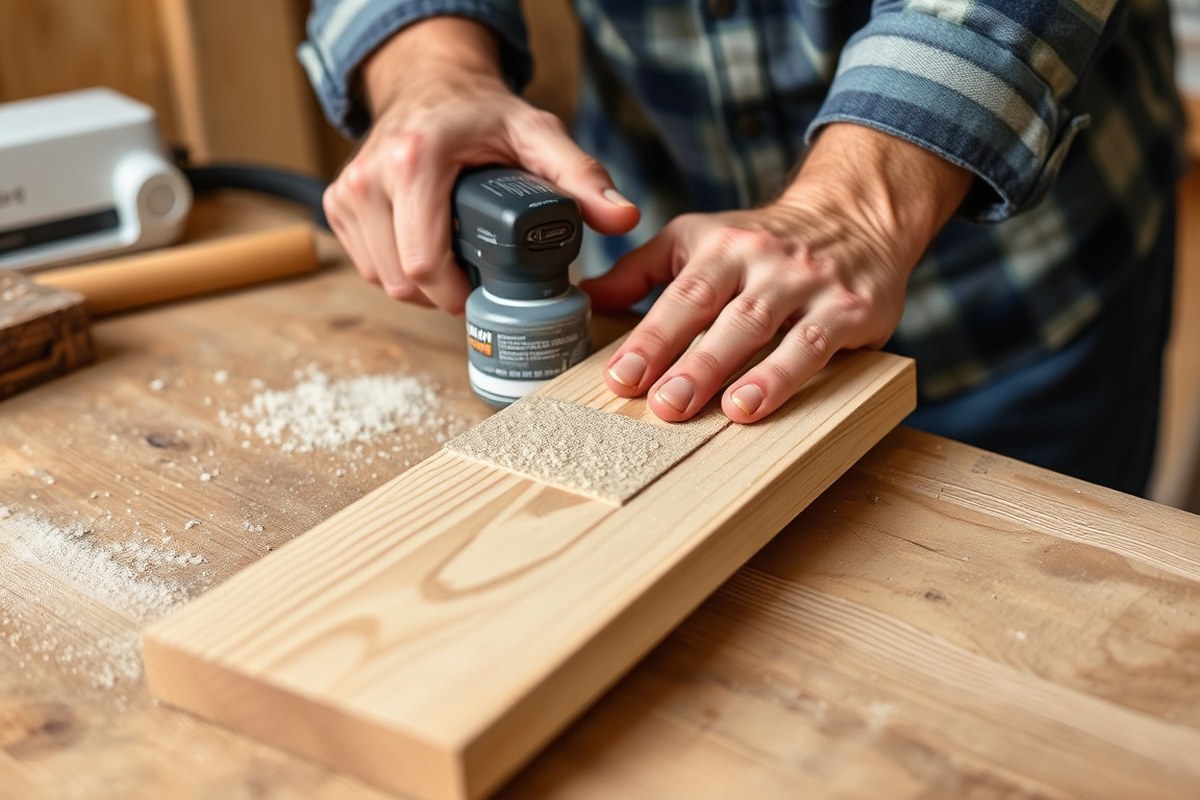
Preparing and assembling the wood base for your farmhouse sign involves cutting the wood to size, sanding for smoothness, applying paint or stain for the desired finish, and optionally adding a wooden frame for a polished look. Careful attention to each step ensures the sign looks professional and fits your design perfectly.
Cutting Wood to Size for Cricut-Compatible Signs
Since Cricut mats have size limits, you’ll usually need to cut your wood to dimensions that fit within your machine’s cutting area or accommodate your stencil placement. Common sign boards are around 4 inches wide by 11 inches long, but check your Cricut mat size before cutting. For example, if the Cricut mat allows a 12-by-12-inch area, you can tape together two narrow boards to fit your design.
Use a miter saw or a hand saw to cut wood to your desired lengths. Choose softwoods like pine or poplar for easier cutting and lighter weight. Aim for consistent thickness, typically 1/2 inch to 3/4 inch, to ensure stability for hanging and framing.
Sanding and Prepping the Wood Surface
Start by sanding each wood piece with medium-grit sandpaper (120 grit). This removes rough surfaces and splinters. Follow up with fine-grit sandpaper (220 grit) to create a smooth surface that paint or stain can adhere to evenly.
Pay special attention to edges and corners to avoid sharpness and to give a polished look. After sanding, wipe the wood with a damp cloth or tack cloth to remove dust. This step prevents paint inconsistencies and helps the stain or paint penetrate the wood better.
Applying Paint or Stain Correctly
You can use chalk paint or wood stain depending on the farmhouse style you want. Chalk paint dries fast and offers an opaque matte finish, optimal for layering designs. Apply 1 to 2 coats, waiting 20 to 30 minutes between each coat for best drying results. Use a foam brush or lint-free cloth for smooth application.
Choose a stain color that complements your sign’s theme when staining. Thin wood strips for the frame can be stained before attaching. Apply a generous coat, wipe off excess quickly, and let dry for at least 2 hours. Stain may require only 1 coat unless you want a deeper shade.
Making and Attaching a Wood Frame or Trim
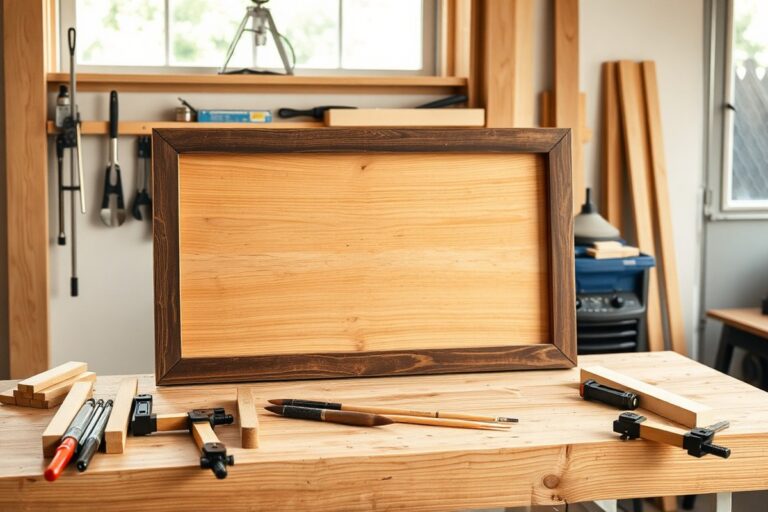
Adding a frame gives your farmhouse sign a finished look. Thin wood strips costing about $1 each from craft stores like Hobby Lobby work well. Cut the strips to match the length and width of your sign board for a clean fit. Stain the strips before attaching to avoid messy smudges afterward.
Attach the frame pieces using a strong adhesive like E6000 glue or small finishing nails. To keep the frame flush, place painter’s tape on the sign edges as guides while gluing. After attaching the frame, stain the back edges of the underlayment so they don’t show irregular color when hung.
Step-by-Step Wood Base Preparation
Follow these steps to prepare and assemble your wood base before applying vinyl or stencils for your farmhouse sign design:
- Measure and mark wood pieces to fit your Cricut project dimensions.
- Cut wood using a miter saw or handsaw to the marked dimensions.
- Sand all surfaces and edges with 120-grit sandpaper, then finish with 220-grit.
- Wipe wood clean with a damp cloth to remove all sanding dust.
- Apply 1-2 coats of chalk paint or wood stain, allowing 20-30 minutes drying time between coats.
- When using a frame, cut and stain thin wood strips to fit the sign size.
- Attach frame pieces to the sign edges using E6000 glue or finishing nails.
- Stain the back edges of the assembled sign to hide unfinished wood when hanging.
Always wear a dust mask and eye protection when sanding to avoid inhaling wood particles and debris.
Designing Your Farmhouse Sign with Cricut Software
You can find and create farmhouse sign designs tailored for Cricut by using Design Space to combine popular fonts and phrases while matching your wood sign’s size. Choosing the right SVG files and adjusting layouts ensures clean cuts and a polished farmhouse look.
Best Websites for Farmhouse SVG Cut Files
Reliable sources for farmhouse SVG files offer free and paid options, with many including commercial use licenses. All So Fontsy provides a Giant Farmhouse Bundle that includes 156 cut files and fonts, perfect for farmhouse signs. Design Space also features many pre-made farmhouse designs, which you can use or modify.
Freeprintable sites provide minimalist farmhouse printables you can convert for Cricut use, especially useful if you’re on a budget. Etsy sellers often offer unique, high-quality SVGs with clear usage rights. Always check for standard commercial licenses if you plan to sell your signs.
- All So Fontsy, Giant Farmhouse Bundle with 156 files and fonts
- Etsy, wide selection of unique SVG cut files
- Cricut Design Space, pre-made and customizable farmhouse designs
- FreePrintable websites, minimalist farmhouse style printables
- LoveSVG and similar platforms for free and paid SVGs
Selecting files optimized for vinyl cutting or basswood cutting helps prevent issues like tearing or incomplete cuts.
Choosing the Right Font Style for Farmhouse Signs
Farmhouse signs favor simple, rustic fonts that resemble chalkboard or handwritten lettering. Fonts with a slightly distressed or script style work well for that authentic farmhouse vibe. Mixing fonts, such as pairing a bold sans serif with a cursive script, creates visual interest and balances readability with charm.
Popular farmhouse fonts include those you can find in the free fall fonts post on All So Fontsy, which offers a variety suitable for seasonal and year-round signs. Use fonts that cut clearly with your Cricut machine and avoid overly fine details that may not cut well on vinyl or wood. Common phrases to feature include warm, inviting sayings like “Gather Here,” “Farm Fresh,” or “Bless This Home.” Personalizing your sign with family names or seasonal greetings adds a unique touch.
Adjusting Design Size and Layout in Cricut Design Space
Measure your wood sign before starting your design and input those dimensions into Design Space. Cricut limits cutting sizes to approximately 10.5 inches by 11.5 inches or 10.5 by 23.5 inches, so design accordingly to fit within these maximums.
To resize your design, select all elements and adjust the width or height in the toolbar. Printing your design on paper before cutting helps you confirm that font size and spacing look balanced and legible on your sign. Use the alignment tools in Design Space to center your design or distribute elements evenly.
Combining or customizing designs involves uploading your own SVG files or using multiple text boxes to try different fonts and phrases. Weld overlapping letters or shapes after adjusting them to prevent cutting them as separate pieces, which ensures smooth application on your wood sign.
Cutting and Preparing Vinyl or Stencils with Your Cricut
Setting your Cricut machine correctly and handling vinyl or stencil materials carefully ensures clean cuts and crisp farmhouse sign designs. Optimal Cricut settings depend on the material you choose. For standard adhesive vinyl, use the “Vinyl” setting on your Cricut Explore Air 2, which applies a pressure between 350 and 400 grams and a blade depth of about 1. For stencil materials like stencil vinyl or acetate sheets, select the “Stencil” or “Stencil Vinyl” setting, which uses slightly less pressure to avoid cutting through the backing.
Choosing the right mat size helps you efficiently use your material. If your wood sign base is 12 inches wide or smaller, a 12″ x 12″ cutting mat works well. For larger signs up to 12″ x 24″, use the longer 12″ x 24″ mat to prevent multiple cuts and seams in your design.
Weeding removes excess vinyl around your design and is important to prevent paint bleeding or messy edges. Handling delicate letter shapes or intricate farmhouse motifs requires precise weeding tools and a steady approach. Follow these steps to cut and prepare your vinyl or stencil material accurately:
- Load your material correctly. Place your vinyl or stencil material glossy side down on a clean Cricut mat. Use a brayer or scraper tool to smooth it out and remove any air bubbles.
- Select the right settings. On the Cricut Explore Air 2, choose “Vinyl” for adhesive vinyl or “Stencil” for stencil material. Adjust the blade depth if your material is thicker than standard (done via Custom settings).
- Cut your design. Use the preview on your software to position the design within the mat size matching your project. Press start and supervise the cut to ensure it cuts through the vinyl but not the backing paper.
- Weed the vinyl carefully. Start by removing the large vinyl areas outside your design. Use a weeding hook tool or tweezers to lift small pieces inside letters, like “A,” “O,” and “E.” Work slowly to avoid tearing these tiny parts.
- Prepare the stencil if needed. For stencils, after weeding, place transfer tape over the stencil side and press firmly with a scraper tool to pick up the cut parts without distortion.
- Store unused vinyl or stencil sheets properly. Keep vinyl rolled with the adhesive side inside to avoid dust contamination. Store stencil materials flat in a cool, dry place to prevent warping.
- Transfer the vinyl or stencil to your wood sign. Use transfer tape for vinyl application or place your stencil securely for painting. Check for smooth adhesion to avoid paint bleed under stencils.
Good results show clean edges on letters and designs with no lifting or bubbling during application. Cutting too deep can score the backing paper, making weeding hard and waste vinyl. Cutting too shallow causes incomplete cutting and peeling issues. Practicing on scrap material before your final sign saves time and material costs. Vinyl sheets typically cost between $1.50 and $3.50 per 12″ x 12″ sheet, so reducing mistakes helps stretch your budget.
Applying the Design to the Wood: Vinyl, Stencil, and Transfer Guide
Applying your Cricut-cut design to wood can be done with vinyl decals, stencils, or pencil and carbon paper transfers. Each method has pros and cons depending on your skill level, desired detail, and time. Choosing the right technique affects how clean and durable your farmhouse sign looks.
Vinyl Decal Application Steps
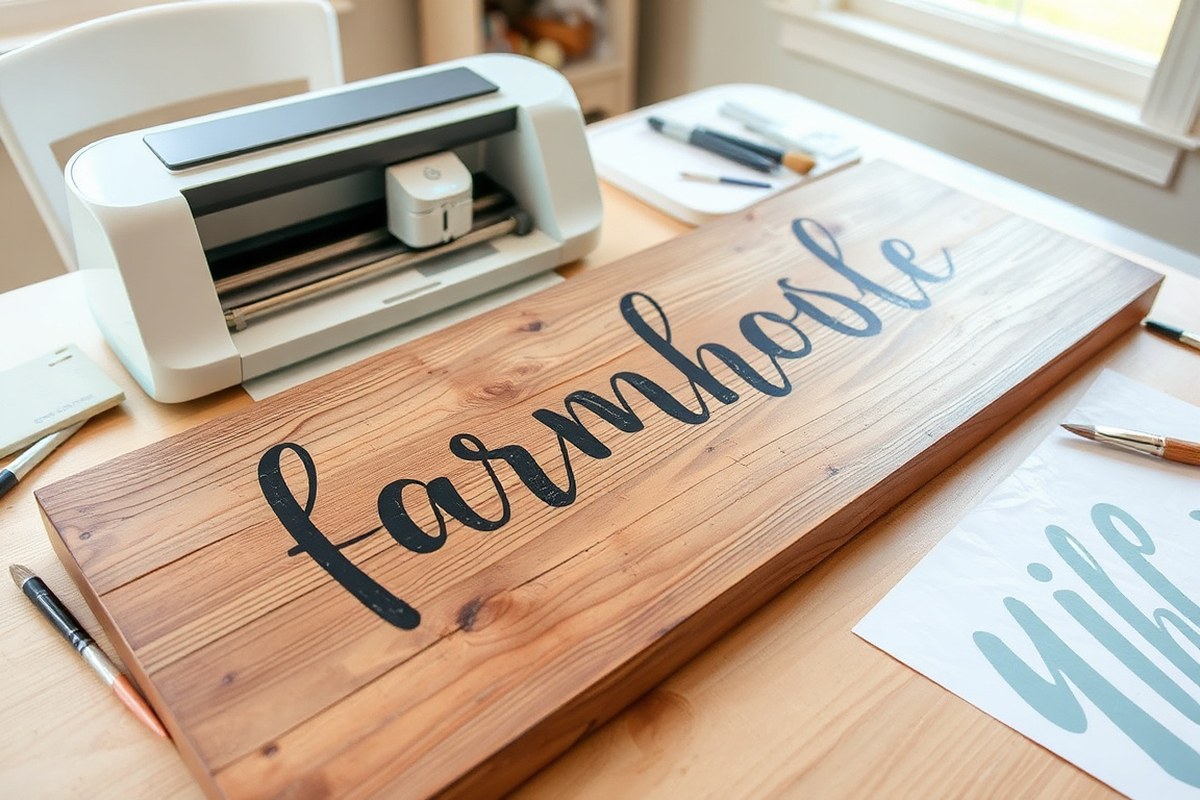
Vinyl decals offer a quick, precise way to transfer designs onto wood, ideal for beginner and intermediate crafters. Start by cutting your design on adhesive vinyl with your Cricut machine. Weed away the excess vinyl, leaving only your design on the backing.
- Use transfer tape to lift the vinyl design from the backing sheet.
- Position the vinyl design on your prepared wood surface exactly where you want it.
- Press down firmly using a scraper tool or a credit card to ensure good adhesion.
- Slowly peel away the transfer tape at a sharp angle, leaving the vinyl on the wood.
This method is fast and yields sharp edges, but vinyl may peel over time if your wood surface isn’t smooth or sealed. It’s best used on sanded, sealed wood and works well for simple lettering and shapes.
Using Stencils for Farmhouse Sign Designs
Stenciling works well for painting farmhouse designs directly onto wood, especially for textured or rustic finishes. After cutting your stencil with the Cricut, place it on the sign and secure with painter’s tape to prevent slipping.
- Apply your paint carefully with a stencil brush or foam roller using light, dabbing motions to avoid bleeding under the stencil.
- Remove the stencil while the paint is still damp to avoid peeling.
- Allow the paint to dry completely before touching or adding other design elements.
Stencils let you get a charming painted look with more flexibility in color and texture. They require more patience and a steady hand to avoid smudges or bleeding. For complex details, they can be harder to align perfectly than vinyl.
Pencil and Carbon Paper Transfer Techniques
Pencil and carbon paper transfers provide a budget-friendly way to trace detailed Cricut designs onto wood for hand painting or filling in with markers. This approach requires more time and precision but works well for custom and detailed art.
- Print your design at the size you want, then lay carbon paper face down on the wood.
- Place your printed design on top of the carbon paper, making sure it won’t slide.
- Trace the design’s outlines with a ballpoint pen or stylus, pressing firmly.
- Carefully lift the papers to reveal a faint pencil outline transferred onto the wood.
- Complete the design by coloring in or painting over the outline as desired.
You can also use plain pencil tracing by placing the printout face down and coloring the back side with a graphite pencil before tracing the front, but carbon paper usually yields clearer results. Buying 100 sheets of carbon paper costs less than $10, making it affordable for multiple projects. The table below compares each transfer method based on ease, cost, detail, and suitability for beginners or particular projects.
| Transfer Method | Ease of Use | Cost | Detail Quality | Best For |
|---|---|---|---|---|
| Vinyl Decal | Easy | Moderate (vinyl sheets around $10-$15 each) | Sharp and precise edges | Simple lettering, quick projects, sealed wood |
| Stencil | Moderate | Low to moderate (stencil material reusable) | Good, but can bleed without care | Painted look, textured wood, multi-color projects |
| Carbon Paper Transfer | Moderate to difficult | Low (packs of 100 sheets under $10) | Detailed, but faint outlines | Hand painting, detailed designs, budget projects |
| Pencil Tracing | Moderate | Very low (just pencil and printout) | Moderate, may be faint | Basic outlines, beginner tracing |
Always secure your stencil or vinyl with tape to prevent shifting; even slight movement ruins the design’s alignment.
Choosing between vinyl, stencils, and transfer papers depends on your comfort, the wood surface, and how permanent or detailed you want your sign. Vinyl works fast for beginners, stencils add a classic painted style, and carbon paper lets you hand-paint elaborate designs on a budget.
Painting and Finishing Techniques to improve Your Farmhouse Look
Acrylic paint works best for farmhouse wood signs because it adheres well and dries quickly, usually within 20 to 30 minutes. Choose chalk paint or matte acrylics for a vintage, rustic finish. When applying base colors, use a foam brush for smooth coverage, then let it dry fully before layering other colors or designs. Thin layers of paint reduce the risk of drips or uneven spots and make distressing easier.
To achieve a farmhouse distressing effect, apply a first base coat in a neutral or muted color. After it dries, add a second coat in a contrasting shade. Use fine-grit sandpaper (around 220 grit) to gently rub off edges and random spots, revealing the first layer beneath. Sand light areas with a circular motion to avoid sharp transitions. This creates the worn, weathered look typical of farmhouse style. Distressing works best after the paint has dried for at least an hour and less than 24 hours to avoid sanding into raw wood.
Adding a protective finish is important to preserve your work and withstand indoor conditions. Apply a clear, matte polyurethane sealant by brush or spray once your paint and distressing are dry to the touch, usually 24 hours after painting. Use two thin coats, drying 2 to 4 hours between each. Sealants that include UV protection can help prevent fading over time, especially in bright rooms. Avoid glossy finishes unless you want a different farmhouse look because they can reduce the rustic charm.
Adding decorative elements improve the farmhouse feel. Wooden frames or bead trims attached with wood glue or small nails frame your sign and give it a finished look. Thin twine or jute wrapped around the edges or tied in simple bows adds texture and complements rustic themes. Plan your layout before gluing to ensure balanced placement. These additions typically cost $2 to $10 depending on materials and can be added before sealing to protect everything evenly.
Good results show smooth paint layers without thick clumps, subtle reveal of underlying colors through sanding, and an even matte seal that feels dry and non-sticky. Mistakes happen when paint layers get too thick or wet during sanding, making the surface uneven or removing too much paint. Applying the sealant too early can also cause smudging or tackiness. Take your time with each step, letting paint dry thoroughly and sanding gently for the best farmhouse sign finish.
Troubleshooting Common Issues with Cricut Farmhouse Signs
Vinyl lifting or peeling from wood often happens when the surface isn’t clean or smooth enough before application. Dust, oils, or rough wood grain prevent vinyl adhesive from bonding well. To fix this, gently sand your wood surface with 220-grit sandpaper until smooth, then wipe it thoroughly with a damp cloth to remove dust. Let the wood dry completely before applying vinyl. Applying a scraper tool firmly across the vinyl helps press it firmly onto the wood, improving adhesion. When the vinyl peels after application, lift the area slowly, add a thin coat of transfer tape, and press firmly with the scraper to reapply.
Paint blotches and uneven coats are common if you overload your brush or paint in thick layers. This causes drips or raised areas that ruin the farmhouse look. Use a foam brush or stencil brush with light, even strokes, applying two to three thin coats instead of one thick one. Let each coat dry for 20 to 30 minutes before adding the next. Blotches may appear; gently sand the paint with fine 320-grit sandpaper after drying, clean the surface, then repaint using thin layers. Paint drying too quickly, especially in hot or dry environments, can cause unevenness, so aim for moderate temperatures between 65°F and 75°F during painting.
Incorrect or crooked cuts from your Cricut can happen because of poor mat adhesion, wrong blade settings, or design errors. To prevent these issues, check that your vinyl or stencil firmly sticks to the Cricut mat with no bubbles or wrinkles. Use the rotary blade for stencils on thicker materials or fine-point blade for vinyl. Double-check your design alignment in the software before cutting. When the design cuts crooked, carefully lift the vinyl with a weeding hook and realign it on the mat for a re-cut. Always preview your cut lines on the screen and run a test cut on scrap material first.
Correct errors before finishing your sign by removing faulty vinyl pieces or mask paint with painter’s tape on affected spots. For paint mistakes, use a damp cloth to blot wet paint before it dries or lightly sand dried paint and repaint. To fix off-center or crooked designs, lightly mark guide lines on the wood with a ruler and pencil before reapplying vinyl or stencils. Light pencil marks can be erased after painting. These fixes help you avoid wasting materials and keep your farmhouse sign looking polished.
Displaying, Maintaining, and Updating Your Farmhouse Sign
Choosing the right hardware to hang your farmhouse sign depends on where you display it. For indoor placement, simple picture-hanging hooks or sawtooth hangers work well and keep the look clean. Outdoors, use weather-resistant options like stainless steel D-ring hangers paired with heavy-duty wire or outdoor-rated twine. These materials resist rust and moisture, helping the sign stay secure through changing weather.
Protecting your sign from dirt, moisture, and fading prolongs its appearance and durability. After finishing your painting, seal the surface with a clear polyurethane spray or outdoor varnish. For outdoor signs, pick a product labeled for exterior use to shield against rain and UV rays. Apply two to three thin coats, allowing about 1 to 2 hours to dry between coats, to avoid cloudiness or peeling. When cleaning, gently wipe with a damp cloth instead of harsh chemicals to preserve the finish.
Farmhouse signs can be adapted for seasonal decor by using removable vinyl or stencils. Instead of permanently painting the design, apply vinyl decals designed for easy removal. To update, peel off the old vinyl carefully and replace it with a new seasonal message or graphic. If using paint, lightly sanding and repainting allows for cover-up but takes more effort and can wear the wood over time. Regular maintenance helps your farmhouse sign stay fresh and attractive year-round. Here’s a checklist to follow every few months or after harsh weather:
- Inspect hanging hardware for rust, loosening, or damage
- Clean dust and dirt with a soft cloth; avoid abrasive scrubbing
- Touch up any scratched or chipped paint with matching paint
- Reapply protective clear coat annually, especially outdoors
- Replace vinyl decals if they start peeling or fading
- Store indoor signs in a dry place when not in use
Signs kept outdoors may require more frequent checks due to greater exposure. Consider moving your sign to a sheltered spot during extreme weather or winter to extend its life. Using twine for hanging provides rustic charm but may wear faster outside, so replace it as needed.
Always test your sealant on a small corner first to ensure it doesn’t alter your paint or vinyl color before covering the entire sign.
Following these steps lets you enjoy your farmhouse sign’s charm with less risk of damage, fading, or wear. A little upkeep preserves your hard work and makes seasonal updates easier and more cost-effective. Budget-friendly sealants cost roughly $8 to $15 per spray can, and durable hanging hardware sets usually run $5 to $10, making maintenance affordable for most DIY crafters.
Step-by-Step Action Plan for Your Farmhouse Sign
Follow these key steps to create your farmhouse sign from start to finish with your Cricut machine. Each phase helps confirm your progress and keeps your project on track.
- Before you start: Gather all materials and tools listed for your farmhouse sign, including wood, vinyl or stencil materials, paint, and your Cricut machine. Verify you have everything before moving on.
- Day 1: Prepare your wood base by sanding and assembling it into the desired sign shape. Check that the surface is smooth and clean to the touch.
- Day 2: Design your sign in Cricut Design Space, selecting fonts and graphics that fit the farmhouse style. Preview your design to ensure it fits your wood dimensions.
- Day 3: Cut your vinyl or stencil using your Cricut machine. Confirm the cut lines are clean and the material can be weeded without tearing.
- Day 4: Apply your vinyl or stencil to the wood, using transfer tape or painters tape as needed. Make sure the design adheres firmly without air bubbles.
- Day 5: Paint your sign using the recommended techniques for farmhouse style, such as distressing or layering colors. Let paint dry fully to the touch.
- Day 6: Remove any remaining stencil materials and add finishing touches like clear sealants or hooks for hanging. Your sign should feel dry and ready for display.
- After 1 week: Check your sign for any needed touch-ups or repairs, especially if displayed outdoors. Make small fixes as you notice wear or fading.
Frequently Asked Questions
What Is the Average Lifespan of a Farmhouse Sign Made with Cricut?
A well-made Cricut farmhouse sign can last several years outdoors when sealed properly. Applying a waterproof sealant helps protect it from weather damage and fading over time.
Can I Use Fabrics Like Burlap with My Cricut to Create Farmhouse Signs?
Yes, burlap can be cut with Cricut for farmhouse signs, adding texture and rustic charm. Using a stabilizer underneath helps cut fabrics cleanly without fraying edges.
How Do I Add a Distressed Look to My Farmhouse Sign Lettering with Cricut Vinyl?
Lightly sanding over the dry vinyl lettering creates a distressed, weathered effect. Be gentle to maintain legibility while achieving the worn farmhouse style.
Is It Possible to Make a Chalkboard Farmhouse Sign Using a Cricut Machine?
Yes, Cricut can cut stencils for chalkboard farmhouse signs, which are easy for beginners. You can customize phrases and switch designs anytime by erasing chalk.
What Size Wood Plank Works Best for a Beginner Farmhouse Sign Project?
A 12×18 inch plank is an ideal starting size, offering enough space for designs without being unwieldy. It’s also easy to handle and fits common vinyl sizes.
Can I Hang My Farmhouse Sign with Twine for Outdoor Display?
Twine is a simple and authentic option to hang farmhouse signs outdoors. Make sure to attach it securely and choose weather-resistant twine to improve durability.
Before You Go
Creating a farmhouse sign with your Cricut lets you add a personal, rustic touch to your home decor. Once your sign is complete, place it in a spot that highlights its charm and consider making seasonal updates to keep your decor fresh. Start your next project by experimenting with different fonts or paint colors to expand your farmhouse crafting skills.