How to Make a Door Hanger Sign: Complete Steps and Tips That Work
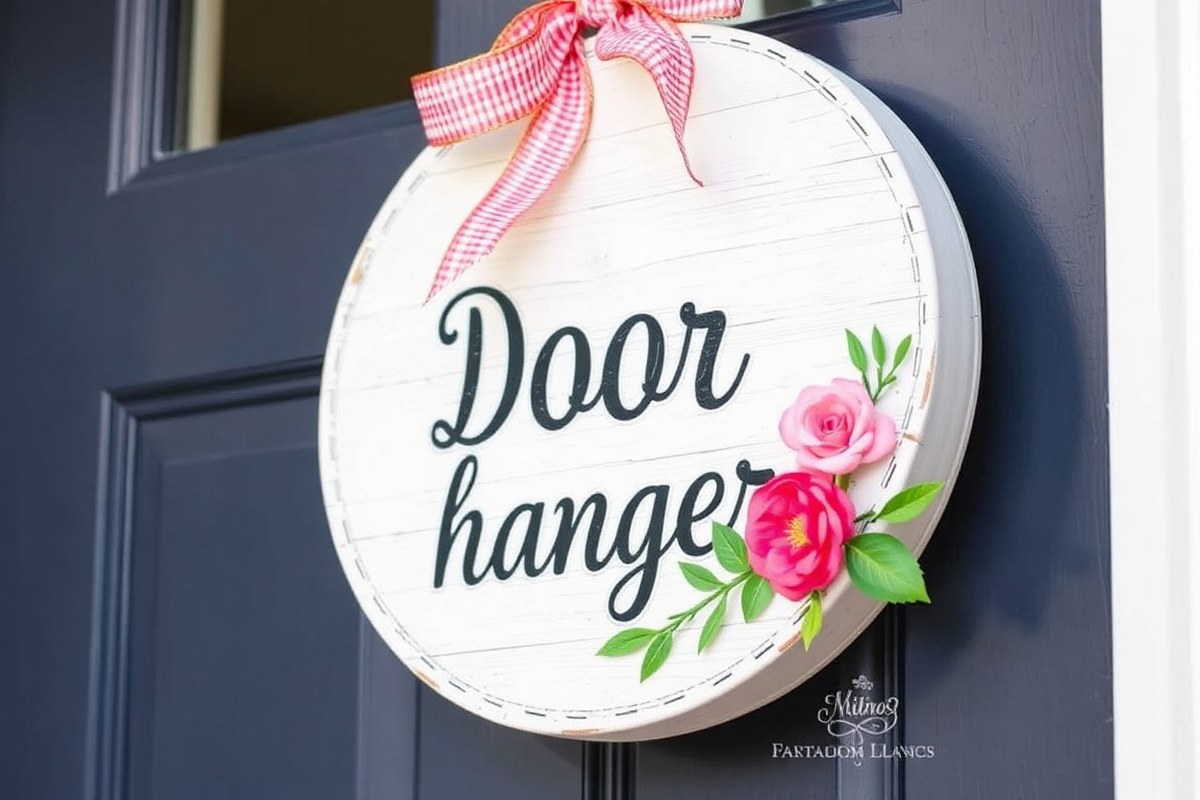
Knowing how to make a door hanger sign lets you create a personal and inviting touch for your front door. Start with a wood round about 12 inches for a perfect fit on most doors, then paint and decorate to match your style. Let each layer dry thoroughly to avoid smudging and maintain a clean look.
Key Takeaways
- Choose a wood round between 12 and 24 inches depending on your door size and desired sign weight.
- Wait at least 2-3 hours for paint layers to dry before adding a second color or design.
- Cut ribbon strips between 10 and 14 inches to create nicely sized loops for embellishments.
- Attach magnets at multiple points around the wood edge for a secure hold without damaging the door.
- Use unfinished wood circles as a blank canvas for versatile painting and decorating options.
- Select a 12-inch wood round for a balanced sign that fits most front doors without being too heavy.
Materials and Tools Needed for Door Hanger Signs

To make a door hanger sign, start by gathering essential materials that suit the style and durability you want. Unfinished wood rounds about 12 inches wide are most popular for a classic look and fit well on most doors, costing around $5 to $10 each at craft stores. Cardstock or plywood are budget-friendly alternatives if you want a lighter or cheaper option. Using permanent vinyl for lettering or decoration ensures durability and adheres smoothly to wood, especially curved surfaces like round signs. A good quality vinyl roll can range from $10 to $20 depending on size and color. For paint, acrylic paints are affordable, generally $3 to $7 per bottle, and work well on both wood and paper surfaces.
Tools make the difference between a polished sign and a frustrating project. A basic craft knife or scissors are enough to cut paper or vinyl transfers. For wood, a jigsaw or fine-toothed handsaw will produce neat cuts; these might cost $20 to $50 if you don’t already own one, but hand saws offer a low-cost method under $15. Sandpaper (about $5 for a pack) smooths edges before painting. Brushes come in various sizes, and synthetic bristles are cost-efficient and easy to clean. A paint scraper or foam brushes help with applying an even coat, especially if you’re working with larger surfaces. Consider an adhesive spray or craft glue for attaching ribbons or embellishments securely.
- Unfinished wood rounds or lightweight plywood (around 12 inches diameter)
- Acrylic paints and permanent vinyl sheets or rolls
- Craft knife, scissors, or jigsaw for cutting
- Sandpaper and paintbrushes (synthetic or foam)
- Strong craft glue or adhesive spray for decorations
- Ribbon and embellishments like buttons, small wood cutouts, or beads
Shopping smart can save on supplies. Buying wood rounds in bulk or from lumber scrap yards lowers cost, sometimes to under $5 each. Vinyl sheets are often sold with coupons or in multi-packs, reducing the price per sheet. Craft stores and dollar stores offer affordable ribbons and decorations, while discount paint outlets may have acrylic sets that last through several projects. Using what you already have at home, like leftover paint, fabric scraps, or recycled cardboard for stencils, reduces expenses significantly.
Preparing materials a day before painting or assembling ensures they dry properly and makes the process smoother. Sanding the wood lightly removes rough spots for better paint adhesion and a cleaner finish, preventing peeling or chipping later. Matching your tools to the project’s scale helps avoid frustration, for example, using smaller brushes for detailed lettering. Budget alternatives usually require more time or careful handling to achieve professional results, but they work well for beginners or casual crafters looking to personalize their space affordably.
Choosing the Best Size and Shape for Your Door Hanger
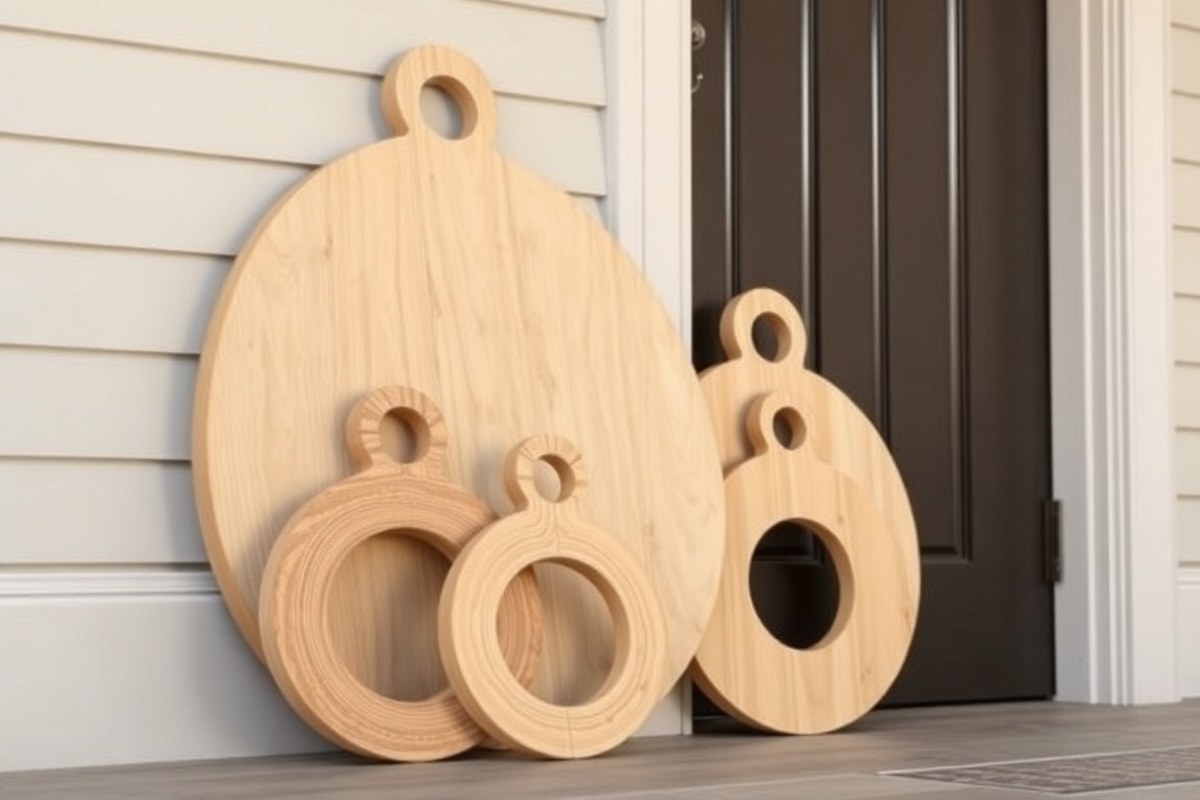
Choosing the right size and shape for your door hanger sign depends on your door’s dimensions, the design you want, and how you plan to hang it. For front doors, a width between 18 and 24 inches works well because it’s large enough to be noticed but not too heavy to hang securely. Shapes like rounds or rectangles are popular; round wood door hangers around 18 to 24 inches are especially common and fit nicely on most standard doors.
Thickness influences sturdiness and weight. A ¼ inch thickness is ideal for wood signs, providing a solid feel without making the sign too bulky. Thinner options, such as cardstock with vinyl layers, are lighter but less durable outside. Larger signs mean more weight, so the hanging method must match, you’ll need stronger hooks or ribbons for heavier pieces. The table below compares common door hanger sizes and thicknesses with their weight considerations and ideal hanging methods for front doors.
| Size (inches) | Shape | Thickness | Approximate Weight | Recommended Hanging Method |
|---|---|---|---|---|
| 12 x 6 (rectangular) | Rectangle | ¼ inch (wood) or cardstock | Light (under 1 lb wood, less for cardstock) | Ribbon (2 inches wide) or adhesive hooks |
| 18 (diameter) | Round | ¼ inch wood | Moderate (2-3 lbs) | Wire ribbon (at least 2 inches wide), sturdy door hook |
| 24 (diameter) | Round | ¼ inch wood | Heavier (4-5 lbs) | Strong metal hook or bracket, reinforced wire ribbon |
| Any (custom) | Varies | Cardstock + vinyl | Very light (under 0.5 lbs) | Double-sided tape or thin ribbon |
Smaller signs fit well on most doors but can limit your design space. Larger signs attract more attention and allow extra design details but may require stronger hanging hardware and wider ribbons to ensure they stay secure and hold their shape. For example, a 2-inch wide wired ribbon, which holds shape better, is ideal for heavier or round signs.
Use wired ribbon at least 2 inches wide for heavier door hangers to prevent sagging and keep the sign steady on the door.
Beyond size and thickness, think about the door style. Narrow doors or those with windows might need slimmer or narrower shapes to avoid blocking key features. Also, avoid signs thicker than ¼ inch if you want the sign to hang flat against the door without sticking out. Balance your design’s size and weight with the hanging hardware you have to prevent damage to your door or the sign falling off.
Step-by-Step Guide to Making a Wood Door Hanger Sign
Making a wood door hanger sign involves preparing the wood, painting designs, applying decals or hand lettering, sealing with a protective finish, and adding final touches like ribbons. Each step ensures your sign looks polished and lasts longer. Follow the process carefully for the best results.
Preparing and Sanding the Wood Surface
Start with a smooth wood surface to help paint and decals stick better. Use fine-grit sandpaper (around 220 grit) to sand the entire board lightly. This removes rough patches and any factory finish that might interfere with paint adhesion.
After sanding, wipe off dust with a damp cloth or tack cloth. Make sure the wood is completely dry before painting. Also, if your wood has pre-drilled holes for hanging, check their location to plan your design around them.
Painting and Adding Designs
Choose your paint, such as chalk paint or acrylic paint. Chalk paint is popular for its matte finish and ease of distressing. Apply the first coat evenly using a foam brush or a smooth-bristle brush. Thin coats dry faster and minimize drips.
Let the first coat dry for at least 1 to 2 hours before adding a second coat to deepen colour and cover the wood grain. If using multiple colours or stripes, allow each coat to dry thoroughly between applications to avoid smudging.
For stenciled designs, place your vinyl stencil or painter’s tape to mask areas. Paint inside the stencil and peel it off gently while the paint is still slightly wet to avoid peeling the paint underneath.
Applying Finishing Coats and Sealants
After your paint and designs have dried around 24 hours, protect them with a clear finish. Use a water-based polycrylic spray or brush-on sealer designed for wood crafts. Polyurethane is not recommended because it yellows over time.
Apply one to two thin coats of sealant, waiting about 2 hours between coats. The smooth finish helps vinyl decals adhere better and gives your sign a durable surface for handling or outdoor exposure.
Creating and Attaching Vinyl or Hand Lettered Decals
Vinyl decals add intricate details that are hard to paint by hand. Cut your design on vinyl and weed out excess material, then add transfer tape over the top to lift the design.
Position your decal on the smooth, sealed surface and press it down firmly, smoothing out bubbles and wrinkles. Slowly peel the transfer tape away at a sharp angle so the vinyl stays in place. Avoid applying vinyl before sealing, as paint can lift during transfer.
For hand lettering, use paint pens designed for wood or fine brushes with acrylic paint. Practice your design on paper before painting on the sign. Apply your lettering on the sealed and painted surface for crisp, clean lines.
Adding Final Decorations and Ribbon
Once your sign is fully decorated and sealed, attach a ribbon loop or bow for hanging. Thread the ribbon through any pre-drilled holes or tie it securely around the sign extender on the back. Wide grosgrain or satin ribbons work well for door hangers.
You can also add small embellishments like buttons or seasonal ornaments using craft glue or hot glue, but avoid heavy items that might pull down the sign. Let glue fully dry before hanging the finished door hanger.
- Sand the wood lightly with 220-grit sandpaper and wipe clean.
- Apply your first coat of chalk or acrylic paint and let dry 1-2 hours.
- Apply additional paint coats as needed, drying between layers.
- Seal the painted surface with polycrylic spray or brush-on, drying 2 hours between coats.
- Prepare and apply vinyl decals using transfer tape on the sealed surface.
- Or hand-letter your design using paint pens on the sealed surface.
- Attach ribbons or hooks through pre-drilled holes for hanging.
- Add any light embellishments with craft glue and allow to dry.
Making a Cardstock and Vinyl Door Hanger Without Wood
Yes, you can create a lightweight door hanger using cardstock and vinyl without wood. This method offers an easy, less bulky alternative that works well for indoor use or on covered doors. The key is choosing sturdy cardstock, durable vinyl, and assembling them securely to maintain form and longevity.
Selecting Cardstock and Vinyl Materials
Choose heavyweight cardstock, ideally 80 lb or thicker, to avoid bending or curling. Matte or lightly textured cardstock works well as a base. For vinyl, opt for adhesive vinyl sheets designed for crafting, which come in various colors and finishes. Removable vinyl can be used if you want to change designs later, but permanent adhesive vinyl is more durable for frequent handling.
Pick a ribbon or twine that matches your décor for hanging, and keep a strong adhesive handy. Double-sided tape or craft glue rated for paper ensures layers bond without warping the cardstock.
Cutting and Layering Design Elements
Prepare your design layout on a computer or sketch by hand, measuring the space to ensure your cardstock fits your chosen door frame or hook. Use a craft knife or scissors to cut your cardstock into your desired door hanger shape. Cut vinyl shapes or lettering carefully using scissors or a cutting machine for precision.
To layer, apply adhesive vinyl directly onto the cardstock background. Smooth out bubbles by pressing with a plastic scraper or your finger, working from the center outward. For printed designs on cardstock, protect the surface with a clear adhesive laminate or spray sealant before applying vinyl to prevent tearing or smudging.
Assembling and Securing the Door Hanger
Assemble your door hanger by stacking layers thoughtfully. Use glue dots or craft glue between layers to hold vinyl embellishments or additional paper cutouts in place. To create a sturdy hook for hanging, staple or glue a loop of ribbon or twine to the back top center, reinforcing with extra adhesive if needed. Here’s a simple step-by-step for assembling your cardstock and vinyl door hanger:
- Cut cardstock into your preferred door hanger shape and size, generally about 8 to 12 inches high.
- Print or apply a background design on the cardstock; seal with laminate or clear spray if needed.
- Cut vinyl letters or shapes for your message or decoration.
- Attach vinyl to the cardstock surface smoothly, removing any air bubbles.
- Add any additional paper embellishments using glue dots or craft glue.
- Attach a folded ribbon or twine loop to the back top center using staples and glue.
- Press all layers firmly to ensure solid adhesion and dry completely before hanging.
Finishing and Hanging the Cardstock Sign
This cardstock and vinyl door hanger works well indoors or in sheltered entryways but is less weather-resistant than wood. Exposure to moisture can cause curling or damage, so avoid placing it where rain or direct sunlight is frequent. To extend durability, keep it away from high humidity and store flat when not in use.
Hang your finished sign by sliding the door handle through the ribbon or twine loop. For extra security, tie a knot or add an adhesive hook to the door’s surface. The lightweight nature makes it easy to move or update your design seasonally without heavy tools.
Adding Ribbons, Embellishments, and Attachments
Adding ribbons, bows, floral wire, and hooks can turn a simple door hanger into an eye-catching decorative piece. The right ribbon length and secure attachment are key to a neat look and durability. Floral wire and hooks help hold embellishments firmly and provide options for hanging the sign reliably.
Choosing Ribbon Types and Sizes
Select ribbons that range from 2 to 2.5 inches in width for creating a door hanger that looks both balanced and appealing. Thicker ribbons offer striking highlights, whereas thinner varieties provide subtle touches. Cut most ribbon pieces between 10 and 14 inches long to adjust the size of the loops around your sign. Combining different ribbon colors or patterns gives your door hanger a more eye-catching design.
Ribbon materials like satin, grosgrain, or deco mesh offer different textures that suit various styles of door hangers. For outdoor signs, pick ribbons that handle moisture better, such as polyester satin. Avoid flimsy ribbons that might fray quickly or lose shape.
Measuring and Cutting Ribbon Loops
Measure the ribbon by wrapping it around your hand or marking lengths on a flat surface. A good starting length is 12 inches for loops that frame the door hanger neatly without overwhelming it. Cut all ribbon strips to the same length for a uniform look or mix lengths for layered effects.
Use sharp scissors or rotary cutters to cleanly cut ribbons, preventing frays. Sealing the edges with a quick pass of a flame (such as from a lighter) or using a fabric sealant helps ribbons last longer and stay neat.
Attaching Ribbons with Floral Wire or Glue
Secure attachment keeps your ribbons and bows from shifting or falling off over time. Use a hot glue gun to firmly attach ribbon loops and bows to the back or front of your wooden or cardstock sign. Arrange loops evenly, spreading them around the edges so they frame the piece smoothly.
Floral wire about 8 inches long works well to hold both ribbons and bows together. Thread the wire through the center circle of the loop arrangement, then twist it tightly behind a bow to lock all parts. This method adds strength and keeps decorations from sliding.
- Arrange ribbon loops in a circle or desired shape behind or around your sign.
- Thread an 8-inch floral wire through the center and twist securely to bind loops together.
- Place a bow over the wired center, then attach it to the sign with hot glue.
- Glue any additional greenery or embellishments around the bow as desired.
- Check that all parts feel secure and adjust before glue sets.
Always use a low-temperature hot glue gun to avoid melting delicate ribbon fibers or warping cardstock signs.
Installing Hooks or Twine for Hanging
Punch a hole near the top center of your sign or use a sign extender at the back with a pre-cut hole or slit for hanging. Lightweight twine, ribbon loops, or small metal hooks serve well for door hanger signs. Twine loops are easy and adjustable; hooks provide extra support for heavier wood pieces.
Measure a 6- to 8-inch length of twine or wire for the hanger, giving enough slack to easily hang on most door knobs or handles. Attach the ends securely through holes or slits with knots or twists behind the sign. Adding magnets at four corners can improve stability on metal doors but isn’t necessary for all mounting types.
Weatherproofing and Finishing for Outdoor Use
To make your door hanger weather-resistant, it’s essential to protect it against moisture, sunlight, and temperature changes. Outdoor conditions can cause wood to warp, paint to fade, and materials to deteriorate quickly without a proper finish. Applying a weatherproof sealant or paint adds a barrier that repels water and blocks UV rays, extending your door hanger’s life.
Start by choosing the right paint if you plan to add color. Exterior acrylic latex paint works well because it’s formulated to resist cracking and peeling in changing weather. You can find it at craft or home improvement stores for about $15 to $25 per quart. Apply two thin coats with a quality brush, letting each coat dry for at least 4 hours in temperatures above 50°F. This paint bonds well to wood and most other craft surfaces.
Once the paint is dry, apply a clear weatherproof sealant for extra protection. Polyurethane or marine varnish are good options. Look for water-based polyurethane with UV inhibitors, they have lower odours and dry faster. Expect to pay $10 to $20 for a small can. Brush on three thin coats, allowing 2 to 4 hours drying time between coats. Make sure to sand lightly with 220-grit sandpaper between coats for a smooth finish. Avoid oil-based products indoors as their fumes can be strong.
For unpainted wood door hangers, clear wood sealers or spar urethane that repel water and sunlight can do the job. Spar urethane is designed for outdoor use; it flexes slightly with temperature changes, reducing cracks. Apply three coats as you would with paint sealer, sanding between each. Test the finish on a small area first to see how it affects the wood color.
Maintenance matters for keeping your door hanger looking good. Reapply a clear sealant every 12 months, especially after harsh winter or rainy seasons. Check for signs like chipped paint, peeling finishes, or water absorption. In freezing temperatures, moisture trapped under finishes can cause cracking. If the door hanger is exposed to direct sunlight, expect to check the finish sooner, around 6 to 8 months, as UV rays break down coatings faster.
Seasonal care includes wiping the sign with a damp cloth to remove dirt or pollen. Avoid harsh cleaners, which can degrade the finish. Bring fragile or heavily decorated door hangers indoors during extreme weather or storms to prevent damage. Following these steps ensures your door hanger stays vibrant and intact for multiple seasons with minimal fuss.
Best Ways to Hang Your Door Hanger Sign Securely
Securely hanging your door hanger sign depends on the sign’s weight and the door’s material. For lightweight signs like cardstock with vinyl, twine or ribbon loops are often enough. Your wood rounds may already include twine, making this a simple, cost-free option. Twine or ribbon can be tied to a door hook or looped over the top of the door for easy hanging.
For heavier wood signs, choose hardware designed to support more weight. Command hooks or adhesive metal hooks work well on smooth doors but may fail on textured or heavy materials. Screws and wall anchors provide the strongest hold, especially on wooden or metal doors, but require drilling. Magnets are an option only if your door is metal; ensure the magnets are strong enough to hold the sign securely to avoid falls.
Different door types need specific attention. Hollow doors or those with glass panels should avoid drilling and instead rely on adhesive hooks or over-the-door hangers. Solid wood or metal doors handle screws or heavy-duty hooks better.
- Use twine or ribbon loops for signs under 1 pound on smooth doors.
- Command hooks support up to 5 pounds and are damage-free on smooth surfaces.
- Strong magnets require metal doors and can support 2, 4 pounds with the right size.
- Drill hooks or screws for signs heavier than 5 pounds, especially on solid doors.
- Over-the-door hangers are good for doors that can’t be drilled or have panels.
To attach hooks or loops, first decide the best spot for your sign. For loop attachment, cut twine or ribbon about 12 inches long, tie both ends securely to small eye screws inserted near the top rear of the sign. For screw hooks, mark two points about 1 inch from the sign’s top corners, drill pilot holes, then screw hooks in firmly. Finally, hang the loops or hooks onto your chosen door hardware.
Magnets come with no mess but less security; always test by gently tugging the sign. Over-the-door hangers slide over the door top and eliminate any mounting damage; choose a hanger width matching your door thickness for stability. Adhesive hooks often cost $5, 10 per pack and can be removed with heat or oil to avoid door damage. Screws and hooks cost $1, 3 each but require tools and caution to avoid door damage. Properly installed hanging hardware keeps your sign upright and prevents damage to both the sign and your door.
Troubleshooting and Avoiding Common Mistakes in Door Hanger Crafts
Painting mistakes like uneven coats or peeling paint often happen when surfaces are dirty or not prepped well. Fix peeling paint by sanding the area smooth, wiping away dust, and applying a primer before repainting. Using high-quality outdoor paint and letting each coat dry fully, usually 24 hours, helps avoid flakes, especially for wooden hangers exposed to weather.
Assembly errors include loose attachments and misaligned parts, causing the sign to fall apart or hang crooked. Prevent these by measuring twice before drilling holes or gluing pieces, and using appropriate fasteners such as wood screws with anchors. Wood glue or strong craft adhesive needs clamping or weight for 30 minutes to an hour to secure joints firmly.
Hanging failures often come from improper hardware choice or door frame damage. Use hook sizes and weights rated for your hanger’s weight, and avoid nails in weather-exposed areas which can rust or loosen. Outdoor hooks rated for 10 to 15 pounds typically support most signs safely, while indoor options vary with door material.
The following table pairs common mistakes with practical fixes and preventive actions. These steps minimize damage and improve the durability and appearance of your door hanger.
| Common Mistake | How to Fix It | Prevention Tips |
|---|---|---|
| Peeling paint on wood | Sand smooth, prime, repaint with weather-resistant paint | Clean surface, prime before painting, apply 2 coats, dry 24+ hours |
| Uneven or blotchy paint finish | Light sanding between coats, thin paint layers | Use angled brushes, avoid overloading paint, allow proper drying time |
| Poor decal or vinyl adhesion | Clean surface with alcohol, press firmly with squeegee | Apply to smooth, dry surfaces; avoid humid conditions; warm surface if cold |
| Loose screws or joints | Tighten screws, re-glue joints, clamp while drying | Pre-drill pilot holes, use correct screw size, apply glue evenly |
| Crooked hanging or sign falls | Adjust hooks, replace weak hardware | Use weight-rated hooks, check door frame condition, hang with stability in mind |
A key to preventing cracking or damage is allowing each layer, paint, glue, or sealant, to dry completely before the next step. Patience during assembly and finishing ensures your sign stays intact and looks polished. For rainy or humid climates, extra drying time or a protective topcoat adds resilience.
Press decals firmly using a squeegee and avoid applying them in temperatures below 50°F to ensure proper adhesion and reduce bubbling.
Step-by-Step Action Plan for Crafting Your Door Hanger Sign
Follow these steps to create a personalized door hanger sign that fits your style and space perfectly.
- Before you start: Gather all your materials and tools, such as wood or cardstock, paints, brushes, vinyl, ribbons, and weatherproofing supplies. Confirm everything works by testing paint on a scrap piece.
- Day 1: Choose the size and shape that best suits your door and design. Measure your door where the sign will hang to ensure it fits comfortably.
- Day 2: Cut your base material to size and shape, using a saw for wood or scissors/rotary cutter for cardstock. Check edges are smooth and even.
- Day 3: Apply your design, paint on wood or vinyl lettering on cardstock. Let each layer dry fully; you’ll know it’s ready when it doesn’t smudge or peel.
- Day 4: Add embellishments like ribbons or small attachments with the appropriate glue or fasteners, making sure everything stays securely put.
- Day 5: Apply a sealant or weatherproof coating if your sign will be outdoors. Test by lightly wetting a corner to confirm water resistance.
- Day 6: Attach your hanging hardware or ribbon securely, double-checking it can support the sign’s weight without slipping.
- Day 7: Hang your sign and observe its placement and sturdiness over a day or two, adjusting the hanger as needed to keep it stable and centered.
Frequently Asked Questions
What Is the Best Wood Type for Making a Door Hanger Sign?
Pine or birch wood rounds work well as they’re lightweight and easy to paint. Choose smooth wood to help vinyl and paint stick better for a cleaner finish.
Can I Use Outdoor Paint on My Door Hanger Sign?
Yes, outdoor acrylic paint helps protect the wood and paint from weather damage. Apply at least two coats and seal it with a clear outdoor sealant for longer durability.
How Do I Prevent Ribbon from Fraying on My Door Hanger?
Use ribbons with finished edges or seal raw edges with a fabric glue or clear nail polish. This keeps the ribbon looking neat and stops unraveling over time.
Can I Personalize a Door Hanger Sign with a Cricut Machine?
Absolutely, a Cricut can cut vinyl letters and shapes easily to add custom designs. Make sure you pick permanent vinyl to stick well on wood surfaces.
What’s the Easiest Way to Hang a Door Hanger Without Extra Nails?
Use an over-the-door hook or adhesive removable hooks rated for outdoor use. This avoids damaging your door and offers easy removal or changes.
How Do I Keep My Door Hanger Sign Looking Good Year-Round?
Store it indoors during extreme weather and refresh paint or sealant yearly. Consider switching seasonal ribbons or elements to keep it looking fresh and relevant.
Before You Go
Making a door hanger sign is straightforward when you take it one step at a time, choosing the right materials and finishing techniques. Start with your preferred design and size today, and you’ll see how rewarding crafting a personalized door sign can be. The next step is to pick your base material and prepare your workspace so you can dive into your project without delays.


