How to Make a Beach Sign: A Complete Guide with Materials, Designs & Tips
Figuring out how to make a beach sign starts with choosing the right wood or base that fits your style and location. Using reclaimed or old wood between 1 to 2 inches thick offers durability and charm at low cost. Begin by sanding the wood lightly to smooth rough edges, which helps paint and lettering stick better and last longer.
Key Takeaways
- Use old or reclaimed wood pieces about 1 to 2 inches thick for authentic, durable beach signs.
- Sand your wood with medium grit sandpaper (#80-#60) before painting to ensure smooth application.
- Simple wood or MDF letters around 2.5 inches high make clear and attractive signage.
- Measure and mark consistently, about 3.5 inches down from the top, to keep lettering aligned.
- For ground-mounted signs, dig holes 6 inches wider than the post and 1-2 feet deep for stability.
- Use inexpensive materials like canvas, paint, and cinnamon to create textured, rustic looks under budget.
Materials and Tools Needed for a Beach Sign
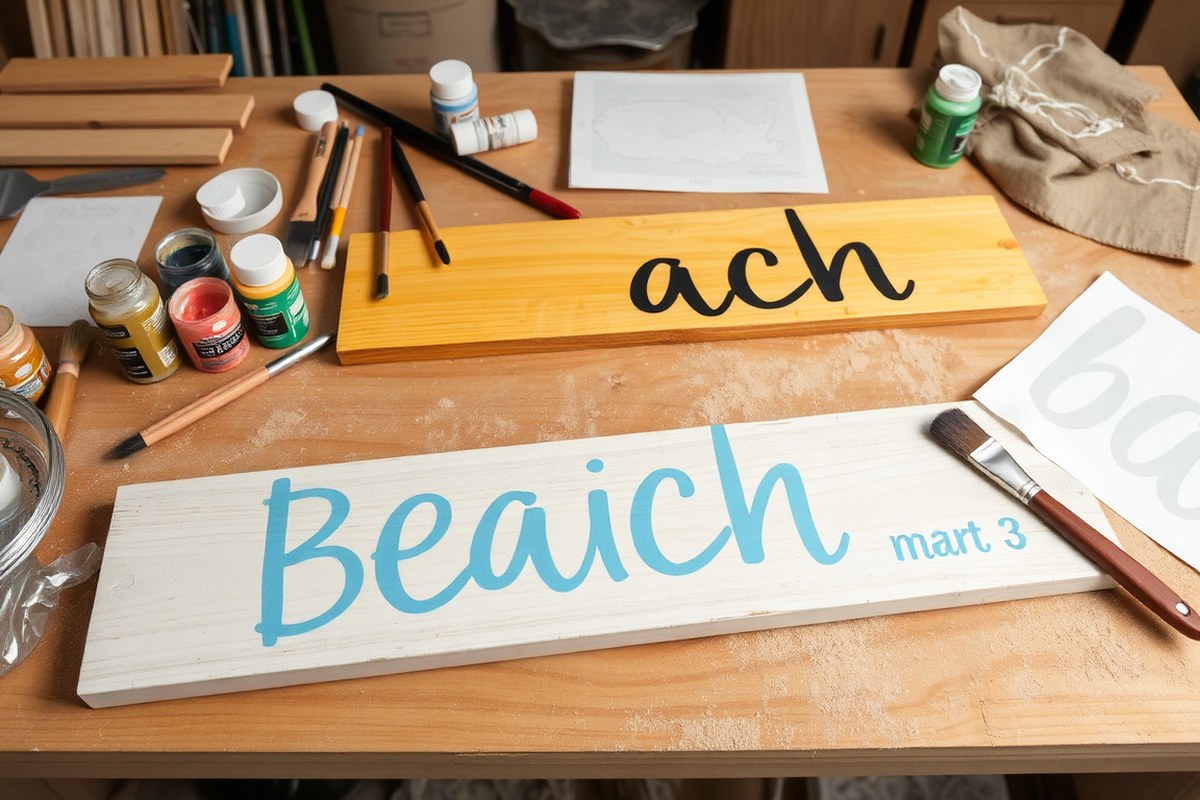
To make a beach sign, start by gathering wood or another sturdy base material. Wood is the most common choice because it’s easy to paint and weather-resistant if sealed properly. Reclaimed or scrap wood works great and adds natural character while keeping costs low. For a standard directional sign, boards that are about 1 inch thick and 6 to 12 inches wide provide enough surface for lettering and designs.
Your choice of wood depends on your budget and style. Pine is inexpensive and widely available, but cedar or redwood resist outdoor damage better. Choosing canvas stretched over a wooden frame offers a lightweight option, though it won’t last as long outdoors. Upcycling pallets or old furniture parts can save money and reduce waste while lending a rustic look.
Essential tools include a saw to cut your wood to size, sandpaper or an electric sander to smooth edges, and paintbrushes for applying your design. You might also want stencils or graphite paper to trace letters neatly, especially if you’re not confident freehanding your message. For lettering, acrylic paint works well, it’s durable, dries quickly, and comes in many colors.
- Wood boards or reclaimed wood, approx. 1″ thick and 6-12″ wide
- Acrylic paints and paintbrushes in various sizes
- Sandpaper (medium and fine grit) or an electric sander
- Graphite paper and stencils for tracing letters
- Saw for cutting wood to desired size
- Sealant like outdoor varnish or polyurethane for protection
- Optional: screws, a drill, and a post if making a standing sign
Reuse old paintbrushes and leftover paint to minimize expenses. Even cinnamon can be a creative addition to achieve an aged, rusty effect on your sign. Having a Cricut machine or projector lets you create neat, professional lettering without needing to buy stencils.
Upcycling materials not only lowers costs but gives your sign a unique story and texture. Look for scrap wood at local hardware stores, check online marketplaces, or repurpose old pieces you have around your home. Similarly, use leftover paint and brushes instead of buying new supplies. This approach makes your beach sign project budget-friendly and environmentally conscious, ensuring you get a charming final product without spending much.
Step-by-Step Process to Make a Beach Sign
Making a beach sign involves several clear steps: preparing your wood, painting a base layer, and adding your lettering and decorative touches. Completing these actions carefully, while observing safety, can take a few hours to a day depending on drying times and complexity. Following these instructions will help you create a charming sign that fits your coastal décor.
Preparing and Cutting the Wood
Start by selecting wood pieces about 1 to 2 inches thick, scrap wood or craft store slats work well. Cut the wood to your desired sign size using a saw, aiming for smooth, even edges. Safety is important: wear goggles and gloves, and cut on a stable surface. Sand all surfaces and edges with medium to fine-grit sandpaper to remove splinters and create a smooth base for painting.
This step ensures the wood is safe to handle and paint, and the sanding helps paint adhere better, making your sign last longer. Planning wood size in advance can allow you to get multiple signs from one piece, reducing cost to under $4 per sign.
Painting the Background and Base Layers
Apply a base coat of paint in your chosen background color. A light sandy or pastel blue works well for a beach theme. Use outdoor acrylic paint for durability if your sign will be exposed to weather. Let the paint dry completely between coats; drying can take longer on humid days or near the coast, sometimes up to 6 hours. You may want to add a second coat for even coverage.
Distressing the paint with sandpaper once dry can add a weathered look that fits beach décor. You can also leave the wood bare if you prefer a natural driftwood finish. Protect your work surface and wear gloves to avoid staining your hands. Good preparation here affects your sign’s appearance and longevity.
Adding Letters and Decorative Details
Print or sketch your lettering to the size that fits your sign, wood or MDF letters around 2.5 inches tall are a popular choice. Attach letters with wood glue or small finishing nails after painting the background. For painted lettering, use stencils or freehand with a small brush. Let any paint fully dry before moving on.
Add accents like waves, shells, or rust effects using cinnamon or specialty paints for texture. Sand gently over letters or decorations to create a distressed finish if desired. Finally, seal your sign with a clear outdoor sealant for protection. Taking your time on details gives a polished look and increases durability outdoors.
- Select and cut your wood to the desired size with safety gear on.
- Sand the wood smooth on all sides and edges.
- Paint a base coat appropriate to your design and let it dry completely.
- Apply additional coats or sanding for weathered effects.
- Attach or paint letters carefully, ensuring proper spacing and adhesion.
- Add decorative touches like stenciled shapes or rust effects.
- Seal the entire sign with a clear protective coating.
- Allow all layers to dry fully before displaying your sign.
Always wear appropriate eye and hand protection when cutting wood and painting to avoid injury or irritation.
Choosing the Right Wood or Base Material
Choosing the right wood or base material for your beach sign can determine how long it lasts and how well it fits your style. The wood’s durability and resistance to moisture and sun exposure matter most if you’re planning to place your sign outdoors. Indoor signs have fewer demands, so you can pick wood with a softer texture or unique grain patterns for the look you want.
Wood is the most popular choice because it’s easy to work with and paints nicely, but not all woods hold up well in humid or salty conditions. Cedar and redwood resist rot and decay better than pine or plywood, making them excellent for outdoor beach signs. These woods cost more, roughly $20 to $35 for a 1×6-foot board, but their weather resistance justifies the price.
If wood isn’t your preference, you can consider alternatives like PVC foam board or metal sheets. PVC foam board is lightweight, waterproof, and easier to cut than metal, and usually costs around $15 to $25 per sheet. Metal offers great durability and a sleek look but can be tougher to customize and costs $30 or more per sheet. Both alternatives work better outdoors if you seal the edges to prevent water damage.
| Material | Durability | Weather Resistance | Cost (Approx.) | Best Use |
|---|---|---|---|---|
| Cedar Wood | High | Excellent (natural oils resist rot) | $25 – $35 per 1×6 ft board | Outdoor signs, rustic beach look |
| Redwood | High | Excellent (stable in moisture) | $30 – $40 per 1×6 ft board | Outdoor signs with classic wood grain |
| Pine Wood | Medium | Low to Medium (needs sealing) | $10 – $20 per 1×6 ft board | Indoor signs or covered outdoor areas |
| Plywood | Low to Medium | Low (can delaminate if wet) | $8 – $15 per sheet | Indoor signs or brief outdoor use |
| PVC Foam Board | Medium | High (waterproof but edges should be sealed) | $15 – $25 per sheet | Outdoor signs, modern look |
| Metal Sheet | Very High | High (rust resistant if coated) | $30+ per sheet | Durable outdoor signs with industrial style |
Signs placed outside should use durable, weather-resistant materials like cedar, redwood, PVC, or coated metal to avoid warping, rotting, or fading. Applying a good sealant on wood improve its resistance to moisture and sun damage. Indoor signs allow more freedom in material choice, and you might prefer softer woods or creatively shaped bases without worrying much about weather exposure. Make sure the shape, size, and thickness of your chosen material fits the tools you have for cutting and painting, to avoid cracking or splintering.
Techniques for Painting and Lettering Beach Signs
Start painting the background of your beach sign with acrylic paint diluted slightly with water to create a wash effect. This technique gives a faded, driftwood-like appearance that mimics weathered wood, perfect for a beachy vibe. Apply the wash with a wide, flat brush in long, even strokes, working quickly before the paint dries. Allow the background to dry fully, which usually takes around 30 minutes at room temperature, before adding any layers or details.
Use cardboard stencils or print out lettering templates to transfer your text onto the sign. Position your stencil carefully to ensure correct spacing and alignment; placing a ruler along the edges helps keep letters straight. Secure the stencil with painter’s tape to prevent shifting. Dab paint on with a stiff-bristled brush or a sponge, applying lightly in multiple thin layers rather than one thick coat. This method reduces bleeding under the stencil edges and results in crisp, clean letters.
Lettering placement matters for readability and visual appeal. Center your text or align it according to the shape of the wood piece. Leave consistent margins around the edges to frame the letters nicely. When tracing letters onto the sign for freehand painting, use graphite transfer paper or lightly sketch with a pencil. Paint over the sketch with a detail brush using steady strokes. Thin brushes with a pointed tip provide better control for clean lines and curves.
Layering colors can add depth and interest. Start with the lighter colors for backgrounds or base lettering, and let each layer dry completely before applying darker accents or shadows. For vintage or faded looks, lightly sand some areas between layers with fine-grit sandpaper to reveal the wood underneath. For brighter, bold designs, use solid, undiluted acrylic paints with crisp edges and avoid over-brushing, which can cause colors to blend unintentionally.
Avoid using too much paint at once, which leads to dripping and uneven textures. Also, do not rush between steps; wet layers mixing together can blur colors and soften edges undesirably. While stencils help with accuracy, don’t press too hard during painting, as this can force paint under the edges and ruin sharp lines. For outdoor signs exposed to sunlight or moisture, seal your finished paintwork with a clear waterproof sealer to preserve colors and prevent chipping.
Creating Rustic, Weathered, and Mosaic Beach Sign Styles
You can achieve distinct beach sign styles by using distressing and weathering methods for a rustic look or by adding mosaic elements like sea glass, shells, and sand for a decorative twist. Each style uses different techniques that highlight the casual, driftwood charm or the colorful, textured beauty of coastal materials. Choices depend on your skill level, available materials, and the sign’s intended environment.
Distressing and Weathering Techniques
Distressed and weathered styles mimic the natural aging of wood exposed to beach elements, giving signs a charming, worn look. This involves sanding painted surfaces and edges to reveal layers and create texture. For a weathered driftwood effect, mixing chalk paint colors such as pale gray, white, and soft blue helps replicate natural wood tones softened by sun and salt air. Follow these steps to distress your beach sign:
- Paint a base coat with your chosen color, applying two solid coats for brightness or one thin coat for subtlety.
- Use a medium-grit sandpaper (#80 to #60) to sand edges and flat surfaces lightly, focusing on raised areas.
- Apply a second lighter or contrasting paint color with a dry brush technique to add dimension.
- Sand through the top layer of paint again, especially on edges and high points, to reveal the base color or bare wood.
- For an authentic look, leave some board edges unpainted or only partially painted to simulate natural wear.
- Optionally, add lettering with a fine brush in a contrasting color, letting parts of the background show through for rustic charm.
- Finish by sanding lightly once more to soften the overall appearance.
Use light, even pressure when sanding to avoid gouging the wood and creating uneven patches that look unnatural.
Adding Beach-Inspired Mosaic Embellishments
Incorporating mosaic elements like sea glass, crushed shells, or fine sand can personalize your beach sign and add color and texture. These pieces are typically arranged in simple shapes such as arrows pointing to beach destinations or incorporated into lettering that spells out words like “surf” or “relax.” To create a mosaic arrow sign with beach materials, start by sketching your arrow shape on the wood. Spread a thin layer of clear-drying silicone adhesive over the outlined area. Carefully press the sea glass, shells, and sand onto the adhesive. Allow the silicone to dry completely, usually overnight, before gently tapping off any loose pieces. This method ensures your mosaic pieces stay firmly attached and show off a tactile, layered look suitable for outdoor use.
Be sure not to apply too much silicone at once; a thick layer can cause pieces to float or slip, ruining your pattern.
Sealing and Protecting Decorative Elements
Once your sign’s paint and decorative materials are dry, sealing with an outdoor polyurethane or marine-grade sealer keeps the finish safe from moisture, sun, and wind. Use a clear, water-based sealer to maintain colors and avoid yellowing. Apply at least two coats, allowing each to dry according to the product’s instructions, usually 2 to 4 hours.
Seal not only painted surfaces but also mosaic areas. Doing this will keep sand, shells, and sea glass in place while preventing damage from weather exposure. For signs displayed outdoors in harsh climates, reapply sealer every year or when signs of wear appear.
Mounting, Displaying, and Using Beach Signs Outside
Mounting a beach sign securely depends on where you want to place it and how it will be viewed. For outdoor directional signs, installing a post in the ground is a strong option; for covered porches or indoor areas, wall mounts or stands work better. It’s important to use weather-resistant finishes to protect your sign from sun, rain, and humidity, especially outdoors.
Installing a Sign Post Outdoors
Setting up a directional post sign outdoors requires digging a stable hole and securing the post so it withstands wind and weather. The post can hold multiple arrow signs pointing to different locations like the beach, picnic areas, or bike paths. Use treated wood or weatherproof paint to increase durability. Follow these steps to install a post-supported beach sign in your yard:
- Choose a spot with firm soil where your sign is visible and won’t obstruct walkways.
- Dig a hole at least 18 inches deep and 8 inches wide to provide a sturdy base.
- Place 3 to 4 inches of gravel or small rocks at the bottom for drainage and stability.
- Set the wooden post into the hole, making sure it is vertical using a level.
- Fill the hole with soil, packing it tightly around the post to prevent wobbling.
- Attach painted directional boards to the post using screws and a drill for secure fastening.
- Apply a clear outdoor sealant on the entire post and signs to protect them from moisture and sun damage.
This method keeps your sign stable and visible through varying weather, with costs generally under $30 for supplies if you have basic tools.
Wall Mounting and Hanging Options
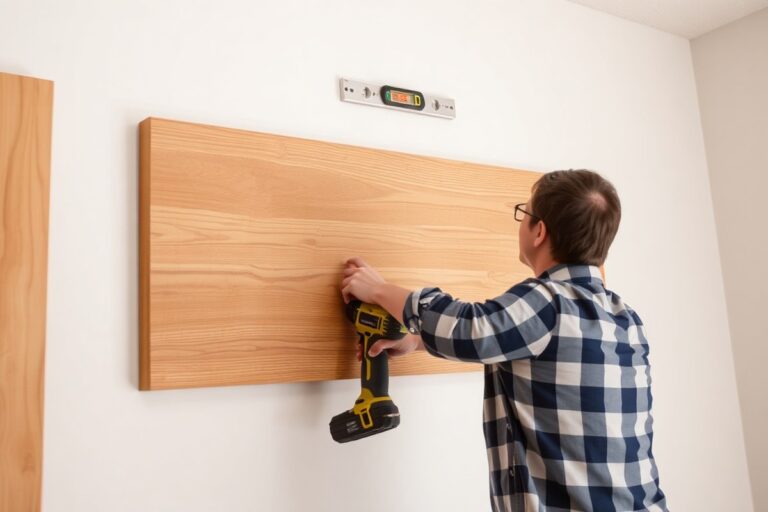
For covered porches, decks, or indoor areas, wall mounting your beach sign allows easy display without heavy installations. Using picture hangers or screws works well for flat signs, while small stands or brackets support free-standing signs on flat surfaces.
Choose mounting hardware rated for the weight of your sign and ensure it’s installed into a stud or solid surface for stability. Hanging signs with rope or twine between hooks can add a rustic look and allow for easy swapping of signs. Position the sign at eye level for best visibility and avoid areas where direct sunlight or rain could degrade it quickly unless your sign is weatherproofed.
Weatherproofing and Maintenance Tips
Protecting your beach sign against weather extends its life and keeps colors vibrant. Outdoor Mod Podge or an exterior clear polyurethane sealant creates a waterproof barrier on the painted surfaces and lettering. Apply at least two generous coats, allowing 24 hours drying time between coats.
Keep in mind that even the best sealants blunt after 1, 2 years under intense sun and rain. Annual inspection and reapplication are recommended to maintain the protective layer. For wooden posts, using pressure-treated lumber or applying a wood preservative before painting adds further defense against rot and insects. Signs in areas subject to strong storms or heavy wind may need additional bracing or be taken down temporarily for protection.
Common Mistakes and How to Avoid Them When Making Signs
Common errors when making beach signs usually start with poor preparation of the wood. Skipping sanding or cleaning leaves dirt and loose fibers that cause paint to peel or flake prematurely. Always sand down rough surfaces with 120- to 220-grit sandpaper until smooth, then wipe off dust with a damp cloth. This ensures paint adheres properly and your sign lasts longer outdoors.
Lettering mistakes often happen when you rush the design or don’t plan out spacing. Using stencils or painting your letters lightly in pencil first can help keep lines straight and even. Avoid applying thick paint layers all at once; build colors gradually in thin coats, letting each dry fully for at least 1 to 2 hours, depending on humidity and temperature. This prevents runs and uneven finishes.
- Sand the wood thoroughly before painting.
- Clean the surface to remove dust and oils.
- Use painter’s tape or stencils for crisp lettering.
- Apply paint in thin, even layers, letting each dry fully.
- Seal your sign with a clear outdoor polyurethane to protect it.
- Allow at least 24 hours curing time before outdoor exposure.
Rushing paint layers or skipping sealants can cause peeling or fading from sun and moisture. If you notice peeling paint or wood damage on an existing sign, gently sand affected areas to remove loose finish, then clean and reapply primer and paint. Use an exterior-quality primer to block moisture and improve adhesion. Finish with a weatherproof clear coat for protection. Expect to spend around $15 to $25 on a quart of exterior polyurethane or sealer, which covers multiple signs.
Paint often needs time to cure completely, especially in humid or cool conditions below 60°F. Failing to wait can cause smudging or poor durability. Store your paint and sign in a dry, warm spot during drying. Reapplying sealant every 1 to 2 years can maintain your sign’s look and extend its life against coastal weather.
Cost-Efficient Tips and Budgeting for Beach Sign Projects
Planning your budget before starting a beach sign project helps you avoid overspending and ensures you get the best materials for your money. Start by listing all the items you will need, such as wood, paint, brushes, sealant, stencils, and hanging hardware. Research prices online or at local craft stores to assign approximate costs to each item. Set a total budget limit, and prioritize the essential materials over optional extras like specialty paints or decorative embellishments that can increase costs.
Saving money on materials often comes down to where you shop and what substitutes you choose. Look for scrap wood or pallets, which many hardware stores or recycling centers give away or sell cheaply. Avoid expensive hardwoods and opt for smooth softwoods like pine or cedar, which cost around $10 to $15 per board, enough to make a two-foot by one-foot sign. For paint, buy small sample pots or craft acrylic paints instead of large cans, which might be unnecessary if you’re only painting one sign. Stencils can be replaced with hand-lettering using painter’s tape or free printable templates if you want to skip buying pre-made ones.
Use brushes and tools you already own before purchasing new ones. If you need specific brushes, discount craft stores or dollar stores usually sell quality synthetic brushes at $1 to $3 each. Sealants such as polyurethane protect signs meant for outdoor use but you can find spray versions in small cans costing about $5, which cover several projects. Avoid expensive specialty finishes if your sign will be indoors or in a protected space.
Batching your projects saves money over time. For example, if you plan to make multiple signs or gifts, buy larger quantities of paint and a bigger wood board to cut multiple pieces yourself. This approach reduces the cost per sign and cuts down on repeated shipping or store trips.
Set realistic expectations about your budget’s impact on the final product. Signs made with less expensive wood might show knots or uneven grain but can be painted over creatively to look rustic. Using fewer colors or simpler designs reduces paint use and drying time, helping you finish faster with fewer supplies.
Double-check that your chosen wood is smooth and sanded before buying to avoid extra effort and sanding dust that can add time and cost to the project.
Step-by-Step Action Plan for Making Your Beach Sign
Follow this plan to create a beautiful, durable beach sign with confidence and efficiency.
- Before you start: Gather all your chosen wood, paints, brushes, stencils, and mounting materials. Confirm everything fits your design and budget.
- Day 1: Prepare and cut your wood base to size, sanding surfaces smooth. The wood should feel smooth and free of splinters.
- Day 2: Apply your base coat of paint or stain, letting it dry fully (usually 24 hours). Check that the finish is even and dry to the touch.
- Day 3: Sketch or stencil your lettering and design onto the sign. Ensure the outlines are clear before painting.
- Day 4: Paint your letters and decorative elements, allowing each layer to dry completely. The paint should have crisp edges without smudges.
- Day 5: Add any finishing effects like distressing or mosaics. Confirm the look matches your vision and is fully dry.
- Day 6: Seal your sign with a waterproof sealant; let it cure as directed (usually 24-48 hours). The sealant should feel dry and provide a protective finish.
- Day 7: Mount or display your sign outdoors in the desired location. Check that it’s secure and visible.
Frequently Asked Questions
What Type of Paint Lasts Longest on Outdoor Beach Signs?
Acrylic latex paint lasts longest outdoors, resisting moisture and sun damage. It also dries quickly and is easy to clean, perfect for DIY beach signs exposed to weather.
Can You Use a Projector to Trace Letters on a Beach Sign?
Yes, a projector helps trace letters accurately onto your wood or base material. It allows you to create precise and consistent lettering without freehand drawing.
How Does Adding Cinnamon Affect a Beach Sign?
Cinnamon adds a rusty texture and a natural scent to your sign, improving its rustic look. It’s an inexpensive ingredient that can make your DIY beach sign unique and budget-friendly.
Is Reclaimed Wood a Good Choice for Making Beach Signs?
Reclaimed wood is excellent for rustic and vintage-style beach signs, adding character and durability. Wood from the 1800s or other old sources can bring history and charm to your craft.
What’s the Best Way to Protect Hand-Painted Signs from Fading?
Apply a clear outdoor sealant like polyurethane to protect from fading and moisture damage. Sealants keep colours vibrant and extend the life of your beach sign in sunlight and rain.
How Can I Make a Multi-Layer Mosaic Beach Sign?
Layer different colored and shaped pieces carefully on your base using strong adhesive for mosaic signs. This technique creates texture and depth, making your beach sign visually interesting and durable.
Final Thoughts
Making your own beach sign offers a rewarding way to add personality and charm to your outdoor space. Taking the time to prepare carefully and follow each step ensures a sign that lasts through sun and salt air. Start by choosing the right wood and paints to suit your style, then enjoy the process of bringing your beach-themed vision to life.