Framed Wood Sign Ideas: Complete Guide with Design and DIY Steps
Framed wood sign ideas offer a simple way to create personalized, stylish decor that fits any room or outdoor space. Using basic materials like plywood and 1×2 boards keeps costs low, often around $4 per sign. Start by selecting quality wood pieces sized carefully to ensure clean, square corners and a solid frame.
Key Takeaways
- Choose plywood around 0.2 inches thick for a sturdy, smooth surface to paint or stain your sign.
- Cut 1×2 lumber into precise lengths to frame wood signs up to 4 feet wide or tall.
- Measure each wood piece carefully since nominal lengths vary slightly and affect final fit.
- Use Mod Podge to adhere graphics or printed designs smoothly onto your wood surface.
- Wood stain improve the rustic look and protects the sign before sealing with a clear finish.
- Seal finished signs with a waterproof clear coat for indoor and outdoor durability.
What Are Framed Wood Signs and Why Use Them?
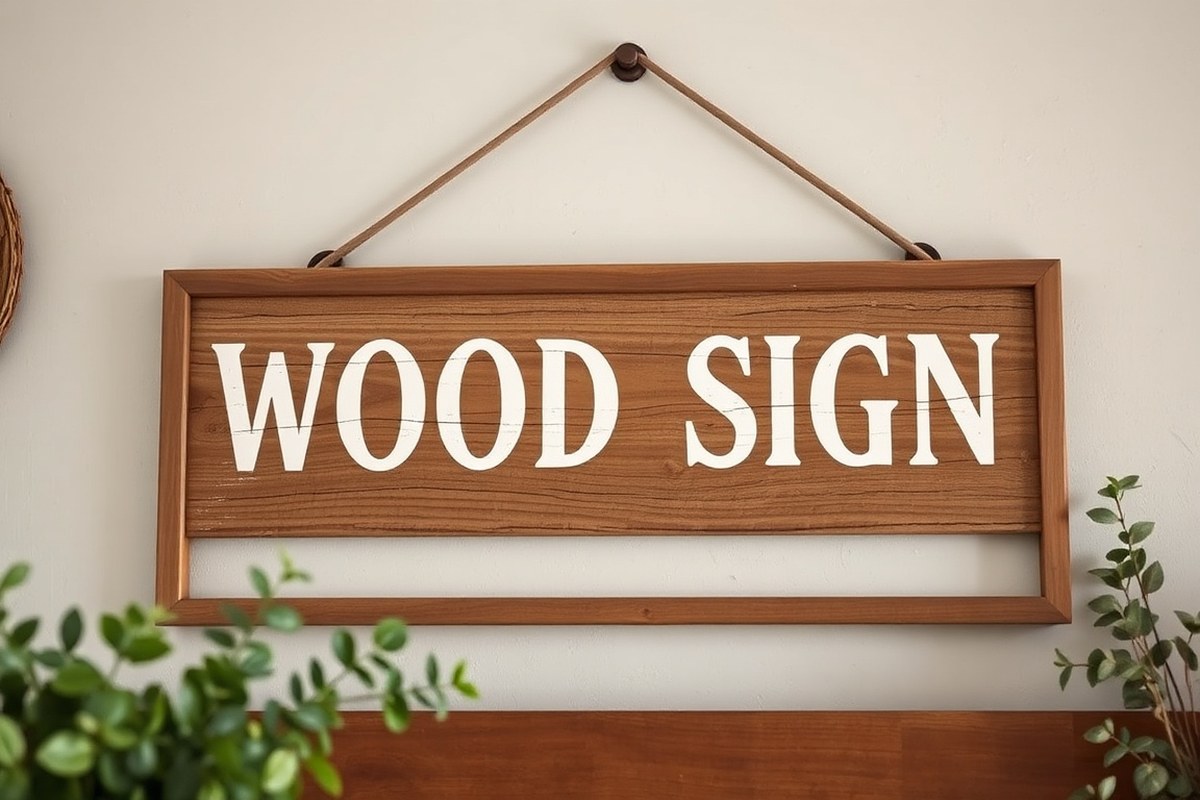
A framed wood sign is a piece of wood, often decorated with paint, stain, or vinyl graphics, that is enclosed or bordered by a wooden frame. The frame serves both a practical and decorative purpose. It protects the edges of the sign and gives it a finished, polished look that draws attention to the design or message displayed. Without a frame, a wood sign can appear rough or incomplete, especially in a home setting where details matter.
The decorative appeal of adding a frame to a wooden sign comes from the contrast and definition it creates. A frame can be as simple as thin strips of scrap wood glued and nailed around the sign or as elaborate as a layered molding style. The frame highlights the wording or image on the sign and can complement various home decor themes, such as rustic farmhouse, vintage, or modern minimalist. Using a frame also helps the sign stand out on your walls, shelves, or tabletops by giving it a clear boundary.
Common uses for framed wood signs in home decor include displaying motivational quotes, family names, seasonal greetings, or welcoming messages. They often find a place in entryways, living rooms, kitchens, or dining areas where guests can see them easily. Some DIY enthusiasts place them on shelves or mantels, mixing them with plants or other decor items. A framed wood sign also works well outdoors near the front door or in a garden, provided it is sealed against weather.
Creating a framed wood sign typically starts with selecting a wooden board slightly larger than the intended design area. Then, you cut frame pieces, usually 1 to 2 inches wide, matching the wood thickness. Attaching the frame involves gluing and nailing the frame pieces flush to the edges, creating a neat border. Careful sanding ensures smooth edges and corners. The cost to make one depends largely on wood choice. Pine scrap wood or pallet wood can cost under $10 for a small sign and frame, while hardwoods might cost more.
Good framed wood signs show even frames with tight joints and smooth finishes. Paint or stain should not bleed under the frame edges, so masking or careful application helps. Problems to watch for include warped frames or boards, loose joints, and chipped paint. Ensuring your wood is dry and flat before assembling, and using clamps during gluing, can prevent these issues. The right frame adds dimension and makes your wood sign a focal point rather than just another wall hanging.
Materials and Tools Needed for Framed Wood Signs
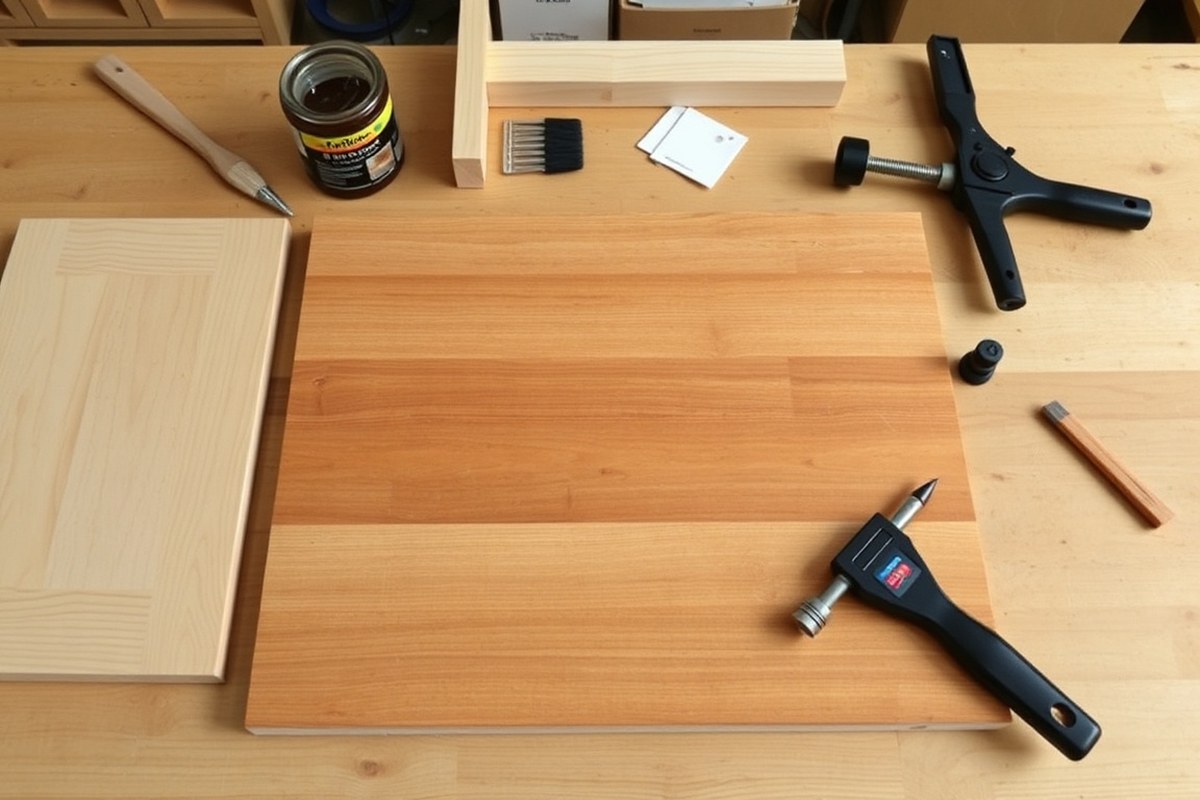
Choosing the right materials and tools is key to making a durable and attractive framed wood sign. For the sign surface, smooth plywood or solid pine boards work best. They are affordable, easy to cut, and accept paint and stain evenly. A common choice is 1/2-inch thick plywood or a pine board cut to your desired size, which typically ranges from 12 to 24 inches wide and 18 to 36 inches long depending on your design.
For the frame, 1×2 pine boards are popular because they are lightweight and simple to work with. You can cut these boards with 45-degree miter cuts to create neat corners. Reclaimed wood or wood shims are alternatives if you want a rustic or textured look. Using clear wood stain or paint to finish the frame helps protect it from moisture and wear.
Paints and stains are another important factor. Acrylic paint is a top choice for lettering and graphics because it dries fast and is easy to clean up. For the background or surface, wood stain can highlight the grain and add warmth. Use a combination of light and dark colors for contrast. Protect your finished sign with a clear exterior sealer or polyurethane to resist fading and damage, especially if the sign will hang outside.
Basic tools simplify the process of cutting, assembling, and finishing your sign. A miter saw or hand saw helps make precise cuts. Sandpaper or an electric sander smooths edges and surface imperfections. Wood glue and finish nails or brad nails secure the frame. A paintbrush or foam brush applies paint and stain evenly. Finally, mounting hardware like D-rings or wire hangers completes the project for easy wall display.
- 1/2-inch smooth plywood or pine board for the sign surface
- 1×2 pine boards or reclaimed wood strips for the frame
- Acrylic paint for letters and graphics; wood stain for background
- Clear exterior sealer or polyurethane for protection
- Miter saw or hand saw for cutting wood pieces
- Wood glue and finish nails or a nailer for assembly
- Sandpaper (120- to 220-grit) and paintbrushes or foam brushes
Use 120-grit sandpaper first to smooth rough edges, then finish with 220-grit for a smooth painting surface.
Preparing your workspace with all these materials and tools ready will make the building process smoother. If you plan to use reclaimed wood, make sure to clean and sand it thoroughly to avoid splinters or uneven surfaces. Frames should fit snugly around the sign with corners cut accurately to prevent gaps. Sealing each part before assembly can improve the longevity of your sign, especially if it will experience outdoor conditions.
How to Choose and Prepare Wood and Frames for Signs
Choosing the right wood and frame for your sign ensures durability and matches your intended style. Precise measuring and cutting keep your frame snug and even around the sign. Proper sanding creates a smooth surface for painting or staining, leading to a professional look.
Selecting Sign Wood and Frame Lumber
Pick straight pieces of wood for both the sign and the frame to avoid warping. Common choices include pine, cedar, or plywood boards that are smooth and flat. Pine is affordable and easy to work with, while cedar offers natural resistance to weather if your sign will be outdoors.
For the frame, select ½ inch thick wood lath or scrap wood pieces that can be stacked to the right thickness. The frame wood should complement or contrast the sign board depending on your design. Make sure the wood is dry and free of major knots or splits, as damaged wood can weaken the frame’s hold.
Accurate Measuring and Cutting Techniques
Measure your sign board first, then add about 1.5 inches to each end of the frame pieces to allow for mitered corners at 45-degree angles. For example, if your sign measures 20 by 10 inches, cut two frame pieces at 21.5 inches and two at 12.5 inches. Use a miter saw or handsaw with a miter box for clean, precise cuts.
Ensure all four frame pieces are cut to their exact lengths and angles before assembly. Test fit each piece around the sign board on a flat surface. Adjust if needed by sanding corners or recutting slightly.
Sanding and Surface Preparation Tips
Sanding is essential for paint or stain to adhere evenly. Start with 100-grit sandpaper to smooth rough edges and surfaces, and follow with 220-grit for a fine finish. Focus on the faces and edges of both the sign board and frame.
Remove any sanding dust with a damp cloth before painting or staining. Sanding also helps remove any splinters that can affect your paint job or create uneven areas under your lettering or graphics. Follow these steps for preparing your wood and frame:
- Choose straight, dry wood with minimal defects for both sign and frame.
- Measure the sign board length and width accurately with a tape measure.
- Calculate frame piece lengths by adding 1.5 inches for miter cuts.
- Cut frame pieces at 45-degree angles using a miter saw or box.
- Test fit the frame pieces around the sign board for a snug fit.
- Sand all surfaces and edges first with 100-grit, then with 220-grit paper.
- Wipe down all pieces with a damp cloth to remove dust before finishing.
Creative Design Styles and Ideas for Framed Wood Signs
Framed wood signs suit a wide range of design styles, from rustic farmhouse to sleek modern minimalism. Rustic designs often use reclaimed wood or 2×4 boards with natural stains or light distressing to bring out the wood grain and knots. This approach adds warmth and character, making the sign feel handcrafted and cozy. Contrasting that, modern wood signs typically feature smooth, sanded surfaces painted in solid colors like white, black, or muted tones. Crisp, clean fonts in sans-serif styles improve the contemporary look and keep the design simple and elegant.
Choosing colors and typography depends on the decor where you plan to display the sign. For rustic interiors, earthy hues such as soft browns, creamy whites, and muted greens pair well. Use hand-lettered or serif fonts with a slight weathered effect to amplify the relaxed vibe. Modern rooms often call for monochromatic palettes or bold accent colors like navy or charcoal. Block fonts or sleek script fonts printed or painted in a single color work best and can be framed with minimalistic wood frames in black or natural light wood tones.
Creative embellishments bring personality and seasonal relevance to wood signs. Three-dimensional accents like small wood cutouts, metal elements, or twine wrapping add texture and a handcrafted feel. Seasonal themes improve versatility; for example, adding miniature pumpkins or autumn leaves for fall, or small floral garlands for spring. These details shouldn’t overpower the lettering but should complement the overall design. Attaching such decorations with wood glue or small nails ensures they remain secure while allowing easy removal for off-season storage.
One effective way to combine rustic charm with modern flair is to use natural wood frames around a painted sign. For instance, paint the sign background white and apply black lettering in a simple font. Finish with an unpainted, lightly sanded wood frame, about 1 to 2 inches wide, to maintain a balanced contrast. Costs vary: untreated lumber runs around $5 to $10 per 2×4 foot board, paint and sealant another $10 to $20 total depending on quality, and embellishments typically range from $5 to $15. Expect to spend several hours sanding, staining, painting, and assembling to achieve professional-looking results.
Common issues include using fonts that are too intricate for wood painting, causing letters to blur or chip when sealed. Also, overly bright paint on distressed wood can clash with the rustic aesthetic. Pretest colors and fonts on scrap wood pieces to avoid surprises. Proper staining and sealing protect against fading and wear while preserving the chosen style, whether rustic or modern. Combining natural wood textures with thoughtfully selected colors and fonts helps your framed wood sign fit perfectly within your home’s decor.
Painting, Staining, and Applying Graphics Effectively
To get clean, professional results when painting or staining your framed wood sign, preparing the wood surface properly and using precise transfer methods for graphics is essential. This process includes careful sanding, applying stain before paint, and adopting techniques to avoid bleeding under stencils or smudging on transfers. Following specific steps and using the right tools ensures your designs show crisp lines and vibrant colors.
Preparing Wood Surface for Paint or Stain
Start by sanding the wood smoothly to remove rough spots and open the grain, allowing even stain absorption. Choose a stain that suits your wood type and desired color depth. Applying stain before painting improve the wood’s natural look and prevents paint from peeling. Use a brush or clean cloth to apply an even coat of stain, wiping off excess within 5 to 15 minutes depending on stain type. Let the stain dry thoroughly, usually 24 hours, before proceeding to paint.
Sealing the stained surface with a clear coat or sanding lightly between coats ensures an even finish. When painting surfaces with stencils, ensure the wood is dry and free of dust to avoid paint lifting or bleeding. For double-sided signs, paint or stain both sides the same color to prevent visible bleed-through from paint or stain seeping through the wood.
Using Stencils and Transfer Methods Safely
Stencils help you create precise lettering and images without freehand errors. To avoid paint bleeding under stencils, seal your stencil edges by applying a thin coat of clear varnish or Mod Podge over the edges and let it dry fully. Use a stencil brush or a sponge, and apply paint with a light dabbing or stippling motion rather than brushing, which can push paint under the stencil.
For transferring custom designs without a cutting machine, place carbon transfer paper between your printout and the wood, then trace over your design with a pencil or stylus using firm, even pressure. Vinyl stencils cut by machines like Cricut provide clean, detailed designs; stick the vinyl firmly to the wood to prevent paint leakage. Another option is using an ink transfer method: print your design on inkjet paper, secure it face down on the wood, rub the back side with a burnishing tool or spoon to transfer ink, then gently peel the paper away once dry.
Apply paint in thin layers over stencils and allow each layer to dry slightly before adding more to prevent smudging and bleeding.
Finishing Touches for Crisp Lettering
Once your paint or stain has dried, carefully remove stencils to avoid peeling paint edges. For sharper lines, lightly sand any rough edges with fine-grit sandpaper (220 grit) and touch up with a small detail brush. Applying a clear matte or satin sealer over letters protects your design from wear and fading, typically costing about $10 to $20 per quart for a quality spray sealer.
Adding a topcoat also improve the wood’s durability and reduces color bleed over time. Avoid heavy sealer coats that can create a plastic-like surface; two light coats are usually sufficient. If you notice paint bleed despite precautions, use a fine artist’s brush dipped in the base color to carefully clean up edges and restore crisp shapes.
- Sanding: Sand your wood thoroughly with medium (120) and then fine (220) grit sandpaper to smooth the surface and open the grain.
- Staining: Apply your stain evenly with a brush or cloth, wipe off excess within 5 to 15 minutes, and let dry for 24 hours.
- Sealing edges of stencil: Brush a thin coat of Mod Podge around stencil edges and allow to dry to prevent paint bleed.
- Painting: Dab paint onto the stencil area lightly using a stencil brush or sponge to avoid pushing paint under edges.
- Design transfer: Use carbon paper or ink transfer methods to trace your custom design onto the wood.
- Stencil removal: Carefully peel off your stencil after paint is mostly dry to preserve crisp edges.
- Touch up: Sand rough edges lightly and paint over any bleeding lines with a fine brush and matching color.
- Sealing: Spray two light coats of clear sealer over your sign after all painting is dry to protect the surface and design.
Sealing and Finishing to Protect Your Wood Sign
Sealing your wood sign is an essential step, especially for outdoor use where moisture and sunlight can quickly wear down both paint and wood. Indoor signs still benefit from sealing because it prevents dust buildup and minor scratches, keeping the design crisp and vibrant over time. For outdoor signs, a weatherproof sealer shields against rain, UV rays, and temperature changes, extending the life of your project.
Various options exist for sealing framed wood signs. Spray sealers are convenient and create an even coat, ideal for beginners or for protecting detailed painted designs without smudging. Use clear acrylic spray sealers designed for wood and painted surfaces; these generally cost around $7 to $15 per can. Apply the spray outdoors or in a well-ventilated area and hold the can 8 to 12 inches away from the sign. Light, even coats work best, with at least two to three layers. Let each coat dry for 20 to 30 minutes before applying the next. This method helps prevent drips and leaves a smooth finish.
Brush-on varnishes or polyurethane give a more durable finish but require careful application to avoid brush marks. Pick a water-based product with UV protection for outdoor projects, as it dries faster and has less odor than oil-based options. Use a high-quality synthetic brush and apply thin layers, brushing in the direction of the wood grain. Wait 2 to 4 hours between coats and lightly sand with fine-grit sandpaper (220 grit) after each dry layer to ensure smoothness and proper adhesion of subsequent coats. Typically, two to three coats are enough to protect both the wood and paint without obscuring fine details.
Applying finish without damaging your painted design means working patiently. If your design includes raised paint or intricate textures, avoid thick layers that could pool and blur the details. Light coats build up protection evenly. For stenciled or graphic transfers, sprays reduce the risk of smearing compared to brushes. Before sealing the whole sign, test your sealer on a scrap piece of similarly finished wood or an inconspicuous corner.
For outdoor signs, consider additional weatherproofing tips such as mounting the sign in a sheltered spot where it is less exposed to direct rain or intense sun. Elevating the sign slightly to prevent water pooling at the frame base also helps. While sealing is important outdoors, indoor signs can sometimes get by with just a varnish or spray to improve longevity without the need for full waterproofing.
Good results come from a sealed surface that feels smooth to the touch, looks even, and leaves the paint color vivid. Signs that are not sealed or improperly sealed may show peeling, fading, or swelling wood within months when exposed to weather. Sealing adds minimal cost and effort but significantly boosts the lifespan and appearance of your framed wood sign. Always follow the product label instructions and let the finish fully cure, usually 24 to 48 hours, before handling or hanging your sign.
How to Hang, Display, and Maintain Framed Wood Signs
Choosing the right hanging hardware for your framed wood sign depends on the size, weight, and location. For lightweight signs under 5 pounds, adhesive strips or small picture hooks work well and avoid wall damage. Heavier signs benefit from D-ring hangers paired with nails or wall anchors, ensuring stability. If your sign has a wire across the back, use a sturdy wall hook placed in a drywall stud or secured with an anchor for extra support.
Placement matters as much as mounting. Select a spot where your sign complements the room’s function and décor, like a welcoming phrase near the front door or an inspirational quote in your office. Avoid direct sunlight or areas with high moisture such as bathrooms, which can cause fading or warping despite sealing. Consider eye level for visibility, roughly 57 to 60 inches from the floor, and ensure enough surrounding space so the sign stands out.
- Use adhesive strips for lightweight signs under 5 pounds
- Install D-ring hangers with nails or anchors for heavier signs over 5 pounds
- Hang wire-mounted signs on a sturdy wall hook, preferably into a stud
- Mount at eye level, about 57 to 60 inches from the floor
- Avoid direct sunlight and damp areas to protect materials
- Choose spots that fit the sign’s theme, like entryways or offices
- Leave space around the sign for a clean, attractive display
Regular maintenance protects both aesthetics and longevity. Dust your sign every two weeks with a microfiber cloth to prevent buildup, which can dull finishes. For deeper cleaning, wipe gently with a damp cloth followed by immediate drying. Avoid harsh chemicals or excessive water, as these can degrade paint or wood seals. Inspect your hanging hardware periodically to tighten screws or replace rusted parts to prevent damage or falling.
Common Mistakes When Making Framed Wood Signs and How to Fix Them
Common mistakes in making framed wood signs often come from imprecise measurements, rushed or improper painting, and wood issues like warping or cracking. Understanding what causes these mistakes and addressing them with straightforward fixes will improve the look and durability of your projects.
Fixing Frame Alignment and Corner Issues
Frame corners typically don’t fit properly because of incorrect miter cuts, mismatched wood thicknesses, or uneven surfaces. Miter cuts must be exactly 45 degrees to create a clean 90-degree corner joint. Using a miter saw with a reliable angle guide helps keep the cuts precise. Check if the corners don’t align by measuring the width and thickness of the frame pieces. Sand any rough edges smooth before putting the frame together. Also, securing corners with wood glue plus finish nails or corner clamps until the glue dries improves strength and alignment.
For warped or slightly bent frame pieces, clamping them flat during drying can restore correct shape. Catch issues before painting by gently sanding the joints flush and filling small gaps with wood filler to create a smooth finish. Expect to spend around 10 to 20 minutes adjusting and sanding each frame corner for a clean fit, which prevents gaps that spoil the sign’s appearance.
Resolving Paint and Stencil Problems
Paint bleeding under stencils or uneven finishes often result from applying thick paint layers or not sealing the stencil edges tightly. Use a dry brush technique by dipping a flat brush or foam roller lightly in paint and wiping off excess on a paper towel before applying. Press stencils firmly in place or use spray adhesive designed for stencils to prevent paint seepage. Thin multiple layers of paint allow better control, with 15 to 20 minutes drying time between coats depending on the type of paint and room temperature.
Paint smudges can be corrected by lightly sanding with 220-grit sandpaper once the paint is dry, then applying a new coat. Uneven finishes can be caused by inconsistent brush strokes or paint thickness, so try to keep strokes consistent in one direction and avoid overloading your brush. Seal the finished paint with a clear matte or satin polyurethane to reduce wear and provide a uniform gloss level.
Test your stencil application on scrap wood first to perfect pressure and paint amount and reduce paint bleeding on your actual sign.
Addressing Wood Splitting, Warping, or Cracking
Wood warps or splits primarily due to moisture changes, inadequate sealing, or stress during fastening. Use kiln-dried wood to lower moisture content under 15%, which reduces warping chances. Address slight bends or cracks in wood by lightly sanding the affected spots and using wood glue on cracks to prevent further damage. Clamp glued cracks firmly and give at least 30 minutes for drying before painting or finishing.
Warping can also happen from uneven sealing or exposure to high humidity. Apply sealers or finishes on all sides of the wood to balance moisture absorption and prevent warping over time. Pick sign locations away from direct sunlight and moisture to extend lifespan. For small splits, wood putty can fill gaps, but large cracks may require replacing the piece to maintain structural integrity and the sign’s appearance.
Step-by-Step Action Plan for Your Framed Wood Sign
Follow these straightforward steps to create your framed wood sign efficiently and confidently.
- Day 1: Select Materials, Choose your wood and frame based on durability and design preference; inspect the wood for smooth surfaces and minimal knots.
- Day 2: Prepare Wood and Frame, Sand all surfaces to ensure paint or stain adheres smoothly; confirm the frame fits snugly around the wood.
- Day 3: Design Your Sign, Sketch or stencil your design on the wood; check alignment and spacing to ensure it looks balanced.
- Day 4: Apply Paint or Stain, Use even brush strokes or a rag for staining; let each coat dry fully to avoid smudging or uneven color.
- Day 5: Add Graphics or Lettering, Use transfer paper or stencils for precise lettering; verify all edges are clean and sharp before drying.
- Day 6: Seal the Sign, Apply a clear protective finish like polyurethane; confirm the finish is even and fully dried to protect your work.
- Day 7: Assemble and Hang, Attach the frame securely to the sign; use appropriate hardware and hang in your chosen spot, checking for level placement.
Frequently Asked Questions
What Are Some Budget-Friendly Framed Wood Sign Ideas?
Use plywood, 1×2 boards, and simple stains to make signs around $4 each. This keeps costs low while allowing for personalized, rustic designs that fit most home styles.
Can Framed Wood Signs Be Customized for Different Holidays?
Yes, you can easily update your wood signs with seasonal paint or removable graphics. This lets you reuse the base sign for Christmas, Halloween, or other occasions without making a new one.
How Can I Create a Distressed Look on My Framed Wood Sign?
Lightly sanding the edges and adding diluted paint layers achieves a worn, vintage feel. This style suits rustic or farmhouse decor and adds character to beginner projects.
Are Stencils the Best Option for Adding Text to Wood Signs?
Stencils provide clean, repeatable lettering that’s beginner-friendly. They help avoid mistakes common with freehand painting and make custom sayings easier to apply precisely.
What Is a Good Wood Type Choice for Outdoor Framed Signs?
Cedar and redwood resist moisture and decay, making them ideal for outdoor signs. Proper sealing after painting protects the wood from weather damage and prolongs the sign’s life.
Can I Combine Different Wood Grains in One Framed Sign?
Combining woods adds texture and visual interest to your design. Just ensure all pieces are sealed evenly to prevent uneven aging and warping.
The Bottom Line
Crafting a framed wood sign combines creativity and practical skills to improve your space with personalized décor. Starting with quality materials and following the right steps ensures your sign will be both attractive and durable. Begin by selecting your wood and design today to bring your custom sign project to life.