DIY Rope Hanging Sign: A Complete Guide with Tips, Materials, and Design Ideas
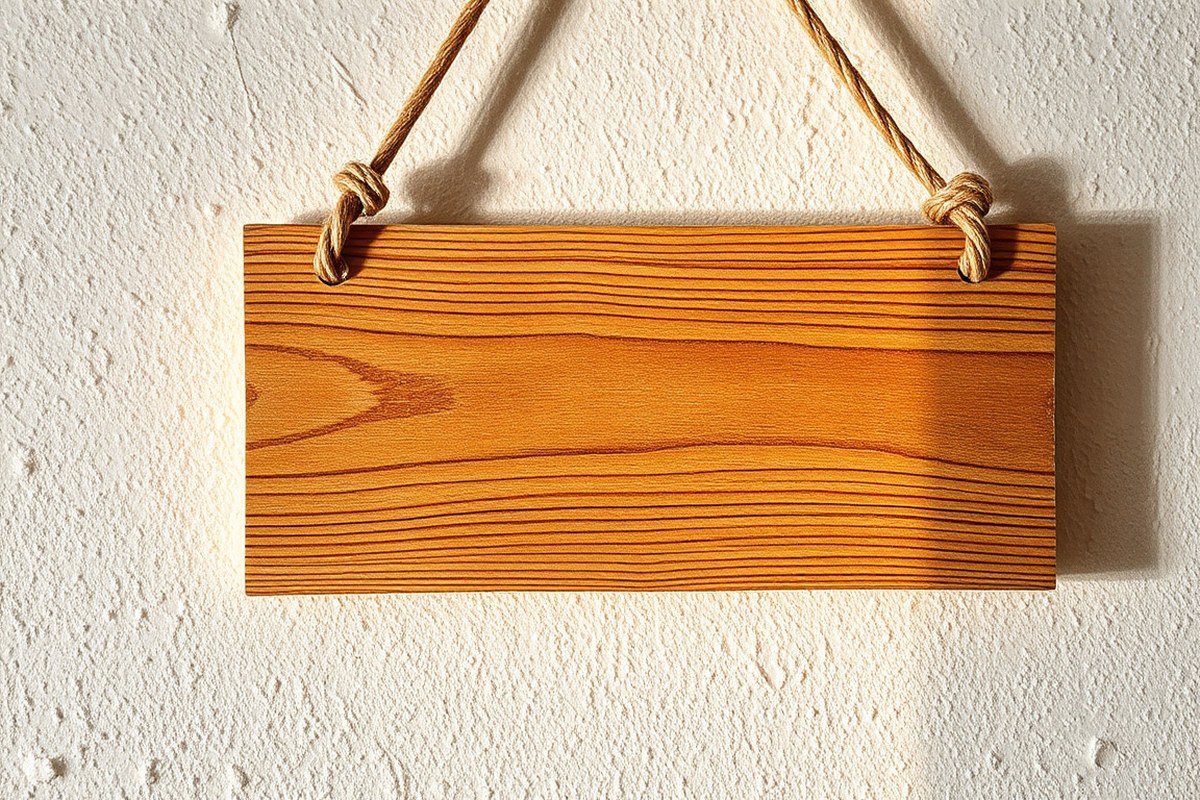
A DIY rope hanging sign is a simple wooden board suspended by sturdy ropes, creating a charming, rustic display for your home. It works by threading the rope through drilled holes or wrapping it around the board securely, allowing you to hang it on a wall or door. Start by choosing a smooth wooden board and strong, durable rope for stability and an appealing look.
Key Takeaways
- Select common boards like 1×4 or 1×8 for ease of cutting and handling.
- Use twisted cotton rope or natural twine for strength and a natural finish.
- Cut wood into even lengths and mark holes precisely, about 1.5 inches from each end.
- Leave about 20 inches extra rope center for hanging and stylistic drape.
- Secure the rope with knots or wood screws to prevent slipping and ensure safety.
- Paint or stain the wooden board before attaching rope to allow drying time.
What Is a DIY Rope Hanging Sign and How Does It Work?

A DIY rope hanging sign is a handcrafted decorative piece that combines wood and rope to create a stylish display for words, phrases, or symbols. It functions both as wall art and as a unique way to express messages or store small items when adapted as hanging shelves. The basic construction involves joining wooden boards into a flat sign surface, then attaching a length of sturdy rope to enable easy hanging on hooks or nails.
Typically, you start by selecting one or more wooden boards cut to your desired size, often from common lumber like a 1×8 board. These pieces may be glued or nailed together for stability; using an adhesive such as Bostik No More Nails helps ensure a strong bond without visible soldering or hardware. The wood is sanded smooth and can be painted, stained, or left natural depending on your style goals.
Next, thick natural rope is attached to the back or top edges of the wooden sign. The rope must be strong enough to support the weight, and leaving extra length, about 20 inches, is helpful for hanging and adjusting the display height. You can tie knots or loop the rope through drilled holes in the wood, securing it tightly for a clean look. Some designs include decorative knots or braids to add texture.
The appeal of DIY rope hanging signs in home decor lies in their rustic and versatile character. They suit various styles, from farmhouse and coastal themes to boho and minimalist modern interiors. These signs can display motivational quotes, family names, or welcome messages near entryways or living spaces. Also, variations like rope-hung wooden shelves add functionality by providing display space for plants, candles, or small collectibles.
Constructing a rope hanging sign generally costs under $20 if you already have basic tools. Rope and boards are inexpensive, and adhesives or paint add only a few dollars. Completing the project usually takes 10 to 30 minutes, depending on the level of customization. A well-made sign hangs level, supports weight without sagging, and has smooth finishes without splinters or rough edges. Problems to watch for include loose rope attachments that cause slipping or uneven hanging, which you can prevent by double-knotting and testing the sign’s balance before final placement.
Some variations use cardboard letters glued onto the wood to spell out words, adding a personal touch without hand-painting. Others incorporate LED neon rope lights shaped into letters or designs for a glowing effect, though these versions require more careful wiring and secure mounting. Whether simple or elaborate, the core concept remains the same: a wooden board and a rope working together to create a functional, eye-catching piece of wall decor.
Essential Materials and Tools for Your Rope Hanging Sign

Your DIY rope hanging sign requires the right combination of wood, rope, and tools to ensure durability and a polished look. Choosing quality materials tailored to your space and style, along with essential tools, sets you up for success.
Types of Wood Boards Suitable for Signs
Look for boards that are easy to work with, lightweight, and have a smooth surface for painting or lettering. Common options include pine, cedar, and poplar, all typically available in 1×6 or 1×12-inch sizes. Pine is affordable and easy to cut but may have knots that affect appearance. Cedar is naturally resistant to moisture and insects, making it ideal for outdoor signs. Poplar offers a smooth, paint-friendly finish with fewer knots than pine.
For beginners, boards cut to about 18 to 26 inches in length balance manageability with visibility. Thinner boards (around 3/4-inch thick) work well for hanging signs since they’re lighter, while thicker boards provide more durability but increase weight.
Comparison of Popular Rope Types and Uses
Choosing the right rope affects both the look and strength of your hanging sign. Natural ropes like cotton or sisal offer a rustic feel but differ in durability and stiffness. Cotton rope is soft, pliable, and easy to knot, making it best for indoor signs where you want a gentle texture. Sisal rope is sturdier and rougher, suitable for outdoor use or heavier signs requiring more support.
Synthetic ropes such as nylon are stronger, resistant to moisture, and less prone to fraying but tend to have a shinier, more modern appearance. Nylon braided ropes, often 3/8-inch in diameter, support heavier weight and hold knots securely. Braided ropes generally lay flatter and knot neatly compared to twisted ropes.
| Rope Type | Material | Appearance | Best for | Strength & Durability |
|---|---|---|---|---|
| Cotton Twisted | Natural Cotton | Soft, matte | Indoor, lightweight signs | Medium strength, easy to knot |
| Sisal Twisted | Natural Fiber | Coarse, rustic | Outdoor, heavier signs | High strength, rough texture |
| Nylon Braided | Synthetic Nylon | Smooth, slight sheen | Heavy-duty, all-weather | Very strong, durable |
Choose your rope type based on where you’ll hang the sign and the weight it needs to support. Cotton works well for decorative indoor projects. For outdoor or larger signs, sisal or nylon is more reliable, but nylon may look less natural.
Must-Have Tools and Optional Accessories
For shaping your wooden sign, a saw is essential. A basic handsaw or a power miter saw works well for cutting your chosen boards to length (for example, four 1×6 boards cut to 26 inches). Use a drill with appropriate bits for making holes sized for your rope thickness, which helps secure the hanging loops or mounting hardware.
Lettering requires sandpaper or a sanding block to smooth surfaces before painting or staining. For painting letters, stencils, brushes, or permanent markers designed for wood are handy. To hang the sign securely, metal rings or picture wire, along with 1/2-inch wood screws, allow for firm attachment either directly through the sign or onto the back.
- Handsaw or power saw for cutting boards
- Power drill with drill bits (circle bits recommended)
- Sandpaper (medium and fine grit)
- Paint, brushes, or permanent markers for lettering
- Metal rings or picture wire for hanging
- 1/2-inch wood screws and screwdriver
- Measuring tape and pencil for accurate marking
Special tools like laser levels can help keep lettering and drilled holes perfectly horizontal, especially for multi-board signs. For knotting the rope securely, practice common knots like the Lark’s Head, which holds tight without slipping.
Tip: Avoid drilling holes that are too large for your rope, as this can weaken the support and cause the sign to hang unevenly.
How to Prepare and Design Your Wooden Signboard
Preparing and designing your wooden signboard starts with shaping the wood, smoothing it, and choosing a finish that protects and highlights the grain. Transferring your custom lettering or graphics requires careful methods like stencils or freehand drawing to get clean and precise results. Each of these steps affects the final look and durability of your rope hanging sign.
Cutting and Sanding Wood for a Smooth Surface
Begin by selecting the right size and type of wood for your signboard, such as a reclaimed 24″ × 6″ plank or a smaller cut like 14-inch planks. Use a saw or jigsaw for cutting to your desired size and shape. Sanding creates an even surface that helps paint or stain adhere better and prevents splinters.
Use medium-grit sandpaper (100- to 150-grit) first, followed by a finer grit (220) for a smooth finish. Sand along the wood grain to avoid scratches. This makes the surface ready for design transfer and finishing.
Applying Paint, Stain, or Sealant
Finishes like paint, stain, and sealant protect wood from moisture and wear, improving its look and longevity. Stains bring out the natural patterns, while paint offers a solid color palette. Sealants provide a protective layer, especially needed for signs exposed to humidity or outdoor use.
- Clean the sanded wood to remove dust with a dry cloth or tack cloth.
- Apply your chosen wood stain or paint with a synthetic brush or lint-free cloth, using even strokes.
- Allow the first coat to dry completely, usually 4 to 6 hours for stain, and 1 to 2 hours for paint.
- Apply a second coat if you want a richer color or better coverage.
- Once color layers are dry, brush on a clear wood sealer or varnish to protect the surface.
- Let the sealed wood cure fully, which can take 24 hours or more depending on product instructions.
Choosing between paint and stain often depends on the style you want and whether you wish to see the wood grain. For indoor signs, a simple paint with sealer is enough. Outdoor signs benefit from a weather-resistant stain and sealant combo.
Design Transfer Methods: Stencils, Vinyl, Freehand Drawing
Transferring your letters or graphics onto the wood ensures accuracy before painting or engraving. Vinyl stencils and pre-made stencils provide crisp edges and are ideal if you want consistent font or shapes. Freehand drawing works well for simple designs or a casual look.
Using chalk to trace your design onto the wood surface before applying paint lets you reposition or correct the layout easily. For vinyl stencils, you peel and stick them directly onto the wood, paint over, then remove once dry.
Tracing works best on a sealed or lightly stained surface. Avoid transferring on bare rough wood, as the uneven texture can blur designs. For cutting out letters with a jigsaw, use pencil outlines transferred through carbon paper or drawn directly for precision cutting.
Attaching and Styling the Rope for a Secure Hanging Sign
To hang your DIY rope sign securely and attractively, measure the rope lengths carefully before cutting, use reliable knots for strength, and style the rope with loops or fringes for a finished look. A well-measured rope avoids sagging, sturdy knots prevent slipping, and decorative touches make the sign stand out on your wall.
Measuring and Cutting the Rope Accurately
Start by determining where you want to hang your sign and how high off the wall it will sit. Measure twice the distance from the hanging point to the top of the sign plus extra length for knots and adjustments. This ensures the rope is long enough to go around the sign and leave room for secure tying.
Using a sharp pair of scissors or a utility knife, cut the rope cleanly to avoid fraying. If your rope is made from natural fibers like jute or cotton, wrapping the cutting point with tape before cutting helps keep the ends neat. Synthetic ropes may melt slightly when cut if sealed carefully with a lighter, but only do this with caution and well-ventilated space.
- Measure the vertical distance from the hanging point to where the sign bottom will be.
- Double this measurement to allow the rope to pass over and under the sign.
- Add 6 to 12 inches for tying knots, depending on knot type.
- Tape the rope ends if using natural fiber to prevent fraying.
- Cut the rope at the marked length with sharp scissors or a utility knife.
- Check the cut ends for fraying and trim or seal if needed.
Knot Techniques for Strength and Style
Strong knots hold the sign safely and maintain tension in the rope. Simple overhand knots at the rope ends after threading through drilled holes on the sign work well. For added security, double knots or figure-eight knots create a larger stopper that won’t slip through holes easily.
To hang the sign, tie a reliable loop at the top for hanging hardware. A bowline knot is worth learning because it creates a fixed loop that won’t tighten or slip under weight. It’s ideal for hanging on a nail or hook without risk of loosening over time.
Adding decorative knots, such as a square knot where ropes meet, can increase both strength and visual appeal. Avoid complicated knots if you’re new to tying, to prevent weakening the rope or making adjustments difficult.
Making Loops or Fringes to Customize Appearance
Loops can be formed above or alongside the sign for styling or to add hanging points. Creating these by folding the rope sections and securing with knots or twine adds dimension and complements the rustic look of rope signs. Experiment with loop sizes to suit your wall space.
Fringes at rope ends are easy to make by unraveling the fibers slightly after cutting and knotting. Trim the fringe evenly for a tidy finish. This detail works well with natural fiber ropes and adds a casual, handmade feel to your sign. For a cleaner look, keep the rope ends knotted and trimmed without fringes. Combining loops and fringes lets you customize the sign’s style, balancing durability with decorative touches based on your room’s theme and the rope’s texture.
Customizing Colors, Letters, and Decorative Elements
Painting letters on your rope hanging sign creates a clear, eye-catching message. Use a stencil or lightly sketch the letters with a pencil first. Choose acrylic paint for its quick drying time and good coverage, or oil-based paint for durability outdoors. Apply thin coats with a small brush to avoid bleeding. Let each coat dry for at least 30 minutes. For stained wood, use painter’s tape to protect surrounding areas and maintain sharp edges. Clear acrylic spray sealer applied after painting helps protect the finish from scratches and moisture.
Adding rope-wrapped letters or shapes brings texture and a handcrafted look. Cut letters out of sturdy foam board or thin plywood, available for around $5 to $10 each. Wrap the edges and faces tightly with twine, jute, or cotton rope using a hot glue gun or strong craft glue. This method allows for lightweight, three-dimensional designs that hang well on the main sign or separately. Secure corners and ends with extra glue to prevent unraveling. Rope-wrapped shapes like hearts, stars, or anchors complement the rustic style and add visual interest. For larger letters, consider floral wire underneath the rope to maintain shape.
Incorporating LED lights adds a warm glow and modern flair but requires planning for power source and attachment. Use battery-powered or USB LED rope tubing designed for crafts, which stays cool and is flexible. Secure tubing outlines along letters or edges of the wooden sign with clear mounting clips or double-sided tape. Arrange the power pack where it won’t be visible but remains accessible for battery changes or plugging in. When wiring around rope or wood, avoid tight bends that can damage the LED tubing. Battery packs typically cost $10 to $20, and USB adapters can vary based on home setup. Decorative ribbons or nail-head trim can hide clips and bring additional detail without blocking light.
Check that all LED wiring and power sources are rated for indoor or outdoor use depending on your sign’s location to avoid safety hazards.
Common Mistakes When Making Rope Hanging Signs and How to Fix Them
Incorrect rope length is a common issue that affects the balance and look of your rope hanging sign. When the rope is too short, the sign might hang too high or be difficult to secure; loose rope makes the sign uneven and unstable. Measure the rope at roughly 16 feet for a standard 1-2 piece wood sign using 5/8-inch thick rope, then tie knots at the top where you want it to hang. Before trimming excess rope, check that both sides are equal, allowing the sign to hang level. Uneven lengths can be fixed by retying knots or adjusting the rope position on the wood.
Paint that bubbles or fades detracts from your sign’s appearance and longevity. Bubbling usually happens when paint is applied too thickly or without proper surface preparation. To avoid this, sand your wood smoothly and clean it of dust before painting. Apply thin coats and allow 24 hours to dry between layers. When bubbling appears, lightly sand the area after it dries and apply a thinner coat of paint. For fading, use exterior-grade paint or seal your finished sign with a clear polyurethane coat, especially if it will hang outdoors or in direct sunlight.
Uneven hanging often results from misaligned attachment points or improper placement of the rope holes in the wood. Mark 1.5 inches from each end of your wooden pieces and drill holes carefully, ensuring marks on stacked wood line up precisely. This alignment keeps your rope symmetrically positioned. Use a level to check your work before final assembly. When your sign hangs crooked, adjust the knot positions on the rope or loosen and re-thread the rope to fix the tilt.
- Measure and cut rope to allow at least a 16-foot length for a balanced hang.
- Tie knots at the hanging point and check rope lengths for evenness before trimming.
- Sand wood and clean thoroughly before painting to prevent bubbling.
- Apply paint in thin coats; let dry 24 hours before adding more.
- Use exterior paint and seal with polyurethane for durability and color retention.
- Align rope holes at equal distances (about 1.5 inches from ends) to ensure balance.
- Use a level to check hanging evenness; adjust knots and rope placement as needed.
Fixing these common mistakes involves careful measuring, preparation, and testing your handiwork as you go. Taking the time to get the rope lengths right and the wood properly finished can save you from frustration and improve your sign’s look and stability. Simple tweaks like realigning knots or sanding and repainting can revive signs that don’t turn out perfectly the first time.
Safe Hanging and Maintenance Tips for Your Rope Sign
Properly securing your DIY rope hanging sign prevents accidents and protects your work. Indoor walls often require different hardware than outdoor surfaces, and these differences matter for safety and durability. You’ll want to check what kind of wall or fence you’re mounting on and choose screws, anchors, or hooks accordingly. Outdoor signs especially need protection against moisture, sun, and temperature changes to keep the wood and rope in good shape.
Both rope and wood benefit from regular care to avoid wear and extend their lifespan. Rope can weaken if it gets damp and doesn’t dry well, or if exposed to harsh sunlight for a long time. Wood is vulnerable to rot and fading without sealing or treating. Cleaning should be gentle to prevent damage but consistent enough to keep dust and grime from building up. Follow these steps to hang and maintain your rope hanging sign safely and effectively:
- Choose the right mounting hardware. For interior walls, use a wall anchor and screw rated for the weight of your sign. On wooden fences, 1-inch wood screws are ideal for a secure hold.
- Mark your hanging points. Hold the sign in place and mark where the rope loops will sit. Use a level to ensure the sign will hang straight.
- Pre-drill holes if mounting on wood or drywall. This prevents cracking and makes inserting screws easier and safer.
- Insert screws or hooks. Screw them firmly into place, leaving enough of the screw/shank exposed for the rope to loop securely.
- Hang the sign and check its stability. The rope should have no slack or slipping, and the sign should stay level without tilting.
- Clean the rope occasionally with a soft brush or cloth. Dust off dirt and remove any grime gently to avoid fraying fibers.
- Protect the wood by applying a clear outdoor wood sealer or furniture wax. Reapply every 6 to 12 months depending on exposure to weather.
- Keep the rope dry. If your sign is outdoors, bring it inside during heavy rain or apply a water-repellent spray designed for natural fibers.
Without proper mounting, your sign risks falling and damaging your wall or the sign itself. Over time, neglected rope may unravel or weaken, and untreated wood can warp or rot. Taking these steps to mount and maintain your rope hanging sign ensures a sturdy, attractive decoration that lasts for years.
Variations and Creative Ideas for Rope Hanging Signs
Popular shape variations for rope hanging signs range from the classic rectangle and round to more creative forms like hexagons or arrows. The size depends on where you want to hang it, with common dimensions like 12 by 8 inches for narrow wall spaces or up to 24 by 12 inches to make more impact on larger walls. You can cut wooden boards into these shapes using a jigsaw and smooth the edges with sandpaper before wrapping the rope around or framing the sign.
Creating a double-sided or layered sign adds dimension and function to your project. To do this, cut two identical wooden shapes and attach them back to back using small wood blocks or spacers approximately 1 to 2 inches thick in between. Secure them with wood glue and screws through the edge for stability. This not only protects the paint or lettering on both sides but also allows you to display different messages or designs facing opposite directions. For layered effects, you can cut smaller shapes to glue on top of the base sign, giving a three-dimensional look. Just ensure the added layers are securely attached to avoid sagging.
Incorporating shelves or plants introduces both style and practical uses to your rope hanging sign. Lightweight wooden shelves can be attached to the bottom or center of the sign by screwing small brackets underneath. Use 1/2-inch thick plywood or repurposed wood slabs, cut to sizes like 8 inches wide by 4 inches deep, which can hold small decorations or potted plants. When hanging plants, choose air plants or small succulents in shallow pots to keep the weight manageable, under 5 pounds per shelf is a good limit for typical wall anchors. You can also string small LED fairy lights along the rope for a cozy glow, securing the wire with clear tape or tiny staples on the back side of the wood.
Seasonal themes allow you to refresh your rope hanging sign throughout the year. Paint or stencil holiday greetings or motifs like snowflakes, fall leaves, or spring flowers. Easy-to-swap attached elements such as small wreaths, ribbons, or detachable ornaments let you update the sign without starting over. Use weather-resistant paint or seal your sign with outdoor polyurethane if you plan to hang it outside during wet seasons.
When adding shelves or plants to your rope hanging sign, always check that your wall anchors and rope knots can support the extra weight to prevent accidents.
Step-by-Step Action Plan for Creating Your DIY Rope Hanging Sign
Follow these steps to build your rope hanging sign successfully, from selecting materials to hanging it up securely.
- Day 1: Gather all essential materials and tools, including wood, rope, paint, hooks, and a drill. Verify you have everything before starting to avoid interruptions.
- Day 2: Prepare and design your wooden signboard by sanding and applying your chosen paint or stain. The surface should feel smooth and dry before moving on.
- Day 3: Customize your sign with letters or decorative elements using stencils, paint, or wood burning. Confirm that the paint or finish is dry and even.
- Day 4: Attach the rope securely, using knots or hooks as planned, and test the strength by gently pulling it. The rope should hold firmly without slipping or loosening.
- Day 5: Select a safe hanging spot and mount your sign using appropriate hardware. Check that the sign hangs evenly and holds steady on the wall or surface.
Frequently Asked Questions
What Types of Wood Work Best for a Durable Rope Hanging Sign?
Pine, cedar, or reclaimed wood work well for durability and easy customization. They hold paint and glue effectively, ensuring your sign lasts longer.
How Do You Keep the Rope from Fraying on a DIY Hanging Sign?
Secure rope ends by wrapping them with tape or applying a small amount of clear glue. This prevents fraying and maintains a neat appearance.
Can You Use Synthetic Rope Instead of Natural Rope for Hanging Signs?
Yes, synthetic ropes like nylon or polyester are strong and weather-resistant, making them ideal for outdoor signs.
Is It Necessary to Seal the Wood After Painting the Sign?
Sealing the wood with a clear varnish protects your paint and wood from moisture, extending your sign’s life.
How Do You Hang a Rope Sign on Uneven Walls?
Use adjustable wall hooks or anchors that allow level positioning regardless of wall texture or surface.
Can Cardboard Letters Be Weatherproofed for Outdoor Rope Signs?
Yes, you can coat cardboard letters with waterproof sealant or use laminated designs to protect against moisture.
Key Points to Remember
Creating a DIY rope hanging sign lets you personalize your home decor with a handmade touch. Start by choosing a simple design and gathering your materials to build confidence. Taking that first step today puts your creative project into motion, bringing charm and character to your space.