DIY Mirror Sign Guide with Materials, Methods and Tips for Best Results
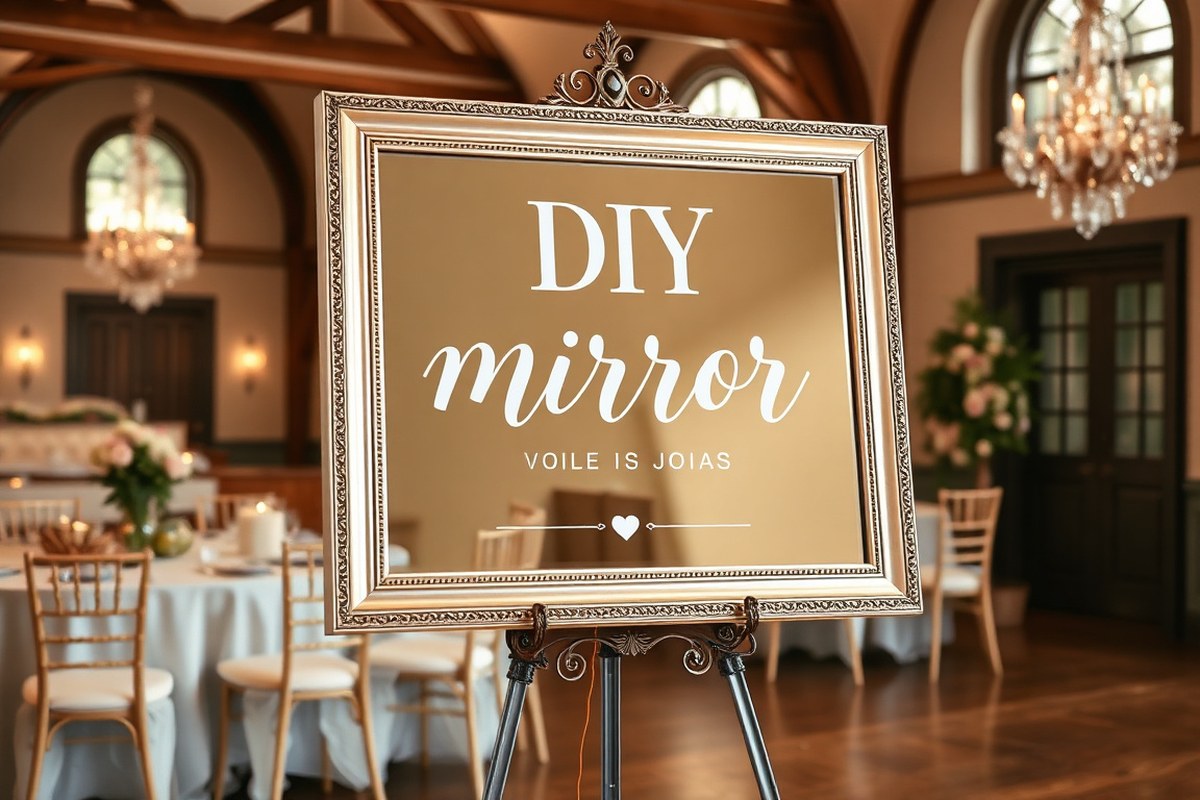
A diy mirror sign offers a stylish, cost-effective way to personalize wedding decor or special events without heavy signage costs. You create custom lettering and designs directly on a mirror surface using paint, vinyl, or markers. Starting with a clean, flat mirror and a clear design plan ensures your sign looks professional and lasts throughout the event.
Key Takeaways
- Choose the right mirror size based on venue visibility: 18″ × 24″ for indoors, 24″ × 36″ for outdoor ceremonies.
- Use an acrylic mirror panel for a lightweight sign that’s easier to handle than heavy glass mirrors.
- Vinyl lettering cut with a Cricut Maker 3 offers clean and repeatable designs without permanent damage.
- Non-permanent bistro markers let you write directly on the mirror and erase mistakes easily.
- Primer and paint on foam insulation board provide a sturdy, budget-friendly base for mounting your mirror sign.
- Work in a well-lit area and use masking tape to position your lettering to achieve precise alignment.
What Is a DIY Mirror Sign and Why Choose It?
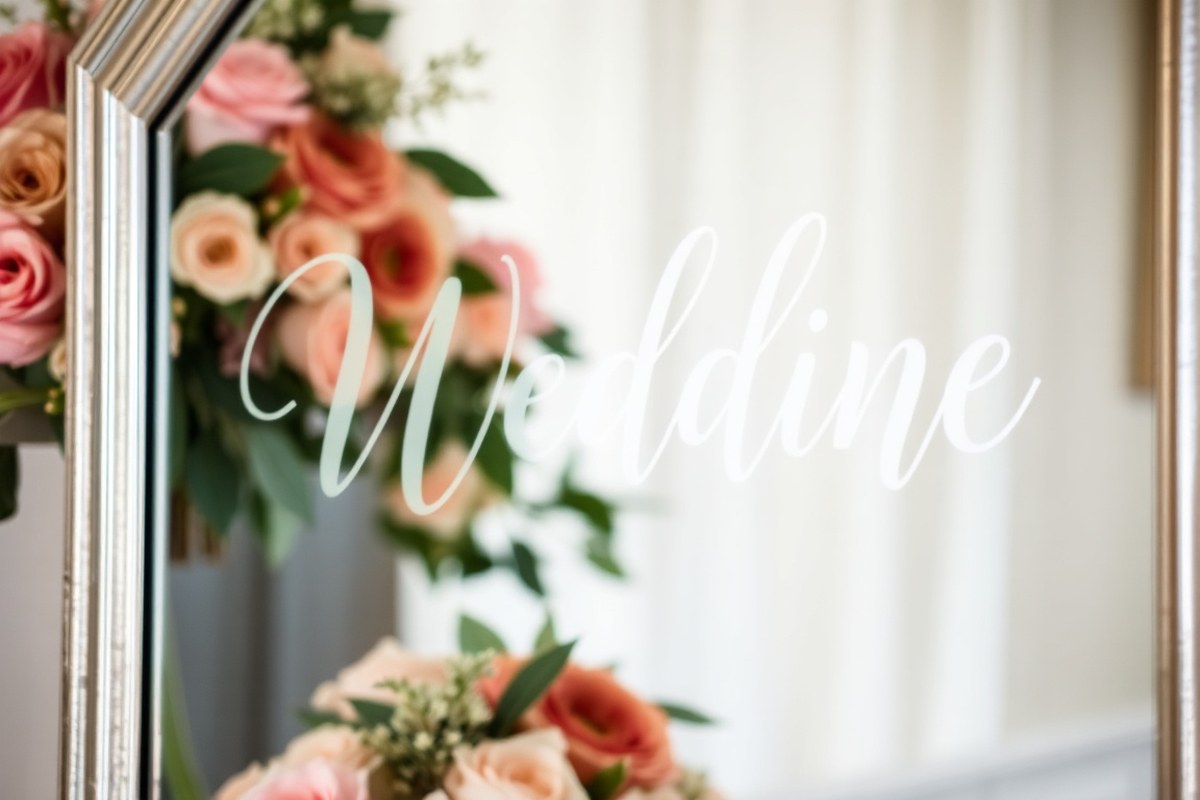
A DIY mirror sign is a personalized decorative piece where you use a mirror as the base for your text or artwork. Instead of traditional materials like wood or chalkboard, the reflective surface of a mirror adds elegance and a unique visual effect. These signs work well for weddings as welcome signs, table numbers, menus, or directional aids. The mirror’s shine captures ambient light and surrounding colors, creating a striking look that stands out in photos and décor.
Choosing a mirror for your sign offers several advantages. Its smooth surface makes lettering easy to apply neatly and cleanly, with oil-based inks or chalk markers. Chalk markers, in particular, allow for easy corrections since you can wipe mistakes off with a damp cloth, making mirror signs forgiving for first-time crafters. Measuring your mirror accurately and dividing it into sections will help you space your design evenly, preventing crowded or off-center text.
The popularity of DIY mirror signs for weddings continues to grow because they combine vintage charm with contemporary style. Antique frames or beveled mirrors add a dramatic touch that highlights the romantic atmosphere of the event. Standard wedding mirror signs often measure around 18 by 24 inches and are placed on a 65-inch tall easel to position the sign at adult eye level. Sizes can vary depending on where you plan to display the sign and how much text you include.
Making your own mirror sign saves money compared to hiring a professional. Acrylic mirror blanks, like those from the Andaz Press line, come in smooth, scratch-resistant panels around 16 by 24 inches and cost under $40. Larger mirrors or antique finds may cost more but add character. By buying your mirror blank and supplies like markers or vinyl cutouts, you can create a high-quality sign for a fraction of custom prices.
DIY mirror signs suit several wedding occasions beyond the ceremony entrance. Consider using smaller mirror signs for seating charts or bar menus. Because the reflective surface picks up candlelight and floral arrangements, these signs blend beautifully into venue décor and photography. Placing a mirror sign near the entrance also encourages guests to take selfies, adding interactive fun to your event.
Crafting your mirror sign starts with choosing a clear, flat mirror and planning your lettering layout with tools like a Stabilo All-pencil for draft sketches. Using oil-based ink ensures a slick finish and quick drying time, resulting in a professional-looking sign. Alternatively, a Cricut machine can cut vinyl lettering to stick neatly onto the mirror surface. With a handful of materials, patience, and attention to spacing, you can achieve a wedding-magazine-quality welcome sign within a weekend’s time and under $50.
Materials and Tools Needed for Making a Mirror Sign
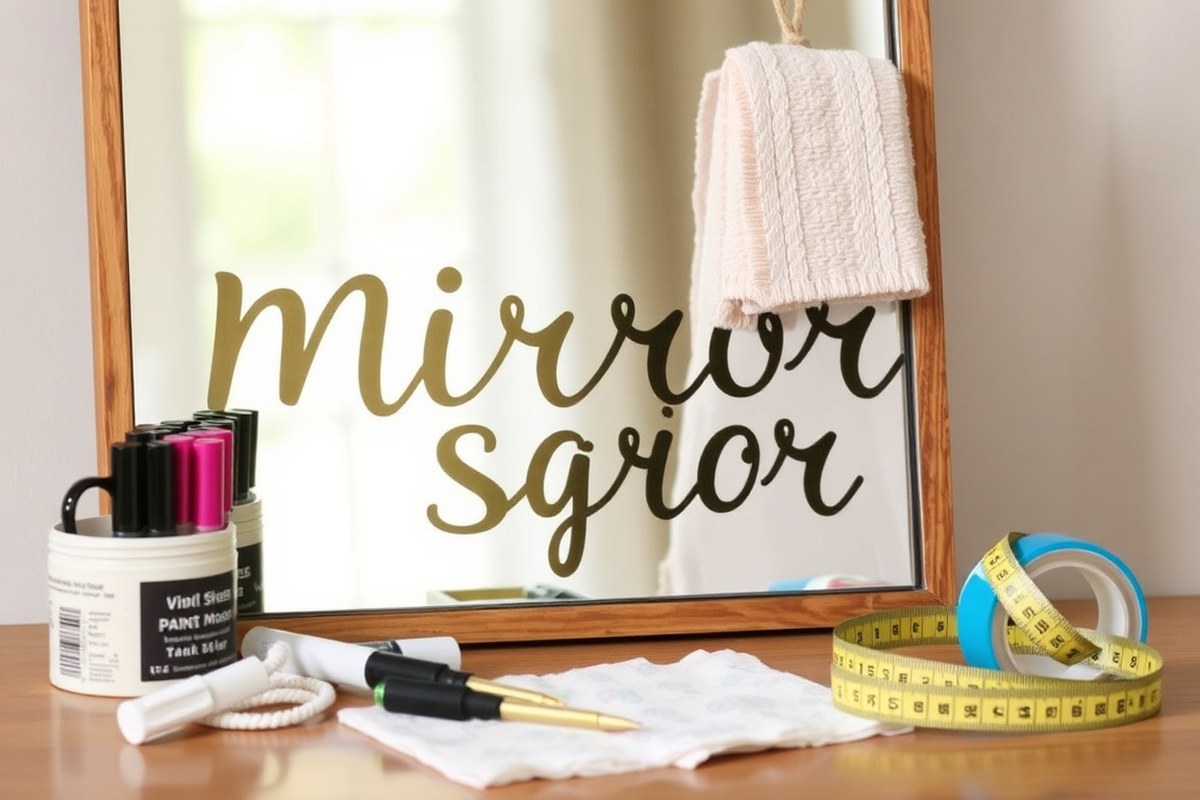
Choosing the right mirror is essential for a successful DIY mirror sign. Opt for a mirror with a clean, flat surface and minimal framing to maximize the writable or vinyl-attachable area. Standard glass mirrors work well, but acrylic mirrors offer lighter weight and better shatter resistance, an important factor if your sign will be displayed outdoors or transported. Select a size that fits your space and lettering design, typically between 18 to 30 inches square or rectangular for wedding signs. Make sure the mirror’s surface is free of scratches or blemishes to achieve crisp lettering.
Lettering materials like vinyl and paint are both effective but meet different needs. Vinyl lettering, especially UV-printed or heat-transfer vinyl, offers clean edges and a modern look. You’ll need transfer tape to move the vinyl from its backing smoothly onto the mirror’s surface. A vinyl cutter like the Cricut Maker 3 is handy for precise designs, costing around $60 for vinyl materials if you already own the machine. For a glossier, quicker-drying finish, oil-based markers designed for glass are excellent for hand-lettering or touch-ups. These markers also resist smudging once dry.
Tools play a significant role in applying your design cleanly and accurately. Clean the mirror thoroughly with rubbing alcohol and a microfiber cloth before applying any lettering to remove dust and oils. Weeding tools help peel away excess vinyl after cutting, allowing your design to stand out clearly without stray bits. Transfer tape moves your vinyl design in one piece, reducing mistakes during application. For paint or marker methods, have painter’s tape and stencils ready to guide your work. Proper lighting and a steady workspace minimize errors.
- Mirror: Choose a clean, flat glass or acrylic mirror, 18 to 30 inches wide
- Vinyl lettering: White, gold, black UV-printed vinyl with transfer tape
- Tools: Cricut Maker 3 (or similar cutter), weeding tools, transfer tape
- Markers: Oil-based markers for glossier, faster drying lettering
- Cleaning supplies: Rubbing alcohol, lint-free cloths, window cleaner
- Additional supplies: Painter’s tape, stencils, masking tape for paint
- Safety: Gloves and eye protection when handling glass mirrors
Always clean your mirror with rubbing alcohol before starting to apply vinyl or paint; even small fingerprints can cause bubbles or smudges that ruin the final look.
Safety gear is a must when handling glass mirrors to prevent cuts. Use gloves and avoid sharp edges. For acrylic mirrors, avoid using a CO2 laser for cutting, as diode lasers don’t work; instead, employ suitable adhesives like 3M masking tape for assembly and secure placement. When working outdoors, secure your mirror sign to prevent tipping in the wind and protect it from strong sunlight to reduce glare. Preparing for these factors ensures your mirror sign looks professional and lasts through your wedding day or event.
Designing Your Mirror Sign Layout and Lettering
Planning your DIY mirror sign layout starts with precise measurement and clear design choices. Proper sizing, font selection, and balanced placement keep your sign readable and elegant, especially for weddings where every detail counts.
Measuring and Marking the Mirror Surface
First, take accurate measurements of your mirror’s height and width to know the exact space you’re working with. Use a Stabilo All-Surface pencil or apply strips of masking tape to divide the mirror into sections. This helps you plan the placement of text and design without marking the glass permanently. Find the center point of the mirror to serve as a guide for evenly spacing your lettering and maintaining balance.
Dividing the mirror into a grid or zones helps ensure that text lines don’t crowd each other or sit too close to the edges. This step is essential for a balanced and organized final look.
Choosing Fonts and Text Styles
For mirror signs, select fonts that offer good readability and contrast. Sans-serif or clean script fonts work well because they stay legible when viewed at different angles and distances. Choose fonts that are bold and clear since fancy or very thin lettering often becomes hard to read against reflective backgrounds.
Sizing your lettering depends on the distance viewers will stand from the sign. For a typical wedding welcome sign, letters should be at least 2 to 3 inches tall for easy reading. Larger letter sizes look intentional; slightly too small text risks appearing unfinished.
Drafting and Adjusting the Layout
Sketch your sign’s layout on paper first. Use tracing paper or a transparent overlay to move elements around and adjust spacing. Once you have a solid draft, transfer it gently onto the mirror using light marks from a pencil or tape guidelines.
Practice on a scrap piece of glass or mirror to check your lettering tools and how the style looks. Position your hands carefully when writing to prevent smudges. Use a ruler or straight edge to keep the lines straight and consistent. Follow these steps for drafting your mirror sign layout:
- Measure the mirror’s dimensions and find its center point.
- Divide the surface into sections using light pencil marks or masking tape.
- Choose a clear, readable font style and decide on letter height based on viewing distance.
- Sketch the wording on paper to finalize positioning and spacing.
- Test your lettering technique on a practice surface.
- Transfer the lightly marked layout onto the mirror following your guidelines.
- Adjust any spacing or alignment before applying permanent lettering.
Methods for Applying Lettering on a Mirror
Vinyl cut-outs, paint markers, chalk markers, and stenciling each provide distinct ways to add lettering to a mirror sign. Your choice depends on factors like permanence, ease of use, and the style you want. Vinyl decals offer clean, precise letters that last, while markers allow more freehand creativity but vary in durability. Stencils bring accuracy with paint for a traditional look but need more preparation.
Vinyl Lettering Application Process
Permanent adhesive vinyl works well on mirrors because it sticks smoothly to the glass surface and creates clear, readable letters that last through handling and exposure. Choose a vinyl color that contrasts with your mirror background to improve visibility. The application involves cleaning the mirror surface with alcohol to remove dust and oils. Then, position the vinyl decal, peel back the transfer tape carefully, and smooth out bubbles with a squeegee or credit card. This process avoids wrinkles or gaps that affect appearance.
Vinyl letters look professional and don’t require drying time. However, they can be challenging to reposition once applied. For larger mirrors, you may need help to hold the vinyl steady during installation. Vinyl decals typically cost around $1 to $3 per square inch if purchased custom-cut, but pre-cut letters are less expensive. This method is best if you want a polished sign with a consistent look.
Using Paint and Chalk Markers
Paint markers provide a permanent, hand-painted look ideal for intricate designs or custom fonts on wedding mirror signs. Use markers designed for glass to ensure adherence. To apply, clean the mirror with glass cleaner, then gently sketch your design with a pencil or use a light guideline. Paint markers require multiple thin layers for opacity. Let each layer dry for 10 to 15 minutes. Markers with different tip sizes, such as fat and thin tips, help create varied line widths. Paint markers cost from $3 to $7 each.
Chalk markers, unlike permanent paint markers, produce lettering that wipes off easily with a damp cloth. This makes them perfect for temporary signs or if you want to change the message after the event. Chalk markers stay bright on mirrors but can smudge if touched. To prevent smudging in outdoor settings, position the mirror so the lettering is back-lit rather than front-lit, which also creates a floating script effect in photos.
Stencil and Other Alternative Techniques
Stenciling allows precise repetition of lettering using paint and can be a good option if you’re less confident in freehand painting. Secure the stencil on the mirror with painter’s tape, then apply paint with a sponge or brush using light dabs rather than strokes to avoid bleeding. Use glass-friendly paint for better adhesion and durability. Stenciling requires time for drying and cleanup but produces a uniform, neat result. It suits classic, formal wedding styles and pairs well with vintage mirrors.
Other less common methods include etching with glass etching cream or engraving tools for a permanent and elegant mark, but these need special equipment and skill. For beginners, vinyl decals and chalk markers are usually the easiest to control and edit. Each has practical trade-offs between permanence, style, and effort. The table below compares the main lettering methods on mirrors by ease, durability, cost, and appearance.
| Method | Durability | Ease for Beginners | Cost Range | Ideal Use Case |
|---|---|---|---|---|
| Vinyl Cut-Outs | Permanent | Easy (with patience) | $1, $3 per sq. Inch (custom vinyl) | Clean, polished look; large or detailed letters |
| Paint Markers | Permanent | Moderate (practice needed) | $3, $7 per marker | Custom styles, varied fonts |
| Chalk Markers | Temporary (wipes off) | Very easy | $2, $5 per marker | Temporary messages, rentables, photography |
| Stenciling with Paint | Permanent | Moderate (prep and drying time) | $5, $15 per stencil + paint cost | Uniform, traditional designs |
Choosing between these methods depends on your comfort with hand lettering, the permanence required, and how much time you want to spend. Chalk markers suit short-term signs, while vinyl decals offer a professional finish without the need to steady your brush. Stenciling and paint markers add a handcrafted touch but need more skill and patience.
Step-by-Step Process to Create Your DIY Mirror Sign
Creating a professional DIY mirror sign involves careful preparation, precise lettering application, and thoughtful finishing touches. Each step contributes to a clean, lasting look that improve your wedding decor. Follow these detailed instructions for best results.
Cleaning and Preparing the Mirror
Start by thoroughly cleaning the mirror to ensure the lettering adheres well and looks crisp. This step removes dust, fingerprints, and oils that cause smudging or bubbling. Use a streak-free glass cleaner and a lint-free cloth for the best results.
Wipe the surface in a circular motion, then finish with vertical strokes to avoid streaks. Avoid touching the mirror with your bare hands after cleaning; rest your wrists on a small towel placed beneath them to prevent new smudges while you work.
Applying Vinyl Letters or Using Markers
Choose vinyl stickers or oil-based markers for your lettering. Vinyl provides clean lines and ease of correction, while markers allow custom calligraphy styles and are popular for white or gold lettering. Whichever you use, applying it carefully avoids bubbles and uneven adhesion. Follow this step-by-step process to apply vinyl letters:
- Position your design on the mirror using a light pencil grid or paper template as a guide.
- Peel away the backing from the vinyl, exposing the sticky side.
- Place the vinyl gently on the mirror without pressing hard to start.
- Use a flat scraper or credit card tool to smooth the vinyl from the center outward, pushing out any air bubbles.
- Lift the transfer tape slowly at a sharp angle once the vinyl is firmly pressed down.
- Check for bubbles; prick small ones with a pin and press flat again.
For oil-based markers, steady your hand and draw strokes slowly. This lets the ink settle evenly and reduces smudging. Since these markers are non-permanent on glass, you can wipe away errors gently and redraw as needed.
Tip: Set a small cloth beneath your wrists to prevent smears on your mirror when attaching letters or creating calligraphy.
Final Adjustments and Corrections
Inspect the sign closely after lettering. Minor mistakes like bubbles under vinyl or uneven ink can be fixed without damaging the mirror. Vinyl bubbles can be carefully lifted and reapplied, while marker smudges wipe clean with a damp, lint-free cloth within minutes of application.
Adding a light sealant designed for glass can protect your sign’s lettering from scratches and moisture, especially if your mirror will be displayed outdoors or handled often. A thin spray sealant should be applied in a well-ventilated area, following manufacturer instructions carefully to avoid clouding the mirror.
Common Mistakes and How to Fix Them on Mirror Signs
Bubbles under vinyl on a mirror sign usually appear due to trapped air or dust between the vinyl and the glass. To fix bubbles, gently lift the affected area with a craft knife, then reapply using a squeegee or credit card to push the air out towards the edges. For stubborn bubbles, prick them lightly with a pin and press the air out. Proper surface cleaning before application reduces bubbles significantly. Clean the mirror with glass cleaner and a lint-free cloth to remove dust and oils.
Preventing smudges and uneven letters requires careful hand positioning and technique. Keep your hands and wrists above the mirror surface to avoid accidentally brushing against wet paint or adhesive vinyl. Use oil-based paint markers, which dry faster and lower the chance of smudging. Apply lettering slowly and steadily, lifting the transfer tape slowly at a low angle to ensure letters stick evenly without shifting.
You can fix paint marker errors by gently rubbing the unwanted paint with a cotton round or paper towel using nail polish remover. Afterward, clean the mirror using a dry cloth to eliminate any leftover residue. When paint removal isn’t effective, consider repainting that part or carefully applying a new paint layer to cover the mistake.
Damaged or peeling lettering should be repaired by thoroughly cleaning the spot with glass cleaner and a lint-free cloth before replacing the vinyl or repainting. When replacing vinyl letters, use your weeding tools to remove loose pieces, then realign the new vinyl carefully. For paint marker touch-ups, ensure the surface is dry and residue-free for smooth application.
- Clean mirror thoroughly to avoid dust and oils causing bubbles
- Use a squeegee or firm card to smooth vinyl and push out air
- Lift vinyl carefully with a craft knife to fix bubbles
- Hold hands above the mirror surface to avoid smudging
- Choose oil-based paint markers for faster drying and less smudge risk
- Use nail polish remover to erase paint marker mistakes gently
- Remove damaged vinyl with weeding tools before reapplying
Each step in fixing common mirror sign errors requires patience and precision, which will save you time and materials. Cost-wise, nail polish remover and paint markers are relatively inexpensive, usually a few dollars per bottle or marker, making corrections affordable. Good results look clean and crisp, with even lettering and a smooth vinyl surface free of bumps or smudges. Avoid rushing since mirror surfaces magnify mistakes more than paper or wood. Rechecking and touching up before final display keeps your wedding decor polished and professional-looking.
Safety Tips for Handling Mirrors and Working with Materials
Handling mirrors and acrylic sheets safely is key to preventing injury or damage while creating your DIY mirror sign. Always wear personal protective equipment. Safety glasses shield your eyes from shards or dust, and cut-resistant gloves help protect your hands from sharp edges. A long-sleeve shirt and closed-toe shoes add an extra layer of safety, especially when cutting or moving large pieces.
Transporting a mirror requires care to prevent cracking or breaking. Use a flat, stable surface and secure the mirror with soft padding like towels or bubble wrap. Carry mirrors vertically rather than flat to reduce stress on the glass. For larger mirrors, it’s best to get help instead of moving them alone.
Mirrors are made of glass, which can splinter sharply if broken. Acrylic sheets offer more flexibility but can scratch easily. When cutting glass mirrors, use a specialized glass cutter and score gently before snapping. Acrylic can be cut with a fine-toothed blade or laser cutter, using recommended settings such as 75 power, 8 speed, and 1 pass for rose gold acrylic. Work in a well-ventilated area, especially when using adhesives or paints, to minimize inhaling harmful fumes.
If glass breaks, avoid touching shards directly. Sweep larger pieces onto a dustpan while wearing gloves and safety glasses. Use a damp paper towel to pick up tiny fragments, then seal waste in a puncture-proof container for disposal. Keep a first aid kit nearby in case of cuts.
- Wear safety glasses and cut-resistant gloves throughout the process
- Transport mirrors vertically with padding and secure straps
- Use a glass cutter for mirrors; a fine blade or laser cutter for acrylic
- Cut acrylic in well-ventilated areas to avoid fumes
- Clean up glass shards with gloves, a dustpan, and damp paper towels
- Store mirrors and acrylics on padded surfaces to prevent scratches and cracks
- Get assistance when moving large or heavy mirrors to prevent dropping
Following these steps reduces risk and protects your project. Sharp edges and broken glass create hazards if not managed properly. Keeping your workspace clean and organized also prevents accidents. Taking the time to secure mirrors and tools preserves your materials and keeps your wedding decor project enjoyable and safe.
Displaying and Caring for Your Finished Mirror Sign
Position your mirror sign where it reflects the best features of your venue without creating glare or obstructing views. Place it near natural light but avoid direct sunlight, which can cause unwanted reflections and make the lettering harder to read. Use a sturdy easel sized appropriately, a typical 18″ × 24″ sign fits well indoors, while a larger 24″ × 36″ sign works better outdoors to maintain visibility from a distance. Make sure the easel is stable on uneven ground to prevent tipping during the event.
Photography is key to capturing the mirror sign’s charm. Angle the camera so the lettering is clear and reflections avoid showing the photographer or distracting backgrounds. Taking photos in soft, diffuse lighting minimizes glare and improve the lettering’s contrast. Avoid using the camera flash, which can create bright spots and wash out the text. A tripod can help steady the camera for sharp shots, especially in lower light settings.
Cleaning requires gentle care to preserve the lettering. Use a soft microfiber cloth dampened with water or a mild glass cleaner sprayed onto the cloth, not directly on the mirror, to prevent liquid seeping under the lettering. Avoid abrasive cleaners or scrubbing, which can scratch the surface or remove paint. Wipe in light, circular motions and dry immediately to keep the mirror clear and streak-free. For signs with vinyl or painted letters, spot-testing a small corner before a full cleaning helps ensure no damage occurs.
Storing your mirror sign properly extends its life and allows you to reuse or update it for future occasions. Wrap the mirror in bubble wrap or a soft cloth to prevent scratches and store it vertically to reduce pressure on the painted surface. Store it in a dry, temperature-controlled area to avoid moisture damage or warping. Many couples reuse their signs for milestone events by re-lettering the mirror with new dates or messages, which usually adds about $30 if you hire a professional. Doing this yourself requires removing the old lettering carefully with a solvent safe for your paint or vinyl type.
To protect your sign against everyday wear, consider placing clear adhesive film over the surface after the lettering fully dries. This adds a shield against minor scratches and smudges, especially useful if the sign is handled frequently at events. Keep extra cleaning cloths and mild cleaner handy for quick touch-ups during use. Proper display and upkeep help ensure your DIY mirror sign remains a memorable keepsake, reflecting the joy of your special day for years to come.
Use a soft microfiber cloth dampened with cleaner sprayed on the cloth to clean your mirror sign and avoid liquid directly contacting the lettering.
Step-by-Step Action Plan for Your DIY Mirror Sign
Follow this plan to create your mirror sign efficiently and with a polished look.
- Before You Start: Choose your mirror and gather all materials and tools. Confirm you have all supplies to avoid interruptions.
- Day 1: Design your sign layout on paper or a digital tool. Make sure the text fits well and is easy to read on your chosen mirror size.
- Day 2: Practice lettering on a spare glass or plastic surface to test your paint or vinyl transfer. Check for clean edges and consistent strokes.
- Day 3: Clean your mirror thoroughly to remove dust and oils. A spotless surface ensures your lettering will stick and look sharp.
- Day 4: Apply your chosen lettering method (paint, vinyl, or markers) carefully, following your design. Let it dry or set according to the product instructions.
- Day 5: Inspect your sign for any imperfections and fix minor mistakes with a cotton swab or touch-up paint. Good lighting helps spot errors.
- After 1 Week: Install or display your mirror sign securely. Confirm it’s stable and positioned for easy visibility at your event or space.
- After 2 Weeks: Clean your sign gently with a soft cloth and verify the lettering remains intact. Proper care keeps your sign looking fresh longer.
Frequently Asked Questions
What Size Mirror Is Ideal for a DIY Wedding Welcome Sign?
A 16″ × 24″ mirror works well for most wedding welcome signs, fitting standard floor easels and providing enough space for clear lettering without overwhelming the venue entrance.
Can I Fix Mistakes Easily When Lettering on a Mirror Sign?
Yes, chalk marker mistakes wipe off with a damp cloth, making mirror signs very forgiving for DIY errors. This allows you to perfect your wording without damage.
What Type of Markers Work Best on Mirrors for Wedding Signs?
Oil-based ink markers provide a glossy finish and dry quickly, giving your wedding mirror sign a professional look that lasts throughout the event.
How Can I Steady My Hand When Lettering a Mirror Sign?
Using a light pencil draft, like a Stabilo All-pencil, helps guide your hand and avoid unwanted marks during the lettering process.
Can I Use a Cricut Machine for My Wedding Mirror Sign?
Yes, Cricut machines can cut vinyl lettering for mirror signs, letting you create neat, professional designs easily and with great precision.
Where Should I Display My DIY Wedding Mirror Welcome Sign?
Place it at the venue entrance so guests see it immediately and can take selfie photos, adding a fun interactive element to your decor.
The Bottom Line
Making your own mirror sign combines creativity with personal style, giving you full control over the final look. Start with a clear design and careful preparation to avoid common pitfalls. Take the first step now by selecting the perfect mirror and sketching your layout. This hands-on project will add a unique touch to your wedding or event decor.