
Acrylic Sign Ideas: Creative Tips and Expert Guide for Stunning Results
Acrylic sign ideas offer a versatile way to create eye-catching decor for weddings, events, or home use. Choose high-quality, 3mm thick acrylic sheets for durability and clear visuals, then apply digital printing or vinyl lettering for crisp designs. Starting with the right acrylic type and finishing method ensures your sign looks professional and lasts long.
Key Takeaways
- Select 3mm thick acrylic glass for an ideal balance of strength and clarity in your signs.
- Use vinyl lettering for sharp, customizable text that adheres well to smooth acrylic surfaces.
- Incorporate digital printing to add detailed, full-color images on transparent or colored acrylic sheets.
- Position mounting holes 1.5 cm from the sign edges to maintain structural integrity and ease of installation.
- Consider UV-filtering acrylic sheets to protect signs from fading when displayed outdoors.
- Use SCIGRIP 3 acrylic cement to securely bond acrylic pieces without damaging the material.
Creative Acrylic Sign Ideas for Different Occasions
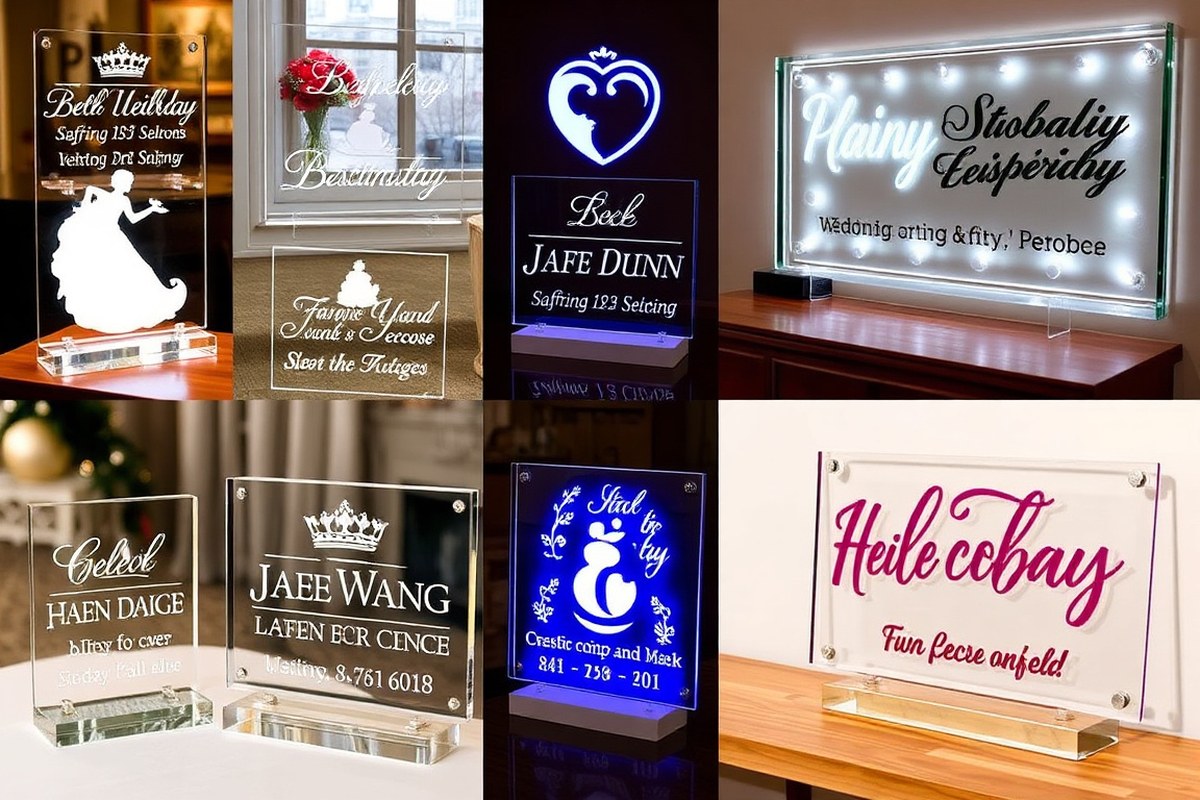
Acrylic signs offer a versatile way to add both style and function to weddings, home decor, businesses, and seasonal events. For weddings, popular ideas include welcome signs, seating charts, and table numbers. These signs often use 3mm thick clear acrylic with vinyl letters or chalkboard markers, adding an elegant, modern touch that guests can easily read. A clear welcome sign with white vinyl script, paired with floral accents, can set a classy tone at the ceremony entrance. Seating charts made from larger acrylic panels help organize guests while blending smooth with other decor, avoiding bulky or dated-looking alternatives.
In home decor, acrylic signs bring personalized charm or a modern vibe. Simple slide-in photo frames with gold paint create classy table signs or small inspirational quotes. A minimalist acrylic sign with a favorite phrase or family name, illuminated with soft LED backlighting, acts as a stylish focal point on a living room wall or shelf. Home acrylic projects often take less than an hour to assemble with a Silhouette cutting machine or vinyl lettering tools. For lasting results, store signs flat in page protectors to prevent scratches to the acrylic or paint finishes.
Businesses benefit from acrylic signs by improving brand visibility and professionalism. Custom logo signs printed on durable German-sourced acrylic glass resist weather and maintain clarity, making them suitable for storefronts or reception areas. A business logo sign about 5.1 by 7.9 inches fits well on counters or displays. On a larger scale, acrylic signs paired with wooden stands create eye-catching promotional pieces for trade shows or event booths. These signs combine durability with a sleek look that can improve customer perceptions.
Seasonal acrylic signs add timely accents for holidays and events, capitalizing on acrylic’s easy customization. Winter scenes or holiday greetings printed in bright holiday colors instantly update a home or store’s atmosphere. For example, pumpkin-shaped acrylic signs with orange vinyl letters work well for autumn and Halloween, while winter-themed signs use frosted acrylic finishes and silver script for a frosty effect. Quick changes between seasons keep decor fresh without permanent installation. Using vinyl lettering or digital printing, you can swap signs in minutes and store them compactly when not in use.
Across all these uses, the key to success lies in selecting the right acrylic thickness, lettering style, and mounting method to suit the occasion. Roughly 3mm thick acrylic balances durability and lightness, making it easy to transport and set up. Vinyl lettering offers clean, crisp edges and quick application, while chalkboard markers allow for temporary customization. For wedding or event signs, wooden stands or easels help the signs remain stable and visually striking. By matching these details to your setting, you create acrylic signs that are both functional and aesthetically appealing, whether greeting guests, showcasing your brand, or celebrating a season.
Choosing the Right Acrylic Type and Finish
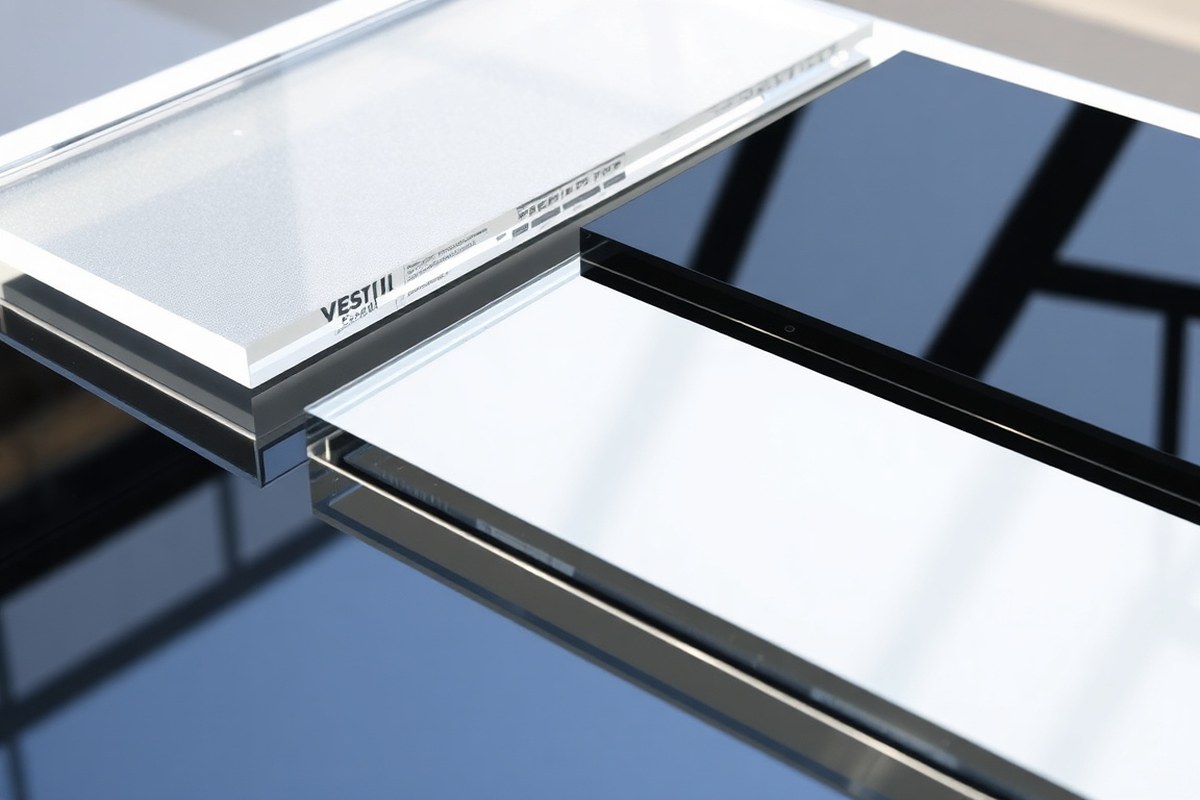
Acrylic sheets come in various types, thicknesses, and finishes, each suited for particular sign-making needs. Choosing the right acrylic affects your sign’s durability, appearance, and suitability for indoor or outdoor use. For example, 3mm thick acrylic is a common choice that balances sturdiness with a sleek look, ideal for most decorative signs.
Thickness influences how strong and rigid your sign will be. Thinner sheets (around 2-3 mm) work well for indoor signs with minimal handling, while thicker sheets (5 mm or more) provide extra durability for signs exposed to harsher conditions or frequent contact. Signs placed outdoors benefit from UV-filtering acrylic options to prevent fading and degradation from sunlight.
Finishes come mainly in clear, frosted (matte), and mirrored acrylic. Clear acrylic shows colors vibrantly and offers a classic glossy look. Frosted acrylic creates a subtle, sophisticated effect by softening light and hiding fingerprints or minor scratches, great for elegant wedding signs or corporate branding. Mirror acrylic reflects surroundings for a high-end feel that suits upscale events or retail displays. Consider the following table summarizing acrylic characteristics and typical uses:
| Acrylic Type | Finish | Thickness (mm) | Best Use | Durability | Price Range (per sq. Ft.) |
|---|---|---|---|---|---|
| Standard Acrylic | Clear Glossy | 3 mm | Indoor signs, event décor, branding | Moderate | $10, $15 |
| Matte Acrylic | Frosted/Satin | 3 mm | Wedding signs, privacy effects | Moderate | $12, $18 |
| Mirror Acrylic | Reflective | 3, 5 mm | High-end retail or event signage | High | $20, $30 |
| UV-Filtering Acrylic | Clear or Colored | 3, 5 mm | Outdoor signs, prolonged sun exposure | High | $15, $25 |
Use this rule to decide on thickness and finish: match your sign’s environment and handling intensity. Indoor holiday or event signs can safely use 3mm clear or frosted acrylic without extra cost. For outdoor or frequently handled signs, increase thickness to 5mm and opt for UV-filtering acrylic to maintain appearance over time.
Complete your acrylic sign with appropriate adhesives like SCIGRIP 3 acrylic cement, which securely bonds sheets without damaging the surface. Avoid using standard glue or tape that could fail or discolor your sign. Before final assembly, clean the acrylic with a soft cloth and acrylic cleaner to ensure a smooth, flawless finish.
Always handle acrylic sheets with clean hands and avoid abrasive cleaners to keep surfaces clear and free from scratches.
Design Techniques: From Digital Printing to Vinyl Lettering
There are several proven methods to design acrylic signs, each offering different effects and ease of use. Digital printing delivers detailed, vibrant images directly onto acrylic while vinyl lettering adds sharp, custom shapes with texture. You can also use hand-painted accents to give your signs a personal, artistic touch that stands out. Picking the right technique depends on your project’s complexity, budget, and the style you’re aiming for.
Digital Printing on Acrylic Explained
Digital printing involves using UV-resistant inks to print your design directly onto the acrylic surface. This method produces bright, crisp colors that make logos and images pop, especially when printed on clear or frosted acrylic sheets. It works well for signs needing detailed artwork, photographic images, or full-color logos. To do this, prepare a high-resolution print-ready file and use a UV flatbed printer designed for rigid materials.
Costs for digital printing can range from $50 to $200 or more depending on size and complexity. Proper curing is essential: the ink must dry thoroughly at room temperature or under UV light to avoid smudges. Digital prints stay vibrant longer and resist fading better than paint or vinyl but need careful handling to prevent scratches. Keep design elements at least 0.44 inches from the edges to avoid cutting or distortion during finishing.
Applying Vinyl Lettering and Graphics
Vinyl lettering uses adhesive film cut into precise shapes with a vinyl cutter or plotter. These letters and graphics then adhere firmly to the acrylic surface, offering a clean, professional look with a slight raised texture. Vinyl is popular for text-heavy signs, date and name customizations, and simple logos. You apply transfer tape over the cut vinyl, position it carefully on the acrylic, then peel off the backing and transfer tape.
This method is affordable and flexible, often costing $10 to $50 depending on size and complexity. Vinyl is easy to update or remove without damaging the surface, making it suitable for temporary or evolving signage. Avoid placing vinyl too close to edges or on highly curved surfaces, as it may peel or lift over time. Adding vinyl over a painted or printed background can create layered, dynamic designs.
Creative Hand-Painted and Mixed Media Additions
Adding hand-painted details or brushstroke elements can personalize your acrylic sign with a unique style. Use acrylic paints designed for plastics or paint markers to decorate names, borders, or decorative flourishes. This works great for smaller signs or custom projects like wedding signs, where pink or ombre blue backgrounds with chalkboard markers or vinyl letters offer creative effects. Allow paint to fully dry, usually 24 hours, before handling or layering other materials.
Combining hand-painting with vinyl or digital printing blends professionalism with artistic flair. For example, print a detailed logo and hand-paint surrounding decorations or highlights. Keep in mind that hand-painted sections may wear with handling or weather exposure, so apply a clear acrylic sealer for protection. Experiment on small acrylic scraps to test paint adhesion and drying times before working on your final sign.
Size, Shape, and Layout Tips for Acrylic Sign Design
Choosing the right size, shape, and layout for your acrylic sign ensures it fits the space, delivers clear messaging, and looks balanced. Start by measuring the display area, then select shapes and fonts that improve readability while supporting your design goals. Managing spacing and text positioning further boosts visual appeal and makes your sign effective.
Determining Ideal Sign Size and Shape
Begin by measuring the wall or area where you’ll place your sign. The sign should be large enough to catch attention but not overwhelm the surroundings. For example, a sign in a small home office might be 12 by 18 inches, while signs for event entrances can range from 24 by 36 inches or larger.
Consider the shape that fits your design concept and available space. Rectangles are common for simple messages, circles offer soft, eye-catching designs, and custom shapes can emphasize your branding or theme. Drawing your design inside a drawn rectangle that matches the intended sign dimensions helps visualize balance before production.
Layout and Spacing Guidelines for Readability
Clear layout and appropriate spacing maximize legibility on acrylic signs. Leave at least a 0.5- to 1-inch margin between the edge of the sign and your text or graphics to avoid crowding. Line spacing should be about 120%-150% of your font size to prevent lines from merging.
Use left or center alignment based on the sign’s context, center aligns well for short messages, left alignment suits longer or multi-line text. If your sign includes multiple layers or elements, arrange them flat first to ensure even spacing and proper alignment.
- Measure the display area carefully before sketching
- Choose shapes that match your design and the space
- Keep margins at least 0.5 inch from edges
- Use line spacing 1.2 to 1.5 times font size
- Align text for clarity and balance: center or left
- Test layout by arranging elements on a flat surface
- Consider text size for readability from typical viewing distance
Text Positioning for Visual Balance
Position your text so it creates a balanced look relative to the overall sign shape. For rectangular signs, centering your headline at the top with supporting text below works well. In circular signs, curved text following the edge or centered text can maintain harmony.
Avoid crowding all text at one edge. Spread content evenly or use consistent padding on all sides. Adjust spacing between letters or words if needed to fill space without breaking readability. Good visual balance helps guide the viewer’s eye naturally across the information.
Decision Rules for Size and Layout Selection
Use a quick checklist while planning your acrylic sign:
- Is the sign size proportional to the intended viewing distance? For close-up signs (2 to 4 feet), 1-inch tall letters can be adequate; for longer distance (10 feet or more), use at least 3-inch letters.
- Does the sign fit comfortably in the allocated display space without crowding surroundings?
- Are margins wide enough (minimum 0.5 inch) to prevent text or elements from running off edges?
- Is the text alignment making the sign easy to scan and understand quickly?
- Have you tested layout by arranging design pieces on a flat surface to check spacing and positioning?
Following these rules helps avoid poor visibility and awkward layouts that distract from your message. Your final design should look clean, balanced, and inviting.
Testing and Adjusting for Best Results
Before cutting into your acrylic sheet, perform a test cut on scrap material to check size and spacing. This helps catch issues with font size or layout proportions. Position your sign mockup in the intended spot and verify it is level and fits visually.
Adjustments may include resizing text, shifting elements, or changing the sign shape slightly to improve flow or fit. Taking time at this stage prevents costly mistakes and ensures your acrylic sign will be both striking and effective.
Essential Tools and Materials for DIY Acrylic Signs
Creating acrylic signs at home requires the right tools and materials to ensure clean cuts, strong assembly, and a polished finish. Using proper equipment helps you work safely and produce professional-looking results, especially if you plan to sell or display your signs regularly.
Cutting and Drilling Tools Needed
Acrylic sheets should be cut while their protective film is still on to prevent scratching. For straight cuts on thinner sheets (up to 1/4 inch), a utility knife with a scoring blade works well. Score the acrylic multiple times along a straightedge, then snap it cleanly. For thicker sheets or more complex shapes, use a fine-toothed circular saw or a jigsaw equipped with a blade specifically designed for plastic.
Drilling holes in acrylic for mounting or hardware attachment requires sharp drill bits made for plastic to avoid cracking. Support the sheet firmly on a flat surface, drill at low speed, and apply steady pressure. Tape over the drill points to reduce chipping.
- Utility knife with scoring blade (for thin sheets)
- Fine-toothed circular saw or jigsaw with plastic-cutting blade
- Drill with sharp plastic drill bits
- Straightedge or ruler for scoring lines
- Clamps to secure sheets during cutting or drilling
- Protective film left on acrylic during cutting
Large or intricate projects may require outsourcing to a laser cutting or CNC routing service, which can handle thicker or specialty acrylic with precision.
Adhesives, Cleaners, and Finishing Materials
Using the right adhesives keeps acrylic signs strong and clear. Solvent cements specifically designed for acrylic, like Weld-On #3 or #4, chemically bond pieces together for an invisible seam. Avoid general-purpose glues that may cause cloudiness or weak joints.
Clean acrylic surfaces gently with a mild soap and water solution or acrylic-specific cleaners to avoid scratching or dulling the finish. Never use ammonia-based cleaners like regular glass cleaner, as they can damage acrylic.
To create a durable, polished edge, you can flame polish cut edges with a propane torch or use fine sandpaper (starting at 400 grit, finishing at 1200 grit) followed by buffing. These finishing touches protect your sign and improve clarity.
Safety Equipment and Handling Tips
Working with acrylic involves hazards like sharp edges, dust, and fumes from adhesives. Wearing safety gear helps prevent injuries and health issues. Always use safety glasses or goggles to protect your eyes from flying debris. Wear a dust mask or respirator when cutting or sanding to avoid inhaling plastic dust. Gloves protect your hands from sharp cuts and chemical exposure.
Keep your workspace well-ventilated, especially when using solvent cements or flame polishing. Secure acrylic sheets firmly to avoid slips or cracks during cutting and drilling.
Always leave the protective film on the acrylic sheet until after cutting to reduce scratches and damage during handling.
Step-by-Step Process to Create Custom Acrylic Signs
Making a custom acrylic sign involves clear planning, careful preparation, and precise finishing to ensure a professional result that lasts. The process begins with your design and moves through cutting, assembling, and protecting your acrylic. Each stage demands attention to detail to avoid scratches, bubbles, or edges that are rough or uneven.
Before you start, keep your workspace clean and free of dust, and gather all necessary tools: protective gloves, acrylic sheets, a cutting tool or laser cutter, adhesive suitable for acrylic, sandpaper or a polishing kit, and a cleaning cloth. Protecting the acrylic before and during assembly preserves its clarity and prevents damage. Use the protective film on the sheets until cutting and handling are complete.
- Plan and finalize your design. Choose the exact size, shape, and text or graphics for your sign. Use design software or prepare a hand-drawn template scaled to your acrylic sheet dimensions. Knowing these details upfront avoids resizing mistakes.
- Cut the acrylic sheet. Score the sheet with a plastic cutter or use a laser cutter for precision. Applying steady pressure, score along a straightedge multiple times, then snap the sheet cleanly along the line. Laser cutters offer smooth edges but require access to specialized equipment.
- Remove the protective film carefully. Peel back the protective layer on both sides only after cutting, so you don’t scratch the surface. Spot minor scuffs by using a polishing compound or fine sandpaper (around 600 grit), then buff to restore clarity.
- Assemble sign elements.When your design includes layered components or vinyl lettering, align and secure each piece with acrylic-safe adhesive or double-sided tape, applying even pressure and allowing about 24 hours to dry to prevent shifting or bubbles.
- Sand and polish edges. Smooth sharp or rough edges using sandpaper (start with 220 grit and finish with 600 grit or higher). For a glossy edge, buff with a flame polisher or acrylic polishing kit, but only if you have experience to avoid overheating or warping.
- Clean the sign surface. Use a lint-free microfiber cloth and a mild soap solution or acrylic cleaner to remove fingerprints or dust. Avoid ammonia-based cleaners that can cause hazing. Dry thoroughly to prevent streaks.
- Apply mounting hardware. Depending on your intended display, attach holes, standoffs, or hooks with a drill or glue suitable for acrylic. Test stability to ensure your sign holds securely in place.
Expect acrylic sheets to cost between $10 to $50 per 12×12 inch sheet, depending on thickness and quality. Thicker sheets provide durability but require more effort to cut and polish. Protecting the acrylic before use reduces the need for repair, and following these steps minimizes costly mistakes.
Displaying and Mounting Acrylic Signs Safely and Stylishly
Selecting the right mounting method for your acrylic sign depends on the sign’s size, weight, and the surface where it will be displayed. For wall mounting, anchors and screws offer the most secure hold, especially on drywall or plaster. Begin by marking the screw positions on the wall exactly where you want the sign to hang. Drill pilot holes slightly smaller than the wall anchors, then insert the anchors firmly. Attach the screws, leaving them protruding just enough to hook the sign’s mounting hardware. This method ensures your sign stays level and secure even in high-traffic areas or outdoor settings where wind might be a factor. Mounting hardware for acrylic signs often includes standoff screws, which create a professional, floating effect by spacing the sign slightly from the wall. These generally cost between $5 and $15 per set and work well for signs up to 24 inches wide.
For freestanding displays, acrylic signs benefit from sturdy display stands made of metal or heavy plastic. Easels designed for frames or menu cards can hold acrylic signs vertically and are portable for event settings, retail counters, or trade show booths. Choose a stand with adjustable height and angle features so you can optimize visibility based on where visitors approach from. For heavier or larger signs, consider acrylic base plates with integrated slots where the sign slides in upright, these start around $20 and provide stable placement on countertops or desks.
Hanging acrylic signs requires hardware that won’t scratch or damage the material. Nylon-coated cables or clear fishing line are popular for suspending signs from ceilings or overhead racks. Attach small holes or grommets to the top corners of the sign before connecting the cables. Use hooks, carabiners, or ceiling anchors rated for several pounds over your sign’s weight as safety margins. For outdoor hanging where weather resistance is important, stainless steel cables and rust-proof hooks are your best bet.
Lighting plays a important role in highlighting acrylic signs. LED strip lights mounted behind translucent or frosted acrylic create a glowing halo effect that boosts visibility in low-light conditions like evening events or retail displays. Inexpensive LED puck lights mounted on shelves or walls near the sign provide focused illumination without generating heat that could warp acrylic. For signs intended to be read at a distance, place adjustable spotlight LEDs overhead or angled from below at about 30 degrees to reduce glare and shadows. Avoid fluorescent lights that can produce flicker or UV light that might fade printed designs slowly over time.
In practical terms, test your sign’s placement by stepping back to view it from typical sightlines. Check visibility at different heights and lighting conditions. Signs that are too high or too low or poorly lit lose impact, even if well designed. Check all mounting fasteners periodically to ensure they remain tight, especially for outdoor or event signs moved frequently. Proper mounting combined with good lighting not only extends your acrylic sign’s lifespan but improves message clarity and attracts more attention from your audience.
Common Mistakes and How to Avoid Them in Acrylic Sign Projects
Handling acrylic signs without care often leads to scratches, cracks, or chips, especially during installation. Acrylic is tough but can be vulnerable to sharp tools or rough surfaces. To protect the edges, use soft gloves and avoid dragging the sign across hard surfaces. When mounting, ensure you use the right hardware without overtightening screws, which can cause stress cracks. A drill with a depth stop can prevent drilling too deep and fracturing the material. When planning outdoor use, remember acrylic is weather-resistant but can yellow over time if exposed to direct UV light without protective coatings.
Color bleeding and peeling usually happen when ink or vinyl is applied on acrylic without proper surface preparation or curing time. Clean the surface with isopropyl alcohol before applying vinyl lettering or paint to remove oils and dust. Allow printed inks to dry for at least 24 hours in a dust-free environment. Use vinyl specifically designed for acrylic surfaces and press down firmly with a squeegee to avoid bubbles. When applying chalkboard or acrylic pens on signs, avoid smudging by letting the ink dry completely before handling. Signs that appear faded or peeling often result from skipping these steps or using incompatible materials.
Layout mistakes can drastically reduce a sign’s impact and readability. Crowded text, tiny fonts, or inappropriate color contrast between letters and the acrylic background make messages hard to read from a distance. Choose fonts size of at least 1 inch tall for signs viewed from close range and larger for signs positioned farther away. Use bold, simple fonts because ornate scripts might look artistic but sacrifice clarity. High contrast colour combinations, like black lettering on a clear or white acrylic sheet, help the text stand out. Balance the sign’s text and graphics by leaving enough white space around elements to avoid a cluttered look. Test readability by viewing your design at the expected installation distance before finalizing.
Always clean and dry the acrylic surface well before applying vinyl or paint to prevent adhesion problems like peeling or bleeding.
Step-by-Step Action Plan for Your First Acrylic Sign
Follow these steps to create a custom acrylic sign that fits your style and purpose. Each phase helps you move from idea to finished product efficiently.
- Before You Start: Choose the occasion and purpose of your sign to determine size, shape, and design style. You’ll know you’re ready when you have a clear vision.
- Day 1: Select the acrylic type and finish that suits your design, like clear for a modern look or frosted for subtlety. Confirm your choice by testing how sample pieces react to light and color.
- Day 2: Sketch your design or create a digital mockup using software. Make sure all lettering and graphics are readable and balanced in the layout.
- Day 3: Gather essential tools and materials such as acrylic cleaner, vinyl lettering or digital print files, cutting tools, and mounting hardware. Double-check everything matches your plan.
- Day 4: Prepare the acrylic sheet by cleaning and cutting according to your design. Verify edges are smooth and dimensions are correct.
- Day 5: Apply the design using your preferred technique, such as vinyl lettering or digital printing. Check for air bubbles or misalignments and fix them immediately.
- Day 6: Allow the sign to dry completely and inspect finish quality under different lighting. Make sure your design looks sharp and vibrant.
- Day 7: Mount your acrylic sign safely using the recommended hardware or adhesive. Test stability and visual impact in its intended location.
Frequently Asked Questions
What Are Some Unique Acrylic Sign Ideas for Seasonal Home Décor?
Use minimalist designs with holiday themes like snowflakes or pumpkins. Changing colors or graphics easily adapts the sign for different seasons or holidays.
Can Acrylic Signs Be Personalized for Weddings Beyond Just Names and Dates?
Yes, you can include custom messages, quotes, or venue illustrations. Many crafters use digital printing to add detailed, meaningful artwork.
How Can I Make My Acrylic Sign More Durable for Outdoor Use?
Choose thicker acrylic sheets and UV-resistant finishes. Proper mounting and sealing edges also help protect against weather and sun damage.
What Are Some Creative Ways to Light Acrylic Signs for Events?
Use LED backlighting or edge lighting to highlight designs. This adds a professional look and improve visibility in dim settings.
Can I Reuse Vinyl Lettering on Different Acrylic Signs?
Vinyl is mostly for single-use and sticks permanently; reusing often damages its adhesive. Consider using removable decals or edge vinyl for temporary signage.
Are There Eco-Friendly Acrylic Options for Sign Making?
Some suppliers offer recycled or bio-based acrylic alternatives. These reduce environmental impact but may vary in clarity and cost.
The Bottom Line
Acrylic signs offer versatile design options that suit any occasion or setting. By selecting the right materials and following a clear process, you can create signs that look professional and last longer. Start by choosing your sign’s purpose and finish, then bring your creative vision to life step by step.


