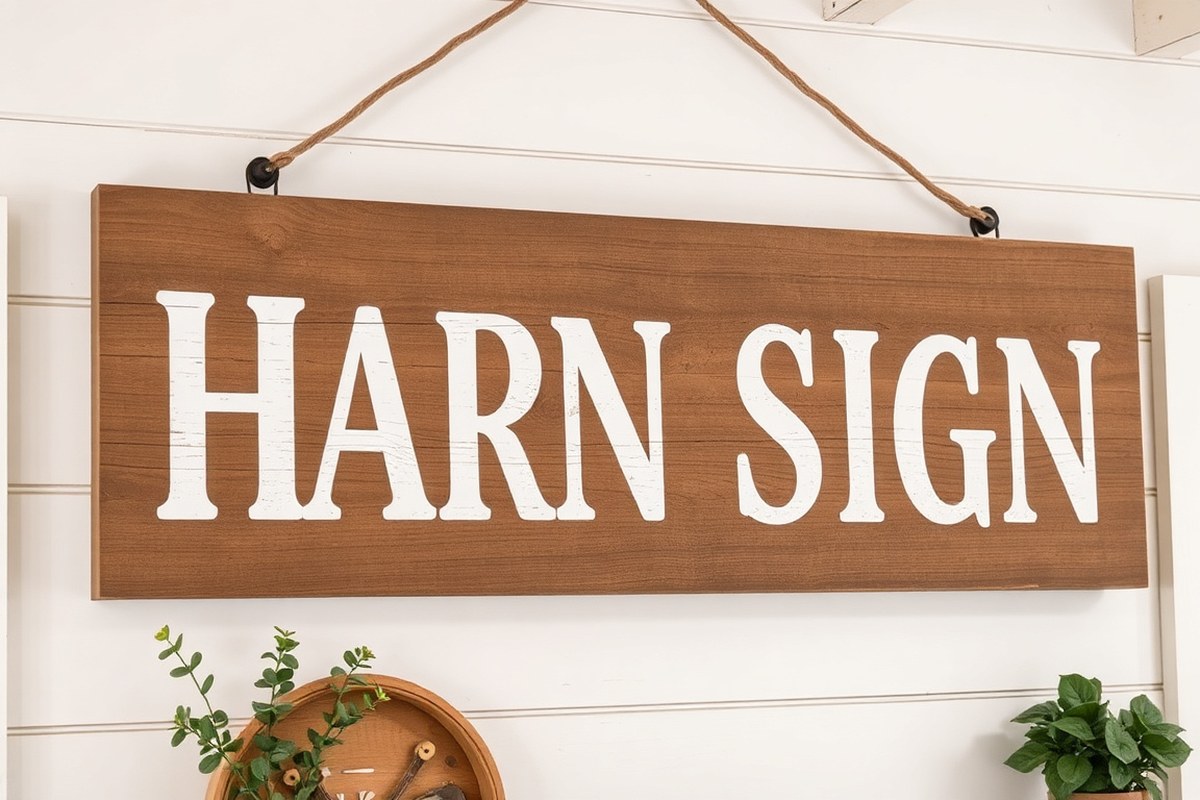
Barn Wood Sign Ideas: 12 Creative Ways to Make Rustic Signs That Impress
Barn wood sign ideas capture the charm of rustic décor by combining weathered wood with simple, heartfelt designs. Using reclaimed barn wood adds character and history that new materials can’t match. Start by choosing wood with unique grain patterns and natural wear to improve the sign’s farmhouse appeal.
Key Takeaways
- Reclaimed barn wood offers authentic texture and patina that create truly unique signs.
- Farmhouse-style typography and simple phrases work well for rustic wood signs.
- Classic barn wood pieces typically measure about 6 inches in width and range from 4 to 6 feet in length.
- Use stencils and paint for cost-effective personalized designs on barn wood.
- 3D carving adds depth, making your sign stand out visually and tactilely.
- Combining smaller signs into sets can create charming seasonal or themed displays.
1. What Makes Barn Wood Signs Unique and Popular?

Barn wood signs are decorative pieces crafted from wood that has typically been reclaimed from old barns or similar structures. These signs feature a rustic appeal rooted in their weathered, aged wood, which adds texture and character impossible to replicate with new lumber. Wood from barns has often been exposed to outdoor elements for decades, resulting in a naturally distressed surface. This gives each sign a one-of-a-kind look, making them popular in both home and business decor where a farmhouse or rustic style is desired.
Reclaimed barn wood is preferred for these signs because it comes with its own history and natural wear. The process starts by salvaging wood from barns, which often costs less than buying new hardwood, although it can vary depending on the source. The wood usually features nail holes, knots, and faded paint remnants that add to its charm. Using reclaimed wood reduces waste and adds authenticity to your project by preserving genuine weathering patterns. New wood lacks these unique features and looks too smooth or uniform for the rustic aesthetic these signs aim to achieve.
To make a barn wood sign, you first select reclaimed wood planks that have been outdoors for years, allowing for natural graying and rough edges. Then you clean and dry the wood thoroughly, which may take several days depending on moisture levels. Avoid sanding the wood smooth because the retention of rough texture is key to maintaining that rustic feel. After prepping, you can apply hand-painted or stenciled lettering directly onto the wood’s surface. This approach preserves the wood’s imperfections, giving the sign character and depth. Choosing carved letters over painted ones adds a 3D effect but requires more tools and skill.
Homeowners and DIY enthusiasts appreciate these signs because they offer a genuine connection to the past and a handcrafted look that fits neatly within farmhouse, rustic, or country decorating schemes. The charm of barn wood signs also lies in their versatility; they can be designed with personal messages, house numbers, or welcoming phrases that improve entryways or living spaces. Comparatively, manufactured signs or those made from new wood do not evoke the same sense of warmth or history.
Costs for barn wood signs depend on the size and the rarity of the reclaimed wood you use. Sometimes local salvage yards or online markets provide barn wood inexpensively or even free if you reclaim it yourself from a barn demolition. Beyond the wood, basic painting supplies, stencils, and brushes or carving tools are required, which are affordable for most DIY hobbyists. Successful results show a sign with visible grain, rough edges, and lettering that improve rather than masks the weathered surface. Over-sanding or using glossy finishes can spoil the rustic effect, so skip those steps if authenticity is your goal.
2. Popular Styles and Themes for Barn Wood Signs

Barn wood signs come in several popular styles that reflect various tastes and settings, from farmhouse decoration to personalized messages. Common themes include farmhouse charm, business branding, family names, and seasonal greetings. These themes suit a range of decor styles and moods, showing how versatile barn wood signs can be in both rustic and modern settings.
Farmhouse and Rustic Designs
Farmhouse style is one of the most popular choices for barn wood signs, thanks to its natural, weathered look and cozy appeal. Signs featuring phrases like “Give us this day our daily bread” or “Always Stay Humble and Kind” evoke a warm, welcoming feeling appropriate for kitchens, entryways, or living rooms. Simple, hand-painted letters or stenciled words in soft tones such as white, gray, or black work best. Gray barn wood, specifically, pairs well with modern farmhouse decor by adding a subtle contrast and texture without overpowering other elements. Sizes typically range from about 8 by 12 inches to 9 by 30 inches, depending on the message length and placement area.
To create or select a farmhouse sign, choose weathered barn wood or reclaimed wood with visible grain and imperfections for authenticity. Lettering can be applied with stencils and paint or cut out in 3D lettering for a more tactile feel. Keeping the design simple with encouraging or homey phrases suits the farmhouse vibe.
Business Logos and Branding Signs
Barn wood signs are increasingly popular for small businesses that want a rustic, authentic image. A sign with a business logo, farm name, or shop motto made from barn wood shows personality and standing out in a casual, vintage way. Typical sizes here vary but often focus on longer rectangular boards that can fit a logo alongside text, such as “Farm” combined with a rooster image or arrows displaying values like “Hope” or “Love.”
Creating business signs on barn wood involves transferring or painting the company logo clearly and legibly, often using stencils or hand-painting. 3D cut letters can add dimension to brand names, making the sign more eye-catching for storefronts or market booths. Protection with a sealant prevents weather damage when used outdoors.
Family Names and Personalized Messages
Personalized barn wood signs featuring family names, wedding anniversaries, or meaningful sayings bring a cozy, personal touch to rustic or farmhouse-themed decorations. Phrases such as “As for me and my house, we will serve the Lord” paired with simple accents like an iron nail cross convey both spiritual meaning and uniqueness. Typical sizes measure around 16 by 30 inches or smaller, depending on space and text length.
You can use stencils or vinyl lettering for crisp family names and dates, or opt for 3D wooden or metal cutouts for a stylish effect. Using reclaimed barn wood or rough-sawn planks reinforces a handmade, vintage appeal. For lasting quality, apply a clear coat to protect wood and designs from fading or chipping.
Seasonal and Holiday Themes
Changing your barn wood signs with the seasons is a popular way to keep rustic decor feeling fresh and relevant. Common seasonal themes include pumpkins, leaves, and greetings like “Happy Fall” for autumn or snowflakes and “Merry Christmas” for winter. Signs designed for seasonal use tend to be smaller, around 8 by 12 inches, allowing easy swapping and storage.
Seasonal messages benefit from simpler designs and paint colors linked to holidays or seasons, orange and brown tones for fall, red and green for winter. You can create basic stencils yourself or buy templates for quick application. Since these signs are changed often, using lightweight woods and minimal layering of paint reduces time for each update.
Use a clear, weather-resistant sealant on barn wood signs to prevent fading and warping, especially for outdoor or seasonal pieces that get swapped frequently.
Adapting Styles to Different Decor
Barn wood signs work well in many decor styles beyond rustic or farmhouse, including modern farmhouse, shabby chic, and country cottage. Gray or whitewashed barn wood suits clean, minimalist interiors, while deeply weathered, dark wood pairs with more traditional country looks. Lettering style matters: script fonts create elegance, block letters add farmhouse boldness, and distressed fonts contribute to shabby chic charm.
For modern farmhouse, choose simple sayings in muted paint colors on smooth, gray barn wood. More rustic designs call for rougher wood surfaces and hand-painted letters in classic black or white paint. Also consider size and placement: long rectangular signs above doorways or mantelpieces, or smaller square signs on shelves, both help customize your decor style.
3. Choosing the Right Wood: Barn Wood and Alternatives
Choosing the right wood makes a big difference in how your barn wood sign looks and lasts. Reclaimed barn wood offers a classic, weathered look because it has natural distressing and color variations from years of exposure. Using this wood gives your sign authentic rustic character, but it might need extra preparation to remove nails, splinters, and dirt before you start. Pallet wood is another popular option. It comes pre-distressed and is often free or very cheap, making it an affordable choice. Pallet wood is easier to work with and lighter but can vary in quality and sometimes contains chemicals or paint that you’ll want to avoid for indoor signs.
New wood, such as pine or cedar, isn’t distressed but provides a smooth and consistent base. Cedar is naturally resistant to outdoor weather and insects, which is a big plus if your sign will hang outside. Pine is softer and easier to work but needs a finish coat to protect it from moisture and wear. The choice depends on whether you want a true rustic vintage look, a budget-friendly option, or a durable wood that handles weather without much upkeep.
| Wood Type | Appearance | Preparation Needed | Outdoor Durability | Cost Estimate |
|---|---|---|---|---|
| Reclaimed Barn Wood | Weathered, natural distress | High, sanding, cleaning, nail removal | Moderate to High (depends on original wood and finishing) | $$ (depends on source and condition) |
| Pallet Wood | Distressed but inconsistent | Moderate, clean, sand, check for chemicals | Low to Moderate (may need protective finish) | Free to $ (often free) |
| New Pine Wood | Smooth, light color | Low, sanding for smoothness | Low (needs sealant for outdoors) | $$ (affordable) |
| New Cedar Wood | Natural warm tones | Low, sanding | High (naturally weather-resistant) | $$$ (higher than pine) |
For outdoor signs, leaning toward cedar or well-sealed reclaimed barn wood often gives the best balance of rustic look and durability. Pallet wood and pine work better indoors or in protected areas unless you’re ready to apply a solid weatherproof finish. Cleaning and sanding each wood type properly is key, rough surfaces or leftover debris can ruin your paint or stain application and shorten the life of your sign. Consider how much time you want to spend prepping wood. Reclaimed barn wood demands patience and care but rewards you with unique character you won’t get from new wood.
4. Tools, Materials, and Safety Checklist for DIY Signs
To make a barn wood sign at home, you’ll need some basic and optional tools, specific materials, and proper safety gear. Using reclaimed barn wood comes with risks like splinters, nails, and dust, so wearing safety equipment and having the right tools ensures a smooth, safe process.
Essential Tools for Crafting Barn Wood Signs
Basic woodworking tools help you cut, shape, and assemble your barn wood sign. A power saw, like a circular or miter saw, is necessary for cutting wood to size, typically ranging from $50 to $150 for a reliable model. Sandpaper or an electric sander smooths rough surfaces, starting around $20. A drill or screwdriver allows you to attach pieces or hang hardware.
Other handy tools include a tape measure, pencil for marking cuts or designs, and clamps to hold wood steady. If you plan to paint or stencil your sign, brushes or applicators will be needed. These tools provide accuracy and control, improving the final look of your sign.
Materials Needed for Your Wood Sign
Start with barn wood or reclaimed wood in sizes that fit your planned design. Look for pieces that are dry and free of excessive rot or insect damage. You might use scrap wood to fill smaller gaps or add layers for a dimensional effect.
Additional materials may include wood glue for stronger joints, nails or screws for assembly, and finishing products like stain or clear sealant to protect the wood. Vinyl lettering sheets or paint provide customization options. Supplies like mason jars can add decorative details if your design calls for them.
Safety Gear Is a Must for Working with Reclaimed Wood
Reclaimed barn wood can contain old nails, rough edges, and dust that pose hazards. Proper safety gear reduces the risk of injury and respiratory problems. Protective gloves shield your hands from splinters while sturdy safety glasses protect your eyes from flying debris. A dust mask or respirator helps prevent breathing in sawdust or mold spores, which may be present in older wood.
Wear ear protection around loud power tools to avoid hearing damage, and work in a well-ventilated area, especially when using paints or sealants with strong fumes. Keeping a first aid kit handy is a good precaution.
Checklist for Tools, Materials, and Safety Gear
- Power saw (circular or miter saw) for cutting wood
- Electric sander or sandpaper (60-120 grit) for smoothing surfaces
- Drill or screwdriver to attach pieces and hardware
- Tape measure and pencil for accurate measurements and marks
- Clamps to keep wood steady while working
- Wood glue, nails, and screws for assembly and reinforcement
- Paint, stain, or vinyl lettering supplies for customization
- Protective gloves, safety glasses, dust mask or respirator
- Ear protection for power tool noise
- Well-ventilated workspace and first aid kit
Having this checklist ready before you start reduces surprises during the project. It helps you prepare not only for building the sign but also for staying safe and achieving a polished finish.
Tips for Working Safely and Efficiently
Inspect the wood carefully before use to remove any nails or screws. Use a stud finder or metal detector to help locate hidden metal pieces. Cut slowly and steadily to avoid splintering the wood. Begin sanding with a coarser grit (around 80) and finish with finer grit (120 or higher) for a smooth surface.
When sealing or painting, apply in thin, even layers and allow proper drying times between coats, typically 2 to 4 hours depending on product instructions. Keeping your workspace organized and clean prevents accidents caused by clutter or tripping.
5. How to Prepare Reclaimed Barn Wood for Your Sign
Preparing reclaimed barn wood properly ensures your sign will be safe, attractive, and long-lasting. Cleaning, removing nails, and sanding the wood removes dirt, old hardware, and rough surfaces that can interfere with painting or carving. Follow these steps carefully to ready your barn wood for the best results.
Removing Nails and Old Hardware
Reclaimed barn wood often contains nails, screws, or staples left over from its previous use. These not only make the wood difficult to work with but can damage your tools or cause injury.
Start by examining the wood for visible hardware. Use a hammer’s claw or a nail puller to gently extract nails without splitting the wood. For deeply embedded nails, grip with pliers and twist while pulling outward. You can use a flathead screwdriver or tin snips to loosen and remove staples or small screws.
Work slowly and carefully to avoid cracking or breaking the wood. Wear gloves to protect your hands from sharp edges, and ensure the work area is clear of hazards.
Cleaning Dirt and Debris
Dirt, dust, and cobwebs are common on reclaimed barn wood. Cleaning removes debris that can affect adhesion of paint or finishes and reveals the true condition of the wood.
Begin by brushing off loose dirt with a stiff broom or brush outdoors. Then, use a mixture of warm water and mild dish soap to scrub the surface with a sponge or soft brush. Avoid soaking the wood; dampen it just enough to remove grime. For stubborn stains or mold, a diluted vinegar solution (one part vinegar to four parts water) works well.
After cleaning, allow the wood to dry thoroughly for at least 24 to 48 hours in a well-ventilated area. Proper drying prevents warping and prepares the wood for sanding and finishing.
Sanding for Smoothness and Paint Adhesion
Sanding removes rough patches, splinters, and old paint remnants, creating a smooth surface that makes painting or carving easier and results in a polished final look. Start sanding with medium-grit sandpaper (around 80- to 100-grit) to level out imperfections and remove surface discoloration. Use a sanding block or an orbital sander for even pressure. Follow up with finer grit sandpaper (150- to 220-grit) to smooth the surface and edges.
For detailed areas or rustic textures you want to keep, hand sanding small spots works best. Always sand in the direction of the wood grain to avoid scratches. Wear a dust mask and eye protection during sanding to avoid inhaling particles and debris.
Step-by-Step Preparation Process
The following steps guide you through preparing your reclaimed barn wood for painting or carving, combining nail removal, cleaning, and sanding into one thorough process.
- Inspect your barn wood closely for nails, screws, staples, and other hardware.
- Remove all hardware carefully using a claw hammer, nail puller, pliers, or screwdriver.
- Brush off loose dirt and debris with a stiff outdoor broom or brush.
- Mix warm water with mild dish soap, dampen a sponge, and scrub the wood surface gently.
- For mold or tough stains, apply a diluted vinegar solution and scrub lightly.
- Let the wood dry completely for 24 to 48 hours in a dry, ventilated space.
- Sand the wood first with 80- to 100-grit sandpaper, then finish with 150- to 220-grit.
- Wipe off sanding dust with a dry cloth or tack cloth before painting or carving.
Wear gloves and safety glasses during hardware removal and sanding; old nails and wood dust can cause cuts and irritation.
Adjusting Technique for Wood Condition
When the barn wood is very old or brittle, take extra care removing hardware to prevent splitting. Skip aggressive sanding on extremely thin wood; instead, lightly sand surface areas and leave some rustic texture for character. For wood with paint or stain you want to preserve, test cleaning solutions on a small spot first.
Reclaimed wood that is heavily stained or weathered may require additional cleaning or light bleaching, but test such treatments carefully. Overwetting or harsh chemicals can damage the wood fibers and weaken the sign’s structure.
6. Painting, Stenciling, and Finishing Techniques for Rustic Signs
Painting and finishing barn wood signs allows you to highlight their natural rustic charm or add custom artistic touches like ombre color fades and weathered distress. Using stencils helps apply clean, consistent lettering or shapes without requiring advanced freehand painting skills. Ombre effects blend two or more shades for a soft gradient that adds visual interest. Applying a protective finish seals your work, improving durability and preserving your sign. Each technique has simple steps to follow, requires budget-friendly materials, and offers room for creativity.
One popular approach is stenciling. It ensures neat, uniform designs ideal for farmhouse quotes or farmhouse-style icons. The ombre painting effect works best on lighter barn wood where colors show clearly. Distressing the paint afterward builds a vintage worn look that fits farmhouse decor. A protective finish like clear wax or matte polyurethane finishes keeps colors vibrant and protects the wood against moisture and dust. Here’s a clear sequence to create a rustic barn wood sign with stenciling, ombre painting, and finishing.
- Choose and prepare your barn wood surface. Sand any rough spots lightly with 120-grit sandpaper to avoid splinters but keep some texture for a rustic feel. Clean dust off with a dry cloth.
- Decide on your stenciled design and cut or buy a stencil. Use adhesive spray lightly on the stencil back or painter’s tape to secure it firmly to the wood surface.
- Apply your base coat of paint if desired. Use a flat brush or foam roller for even coverage. Let it dry completely, about 2 hours at room temperature.
- Create the ombre effect. Select two or three paint shades from light to dark. Use a clean brush or sponge to blend the colors horizontally or vertically across the sign, spending 5 to 10 minutes working the gradient before it dries.
- Stencil your text or images. Dab paint onto the stencil with a sponge or stencil brush in thin layers to prevent bleeding under edges. Remove the stencil carefully after the first coat dries, usually 15 to 20 minutes.
- Distress your painted sign if you want a weathered look. Lightly sand edges and over the painted letters with 220-grit sandpaper or use a steel wool pad. Focus on raised areas where natural wear might occur.
- Apply a protective finish. Use a matte clear polyurethane or furniture wax suitable for wood signs. Brush or rub in thin layers, allowing 4 to 6 hours drying time between coats for outdoor signs.
- Let your sign cure fully. Avoid handling or hanging for 24 hours to ensure the paint and finish set properly, preserving your work.
Costs vary by paint type and brand, but a small set of acrylic paints and stencils can cost around $20 to $30. Protective clear finishes range from $8 to $20 per quart. You can find these supplies at craft stores or home improvement centers. Good results show crisp, clear stenciling with smooth paint gradients and an authentic rustic texture. Poor results often come from too much paint under the stencil, causing bleeding, or rushing drying times between steps. Patience and light layering protect your final sign’s look and durability.
7. How to Add Personalization and Unique Touches to Signs
To personalize barn wood signs effectively, start by selecting meaningful names, dates, or quotes that reflect your style or the occasion. Adding these elements transforms a simple wooden board into a memorable piece that resonates with anyone who sees it. For example, including a family name paired with the year the home was built creates a timeless connection. Use stencils or custom vinyl cutouts to transfer lettering cleanly before painting or carving, which helps avoid mistakes common with freehand work.
Unique design touches can make your sign stand out. Custom carvings such as simple silhouettes of local wildlife, initials, or rustic motifs add depth. These can be achieved with rotary tools or CNC machines if precision is important. Engraving names or dates with a wood burner also adds a handcrafted feel without extensive equipment. Combining paint and carving, paint in the letters and carve around them, can create a vivid contrast that highlights the text. Here are practical ideas to consider:
- Use vintage-style lettering fonts for a classic farmhouse look
- Incorporate family mottos or inspirational quotes for a personal message
- Carve or burn a simple border or frame around the sign to improve the rustic appeal
- Add metal accents like small nails or corner brackets for texture and charm
- Include seasonal or location-specific symbols, for instance, leaves for autumn or pine trees for mountain cabins
- Paint or stain parts of the wood unevenly to emphasize its reclaimed nature
- Use a mix of uppercase and lowercase letters for a casual, hand-painted effect
The materials and tools you choose influence the cost and effort involved. Stencils and vinyl kits range from $10 to $30 and are beginner-friendly. Carving tools or wood burners start around $20 but require practice to avoid mistakes that can be costly on reclaimed wood. Results look best when letters are sharp and readable, with smooth edges and consistent paint coverage. Mistakes like uneven spacing or burnt wood marks can detract from the sign’s quality, so test techniques on scrap wood first.
Personalization matters because it turns rustic decor into a reflection of your identity or story. Adding names, dates, or custom designs makes each barn wood sign a unique conversation piece. Take your time planning the layout and experimenting with different textures and finishes to ensure you create something truly yours.
8. Comparing 3D Carving, Cutout Letters, and Painted Signs
3D carving, cutout letters, and painted signs each offer distinct looks and require different skills and tools. Understanding these differences helps you pick the best technique for your barn wood sign project.
3D carving involves carving letters or designs directly into the wood to create depth and texture. This method needs carving tools like chisels or a CNC router and some woodworking experience. Carving creates a tactile, eye-catching effect that lasts long but takes more time and skill. You can highlight the carvings with paint or finish to make them stand out.
Cutout letters are made by cutting shapes or letters out of separate wood pieces and attaching them to the sign’s surface. This adds raised, dimensional letters without the detailed work of carving into the wood itself. It’s often easier than carving and creates a bold statement, especially on smaller signs like the 8-9″ x 12″ authentic barn wood panels seen in popular examples. Cutouts also let you paint or finish the letters separately before attaching them.
Painted signs are the simplest and most cost-effective option. Using stencils or freehand painting, you add text or designs directly to the barn wood. This method works well for rustic looks and is faster. Painted signs can fade or chip over time if exposed to weather without protection. You can make a rustic painted sign with common lumber like 2×4s, keeping costs low and customization easy.
| Technique | Appearance | Tools/Materials Needed | Skill Level | Durability | Typical Sizes |
|---|---|---|---|---|---|
| 3D Carving | Textured, engraved depth | Chisels, carving tools, finishing paint | Intermediate to advanced | High, less weather damage | Varies, works well for signs like 8-9″ x 12″ |
| Cutout Letters | Raised, dimensional letters | Jigsaw or laser cutter, wood glue, paint | Intermediate | High if sealed correctly | 8-9″ x 12″ and larger |
| Painted Sign | Flat, rustic look | Paint, stencils or brushes, wood (e.g., 2×4 lumber) | Beginner | Moderate; needs touch-ups outdoors | Any size |
Choosing 3D carving suits you if you want a durable, professional look with rich texture and don’t mind investing more time and skill. Cutout letters offer a strong dimensional effect without carving but need careful attachment and sealing. Painted signs allow quick, low-cost personalization but may require regular upkeep if outside. For indoor rustic farmhouse décor, painted signs using 2×4s work well; outdoor signs benefit more from 3D or cutout styles to withstand weather.
Make sure to seal carved or cutout signs with a clear outdoor finish to protect against moisture and UV damage, especially if placing the sign outside.
9. Creative Barn Wood Sign Design Ideas for Any Space
Barn wood signs offer a versatile canvas for creative designs that suit any room or purpose. Their rustic texture adds character to spaces like kitchens, nurseries, or business storefronts. Matching the design to the intended use and location helps the sign feel both functional and decorative. Common sizes range from small 8″ x 12″ pieces for countertop displays to large 24″ x 36″ signs for entrances or walls. Rectangular and square shapes work well for text-heavy designs, while circular or irregular shapes add visual interest in casual, playful spaces.
Kitchen barn wood signs often feature inspiring cooking or family quotes with simple painted lettering or stencils in neutral tones. A common phrase might be “Gather Here,” painted in white or black for contrast. For a nursery, softer shapes like cloud or heart-cut wood pieces painted in pastel colors create a welcoming vibe. Custom nursery signs usually show the child’s name with playful fonts and maybe an animal silhouette. These designs are smaller (about 10″ x 14″) to fit over cribs or shelves.
Businesses can use barn wood signs to display logos, store names, or welcome messages that reflect their brand’s rustic or vintage style. Bold carved letters or cutout shapes make the sign stand out outdoors. A wood seal or protective finish adds durability to signs exposed to weather. Seasonal decor signs adapt well by swapping painted messages for holidays or events: think “Happy Fall” with leaves or “Merry Christmas” with pine accents. Lightweight plywood versions can be made in batches for changing seasonal displays.
- Rectangular barn wood sign (18″ x 24″) with a kitchen recipe or family quote using white stencil paint
- Small heart-shaped nursery sign (10″ x 14″) hand-painted with child’s name and animal motif in pastel tones
- Large business logo sign (24″ x 36″) with carved or cutout letters, sealed for outdoor use
- Seasonal flat barn wood signs (12″ x 18″) with festive painted designs and interchangeable hooks
- Rustic directional sign cluster with arrow shapes for garden or entryway wayfinding
- Religious-themed barn wood plaque with warm-toned lettering and simple cross symbol
To craft these signs, start by selecting barn wood planks in good shape, free from major rot but with natural weathering. Sand smooth sections for painting or carving while retaining some rough texture. Use acrylic paint for longevity indoors or outdoor-grade paint plus sealant for exterior pieces. Stencils and vinyl cutouts help achieve crisp lettering, while hand painting suits more organic styles. Allow 24 hours drying time between coats and for sealers. Light hanging hardware or swivel hooks work well depending on weight and location. Pricing for materials often runs $15 to $50 per sign depending on size and finish details, plus labor for personalized work.
10. Protecting Outdoor Barn Wood Signs from Weather Damage
Barn wood signs placed outdoors face challenges like rain, sun exposure, and fluctuating temperatures that can cause warping, cracking, and fading. Protecting them requires sealing and finishing steps that block moisture and UV damage while allowing the wood to breathe. A well-chosen finish preserves the rustic charm and extends the life of the sign.
Start with clean, dry wood. Any dirt or debris can interfere with sealers. Use a gentle sandpaper grit (around 120-150) to smooth rough spots without removing the aged character. After sanding, remove dust thoroughly with a tack cloth or vacuum. This prep ensures the finish adheres well and lasts longest. For outdoor barn wood signs, these finishes work best:
- Exterior-grade clear wood sealer with UV inhibitors to prevent sun fading.
- Water-repellent preservatives that penetrate and reduce wood swelling or cracking.
- Spar urethane or marine varnish designed for outdoor wood, flexible under temperature changes and moisture.
- Oil finishes
- Exterior polycrylic
Apply sealers or finishes using a natural bristle brush or clean, lint-free cloth, moving with the wood grain. Apply two to three coats, following drying times on the product label, usually 4 to 6 hours per coat. Lightly sanding between coats with a fine sandpaper (220 grit) helps smooth imperfections and improves adhesion. Allow the final coat to cure for 24 to 48 hours before exposing the sign to weather.
Maintaining outdoor barn wood signs requires periodic inspection and touch-ups every 1 to 3 years, depending on exposure severity. Reapply the finish if the wood looks dry or starts absorbing water, which can appear as darkening or swelling. Avoid thick layers of finish, which can crack or peel under temperature swings.
In locations with heavy rain or snow, mounting the sign under a small roof or eave reduces direct water exposure and extends finish life. Avoid placing signs where they stay wet for long periods or on direct soil to prevent rot at the base. Temperature extremes and UV light will still fade wood color and degrade finishes over time, so planned replacement or refinishing every few years keeps signs looking their best.
11. How to Safely Reclaim and Repurpose Barn Wood or Pallets
Yes, you can repurpose pallets or barn doors to make rustic signs that add farmhouse charm to your home. Using reclaimed wood saves money and creates unique pieces, but you must handle the wood carefully. Old wood may contain nails, splinters, chemicals, or mold. Proper cleaning and preparation are critical for safety and a quality finished sign. Follow these steps to safely harvest and repurpose barn wood or pallets for your sign project:
- Inspect the Wood: Look for nails, staples, screws, and damaged areas. Remove any metal fasteners with a claw hammer or pry bar. Pay attention to wood that smells musty, shows mold, or looks chemically treated (often marked with stamps).
- Wear Protective Gear: Use work gloves to avoid splinters, safety goggles to protect your eyes, and a dust mask to prevent inhaling wood dust, mold spores, or any chemical residues.
- Clean the Wood Thoroughly: Use a stiff brush outside to remove dirt and loose debris. If mold is present, scrub the wood with a mixture of water and mild detergent or white vinegar, then let it dry completely in a well-ventilated area or outdoors in sunlight.
- Cut and Sand the Wood: Use a saw suitable for rough lumber to trim the wood to your desired size. Sand the surfaces with medium-grit sandpaper (80-120 grit) to smooth splinters but maintain a rustic texture. Always sand outdoors or in a dust collection area.
- Seal and Condition the Wood: Apply a wood conditioner or clear sealer to stop further deterioration and lock in any residual contaminants. This step also prepares the surface for paint or stain and preserves the wood’s natural look.
- Use Non-Toxic Finishes: Choose paints, stains, and sealers labelled safe for indoor use and low in volatile organic compounds (VOCs), especially if your sign will be inside.
Always check wood pallets for the “HT” (heat treated) stamp to confirm they haven’t been chemically treated; avoid pallets marked “MB” (methyl bromide) as this pesticide is hazardous.
12. How to Hang and Display Barn Wood Signs Indoors and Out
Securely hanging and displaying barn wood signs depends on the sign’s weight, location, and exposure to elements. Indoors, lightweight signs under 10 pounds can use either sawtooth hangers or D-ring hangers nailed or screwed into the back of the sign. For heavier signs, wall anchors combined with sturdy screws provide better support and prevent damage to drywall. Locate wall studs using a stud finder and mount into studs for the strongest hold. When choosing placement, consider eye level height, typically around 57 to 60 inches from the floor, to maximize visibility and impact.
Outdoor display requires hardware and methods that resist weather and wind. Stainless steel or galvanized screws prevent rust. Use heavy-duty D-rings or French cleats, which allow the sign to sit flush against the wall and make removal easy for repainting or repair. For mounting on brick, stone, or concrete, masonry anchors or tapcon anchors secure the sign reliably. Avoid direct ground contact or locations exposed to dripping water to extend the sign’s lifespan. Applying a waterproof sealant before hanging improve durability against moisture and UV damage.
When freestanding display is preferred, for either location, setting barn wood signs on vintage wooden crates, metal easels, or leaners made from reclaimed wood can create a rustic accent without wall mounting. Inside, placing signs on open shelves or mantels also works well.
- Use heavy-duty D-ring hangers and screws for signs over 15 pounds indoors and outdoors
- Mount into wall studs or use appropriate wall anchors for drywall application
- Choose stainless steel or galvanized hardware for outdoor use to avoid rust
- French cleats provide secure and flush mounting and allow easy removal
- Apply waterproof sealant to signs exposed to moisture and sun
- For masonry surfaces, use masonry anchors or tapcon screws
- Consider freestanding options like wooden crates or metal easels indoors and outdoors
Putting the right hardware in the right place avoids warping, sagging, or incomplete attachment, which can damage the sign or the surface. Always measure twice and level the sign before securing hardware to maintain a clean, professional look. For outdoor settings, checking hardware periodically for looseness or corrosion helps keep your sign safely displayed and looking good over time.
Step-by-Step Action Plan for Creating Your Barn Wood Sign
Follow these steps to make your own barn wood sign, from prepping the wood to displaying your finished piece.
- Day 1: Source reclaimed barn wood or quality pallets, making sure the wood is solid and free of harmful chemicals.
- Day 2: Prepare the wood by cleaning and sanding it; you’ll know it’s ready when the surface is smooth without splinters.
- Day 3: Design your sign with either painted letters, stencils, or 3D elements; test your layout on paper first to ensure it fits well.
- Day 4: Apply paint or carve your design, checking for crisp lines and full coverage without smudges.
- Day 5: Seal your sign with an outdoor-rated clear coat if it will be outside; the finish should feel even and dry within a few hours.
- Day 6: Attach hardware for hanging, making sure it is secure and balanced to avoid tilting.
- Day 7: Hang or display your sign indoors or outdoors, stepping back to confirm it looks attractive and fits the space.
Frequently Asked Questions
What Are the Best Fonts for Barn Wood Signs to Keep a Rustic Look?
Fonts with simple, weathered, or hand-painted styles work best to maintain the rustic charm of barn wood signs. Avoid overly modern or intricate fonts to preserve the vintage farmhouse aesthetic you want to achieve.
Can Barn Wood Signs Be Safely Used Indoors with Kids Around?
Yes, barn wood signs can be safe indoors if finished with non-toxic paint and sealed properly. Keep nails and sharp edges away from play areas for child safety.
How Can I Make a Barn Wood Sign Without Power Tools?
You can use hand saws, sandpaper, and brushes to create a barn wood sign. It requires more effort but keeps the DIY project simple and accessible without electricity.
What Types of Paint Last Longest on Barn Wood Signs Outside?
Oil-based and exterior acrylic paints resist weather and UV damage best for outdoor barn wood signs. Use a clear outdoor sealer to boost durability.
Are Reusing Old Barn Wood Nails in Signs a Good Idea?
Old barn wood nails can add authentic charm but may rust and weaken the wood over time. Consider using new or rust-proof hardware for longevity.
Can Barn Wood Signs Increase Home Value?
Barn wood signs add character and charm but usually don’t directly increase resale value. They improve farmhouse style, which might attract certain buyers.
Before You Go
Creating a barn wood sign blends rustic charm with personal style, adding character to your home or business. Start with simple designs and sturdy wood, focusing on preparation for the best results. Your next step is to gather your wood and tools so you can bring your unique sign idea to life this weekend.