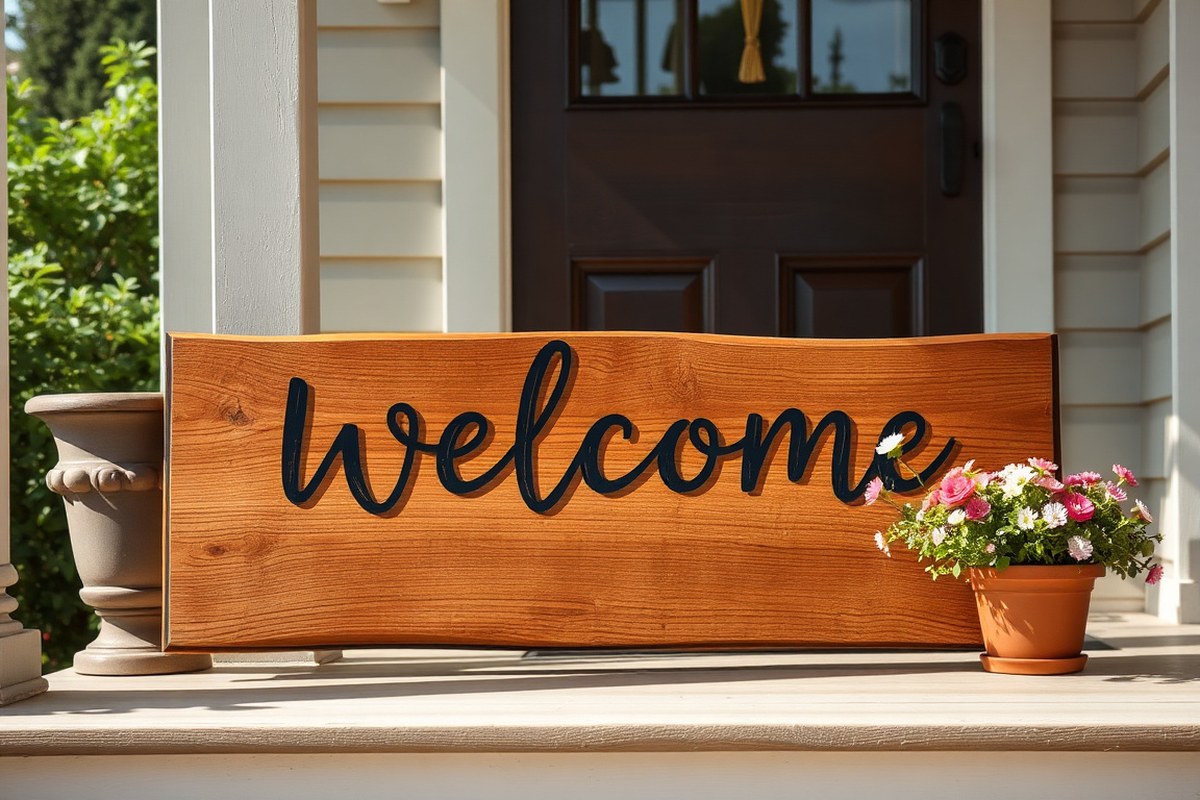
How to Make Welcome Signs: Step-by-Step Guide with Tips and Budget
How to make welcome signs begins by choosing the right materials like cedar wood and paint samples, then preparing the wood for painting. Using vinyl stencils with transfer tape rollers speeds up adding letters and designs. Finishing with sanding and a protective coat ensures your sign lasts outdoors.
Key Takeaways
- Select cedar or basswood for durable, attractive welcome sign bases.
- Use paint samples from brands like Behr or Valspar to keep costs under $5 per color.
- Prepare wooden boards by sanding smooth before applying paint and vinyl stencils.
- Apply vinyl stencils with transfer tape rollers to create clean, precise lettering quickly.
- After painting, wait at least 24 hours before lightly sanding for a rustic finish.
- Customize signs seasonally by swapping designs or adding themed wreaths and ornaments.
What Materials and Tools You Need to Start
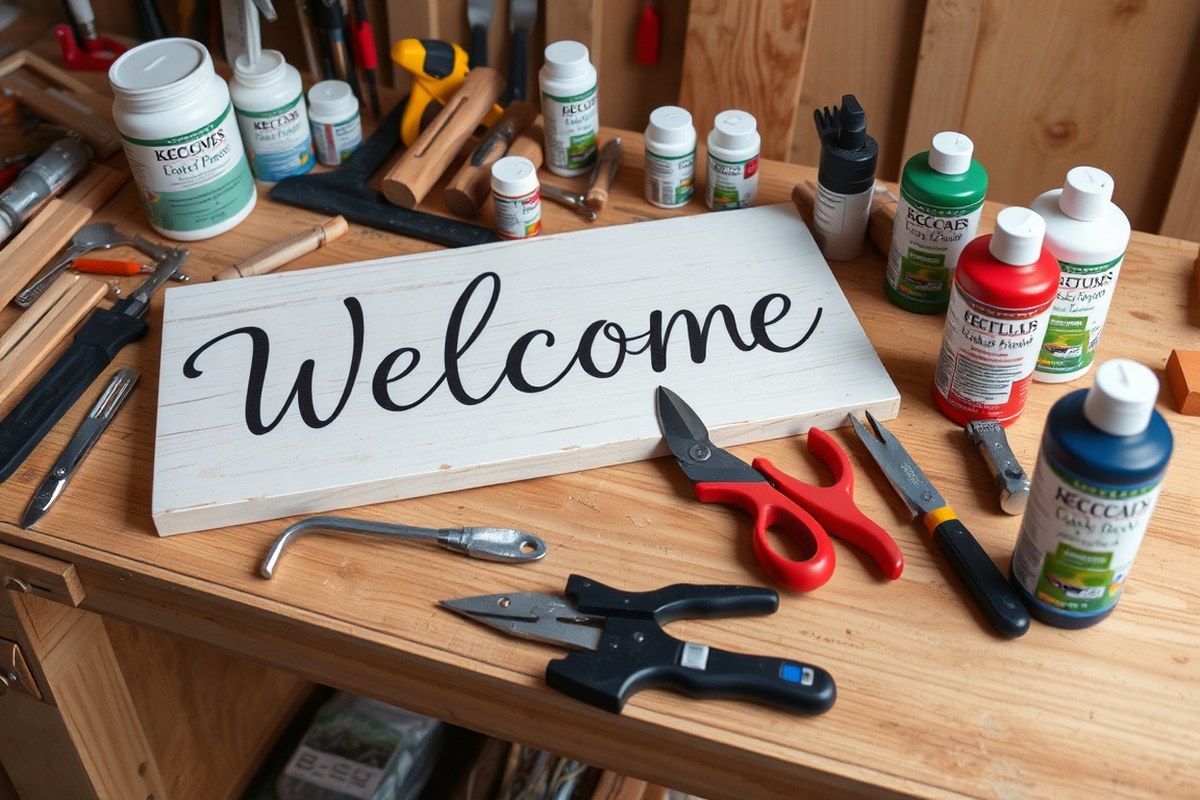
To make a welcome sign, you need a few essential materials and tools that keep costs low and results polished. Choose a wooden board or slat as your base; a piece about 12 by 18 inches is a common size and easy to handle. Look for untreated pine or reclaimed wood for budget-friendly options, which often cost under $10 at craft stores or online sellers like Amazon. Using wood gives your sign durability and a rustic look that you can customize with paint and finish.
For making your letters and designs stand out, use stencils or printed lettering templates you can find at office supplies stores like Staples or free online. This helps avoid freehand mistakes and ensures even spacing. Use foam brushes or small angled paintbrushes to apply paint cleanly. Acrylic paint is a good choice for its quick drying and vibrant colors; if your sign will face weather, switch to exterior-grade paint to prevent fading and peeling. A few basic colors, such as white, black, and one or two accent colors, allow you to create various themes without buying many supplies.
Sandpaper (medium grit) is needed to smooth the wood surface before painting. This step helps paint adhere better and avoids rough patches in the final look. Lastly, use a clear sealer for protection, especially if your welcome sign will hang outside. Spray sealers or brush-on polyurethane both work, with prices around $5 to $12 depending on size.
- Wooden board, 12″x18″ pine or reclaimed wood ($5 to $10)
- Stencil set or printed lettering templates (free to $10)
- Acrylic paint, basic colors, exterior-grade if outdoors ($3 to $6 per color)
- Foam brushes and small angled paintbrushes (around $1 to $3 each)
- Medium grit sandpaper (about $3 for a pack)
- Clear protective sealer (spray or polyurethane, $5 to $12)
- Pencil and ruler for letter spacing
Assemble your supplies on a flat workspace, keeping paint and brushes close at hand. Start by sanding your wood surface evenly, removing dust with a dry cloth before painting. Align your stencil or printed letters carefully using a ruler to check spacing and lightly mark with a pencil if needed. Apply paint in thin, even layers with your foam brush to avoid drips, allowing 15, 30 minutes drying time between coats. After your design is complete and dry, apply one or two coats of protective sealer following the product instructions, usually involving 1, 2 hours drying per coat. This methodically organized process saves time and keeps your project budget-friendly without sacrificing quality.
How to Prepare Wood or Base for Your Sign
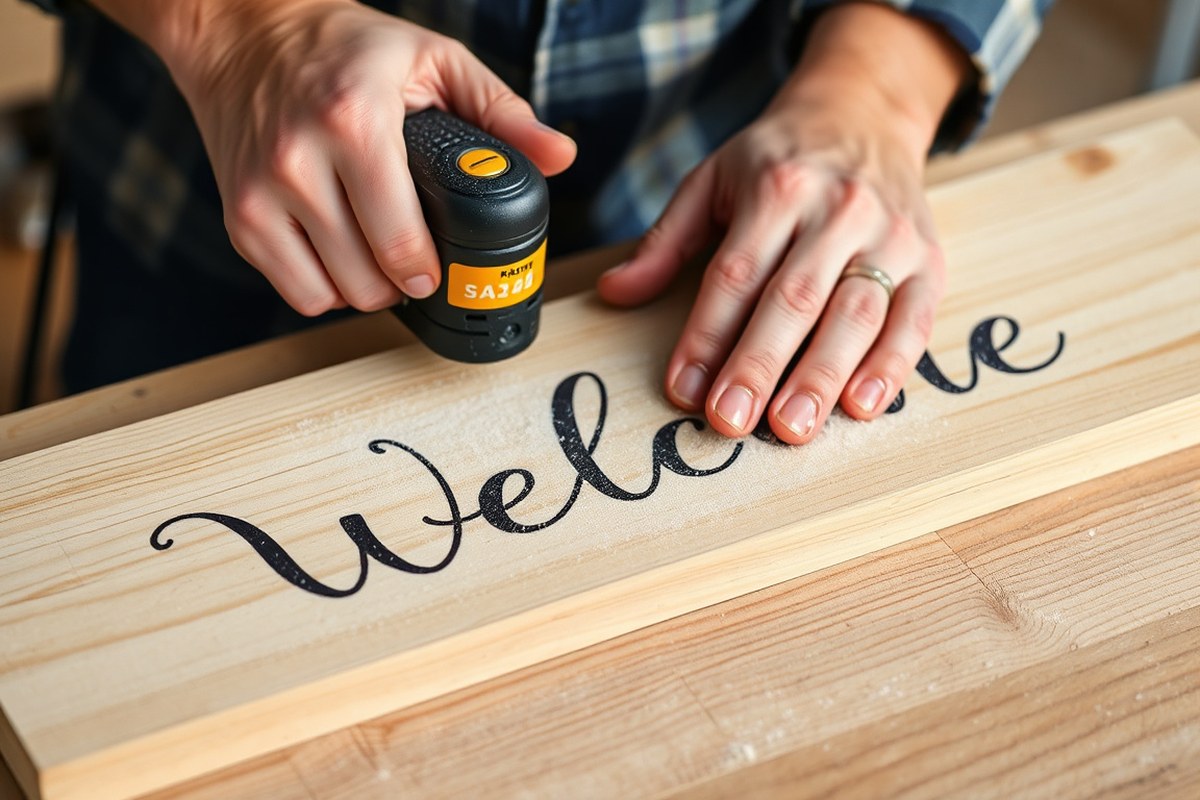
Choose a flat, sturdy base like wood or plywood and shape it to fit your space and style. Properly cutting, sanding, and priming the base ensures a smooth, durable surface that holds paint or stain well and looks professional.
Selecting the Wood or Base Material
Wood is the most popular material for welcome signs due to its warmth and ease of customization. Plywood sheets around 3, 6 mm thick make lightweight door signs, while solid woods such as basswood, cedar, or pine provide a more substantial base that can be carved or stained. Cedar’s softness lends itself to a rustic look but can peel vinyl lettering if handled roughly.
Consider where you’ll hang the sign, softwoods with good weather resistance like cedar are better for outdoors. Acrylic and cardboard are alternatives but usually don’t offer the same durability or craft-friendly feel as wood. Size depends on your porch or door space, with common dimensions from 12″ to 24″ wide and 6″ to 12″ tall.
Cutting to Size and Shape
Cutting your wood cleanly ensures the sign fits well and looks neat. Measure your space before starting. A sharper saw blade gives smoother cuts with less splintering. If you don’t have power tools, a fine-toothed handsaw or utility saw will work for thinner wood or plywood.
For shapes beyond rectangles, like ovals or scalloped edges, you can use a jigsaw or scroll saw. Always cut outside your marked line and sand down to the exact shape to avoid mistakes.
- Measure the width and height based on your location and desired sign size.
- Mark your cut lines clearly using a pencil and a straight edge or stencil for curves.
- Clamp the wood securely to your work surface to prevent slipping.
- Cut along your lines slowly and steadily with the appropriate saw.
- Inspect the edges for any rough spots or splinters after cutting.
Wear safety glasses and a dust mask during cutting to protect your eyes and lungs.
Sanding and Priming for Best Results
Sand the entire surface, focusing on edges and corners, to create a smooth base for decorating. Start with 80-grit sandpaper to remove roughness and then progress to 120- or 150-grit for a finer finish. This helps paint or stain adhere evenly and prevents uneven patches.
Priming depends on the look and type of topcoat. Use a wood primer for painted signs to seal the wood and prevent blotchy colours. For stained signs, a wood conditioner or pre-stain treatment helps reduce blotches and brings out natural grain. Allow any primer or conditioner to dry fully, usually about 1-4 hours depending on the product and temperature, before painting or staining your welcome sign.
Best Methods to Add Letters and Designs
You can add letters and graphics to your welcome sign using paint, stencils, vinyl decals, or carving. Each method offers different levels of control, cost, and time commitment. Choosing the right method depends on your comfort with crafting, desired look, and tools available.
Painting letters by hand gives a personal touch but requires steady hands and patience. Stencils make lettering easier and provide consistent shapes, especially if you want clean, uniform fonts. Vinyl decals are pre-cut adhesive designs that stick directly to your sign, offering a fast and sharp look without any painting mess. Carving or using 3D letters provides texture and a professional finish but needs more skill, time, and special tools.
| Method | What It Is | Time & Cost | Skill Level | Best For |
|---|---|---|---|---|
| Hand Painting | Painting letters freehand with a brush | Low cost (paint & brush under $10); 1-3 hours | Beginner to Intermediate (requires steady hand) | Custom look, small signs, artistic style |
| Stencils | Using pre-cut letter templates to paint over | Stencil set $5, $15; 1-2 hours | Beginner (easy to follow, uniform letters) | Consistent font, quick lettering |
| Vinyl Decals | Adhesive letters cut from vinyl sheets | Vinyl rolls $10-$30; about 1 hour | Beginner (requires cutting machine or pre-made decals) | Crisp letters, quick application, no drying time |
| Carving / 3D Letters | Cut or carve letters into wood or glue pre-made wood letters | Tools $20+ if not owned; 2-5 hours | Intermediate to Advanced (requires tools and skills) | Textured signs, durable and professional look |
Painting with stencils is popular because it combines ease and neatness. Start by lightly sanding your sign surface and painting a base color. Next, pick stencil letters about 3 to 5 inches tall for good visibility. Use painters’ tape to secure each letter stencil on the board, spacing the letters evenly by measuring the total width of the word and dividing by the number of letters plus gaps.
Apply paint with a small foam brush or sponge, using a dabbing motion to avoid paint bleeding under the stencil. Remove the stencil while the paint is still wet for clean edges. Let dry for 30-60 minutes and use a clear sealer to protect your work if outdoors.
Vinyl decals require less effort. You can buy pre-cut letter sets or create your own using a cutting machine like a Silhouette Cameo. Apply the vinyl by peeling the backing and pressing the letters firmly onto the board, starting from the center and smoothing outwards to avoid bubbles. Using vinyl stencils lets you paint over the design with no freehand painting involved.
Carving involves tracing letters onto your wood surface using printed templates. For best results, place a grid or use pencil marks to align spacing. Carve slowly with hand tools or a power rotary tool, following the letter outlines. Alternatively, you can glue 3-inch tall pre-cut wood letters onto the sign and paint or stain them. This method adds dimension and lasts well outdoors but takes more time and practice.
Keep these tips in mind for spacing and alignment: measure the exact center of your board first, then mark spaces for each letter with a pencil and ruler. Using registration marks with stencils or vinyl transfer tape can help maintain straight lines.
How to Customize Your Welcome Sign by Season and Occasion
Customizing your welcome sign for different seasons and occasions keeps your porch inviting and relevant all year long. Using interchangeable parts and weather-resistant materials allows you to swap out decorations easily while protecting your sign outdoors. Thoughtful storage and quick changes help keep the display fresh without damaging your handiwork.
Spring and Summer Decor Ideas
Spring and summer designs often focus on bright colors and natural motifs, signaling warm weather and new growth. Fresh floral accents, pastel shades, and lightweight additions like faux bees or butterflies work well on wooden or acrylic signs. Consider a tulip motif or a 3D layered look to add texture and appeal. Lightweight materials like foam or fabric flowers attached with removable adhesive let you change the look without drilling or permanent glue.
Summer themes can include nautical elements, sunflowers, or patriotic symbols for early summer. Using weatherproof paints and clear sealants keeps your base sign safe against sun damage and moisture even as you swap decorations. Try to limit replacements to times when the forecast predicts dry weather to avoid wear.
Holiday and Winter Themes
Winter and holiday designs often blend darker colors with festive accents like snowflakes, holly, or ribbons. To cover the entire season flexibly, choose a general winter theme first and then add holiday-specific pieces like Christmas ornaments or patriotic decorations for national celebrations. A popular idea is an interchangeable “O” on the sign, letting you insert themed items such as a pumpkin for Halloween or a flag for the Fourth of July.
For durability, use outdoor-rated fabrics, recycled plastic, or metal accents attached with screws or strong Velcro. Store all seasonal add-ons in labeled, sealable containers in a dry, climate-controlled area to prevent damage or warping. Swapping decorations every few weeks keeps your display current and prevents fading.
Special Occasions Like Weddings and Birthdays
Special events call for temporary but striking customizations. Lightweight cardstock, ribbons, or small wooden cutouts painted with chalkboard or metallic paint provide an easy way to personalize signs without permanent changes. Attach these items with clips or removable adhesive for fast, clean removals after the occasion.
For weddings, elegant colors like white, blush, or gold paired with flowers or lace add a celebratory feel. Birthday signs can include balloons or numbers crafted from foam board or acrylic, which you can store flat to save space. Mark event dates on the back or inside the storage container to keep future setups easy.
- Use weatherproof paint and sealants to protect the base sign
- Create interchangeable pieces with Velcro, magnets, or removable adhesive
- Store seasonal decorations in labeled, airtight containers in a cool, dry space
- Swap decorations during suitable weather to avoid damage
- Choose lightweight materials for easy handling and quick changes
- Plan color palettes to match your home’s exterior and porch style
- Consider layering 3D elements for more visual interest and popularity
Finishing, Protecting, and Displaying Your Sign
Sealing your welcome sign is essential to protect it against moisture, sun damage, and dirt, especially if you plan to display it outdoors. Using an appropriate outdoor sealant extends the life of the paint and wood, keeps colors vibrant, and prevents warping or cracking. For hanging, choose an option that suits your sign’s weight and location, ensuring it stays secure through weather changes or daily use. Freestanding signs require stable bases to avoid tipping over, especially in windy garden areas.
Sealing and Weatherproofing Techniques
You should always seal signs made for outdoor use to avoid weather damage and fading. Clear polyurethane varnishes, spar urethanes, or exterior-grade water sealers work best for wood signs. These products create a protective barrier against rain, sunlight, and temperature changes. For painted signs, apply two to three thin coats of sealant, allowing each coat to dry for at least 24 hours before the next.
Brush-on sealants are ideal for detailed signs, while spray-on versions can cover large flat areas quickly and evenly. For signs made from reclaimed wood or porous materials, sealing helps prevent moisture absorption and mold growth. Depending on the sealant brand, costs range from $10 to $20 per quart, covering about 200, 300 square feet, so one bottle is enough for multiple signs.
- Apply sealant outdoors or in a well-ventilated area.
- Lightly sand between coats with fine-grit sandpaper for smooth finish.
- Wait for full curing, typically 48 hours, before hanging outside.
- Reapply every 1, 2 years for outdoor signs prone to heavy weather.
- Choose UV-resistant sealants for signs exposed to strong sunlight.
Never skip sealing outdoor wood; water damage can cause warping that ruins your sign’s appearance within months.
Hanging Methods for Doors and Walls
For door or wall-mounted signs, secure hanging brackets or hardware is important. Large and heavy signs perform best with keyhole brackets or French cleats attached to the back. These provide stability and keep the sign flush against the surface. For smaller signs, strong picture hanging wire or sawtooth hangers are quick and easy options.
When selecting hardware, consider the door or wall material. For brick or masonry, use anchors and masonry screws; for drywall, use heavy-duty wall anchors or toggle bolts rated for at least 10 pounds. Keep the sign height visible and centered, usually about 4 to 5 feet from the ground or eye level.
- Use two mounting points spaced evenly to distribute weight.
- Check your hardware packaging for weight limits before purchasing.
- Pre-drill holes in wood signs to prevent splitting when inserting screws.
- Consider using removable adhesive hooks rated for outdoor use on smooth surfaces.
- For porch ceilings, lightweight chain hangers or sturdy twine tied to hooks work well.
Creating Freestanding and Garden Signs
Freestanding welcome signs add charm to gardens or pathways and avoid door drilling. To make one stable, attach a wooden stake or metal rod to the back of your sign, burying it 12 to 18 inches into soil for solid support. For heavier signs, use two stakes spaced apart to prevent wobbling.
Alternatively, build or buy simple wooden A-frame stands. Secure your sign to the frame with screws or strong outdoor adhesive. These portable signs can be moved seasonally or stored during harsh weather. Choose materials like cedar or treated pine, which resist decay when placed in the ground.
- Use pressure-treated wood or rust-resistant metal for garden hardware.
- Paint stakes with weatherproof paint for extra durability.
- Check soil type; soft soil may require longer stakes or additional support.
- Consider weighted bases like sandbags or bricks for patio freestanding signs.
- Place signs where they won’t block walkways or ventilation.
Anchor signs securely in windy areas; falling signs risk damage to plants or injury to passersby.
Typical Timeframes and Cost Estimates for Projects
The time it takes to make a welcome sign varies widely based on the design complexity, materials, and your crafting experience. Simple projects, like a popsicle stick sign, can be completed in about 30 minutes or less, while larger, personalized wooden signs with painted details might take several hours or a few days if multiple coats of paint and finishes are involved.
Cost depends mainly on the materials used and whether you already have basic supplies like paint and brushes. Using repurposed items like an old headboard or scrap wood lowers your expenses significantly and adds a rustic charm. Signs made from fresh lumber or new supplies can cost from under $5 up to around $20, especially if you’re buying basic wood, paint, and weatherproofing products.
Quick alternatives are ideal if you want a fresh look without a multi-step process. For instance, a painted horseshoe welcome sign or a simple vertical board with stenciled lettering delivers a boutique feel with minimal time investment. These projects still need some prep and drying time but usually wrap up within an hour or two.
| Project Type | Approximate Time | Expected Cost | Notes |
|---|---|---|---|
| Popsicle Stick Sign | 30 minutes or less | Under $5 | Uses inexpensive craft sticks; very beginner-friendly |
| Basic Painted Wooden Sign | 1 to 3 hours plus drying | $10 to $20 | Includes sanding, painting, lettering, and sealing |
| Repurposed Wood Sign (e.g., old headboard) | 2 to 4 hours plus drying | Mostly under $10 | Cost savings by reusing materials; rustic aesthetic |
| Detailed Seasonally Customized Sign | Several hours to days | $15 to $25 | Multiple paint layers and protective finishes required |
| Quick Painted Horseshoe Sign | 1 to 2 hours | Under $15 | Simple design; weatherproofing needed if outdoors |
Start your project planning by deciding how much time you want to spend and how detailed the sign should be. Budget your materials accordingly, tracking what you already have at home, like paint and brushes, to keep costs low. For projects exposed to rain or sun, include protective sealants in your budget to increase your sign’s longevity. Knowing these details ahead of time ensures you pick a project that fits your schedule and wallet while producing a sign that truly welcomes guests with style.
Common Mistakes and How to Fix Them
Misaligned letters are one of the most common issues when painting welcome signs, often caused by rushing or skipping the step of marking guidelines. To fix this, use a pencil and a ruler to lightly draw straight lines where the letters should go before you paint. When a letter ends up crooked, wait until the paint dries fully, then gently sand the area with fine-grit sandpaper (around 220 grit) to smooth it before repainting. This method takes only about 10 to 15 minutes but can greatly improve the sign’s look.
Smudges happen when paint smears before it dries or when you touch wet areas accidentally. Spot smudges while painting? Stop and let the sign dry completely, usually 1 to 2 hours depending on the paint and weather. Use a small flat brush dipped in warm, soapy water to soften the dried smudge, then carefully wipe it away with a cloth. Avoid trying to fix smudges right away, as this often makes the problem worse.
Paint bubbling or peeling usually means the surface wasn’t prepped well, or the paint was applied too thickly. The bubbles trap air and moisture, causing the paint to lift. To fix bubbling, let the paint dry completely, then gently scrape off the bubbled paint with a plastic scraper or putty knife. Sand the area lightly and repaint using thin coats, allowing each layer to dry fully (at least 2 hours) before adding the next. Using a quality primer can prevent this issue by ensuring better paint adhesion.
- Always prep your surface by sanding and cleaning thoroughly before painting
- Use painter’s tape and stencils to keep letters aligned and sharp
- Allow each paint layer to dry completely to prevent smudging or bubbling
- Troubleshoot errors by sanding and repainting after drying
- Choose outdoor-grade paint and sealant if the sign will be outside
- Avoid applying finishing coats in high humidity to reduce peeling risks
Damage during finishing usually happens when seals or clear coats are applied over still-wet paint or when the sign is handled roughly during curing. Protect your work by waiting at least 24 hours before applying any finish. Use a foam brush or spray sealer and apply thin, even coats. Streaks or dust stuck in the finish? After drying, lightly sand with 320-grit sandpaper and apply another thin coat. This process may take 2 days but creates the toughest, longest-lasting surface for your welcome sign.
Safety Tips When Working with Wood and Paint
Protective gear is your first line of defense when working with wood and paint. Always wear safety glasses to shield your eyes from wood chips and dust. Use work gloves to protect your hands from splinters and sharp tool edges. A dust mask or respirator is critical when sanding or using paint and solvents to avoid inhaling harmful particles or fumes.
Power tools like saws and drills require careful handling to prevent accidents. Before starting, inspect your tools for damage and ensure cords or batteries are secure. Always cut away from your body and keep hands clear of the blade or drill bit. Clamp your wood securely to your work surface, so it doesn’t move mid-cut. Avoid loose clothing or jewelry that might get caught in moving parts.
Paints and solvents often contain volatile chemicals that need proper ventilation. Work outdoors or in a well-ventilated space, such as near an open window with a fan pushing air outside. Avoid painting in temperatures below 50°F (10°C) to ensure proper drying and reduce fume buildup. Store paints and solvents tightly sealed when not in use, away from heat sources and children.
- Wear safety glasses, gloves, and a dust mask or respirator.
- Check tools for defects before use and maintain steady, controlled motions.
- Clamp wood pieces firmly before cutting or drilling.
- Ventilate your workspace well when painting or using solvents.
- Wear old clothes to protect your skin from paint stains and splashes.
- Dispose of paint-soaked rags properly to prevent fire hazards.
- Allow paint to dry completely, usually at least 24 hours, before handling.
Following these precautions helps improve the quality of your work and protects you from injury. Proper ventilation and protective gear reduce risks like respiratory irritation and skin contact with toxic substances. Using tools correctly prevents slips and accidental cuts, which often happen when blades bind or the workpiece shifts unexpectedly. Taking 15 to 20 minutes before you start to set up your safety measures is time well spent for better outcomes and fewer risks.
Never ignore ventilation requirements when working with paint or solvents; inadequate airflow can cause dizziness or worse, even if you feel fine at first.
Step-by-Step Action Plan for Making Your Welcome Sign
Follow these steps to create a personalized welcome sign that suits your style and space. Each phase helps you build confidence and check your progress.
- Before You Start: Gather all materials and tools based on your design choice, such as wood, paint, brushes, and stencils. Confirm everything is ready to avoid mid-project delays.
- Day 1: Prepare your wood by sanding and cleaning to create a smooth, clean surface. Test by running your hand over the wood to ensure no rough spots remain.
- Day 2: Apply your base coat of paint or stain evenly. Let it dry completely, checking that the color is even and there are no drips.
- Day 3: Add letters and designs using your chosen method, like stenciling or hand-painting. Step back and make sure the design is clear and aligned.
- Day 4: Customize with seasonal or occasion-specific decorations, like attaching small floral accents or adding holiday graphics. Check that all additions are securely fixed.
- Day 5: Apply a protective clear coat to shield your sign from weather and wear. The surface should feel smooth and not tacky after drying.
- Day 6: Choose your display location, clean it, and securely mount your sign using appropriate hardware. Give your sign a gentle shake to confirm it’s firmly in place.
Frequently Asked Questions
What Are Some Unique Shapes to Try for a Welcome Sign Besides Rectangular?
Circular wreath shapes offer a fresh alternative to the usual rectangular welcome signs, adding dimension and seasonal interest, especially for spring decorations.
Can I Use Non-Wood Materials for a Welcome Sign?
Yes, materials like metal, fabric, or recycled items can work, but wood remains easiest to paint and customize for beginners.
How Do Event Welcome Signs Differ from Year-Round Home Decor Signs?
Event signs typically include names, dates, or venues for weddings or special occasions, focusing on personalization rather than seasonal themes.
What’s a Good Way to Make a Welcome Sign Stand Out on My Porch?
Adding dimensional elements like a hanging wreath or 3D ornaments makes your porch sign more inviting and unique.
Can I Reuse Parts of a Welcome Sign for Different Seasons?
You can design interchangeable pieces or repaint motifs to refresh your welcome sign for various seasonal displays.
How Do I Choose Between Wall-Hanging and Self-Standing Welcome Signs?
Consider your porch space and desired impact; wall-hung signs fit smaller areas, while self-standing signs make bolder statements.
Final Thoughts
Making your own welcome sign lets you bring a personal touch to your home’s entrance. Start small, pick a design you like, and enjoy the process of crafting something unique. Next, gather your materials today and take the first step by prepping your wood surface for painting.