How to Make an Evacuation Map: Clear Steps and Tools for Safety Compliance
How to make an evacuation map starts with a clear, accurate floor plan showing all exits and designated escape routes. Use symbols for clarity and highlight primary and backup paths to guide occupants quickly during emergencies. Begin by gathering detailed building layouts to ensure your evacuation map reflects current structures and complies with local safety codes.
Key Takeaways
- Start with a precise floor plan of your building to ensure all exits and routes are accurately documented.
- Mark every exit clearly and draw primary and backup escape routes on the map.
- Follow OSHA 1910.38 and local fire marshal guidelines for required exit postings and map locations.
- Use symbols and keys to represent fire alarms, extinguishers, and emergency equipment visually.
- Create separate maps for each floor in multi-story buildings, ensuring one page per floor at 300 DPI resolution.
- Download print-ready PDFs at actual size (A4 or US Letter) for consistent, compliant signage.
What Is an Evacuation Map and Why Use It?
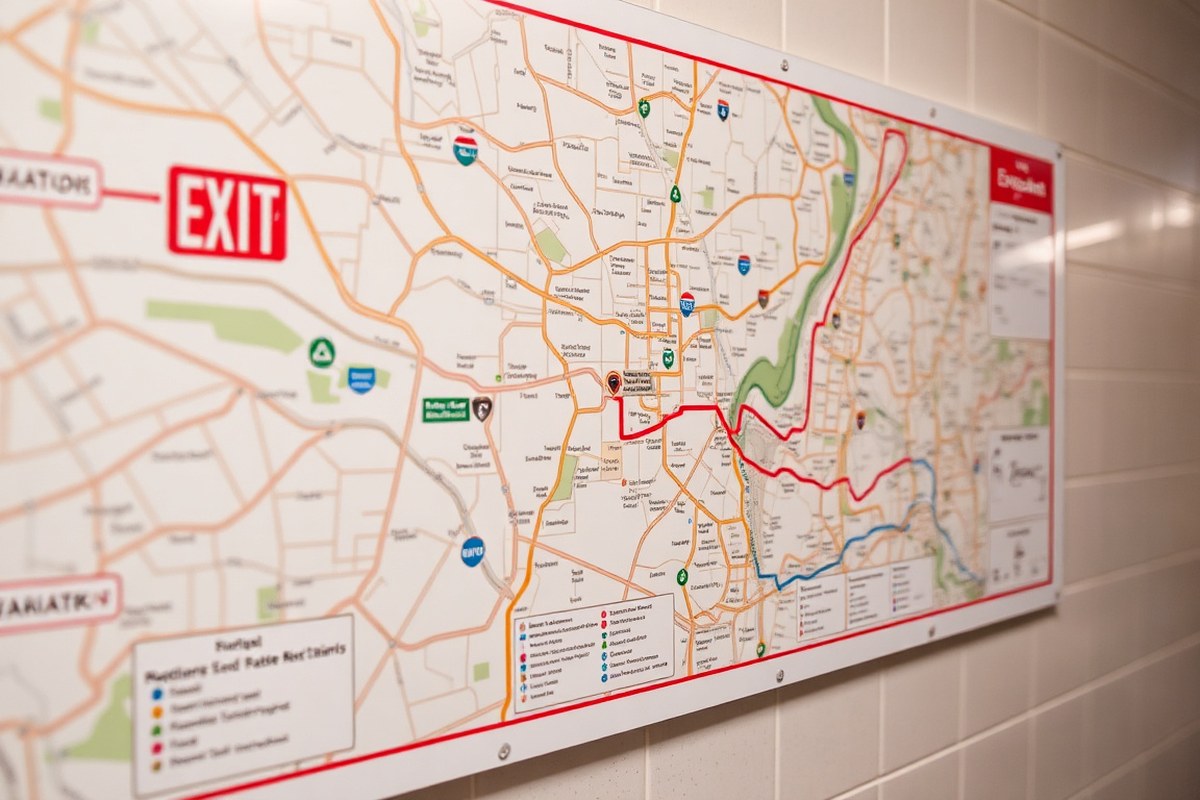
An evacuation map is a clear, visual diagram that shows safe escape routes and emergency exits within a building. It guides occupants during emergencies like fires, power outages, or natural disasters by highlighting primary and backup escape paths, exit locations, fire extinguishers, alarm pull stations, and assembly points. The map typically includes a “You are here” marker to help people immediately understand their location relative to exits. This tool is a core component of a facility’s emergency action plan, ensuring everyone can find their way out quickly and safely.
Evacuation maps are essential for safety because they provide a straightforward reference that saves critical time when every second counts. Employees, visitors, and contractors might not know all the exits or the easiest way out, especially in large or complex buildings. Displaying evacuation maps in visible areas, such as near exits and main hallways, helps first-time visitors and regular occupants alike. For example, hotels must post a map on the back of every guest-room door to ensure guests can evacuate independently if alarms sound. Daycares and schools post maps in every room used by children to maintain safety compliance and guide quick evacuations.
Creating an effective evacuation map starts with obtaining a precise floor plan of your facility. Mark all available emergency exits and draw the primary escape routes from different parts of the building. Wherever possible, include backup routes to account for blockages or hazards that could appear during an emergency. Add symbols for fire extinguishers, alarm pull stations, and clearly indicate the assembly point outside the building where everyone should meet after evacuation. Checking the map by physically walking the routes ensures accuracy and practical usability.
Your local fire marshal or authority having jurisdiction will set specific requirements for evacuation map content and posting locations. OSHA requires emergency action plans including evacuation procedures but leaves the exact format to local enforcement. Costs for creating these maps vary widely: you can draw maps by hand, use free software to upload your floor plan, or purchase professionally made print-ready PDFs starting at about $1.65 per map. Glow-in-the-dark or framed versions add durability and visibility for critical evacuation signage. The first map download is often free, making it easy to test and finalize your layout.
Good evacuation maps allow any person, including visitors unfamiliar with the building, to find the safest exit within seconds. Avoid clutter or unreadable fonts; the map must be clear, simple, and up to date. Keeping maps current with the latest building changes and verifying escape routes regularly improves readiness. Without a reliable evacuation map, confusion and delays increase risks during emergencies, potentially causing injury or worse. Facilities with specialized needs, like multi-floor complexes or healthcare centers, should tailor maps to reflect unique layouts and evacuation procedures.
Understanding Legal and Safety Requirements

Evacuation maps must comply with specific legal and safety standards set by OSHA, NFPA, and local authorities to ensure they effectively guide occupants to safety in emergencies. These organizations establish rules about what the map should include and who enforces those rules. Meeting these requirements helps protect your facility occupants and keeps you aligned with fire safety and workplace safety regulations.
Overview of Governing Codes and Standards
The primary federal requirement for evacuation maps at workplaces in the US comes from OSHA’s emergency action plan standard (29 CFR 1910.38). This regulation mandates employers to develop clear evacuation procedures and designate exit routes. Meanwhile, the National Fire Protection Association’s Life Safety Code (NFPA 101) sets detailed fire and life safety requirements that local jurisdictions often incorporate or expand upon. Also, local and state fire codes, which may follow the International Fire Code (IFC) or other standards like UK or Irish fire safety laws outside the US, influence your map’s design and posting requirements.
Since codes differ depending on location and building type, coordinating with the local fire safety officer or fire marshal is important. These authorities understand the applicable local rules and how they mesh with federal OSHA mandates.
Identifying the Authorities Having Jurisdiction (AHJ)
Authorities Having Jurisdiction, commonly abbreviated as AHJ, are organizations empowered to enforce fire and life safety codes for your facility. The NFPA describes AHJs as a group that may include state and local fire marshals, building code officials, labor departments, and health departments. The fire marshal is typically the most involved AHJ, but your evacuation map may need to meet multiple agencies’ requirements, especially in complex facilities like schools, healthcare centers, or multi-use buildings.
Your AHJ reviews and approves your evacuation plans and maps, ensuring compliance with mandated codes. Without their approval, posted plans might be rejected during inspections, leading to fines or unsafe conditions.
Essential Map Features to Comply with Codes
Your evacuation map must clearly identify exit routes, emergency exits, and assembly points using standardized ISO 23601 and OSHA symbols. OSHA 29 CFR 1910.38 specifies that maps should include “You are here” points, escape path markings, locations of fire equipment such as extinguishers or pull stations, and concise “In case of fire” instructions.
Adding a legend or map key is important for legibility, explaining symbols and instructions at a glance. Although not always required, including additional features like emergency phone numbers, assembly area instructions, and locations of AEDs improve readiness and can be beneficial during audits.
Adapting Maps for Your Facility’s Specific Needs
Your evacuation map should reflect the unique layout and operational aspects of your building. This means applying OSHA and NFPA guidelines alongside any local code nuances, adapting routes according to floors, sections, or special hazard areas. Facilities with employees must ensure their maps cover OSHA’s emergency action plan elements, while public buildings might have stricter posting and accessibility requirements.
Using modifiable templates from recommended software tools allows you to customize your maps with ease and maintain compliance. These tools often provide preset themes, colors, and drag-and-drop features that help align the design with regulatory standards.
Costs and Practical Considerations for Compliance
Producing compliant evacuation maps involves costs for design, printing, and posting. Maps can be printed for around $1.65 each, while glow-in-the-dark or durable signage may cost approximately $59 apiece. Planning for periodic updates is also necessary to keep maps current after building modifications or changes in exit routes, typically reviewed during fire inspections or annual audits.
Efficient cloud-based design tools can reduce ongoing costs and improve accessibility, enabling easy updates and sharing with key personnel such as safety officers or the AHJ. Proper investment in compliant maps minimizes risks of fines and improves occupant safety significantly.
Consult your local fire marshal early in the design process to ensure your evacuation maps meet all relevant codes and avoid costly revisions later.
Step-by-Step Guide to Creating Your Evacuation Map
Creating an evacuation map starts with securing an accurate floor plan, then clearly marking all emergency exits, escape routes, and safety equipment. Adding “You Are Here” indicators and assembly points ensures users can quickly orient themselves and know where to gather safely. Walking the routes physically verifies accuracy and reveals any potential obstacles or changes needed.
Obtain or Draw a Building Floor Plan
The first step is to obtain a detailed floor plan of your building or draw one yourself if none exists. Many facilities already have architectural drawings available from property managers or maintenance departments. If you don’t have access, you can create a hand sketch or use digital tools to draft a map.
Using software like EdrawMax allows you to create or upload floor plans. It accepts PDF, CAD exports, photos, or hand sketches as a base. These tools help you scale your drawing to realistic dimensions and prepare it for markup.
Start by ensuring every room, corridor, stairwell, and door is accurately shown. This plan will be your foundation for all further markings and safety information.
Mark Exits, Escape Routes, and Safety Equipment
After securing your floor plan, mark all emergency exits clearly. Use universally recognized symbols for fire exits and doors. The routes from key areas like offices, conference rooms, or production spaces to these exits must be highlighted prominently.
Also, mark locations of fire extinguishers, alarm pull stations, first-aid kits, AEDs, and emergency lights based on your building’s current equipment. Mapping these delivers important information during an emergency.
Many evacuation plan makers have extensive libraries of safety symbols you can drag and drop onto your plan. You can customize routes to avoid production lines, loading bays, or other obstacles, especially in industrial or warehouse settings.
Add ‘You Are Here’ Markers and Assembly Points
Including “You Are Here” markers near each posted evacuation map helps users quickly locate themselves on the map. Place these markers at each strategic posting location: near stairwells, reception areas, elevators, or staff break rooms.
Also mark the outdoor assembly point clearly on the map, usually designated in a safe area away from vehicle traffic or building hazards. Providing the emergency phone number and simple “In case of fire” steps in a green header or key area of the map adds useful instructions. Different facilities may have different assembly point needs: care homes may need separate areas for residents requiring extra assistance, while office buildings focus more on exits per floor and general staff assembly.
Review and Verify Routes with a Walkthrough
Conducting a physical walkthrough of the marked evacuation routes is essential to confirm accuracy. Walk each route from different rooms and offices to verify that markings are logical, clear, and unobstructed.
Update your plans after every fire drill or if any structural changes occur, such as new walls, closed doors, or relocated equipment. This ensures the maps remain up-to-date and reliable during emergencies. Having staff or safety officers walk routes during drills also helps identify confusing signage or potential safety hazards along the escape paths.
- Secure an accurate, to-scale floor plan from property management, maintenance, or by drawing/sketching.
- Use evacuation plan software (EdrawMax, others) to upload, adjust, and prepare the floor plan for marking.
- Mark all emergency exits, fire equipment, alarm stations, and emergency lights using standard symbols.
- Draw clear escape routes from main occupied areas to nearest exits, avoiding hazards and obstacles.
- Add “You Are Here” markers at every posting location and place an outdoor assembly point symbol.
- Include emergency instructions and contact numbers near the map for quick reference.
- Physically walk all routes to verify clarity, accessibility, and update maps after changes or drills.
Essential Elements to Include on Evacuation Maps
Evacuation maps must show clear, standardized symbols to make sure everyone understands the routes and safety features. Exits are usually marked by green rectangles or arrows, often labeled “EXIT” in white letters. Fire extinguishers typically use a red icon with a fire extinguisher shape, while fire alarms are shown as red circles or bells. You should also include stairwells, restrooms, and areas where people with disabilities need assistance. Clear legends or keys explaining these symbols are important for anyone reading the map, especially visitors and new employees.
Including emergency contact information is essential for response coordination during an evacuation. This typically includes phone numbers for local fire and police departments, building security, and emergency medical services. Place this information near the corner of the map or a visible section for quick access. Adding instructions for safe evacuation, such as “Do not use elevators” or “Proceed calmly to the nearest exit,” also improve clarity and safety.
- Clearly mark all exits with green “EXIT” signs and directional arrows
- Use standardized red symbols for fire extinguishers and fire alarms
- Include a legend explaining each symbol for quick understanding
- Show primary and secondary evacuation routes with distinct colors or lines
- Display emergency contact numbers such as fire department and security
- Identify assembly points outside the building
- Note accessibility features and safe routes for individuals with disabilities
The map should be large enough to read easily on posted signs, typically at least 11×17 inches, depending on the building size and complexity. Use contrasting colors and fonts that comply with local safety standards for visibility. Errors like missing symbols, unclear routes, or illegible text can slow evacuation and increase risk. For large or multi-floor buildings, create separate maps for each floor and clearly indicate stairwells and elevator locations, emphasizing that elevators should not be used in emergencies.
How to Handle Multi-Floor and Complex Building Maps
Organizing evacuation maps for buildings with multiple floors requires a clear and consistent approach. Start by maintaining a master editable plan for the entire building, then create individual floor maps based on this master copy. Duplicate the layout for floors that share a similar design to save time. Each floor map should display the exact location of the map with a “You are here” marker, showing the quickest exit routes from that point. These markers help occupants quickly orient themselves and understand their escape path.
Complex buildings with interconnected structures or multi-floor layouts benefit from additional markings to clarify routes. Mark secondary evacuation paths for use when primary routes are blocked. Include refuge areas where people requiring assistance can wait safely. Clearly indicate locations of emergency equipment such as AEDs and fire extinguishers. Use arrows or pathway lines that differ in color or style to distinguish escape routes on various floors and connections between floors via stairwells or elevators. Highlight assembly points outside the building, ensuring they are marked as safe locations clear of traffic and emergency vehicle access.
Maintaining consistency across all floor maps promotes better understanding and faster evacuation. Use the same symbols, colors, and fonts on every map to avoid confusion. Frame a checklist before finalizing your maps: verify “You are here” markers are accurate for each mounting location, confirm all exits and emergency equipment are represented, and check that route lines are clearly visible and distinct from less critical building features. Consistent scale across floors is helpful, but if impossible, clearly label scale differences. Try to keep legend placement and design uniform on every map.
Good results come from regularly updating these maps, especially after layout changes or safety upgrades. Digital tools like EdrawMax can simplify this process by allowing you to edit one master plan and auto-generate maps for separate floors. The software also supports exporting to printable PDFs or image formats at 300 DPI, which ensures good print quality for site postings with limited space, such as A4 or US Letter size sheets. This digital approach reduces errors and ensures quick reprints after any modifications.
The biggest risks include outdated or inconsistent maps, which can confuse occupants and delay evacuation. Avoid cluttering the maps with unnecessary details that obscure critical paths. Instead, focus on clarity with sufficient but not overwhelming information. For buildings where floors vary significantly, create separate tailored maps emphasizing specific escape routes and hazards unique to each level rather than reusing identical plans.
Always update and reprint evacuation maps immediately after any changes in building layout or exit routes to maintain accuracy in emergencies.
Comparison of Tools and Software for Evacuation Maps
Selecting the right tool for creating your evacuation map depends on your budget, the complexity of your building, and how much design support you want. Many popular options offer templates and AI assistance, which can save time and help make your map clear and professional. Some tools provide free versions, allowing you to try before committing to purchase. However, free tools often come with limitations such as restricted downloads or fewer customization options. Here’s a comparison table of several evacuation map creation options based on ease of use, cost, template availability, and key features:
| Tool | Cost | Templates & AI | Features | Download & Print |
|---|---|---|---|---|
| Online Evacuation Plan Software | Free for first map; paid maps start around $20 | AI-assisted first-floor map free; multiple building types | Scalable floor plan; no installation needed | Download first map free; paid maps downloadable indefinitely; print options available |
| EdrawMax | Paid; subscription approx. $8/month | Extensive floor plan templates; manual editing | Professional diagrams; supports complex layouts | Maps exportable in multiple formats; printing self-managed |
| Microsoft Visio | Subscription approx. $15/month | Limited evacuation map templates; manual creation | Advanced drawing tools; good for multi-floor plans | Download and print at will |
| Free PDF Templates | Free | Basic templates; no AI assistance | Fill-in-by-hand; no scaling tools | Print only; no digital editing after printing |
| OSHA Map Tools | Free or low-cost | Standard safety templates; minimal AI | Compliance-focused; limited customization | Printable after creation |
Tools with AI assistance and templates can build a first draft quickly, especially for standard building types like schools or small businesses. The online evacuation plan software stands out because it requires no installation, offers free first-floor AI-generated maps, and provides realistic scaling. This is helpful if you want an accurate representation of your space without technical design skills.
Cost considerations vary widely. Free PDF templates are zero cost but require manual drawing and might look less professional, impacting clarity in emergencies. Paid software like EdrawMax and Visio offer deeper customization and professional-quality maps but cost $8 to $15 monthly, which might not be worthwhile for small, simple facilities.
When selecting your tool, consider your building’s complexity. For multi-floor or large facilities, software with strong scaling and layering tools like Visio or EdrawMax helps prevent mistakes. For smaller places, free or low-cost online options with templates will generally meet your needs. Always confirm that the tool you choose allows you to download and print your map in formats and sizes suitable for your building’s evacuation signage standards, such as glow-in-the-dark or matte finishes in A4 or Letter sizes.
Common Evacuation Map Mistakes and How to Fix Them
One of the most common mistakes in evacuation map design is using unclear or inconsistent symbols. Exit routes, fire extinguishers, or hazards that are not visually distinct can cause confusion during an emergency. You should use standard, easy-to-recognize icons and include a clear legend. For example, replace vague arrows with bold, directional arrows in a contrasting color like red or green to guide occupants effectively.
Another frequent error is missing the “You are here” marker or placing it incorrectly. The marker must appear on each posted map tailored to that specific location within the building. Without it, people can’t orient themselves quickly and might head the wrong way. To fix this, create multiple map versions with properly positioned “You are here” markers. For instance, in a school, the marker on the gym’s map should differ from the one near the cafeteria.
Omitting critical information like secondary exits, assembly points, or areas to avoid can reduce a map’s usefulness. While primary exit routes are essential, including alternate paths ensures safety if the main exit is blocked. Be sure to mark assembly areas outside the building clearly and note potential hazards like electrical rooms or chemical storage.
- Use consistent, standardized symbols and include a legend with all icons.
- Place and update the “You are here” marker for every posted map.
- Show all exit routes, including secondary and emergency exits.
- Mark safe assembly points outside the building clearly.
- Avoid clutter by limiting unnecessary details but don’t omit essential information.
- Use high-contrast colors for visibility in low-light or smoke conditions.
- Keep maps updated after renovations or layout changes.
Low contrast or overly complex maps slow down evacuation by requiring people to stop and decipher them. Using simple, bold colors like red for exits and blue for fire equipment helps occupants identify key information instantly. For buildings with multiple floors, avoid crowding all floors on one map by creating separate maps for each floor with consistent layouts.
Remember that evacuation maps must comply with local fire codes and safety standards, which often specify symbol shapes, sizes, and map orientation rules. The cost of revisions depends on whether you update printed maps or digital plans, but investing in clear designs can reduce evacuation times and risks. Well-designed maps help people act confidently in emergencies, minimizing confusion and injury.
When to Hire a Professional vs. DIY Evacuation Maps
Choosing between making an evacuation map yourself or hiring a professional depends on your building’s design complexity, legal liability, and safety risks. Simple, single-floor layouts with clear exit routes can often be managed using DIY tools, while multi-floor buildings or those with special hazards usually require expert input. Understanding these factors helps you avoid costly mistakes and meet compliance standards effectively.
Assessing Your Building’s Complexity and Risks
Start by evaluating your facility’s size, layout, and features that affect evacuation planning. Small buildings with straightforward floor plans and clearly marked exits are easier to handle with DIY methods. However, buildings with multiple floors, interconnected areas, hazardous materials, or high occupant capacity introduce complexity that increases legal and safety risks.
Complex facilities such as hospitals, schools, manufacturing plants, or high-rise office buildings require detailed risk analysis and careful route planning. These structures often demand specialized symbols, fire protection zones, and navigation considerations for people with disabilities. Failure to address these properly can lead to evacuation confusion and legal liability in an emergency.
Assess whether your building has unique risks like flammable storage, electrical hazards, or zones subject to frequent changes. These factors may push toward professional involvement to ensure maps stay accurate and compliant with local regulations.
DIY Tools: When They Work Best
DIY evacuation map software and templates are useful for facilities with basic layouts and minimal special hazards. Many user-friendly programs offer drag-and-drop features and standard symbols, enabling you to create clear maps quickly. These tools usually save on cost, with some free or low-priced options available that fit budgets under $100.
Use DIY tools when your building is in a stable condition without frequent remodeling or equipment changes. When simple updates or periodic reviews are needed, this approach offers flexibility and control. Also, small businesses or schools with limited budgets often benefit from starting with a DIY map, especially if you involve staff familiar with the facility’s layout.
The tradeoff is that DIY maps may miss important legal or safety nuances, including compliance with the Americans with Disabilities Act (ADA) or local fire codes. Mistakes like incorrect exit locations or unclear symbols can cause confusion during an evacuation, increasing risk to occupants.
Benefits of Hiring a Safety Professional
Hiring a professional evacuation planner ensures expertise in safety standards, legal compliance, and risk mitigation. Certified consultants or fire protection engineers bring knowledge of local building codes and emergency procedures that guarantee your map works under real conditions. They conduct thorough site assessments and often coordinate with local fire departments and safety inspectors.
Professionals provide detailed, high-quality maps suitable for complex buildings, including multi-story layouts, hazardous areas, and spaces requiring specialized evacuation plans. Their involvement reduces liability risks by ensuring your documentation meets regulatory requirements, which can also lower insurance premiums in some cases.
The main drawback is cost. Professional services typically start around $500 for small sites and can exceed several thousand dollars for larger facilities. However, this investment often pays off by preventing costly fines, improving occupant safety, and avoiding expensive map revisions down the line.
How to Find Qualified Experts
Look for consultants with credentials such as Certified Fire Protection Specialist (CFPS) or relevant safety certifications. Many firms specialize in safety consulting for schools, commercial buildings, and industrial sites. Local fire departments or building code offices can recommend professionals experienced with your area’s regulations.
Ask for portfolios showing past evacuation maps and experience with facilities similar to yours. Verify that the consultant understands the unique challenges of your building type, such as accommodating disabled occupants or integrating with existing emergency systems. Getting multiple quotes and checking references helps ensure the best fit for your budget and safety goals.
Make sure the expert provides clear documentation and a revision schedule to keep maps current as your building changes. Collaborate closely during the process to ensure the final product aligns with your operational needs and staff training plans.
Regularly update evacuation maps after renovations or layout changes, outdated maps can create real risks and void compliance.
Step-by-Step Action Plan for Your Evacuation Map
Use this plan to create and implement a clear evacuation map that meets safety requirements and guides occupants effectively during emergencies.
- Before you start: Review local safety codes and standards relevant to evacuation maps. Confirm your facility’s legal requirements to ensure compliance.
- Day 1: Gather accurate floor plans and building layouts, noting emergency exits and hazards. Verify plans with building managers to ensure accuracy.
- Week 1: Draft your evacuation map using simple design tools or specialized software. Include all essential elements like exit routes, alarm locations, and assembly points.
- Week 2: Conduct a walkthrough with your map to check clarity and accessibility of routes. Adjust map details based on real-world observations.
- Week 3: Share the map with key personnel and facility occupants. Collect feedback to identify confusing spots or missing information.
- Week 4: Finalize the map design ensuring high visibility and durability. Print and install maps in mandatory locations per regulations.
- Ongoing: Schedule regular reviews and updates after any building changes or safety incidents to keep the map current and effective.
Frequently Asked Questions
How Do I Ensure My Evacuation Map Complies with Local Fire Codes?
Consult your local fire marshal to understand specific requirements and posting locations. Most require maps at exits and main hallways to clearly show escape routes. Local advice helps avoid costly revisions and ensures safety compliance.
What Should I Consider When Marking Assembly Points on an Evacuation Map?
Choose assembly points in safe, open areas away from the building and hazards. Clearly mark these on your map so evacuees know where to gather after exiting, improving tracking and headcounts during emergencies.
How Detailed Should Evacuation Routes Be for Multi-Floor Buildings?
Routes should clearly show primary and backup escapes from each floor, including stairways and exits. Detail helps occupants quickly identify the best path based on their location during an emergency.
Can I Use Digital Platforms to Train Staff on Evacuation Routes?
Yes, digital maps can be incorporated into training software or apps, allowing interactive reviews of escape paths. This reinforces familiarity and reduces confusion during real evacuations.
How Often Should Evacuation Maps Be Updated?
Update maps whenever structural changes occur or safety equipment is moved. Regular reviews, at least annually, ensure maps reflect current conditions and safety setups accurately.
What’s the Best Way to Verify Evacuation Routes on My Map?
Walk through the building following marked routes to confirm accuracy and accessibility. Testing with actual users can reveal unclear signage or blocked paths before posting maps.
Final Thoughts
A clear evacuation map plays a important role in building safety and emergency response. Start by securing accurate building layouts and confirming your local safety rules. Focus on clarity and practicality to ensure everyone can evacuate safely in an emergency. Your next step is to draft your first version, then test it in a real walkthrough to refine the design.