How to Make an Engraved Sign: A Complete Guide with Tips & Methods
How to make an engraved sign starts with choosing the right material and method for your design and tools. Engraving wood or acrylic using a laser or rotary tool gives precise results, while hand carving adds a personal touch. Begin by creating a simple template to guide your engraving process for clean and accurate work.
Key Takeaways
- Plywood offers affordable, easy-to-engrave material ideal for budget-friendly wooden signs.
- A 10 by 7-inch sign can be engraved within 20 to 60 minutes depending on design detail.
- Set a 60W laser to 200mm/s speed at 30% power for engraving 3mm plywood effectively.
- Use a Dremel 100 rotary tool for controlled hand carving with enough power for wood engraving.
- Acrylic signs under 3mm thick work well with a Cricut Maker for precise engraving.
- Start your project by making a detailed template in about 10 minutes to ensure accuracy.
How to Make an Engraved Sign Step-by-Step
Creating an engraved sign involves a clear sequence of steps from design to finishing touches. Your success depends on careful transfer of the design onto the material and proper finishing after engraving to preserve and highlight your work. Time ranges from about 20 minutes for small projects to over an hour for larger or detailed signs. Following a checklist helps keep your workflow organized and ensures a professional result.
- Prepare your design. Create or select a design suitable for engraving, keeping it simple if you’re starting out. Print it out at the actual size of your sign. For sharper transfer, shade the back of the printed design thoroughly with a soft pencil or use graphite transfer paper.
- Transfer the design to your material. Place the shaded side face down onto the wood or acrylic. Use a pencil to carefully trace over the design lines. This action transfers graphite onto the surface, outlining your engraving. Wipe away any smudges without removing the transferred lines.
- Prepare the surface. Sand the material lightly with fine-grit sandpaper (around 220 grit) to smooth the area where you’ll engrave. This removes imperfections and helps the engraving tool work evenly. Clean off dust completely before starting.
- Engrave your sign. Use your chosen engraving tool, like a rotary tool or laser engraver. Follow slow, steady motions. Small, simple signs usually take 15 to 30 minutes, while complex or larger designs can require up to an hour or more. Work carefully around edges and detailed areas.
- Clean the engraving. After carving, brush away dust and loose debris. If any graphite transfer lines remain outside the engraved area, wipe gently with a damp cloth. Let it dry fully before proceeding.
- Apply finishing touches. You can leave the wood natural for a rustic look or improve the contrast by highlighting the engraving with paint markers made for wood. Take about 30 minutes to 2 hours to paint, stain, or seal the sign, depending on your chosen finish. Sealing protects your work from damage and fading.
- Final cleanup and inspection. Sand any rough edges gently if needed and remove all dust. Check the sign in good light to ensure all details are clear and the finish is smooth. Adjust paint or sealer if necessary before displaying your sign.
Choosing the Right Materials for Engraving
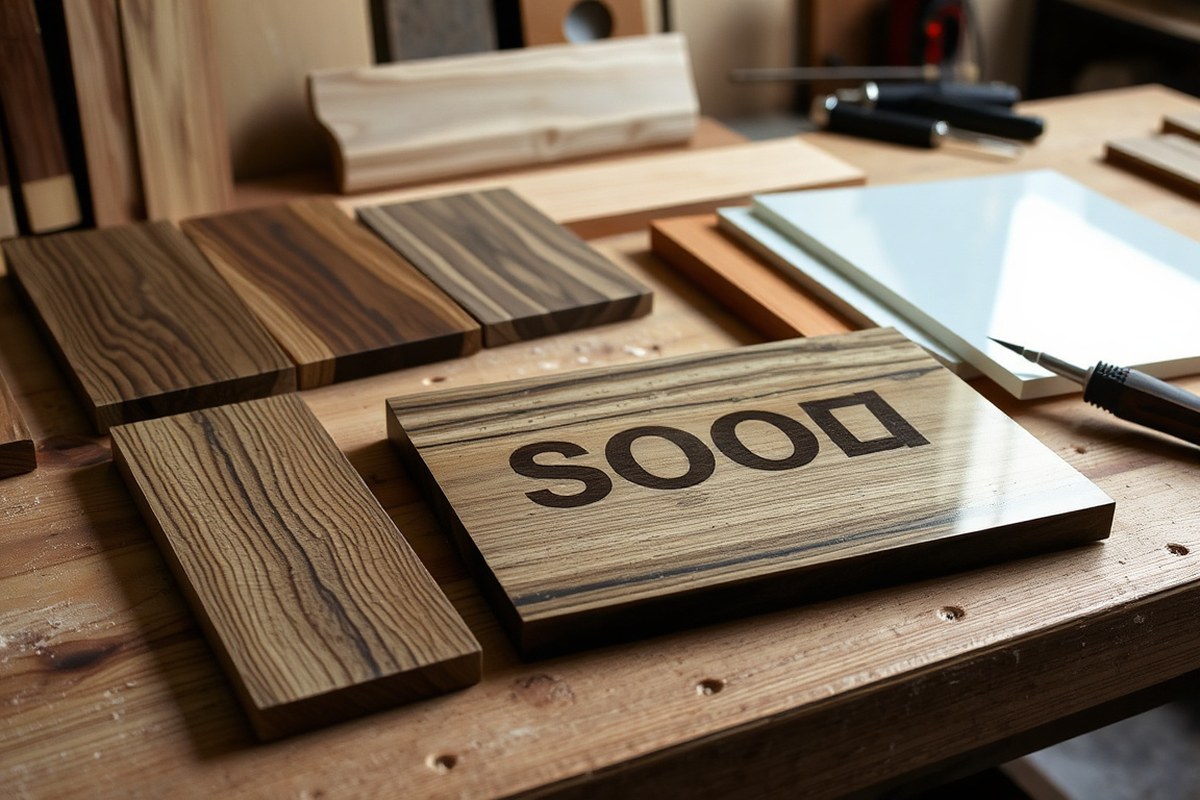
Choosing the right material for your engraved sign shapes the look, feel, and durability of your final product. For wood signs, pick woods with tight grains and smooth surfaces to allow clear detail in the engraving. Popular choices include plywood and MDF, which are affordable, easy to work with, and produce good engraving results. Hardwoods like maple and cherry give a richer finish but may require stronger tools or laser settings. Thickness matters: a thickness between 1/2 inch to 3/4 inch is typical, providing enough depth for engraving without risking burn-through or breakage.
Acrylic and other materials also work for engraving. Acrylic signs are trendy, especially for weddings and home décor, and they engrave cleanly with laser tools. Unlike wood, acrylic requires lower laser power and precise settings to avoid melting or cracking. Thickness should range from 1/8 inch to 1/4 inch for sturdiness and clear engraving. Cost-wise, plywood sheets run between $10 and $40 based on thickness and quality, while acrylic panels generally cost more but offer a modern look. Your choice depends on style preference, budget, and the intended use, wood for rustic warmth, acrylic for sleek clarity. The table below compares common materials for engraved signs, highlighting their suitability, typical thickness, costs, and ideal applications:
| Material | Best For | Typical Thickness | Cost Range (per sheet) | Engraving Notes |
|---|---|---|---|---|
| Plywood | Budget-friendly, beginner projects | 1/2″ to 3/4″ | $10 – $40 | Good grain; slightly rougher finish |
| MDF | Smooth surface, detailed engraving | 1/2″ to 3/4″ | $15 – $35 | Uniform surface; can burn easily |
| Hardwoods (Maple, Cherry) | Rich finish, durable signs | 1/2″ to 1″ | $30 – $80+ | Requires higher laser power for detail |
| Acrylic | Modern look, event signs | 1/8″ to 1/4″ | $20 – $50 | Low laser power; avoid melting |
Selecting high-quality wood or acrylic reduces issues like uneven engraving or charring. Before starting, examine the material for knots, cracks, or warping that can spoil the design. For wood, sanding the surface smooth ensures crisp lines. Begin test engravings on a scrap piece matching your project’s material and thickness to find the right laser power and speed settings. Power settings for wood typically fall between 10% and 20% laser power for detailed work. Acrylic demands careful power control, too high can cause melting, too low yields shallow marks.
Always test your engraving settings on a scrap piece of the same material and thickness to fine-tune power and speed before committing to your main sign.
Comparing Engraving Methods: Laser, Rotary, and Hand-Carve
Laser, rotary, and hand engraving each offer different advantages depending on your skill level, budget, and project needs. Laser engraving provides exceptional precision, reaching accuracy down to 0.01 mm and producing detailed designs that are difficult to achieve by hand or rotary methods. It’s fast, with speeds up to 20,000 mm/min on some beginner-friendly models like the BlazeX M3 Pro. However, laser engravers can be costly upfront, ranging from several hundred to thousands of dollars based on power and features. They also require ongoing maintenance costs for bits, filters, and cleaning.
Rotary engraving uses a spinning bit to carve into wood or acrylic. It’s slower than laser engraving but less expensive initially. Typical rotary tools cost between $50 and $200 and generally take more time for detailed designs. The precision depends on the bit quality and tool control, so beginners may need practice to achieve clean results. Hand carving is the most affordable option, needing only basic tools costing under $50, but it is time-consuming, physically demanding, and requires skill to avoid mistakes. The table below summarizes the main differences to help you decide which method suits your project and experience level best.
| Method | Precision | Speed | Typical Cost | Best Use Case |
|---|---|---|---|---|
| Laser Engraving | High (up to 0.01 mm accuracy) | Fast (up to 20,000 mm/min) | $300 to $5,000+ | Detailed, precise designs; beginners using models like BlazeX M3 Pro |
| Rotary Engraving | Medium (depends on bit and skill) | Moderate (slower than laser) | $50 to $200 | Simple designs on wood or acrylic; moderate detail |
| Hand Carve | Low to Medium (skill dependent) | Slow (manual effort) | Under $50 | Rustic, personalized signs; hobbyists wanting hands-on work |
Laser engraving works well for beginners who want precision quickly and are willing to invest in a machine. Use recommended settings like 200 mm/s at 30% power for engraving 3 mm plywood with a 60W laser. For rotary engraving, start with soft woods and simple shapes to build skill. Hand carving needs patience; start with soft woods like basswood and use sharp tools to reduce slips. Consider laser engraving if you want quick results and detailed designs, but rotary or hand carving can be the right choice when you have a strict budget or want a handcrafted look.
Designing Your Engraved Sign: Tips and Tools
Designing your engraved sign starts with choosing the right font and layout that suit your message and style. Using the right software helps you create clear, precise designs before transferring them to your wood or acrylic material. Planning carefully ensures your final sign looks balanced and professional.
Selecting the Perfect Font and Style
Choose a font that matches the vibe and purpose of your sign. For casual or rustic signs, serif or handwritten fonts work well. Modern or minimalist signs often benefit from clean sans-serif fonts. Keep readability high by avoiding overly complicated or small fonts. The layout should balance text and images without overcrowding the sign’s surface.
Consider the size and style of your sign; larger signs can handle more decorative fonts, while smaller signs need simpler type for clarity. Make sure to center or align your text carefully. Sketching a rough layout on paper can help visualize the design before using software.
Recommended Design Software Options
Many free and paid programs help you create vector designs ideal for engraving. Starting with free options like Inkscape or online sign makers lets you experiment without cost. LightBurn is popular for engraving and costs between $60 and $500 depending on features needed. Adobe Illustrator offers advanced tools but requires a subscription.
Use programs like Microsoft Word or Photoshop for text-heavy signs or simpler layouts. Import or trace images from free or paid online design sites to add decoration. Make sure your design format supports your engraving tool, usually SVG or DXF for vector files.
Simple designs may take 15-30 minutes to create, while layered or complex signs can require a couple of hours to perfect. Save your work regularly and use templates if available to speed up future projects.
Methods to Transfer Designs Onto Wood or Acrylic
Once your design is ready, transfer it onto your sign material accurately. If using a laser or rotary engraver, load the digital file directly into the machine’s software for precise cutting. For hand engraving or painting, print your design and use transfer paper to trace it onto wood. Here is a step-by-step process to transfer your design manually:
- Choose the size of your printed design to match your sign dimensions.
- Print the design on regular or transfer paper, depending on your method.
- Place transfer paper on the sign surface, with the design on top.
- Secure all layers with tape to prevent shifting.
- Trace the design outlines firmly using a pencil or stylus.
- Remove papers carefully to reveal the transferred image.
- Check that all important elements are clear before starting engraving or painting.
For acrylic signs, use a laser engraver or follow specific machine instructions to align the design exactly on the sheet. Confirm alignment before starting to avoid wasting material.
Preparing and Finishing Your Wood or Acrylic Sign
Preparing your wood or acrylic surface before engraving ensures a clean, smooth design and prevents damage during the process. Finishing the engraved sign with staining or protective coatings helps maintain its appearance and durability, especially in outdoor or high-use settings.
Surface Preparation for Smooth Engraving
Start by cleaning the surface of your wood or acrylic to remove any dust, grease, or debris. For wood, lightly sand with progressively finer sandpaper, beginning around 80 grit and moving up to 220 grit. This smooths out rough areas and helps the engraving tool work evenly. Acrylic should be wiped clean with a lint-free cloth and mild soap if necessary, but avoid heavy sanding to prevent scratches.
Ensure your material fits securely on the engraving bed to avoid shifting during the process. For wood, lightly tap the edges to check for any loose fibers or splinters that might interfere with engraving precision. For acrylic, check for any surface scratches and polish if needed to maintain clarity.
- Clean surface with damp cloth or mild soap.
- Sand wood starting with 80 grit, finishing with 220 grit.
- Avoid sanding acrylic; clean with a soft cloth instead.
- Secure material firmly on the engraving table.
- Remove any loose splinters or fibers from wood edges.
Always check that the surface is completely dry before beginning engraving to avoid tool slippage or uneven cuts.
Painting and Staining Techniques
Applying paint or stain can significantly improve the look of your engraved sign. Wood takes stain well, highlighting the grain and adding depth. Use a brush or cloth to apply an even coat. Allow at least 24 hours to dry before adding further layers or starting engraving. For acrylic, painting is an option but requires a primer first to help paint adhere properly.
If you want a bright or opaque look, consider applying a primer before painting your wooden sign. Primer creates a smooth base and helps paint stick better. For stained wood, avoid primer unless you plan to paint over it, as staining typically penetrates the wood directly to bring out the texture.
Applying Sealants for Durability
To protect your engraved sign, especially for outdoor use, apply a clear sealant or lacquer after engraving and finishing. This step guards against dirt, moisture, and UV damage, which can dull or warp wood over time. Use a spray or brush-on clear wood sealant designed for outdoor use if your sign will be exposed to weather.
For indoor signs, a clear lacquer or polyurethane coat adds durability without altering the final look. Apply 2 to 3 thin coats, allowing each one to dry fully (usually 2 to 4 hours) before applying the next. Avoid thick coats that can drip or cloud the finish.
- Choose clear sealants compatible with your material.
- Apply sealants in thin, even coats with a brush or spray.
- Allow each coat to dry 2 to 4 hours before next application.
- Use outdoor-grade sealants for signs exposed to rain or sun.
- Test sealant on a scrap piece to check for finish changes.
Setting Your Laser or Rotary Tool for Best Results
To achieve clean, precise engraving on wood with a laser or rotary tool, carefully adjusting power, speed, and depth is essential. For laser engraving on common woods like pine or birch, setting the laser power between 15% and 30% combined with a speed of 300 to 500 millimeters per second tends to work well. Slower speeds increase burn depth but raise the risk of scorching, while faster speeds may produce shallow, less visible marks. Testing these settings on a scrap piece lets you balance the contrast and detail without damaging your main material.
Depth control is especially important with rotary tools like the Dremel 100, which offers enough power for wood engraving. You achieve depth by varying the pressure and the amount of time the bit stays on each spot rather than through fixed settings like a laser. Start with shallow passes on scrap wood, gradually deepening with multiple passes. This prevents chipping and excessive wear on the bit. For example, use a rotary speed around 20,000 to 25,000 RPM and let the tool do the work without pushing too hard. Consistent, steady motion avoids gouges or uneven engraving.
Different woods react uniquely to these adjustments. Hardwoods such as maple require more power or slower laser speeds to engrave well, while softwoods like cedar may burn more easily and need lower power. Acrylic, often used for signs, requires lower laser power (around 10% to 20%) but higher speed (500 to 700 mm/s) to avoid melting or bubbling the surface. Unlike wood, acrylic engraving focuses on surface marking rather than depth, so keeping the laser slightly out of focus can help produce cleaner lines without cutting through.
Always run a small test on your material to refine these settings. Begin by setting the laser or rotary tool to lower power and faster speed. Watch for signs of burning or chipping and adjust accordingly. When the wood edges look blackened or you notice bubbles on the acrylic surface, lower the power and speed up the engraving speed. Make the engraving stand out more by turning up the power or slowing the speed. Avoid deep cuts that chip material by limiting passes or reducing tool pressure. This trial method saves material and prevents costly mistakes.
In practical terms, start with a laser setting of 20% power and 400 mm/s speed on pine wood. Run a small square test pattern. Dark charred lines show up? Try speeding up to 450 mm/s or lowering the power to 15%. For rotary tools on hardwoods, use high speed and maintain light pressure, doing two or three shallow passes for visible depth. For acrylic signs, choose laser power under 20% and speed above 500 mm/s, focusing carefully. Adjust each by small increments of 5% power or 50 mm/s speed based on test results.
The right combination depends on your wood type, desired depth, and tool capabilities. Your goal is clean, sharp engraving without scorch marks or surface damage. Both laser and rotary tools require patience to dial in settings, but testing on scraps and adjusting power, speed, and depth practices keeps your finished sign looking professional and lasting long.
Common Engraving Mistakes and How to Fix Them
Uneven depth in your engraving often results from moving your tool too fast or uneven pressure. To fix this, slow down your tool speed and keep a steady hand, allowing the bit to cut consistently. For rotary tools, try lowering the speed setting; for laser engravers, reduce the power output or increase the engraving speed to avoid burning the wood.
Burn marks are a common problem, especially with laser engraving on wood signs. You can prevent them by applying painter’s tape or transfer tape over the wood before engraving. This tape acts as a protective layer, reducing scorch marks and making cleanup easier after you remove the tape. Lightly sanding the area with fine-grit sandpaper (220 grit or higher) can restore the surface and fix burn marks without damaging the design.
Sometimes your design doesn’t transfer well due to improper preparation or incorrect settings. Make sure your file resolution is high enough for the detail level you want, typically at least 300 DPI for clear lines. When using hand-transfer methods like stencils, make sure the stencil sticks evenly with no bubbles or wrinkles to avoid distorted lines. Reapplying a fresh coat of clear sealant or wood finish before engraving can help the design transfer more crisply by creating a smoother surface.
- Check the tool speed and pressure to avoid depth variations
- Use painter’s tape to protect the wood and reduce burn marks
- Sand gently to remove minor scorch marks without harming the wood
- Ensure high-resolution design files (300 DPI or more) for clear details
- Press stencils firmly and evenly to prevent distorted transfer lines
- Apply a clear sealant before engraving to improve design crispness
- Test settings on scrap material before starting the actual sign
Misaligned designs often happen when the wood shifts during engraving or if the tool calibration is off. Secure your board firmly and double-check the tool’s zero point before starting. Using clamps or a non-slip mat can save you from costly misalignments. Always run a small test engraving on scrap wood that matches your project’s material to confirm your settings and design placement are correct.
Safety Tips and When to Get Professional Help
Use proper safety gear and ventilation when engraving at home to protect your eyes, lungs, and skin. Both laser and rotary engraving carry risks from fumes, dust, and moving parts. Consider hiring a professional if your project involves complex designs, hazardous materials, or large-scale work beyond beginner tools.
Essential Safety Equipment and Setup
Protect your eyes with safety goggles or a face shield, especially when working with rotary tools like a Dremel or laser engravers. Gloves can protect your hands from splinters or burns but avoid loose gloves around spinning bits. Set up your workspace in a well-lit, stable area clear of clutter to prevent accidents.
Choosing the right ventilation is important. Place your equipment near a window or use an exhaust fan to direct fumes outside. A small workshop air purifier with a HEPA filter can reduce airborne dust if outdoor ventilation is limited. Always read your tool’s manual for manufacturer safety recommendations.
- Wear eye protection such as goggles or a safety mask
- Use a dust mask or respirator when engraving wood or acrylic
- Work in a well-ventilated area or near an exhaust vent
- Keep your workspace clean and free of flammable materials
- Secure your material firmly before engraving
- Turn off and unplug tools when changing bits or cleaning
Following these steps reduces the risk of injury and improves your focus during engraving. Simple precautions help avoid long-term damage like eye strain or respiratory irritation.
Handling Toxic Fumes and Dust
Engraving materials can release hazardous fumes and fine dust particles. Laser engraving wood or acrylic produces smoke containing volatile organic compounds (VOCs), while rotary engraving creates airborne wood dust, which may irritate your lungs.
Use a NIOSH-approved respirator mask rated for particulates when rotary engraving wood or aerosols from acrylic. For laser engraving, ensure your space has at least 4 to 6 air changes per hour by opening windows or using an exhaust system. Avoid engraving pressure-treated or painted wood that could emit toxic chemicals.
Never ignore poor ventilation; inhaling fumes over time can cause chronic respiratory problems.
Regularly clean the work area and empty dust collectors or filters to maintain a safe environment. Wearing long sleeves and gloves can prevent skin contact with irritants. Prioritize natural ventilation or use a fume extractor designed for laser machines to keep air free of harmful particles.
Criteria for Calling a Professional
Hire a professional sign maker when your project demands precision beyond beginner equipment capabilities. Complex fonts, gradient shading, or large-scale designs often require commercial-grade laser engravers and software. Professionals also safely handle materials like metal or composite substrates that may emit dangerous fumes or require special disposal.
Consider professional services if you feel unsure about setting up ventilation or safety gear correctly. Errors during engraving can ruin materials, waste time, and possibly damage your home or health. Professionals usually charge $50 to $200 for custom signs depending on size and detail. This cost may outweigh the expense of buying advanced tools and supplies, especially for one-time projects.
- Designs needing high precision or multiple colour layers
- Engraving large batches or commercial orders
- Use of hazardous materials like metals or treated wood
- Lack of proper ventilation or safety equipment at home
- Unfamiliarity with engraving tools and software
- Projects seeking a polished, professional finish
Choosing professional help reduces risk and ensures a quality result when your sign project is beyond beginner scope or safety limits.
Step-by-Step Action Plan for Your Engraved Sign
Follow these clear steps to create your first engraved sign successfully. Each step focuses on a key task to keep you on track and confident in your progress.
- Before you start: Choose your material (wood or acrylic) and engraving method (laser, rotary, or hand-carve) based on your design needs and available tools.
- Day 1: Design your sign using free or paid software, making sure your text and images fit your material size and style preferences.
- Day 2: Prepare your material by sanding wood or cleaning acrylic, ensuring a smooth surface free of dust or oils for best engraving results.
- Day 3: Set your engraving tool’s speed, power, and depth according to the material type and thickness; test on a scrap piece to check clarity and depth.
- Day 4: Perform the engraving, monitoring progress carefully and pausing if you notice any burning, chipping, or tool strain.
- Day 5: Clean the engraved surface gently with a soft brush or cloth; for wood, apply a sealant or finish to protect and highlight your work.
- After 1 week: Review your sign for any needed touch-ups using fine sandpaper or additional engraving to correct small mistakes.
- After 2 weeks: Display or gift your sign, making note of what worked well to improve your next project.
Frequently Asked Questions
How Long Does It Usually Take to Engrave a Wooden Sign?
A small, simple wooden sign can take 15 to 30 minutes to engrave. Larger or more detailed designs may require up to an hour or longer depending on complexity.
What Type of Protective Finish Should I Use After Engraving a Wooden Sign?
A clear sealant like polyurethane or varnish works well to protect the engraved design. It preserves the wood and keeps the engraving from fading or wearing down over time.
Can I Reuse the Same Design Template for Multiple Engraved Signs?
Yes, you can reuse the same template for several signs. Just make sure to clean leftover template material off the wood each time to keep your engraving crisp.
Is It Better to Use Scrap Wood or Buy New Wood for Engraving Signs?
Scrap wood is fine for practice or rustic signs and saves money. New wood offers a smoother surface and fewer imperfections for a professional look.
How Do I Remove Rough Edges After Carving an Engraved Wood Sign?
Use fine sanding paper to smooth any rough edges left by your carving tool. Sanding helps achieve a clean, polished finish.
Should I Build the Sign Before or After Engraving the Wood?
It’s best to engrave each piece before building the sign. This way the engraving stays sharp and you avoid damage while assembling.
The Bottom Line
Making an engraved sign takes attention to detail and patience, but the results are rewarding when you see your design come to life on wood or acrylic. Try starting with a simple project and test your settings carefully to build confidence. Begin today by picking your material and sketching a design that fits your style and space.