How to Make an Aluminum Sign: A Complete Step-by-Step DIY Guide
Knowing how to make an aluminum sign means selecting the right metal size, cutting it safely, and applying weatherproof graphics properly. Start with an aluminum sheet sized for your space, a 12×18 inch panel suits home use while businesses may need larger like 24×36 inches. Use clean surface prep and accurate scaling to ensure your design looks sharp and lasts outdoors.
Key Takeaways
- Choose aluminum sheets with pre-drilled holes or drill 1/4-inch holes using a drill press for mounting.
- Scale sign text to 2, 3 inch tall letters for standard 12×18 inch aluminum signs to maintain visibility.
- Use 2, 3 thin paint coats with 30-minute intervals, letting each dry fully for weather-resistant graphics.
- Seal finished signs with clear protective coatings to prevent corrosion and maintain appearance.
- Mount signs with screws and anchors on wood or masonry, or use adhesive strips on smooth surfaces.
- Apply mounting hardware compatible with your installation surface for secure, long-lasting attachment.
How to Make an Aluminum Sign: Step-by-Step Process
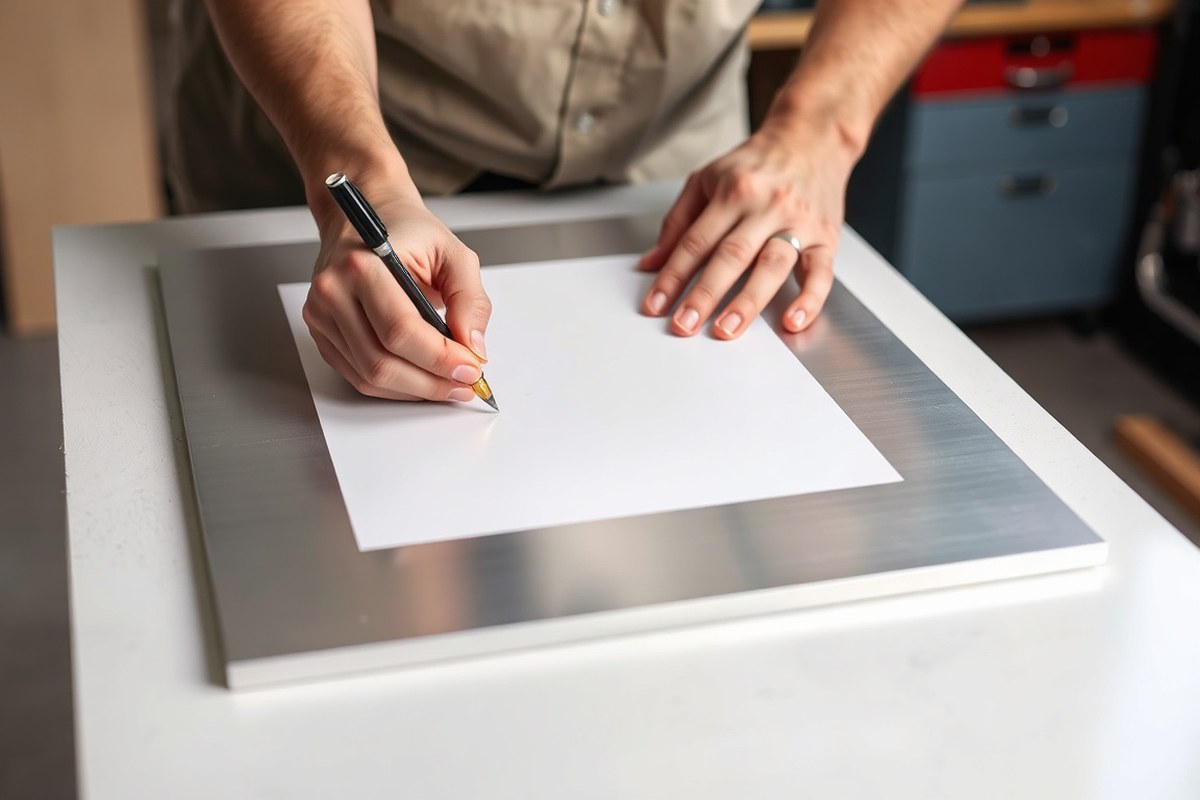
Making an aluminum sign involves precise steps to cut, paint, and seal your design into the metal surface for lasting durability and clear visibility. Begin with transferring your design accurately, then cut the aluminum to shape using tools suited for the thickness. After cutting, use a proper cleaning and painting technique, and finish with a protective sealant that allows for drying and curing to protect against weather and wear.
Design Transfer Techniques
Transferring your design onto aluminum requires accuracy to maintain the integrity of the artwork. Carbon paper works well for simple, hand-drawn designs by placing it between your printout and the metal, then tracing over the artwork to leave a faint outline. Stencils provide a reusable way to paint shapes or lettering neatly, especially if the design repeats or is complex. For precision, especially with fine lines or lettering, a vinyl cutter creates adhesive vinyl templates that stick to the aluminum, guiding paint application without smudging.
These transfer methods avoid freehand drawing errors and help align the design exactly before cutting or painting. To ensure accuracy, confirm your aluminum surface is flat and clean before transfer, and check that the stencil or vinyl adheres smoothly without bubbles.
Cutting the Aluminum Sheet
Select a cutting method based on the aluminum thickness and your tools. Thin aluminum sheets, typically under 0.040 inches, can be cut safely with metal shears by scoring and snapping pieces or snipping along curves. For thicker sheets or detailed shapes, a jigsaw with a metal-cutting blade offers controlled cuts but requires steady handling to avoid jagged edges.
For commercial-grade or complex signage shapes, plasma cutters or laser cutters provide clean, precise edges but cost more and need specialized handling. Always wear safety goggles and gloves when cutting. Clamp your metal securely to avoid slips. After cutting, smooth any sharp edges with a metal file or sandpaper for a professional finish and safe handling.
Preparing and Painting
Proper surface preparation is critical for paint adhesion and longevity. Start by cleaning the aluminum with rubbing alcohol or a degreaser to remove oils and dirt. Avoid water, which may leave residue or cause oxidation. Next, apply a metal primer designed for aluminum to prevent rust and create a better surface for paint. Allow the primer to dry according to the manufacturer’s instructions, generally 30 minutes to 1 hour.
Use exterior-grade acrylic or enamel spray paint for the base coat, applying thin, even layers to avoid drips and uneven color. Let each coat dry fully, roughly 15 to 30 minutes, before adding more. Two to three coats typically provide good coverage. Add details or lettering after the base coat dries, using small brushes or vinyl decals for sharp edges and professional look.
Sealing and Drying
Protect your painted aluminum with a clear coat sealant to guard against UV rays, moisture, and scratching. Polyurethane or acrylic clear coats designed for metal surfaces are good choices. Apply at least two thin layers, allowing 30 to 60 minutes drying time between coats. Check the product label for exact times and recommended application temperatures, usually between 50°F and 85°F.
Let your sign cure fully in a dust-free, ventilated area. Curing time varies based on conditions but expect 24 to 48 hours before handling or mounting. Avoid stacking or resting the sign on rough surfaces during drying to prevent blemishes. Regularly reapply clear coats every few years if outdoor exposure causes visible wear to prolong sign life.
- Clean the aluminum surface thoroughly with rubbing alcohol or a degreaser and let dry completely.
- Transfer your design onto the aluminum with carbon paper, stencil, or vinyl cutter for precision.
- Cut the aluminum to shape using metal shears for thin sheets, a jigsaw for medium thickness, or a plasma/laser cutter for thick or detailed designs.
- File or sand all cut edges to remove sharpness and ensure smoothness.
- Apply a metal primer coat and allow it to dry as per instructions.
- Paint your base coat in thin, even layers, drying between coats; add detailed paint or decals after the base coat dries.
- Seal the painted surface with multiple thin layers of clear coat, allowing drying time between each.
- Let the sign cure for 24 to 48 hours before drilling mounting holes or installation.
Choosing the Right Aluminum and Tools for Your Sign
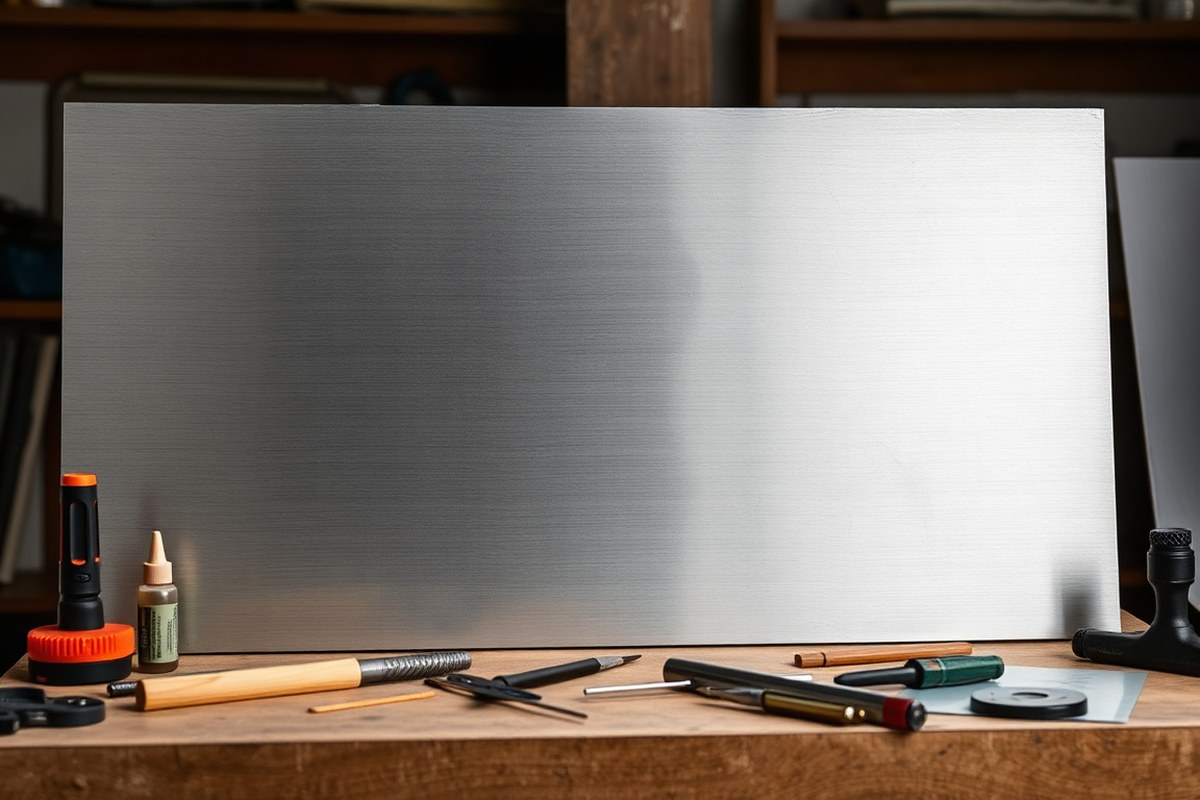
The thickness of aluminum you choose directly affects your sign’s durability and ease of handling. For most aluminum signs, gauges between 16 and 22 work best. Thicker aluminum provides more strength and resists bending, which is critical for outdoor or larger signs exposed to wind. Thinner gauges reduce weight and cost but can flex or warp, especially if your sign is large or has cut-out designs.
| Aluminum Gauge | Approximate Thickness (inches) | Durability | Weight | Recommended Use |
|---|---|---|---|---|
| 16 | 0.06 | High – Very rigid and impact resistant | Heavy | Large outdoor signs requiring maximum strength |
| 18 | 0.05 | Good – Rigid and durable | Moderate | Medium-sized outdoor or indoor signs |
| 20 | 0.04 | Moderate – Slightly flexible | Light | Small to medium signs; easier to cut and handle |
| 22 | 0.03 | Lower – Flexible and less impact resistant | Very Light | Small indoor signs or temporary displays |
Select a size that fits your design’s scale. For example, text height of 2 to 3 inches suits a 12×18 inch sign, ensuring legibility. Larger signs call for sturdier aluminum, as thin gauges can bow or deform easily. Estimate how much bending or exposure the sign will face and plan accordingly.
Essential tools depend on your cutting and drilling method. A reliable metal cutting tool helps produce clean edges. A jigsaw with a fine-toothed blade or a metal shear is suitable for DIY projects. For drilling holes, a power drill with metal drill bits sized to your mounting hardware is necessary. Sandpaper or a metal file smooths sharp edges after cutting.
Tip: Using a lubricant like cutting oil during drilling reduces heat and prevents damaging softer drill bits.
Alternatives for cutting include a rotary tool with metal cutting discs for intricate shapes or a plasma cutter if you have access to one. Drilling can also be done with hole saws for larger holes or step drill bits for a range of sizes. These tools vary in price; for example, a jigsaw starts around $50, while specialized cutting tools may cost $100 or more. Here’s a simple checklist of tools based on method:
- Basic cutting and drilling: Jigsaw with metal blade, power drill, metal drill bits, metal file, safety goggles, gloves
- Advanced or precision cutting: Rotary tool with metal discs, step drill bits, clamps to secure metal sheet
- Optional: Lubricating oil for drilling, metal shears, bench vise for stability
Good results mean clean edges without deformation, accurate holes matching your hardware, and a sign surface free of scratches or gouges. Using the right gauge aluminum with the correct tools will give your sign the balance of durability and weight needed for your project’s location and size.
Designing Your Aluminum Sign for Best Impact
Designing your aluminum sign effectively requires choosing the right software, sizing text and graphics properly for easy reading, and selecting colors that stand out on metal surfaces. Using vector files ensures sharp prints, while attention to color contrast and UV-resistant inks helps your sign remain clear and vibrant outdoors for years.
Recommended Design Software
Adobe Illustrator is a top choice for designing aluminum signs because it handles vector graphics, letting you scale images without losing quality. This is important for sharp lines and crisp lettering on metal. Canva offers a user-friendly alternative with free templates and tools suitable for beginners or those wanting quick results. It also supports exporting vector-compatible files like PDF or SVG when upgraded.
Procreate allows hand-drawn effects for a more personalized touch, especially if you use an iPad. It’s best for creating artwork that you can then vectorize in Illustrator or another vector program. For budget-friendly and precise design workflows, start with Canva for layout and Illustrator or free vector software (like Inkscape) to finalize files for cutting or printing.
Text Sizing and Positioning
Readable text is key, you want your sign’s message to be clear from a reasonable distance. For aluminum signs, the standard recommendation is to have letters at least 1 inch tall for every 10 feet of viewing distance. For example, if your sign will be seen from 30 feet away, letters should be at least 3 inches tall.
Graphics and logos should be proportionate to the text to maintain balance. Avoid clutter by leaving enough spacing around text and graphics, typically no less than 10% of the sign’s total size as margin. Central or top-center positioning works best for business names or key messages, with supporting details below or to the side.
Color Schemes for Visibility
High contrast between text and background color makes your sign easier to read. For metal signs, light text on a dark background or dark text on a light background works well. Limit your color palette to 2 or 3 complementary colors to avoid visual confusion.
Choosing UV-resistant inks or outdoor-grade paints is essential since aluminum signs are often displayed outdoors and exposed to sunlight. These inks resist fading and keep colors vibrant for several years. Matte finishes help reduce glare, improving visibility in bright sunlight.
- Start your design by defining the overall sign dimensions based on where you plan to mount it.
- Choose your design software (Adobe Illustrator, Canva, or Procreate) and create a new file matching your sign size in inches or millimeters.
- Design your layout with clear text sized at least 1 inch tall per 10 feet of expected viewing distance.
- Select a simple color scheme using 2, 3 colors with strong contrast to boost readability on the metal surface.
- Position text and graphics evenly, keeping at least 10% margin from the edges for a balanced look.
- Export your file as a vector format like SVG, PDF, or AI to retain detail for cutting or printing processes.
- Confirm colors are set to CMYK or spot colors compatible with your printing method and UV-resistant inks.
- Review your design at full size on screen or with printed proofs before sending it to production.
Safe Cutting and Drilling Techniques for Aluminum
Cutting and drilling aluminum sheets safely requires the right protective gear, steady handling, and the proper tools to avoid warping the metal or damaging it. Wearing gloves, goggles, and a dust mask protects you from sharp edges and metal dust. Use clamps to secure your workpiece flat and steady. When drilling holes, a drill press paired with a step drill bit produces clean openings without bending the sheet.
Personal Protection Equipment
Handling aluminum sheets means working with sharp edges that can cut your skin easily. Wearing thick work gloves protects your hands from accidental nicks. Safety goggles shield your eyes from metal shavings generated when cutting or drilling. Ear protection helps reduce noise when using power saws or drills. A dust mask guards against inhaling fine aluminum particles, which can irritate your respiratory tract.
Always check that your gear fits well and is rated for the tasks involved. Loose gloves or improper goggles may reduce safety. Invest $10 to $30 for a quality dust mask and ear protection set. Basic work gloves and goggles are often under $15 each at hardware stores, making safety affordable and essential.
Proper Cutting Methods
Cutting aluminum sheets without causing warping depends on maintaining steady speed and applying even pressure. Use a fine-tooth saw blade designed for metal cutting. Clamping the sheet flat to a solid work surface prevents vibrations and bending. Supporting the aluminum close to the cutting path stops it from flexing under the blade’s force.
Adjust your cutting speed to medium, too slow can overload the blade, too fast may tear the metal. Wear protective gear and keep your hands clear of the blade path throughout the cut. Avoid letting the sheet hang unsupported, which increases the chance of warping or sharp bends.
Drilling Clean Holes
Clean drilling starts with choosing the right bit and tool. Step drill bits, which widen holes progressively, help produce smooth edges without tearing the aluminum. A drill press holds the metal steady at a fixed angle and pressure, reducing the risk of slipping or distortion that handheld drills might cause.
To drill holes for mounting your aluminum sign, place the sheet flat on a sturdy surface. Clamp it securely and mark your hole positions clearly. Use a center punch to create small indentations where the bit will start to prevent wandering. Drill slowly with steady pressure and back the drill bit out occasionally to clear metal shavings.
- Place the aluminum sheet flat on a workbench and clean the marked hole positions.
- Use clamps to secure the sheet firmly, preventing movement during drilling.
- Make a small dimple at each hole mark with a center punch and hammer.
- Attach a step drill bit to your drill press, ensuring it is tight and centered.
- Align the drill bit over the punched mark and lower the drill press slowly.
- Drill at a steady speed, applying moderate pressure to avoid overheating.
- Withdraw the drill bit periodically to clear metal debris from the hole.
- After all holes are drilled, deburr the edges with a file or deburring tool to smooth sharp edges.
Painting and Adding Graphics to Aluminum Signs
Applying paint and graphics on aluminum requires careful preparation for lasting results. Start by sanding the aluminum surface lightly with fine-grit sandpaper to create a texture that helps primer and paint adhere better. Use a metal primer specifically formulated for aluminum, such as an etching primer or an acid-based primer, to ensure strong bonding. Avoid general-purpose primers, as they might peel over time. After priming, allow the primer to dry for at least 24 hours in a dust-free, well-ventilated space. This dry time prevents smearing when you apply subsequent paint layers.
For paint, spray paint designed for metal surfaces is best for large, flat areas, offering smooth and even coverage quickly. A brush works better for small signs or intricate edges and details. Use high-quality enamel or acrylic spray paint for durability in both indoor and outdoor settings. Apply two to three thin coats rather than one thick layer to avoid runs and drips. Wait 15 to 30 minutes between coats, then let the final coat cure for 24 to 48 hours before adding any graphics or finishing touches.
| Product | Purpose | Drying Time | Recommended For |
|---|---|---|---|
| Etching Primer | Metal surface adhesion | 24 hours | All aluminum surfaces |
| Metal Enamel Spray Paint | Color coating | 24-48 hours | Large smooth areas |
| Acrylic Brush-On Paint | Detail work, edges | 24-48 hours | Small signs, fine details |
When adding detailed graphics, three common methods each have pros and cons. Hand painting allows custom designs but requires steady skill and patience; it’s best for small signs or one-of-a-kind pieces. Using stencils helps replicate precise shapes and letters repeatedly and keeps edges sharp; create stencils from vinyl or plastic and secure them firmly before painting. Vinyl graphics are another durable option, applied as adhesive decals directly on the dry painted surface. Vinyl provides crisp, clean lines and can include complex images or lettering but may cost more depending on size and design complexity.
The typical process for graphics involves waiting until the paint is fully cured, usually 24 to 48 hours after the final paint layer, then applying your chosen method. If hand painting or stenciling, apply multiple thin coats for vibrant, even coverage and let each dry 15 to 20 minutes before the next. Vinyl graphics should be applied smoothly without air bubbles; use a squeegee tool and work from the center outward. Once graphics are on, seal the entire sign with a clear protective topcoat designed for metals to protect against weather, UV rays, and scratching.
Always ensure primers and paints are compatible and fully dry before layering; rushing this step can cause bubbling or peeling that ruins your sign’s finish.
Sealing and Finishing Your Aluminum Sign for Longevity
Sealing your aluminum sign protects it from weather, UV rays, and everyday wear, greatly extending its lifespan. Because aluminum naturally resists rust, a sealant primarily guards against surface damage like fading, scratches, and corrosion caused by environmental exposure. Clear acrylic or polyurethane sealants work best for this purpose. Look for products labeled as UV resistant and suitable for outdoor use, as they prevent discoloration and degradation from sunlight.
You can choose between spray and brush-on sealants depending on your sign’s size and detail. Spray sealants offer even, thin coats and are ideal for large or intricately designed signs. Brush-on sealants provide more control in small areas but can leave texture if applied too thickly. Apply two thin coats and allow each to dry for at least 30 minutes before the next. After the final coat, let the sealant cure for at least 24 to 48 hours at room temperature to ensure full hardening and durability. Avoid handling or mounting the sign during this curing period.
Additional UV protection is important for outdoor aluminum signs, especially if your graphics are colorful or detailed. A clear UV-resistant coat helps maintain the vibrancy and reduces chalking. Some sealants include UV inhibitors, so check product labels to combine weather and UV protection in one step. If your sign will face harsh sunlight or extreme weather, consider using a marine-grade polyurethane coating, which offers superior resistance to UV damage and moisture but can cost around $20 to $40 per quart.
For best results, prepare the surface before sealing by ensuring paint layers are fully dry and dust-free. Sealants work best on smooth, clean surfaces. Avoid outdoor application in high humidity or temperatures below 50°F, as this lengthens curing time and can affect adhesion. Signs properly sealed and cured should resist moisture and sunlight damage for several years, preserving both metal and graphics. Without sealing, colors may fade within months, and dirt or moisture can dull the finish, reducing overall sign quality and life.
Mounting Aluminum Signs Safely and Securely
Choosing the right mounting hardware depends on the surface where you’ll install the aluminum sign and exposure to outdoor conditions. For wood, screws with rubber washers provide secure attachment without damaging the material. Masonry surfaces require anchors and masonry screws or expansion bolts to firmly hold the sign without loosening over time. Glass needs special suction cups or adhesive mounts designed for smooth surfaces to avoid drilling and cracking. For chain-link fences or metal gates, use stainless steel zip ties or metal clamps that resist weather and provide strong support.
Drilling mounting holes in aluminum requires care to avoid bending or warping the sign. Use a drill bit sized slightly larger than the screw or bolt to prevent tight fits that stress the metal. Clamp the sign firmly to a flat surface before drilling and use low to moderate speed with consistent pressure. Adding a backing board behind the sign during drilling can help stabilize it and reduce vibration. Clean any metal shavings after drilling to avoid scratching or rust spots.
Keeping the sign level and preventing warping means checking your mounting points before installation. Use a level or laser level to mark where holes go and pre-drill pilot holes on the mounting surface. Avoid over-tightening screws, which can deform aluminum. Spread mounting points evenly across the sign to distribute weight and prevent sagging over time. Signs thicker than 1/8 inch are less prone to bending but consider extra reinforcement for large or heavy signs.
| Surface Type | Recommended Hardware | Why It Works | Environmental Suitability |
|---|---|---|---|
| Wood | Wood screws with rubber washers | Secure grip without wood splitting; washers seal against moisture | Good for both indoor and outdoor use if screws are rust-resistant |
| Masonry | Masonry anchors with screws or expansion bolts | Expands to grip inside brick or concrete; strong hold | Ideal for outdoor; resists weathering and holds under vibration |
| Glass | Suction cups or specialized adhesive mounts | Non-invasive; avoids drilling that could crack glass | Best for smooth, clean indoor or semi-outdoor locations |
| Fences (Chain-link, metal) | Stainless steel zip ties or metal clamps | Flexible and corrosion resistant; easy to adjust or replace | Outdoor suited; withstands weather and movement |
- Plan mounting hardware before drilling or finalizing your sign thickness.
- Mark level mounting points carefully with a level or laser level.
- Clamp the aluminum sign flat on a sturdy surface before drilling.
- Use a drill bit slightly larger than your screws and drill at moderate speed.
- Attach the sign with chosen hardware without overtightening to avoid bending.
- Check mounting hardware regularly and replace if you notice corrosion.
Common mounting mistakes include underpreparing the mounting surface, overdrilling, and using incorrect hardware for the environment. Signs mounted without evenly spaced supports may warp, especially outdoors where temperature changes cause expansion and contraction. Avoiding these errors ensures your aluminum sign stays secure, level, and attractive over many years.
Common Mistakes and Troubleshooting When Making Aluminum Signs
Aluminum signs sometimes warp or bend because the metal is thin or not properly supported during or after installation. Exposure to extreme heat or uneven mounting can create stress points that cause warping. To fix a warped sign, gently lay it flat on a firm surface and apply even pressure to bend it back into shape. Prevent future warping by selecting a thicker aluminum sheet (at least 0.040 inches thick) and using backing materials or supports behind the sign. Ensure mounting surfaces are flat and use multiple mounting points for even tension.
Paint smears and fading usually happen because of improper surface preparation or low-quality paint. Avoid smears by cleaning and sanding the aluminum well before painting, and allow each paint layer to dry fully, usually 20 to 30 minutes at 70°F, before applying the next. To fix smears, wait until the paint dries, then lightly sand the area and repaint using outdoor-grade, UV-resistant paint designed for metal. Fading can also be reversed by repainting, but choose high-quality sealants to protect the new finish.
Mounting hardware can damage your sign when it’s too tight, rusty, or inappropriate for the material. Over-tightening screws can create dents or cracks, while corroded screws can cause staining or weaken attachment points. To avoid this, use rust-resistant stainless steel screws designed for aluminum and apply gentle but firm pressure when installing. If existing hardware has damaged the sign, remove the screws carefully and assess if you need to patch dents with a lightweight epoxy filler or replace the sign if cracks are severe.
- Warping often results from thin material and uneven mounting, support the back and use thicker aluminum.
- Clean and sand before painting; dry paint completely between coats to avoid smears.
- Use rust-resistant fasteners and avoid overtightening to prevent mounting damage.
- Seal your signage with UV-resistant sealants to protect against fading and weathering.
- Regularly inspect mounting hardware and tighten screws carefully every 6 months.
- Refinish small paint defects, but replace signs with structural damage to maintain durability.
Always test mounting hardware on a scrap piece of aluminum to check fit and tightness before attaching your actual sign.
Deciding whether to refinish or remake a sign depends on the damage. Surface-level paint issues, minor dents, and fading can be addressed through refinishing for a cost-effective refresh. Expect refinishing to require sanding, cleaning, repainting, and sealing, which can take a day or two depending on drying times. Signs with severe bends, cracks, or mounting holes that compromise structural integrity should be remade to ensure longevity and maintain a professional appearance. Remaking a sign costs more but avoids frequent maintenance and potential replacement costs later.
Step-by-Step Action Plan for Making Your Aluminum Sign
Follow these key steps to create a durable, professional-looking aluminum sign efficiently.
- Day 1: Select the right aluminum sheet thickness (usually 0.040″ to 0.080″) based on where your sign will be displayed. Verify it feels sturdy but manageable to work with.
- Day 2: Design your sign using vector-based software for crisp graphics. Print a test on paper to ensure sizing and readability.
- Day 3: Carefully cut and drill the aluminum using recommended tools and safety gear. Check that edges are smooth and holes align with your mounting needs.
- Day 4: Apply primer and paint suitable for metal surfaces, allowing proper drying time between coats. Inspect for even coverage and no paint runs.
- Day 5: Add your graphics by applying vinyl decals or hand-painting details. Use a clear coat sealer after graphics dry to protect from weathering.
- Day 6: Attach mounting hardware securely to your sign with corrosion-resistant fasteners. Test the sign’s stability by gently shaking it once mounted.
- Day 7: Install your sign at the chosen location according to local guidelines, making sure it is safe and visible. Confirm the sign is firmly in place and weather-resistant.
Frequently Asked Questions
What Type of Aluminum Thickness Is Best for Outdoor Signs?
Choose aluminum that is 0.040 to 0.063 inches thick for durability outdoors. This thickness balances strength with ease of cutting and prevents bending in most weather conditions.
How Can I Prevent Color Fading on My Aluminum Sign?
Apply a UV-repelling laminate over the painted surface to block sun damage. This layer helps maintain vibrant colors longer despite outdoor exposure.
What’s the Safest Way to Drill Holes in Thin Aluminum Sheets?
Use a drill press instead of a handheld drill to avoid buckling the metal. A steady, controlled drill prevents warping and produces clean holes.
Can I Recycle Leftover Aluminum from Sign Making Projects?
Yes, aluminum scrap is widely recyclable and should be taken to a local recycling center. Recycling reduces waste and recycles valuable material efficiently.
How Do I Clean an Aluminum Sign Before Applying Adhesive Strips?
Clean the surface with rubbing alcohol and let it dry fully before applying adhesive strips. This prevents strips from slipping off or peeling too early.
Why Do Aluminum Signs Warp After Mounting?
Overtightening screws can bow or warp the aluminum panel; tighten only until the washer touches the metal. This prevents permanent bending due to pressure.
Wrapping Up
Making an aluminum sign involves careful planning, precise work, and the right finishing touches to ensure it lasts outdoors. Take your time on each step to avoid common mistakes like improper cutting or insufficient sealing. Start by choosing your aluminum sheet and designing your sign today, then move forward with the cutting and painting steps on your schedule.