How to Apply Reflective Mailbox Numbers: A Complete Guide for Best Visibility
How to apply reflective mailbox numbers starts with choosing the right size and material for clear visibility and proper adhesion. Clean and dry the mailbox surface, then apply numbers when the surface temperature exceeds 50°F to ensure the adhesive sticks well. Position the numbers with correct alignment and spacing to maximize legibility from the road.
Key Takeaways
- Select 3-inch reflective numbers for smaller mailboxes and 4-inch or larger for better street visibility.
- Use bold fonts with numbers 6 inches or taller to improve readability from 40+ feet away.
- Clean the mailbox surface thoroughly to remove dirt, grease, or moisture before applying numbers.
- Apply reflective numbers only when the mailbox surface is above 50°F for best adhesion.
- Place numbers between 41 and 45 inches above the ground to comply with USPS curbside mailbox height.
- Align numbers horizontally and position them 6 to 8 inches from the curb on the mailbox door for proper sightline.
How to Apply Reflective Mailbox Numbers Properly
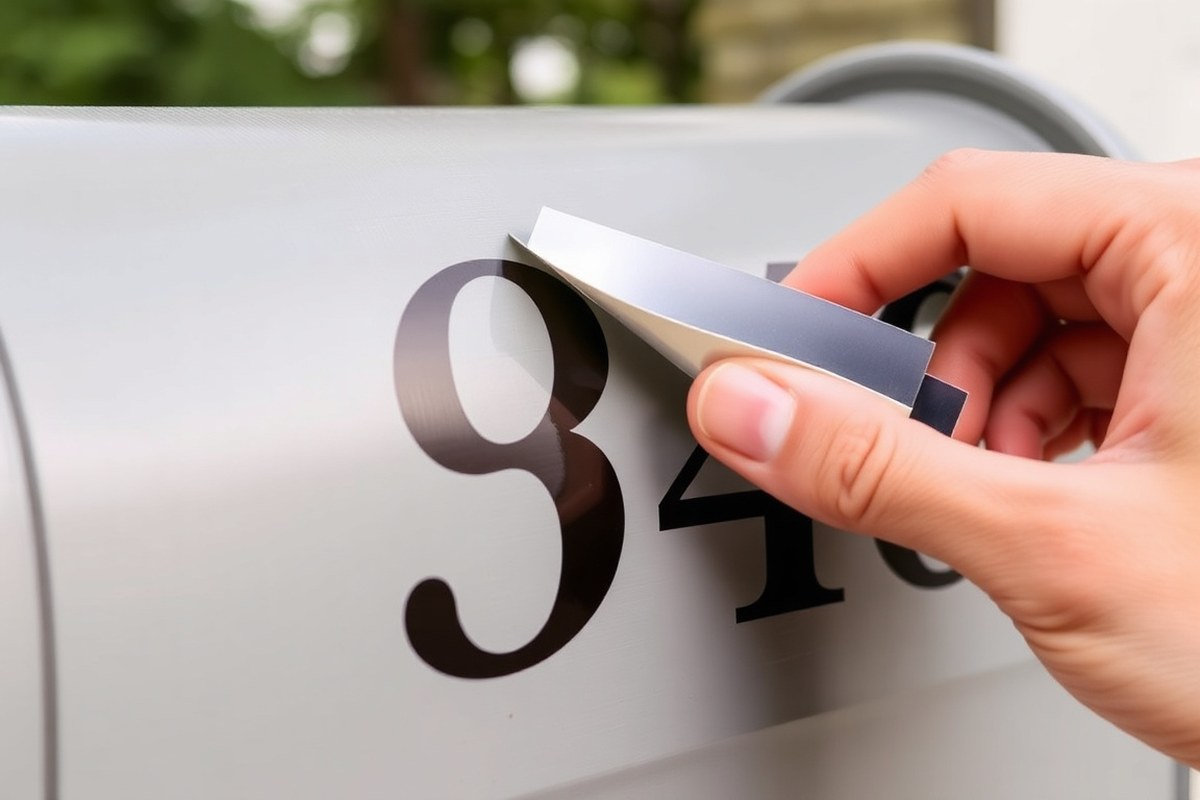
Applying reflective mailbox numbers correctly ensures they stay firmly attached and remain readable, especially at night. The right installation technique depends on surface temperature, material, and proper positioning to avoid bubbles or misalignment. Reflective numbers with adhesive backing, like those made of vinyl or acrylic, provide durable, 7+ year outdoor performance when installed on clean surfaces above 50°F (10°C).
Start by holding the numbers in place with the transfer tape, using a level or ruler to check horizontal alignment. Pressing firmly and evenly removes air pockets and ensures strong bonding. Avoid stretching or repositioning the decal after initial contact, which can cause wrinkles or loosen the adhesive. Keep the mailbox dry and at the right temperature for at least 24 hours after installation to complete the adhesive curing.
- Clean the surface thoroughly. Wipe the mailbox with rubbing alcohol or mild cleaner to remove dust, grease, and moisture. Allow it to dry completely before proceeding.
- Position the numbers using the transfer tape. Align the reflective numbers with a ruler or small level to maintain straightness and center within the designated area. Hold the tape gently without pressing down hard yet.
- Secure the numbers by firm, even pressure. Starting from the middle and moving outward, press the numbers down with a flat tool or your palm to avoid bubbles. Use slow, deliberate motions instead of quick pressing to ensure adhesion.
- Remove the transfer tape carefully. Peel the tape back at a sharp angle (close to 180 degrees) slowly to ensure the numbers stay stuck. Stop if any number lifts; smooth it back down immediately.
- Check for bubbles or gaps. Use a pin to gently pop any trapped air pockets and press down the edges. Avoid lifting edges as it weakens adhesion.
- Let the decal cure. Keep the mailbox dry and avoid touching the numbers for at least 24 hours after installation for the best bond strength.
- Adjust if needed before curing. Minor repositioning must happen immediately after placing the numbers, or else you risk damaging the adhesive backing.
Common mistakes include applying numbers below 50°F (10°C), which weakens the adhesive, rushing the pressing and peeling steps, or ignoring alignment tools. Taking time on each step secures a lasting, professional look that meets USPS standards for size and contrast. Reflective numbers should appear straight, flat, and bubble-free with good nighttime visibility after installation.
Preparing the Mailbox Surface for Best Adhesion
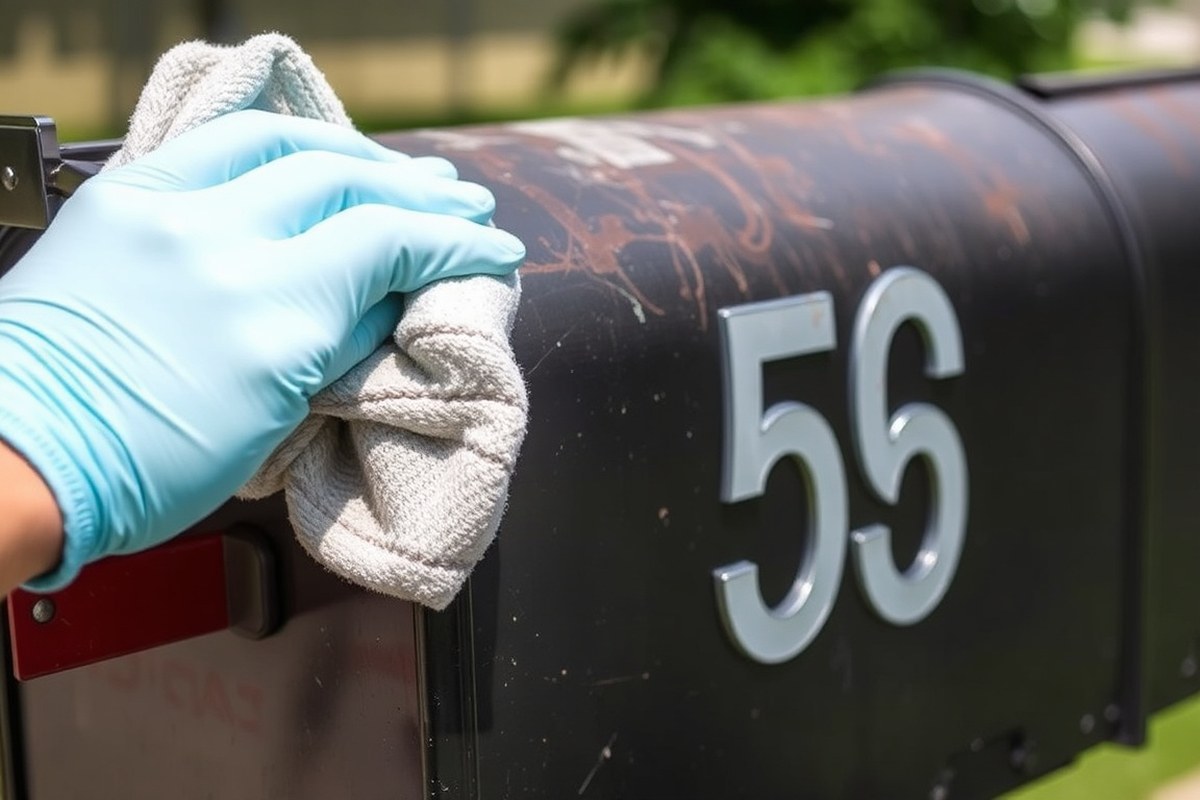
Preparing your mailbox surface properly before applying reflective numbers ensures that they adhere securely and last through weather changes. Different mailbox materials, metal, wood, or plastic, require specific cleaning and prep methods for the best results. Also, applying numbers during the right temperature range improves adhesion.
Cleaning and Drying: The Basic Steps
Start by cleaning the mailbox surface thoroughly to remove dirt, grease, and dust. Use a mild detergent mixed with warm water for initial cleaning. Avoid harsh chemicals that may damage paint or surface finishes. After washing, rinse well with clean water and dry completely with a lint-free cloth. Any moisture left on the surface can prevent adhesive numbers from sticking properly, so give it at least 15 to 30 minutes to air dry if needed.
For tougher residues like grease or grime, rubbing alcohol on a clean cloth works well to finish cleaning and to remove oils. This step is especially helpful on metal and plastic mailboxes because it provides a slightly tacky surface that improves bonding for adhesive-backed numbers.
Surface Preparation for Metal Mailboxes
Metal mailboxes often have smooth, hard surfaces, making adhesion straightforward if properly cleaned. After cleaning with detergent and alcohol, check for rust or chipped paint. Sand any rough or rusty spots lightly with fine-grit sandpaper (around 220 grit) to create an even surface. Wipe away sanding dust before applying numbers.
Metal surfaces can sometimes be cold or damp, especially in cooler weather. Aim to apply numbers when the metal surface temperature is between 50°F and 90°F for the strongest adhesion. If the metal is cold, warm it slightly with a hair dryer before application to improve the bond.
Preparing Wooden Mailboxes
Wood surfaces require extra care because they can absorb moisture and may have uneven textures. Start by cleaning the surface with a soft brush and mild soap to remove dirt. Sand the wood lightly with 180- to 220-grit sandpaper, focusing on rough areas to create a smooth application surface.
Let the wood dry fully after cleaning and sanding, which could take several hours to a day depending on the weather. Avoid applying numbers if the wood is damp or if high humidity is expected shortly, as this can weaken the bond. Applying a clear, dry sealant before numbering can improve adhesive performance and protect wood from moisture.
Plastic Mailbox Surface Tips
Plastic mailboxes are popular due to their lightweight and weather resistance but need special prep because some plastics have slick or waxy surfaces. Follow the same cleaning process with soap and warm water, then use isopropyl alcohol to remove any remaining oils or residues.
For plastics, lightly sanding the area with fine sandpaper (400 grit) or using a plastic-safe surface primer can improve adhesion for reflective numbers, especially for adhesive-backed designs. Test a small area first to avoid damaging the plastic surface.
Surface Preparation Checklist by Mailbox Material
Use this checklist to make sure your mailbox surface is ready for permanent reflective numbers:
- Clean with mild detergent and warm water; rinse thoroughly
- Dry completely with a lint-free cloth and air dry for 15, 30 minutes
- Wipe surface with rubbing alcohol to remove oils and improve adhesion
- Metal: Sand rusty or rough areas lightly and warm surface if cold
- Wood: Sand smooth and allow wood to dry fully; optional sealant
- Plastic: Lightly sand or apply plastic-safe primer for slick surfaces
- Apply numbers only when surface temperature ranges between 50°F and 90°F
Following these steps helps ensure the adhesive on your reflective numbers bonds well and lasts for years, avoiding peeling or curling edges.
Avoid installing reflective numbers on damp or cold surfaces; this can cause the adhesive to fail prematurely.
Choosing the Right Reflective Numbers Size and Material
Choosing the right size, font, and material for reflective mailbox numbers ensures they are visible to mail carriers and visitors while standing up to outdoor conditions. Size selection depends on how far away the numbers need to be read, with materials chosen for durability and reflectivity in local weather. Fonts should be bold and clear to improve legibility from the street.
Reflective Number Sizes and Visibility Rules
For optimal visibility, use the general rule of 1 inch in number height for every 10 feet of viewing distance. Most homes find 4-inch numbers suitable for typical mailbox distances, while larger homes or properties with greater curb distance benefit from 6- or 8-inch numbers. The numbers should be placed so the carrier can easily see them when approaching, typically on the mailbox side facing the road. Below is a comparison of common reflective number sizes with their recommended viewing distances and typical use cases:
| Size | Recommended Viewing Distance | Typical Application |
|---|---|---|
| 4 inches | Up to 40 feet | Standard residential mailboxes |
| 6 inches | Up to 60 feet | Homes set back further or larger mailboxes |
| 8 inches | Up to 80 feet | Larger properties or rural areas |
Opting for at least 6-inch numbers improves street-level readability, especially when paired with bold fonts. Avoid smaller numbers if your mailbox is far from the curb or obstructed.
Material Options and Outdoor Durability
Reflective mailbox numbers commonly come in materials such as aluminum, plastic with reflective sheeting, and dimensional metal finishes like brass or bronze. Aluminum with reflective sheeting, such as 3M reflective vinyl, combines high reflectivity with weather resistance, lasting several years in rain, sun, and snow. Plastic options often cost less but may degrade faster in harsh climates.
Metal numbers in finishes like aged bronze or brass provide durability and style, although they might require clear coatings to maintain reflectivity and prevent tarnishing. Choose a material that resists your area’s typical weather patterns such as UV exposure, freezing temperatures, or humidity. Ensuring the material’s finish contrasts with the mailbox color also supports visibility.
| Material | Durability | Reflectivity | Weather Resistance | Approximate Cost |
|---|---|---|---|---|
| Aluminum with Reflective Vinyl | High | High | Excellent, resists sun and rain | Moderate ($10, $20 per number) |
| Plastic with Reflective Coating | Moderate | Moderate | Fair, may fade or crack over years | Low ($5, $12 per number) |
| Metal (Brass, Bronze) with Coating | High | Moderate to High | Good with maintenance | Higher ($15, $30 per number) |
Aluminum with reflective sheeting often offers the best balance of cost, durability, and visibility for mailbox numbers. Selecting a finish that fits your home’s style adds curb appeal without sacrificing function.
Font Styles for Maximum Readability
Choose fonts that are bold and simple to maximize legibility from a distance. Sans-serif fonts with thick strokes work best because they reduce visual clutter and better reflect light. Avoid overly decorative or script fonts that can be hard to read at a glance.
Selecting a font with consistent stroke width supports reflective performance since the light is returned evenly, increasing nighttime visibility. Make sure the numbers contrast sharply with the mailbox’s color; for example, white reflective numbers on a dark mailbox or black reflective numbers on a light one are easiest to read.
Guidelines for Placement and Alignment of Numbers
Place reflective mailbox numbers on the side of the mailbox facing oncoming traffic, centered at about eye level for optimal visibility and compliance. Numbers should be at least 1 inch tall, in a contrasting color, and aligned horizontally to ensure they catch the carrier’s eye without obscuring any mailbox features. Proper alignment involves both measurement tools and visual checks to achieve a clean, professional look that meets USPS and local rules.
USPS and Local Placement Requirements
The USPS mandates that mailbox numbers for city delivery be at least 1 inch high and have a color that contrasts sharply with the mailbox’s background. The numbers must be placed on the side facing the street or where mail carriers normally approach. This placement ensures the address is easily readable from the road, aiding accurate and timely deliveries.
Local municipalities and homeowners associations often add their own rules regarding number size, color, and exact placement. Some require numbers to have reflective properties or specific mounting heights, such as 4 to 6 feet from the ground. Always check local and HOA guidelines before installation to avoid needing costly changes or fines.
Tools for Measuring and Leveling Numbers
Use simple household tools for precise alignment. A tape measure helps ensure your numbers sit at the right height and are spaced evenly. A spirit level or a small laser level guarantees the numbers are perfectly horizontal, preventing a crooked appearance.
For casual applications, a ruler and a level app on a smartphone can substitute specialized tools. Mark placement points lightly with a pencil to avoid visible marks after installation. When your mailbox material permits, making a drilling or adhesive template can make repetitive installations easier.
Visual Alignment Tips for Perfect Positioning
Visual checks complement measuring tools to fine-tune positioning. Stand back about 10 feet from your mailbox and view the numbers from the typical angle of a passing car or the mail carrier’s usual spot. Numbers should appear balanced, neither too high nor too low, without crowding the mailbox edges or other features.
Center the numbers horizontally on the mailbox panel. On curved or uneven surfaces, pick the flattest visible spot to apply the numbers. Avoid placing numbers too close to the edges to prevent damage during mail handling or from weather exposure.
- Check USPS and local codes for size, color, and placement rules.
- Choose the mailbox side facing oncoming traffic as your number placement panel.
- Measure and mark the height ensuring numbers sit around eye level, generally 4 to 6 feet above ground.
- Mark the horizontal center point on the mailbox side using a tape measure.
- Use a spirit level to draw a light horizontal guideline for aligning the numbers straight.
- Fit your numbers along the guideline, spacing them evenly and maintaining at least 1-inch height.
- Step back and check visibility and straightness from the street or driveway.
- Apply the numbers firmly following product instructions, ensuring good adhesion or mechanical attachment.
Types of Reflective Mailbox Numbers and When to Use Each
Reflective mailbox numbers come in several types, each with distinct advantages and best use cases. The most common options include vinyl decals, metal numbers, magnetic numbers, and reflective paint. Choosing the right type matters because it affects durability, ease of installation, visibility, and overall cost.
Vinyl reflective numbers are adhesive-backed and made from weather-resistant material. They stick firmly to smooth mailbox surfaces and reflect light for easy nighttime reading. Typically priced around $1 to $3 per number wholesale, they offer a balance of affordability and durability lasting 3 to 5 years if applied to clean surfaces and gently wiped with a damp microfiber cloth. Avoid harsh solvents that can break down the adhesive.
Metal reflective numbers are available in materials like aluminum or stainless steel coated with a reflective finish. They are the most durable choice, often lasting 10 years or more because they’re resistant to rust, UV damage, and physical wear. These require screws or strong adhesive for attachment, which takes more effort but ensures a secure fit on most mailbox types. Prices can run higher than vinyl, starting around $5 per number, reflecting their longevity.
Magnetic reflective numbers offer the convenience of no-permanent installation. They’re a great choice if you want to remove or reposition numbers seasonally or when moving mailboxes. However, magnetic adhesion only works on steel or metal mailboxes and may lose strength due to weather exposure. Their lifespan is usually shorter, around 1 to 2 years, and they are generally less visible compared to vinyl or metal options due to thinner reflective layers.
Reflective paint is a flexible option for customizing mailbox numbers directly on the surface. Use it where you want a handmade or integrated look. Application requires patience and steady hands. Reflective paint takes longer to dry (often 24 hours for full curing) and masks need to be used for clean edges. It provides moderate durability, lasting about 2 years under harsh weather conditions. Costs vary by brand but often run around $5 to $10 for a small can that covers multiple mailboxes.
- Vinyl: inexpensive, easy to apply, best on smooth surfaces, lasts 3, 5 years
- Metal: most durable, waterproof, requires mounting hardware, lasts 10+ years
- Magnetic: removable, limited to metal mailboxes, shorter lifespan (1, 2 years)
- Reflective paint: custom application, moderate durability, requires curing time
Always clean the mailbox surface thoroughly before applying any reflective numbers to ensure maximum adhesion and longevity.
Consider your mailbox material and how permanent you want the numbers to be when selecting the type. Metal numbers suit those looking for a long-term investment with minimal maintenance. Vinyl numbers work well for quick, cost-effective installations on standard mailboxes. Magnetic numbers fit temporary setups, and reflective paint suits creative or irregular surfaces but demands more time and care.
Troubleshooting Common Reflective Number Installation Issues
Peeling or lifting of reflective mailbox numbers often happens when the surface wasn’t fully clean or dry before installation. Dirt, moisture, or oil can prevent strong adhesion. To fix peeling, gently peel the number off, clean the surface with a mild soap and water solution, then dry it completely. Remove any leftover adhesive with an adhesive remover safe for your mailbox finish. Reapply the number slowly, pressing firmly to avoid new air bubbles.
Air bubbles trapped under reflective numbers create unsightly bumps and reduce reflectivity. To remove bubbles after application, use a plastic squeegee or a credit card to push them toward the edges. Applying steady, firm pressure works best. For stubborn bubbles, use a sharp pin to prick the bubble gently then smooth it out, releasing trapped air.
Crooked or misaligned numbers can spoil curb appeal and make your address hard to read. To reposition numbers safely, heat the adhesive side slightly with a hairdryer on low heat for about 10 seconds. This softens the glue, allowing careful peeling and repositioning without damaging the number or mailbox surface.
- Peeling: Clean, dry surface and remove residue before reapplying
- Air bubbles: Smooth out immediately with a squeegee or card
- Persistent bubbles: Prick carefully with a pin to release air
- Crooked numbers: Warm adhesive with a hairdryer, then reposition
- Residue removal: Use a cleaner safe for mailbox material
- Apply slow, firm pressure during reapplication for best adhesion
- Allow adhesive to set undisturbed for at least 24 hours
Good results mean numbers lie flat without wrinkles or bubbles, firmly stuck even after rain or extreme temperatures. Peeling might return if you rush installation or apply on a dirty mailbox. Heating the numbers to reposition works well on vinyl or thin metal numbers, but avoid excess heat which can warp or discolor reflective surfaces.
Maintaining and Cleaning Reflective Mailbox Numbers over Time
Keeping your reflective mailbox numbers bright and intact relies on regular cleaning and proper maintenance. Dirt, grime, and weather exposure can dull the reflective surface, making your numbers harder to see. Cleaning them gently with the right approach ensures the reflective coating stays effective without peeling or fading.
The best way to clean reflective numbers depends on their material. For adhesive vinyl or plastic numbers, use a soft cloth soaked in warm water mixed with mild dish soap. Wipe the surface gently to avoid scratching. Avoid harsh chemicals or abrasive scrubbing pads, which can damage the reflective layer. For metal numbers like cast aluminum, you can add a small amount of car wax applied with a soft cloth to protect the finish and keep the reflection strong. Since aluminum doesn’t rust, numbers stick well and hold up longer, but dirt buildup can still reduce visibility.
- Use warm water and mild soap for cleaning most reflective numbers
- Wipe gently with a soft, non-abrasive cloth or sponge
- Avoid harsh chemicals, solvents, or abrasive scrubbers
- Apply car wax on metal numbers to add a protective layer
- Clean numbers at least once every 3 to 6 months for optimal results
- Inspect numbers monthly for peeling, fading, or damage
- Replace numbers when reflectivity significantly fades or edges start peeling
Besides cleaning, routine inspection matters. Check your numbers monthly to catch any peeling edges, fading, or damage caused by sun exposure and temperature changes. Reflective materials degrade after several years outdoors; numbers typically last between 5 to 7 years before needing replacement. Promptly replacing worn numbers keeps addresses visible for drivers and emergency responders.
When replacing, peel off the old numbers carefully and clean the mailbox surface thoroughly before applying new ones. This prevents trapped dirt or adhesive residue from weakening the bond. Regular cleaning combined with timely replacement ensures your reflective mailbox numbers stay bright and reliable through changing weather conditions and daily wear.
Adjusting Application Methods for Different Mailbox Materials
Reflective mailbox numbers require different preparation and application methods depending on whether your mailbox is metal, wood, or plastic. Each material affects how well the numbers stick and how long they last. Proper surface prep and selecting the right adhesive ensure good adhesion and durability, especially since reflective numbers tend to be smaller and detailed elements.
Metal mailboxes typically have smooth, hard surfaces that clean easily. Start by wiping the area with rubbing alcohol to remove dirt, grease, and oxidation. Avoid oily cleaners that can leave residue. Because metal is non-porous, using an adhesive primer designed for metal can improve the bond. For metal or plastic numbers, screws or heavy-duty adhesives like epoxy or construction adhesive work best for long-term hold. Reflective vinyl stickers will adhere well if applied on a clean, dry metal surface with firm pressure.
Wood surfaces are more porous and may be uneven or textured. Sand the application area lightly with fine sandpaper until smooth, then remove dust with a tack cloth. Wood can absorb moisture and oils, so let it dry completely after cleaning. Use an adhesive designed for porous surfaces, such as a wood glue variant or a strong double-sided outdoor tape made for irregular materials. Applying a clear outdoor sealant or primer to the wood before mounting numbers can protect both the wood and adhesive from weather effects. Avoid heavily textured wood where vinyl numbers will not stick consistently.
Plastic mailboxes vary widely in texture and hardness, which affects adhesion. Smooth plastics respond well to alcohol cleaning but check the manufacturer’s recommendation to avoid damaging the plastic. For curved or irregular surfaces, flexible adhesives or self-adhesive numbers with a strong backing can conform better. Using screws with plastic numbers is also effective, but pre-drill holes carefully to avoid cracks. Avoid placing vinyl stickers on highly textured or curved areas where edges may lift over time.
- Clean all surfaces with rubbing alcohol and a lint-free cloth before applying numbers.
- Sand wood surfaces smooth and dry completely before applying numbers or adhesives.
- Use metal primers or epoxy for metal mailboxes to improve adhesive strength.
- Choose adhesives compatible with porous surfaces for wood, such as strong outdoor double-sided tapes or wood glue variants.
- For plastic, prefer flexible adhesives or mechanical fasteners like screws where appropriate.
- Firmly press down each number for at least 30 seconds to ensure full contact.
- Avoid highly textured or curved areas where vinyl numbers cannot make full contact.
Ensure the surface temperature is between 50°F and 85°F (10°C to 29°C) during application; colder or hotter conditions can weaken adhesive bonds and cause early failure.
Firm pressure and clean surfaces are key for all materials, but smooth, dry surfaces give the best results. Take extra time prepping wood to prevent moisture and irregularities from weakening the bond. Screws offer a mechanical backup for metal and plastic numbers to reduce the chance of them falling off in harsh weather. Test a small area first with your chosen adhesive to confirm compatibility and adhesion strength before applying all numbers.
Step-by-Step Action Plan for Installing Reflective Mailbox Numbers
Follow this plan to get your reflective mailbox numbers installed correctly for clear visibility and lasting adhesion.
- Before you start: Clean the mailbox surface with soap and water, then dry completely; the surface should look and feel clean with no dust or grease.
- Day 1: Measure and mark the placement for your numbers using a pencil or removable tape; confirm the alignment with a level to keep numbers straight.
- Day 1: Peel off the backing from the reflective numbers and press them firmly onto the mailbox for about 30 seconds; the numbers should feel stuck and not move when you test lightly.
- Day 1-2: Avoid touching or wetting the numbers for at least 48 hours to allow the adhesive to set properly; after this, gently test adhesion by tapping near the edges.
- After 1 week: Inspect the numbers for any lifting or peeling; if you find issues, press down again firmly or reapply a new set if needed.
- After 1 month: Clean the numbers gently with a soft cloth and mild soap to keep reflectivity clear; avoid abrasive cleaners which can damage the surface.
Frequently Asked Questions
What Temperature Is Best for Applying Reflective Mailbox Numbers?
Place reflective mailbox numbers on your mailbox only when the surface temperature surpasses 50°F (10°C). Applying them in colder conditions may weaken the adhesive, causing the numbers to peel or move later.
Can I Use Reflective Numbers on a Painted Mailbox?
Yes, you can apply reflective numbers on a painted surface as long as the paint is fully dry and smooth. Prepare the surface by cleaning it gently without scraping to avoid damaging the paint or interfering with adhesion.
How Do I Remove Reflective Mailbox Numbers Without Damaging the Mailbox?
Use a heat gun or hairdryer to soften the adhesive before gently peeling off the numbers. Avoid harsh scraping, which may scratch or dent the mailbox surface, especially on metal or painted finishes.
Are 3-inch Reflective Numbers Visible Enough at Night for Mail Carriers?
Yes, 3-inch reflective numbers are compliant with 911 standards and provide sufficient nighttime visibility for mail carriers and emergency services on typical residential mailboxes.
Can Reflective Paint Replace Adhesive Reflective Mailbox Numbers?
Reflective paint can be used with a stencil to create mailbox numbers but requires even application and curing time. Adhesive numbers are quicker to install and provide consistent reflectivity without needing multiple coats.
Should I Use Reflective Numbers on Plastic or Metal Mailboxes?
Use adhesive reflective numbers designed for the specific material; vinyl or acrylic options stick well to plastic, while engineered reflective film works best on metal for strong, long-lasting adhesion.
Wrapping Up
Applying reflective mailbox numbers properly improves visibility and safety for visitors and emergency services. Taking time to prepare the surface, align the numbers carefully, and allow the adhesive to cure ensures your numbers stay in place longer. Start by cleaning your mailbox thoroughly today, and you’ll have a clearer, more durable numbering system in no time.