How Do Solar Address Signs Work: A Complete Guide to Boost Visibility and Safety
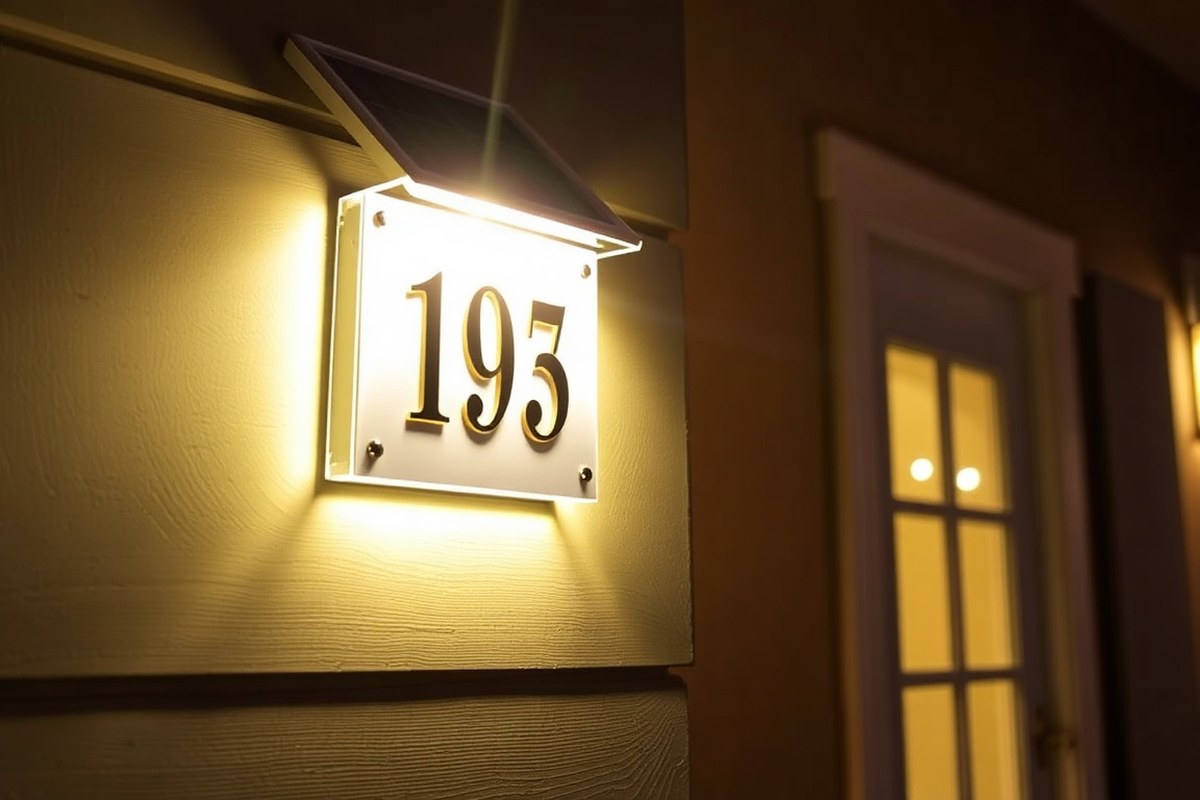
How do solar address signs work to light up your home number at night? They store solar energy collected by a small panel during the day in a rechargeable battery. That energy powers LED lights at night, illuminating your address without wiring or extra electricity costs. To get started, place the sign where it catches plenty of sunlight for the solar panel to charge fully.
Key Takeaways
- Solar address signs use solar panels to convert sunlight into electricity stored in rechargeable batteries.
- LED lights inside the sign use the stored energy to illuminate your house number after dark.
- Most solar signs operate on a simple 24-hour cycle of charging by day and lighting by night.
- Solar signs typically operate for 8 to 10 hours after absorbing a full day of sunlight.
- Proper placement in direct sunlight ensures maximum battery charging and nighttime brightness.
- Sign visibility depends on number size, with at least 4 inches tall recommended and larger for long distances.
How Do Solar Address Signs Work to Illuminate Your Home Number
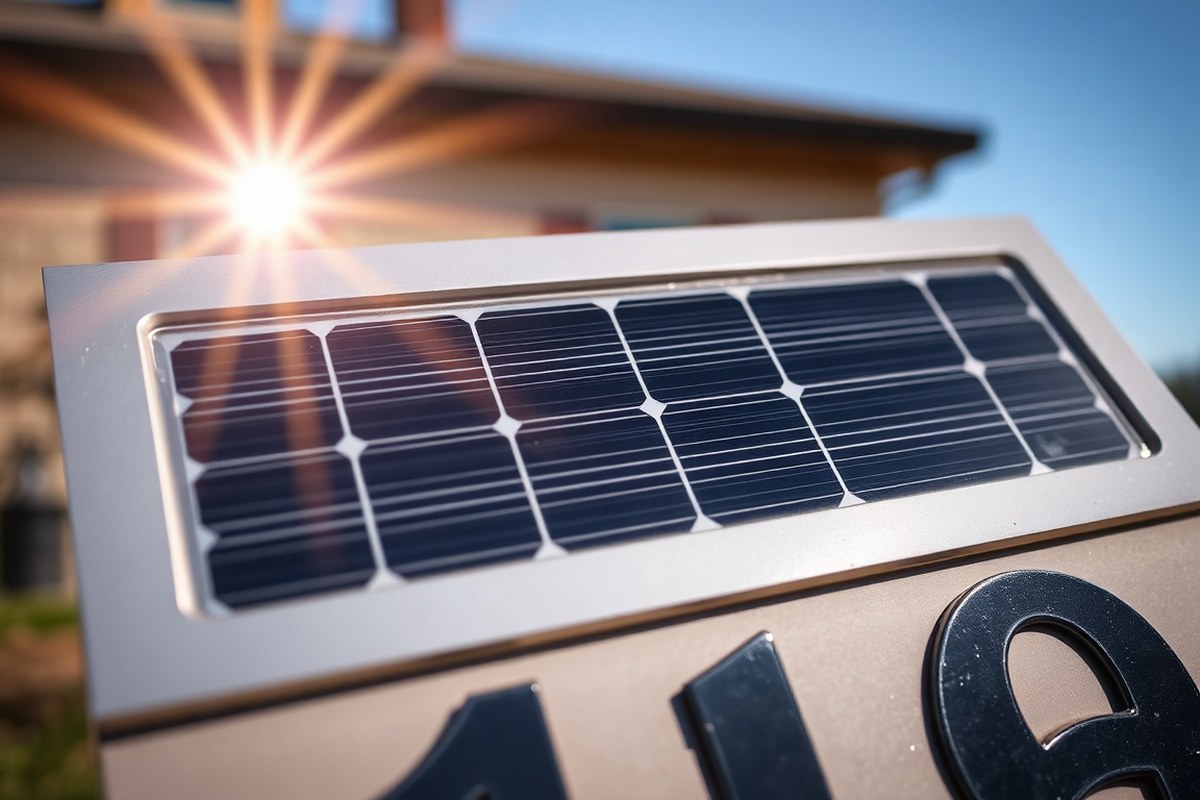
Solar address signs turn sunlight into visible light by using a built-in photovoltaic solar panel, a rechargeable battery, and LED lights. During daylight hours, the solar panel captures sunlight and converts it into electrical energy. This energy charges the battery inside the sign, storing power for when it gets dark. As night falls, the sign’s built-in photosensor senses the drop in ambient light and automatically switches the LED lights on, illuminating your house number without the need for wiring or manual operation.
The solar panel is the key component that performs the energy conversion. Made of semiconductor materials, it absorbs photons from sunlight and generates electricity through the photovoltaic effect. This electricity is then routed to the rechargeable battery housed within the sign. Typical batteries used in solar address signs are sealed nickel-metal hydride or lithium-ion types, designed to hold enough charge to power LEDs through the night, which usually lasts 8 to 12 hours depending on battery capacity and LED brightness.
LED lights arranged behind or around the house numbers turn the stored electrical energy back into light with very high efficiency. LEDs consume very little power compared to traditional bulbs, making them ideal for solar-powered products that have limited energy storage. The light output is typically bright enough to be visible from the street but uses about 0.5 to 1 watt per hour, helping the battery last all night long. For example, a solar sign like the INDARUN 45 LED provides around 500 lumens, ensuring numbers are clear even if plants or other obstructions are nearby.
The operation cycle starts with daylight charging: as the sun shines, the panel produces energy, and the battery fills up. Once the sun sets and ambient light falls below a certain threshold, this threshold is set by the photosensor or light sensor integrated with the system, the circuit completes to switch on the LEDs. This automatic on/off function prevents wasted power by turning off the lights at dawn, allowing the battery to recharge again during the day. This cycle repeats approximately every 24 hours without needing user input.
Successful performance depends on the solar panel’s size and quality, the battery’s capacity and chemistry, and the LED brightness. A small or inefficient panel may lead to incomplete charging on cloudy days, reducing illumination time. Dirt or debris obstructing the panel can similarly reduce charging efficiency. For locations with limited direct sunlight, signs with larger panels or higher-capacity batteries work better. Weather resistance also matters, as the sign must withstand temperature ranges from below freezing to hot summer heat without damage.
Key Components Inside Solar Address Signs Explained

Solar address signs rely on four key components to work efficiently: solar panels, LED lights, rechargeable batteries, and sensors. Each plays a specific role, converting sunlight into power, illuminating your house number, storing energy, and activating the light when needed.
Solar Panel Types and Materials
Most solar address signs use monocrystalline or polycrystalline panels. Monocrystalline panels offer higher efficiency, around 15% to 20%, and perform better in low light, making them ideal if your sign faces shaded areas. Polycrystalline panels cost less but typically have 13% to 16% efficiency and require direct sunlight to charge optimally. Recent advancements include thin-film solar panels, which are flexible and cheaper but less efficient.
The panels convert sunlight into electricity during the day, charging the internal battery. Good solar panels are made with durable tempered glass and have weather-resistant coatings to endure rain, snow, and heat. Proper panel quality matters because lower-quality panels produce less energy, reducing light brightness and battery life.
The size and wattage of the solar panel vary by model but generally range between 1 to 3 watts for address signs. A 2-watt monocrystalline panel will charge faster than a similar polycrystalline panel in partly cloudy conditions, allowing the light to operate longer into the night.
LED Lights and Color Temperature Options
LEDs are the preferred light source due to their energy efficiency, long lifespan, and brightness. Most solar address signs use white LEDs, with brightness levels typically between 50 and 200 lumens. Higher lumens improve visibility from the street, but brighter LEDs also consume more battery power, so balance is key.
Color temperature affects how the light appears. Warm white LED lights (2700K to 3000K) offer a softer yellowish glow, which can be easier on the eyes in residential areas. Cool white LEDs (4000K to 6000K) provide crisp, bluish-white light that improve contrast and visibility in low-light environments. Some solar signs allow you to choose or adjust color temperature based on your preference and local lighting conditions. A comparison table shows typical LED types in solar address signs:
| LED Type | Brightness (Lumens) | Color Temperature (K) | Typical Runtime (Hours) |
|---|---|---|---|
| Standard White LED | 50-100 | 3000-4000 | 6-8 |
| High-Brightness LED | 150-200 | 4000-6000 | 4-6 |
| Warm White LED | 50-100 | 2700-3000 | 6-8 |
Battery Types and Lifespan
Solar address signs typically use rechargeable lithium-ion or nickel-metal hydride (NiMH) batteries. Lithium-ion batteries have higher energy density, lasting longer per charge, and offer about 500 to 1000 full charge cycles before needing replacement. They operate efficiently between 32°F and 104°F. NiMH batteries are less expensive but have lower capacity and shorter lifespan, around 300 to 500 cycles.
Batteries store the electricity generated by the solar panel during daylight. Stored energy powers the LED lights after dark, often controlled by a light sensor that detects ambient brightness. Battery capacity influences how long the sign stays lit, with common battery sizes ranging from 600mAh to 2000mAh. A larger capacity means longer illumination but requires a larger solar panel to recharge fully.
Rechargeable batteries don’t last forever and generally need replacement every 3 to 5 years, depending on usage and environmental exposure. Signs in areas with less sunlight or extreme temperatures may experience reduced battery life. Choosing a sign with high-quality, weather-sealed battery compartments helps extend operational reliability.
Regularly check and replace the rechargeable battery every few years to maintain bright and reliable illumination throughout the night.
How Sunlight and Weather Affect Solar Address Sign Performance
Solar address signs rely on direct sunlight to charge their batteries fully, which impacts how long they can light up your house numbers each night. The amount of sunlight varies throughout the year and with weather conditions, directly affecting illumination duration. Proper placement and understanding seasonal changes help ensure your sign stays visible when you need it most.
Minimum Sunlight Requirements
Solar address signs generally need about 6 to 8 hours of direct sunlight daily to charge their batteries sufficiently. Under ideal conditions, this charging supports 8 to 10 hours of illumination after dusk. Less than 6 hours of sunlight will reduce charging capacity and shorten the time the sign stays lit at night. This is why positioning the sign facing south or southwest, with no shade during daytime, is essential for maximizing sun exposure.
Signs with adjustable brightness may extend runtime by lowering power consumption, but that only helps if the battery has enough charge. Even a cloudy midday with 3 to 4 hours of filtered sunlight can partially charge the battery, but you should not expect full performance on days with significantly less sun.
Performance in Cloudy and Winter Conditions
Cloudy, rainy, or snowy weather decreases the amount of sunlight reaching the solar panel, reducing charging rates. Despite advances in solar technology increasing sensitivity, a solar address sign will still charge more slowly under overcast skies. Expect shorter lighting durations after several gloomy days. For example, after 2 or 3 cloudy days, illumination might drop to 4 to 6 hours instead of 8 to 10.
Winter months bring additional challenges: daylight hours are shorter, and the sun’s angle is lower, providing less direct sunlight even on clear days. Snow and grime buildup on the solar panel can further block sunlight and reduce battery charging. After a full sunny day in summer, your sign might light all night, but during winter, expect lighting to fade by 9 p.m. Or earlier. Regularly clearing snow off the panel helps maintain performance.
Adapting Placement for Max Sun Exposure
To maximize charging, mount the solar address sign where it receives the most unobstructed sunlight during the day. Avoid areas shaded by trees, vehicles, buildings, or overhangs. Aim the panel toward the sun, typically facing south in the northern hemisphere, at an angle matching your latitude to capture the most sunlight year-round.
Adjusting the sign’s angle slightly steeper in winter can improve charging during the low sun angle months. Testing different locations and angles before final installation helps you find the spot that balances sun exposure and visibility. If your house faces north or a shaded street, consider panels with larger solar cells designed for low-light conditions, although these tend to cost more.
Best Placement and Mounting Tips for Optimal Visibility
Mount solar address signs between 4 and 8 feet high for the best visibility. This range matches both eye level for pedestrians and headlight height for passing vehicles. Signs placed too low risk being blocked by landscaping or snow, while those mounted above 8 feet may become difficult to see from the street, limiting their effectiveness at night.
To maximize solar charging, point the solar panel south or southwest if you live in the northern hemisphere. Afternoon sun provides the strongest and longest sunlight exposure. Some signs, like the FORUP model, offer a 270-degree rotatable panel that lets you adjust tilt and orientation to face the sun even if the sign itself must be installed on a shaded wall or less-than-ideal angle. This helps maintain battery charge and keeps the sign illuminated throughout the night.
- Mount sign between 4 and 8 feet high on a post or house facade facing the street
- Angle solar panel directly toward south or southwest to capture afternoon sun
- Avoid shaded locations under trees, eaves, or next to tall fences that block sunlight
- Keep solar panel free from dust and debris for optimal energy absorption
- Do not place sign near bright outdoor lighting that can drown out the address illumination
- Ensure the sign faces main street or driveway for maximum identification when approaching
Avoid placing signs where shadows from trees or structures fall on the solar panel during daytime. Even partial shading reduces energy collection, cutting battery power and light duration after dark. Also, avoid mounting the sign near intense artificial lights such as floodlights, which may reduce nocturnal visibility of the sign’s illumination by overpowering its glow.
Using an adjustable mounting bracket can facilitate fine-tuning the sign’s height and solar panel angle over time. This flexibility compensates for changes in surrounding foliage or new construction that might impact sunlight exposure. Monitoring your sign’s brightness during the first few weeks after installation ensures optimal settings and helps identify any adjustments needed for peak performance and visibility.
How to Choose the Right Solar Address Sign for Your Needs
Choosing the right solar address sign involves balancing size, brightness, style, battery life, budget, and warranty. The size of the sign should be large enough for clear visibility from the street, typically between 12 to 18 inches wide. Larger signs increase visibility but may cost more and require more powerful solar panels to maintain full brightness.
Brightness is measured in lumens, with most solar address signs offering between 10 and 50 lumens. Look for signs that provide consistent brightness throughout the night, generally running for at least 8 hours on a full charge. Battery life is important for maintaining illumination on cloudy days; signs with larger Lithium-ion batteries tend to hold charge longer and endure variable weather better.
Style options include metal, wood-look, or durable plastic finishes. Custom signs let you choose fonts, layouts, and finishes for a tailored look that complements your home’s architecture. Many signs come with decorative frames or stakes designed to blend with outdoor landscaping. This customization usually increases the price but contributes to your home’s curb appeal.
Budget varies widely. Basic models start around $40, custom options can cost up to $150 or more depending on materials, size, and solar panel quality. Warranty coverage often ranges from 1 to 3 years, covering defects and occasional battery replacements. Prioritize products with at least a 1-year warranty for peace of mind.
| Model | Size (inches) | Brightness (lumens) | Battery Life (hours) | Price Range ($) | Style Options | Warranty (years) |
|---|---|---|---|---|---|---|
| Basic Metal Panel | 12 x 6 | 15 | 8 | 40, 60 | Limited (1-2 fonts, black finish) | 1 |
| Custom Wood-Look | 18 x 8 | 30 | 10 | 100, 150 | Multiple fonts, finishes, layout options | 2 |
| Decorative Plastic Stake | 14 x 7 | 20 | 9 | 50, 90 | Various colors, frame styles | 1 |
| Premium Customized Panel | 18 x 10 | 40 | 12 | 120, 180 | Full custom design, metal or composite | 3 |
Compare your local lighting needs and budget with these specs. For example, a home on a quiet street may only need a smaller, affordable sign with moderate brightness. Homes on dimmer, busier roads benefit from larger, brighter signs with a longer battery life for continuous visibility. The choice of style also needs to fit the home’s design and curb appeal goals.
Check the solar panel’s placement options; even the best sign won’t work well if shaded by trees or facing the wrong direction.
Evaluate the tradeoffs: more brightness generally means a bigger solar panel and battery, influencing both cost and maintenance. Consider how often you want to replace batteries and if you prefer a ready-to-use sign versus a custom design. Selecting signs with good reviews for battery durability and weather resistance usually leads to better long-term satisfaction.
Step-by-Step Guide to Installing Solar Address Signs Yourself
Installing a solar address sign requires only basic household tools and no electrical expertise. You only need to focus on securely mounting the sign and the attached solar panel in a location with ample sunlight exposure. The whole process can be completed in under an hour by following simple preparation and mounting steps.
Preparing the Mounting Surface
Choose a flat and stable surface for mounting the solar address sign, such as a wooden post, fence, or the side of your house. The location should receive direct sunlight for several hours daily to ensure the solar panel charges properly. Clean the surface area to remove dirt, dust, or debris before installation to help the mounting hardware grip securely.
Mark the mounting points with a pencil or masking tape, aligning the sign height for optimal road visibility, generally 3 to 5 feet above ground level. Check weather exposure and adjust location choices to prevent shading by trees or structures, which can reduce illumination performance.
Securing the Sign and Solar Panel
Use common hand tools like a cordless drill with a screwdriver bit, a tape measure, and a level to install the sign. Most solar address sign kits include mounting brackets, screws, and sometimes wall anchors suitable for wood, metal, or masonry surfaces. No wiring or electrical knowledge is necessary since the solar panel powers the LED lights internally.
- Hold the sign against the mounting surface and mark the holes through the bracket or mounting plate.
- If mounting on wood or a post, pre-drill pilot holes about 2 to 3 inches deep using a drill bit slightly smaller than the screws.
- Insert anchors if mounting on drywall, brick, or stone to ensure a strong hold.
- Align the sign and secure it with the provided screws using the drill or screwdriver.
- Attach the solar panel in its bracket, positioning it where it receives the most direct sunlight throughout the day.
- Adjust the solar panel angle if adjustable, aiming to face true south in the northern hemisphere to maximize exposure.
- Tighten all hardware firmly and verify the sign and panel are secure and level.
Final Testing and Adjustment
After mounting, test the solar address sign by covering the solar panel for 10 to 15 seconds to simulate darkness, which triggers the LED lights to turn on automatically. This confirms the battery is charging and the light sensor is functioning. Make sure the sign illuminates clearly and is visible from the street at night.
Adjust the panel angle or location if the light is dim or fails to turn on consistently. Check the manufacturer’s recommended operating temperature, often between 32°F and 140°F, to avoid performance issues in extreme weather. Routine inspection every few months ensures the solar panel remains clean and free of obstructions.
Maintaining and Troubleshooting Solar Address Signs Effectively
Regular maintenance keeps your solar address sign bright and reliable. Cleaning the solar panel every 1 to 2 months removes dust, dirt, and debris that block sunlight. Use a soft cloth and mild soap with water, then dry it thoroughly. Avoid abrasive materials that could scratch the panel, reducing its efficiency.
Rechargeable batteries inside solar signs usually last 1 to 3 years, depending on usage and temperature. Signs dimming early or not lighting at all often mean the battery needs replacement. Check your product manual for the exact battery type, often AA or AAA NiMH rechargeable cells, costing around $5 to $15 each. Replace batteries in early spring after several months of reduced sunlight to ensure full power during peak months.
Address signs may stop working for reasons besides battery failure. Common issues include shading from new trees or structures, damaged wiring, and faulty sensors. Inspect the sign in daylight to ensure the panel faces direct sun and remove any new obstructions. Examine wiring connections for corrosion or breaks, especially after storms.
- Clean the solar panel every 1 to 2 months with mild soap and water.
- Replace rechargeable batteries every 1 to 3 years or when the sign dims early.
- Check for new shading and remove leaves or branches regularly.
- Inspect wiring and sensor components annually or after severe weather.
- Store signs indoors during extreme cold below 14°F (-10°C) to protect batteries.
Use the following table to diagnose common problems and their fixes:
| Problem | Cause | Fix |
|---|---|---|
| Sign does not light at night | Dead or drained battery | Replace rechargeable battery with correct type |
| Light dims early in the evening | Dirty solar panel or shading | Clean the panel and clear any new shade |
| Sign turns on and off repeatedly | Faulty photo-sensor or loose wiring | Check connections, tighten or replace sensor if needed |
| Battery fails quickly in cold weather | Low temperatures reduce battery efficiency | Store sign indoors in winter or use cold-resistant batteries |
Maintaining a schedule helps you catch problems early. Note maintenance dates in a calendar or set phone reminders. Expect to spend about 10 to 20 minutes per session cleaning and inspecting. This upkeep maximizes your sign’s lifespan and ensures your home stays visible and safe.
Common Installation Mistakes and How to Avoid Them
Poor placement is a common issue that reduces the effectiveness of solar address signs. Positioning the sign in a shaded area, such as under large trees or beside buildings, limits sunlight exposure necessary for fully charging the internal battery. Solar panels need direct sunlight for at least 6 hours daily to maintain optimal brightness. Signs placed where shadows cover the panel during prime daylight hours often suffer from insufficient charging, leading to dim or no illumination at night.
To diagnose insufficient charging, check the sign after a sunny day. When the light stays off or is very dim at night, it likely means the sign isn’t getting enough sunlight. Temporarily placing the sign in a direct sun spot for a day can verify this. Should brightness get better, you will need to move the sign to a sunnier spot. Avoid placing solar signs on north-facing sides of buildings in the northern hemisphere, as they receive minimal sun.
Mounting height also affects visibility. Signs set too low risk being hidden by grass, bushes, or snow. A height around 39 inches, often achievable with included extension poles, keeps the sign clearly visible from the street. This standard height solves the problem of signs buried in bushes, ensuring drivers and emergency responders can see your address easily. Mounting too high, above eye level, can reduce readability, so stay within the recommended height range.
Signs must face the sun to maximize charging and face the street for visibility. Align the solar panel toward the direction where it receives the most sunlight, usually south in the US. Position the front of the sign so it is easy to spot from typical driving paths. Testing the viewing angles during installation by walking or driving by helps confirm visibility.
Before installation, clear any vegetation or debris that might block light at both panel and sign levels. Over time, regularly trim plants that grow into the sign’s path. Dirt and dust on the solar panel surface lower efficiency. Clean the panel with a damp cloth every few months, requiring only a few minutes, to maintain performance.
Place the solar panel where it gets at least 6 hours of direct sunlight daily, and mount the sign about 39 inches high to keep your address clear from bushes and snow.
Cost-wise, repositioning an already purchased sign incurs minimal expenses. For new signs, choose models with adjustable poles to fit your height needs. Test placement in different spots during daylight hours before final installation. Good results show a bright, steady glow visible from the street throughout the night. Problems like flickering or darkness indicate the need to increase sun exposure or adjust mounting height.
Step-by-Step Action Plan for Installing Your Solar Address Sign
Follow this simple plan to get your solar address sign up and shining clearly as soon as possible. Each step ensures your sign works well and stays functional.
- Before you start: Choose a location with at least 6 hours of direct sunlight daily. Check your spot after sunset to confirm it’s visible from the street.
- Day 1: Assemble your solar address sign according to the instructions. Make sure all components, especially the solar panel and LED lights, are secure.
- Day 2: Mount the sign securely on a post or wall using the recommended hardware. Test stability by gently shaking it; it should not move.
- Day 3: Charge the sign by leaving it in full sun all day. At night, verify the LED lights turn on automatically and remain lit for several hours.
- Week 1: Monitor the sign’s brightness each night. If it dims early, adjust the sign’s angle or location for better sunlight exposure.
- Month 1: Clean the solar panel with a soft cloth and water to maintain efficiency. Check for any debris or damage that could block sunlight.
- After 2 months: Inspect battery performance. Replace rechargeable batteries if the sign’s light duration significantly decreases.
Frequently Asked Questions
Can Solar Address Signs Charge on Cloudy Days?
Yes, solar address signs can charge on cloudy days, but their charging efficiency decreases. They rely on ambient sunlight, so overcast weather reduces how fully the batteries charge, which may shorten illumination time at night.
Do Solar Address Signs Work During Power Outages?
Solar address signs still work during power outages because they don’t need electrical power. They operate independently using stored solar energy, providing reliable visibility even when the main grid is down.
How Long Does the Battery in a Solar Address Sign Last?
The battery in a solar address sign usually lasts 3 to 5 years. Replacing the battery ensures continued brightness and functionality without needing to replace the entire sign.
Are There Solar Address Signs with Motion Sensors?
Some solar address signs include motion sensors to increase brightness when detecting movement. This feature saves battery by dimming when no activity is detected and helps highlight your address when visitors approach.
Can Solar Address Signs Charge Too Much and Get Damaged?
No, solar address signs have built-in charge controllers to prevent overcharging. These ensure the battery safely stores energy without damage, promoting longer battery life and consistent light performance.
What Materials Are Solar Address Signs Typically Made From?
Solar address signs are often made from weather-resistant and recyclable materials. Durable materials protect the internal components from harsh outdoor conditions and support eco-friendly choices.
Final Thoughts
Your solar address sign depends on good sunlight, proper installation, and regular care to keep your home number visible at night. Start by finding the sunniest spot and setting up your sign securely today. This small step improves your home’s safety and helps emergency services locate you quickly.