House Number Sign Ideas: 11 Creative Ways to Boost Curb Appeal
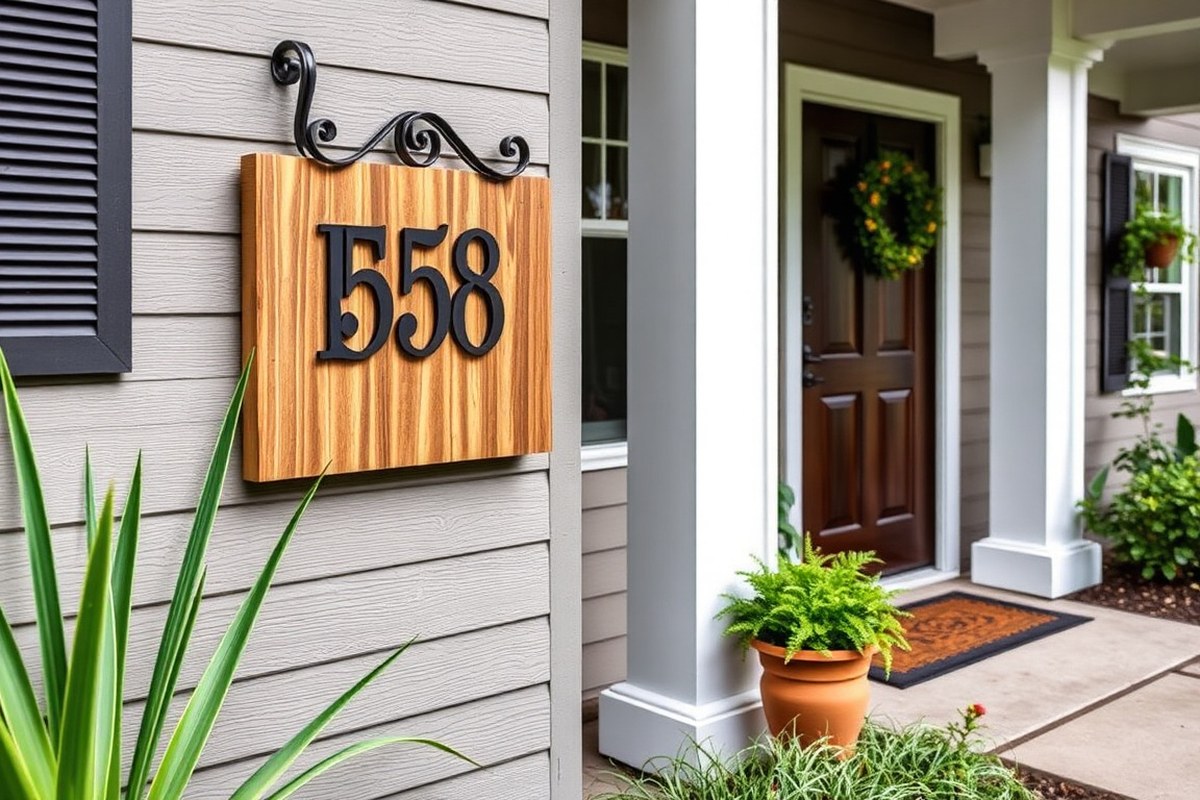
House number sign ideas can instantly improve your home’s curb appeal and make your address easy to find. Choosing unique materials like reclaimed wood or metal adds character and durability. Starting with a style that suits your home’s exterior ensures your new sign complements rather than clashes with your façade.
Key Takeaways
- Use reclaimed wood for a rustic, cost-effective house number sign under $20.
- Metal numbers offer a sleek look and usually need minimal upkeep.
- Incorporate LED lights in your sign for nighttime visibility on a budget below $30.
- Match the sign’s design style to your home’s architecture for a cohesive appearance.
- Adding a planter with house numbers near your path creates a functional, decorative feature.
- Apply sealant or stain every 1-2 years to protect wooden signs from weather damage.
1. Unique Materials for House Number Signs
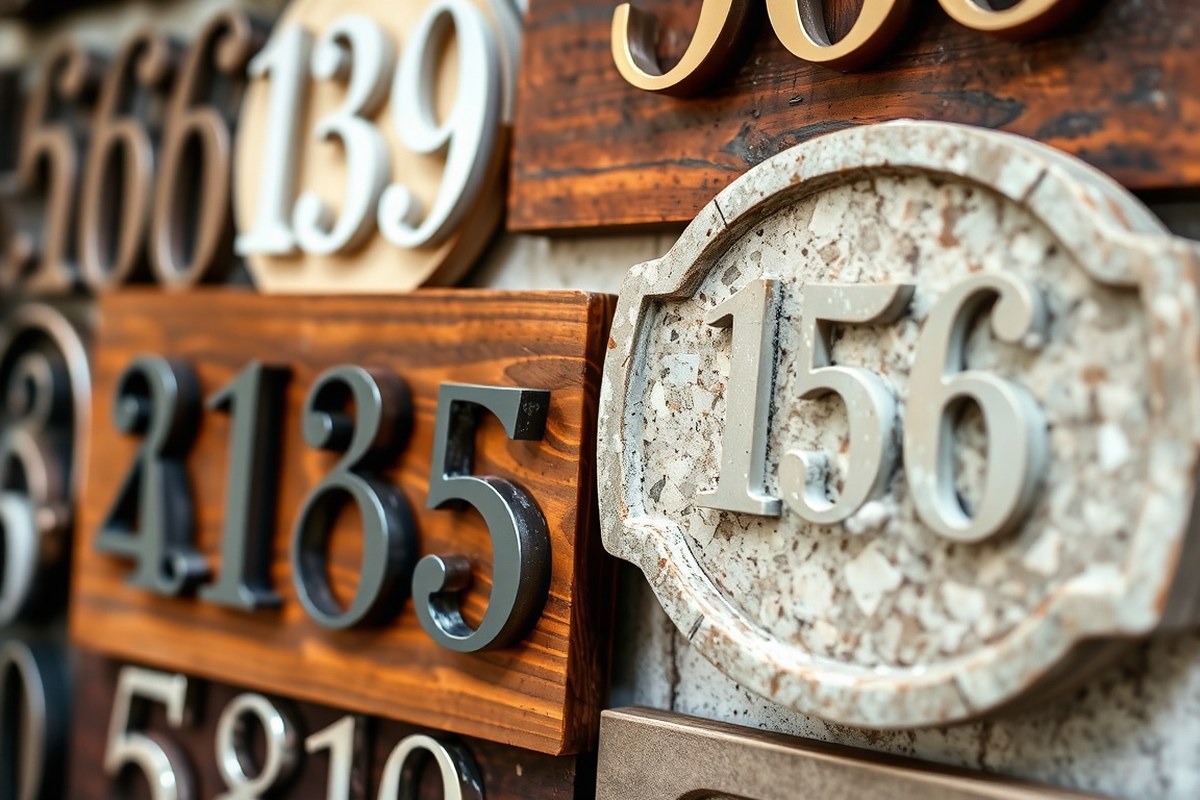
Choosing the right material for your house number sign affects its look, durability, and ease of upkeep. Common materials include wood, metal, stone, resin, and recycled composites. Each offers distinct benefits and challenges depending on your home’s exterior style and climate conditions.
| Material | Benefits | Drawbacks | Maintenance Needs |
|---|---|---|---|
| Wood | Warm, natural look; easy to customize; affordable (around $20-$50 for a sign) | Prone to weather damage and fading outdoors; can warp or crack | Requires regular sealing or painting every 1-2 years; protect from direct rain when possible |
| Metal | Durable against elements; modern or rustic finishes available; low profile | May rust if untreated (steel) or dent under impact; can get hot in sun | Inspect for rust spots annually; apply protective coating or paint if needed |
| Stone | Highly durable; natural aesthetic; resists UV and weathering | Heavy; costly (often $100+); limited design flexibility | Minimal; clean with non-abrasive cleanser; avoid harsh chemicals |
| Resin | Lightweight; weatherproof; can mimic wood or stone; affordable | Can fade over years; less sturdy than stone or metal | Wipe clean as needed; check for cracks every few years |
| Recycled Materials | Eco-friendly; unique textures; often cost-effective | Durability varies widely; some materials degrade fast outdoors | Depends on material; sealants or paint may be necessary for protection |
Wood signs suit traditional or cozy home styles but need sealing to resist moisture and sun damage. Use exterior-grade paint or polyurethane, applying a fresh coat in spring or fall. Metal signs, such as aluminum or stainless steel, last longer and withstand wind and rain but check regularly for corrosion, especially if located near saltwater or high humidity areas.
Stone signs have a premium feel and can last decades with little effort, ideal if you want something low maintenance and sturdy. Resin offers flexibility in design and color but may require replacement after 5 to 10 years due to fading or cracking. Recycled materials vary greatly, so check product details closely and apply protective coatings to extend lifespan.
Choosing a material that fits your local climate is key. For example, in areas with heavy rain or snow, avoid untreated wood or uncoated metal. In hot, sunny climates, lighter colors and UV-resistant paints help reduce fading. Maintain your sign by cleaning it gently with water and mild soap once or twice a year, avoiding abrasive tools that can damage surface finishes.
2. Design Styles for Every Home Exterior
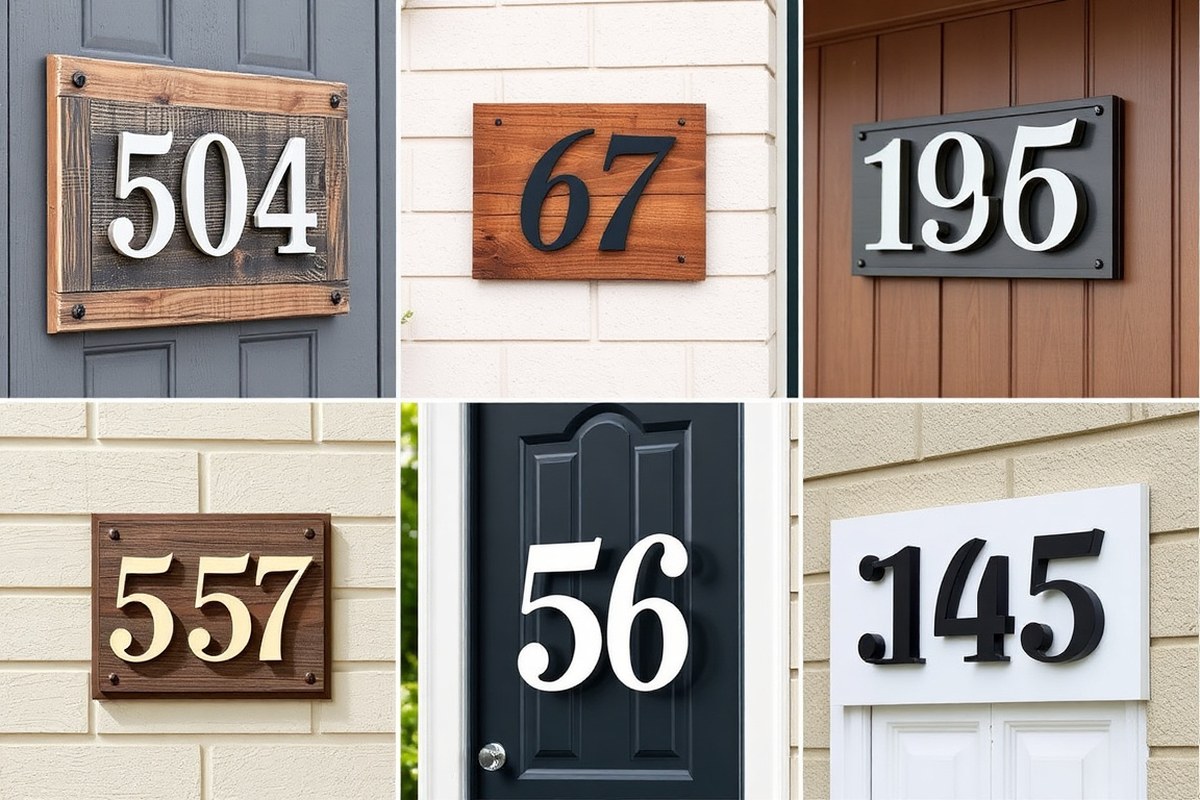
Choosing the right house number design depends on your home’s style and the surrounding landscaping. Rustic homes call for natural, textured materials and warm colors, while modern homes benefit from sleek, minimalist numbers in bold fonts. Vintage houses suit decorative, classic numbers with intricate frames. Picking the right style improve curb appeal and ensures your address stands out clearly.
Design Styles to Match Home Aesthetics
Rustic homes pair well with wood or wrought iron number signs. Look for distressed finishes or natural textures that blend with stone or wood siding. Black or dark brown numbers on a wooden plaque create a warm, inviting look.
Modern homes work best with minimalistic metal numbers in clean, straight lines. Matte black or brushed silver numbers on plain backgrounds maintain a sharp, uncluttered appearance. Placement should be simple, such as directly mounted on a wall or mailbox.
For vintage or traditional homes, ornate frames with decorative numbers in serif fonts stand out. White or cream backgrounds with black or dark-colored numbers suit charming porches or entryways. Using vintage picture frames or repurposed architectural pieces adds character.
Choosing Between Decorative and Minimalist Numbers
Decorative numbers, often in script or serif fonts with embellishments, add style but can reduce readability if too intricate. Use them when aesthetics are a priority and your house is visible from close up. Minimalist numbers emphasize functionality and visibility with sans-serif fonts and clean edges, ideal for high-traffic streets or larger setbacks.
Balance decoration and clarity by selecting mid-weight fonts and numbers at least 4 inches tall. Matte finishes reduce glare and improve legibility.
Consider how the numbers contrast with the background. High contrast, such as white numbers on dark wood or black on light-colored stone, improve visibility day and night.
Recommended Colors and Fonts for Visibility and Style
Colors that pop against your home’s exterior ensure quick address recognition. Use high-contrast combinations like black on white, white on dark gray, or navy blue on beige. For rustic settings, earth tones like deep green or reddish-brown can complement landscaping while maintaining readability.
Fonts without excessive curls or thin lines perform best. Popular choices include Helvetica, Arial, and Futura for modern looks, or Times New Roman and Garamond for vintage styles. Pick fonts that reflect your home’s character but keep numbers clear from a distance. For mixed materials, such as metal numbers on a wooden plaque, maintain color contrast and avoid translucent or reflective finishes that reduce contrast under sunlight.
Placement Tips to Improve Style and Function
Position house numbers where they’re easily seen from the street, often by the front door, on a mailbox, or low-post sign near the driveway. Grouping numbers together avoids confusion, especially in multi-unit homes or clustered neighborhoods.
Match the number size and thickness to viewing distance, numbers should be at least 4 inches tall if viewed from 40 feet away. Thickness of the numbers (usually between ¼ and ½ inch) adds dimension and shadow for better visibility.
- Use matte finishes to prevent glare and improve visibility in direct sunlight
- Keep font size at least 4 inches tall for readability from the street
- Ensure background color contrasts strongly with the numbers
- Choose weather-resistant materials matching your home’s exterior
- Consider lighting to improve visibility at night
- Use bold, sans-serif fonts for modern homes; serif or script fonts for vintage styles
- Coordinate number placement with landscaping for a cohesive look
Integrating your house number sign with landscaping elements like flower beds or stone walls can turn it into a subtle yet stylish focal point that matches the overall exterior design.
Use contrasting colors and numbers at least 4 inches tall to ensure your house number is legible from the street under different lighting conditions.
3. Step-by-Step DIY House Number Sign Projects
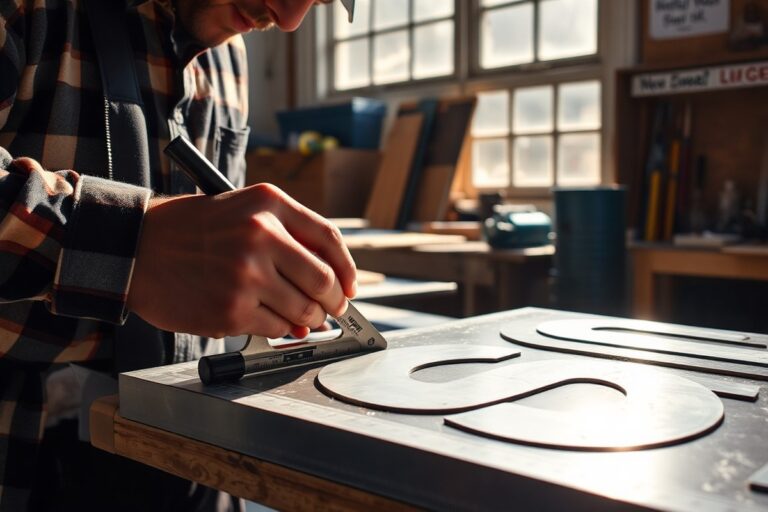
DIY house number signs let you add a personal touch to your home’s exterior using simple materials and basic tools. Crafting your own sign often takes an afternoon or less, and you can customize the style and finish for your desired look and durability. Protecting your sign with a clear sealant ensures it withstands outdoor weather.
Wooden Plaque with Painted Numbers
A wooden plaque gives a warm, natural look and can be personalized with paint colors that match your home’s style. This is an easy project suitable for beginners and costs around $20 to $30 for the materials if you buy a pre-cut wooden board. Choose cedar or pine for durability outdoors.
You will need sandpaper, exterior paint, painter’s tape, a paintbrush, and a clear outdoor sealant. Vinyl stencils or number decals help achieve crisp, professional-looking numbers on the wood surface. Finishing with a weatherproof sealant protects the paint from chipping and moisture.
- Sand the wood plaque smooth to remove rough edges and prepare the surface for paint.
- Apply primer if desired, then paint the plaque in your base color and let it dry completely.
- Place number stencils or decals in your layout and secure them with painter’s tape.
- Paint the numbers using a contrasting color. Apply two coats if necessary, allowing drying time between coats.
- Carefully remove the stencils or decals to reveal clean edges on the numbers.
- Apply two to three coats of clear outdoor sealant for protection, letting each coat dry per the product instructions.
Metal Number Sign Mounted on Stone
Mounting metal numbers on a natural stone base adds durability and elegance. This project costs $40 to $60 depending on the stone and metal numbers you select. Black powder-coated metal numbers stand out well against light colored stones like granite or limestone.
Tools and materials include stone tiles or a stone slab cut to size, metal house numbers, construction adhesive rated for outdoor use, a drill with masonry bits, and anchors or mounts if going into stone with screws. The stone base should be sealed to prevent water absorption and frost damage before affixing the numbers.
- Clean the stone surface thoroughly to remove dust and dirt.
- Apply a suitable stone sealant and let it cure for 24 hours.
- Mark placement for house numbers on the stone, checking alignment and spacing.
- Use construction adhesive to attach metal numbers, pressing firmly for several minutes.
- For added security, drill pilot holes into the stone and insert anchors, then fasten the numbers with screws if your number design allows.
- Allow adhesive to cure fully according to manufacturer guidelines before mounting the stone on your wall or post.
Planter Combo House Number Post
This dual-purpose project features a wooden post combined with a planter box to display your house numbers surrounded by plants or flowers. It’s an attractive and practical option suitable if you have space at your driveway entrance or garden. Typical costs range from $50 to $80 based on wood and plants selected.
Gather lumber for the post and planter box, metal or wooden house numbers, outdoor paint or stain, screws, a drill, outdoor adhesive, and potting soil with plants or succulents. Finishing with exterior wood stain and a clear coat keeps the wood protected from sun and rain. Opt for succulents if low maintenance is preferred.
- Cut and assemble the wooden post and planter box according to desired dimensions (common size: post 4″x4″x48″, planter 12″x12″x12″).
- Sand all surfaces to smooth edges and prepare for finishing.
- Apply outdoor wood stain or paint to all sides and allow to dry fully.
- Attach house numbers to the post using outdoor adhesive or screws depending on material.
- Fill the planter with potting soil and arrange your choice of plants or succulents.
- Seal the entire project with a water-resistant clear coat to protect the finish and wood.
4. How to Ensure Visibility Day and Night
Ensuring your house numbers are easy to see both day and night improves safety and convenience. Using proper lighting, choosing the right size, and placing numbers in clear, visible spots all contribute to better visibility. Each factor complements the others, so addressing them together offers the best results.
Effective Lighting Options for Night Visibility
Lighting your house numbers helps people find your home after dark, especially for emergency responders or delivery personnel. Solar-powered LED lights are a popular choice because they cost about $20 to $50, need no wiring, and turn on automatically at dusk. Install small, focused spotlights above or below the numbers, aiming at the sign to avoid light pollution. Alternatively, battery-operated stick-on lights are easy to attach and can run for several months before needing new batteries.
For homes with wired lighting, low-voltage landscape lights ($30 to $60 each) provide consistent illumination with adjustable angles. Position the lights to eliminate shadows over the numbers by testing different placements at night. Avoid colored lights or overly bright bulbs that cause glare or make the numbers harder to read. A soft white or daylight color temperature between 3000K and 5000K works well for contrast and clarity.
Choosing the Right Size for Distant Visibility
House numbers should be large enough to read from the street, which is usually 30 to 50 feet away. According to the United States Postal Service guidelines, numbers should be at least 4 inches tall for average street distances. When your home is set far back, make numbers 6 inches or larger to keep them visible. Larger numbers take up more space but ensure quicker recognition, which matters most in emergencies.
Width also matters; make sure the style of your font is clear and simple rather than decorative or intricate. Thick, sans-serif fonts improve legibility from a distance. The color contrast between the numbers and their background must be sharp, for example, black numbers on a white or light-colored base, or white numbers on a dark background. This contrast aids visibility even without lighting, during the day.
Ideal Placement for Maximum Visibility
Position house numbers where they face the main road or driveway directly, without obstruction. Common spots include the front porch wall near the door, mailbox posts, or mounted on a post by the driveway. Make sure landscaping like shrubs or flowers does not cover the numbers at any season. When incorporating natural elements such as rocks or planters, mount numbers on the side or top so they are fully visible from the street.
Mount the numbers at eye level, roughly 5 feet from the ground, which helps drivers and pedestrians spot them without straining. Avoid corners or shaded areas where shadows or angles can hide the numbers. For homes with multiple entrances, put numbers near the street-facing door or gate to guide visitors properly. Consulting local fire department recommendations can also help meet visibility standards for your neighborhood.
5. Creative Planter Ideas Combined with House Numbers
Integrating planters with house number signs adds charm by combining greenery with functionality. Plants bring natural texture and color to your entryway, making your address both visible and inviting. By placing your house numbers on or near a planter, you create a focal point that draws attention and reflects your home’s personality. This approach suits various styles, from modern to rustic, giving you flexibility in design.
Choosing the right plants depends on your climate and site conditions. For sunny locations, drought-tolerant succulents or ornamental grasses work well because they require less water and maintenance. In cooler climates or shaded spots, consider ferns or small flowering plants like impatiens that add vibrancy without harsh sunlight. Incorporating hardy, low-maintenance plants keeps the display attractive year-round without frequent upkeep.
DIY projects often pair a wooden or metal planter box with bold, contrasting house numbers made from metal, resin, or painted wood. You can build a simple rectangular planter measuring about 24 inches wide, 8 inches deep, and 12 inches tall. Attach your house numbers to the front or side using screws or strong adhesive suitable for outdoor use. Bright paint on the planter box helps the sign stand out, while soil and plants add a natural, welcoming touch.
- Mount house numbers on a colorful planter box placed near your front door or mailbox post.
- Attach metal numbers directly to a ceramic or wooden planter that supports trailing plants or small shrubs.
- Create a vertical planter stand with built-in house numbers visible from the street.
- Use a planter with seasonal flowers beneath large numbers mounted on a stake or frame.
- Install solar-powered lights in the planter for nighttime visibility of both plants and numbers.
Combining plants with your house number sign also helps soften harsh architectural lines and adds texture to otherwise plain areas. Costs vary depending on materials and plant choice but expect to spend $20 to $70 on a DIY planter box, plus $10 to $40 for numbers and plants. Most projects can be completed over a weekend, requiring only basic tools like a drill and paintbrush.
Choose weather-resistant materials and secure all elements firmly to withstand wind and rain, preventing damage or loss over time.
6. Installation Tips for Durable and Secure Signs
Mounting your house number sign securely ensures it can endure weather changes and remain visible for years. Different materials and surfaces require specific hardware for a safe fit. Knowing the right tools and avoiding common mistakes, like improper anchoring or unsuitable fasteners, will help your sign stay firmly in place.
Before you start, gather the right tools. For wooden signs or posts, stainless steel screws resist rust and offer strong hold. Masonry surfaces need wall anchors or masonry screws with a drill bit meant for concrete or brick. Lightweight metal or plastic signs may work well with outdoor-grade double-sided adhesive tape, but only on clean, dry surfaces and in sheltered areas. Avoid nails for heavy signs; they rarely hold up against wind or moisture. Follow these steps to install your house number sign safely and securely:
- Measure and Mark the Spot: Use a tape measure and level to mark where you want your sign. Mark holes for screws or anchors evenly spaced for balance.
- Choose Suitable Mounting Hardware: Pick stainless steel screws and anchors matched to the wall type, plastic anchors for drywall, masonry anchors for brick or stone, and wood screws for wooden surfaces.
- Drill Pilot Holes: For masonry or drywall, drill pilot holes at your marks with a bit size matching the anchors. For wood, pilot holes prevent splitting and ensure easy screw insertion.
- Insert Anchors if Needed: Push or tap wall anchors gently into the pilot holes until flush with the surface.
- Attach the Sign: Hold the sign in place and drive screws through the mounting holes into the anchors or wall. Tighten screws without overdriving them to avoid cracking the sign or stripping the anchors.
- Check Stability and Level: Use a level again to confirm the sign is straight. Shake gently to test stability.
- Seal Edges If Exposed: Apply a clear silicone sealant around screw heads and the sign edges to prevent water infiltration that could loosen mountings.
Some installation pitfalls to watch for include drilling too deep, which weakens the wall, or ignoring the sign’s weight, leading to inadequate hardware. Signs installed too low near vegetation can become obscured, and fasteners prone to rust will fail under frequent moisture. Expect to spend about $10 to $30 on hardware for an average installation, depending on wall type and sign size. A secure, weather-resistant mounting saves future maintenance costs and keeps your numbers visible.
7. Budget-Friendly House Number Sign Solutions
Keeping your house number sign budget under $30 is achievable by choosing simple materials and limiting the need for expensive tools or professional help. Opt for items like reclaimed wood, lightweight metal sheets, or sturdy plastic from packaging that can be repurposed. These materials often cost less than $10 per piece when sourced from local hardware reuse centers or leftover home improvement supplies. For instance, a small wooden plaque from a lumber yard might run about $8, while metal letters bought individually online or at craft stores usually cost between $2 and $5 each. By combining a basic plaque and low-cost numbers, you can stay within budget while still creating a durable piece.
Focusing on recycled or low-cost materials further reduces expenses and introduces a unique, personalized touch. Old pallets can be broken down and sanded for a rustic base, while leftover house paint offers free color to customize your sign. For the numbers, consider cutting them out from thin sheets of scrap metal or using inexpensive adhesive vinyl, which ranges from $5 to $10 per roll and is weather resistant. Avoiding expensive hardware, adhesive hooks, or rust-proofing sprays keeps costs low without sacrificing function.
Inexpensive pre-made house number signs are also an option worth considering. Ready-made metal or plastic signs range widely from $15 to $40 but often fall around the $25 mark for simple designs. Many online retailers and home improvement stores offer classic, weather-resistant models that can be customized with your numbers at checkout at no extra cost. Buying pre-made signs saves time and may come with mounting hardware included, which can add value if you lack tools or skills for DIY installation. However, pre-made signs typically limit customization options compared to DIY projects.
Reducing costs for DIY projects involves a few practical tips. First, plan your design carefully to use minimal materials and avoid waste. Measure twice and cut once to prevent errors that cause overspending. Use basic hand tools like sandpaper, a small saw, or a utility knife instead of power tools. Applying a clear outdoor sealant, costing around $10 per can, prolongs your sign’s life and protects paint from fading, which keeps maintenance low. Paint only the numbers or edges to save on supplies, focusing on visibility and contrast for easy reading.
Good results show up as a clean, legible sign that withstands weather changes without warping or peeling paint. Signs resting on smooth surfaces with a layer of sealant resist moisture and sun damage better. Avoid overly thin materials that bend or crack or paints not rated for outdoor use, as these lead to frequent touch-ups or replacement. Whether you pick recycled wood for a natural look or a metal sign for sleek durability, keeping control of material quality and installation ensures you get both style and resilience for under $30.
8. Maintaining and Protecting Your House Number Sign
Sealing or repainting wooden house number signs every 1 to 3 years keeps them looking fresh and protects against moisture and sun damage. Choose a high-quality outdoor wood sealer or exterior paint with UV protection. Clean the sign with a mild soap solution and a soft brush before applying any coatings. Sand lightly to remove peeling paint or rough spots, then apply two thin coats of your chosen product, allowing at least 4 hours drying time between coats. This routine prevents cracking, warping, and fading.
Metal numbers need gentle cleaning to avoid scratches and corrosion. Wipe them down every 6 months with a soft cloth dampened with water and mild dish soap. Avoid harsh chemicals or abrasive pads that remove protective finishes. After cleaning, dry the numbers thoroughly. For iron or steel signs, apply a rust-inhibiting spray once per year, especially in humid or coastal areas where corrosion risk is higher.
Fading and weather damage result from prolonged exposure to sunlight, wind, rain, and freezing temperatures. To slow this, position signs where they get partial shade, such as under eaves or overhangs. Use weather-resistant materials and finishes designed to repel moisture and resist UV rays. During winter or stormy seasons, inspect signs monthly and remove debris like leaves or snow that can trap moisture and encourage decay.
- Check wood signs for peeling paint or sealant cracks annually
- Clean metal numbers twice a year with mild soap and water
- Reapply protective coatings to wood every 1-3 years depending on exposure
- Apply rust-protective spray to metal numbers yearly
- Trim nearby bushes or tree branches to minimize sign abrasion
- Remove snow or debris from signs promptly during winter
- Perform a detailed inspection each spring and fall
Use outdoor-grade polyurethane or marine varnish for wood signs exposed to heavy rain to extend durability.
Adding a clear coat on top of painted wood adds an extra shield against fading. For mixed-material signs combining wood and metal, maintain each component according to its needs to avoid uneven wear. Taking these steps costs under $50 for materials and about an hour per season, yet keeps your sign attractive and readable longer. Signs left unattended can lose paint, rust, warp, or become difficult to read, which defeats their purpose of identifying your home clearly to visitors and emergency responders.
9. Adding Personal Touches: Family Initials and Decorative Elements
Adding family initials to your house number sign can give it a personal feel without cluttering the design, as long as you follow some clear guidelines. Keep the initials small and positioned away from the main numbers, such as in a corner or along the bottom edge. Using a simple, clean font for the initials helps maintain readability. For example, a sign with bold, raised numbers can have slender, understated initials etched or painted in a contrasting but muted color like dark gray or bronze. This creates a visual hierarchy where the address stands out first, but the initials add character without overpowering. Using stencils or decals for initials offers precision and uniformity, making the customization look professionally done.
Decorative elements that complement house number signs often include subtle motifs such as leaves, geometric shapes, or small floral designs. These work well because they frame the numbers rather than distract from them. Choose motifs that reflect your home’s style, a modern house might suit angular lines or circles, while a cottage might pair well with delicate vines or blossoms. Applying these accents in the same color palette or in metallic finishes like brushed nickel or copper adds depth and interest without reducing readability. Keep decorative elements limited to one or two key spots on the sign to avoid visual overload.
Balancing decoration and readability is essential. Raised house numbers provide a clean contrast that improves visibility, especially when paired against a simple background. When adding personal touches, make sure the numbers remain the largest feature on the sign and that any colors used for initials or decorations contrast differently from the numbers’ color. For example, if your numbers are matte black, using a slightly lighter gray or white for decorative accents keeps everything distinct. Avoid overly bright or neon colors, which can strain the eyes and make your address harder to read from a distance.
One effective method is to spell out part of your address or family name in a smaller size and place it below or beside the main numbers. You might use stencil letters or vinyl decals for these words to ensure neatness. The cost for materials like vinyl decals, stencils, and weather-resistant paint usually ranges from $10 to $40, depending on size and quality. This approach allows you to keep your signage clear and attractive with a very manageable investment.
Good results come from testing layouts before installing. Arrange your numbers, initials, and accents on a piece of cardboard or digitally to check spacing and visibility. Avoid placing decorative elements too close to the numbers, as they can blend together visually from a distance. Signs with balanced spacing and complementary accents typically look polished and inviting. Overcrowded or too brightly coloured designs often reduce curb appeal and defeat the purpose of easy address identification.
10. Weatherproofing Techniques for Long-Lasting Signs
Protecting your house number sign from the elements means choosing the right materials and applying effective sealants or finishes. For wood signs, a high-quality exterior polyurethane or spar varnish offers strong protection against sun, rain, and snow. These finishes form a clear, flexible layer that resists UV damage and moisture penetration. Expect to apply two to three coats, sanding lightly between each. Cost for a quart of exterior polyurethane ranges from $15 to $25, and one quart covers about 100 square feet, which is enough for several signs. Without proper sealing, wood can warp, crack, or fade within a year or two, especially in harsh climates.
Metal signs require a different approach. Powder coating is among the best weatherproof options; it’s a dry finishing process that bonds a durable layer of polymer to the metal surface. Powder-coated signs resist rust, chipping, and fading for years without extra maintenance, but professional application typically costs $100 or more per sign. Alternatively, clear polyurethane or acrylic spray can protect metal signs but usually needs reapplication every 1, 2 years in exposed areas.
LED and solar-powered house number signs generally come with weather-resistant casings designed to withstand rain and moderate snow. Their plastic or metal housings often have an Ingress Protection (IP) rating, commonly IP65 or higher, which means they are dust-tight and resist water jets. Even so, placing these signs under eaves or in partly sheltered locations can increase longevity. Extreme cold below -20°F or constant freeze-thaw cycles may still degrade batteries or LED circuits over time. Replacement batteries usually cost $10 to $30 depending on the model.
Addressing extreme climates requires extra care. In hot, sunny regions, UV-resistant sealants and powder coating prevent fading and cracking. You may also add thin, clear UV film over signs for extra protection. In cold and snowy areas, avoid sealants that become brittle when frozen; flexible, marine-grade spar varnish is better suited. If heavy snowfall occurs, position signs to minimize direct snow accumulation or install angled covers. Frequent inspections every 6 months help identify wear early, especially after winter.
Weatherproofing starts with thorough surface preparation. Clean and sand your sign to remove dirt and rough spots; moisture or dirt trapped beneath the finish shortens its life. Apply sealants in thin, even coats in dry weather, with temperatures between 50°F and 85°F for best curing. Allow each coat to dry for about 4 to 6 hours before applying the next. For powder coating, professional blend and curing ovens provide consistent results difficult to match with DIY methods.
Proper weatherproofing can extend the lifespan of a house number sign to 5 to 10 years or more, depending on the material and climate. Signs that become dull, cracked, or show peeling finishes indicate the need for resealing. Avoid clear finishes that yellow quickly or peel off in sheets; these flaws expose the sign to moisture and speed deterioration.
11. Common Mistakes and How to Fix Them
One of the most common mistakes with house number signs is choosing numbers that are too small or colors that blend into the background. This makes them hard to see from the street, especially at night or in bad weather. To fix this, pick numbers that are at least 4 inches tall and use high-contrast colors like white on dark backgrounds or black on light backgrounds. You can boost visibility by adding reflective paint or installing a small solar-powered light nearby.
Fading and weather damage often occur when signs are exposed to sun and rain without proper protection. Signs made from untreated wood or low-quality paint can lose their color within a year. Fix fading by repainting with outdoor-grade paint and sealing the sign with a clear, UV-protective varnish. This usually costs $20 to $50 and takes a few hours to apply. Ideally, reseal every 1 to 2 years to maintain durability.
Improper mounting causes signs to fall or tilt, which not only looks bad but risks damage. This often happens when screws are too short, anchors are missing, or the mounting surface is uneven. Secure your sign by drilling pilot holes and using weather-resistant screws and wall anchors made for the specific surface, such as masonry or vinyl siding. Use a level to ensure the sign sits straight. For wood surfaces, use 2-inch stainless steel screws with plastic anchors for the best hold.
- Using numbers smaller than 4 inches compromises readability
- Low-contrast colors reduce visibility from the street
- Failing to seal or protect the sign causes fading and cracking
- Skipping wall anchors leads to loose or fallen signs
- Mounting on an uneven surface causes tilting or damage
Correcting these issues significantly improves how your house number sign performs and lasts. Always clean the mounting surface before installation to help the screws and anchors grip better. If repainting, remove loose flakes with sandpaper and apply paint in thin, even coats. This approach saves money and effort over replacing the entire sign. You might spend $10 to $30 on paint and anchors, but it prevents bigger costs down the line.
Use a portable level during installation to avoid crooked signs that lower curb appeal and increase the chance of damage.
Step-by-Step Action Plan for Your House Number Sign
Use this plan to choose, craft, and install a house number sign that you’ll be proud of and that will stand the test of time.
- Day 1: Evaluate your home’s exterior style and lighting conditions to decide on the design and visibility features that fit best. Check how readable current numbers are from the street.
- Day 2: Choose materials that suit your climate and maintenance preference. Test durability if you can by touching or visualizing how they age in weather.
- Week 1: Sketch your personalized design, including any family initials or decorative touches. Confirm the design is legible and balanced on paper before starting the build.
- Week 2: Gather your tools and materials, then begin building your sign according to your DIY plan. Ensure each step matches your design and construction guide.
- Week 3: Apply weatherproofing treatments and protective coatings. After drying, check for even coverage and no sticky or rough spots.
- Week 4: Plan and prepare the installation site by cleaning and leveling the mounting area. Use a level tool to confirm readiness before attaching your sign.
- Week 4 (end): Securely install your house number sign using recommended fasteners and methods. Test stability by gently pulling or tapping on the sign.
- After 1 month: Evaluate visibility during day and night, making adjustments to lighting or location if needed.
Frequently Asked Questions
What Are the Most Durable Materials for Outdoor House Number Signs?
Metal, stone, and high-grade plastics usually offer the best durability outdoors due to their resistance to weather and wear. Wood can last if properly sealed and maintained but generally needs extra care to withstand rain and sun exposure.
How Can I Make My House Number Sign Stand Out at Night?
Using LED lighting or reflective paint improves visibility after dark. Adding backlit numbers or solar-powered lights can improve safety and help visitors locate your home easily.
Are There Any Simple DIY House Number Signs for Beginners?
Yes, starting with painted wood or metal numbers on a ready-made board is simple and effective. Using stencils and spray paint can give a neat finish without special tools or experience.
Can I Combine House Numbers with Other Exterior Decorations?
Integrating numbers with planters, wall art, or mailbox designs creates a personalized appearance. This approach saves space and adds charm, tying your house number into your overall curb appeal.
How Do I Securely Install a House Number Sign to Withstand Strong Winds?
Use anchors, screws, or studs designed for your mounting surface to ensure a solid hold. Positioning the sign away from direct wind exposure boosts stability too.
Which Style of House Number Sign Works Best for Traditional Homes?
Classic materials like wood or wrought iron and serif fonts complement traditional architecture well. Choosing styles that echo your home’s era maintains a cohesive, timeless look.
Final Thoughts
Choosing the right house number sign helps your home stand out while staying functional and durable. Start by selecting a material and style that fits your home’s character and weather. Once you have your sign, install it with care and add lighting to maintain visibility. Taking these focused steps will improve curb appeal and simplify finding your home.