Gender Reveal Sign Ideas: 12 Creative & Easy Ways to Make It Memorable
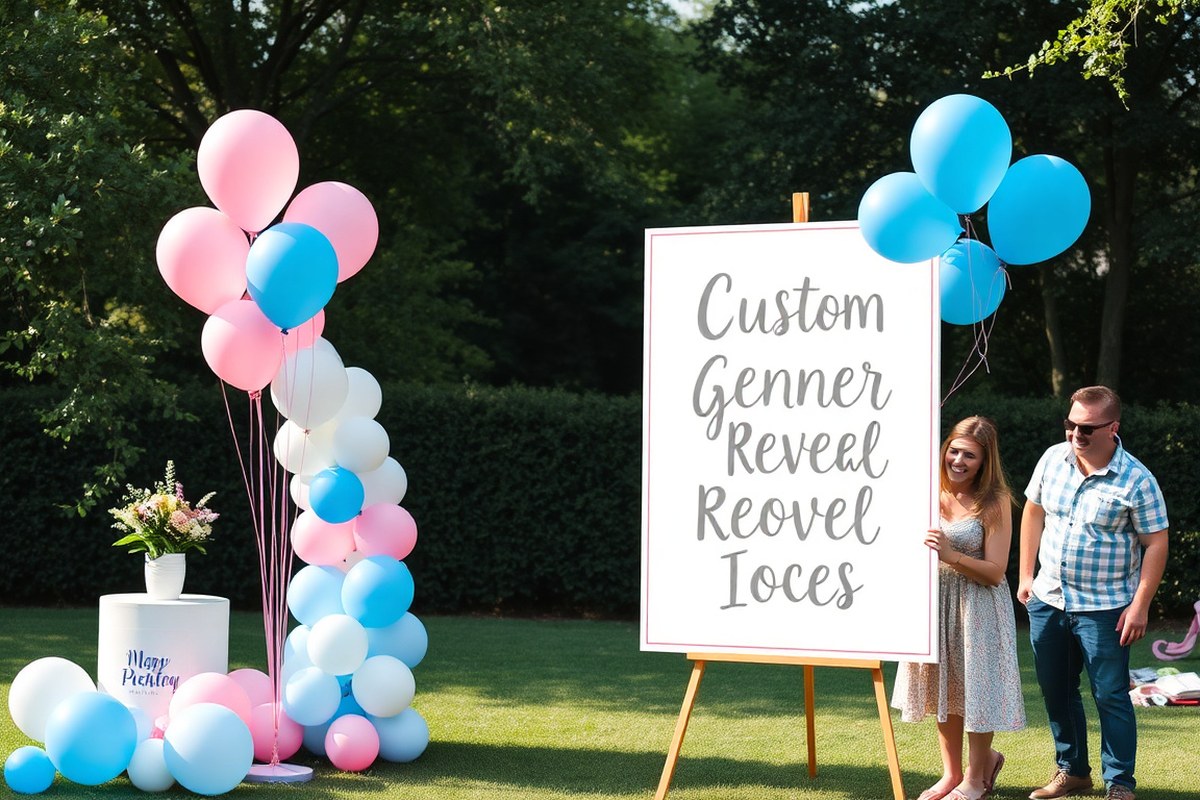
Finding the perfect gender reveal sign ideas can make your celebration stand out and create lasting memories. Simple, creative signs add a personal touch and keep your guests engaged. Starting with clear, bold lettering on a backdrop helps convey your message clearly and looks great in photos.
Key Takeaways
- Use bright colors and large fonts for easy visibility in your gender reveal signs.
- Incorporate your party’s theme to create cohesive and memorable signage.
- DIY signs with simple materials like cardboard and paint save money and add personalization.
- Consider outdoor-friendly signs made of weather-resistant materials for backyard parties.
- Include siblings’ or pets’ names on signs to make family involvement special.
- Choose eco-friendly sign options such as reusable chalkboards or biodegradable materials.
12 Creative Gender Reveal Sign Ideas for Any Party
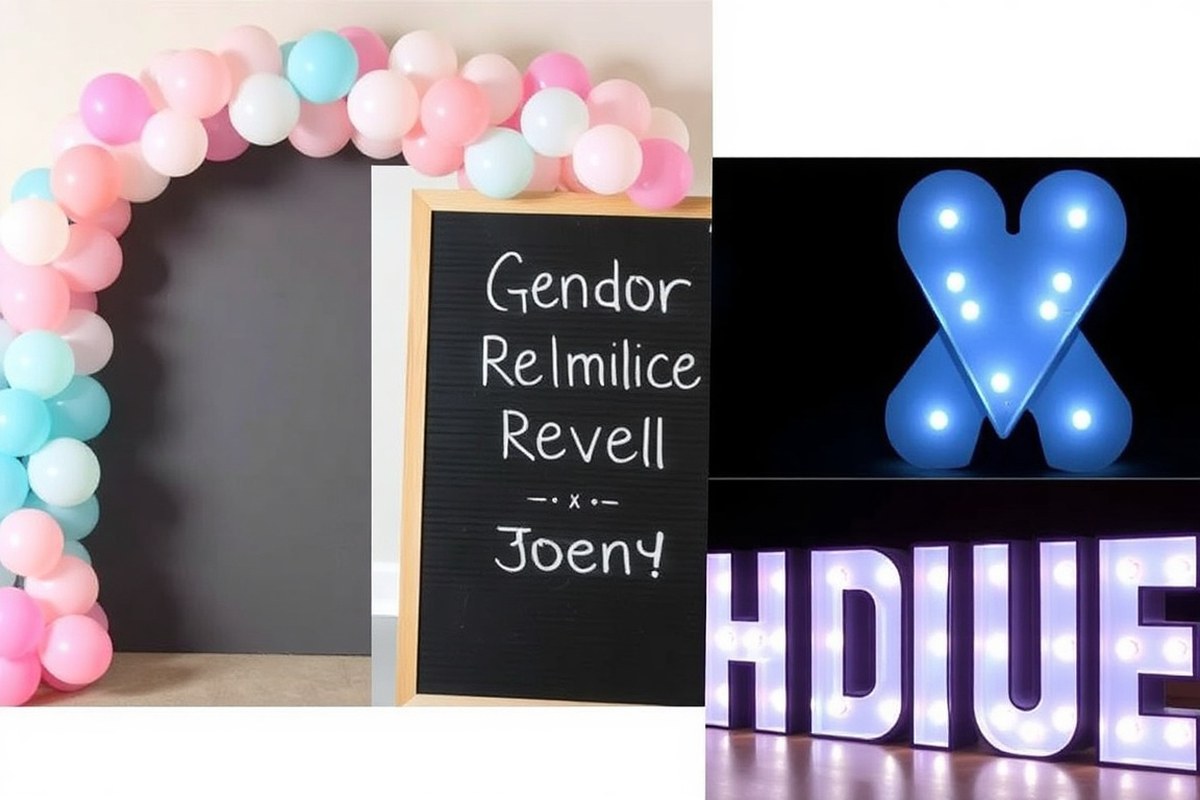
Creative gender reveal signs add a unique touch to your party by visually highlighting the baby’s gender in a way that fits your style and setting. These signs can be simple yet impactful, ranging from playful banners to interactive elements that engage your guests. Choosing the right sign depends on your party size, location, and how you want to share the excitement, whether intimate or with a larger group.
One popular option is a large banner with “He or She?” printed in bold colors. It serves as a focal point and builds anticipation before the reveal moment. Using high-quality cardstock or fabric keeps it durable, and placing it behind the reveal spot creates a perfect photo backdrop. Expect to spend around $10 to $25 on materials if you DIY, or order custom prints online for about $40 to $60.
- Chalkboard signs: Write playful prompts or guesses using colored chalk, ideal for rustic or backyard parties and reusable for multiple events.
- Balloon garlands with color cues: Mix pastel pink and blue balloons with a sign that invites guests to guess. Add a “Guess Pink or Blue?” tag for interaction.
- Light-up marquee letters: Spell out “Boy or Girl” with LED letters, perfect for indoor or evening reveals. They cost around $30 to $50 to rent or buy.
- Flip signs or cards: Reveal the gender with a simple flip sign held by the parents. This interactive idea works well for small gatherings or virtual parties.
- Scratch-off cards as a sign: Combine invitation and reveal in one by handing out scratch-off cards. Guests share the fun moment together while revealing the gender.
- Hand-painted wooden plaques: A charming option that can match your party theme. Paint “Team Pink” or “Team Blue” before the party; flip or remove a cover to reveal colors.
- Directional yard signs: Great for outdoor parties, use arrows pointing “Boy this way” or “Girl this way,” creating a fun path to the reveal area.
Choosing signs with clear, contrasting colors helps the gender reveal stand out, especially in photos. For example, white background with bold pink or blue text keeps visibility high and timeless. Budget around $15 to $50 depending on materials and customization. Avoid overly intricate designs that may confuse guests or detract from the reveal moment.
Interactive signs invite guests to take part in the reveal, adding emotional value and making everyone feel included. Signs that double as decor also help keep your party visually engaging while minimizing setup time. Plan ahead to align the sign style with your venue lighting and size, ensuring it fits naturally into the celebration space.
DIY Gender Reveal Signs with Minimal Effort at Home
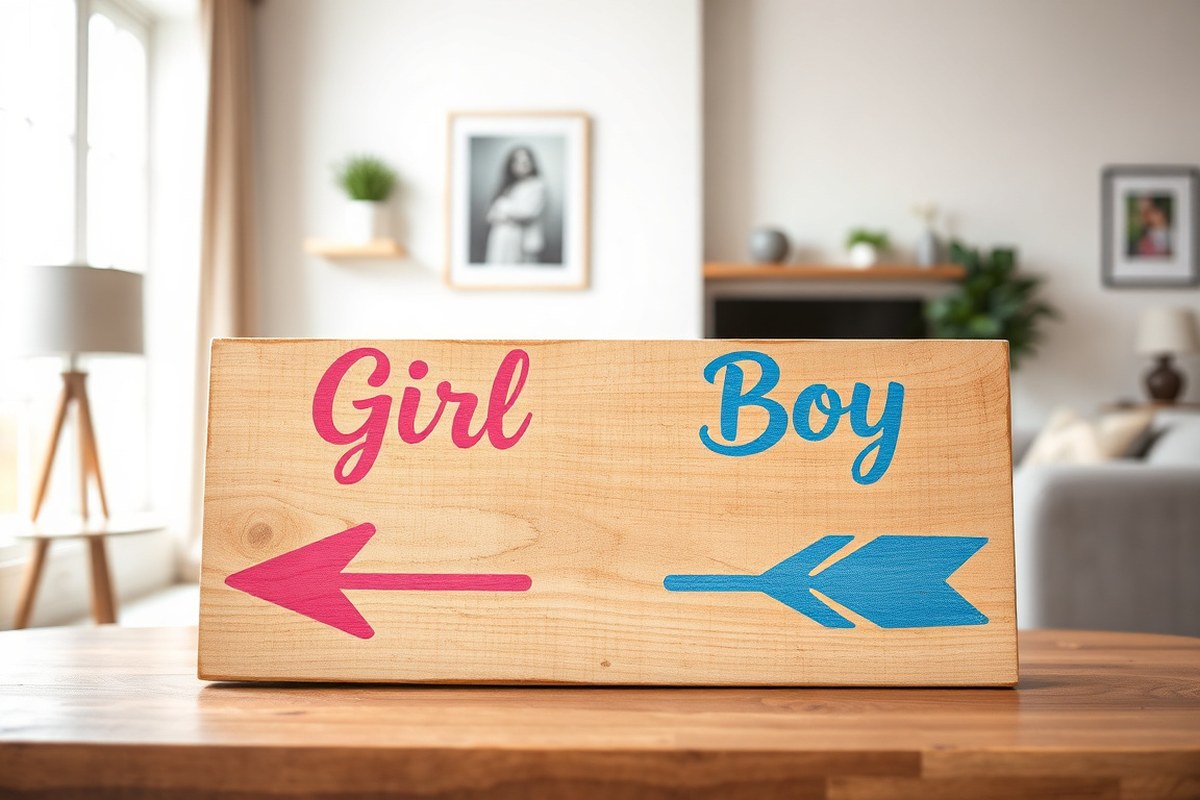
Making a gender reveal sign at home can be simple and quick, using materials you likely already have. You can create charming, personalized signs with minimal tools, taking little time but still delivering a memorable reveal moment. Focus on easy-to-find materials and straightforward designs that fit your home setup.
Basic Materials for DIY Signs
You don’t need fancy supplies to make attractive gender reveal signs. Common craft items like poster board, cardboard, markers, and paint work well. Using neutral colors like white or kraft brown allows you to add pops of pink or blue where needed. A roll of washi tape or colored duct tape helps with easy borders or accents. Here’s a checklist of useful materials:
- Cardboard or sturdy poster board
- Markers, paint, or pens (preferably in pink, blue, black, and white)
- Scissors and/or craft knife
- Glue stick or double-sided tape
- Ribbons or strings for hanging
- Optional: stencils or letter stickers for neater text
Simple Design Ideas to Try
A popular and straightforward option is a large, hand-painted sign with the phrase “Boy or Girl?” or “What Will Baby Be?” Using stencils can help make the lettering more precise. Another fast idea involves cutting out large letters spelling “BABY” on cardboard and painting each letter with a neutral background, then adding pink or blue highlights in patterns or dots.
Balloon accents add charm without extra effort. Tie a few pink or blue balloons next to your sign for an instant pop of color. For an interactive reveal, consider a simple string-pull box filled with pink or blue confetti or balloons inside a large cardboard box. These ideas require minimal patience and deliver big smiles.
Quick Setup Tips for Maximum Impact
For the best results in a home setting, prepare the sign a day ahead to allow paint or glue to dry fully. Position your sign centrally in the room where everyone can see it clearly, above a snack table or near the main seating area works well. Keep the colors bright and contrasty for easy visibility on photos and video. Follow these easy steps to create a quick, effective DIY gender reveal sign:
- Choose a sturdy poster board or cardboard base about 18 by 24 inches for good visibility.
- Use a pencil to sketch the message or design lightly on the surface.
- Fill in the letters with pink or blue paint or markers, or keep letters neutral and add colored borders.
- Add decorations like ribbon borders, small balloons glued along edges, or washi tape accents.
- Allow the paint or glue to dry completely, ideally overnight.
- Attach a string or ribbon to hang the sign if desired.
- Set up the sign in your chosen location and position balloons or confetti nearby for the reveal moment.
Don’t try to paint or decorate your sign right before the party; wet paint can cause smudges and delays.
Outdoor Gender Reveal Sign Ideas for Memorable Celebrations
Choosing the right gender reveal sign for an outdoor setting requires attention to materials that resist weather and construction that ensures visibility and safety. Durable signs typically use waterproof materials like laminated coroplast or heavy-duty vinyl, which withstand wind, rain, and sunlight without fading or tearing. Avoid cardboard or paper signs outside, as they absorb moisture and become unreadable. Signs mounted on sturdy stakes or stands keep them secure on grassy or uneven terrain, preventing them from blowing over during gusts.
Visibility depends largely on size, color contrast, and placement. Use bold, bright colors such as pink or blue backgrounds with white or black lettering to catch the eye. Lettering should be large, ideally at least 6 inches tall, so guests can read from 20 to 30 feet away. For parties in larger spaces like parks or backyards, placing the sign along entry paths or near gathering areas ensures everyone notices it.
Consider adding reflective tape or solar-powered lights around the sign for afternoon or evening events. These improve visibility at dusk without requiring external power. Position signs in open spots without nearby tall plants or decorations blocking the view. When hanging signs, use durable, weather-resistant rope or zip ties to avoid breakage. Signs that incorporate balloons should use helium-filled latex or foil balloons tied securely and weighed down to prevent drifting.
A safety checklist reduces risks in outdoor environments. Choose weather conditions thoughtfully: avoid revealing on windy days when dust or powdered props can spread unpredictably. Ground surfaces should be level and free of obstacles like rocks or roots to avoid trips. Steer clear of placing signs where traffic, active play areas, or barbecue zones interfere. If using signs with flammable materials or smoke effects, keep a fire extinguisher or water nearby and follow product instructions carefully. Always confirm local park or venue rules to ensure permitted materials and sign placement.
For a daytime reveal in a grassy backyard, a laminated coroplast sign on a metal stake works well. Paint simple messages like “Team Pink or Team Blue?” in block letters with non-toxic exterior paint. Add weighted balloon clusters at the base for color coding. For a beachside reveal, consider a large weatherproof banner tied between two poles in the sand. Use vibrant colors contrasting with the natural background. For colder seasons, consider heavier vinyl banners that resist wind gusts and can dry quickly if damp. In shaded areas, use brighter colors and reflective accents to improve visibility.
Example gender reveal script for a large outdoor sign reads: “Pink or Blue? Cast Your Vote Here!” in a bold font on a waterproof banner. Underneath, attach two containers with colored chalk or stickers for guests to mark their guess. This turns the sign into an interactive feature that doubles as decoration and a keepsake activity. The total cost for materials like coroplast sheets, paint, and stakes ranges from $30 to $60, and signs can be prepared in one to two hours.
Theme-Based Gender Reveal Signs That Wow Guests
Matching your gender reveal signs to your party theme creates a cohesive and visually appealing atmosphere that impresses guests and highlights the special moment. Using coordinated colours, fonts, and graphics that reflect your theme helps tie the signs into the overall décor. Thoughtful wording and design details let your reveal sign stand out as both a decorative element and a fun part of the celebration.
Classic Blue & Pink Themes
The classic blue and pink colour scheme remains a favourite for gender reveal parties because of its clear symbolism. To incorporate this, use signs with bold blue and pink fonts or designs featuring stripes, polka dots, or small baby icons like rattles or pacifiers. For example, a sign reading “Team Blue or Team Pink? Place your guess here!” invites guest interaction and adds excitement.
Design with bright, contrasting blues and pinks will stand out outdoors or in well-lit spaces. Consider simple shapes like arrows pointing to the reveal area, or signs shaped like baby bottles or onesies. Hand-painted wooden signs or printed cardstock mounted on stakes cost between $10 and $30, depending on size and materials, making them an affordable choice you can reuse or gift to family.
Seasonal & Holiday Themes
Using seasonal or holiday themes deepens the party’s atmosphere and makes your gender reveal unique. For a winter celebration, think about cosy elements like “Baby’s First Winter” with snowflake cutouts and a soft pastel blue or pink background. Christmas-themed parties might use signs shaped like ornaments with wording such as “Our Little Christmas Miracle is a…” with glittery blue or pink accents. A Halloween reveal could feature signs that say “Witch will it be? Boy or Girl?” decorated with small witch hats and brooms.
When using seasonal foliage or holiday motifs, print signs on sturdy cardstock or lightweight wood to withstand weather or indoor handling. Order pre-cut signs online for $15-$40 or create your own using seasonal craft supplies from a local store for under $20. Add a layer of weatherproof sealant if outdoors.
- Snow-themed signs with soft pink and blue snowflakes for winter reveals
- Halloween signs featuring pumpkins and spooky silhouettes
- Christmas ornament-shaped signs with glitter or confetti inside
- Spring garden themes with florals and pastel colours
- Summer beach or nautical signs with blues, white, and pink accents
- Autumn leaves and warm tones with subtle blue or pink highlights
Seasonal signs help guests connect emotionally with the timing of your reveal and create memorable photos consistent with your chosen theme.
Unique Themes for Personality
Choose a theme based on your interests or style to personalize the reveal. Popular ideas include sports, with signs like “Home Run Baby, Girl or Boy?” decorated in your favourite team’s colours plus pink or blue accents. Animal themes work well for nature lovers, such as a woodland sign saying “Baby Deer Coming Soon!” painted with subtle blue or pink touches. A book or storytime theme can include signs quoting favourite children’s stories, such as “Guess Who’s Joining Our Story?” with design elements from classic kids’ books.
Creative wording paired with themed icons or props makes your signs memorable. Use chalkboards for casual parties, letting guests guess the gender next to a theme-based graphic. For a playful touch, a sign that reads “Ready to Paint the Town Pink or Blue?” fits well with a paint war or silly string reveal party. Investing in reusable signs or custom prints ranges from $20 to $50, depending on size and graphics detail, and these become keepsakes after the event.
Eco-Friendly Gender Reveal Sign Options and Tips
Choosing eco-conscious materials for gender reveal signs helps reduce your party’s environmental impact. Wood, bamboo, and recycled cardboard are sustainable choices that balance durability and biodegradability. Wooden signs are sturdy and reusable but may cost $20 to $50 depending on size. Bamboo offers a naturally lightweight, renewable option that biodegrades within months if composted properly. Recycled cardboard signs cost under $10, decompose in a few weeks outdoors, but are less durable, especially in damp conditions.
Sign materials differ in environmental safety and longevity. Plastic signs can last many years but are not biodegradable and often end up in landfills. Fabric signs made from organic cotton or hemp avoid plastics, can be reused multiple times, and wash easily. Paper signs printed on recycled paper with soy-based ink represent a lower-impact option, though they are less durable outdoors.
| Material | Environmental Impact | Reusability | Typical Cost |
|---|---|---|---|
| Wood | Renewable, biodegradable | High | $20-$50 |
| Bamboo | Renewable, biodegrades in months | Moderate | $15-$40 |
| Recycled Cardboard | Biodegradable, low impact | Low | Under $10 |
| Organic Cotton Fabric | Renewable, compostable | High | $10-$30 |
| Recycled Paper with Soy Ink | Low impact, biodegradable | Low | Under $10 |
| Plastic | Non-biodegradable, long-lasting | Variable | $5-$50 |
Reuse and waste reduction are key strategies for greener gender reveals. Create signs with removable or interchangeable elements, such as chalkboard paint surfaces or clip-on letters. This allows you to update messages for future events or celebrations, offsetting initial cost and material use. Storing signs properly after use keeps them in good shape for years, whether made of wood, bamboo, or fabric.
Including biodegradable decorations adds color and fun without lasting waste. Paper garlands, tissue pom-poms, and dried flower arrangements break down naturally within weeks in compost or soil. Avoid plastic confetti, which can harm wildlife and pollute water. Edible decorations, like popcorn strings or fruit skewers, offer a fully compostable and zero-waste option.
Setting up eco-friendly gender reveal signs requires planning. Use plant-based adhesives or painter’s tape to avoid damaging reusable surfaces. Place signs in shaded areas to prevent fading or warping, especially for paper or cardboard. For outdoor events, consider temporary stakes anchored with natural twine rather than plastic supports. This setup reduces leftover non-recyclable materials.
Make sure any paint or ink used on signs is non-toxic and environmentally safe; avoid spray paints that contain harmful chemicals.
Incorporating Siblings and Pets in Gender Reveal Signs
Including siblings and pets in your gender reveal signs adds a personal touch and makes the moment more memorable for everyone involved. For siblings, creating signs that emphasize their new role can heighten excitement and create lasting family memories. A popular script for a sibling sign might read, “Big Brother in Training” or “Future Big Sister Can’t Wait,” paired with the child holding a simple chalkboard or a framed sign in party colors. This highlights their importance while tying them directly into the reveal.
For pets, signs that playfully introduce their new title often work well. Phrases like, “Guard Dog on Baby Duty” or “Big Sister/Paw-spective” can be printed on lightweight boards that pets can wear comfortably. To keep pets safe during the gender reveal, avoid loud surprises, smoke, or confetti around them, which can cause stress or pose ingestion risks. Stick to quiet, visual signs and ensure pets are comfortable and supervised throughout.
Choosing poses that include both siblings and pets can boost the emotional impact. For instance, having the older child hold the pet with the sign between them creates a cozy scene that highlights the family unit awaiting the new arrival. Another idea is capturing a photo of siblings wearing matching tees that say, “Team Pink” or “Team Blue,” with a pet in a coordinating bandana. Such setups only require simple props like shirts, signs under $20, and a few minutes for arrangement, making them budget-friendly.
Different situations call for varying approaches. When the sibling is shy or very young, use a simple sign with a big, bold message to catch attention. Older kids may enjoy more elaborate scripts like, “Counting Down the Days to Meet My Sister/Brother.” For pets, use familiar locations during photo time to prevent anxiety, and always use safe materials. It’s best to limit the reveal props to visuals only to avoid startling animals.
Good results show in candid smiles and shared excitement that come naturally during the photo session, making the reveal feel warm and inclusive. Potential problems include siblings feeling overshadowed or pets getting startled if too much noise or activity surrounds the reveal. Calm reassurance and minimal surprise elements reduce these risks.
Including family members and pets in gender reveal signs helps create a sense of inclusion, makes for great photos, and builds stronger emotional connections. Simple scripts, gentle handling of animals, and well-planned poses ensure the moment is joyful and safe for everyone. For example, a sibling sign might say, “Promoted to Big Brother, Class of [Due Year],” paired with a pet wearing a matching collar tag, making the reveal both fun and meaningful without requiring elaborate setups or costly materials.
Photo-Ready Gender Reveal Signs with Scripts and Templates
Choosing gender reveal signs that look great on camera helps capture memories that last beyond the party. Signs with clear, bold lettering and balanced colors make photos and videos stand out, while a well-timed reveal script guides everyone through the big moment with ease. Planning the timing of your shoot ensures you catch authentic reactions and crisp images without rush or confusion.
Sign Design Tips for Photos
Select signs with simple, legible fonts in contrasting colors to ensure the text pops in photos. Matte finishes prevent glare from lighting or sunlight, avoiding washed-out or unreadable images. Signs sized around 18 by 24 inches are easy to hold or place in the background and fill the camera frame nicely without overpowering the scene.
Use minimal decorations around the sign to keep the focus on the text but add a splash of color that matches the party theme or gender colors. Avoid overly shiny or reflective materials; soft pastels or bright gender-specific blues and pinks photograph well under most lighting. If filming a video reveal, choose a sign that can remain stable or be held securely to prevent motion blur.
Sample Reveal Script for Photos
Planning a word-for-word script helps you capture clear, heartfelt responses and coordinate everyone’s timing. Start with a warm welcome, follow with a countdown, reveal the sign, and let the reactions unfold naturally. This script also works well if you record a video to share with distant friends or family. Here’s a simple script you can follow:
- “Thanks for joining us today! We’re so excited to share this moment with you.”
- “Ready? Let’s count down from three: 3, 2, 1…”
- Reveal the sign clearly toward the camera or crowd.
- “It’s a [boy/girl]! We’re so happy to share this with you.”
- Pause to capture reactions and smiles, then invite everyone to celebrate.
Adjust the wording depending on your audience or setting. For smaller, intimate groups, keep it personal and conversational. For larger gatherings or virtual events, direct the reveal toward the camera for the best viewing experience.
Checklist for Picture-Perfect Signs
Prepare your signs and photo setup to avoid common issues like lighting problems or unreadable text. Use this checklist to plan your photo shoot and gender reveal moment smoothly:
- Choose signs with high-contrast, bold font and clear messaging
- Pick non-reflective materials to prevent glare or reflections
- Position signs at eye level and ensure enough space for holding or display
- Test lighting ahead of time to avoid shadows and brighten the sign
- Set up your camera or phone on a stable surface or use a tripod
- Assign someone to operate the camera or take photos for consistent shots
- Coordinate the reveal timing with your script and allow reaction time for photos
Spending 10 to 15 minutes rehearsing this sequence before your event helps the reveal go smoothly. Taking multiple shots during the reveal, from close-up sign details to wide reaction photos, captures the full story of the moment. Planning based on the checklist increases your chances of sharing beautiful, memorable images after the party.
Small and Intimate Gender Reveal Sign Ideas
For a small and intimate gender reveal, subtle signs work best to keep the moment personal and meaningful. Choose designs that are elegant and simple, avoiding oversized decorations that might overwhelm a limited space. A good approach is to use minimalist wooden signs painted in soft pastel colors, think light pink, baby blue, or neutral tones like white and beige. These materials stay lightweight and easy to move around, making setup quick and adaptable to your home or a cozy venue.
One straightforward idea is a small chalkboard or letter board with a clean message like “He or She? We’ll See!” or “Little One Loading…” These signs cost about $10 to $20 and can be placed on a table or hung on a wall. Write the reveal phrase neatly with chalk markers or removable stickers to keep it classy and mess-free. This type of sign suits an intimate reveal by focusing attention without overwhelming your guests.
Another option is a delicate banner made with felt or paper cutouts, spelling out “Baby’s Gender” or “Pink or Blue?” Use string and small clothespins to hang the letters, which saves space and adds a handcrafted feel. Banners like this can be made for under $15 and easily folded for storage. Keep the colors understated and match them to your overall party theme to maintain a cohesive look.
For a more interactive sign, use a small chalkboard easel set up at the entrance where guests can write guesses about the gender. This personalized touch engages your close group in a low-key way. Picking up a portable chalkboard easel costs around $25, and chalk markers can be bought for $5 to $7. The smaller size means it won’t take up much room but will still be a memorable part of the reveal.
These simple signs also pair well with subtle props like cake pops, which are perfect for small groups. Gender reveal cake pops are easy to display alongside your sign on a small table and cost roughly $1 to $3 each if you order from a bakery. The pops add a sweet, themed element without the need for extra decorations.
Setting up your intimate gender reveal sign involves choosing a low-traffic spot where guests can comfortably gather, such as a living room corner or dining table. Ensure good lighting to highlight the sign’s message without harsh glare. Keep decorations minimal around the sign to avoid clutter and focus attention on the reveal itself. In small spaces, avoid anything too bright or noisy that could distract from the emotion of the moment.
Signs made from lightweight wood, chalkboards, felt, or paper allow quick assembly and removal, which suits informal settings and short gatherings. These materials are inexpensive and reusable, so you won’t spend much more than $50 on all your sign supplies. Being intentional about the style and setup helps create an atmosphere where everyone feels close to the parents-to-be.
Choose signs that can double as keepsakes, like wooden plaques or chalkboards, so you have a lasting memento after the reveal.
Safety Tips for Using Gender Reveal Signs and Props
Handling gender reveal signs and props demands attention to safety, especially when using confetti, smoke, or other materials that can pose risks. Avoid hazards such as fire, inhalation of smoke, slipping on scattered confetti, or unintended damage to property or people. Before you begin, check the environment and consider potential dangers to everyone present, including children and pets.
Set up your signs and reveal props on stable surfaces away from flammable or fragile materials. When using colored smoke, choose well-ventilated outdoor areas and keep a safe distance of at least 10 feet for guests. Smoke bombs typically last 30 to 90 seconds, so coordinate your reveal timing to ensure everyone is ready and safely positioned. Confirm local fire regulations and weather conditions such as wind, which can spread smoke unpredictably.
Confetti may seem harmless, but it can create slip hazards or litter issues. Use biodegradable confetti or paper alternatives to reduce environmental impact and clean up promptly. Large confetti poppers should be handled carefully, follow label instructions for activation and never point them at people or animals. Outdoor setups allow for easier cleanup and reduce risks compared to indoor spaces.
- Ensure props are child-safe and avoid small detachable parts if toddlers are attending
- Check all reveal items for manufacturer safety warnings before use
- Keep fire extinguishers or buckets of water nearby when using smoke devices or fireworks
- Designate a responsible adult to manage prop setup and activation
- Test any electronic props ahead of time to avoid malfunction during the event
- Place signs where they won’t block pathways or create tripping hazards
- Clear the area of pets during smoke or confetti reveals to prevent distress
Safer alternatives include using ribbons, balloons, or colored lights that do not produce smoke or debris. These options typically cost less and require minimal setup while reducing environmental and health risks. Paper or wooden signs with colored paint or markers provide a simple reveal method that’s fully reusable and easy to handle. Using a photo booth backdrop with colored props offers a playful reveal experience without any safety concerns.
In a golf-themed reveal, swinging a club to smash a ball filled with colored powder or biodegradable confetti can be exciting but requires ample open space. Ensure no one stands within 20 feet of the player, and use protective eyewear for people nearby. Consider practicing the swing first to avoid accidents. Always verify that such props are legal in your location and permitted where you hold the event.
Seasonal Gender Reveal Signs Tailored to Time of Year
Designing gender reveal signs that fit the season improve your party’s atmosphere and connects it to the time of year. To create a timely feel, choose colors, decorations, and props that naturally align with seasonal themes. For spring reveals, pastel colors like soft pink, baby blue, lavender, and mint green work well. Add floral patterns or fresh blossoms to the sign, such as tulips or daisies, to evoke renewal and growth. Incorporate props like bird nests or butterflies to emphasize the idea of new life. A script for a spring sign could say, “Our little bloom is on the way! Girl or boy?” This approach gives a fresh, airy vibe suitable for temperatures between 55°F and 70°F, keeping outdoor signs sturdy against spring breezes.
Summer gender reveal signs should feature vibrant, bold colors such as bright yellow, coral, aqua, and turquoise. Use tropical leaf designs, suns, or beach motifs like seashells to capture summer energy. For props, consider sand buckets, beach balls, or even sunglasses hanging from the sign. Summer temperatures often exceed 80°F, so choose materials like laminated cardstock or waterproof foam board to avoid warping or fading under sunlight. A straightforward script might read, “Sunny days and sweet surprises, boy or girl?” to play off the warm atmosphere.
In fall, rich hues like burnt orange, mustard yellow, deep red, and brown create a cozy, autumnal feel. Incorporate leaves, pumpkins, and acorn decorations into your sign design. Props such as mini hay bales or rustic wooden crates help set the seasonal tone, especially for outdoor backyard reveal parties. Since fall weather can be cooler, around 50°F to 65°F, adding warm touches like burlap ribbon or fairy lights improve both aesthetics and comfort. An example sign phrase could be, “Falling leaves and baby dreams, boy or girl?” which ties in the spirit of the season.
Winter-themed gender reveal signs often use icy blues, silvers, whites, and soft pinks. Snowflake patterns or frosted effects on the sign make clear the season without overwhelming the gender reveal message. Props that fit include small evergreen branches, pinecones, or string lights to create a magical winter look. When revealing indoors during cold winter months, around 30°F to 50°F outside, consider signs made from canvas or wood which resist cold damage better than paper. A possible script is, “Our little snowflake is on the way, boy or girl?” keeping the message warm and inviting.
Choosing seasonally appropriate materials keeps your sign durable. Paper can warp with humidity or rain, so waterproof options suit summer and spring better, while wood or fabric signs work well in fall and winter when weather can be harsher. Tailoring your colors and props shows the thought you put into the party and helps guests feel connected to the moment. Adjust your design depending on whether your celebration is indoors or outdoors to prevent damage and maintain visual impact. Seasonal reveal signs typically cost between $20 and $60, depending on materials and customisation. When the sign feels too cluttered, guests might miss the message, so balance decoration with readability to ensure your reveal surprises and delights everyone present.
Virtual-Friendly Gender Reveal Signs and Presentation Tips
Interactive reveal ideas help online participants feel involved. One simple option is a timed countdown with signs that change from a neutral message to the reveal color. For example, display a sign reading “Waiting for the Big News” during the countdown, then switch to a brightly colored “It’s a Boy!” or “It’s a Girl!” sign exactly when you say “3, 2, 1!” Guests on Zoom can cheer and react immediately, sharing the moment live. Another idea is mailing small reveal items like color-specific pins or ribbons to guests ahead of time. Ask them to wear their item on camera simultaneously with your reveal, creating a shared visual effect. For instance, guests can put on blue or pink bows or wristbands as you hold up the corresponding sign, reinforcing connection through synchronized action. You can also use digital tools like virtual polling apps where guests vote on the gender before the reveal. Show live poll results during the event, then unveil the sign to confirm or surprise the group. This adds excitement and interaction beyond just watching. Setting up these signs and interactive moments generally costs under $20 if you buy supplies like foam board and markers or print designs at a copy shop. Mailing reveal items to guests varies by quantity and distance but remember to send them 1 to 2 weeks in advance to ensure on-time delivery. Testing technology and rehearsing timing beforehand prevents delays or confusion, making your virtual reveal smooth and memorable. Keep your virtual reveal sign in well-lit, glare-free space and test your camera framing early to avoid guests struggling to see the message.
How to Choose the Perfect Gender Reveal Sign for Your Party
Choosing the perfect gender reveal sign comes down to a few key factors: your party’s size, venue, theme, and budget. Each of these affects how visible, appropriate, and memorable your sign will be. Start by listing your priorities. For example, is your main goal an eye-catching visual for a large outdoor crowd, or a sweet, personal message for a small, intimate gathering? The answer guides your sign’s size, material, and style.
Matching a sign to your setting matters. If your party is outdoors with lots of space, larger signs made of weather-resistant materials like wood or corrugated plastic work well, ensuring guests can see the message from a distance. Indoors or in smaller spaces, lighter materials like cardstock or fabric banners suit the environment better and reduce setup effort. Also consider the lighting; signs with bold, contrasting colors or built-in LED lights help in dim conditions.
Your theme and season should also influence your design. A patriotic celebration near the 4th of July can incorporate fireworks or red, white, and blue colors in the sign design. Seasonal motifs like flowers in spring or pumpkins in fall give your sign a cohesive look without needing complicated artwork. Pick one reveal moment, such as opening the sign to reveal the gender or lifting a curtain to a hidden message, so there’s a clear focus.
Budget-friendly signs don’t have to compromise impact. DIY signs using affordable materials like poster boards, paint, or printed vinyl can look great and allow you to add personal touches. Prices range significantly: premade wooden signs often start around $50, while DIY options may cost under $10 plus your time. Renting or borrowing props can also reduce costs. Prioritize what will impress your guests the most, whether that’s a clever message, a playful font, or a surprise element like glitter or confetti. Use this checklist to decide what fits your party best:
- Party size: Will everyone see the sign clearly?
- Venue type: Indoor or outdoor? Weather concerns?
- Theme and season: Does the sign improve your chosen motif?
- Reveal style: Single dramatic moment or ongoing decoration?
- Budget: How much can you spend without stress?
- Setup time and skill: DIY or professional?
Comparing common sign types provides clarity on costs, setup, and atmosphere. The table below offers side-by-side factors to weigh for three popular choices.
| Sign Type | Ideal Setting | Estimated Cost | Setup Time | Visibility | Customization |
|---|---|---|---|---|---|
| Wooden Sign | Outdoor, larger venues | $50-$150+ | 1-2 hours | High | Medium to High |
| D.I.Y. Poster Board | Indoors or small groups | <$10 plus materials | 30-60 minutes | Medium | High |
| Fabric Banner | Indoor or shaded outdoor | $15-$50 | 1 hour | Medium | Medium |
Signs in larger venues need to be more durable and visible from far away, so invest in sturdy materials or professional printing to avoid wear or fading. Smaller parties benefit from lightweight signs that can be easily moved and stored. When the budget is tight, simple and creative DIY options still make an emotional impact, especially when combined with thoughtful wording or personal elements. The key is balancing practicality with your style and guest experience to create a memorable reveal moment.
Your Gender Reveal Sign Quick-Start Action Plan
Get your party ready by following these simple steps to pick, create, and set up your perfect gender reveal sign.
- Two weeks before the party: Choose a theme that matches your style and venue. Knowing your theme early helps guide all your sign choices and coordination.
- Ten days before the party: Decide between a DIY or purchased sign based on your time and skill level. Confirm your choice by gathering materials or placing an order.
- One week before the party: Create or assemble your gender reveal signs. Check that they look clear and attractive in good lighting for photos.
- Five days before the party: Plan sign placement, considering visibility, safety, and photo backdrops. Walk the venue to verify spots are secure and accessible.
- Two days before the party: Test any props or signage with helpers or pets involved to ensure smooth use. Make adjustments if needed for safety and effect.
- Day of the party: Set up the signs early and check all final details, especially lighting for outdoor or evening reveals. Confirm with your photographer or host that everything is ready to capture great moments.
Frequently Asked Questions
What Materials Work Best for DIY Gender Reveal Signs?
Lightweight materials like foam board or cardboard work best for DIY signs, making them easy to carry and display. Choose materials that hold up well outdoors if your party is outside to prevent damage from wind or moisture.
How Can I Incorporate Cultural Elements into My Gender Reveal Sign?
Use symbols, colors, or sayings that have cultural significance to you and your family. This adds a personal touch and makes the celebration more meaningful for close relatives and friends.
What’s a Creative Way to Use Pets in a Gender Reveal Sign?
Attach a bandana or small sign with pink or blue next to your pet’s collar for a cute, memorable photo. Keep your pet’s comfort in mind and avoid anything too heavy or restrictive.
How Do I Make My Gender Reveal Sign Stand Out in Photos?
Use bold fonts and bright contrast colors so the text is clear in pictures. Adding props like balloons or floral accents draws the eye and creates a festive backdrop for your reveal photos.
Are There Gender Reveal Signs Suitable for Small Apartment Spaces?
Yes, opt for compact signs like table tents or wall decals that don’t take up much room. Choose lightweight materials so you can easily rearrange the setup for the best angle in photos.
Can Gender Reveal Signs Be Reused for Other Baby Celebrations?
Some signs made from durable materials can be adapted for baby showers or first birthdays by swapping out the text or decorations. Keep your original safe during the reveal to reuse it later with minor changes.
The Bottom Line
Choosing the right gender reveal sign is about matching your celebration’s style while keeping safety and fun in mind. Start by picking a sign that fits your party’s vibe and your comfort level with crafting or buying ready-made designs. Next, think through how it will look in photos and how to keep everyone safe during the reveal. Taking these steps ensures your reveal becomes a memorable and joyful experience for you and your guests.