Entryway Sign Ideas: 12 Creative Ways to Welcome with Style
Entryway sign ideas can transform a plain entry into a welcoming focal point that reflects your style. Choosing a sign with clear messaging and attractive design sets the tone for your home instantly. Start by selecting a style that complements your existing decor to create a cohesive, inviting space.
Key Takeaways
- Select entryway signs that match your home’s architectural style for a smooth look.
- Wood, metal, and acrylic signs offer durability and distinct visual appeal for different settings.
- Personalize signs with family names, meaningful quotes, or custom artwork to add character.
- Incorporate hooks or shelves in signs to increase entryway functionality.
- Consider seasonal themes to refresh your entryway throughout the year.
- Choose the right size and lighting to ensure your sign stands out without overwhelming the space.
1. Best Entryway Sign Styles for Every Home
Entryway signs come in various styles that fit different home designs, improving the look and feel of your entrance. For modern homes, minimalist metal signs or sleek black and white signs work best. These signs have clean lines and simple fonts that match contemporary décor, creating a chic, uncluttered appearance. A modern black and white entryway sign, for example, often costs between $30 and $75 depending on size and finish and pairs well with monochrome palettes or minimalist furnishings.
Rustic homes benefit from natural wood welcome signs that bring warmth and charm. Handcrafted wooden signs with distressed finishes or visible wood grain connect with farmhouse and country styles. A rustic wood sign may include additional features such as key hooks or chalkboard panels, making the entryway both inviting and organized. These signs usually range from $40 to $100, depending on size and detail, and complement natural materials like stone or wicker found in rustic interiors.
For minimalist interiors, metal signs in simple geometric shapes or thin lettering emphasize elegance and style without overwhelming the space. A minimalist metal entryway sign, priced around $25 to $60, fits perfectly above a slim console table or near sleek built-ins. Pairing these signs with neutral tones and minimal accessories maintains a sense of openness and calm in the entryway.
Vintage or eclectic homes often feature vintage metal signs or wood frame chalkboards to add personality and nostalgic appeal. These signs usually have ornate lettering or aged finishes that evoke a retro vibe. A vintage metal welcome sign can be combined with other vintage-inspired decor, such as antique mirrors or lanterns, to create a layered look. Costs for vintage metal signs typically fall between $30 and $70. Combining vintage styles with modern elements works by balancing textures and colors, for example, placing a vintage sign on a sleek modern wall or with clean-lined furniture softens the contrast and creates a cohesive statement.
Blending vintage and modern elements in your entryway signs can refresh your space without overwhelming it. Use a modern frame with a vintage-inspired print or pair a rustic wooden sign with a metal key holder in a simple design. This mix keeps the entrance feeling current while respecting tradition. It matters because entryways set the tone for the whole home, and choosing signs that echo your home’s overall style or that thoughtfully combine styles helps guests feel welcomed instantly.
Trending now are signs that combine function with style, such as wooden signs with hooks or chalkboards for notes and keys. These add usability to decoration, keeping clutter low without sacrificing charm. Using such signs in your entryway supports efficient organization and personal expression. They also offer opportunities to update messages seasonally, keeping your entryway fresh and engaging all year.
Matching your entryway sign to the surrounding décor is key. A rustic sign pairs nicely with natural fibers and vintage accessories, while a minimalist metal sign looks best near modern furnishings and clean wall space. For vintage-modern blends, focus on balancing colors: black metal signs can complement farmhouse wood tones, or a distressed wooden sign can warm up a sleek entryway.
2. Choosing the Perfect Material for Lasting Entryway Signs
Choosing the right material for your entryway sign affects how long it lasts, how it looks, and how much care it needs. Durability depends on where you place the sign, indoor entryways handle weather better than outdoor ones, so materials exposed to sun and rain must resist fading and moisture. Cost also varies widely, so pick a material that fits your budget and style while matching your maintenance willingness.
The table below compares wood, metal, bamboo, chalkboard, and plastic signs to help you decide. Each material has unique traits that suit different entryway types and décor preferences. Eco-friendly choices like bamboo and reclaimed wood stand out for those wanting to minimize environmental impact without sacrificing charm or durability.
| Material | Durability | Maintenance Needs | Style | Typical Cost Range | Eco-Friendliness |
|---|---|---|---|---|---|
| Wood (Reclaimed) | High indoors, moderate outdoors with sealant | Regular sealing or varnishing to prevent warping | Rustic, warm, natural | $30 – $100 | Very good; repurposes materials and reduces waste |
| Metal (Aluminum, Steel) | Excellent resistance to elements | Occasional cleaning; rust-proof varieties require less care | Modern, sleek, industrial | $40 – $120 | Moderate; recyclable but energy-intensive production |
| Bamboo | Good indoors, moderate outdoors with finish | Wipe clean, apply protective coating yearly outdoors | Natural, eco-friendly, light texture | $35 – $80 | Excellent; fast-growing and sustainable |
| Chalkboard | Low to moderate; sensitive to moisture and scratches | Regular dusting and careful storage | Casual, customizable, playful | $20 – $50 | Varies; depends on frame material |
| Plastic (Acrylic, PVC) | Moderate; fades or cracks outdoors over time | Wipe clean; no sealing needed | Bright colors, smooth finish, versatile | $15 – $60 | Low; petroleum-based, less biodegradable |
Maintenance matters most to extend your sign’s life and keep it looking fresh. Wooden and bamboo signs benefit from a protective coating at least once a year, especially if your porch catches direct sunlight or rain. Metal signs may need less care if they are rust-proof, but keep an eye out for scratches that expose bare metal. Chalkboards are best indoors to prevent damage and require wiping with a damp cloth and mild soap. Plastic signs need no special sealing but can look weathered after prolonged outdoor exposure.
Check your sign periodically for wear and tear, especially if placed outdoors; early cleaning or refinishing can prevent costly replacements.
Eco-friendly options like bamboo and reclaimed wood offer both style and sustainability. Bamboo grows quickly, reducing environmental impact, while reclaimed wood reuses existing materials and adds character to the entryway. Selecting these also supports a green home style that guests can appreciate right at your doorstep. Metal provides a long-lasting choice and recycles well but has a higher energy cost in production. Meanwhile, chalkboard and plastic signs work best indoors or in covered entryways, keeping maintenance simple and costs lower.
3. How to Personalize Entryway Signs with Meaningful Touches
Incorporating Family Names and Welcome Messages
Adding your family name or a warm welcome message creates a unique entryway sign that feels personal and inviting. To do this effectively, choose clear, simple wording that reflects your home’s personality. Common options include just the family surname, a full welcome greeting like “Welcome to the Smith Home,” or a short phrase such as “Home Sweet Home.” These choices immediately make the sign meaningful and help guests feel greeted before they even enter.
For a handcrafted look, using reclaimed wood with a painted or carved family name offers a cozy, rustic appeal. For a polished look, opt for custom metal letters or acrylic cutouts that match your message. Tailor the message length to fit your sign’s size, keeping it concise but expressive.
Choosing Fonts That Improve Readability
Legibility is key when personalizing entryway signs. Sans-serif fonts like Arial, Helvetica, or Futura are clean and easy to read from a distance, while serif fonts such as Times New Roman or Georgia can add traditional elegance if kept simple. Avoid overly ornate or script fonts for the main message since they reduce clarity, especially outdoors.
For a friendly tone, casual sans-serif fonts or rounded letterforms work well. You can use a decorative font sparingly, such as for a single word like “Welcome,” but keep most text in a clear style. The font size should be at least 3 inches tall for visibility from 10 feet away. Balance decorative appeal and readability to prevent guests from straining to read your sign.
Effective Color Combinations for Text
High contrast between text and background colors improve visibility. Black or dark letters on a light background provide sharp contrast, while white or light colors on a dark background can create a dramatic effect. Avoid using colors that clash or blend together, such as red on brown or dark green on black.
Complement your exterior color scheme when choosing colors. Neutral tones like black, white, or deep gray are versatile and timeless. Bright colors like navy blue, forest green, or crimson add personality but should maintain contrast for easy reading. For LED or metal signs, use contrasting finishes, matte backgrounds with polished letters or vice versa, to improve definition.
Placement and Layout Tips for Custom Text
Centering the text on the sign usually offers the best visual balance, especially for family names and welcome phrases. Align longer messages so they don’t crowd the edges or appear cramped. Use consistent letter spacing and line spacing to keep the design clean and uncluttered.
Place shorter focal phrases, like your family name, at eye level, about 60 to 66 inches from the ground, to maximize visibility for visitors. When your sign has several lines, make the key text larger or bolder to naturally direct attention. Leave some margin around the text to frame it well and avoid overwriting any decorative elements like borders or graphics.
Deciding Between Customized and Pre-Made Signs
Customizing your own entryway sign takes more time and effort but results in a tailored look that truly represents your family. It can cost anywhere from $50 on simple DIY kits to several hundred dollars for professionally crafted metal or wooden signs. Pre-made signs offer convenience and lower price points, typically under $100, but often lack the specific names or messages you want.
Choose a pre-made sign if you want something quick or prefer seasonal interchangeable messages. Opt for customization if your goal is to prominently feature your family name or a unique greeting. Some retailers offer custom options that balance cost and personalization by allowing you to select fonts, colors, and text on a standard blank sign template. This approach saves on design fees while still making the sign meaningful.
4. DIY Entryway Sign Ideas and Step-by-Step Creation Guide
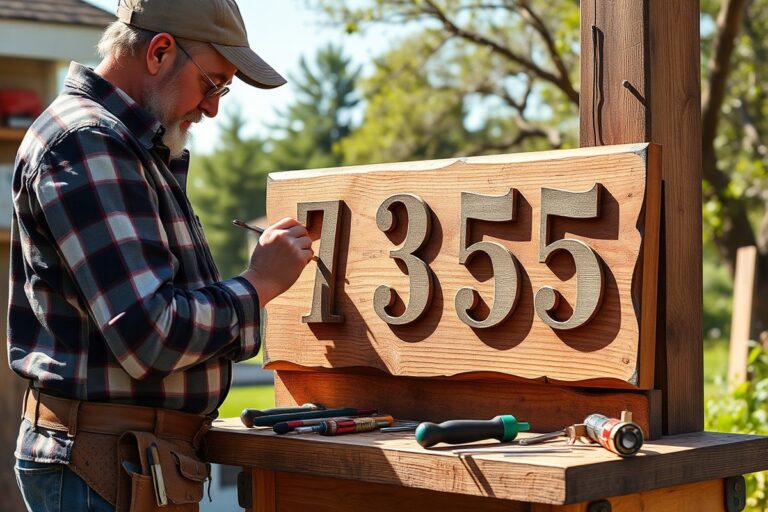
Creating your own entryway sign adds a personal touch and warmth to the first space guests see. A wooden welcome sign is a popular DIY project that balances style with function and can be completed in a few hours using basic tools and materials. Time and cost vary based on design complexity, but a simple, attractive sign often takes one to two afternoons from start to finish.
Selecting Your Materials and Tools
Choosing the right materials sets the foundation for your DIY entryway sign. Use a smooth wooden board, pine or cedar works well, that measures around 12 by 24 inches for a balanced size. You’ll also need outdoor-grade paint or stain to withstand entryway exposure. Tools include a measuring tape, pencil, painter’s tape, fine-grit sandpaper, paintbrushes or foam brushes, and either stencils or letter decals if you want help with lettering. A drill or screwdriver will be necessary if you plan to hang the sign with screws or hooks. Consider the finish and mounting hardware during selection to match your home’s style and ensure durability.
Designing Your Sign Layout
Start by sketching your sign’s message and layout on paper. Popular phrases include “Welcome,” your family name, or a warm greeting like “Home Sweet Home.” Decide on a font style that matches your decor, block letters for a modern look or script for a rustic feel.
Transfer the design onto the wood using a pencil for precise placement. Painter’s tape helps create crisp lines for borders or to mask areas. Double-check spacing and alignment before painting to avoid errors.
Painting and Finishing Tips
Sand the wood surface lightly with fine-grit sandpaper before painting to improve paint adhesion. Apply a primer if you’re using lighter colors over raw wood. Use thin layers of paint and let each coat dry fully, usually about 30 to 60 minutes, to prevent drips and uneven texture.
Once painting is complete and dry, typically 2 to 4 hours for full curing, seal the sign with a clear outdoor polyurethane for protection against moisture and wear. Attach mounting hardware on the back, placing them 2 to 3 inches from each edge for stability.
- Prepare the wood: Sand the board smoothly and wipe off dust.
- Plan your design: Draw or tape your text and decorations on the wood.
- Paint your base coat: Apply background paint or stain and let dry.
- Add lettering and details: Use brushes or stencils for the message.
- Apply a protective finish: Use outdoor polyurethane to protect your work.
- Attach hanging hardware: Screw in hooks or hangers securely.
- Install your sign: Mount it on the wall near your entryway using anchors for drywall or screws for wood surfaces.
5. Incorporating Functionality into Your Entryway Signs
Entryway signs can do more than greet guests; they can also serve as practical organization tools. By adding hooks, shelves, or lighting, you make your entryway not only stylish but also functional, helping keep everyday essentials in order and making the space more welcoming.
Adding Hooks for Easy Organization
Hooks provide a simple way to hang keys, bags, coats, or hats right by the door. Choose wall-mounted hooks attached directly beneath or alongside your entryway sign to maintain a cohesive look while adding utility. Metal hooks in gold, black, or brushed nickel can complement the style of your sign and add sophistication.
In smaller entryways, vertical arrangements of hooks can maximize space without overcrowding. Combining several hooks can create a miniature storage station, minimizing clutter. Using hooks designed to hold weights between 5 and 15 pounds ensures durability for everyday items.
Incorporating Shelves for Storage and Display
Small shelves integrated below or around your entryway sign create extra storage and display areas. These shelves can hold decorative baskets, mail trays, or catch-all dishes, helping you keep essentials in sight but orderly. Wooden floating shelves around 6 to 12 inches deep fit most entryways without protruding excessively.
Wall-mounted shelves combined with baskets add hidden storage for gloves, scarves, or small gadgets. Using lightweight but sturdy materials, such as pine or MDF with a painted finish, keeps costs reasonable, typically between $20 and $50 per shelf. Choose adjustable brackets when possible to tailor shelf height to your specific needs.
Incorporating Lighting for Ambiance and Utility
Lighting improve the entryway sign’s visibility and sets the mood, especially in darker spaces. Wall sconces or LED strip lights can be mounted above or around the sign to highlight it and brighten the area. Installing battery-operated LED puck lights behind or below the sign adds subtle illumination without wiring, costing about $15 to $30 per light.
For permanent lighting, hire a licensed electrician to install wall sconces costing between $100 and $300 including labor. Dimmer switches allow you to adjust brightness, creating a warm welcome or a brighter task light depending on the time of day.
Balancing Style with Practical Features
When blending decorative entryway signs with functional elements, aim for cohesive materials and colors. For example, pair a wooden sign with wrought iron hooks or match a painted metal sign with sleek black shelves. Avoid overcrowding the space; leave at least 2 to 3 inches of clearance between hooks and shelves for easy access.
Choose functional additions that complement the size and layout of your entryway. Large entryways can support multiple shelves and rows of hooks, while small ones benefit from vertical solutions that use wall space efficiently.
- Use gold or black metal hooks to add color and function.
- Install floating shelves of 6, 12 inches depth for storage without bulk.
- Add woven baskets on shelves for hidden organization.
- Use battery-operated LED lights to avoid rewiring.
- Choose adjustable or modular designs to fit your space.
- Maintain 2, 3 inch spacing between hooks and shelves for usability.
Be careful not to overload hooks or shelves; weight limits vary but typically do not exceed 15 pounds per hook or 30 pounds per shelf to avoid damage.
Customizing for Different Entryway Sizes
Smaller entryways benefit from vertical solutions, such as a narrow sign with several hooks stacked beneath it, plus a small shelf for mail or sunglasses. In larger foyers, you can combine multiple functional signs or add a bench with integrated storage beneath the sign to create a welcoming and organized zone.
Modular and customizable entryway sign designs help you adapt functionality if your needs change over time. For renters, using command hooks and removable shelves offers flexibility without damaging walls. Permanent installations suit homeowners wanting long-term, sturdy options.
6. Seasonal and Themed Entryway Sign Ideas for Year-Round Style
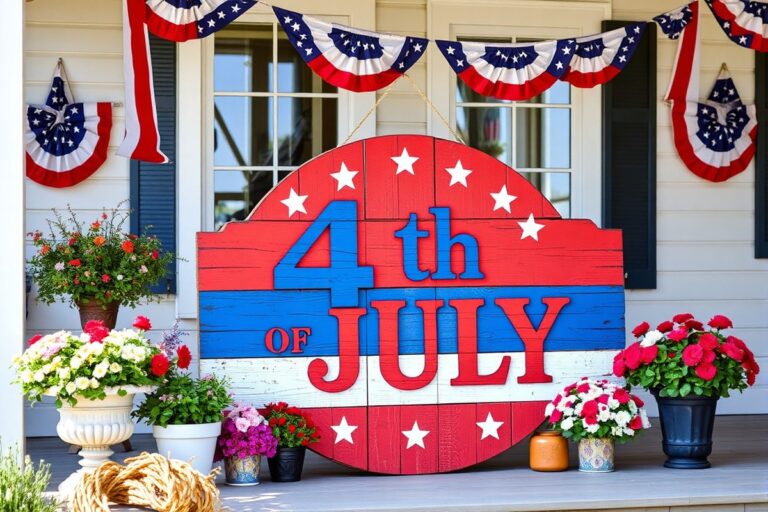
Rotating your entryway sign to match the seasons provides a simple yet effective way to refresh your home’s first impression regularly. Seasonal signs reflect nature’s changes and holidays, making your entryway feel more welcoming and current. For example, switching to a sign with warm colors and cozy motifs like leaves or pumpkins in the fall sets a different tone than a bright floral sign for spring. These small adjustments show attention to detail that visitors and family members appreciate.
Creating seasonal or themed entryway signs doesn’t have to be expensive. You can design signs that allow interchangeable parts, such as attaching seasonal embellishments like miniature wreaths, festive ribbons, or themed decals with removable adhesive. These options cost from $5 to $20 for materials like wood plaques, paints, and embellishments. A DIY approach lets you customize signs yearly at a low cost and ensures they fit perfectly with your existing decor. Alternatively, purchasing ready-made seasonal signs typically ranges from $15 to $50 each depending on the size and material.
Storing your seasonal signs properly is essential to keep them looking fresh year after year. Use a dedicated container such as a plastic bin with a secure lid or a hanging garment bag to protect signs from dust and moisture. Label each container clearly by season or holiday and store it in a cool, dry closet or garage away from extreme temperature changes to prevent warping or fading. Keeping signs flat and cushioned helps maintain their shape, especially for wood or canvas materials.
Changing your entryway sign seasonally is easiest when you create a routine. Mark your calendar to swap signs about once every three months or with major holidays like Halloween, Thanksgiving, Christmas, and springtime. Coordinate the sign change with other decor pieces such as pillows, throws, or doormats to ensure a cohesive look. Using a simple hook or removable wall hanger allows for quick sign exchanges without damaging walls or frames.
Including small seasonal embellishments on or around your sign helps you achieve stylish updates without a complete redesign. Consider adding faux greenery in winter, fresh flowers in spring, or pinecones and miniature pumpkins in the fall. These inexpensive details cost about $5 to $15 per update and add texture and dimension to your entryway. Just swap these decorations alongside your sign to refresh the space economically and effectively.
Budgeting for seasonal entryway signs also means considering their lifespan and durability. Opt for weather-resistant materials if your entryway is near the door or exposed to humidity. Otherwise, select lightweight, easy-to-store signs to reduce the effort of yearly replacement. Expect to spend $20 to $50 annually if you create versatile signs with interchangeable parts and add minimal décor updates. Avoid spending too much on trends, which might quickly date your space or require frequent replacement.
7. Size, Placement, and Lighting Tips for Maximum Impact
The size of your entryway sign should be proportionate to the available space to avoid overpowering the area or looking insignificant. A simple rule is to choose a sign that occupies about 20 to 30 percent of the wall or surface where it will be placed. For example, if your entryway wall is 5 feet wide, your sign should be between 12 and 18 inches wide. This balance keeps the sign noticeable without cluttering the space. In narrow entryways, smaller, vertical signs work better to maintain flow and avoid crowding the walkway.
Placement depends on how people enter and what they see first. Position the sign at eye level, usually between 57 and 60 inches from the floor, to ensure it’s easy to read and visually comfortable. Centering the sign above a console table or bench creates a natural focal point and complements other decor elements. If your entryway has limited wall space, consider an angled placement near the doorframe or alongside a mirror to maximize visibility without impeding foot traffic.
Lighting plays a major role in making your entryway sign stand out while improving the overall mood. Natural light is ideal during the day; placing the sign near a window can highlight its details without extra cost. For dimmer spots or evening hours, LED lighting offers an efficient solution. Slim LED strip lights installed above or below the sign add a soft glow that draws attention without harsh shadows. These generally cost between $20 and $50 and are simple to install with adhesive backing.
Accent lighting, like a small spotlight or sconce directed at the sign, creates a dramatic effect. A well-placed accent light can cost around $50 to $150 depending on style and installation requirements. Using warm white bulbs (around 2700K to 3000K temperature) ensures the sign is inviting and easy to read. Avoid harsh cool-white bulbs as they can wash out colors and feel unwelcoming.
One downside of improper lighting is glare, which can make the sign hard to read or create unwanted reflections, especially on glossy materials. Position lights slightly off-center and use diffusers or frosted covers to soften the beam. Another common mistake is over-lighting; too many fixtures can overwhelm the space and diminish the sign’s impact.
Combining natural light with subtle LED or accent lighting helps keep the entryway warm and inviting at all hours. For example, during the daytime, rely on the natural sunlight filtering in, and activate the LED strips or spotlights in the evening to maintain consistent visibility. This layered approach balances utility and style, ensuring your entryway sign is both functional and visually appealing.
8. Combining Entryway Signs with Other Decor Elements
Combining entryway signs with other decor elements works best when you aim for harmony in style, color, and function. The entry area is your home’s first impression, so keeping a consistent look makes the transition from exterior to interior feel natural. Start by selecting an entryway sign that shares design cues with nearby items, such as a mirror frame or a gallery wall’s picture frames. For example, a rustic wooden sign pairs well with a large mirror that has a distressed wood frame, creating a warm and inviting atmosphere.
Color coordination plays a key role. Choose colors for your sign that either complement or contrast with the entryway’s main hues while tying to your front door’s exterior. Your door in deep navy pairs well with an entryway sign featuring white or soft gray lettering; this combination brightens the space and matches navy or white framed art nearby. Layering colors through the sign, wall art, and accessories like baskets or a called-out bench cushion gives a polished, pulled-together feel.
Decor layering not only applies to textures but also to function. For small spaces, combine a wall-mounted hook rack under or near the sign to add utility without clutter. Hooks for coats and bags integrate practicality, turning your entryway into a welcoming spot that’s also organized. For homes with a smaller niche or no wall space, a table under the sign can hold decorative baskets that echo your sign’s color or style, wood, metal, or painted finishes work well and provide storage.
Gallery walls with an entryway sign at the center or off to one side can create visual interest. Group pictures, art, and the sign in similar-scale frames or matching materials for a curated look. Arrange them in a loose grid or a more dynamic layout that fills the wall space without overwhelming it. Good results come from balanced spacing, leave about 2 to 3 inches between each piece, and choosing frames that reflect similar color tones or finishes as the sign.
The size of the entryway and available wall space matters. In larger entryways, combining multiple decor elements allows for more creative freedom and deeper layering. Smaller spaces call for minimalist combinations to avoid clutter, focusing perhaps on a medium-sized sign paired with a mirror. Consider your home’s architectural style; modern or minimal interiors often look best with sleek, simple signs and mirrors, while farmhouse or traditional homes benefit from textured, rustic materials.
Matching your entryway’s look to the exterior involves echoing color schemes and materials. Front doors with matte black hardware look great with entryway signs that have black frames or black lettering. A brick or stone exterior might inspire natural wood or metal finishes inside to keep a cohesive flow. These choices don’t require a large budget; a well-selected sign under $50 paired with thoughtfully placed mirrors or frames from budget stores or thrift shops can create impact without overspending.
Keep balance in mind: too many overlapping textures or clashing colors can make the entryway feel crowded and disjointed instead of welcoming and cohesive.
9. Avoiding Common Mistakes with Entryway Signs and Fixes
Choosing the wrong entryway sign can make your space feel cluttered or awkward. Picking a sign that is too large may block doorways or make the area hard to navigate. Conversely, a sign that is too small can go unnoticed, reducing its decorative impact. Measure your wall space before buying or designing your sign to ensure it fits well without interfering with traffic flow.
Signs that clash with your entryway style can disrupt the overall look. A rustic wood sign in a sleek, modern entryway might feel out of place. Match the style and color palette of your sign to existing decor to create harmony.
Placement errors often occur because of poor lighting or mounting height. Signs hung too high might not be easily visible, while those too close to a light source could cause glare or reflection. Position your sign at eye level, about 57 to 60 inches from the floor, for the best visibility. Consider lighting sources to avoid harsh shadows or shine.
Mounting entryway signs without proper hardware can cause damage to walls or lead to the sign falling. Always use anchors, screws, or hooks rated for the sign’s weight. When your walls are drywall, use wall anchors to stop holes from getting bigger over time. For masonry or brick walls, use masonry screws or adhesive hooks designed for heavy items.
- Avoid signs wider than 24 inches in narrow entryways to prevent obstruction.
- Use a level to ensure the sign hangs straight.
- Select mounting hardware appropriate for wall material and sign weight.
- Place signs at eye-level, about 57 to 60 inches from the floor.
- Test lighting at different times to avoid glare on reflective signs.
- When unsure, ask a professional to install safely and avoid wall damage.
- Select styles that align with your entryway’s overall design scheme.
For safety and longevity, check your sign’s weight before installation and balance it with sturdy anchors. Signs heavier than 5 pounds require more strong mounting solutions like toggle bolts or wall anchors designed for heavier loads. Use a stud finder to see if you can mount directly into studs for extra strength. This prevents accidents and extends the life of your sign.
Signs made of metal, glass, or heavy wood may need professional installation to secure mounting safely, especially if the entryway is exposed to vibrations or frequent use. Soft or fragile materials, like thin wood or fabric, may not need heavy-duty hardware, but still require careful placement away from high-traffic zones.
10. Innovative and Unexpected Entryway Sign Ideas to Stand Out
Entryway signs that stand out often use innovative materials and styles you won’t find in typical decor. Neon signs, for example, create a bright, colorful glow that can make your entrance eye-catching day or night. These signs are made from glass tubes filled with inert gases and require a power source, so installation might involve basic electrical work. Neon signs can cost anywhere from $150 to $500 or more, depending on size and complexity. Choose simple text or shapes that reflect your personality or family name to keep them looking clean and readable. LED alternatives mimic neon’s effect but use less power and last longer, making them a low-maintenance option.
Three-dimensional signs bring a tactile aspect to your entryway. Think layered wood, metal, or acrylic letters and shapes that pop off the wall. A 3D sign adds depth and shadow, so lighting placement becomes important. You can highlight these signs with spotlights or wall washers to improve their effect. Custom 3D signs often start around $200 but prices rise with size, detail, and materials used. Because of their complexity, these signs typically require professional design and installation to ensure durability and a polished look. Try metallic finishes or natural wood grain for styles that match modern or rustic entryways.
Digital entryway signs take creativity further by allowing you to change messages without replacing anything physically. Using LCD or LED display panels, these signs can show names, greetings, important reminders, or even seasonal messages controlled remotely through apps. Costs range widely from $100 for small DIY kits up to $600 or more for professional-grade panels and enclosures. These signs need reliable power and internet access, plus weatherproofing for outdoor use. Digital signs work best if you enjoy updating your home’s look frequently or want a tech-forward touch in your décor.
Choosing an innovative sign involves weighing your style, budget, and installation abilities. Experts should handle electrical wiring for neon or digital signs, ensuring safety and compliance with local codes. A professional also guarantees that 3D signs are securely mounted and visually balanced. Custom design services let you incorporate unique fonts, logos, or symbols that standard signs don’t offer, but they require more time and money, expect design approval and production to take several weeks.
Unexpected materials can include clear acrylic panels with etched designs, reclaimed wood with painted accents, or even metal sheets laser-cut with intricate patterns. Each material affects the sign’s longevity and appearance in various climates. For example, acrylic suits humid areas better than untreated wood, but metal signs might need coatings to prevent rust outdoors.
Innovative entryway signs not only decorate but also invite curiosity and express your home’s character. Think through your skill level and tools before picking a high-tech or intricate sign. Hiring professional designers or installers reduces risks like poor visibility, electrical hazards, or damage during mounting. When affordable options meet your needs, like LED neon strips or DIY 3D letters, you can achieve a creative look without overspending or complicating maintenance.
11. Maintaining and Updating Entryway Signs for Long-Term Use
Entryway signs need routine care to stay looking fresh and inviting. Dust them regularly using a soft cloth or a microfiber duster. For wooden signs, avoid excess moisture when cleaning; lightly dampen a cloth with water or a wood-safe cleaner if needed. Metal or plastic signs can usually handle a mild soap solution followed by drying with a soft towel. Regular cleaning prevents grime buildup that dulls the finish and obscures details.
Protecting entryway signs from damage depends largely on their material and location. For outdoor or exposed indoor areas, applying a clear sealant or spray lacquer can create a durable protective layer against humidity, fingerprints, and fading. Follow label instructions for drying times and reapplication frequency, generally every 6 to 12 months.
Seasonal updates keep your entryway sign relevant and engaging. Swap out small decorative additions tied to different times of year, like miniature wreaths in winter or fresh floral accents in spring. Use removable adhesive strips rather than nails or glue to avoid damaging the sign. You can also repaint or touch up faded lettering with matching paint and a fine brush, but test colors in a hidden spot first.
Budgeting roughly $10 to $20 annually for cleaning supplies including microfiber cloths, mild soap, and sealant covers basic upkeep costs. Repainting or adding decorative features can increase your costs based on the products and tools you choose. Investing this effort means your entryway sign continues to make a positive impression over years rather than looking neglected.
Consider developing a simple maintenance checklist to follow twice a year. Start by dusting and washing the sign, then inspect for chips, cracks, or peeling paint. Reapply protective finishes if needed and swap seasonal decor items. A wooden sign should be checked for warping or splintering from moisture and fixed by lightly sanding and resealing. For metal signs, watch for rust spots and treat them promptly with rust remover and touch-up paint.
Keep tools like a soft brush, microfiber cloth, gentle cleaning liquid, painter’s tape, small paintbrushes, and seasonal decorative accents within easy reach. Having these supplies ready makes upkeep less of a chore and encourages regular attention. Make sure any cleaning products are safe for the sign’s material, especially if it features delicate paint or finishes.
Avoid harsh chemicals that can strip paint or damage finishes, stick to mild soaps and appropriate sealants to extend the life of your entryway sign.
12. Budget-Friendly Entryway Signs Without Sacrificing Style
Entryway signs can range in price from under $10 for simple prints to over $100 for custom wooden or metal designs. Paying attention to materials and detail makes a big difference in style and durability. Choosing budget-friendly options helps you refresh your entryway without overspending.
Creating your own entryway sign often costs less than buying ready-made options. Basic supplies like wood panels, paint, stencils, and brushes usually total under $25. This contrasts with store prices where a mid-range sign can easily run $40 to $60. Making it yourself gives full control over size, colors, fonts, and details. It also allows you to match the sign perfectly to your home’s style and color scheme.
Finding second-hand or clearance signs can save money while still providing a stylish look. Thrift stores, flea markets, and online marketplaces often have unique signs priced between $10 and $30. Sometimes you’ll find higher-end signs on clearance for 50% off or more. Buying second-hand also reduces waste and supports a sustainable approach.
- Check craft stores for discounted or scrap wood and reusable stencils to lower DIY costs.
- Use acrylic or chalk paint for customizable, affordable color options that dry within hours.
- Repurpose old frames or mirror backs as sign bases instead of buying new materials.
- Search clearance sections online or in local stores for deals up to 60% off on stylish signs.
- Try print-at-home options for customizable digital designs, which cost under $5 plus frame expenses.
- Combine smaller signs or plaques with inexpensive hooks or shelves for a layered look.
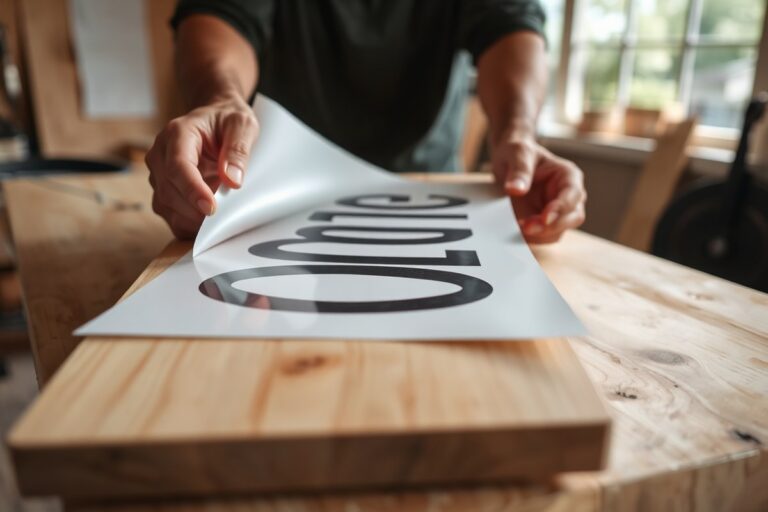
- Use adhesive vinyl letters for a clean, professional appearance without expensive equipment.
DIY signs generally take 1 to 2 hours to assemble, including drying time for paint. Planning your design carefully and using online templates or free design apps can speed up the process and improve results. Look out for common problems such as uneven paint layers or peeling vinyl, and fix them right away by lightly sanding or reapplying adhesive.
Choosing a compact size around 12 to 18 inches wide fits most entryways without overcrowding while keeping costs and material use low. Slim boards or repurposed drawer fronts work well as bases. If you prefer ready-made signs, target materials like MDF or reclaimed wood over metal or glass to balance style with cost. Prioritize designs with neutral colors or simple fonts for timeless appeal, helping your sign last several seasons before updates are needed.
Step-by-Step Action Plan for Entryway Sign Success
Use this plan to create an entryway sign that reflects your style, fits your space, and stays functional and fresh.
- Day 1: Measure your entryway wall and note lighting conditions to select the right size and placement for your sign.
- Day 2: Choose the style and material that match your home’s decor and durability needs, ensuring your sign fits your design vision.
- Day 3: Decide on personalization details, names, quotes, or themes, and sketch a design or find inspiration photos.
- Week 1: Create or buy your sign, incorporating functionality like hooks or shelves if needed, and test it in the intended spot.
- Week 2: Add complementary decor items like plants, mirrors, or baskets around your sign to improve the look.
- Month 1: Assess wear and lighting; swap out seasonal elements and make updates to keep your entryway fresh and inviting.
- Ongoing: Keep your sign clean and check mounting regularly to maintain safety and appearance.
Frequently Asked Questions
What Are Creative Ways to Use Lighting Around Entryway Signs?
Using soft LED strip lights or spotlighting can highlight your entryway sign and create a welcoming glow. Choosing warm white lighting adds a cozy touch, perfect for a homey entrance.
Can Entryway Signs Be Combined with Smart Home Technology?
Yes, integrating smart displays or motion sensors with entryway signs can provide personalized greetings or adjust lighting automatically. This adds both convenience and modern style to your entryway.
How Do I Match My Entryway Sign with Outdoor Landscaping?
Choose colors and materials that complement your plants and outdoor decor, like natural wood for a rustic garden or metal for modern minimalism. It helps create a smooth transition from outside to inside.
What Are Good Entryway Sign Options for Renters?
Lightweight, damage-free options like adhesive vinyl decals or hanging signs on removable hooks work well for renters. These allow personalization without permanent changes to the space.
Can Entryway Signs Feature Local Themes or Hometown Pride?
Yes, signs can showcase local landmarks, state shapes, or regional phrases to reflect your connection to your community. This adds personality and a conversation piece for guests.
How Do I Incorporate Family Names or Monograms on Entryway Signs Tastefully?
Use simple fonts and subtle colors to keep family name signs elegant and readable. Avoid overcrowding the sign to maintain a balanced and welcoming look.
Wrapping Up
Picking and customizing the right entryway sign adds personality and organization to your home’s entrance. Start by measuring your space and choosing a style that fits your home’s feel. The next step is to make or buy a sign that balances function with your unique touch. With some care and seasonal updates, your entryway sign can keep welcoming guests for years.