DIY Cardboard Sign: Step-by-Step Guide and Expert Tips for Beginners
Creating a DIY cardboard sign is an affordable and quick way to make personalized displays without spending much money. You can craft a stand-up sign using just a few household supplies like cardboard, scissors, paper, and glue. Start by choosing your design carefully and assembling the basic structure to ensure stability and a professional look.
Key Takeaways
- Use 840 gsm multi-layer embossed cardboard for a sturdy and recyclable DIY sign base.
- Print your graphics on A4 or US letter paper to keep designs clear and easy to attach to cardboard.
- Cut 1/2 centimeter slits around letters spaced 2 inches apart to help edges bend smoothly.
- Leave about 2 inches unglued at the bottom of letters to slide in support sticks for upright display.
- Attach sticks or poles between 3 and 8 feet tall, depending on your desired sign height and visibility.
- Assemble your standee by carefully gluing printed paper to cardboard, trimming excess, and adding mounting sticks.
What Materials You Need for a DIY Cardboard Sign
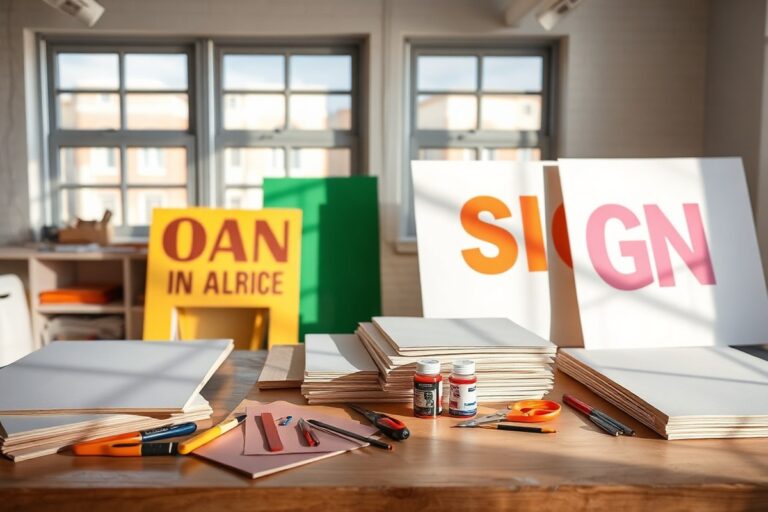
Creating a DIY cardboard sign requires some basic materials that you can usually find around the house or purchase inexpensively. The foundation is a good-quality cardboard, ideally corrugated, with a thickness of about 1/4 to 1/2 inch for stability without being too heavy. Single-layer cardboard, such as from shipping boxes, works well for indoor signs, while double-flute corrugated cardboard with a smoother surface is better for outdoor or longer-lasting projects. Recycled cardboard is fine, but make sure it’s clean, dry, and free of dents or tears that could weaken your sign. Using thicker cardboard helps your sign hold its shape and stand upright without additional support in many cases.
To make cutting and decorating easier, you should have some sharp cutting tools like a craft knife or scissors. A metal ruler helps guide straight cuts. For decorating, basic art supplies such as acrylic paints, permanent markers, or colored pencils work well. You might also want glue or double-sided tape to affix letters, printed graphics, or embellishments.
- Corrugated cardboard (single or double-flute, 1/4 to 1/2 inch thick) for the sign base
- Craft knife or sharp scissors for precise cutting
- Metal ruler for straight lines and accurate measurements
- Permanent markers or acrylic paint for lettering and decorations
- Glue stick or double-sided tape for attaching paper graphics or accents
- Printer and paper (A4 or US letter size) if printing letters or images to apply
- Optional: Clear spray sealer to protect the sign from moisture and wear
Choosing the right cardboard involves balancing durability and weight. Thicker, multi-layer cardboard resists bending and warping, especially in humid conditions. Cheaper cardboard with single or few layers may crease or tear more easily but is lighter and suitable for temporary signs or indoor use. For outdoor signs, look for cardboard labelled as FSC® certified and recyclable, which often means a sturdier, environmentally responsible material. Expect to spend between $1 and $5 per large sheet of cardboard depending on quality and thickness, with double-flute types costing more.
For ease of decorating, a smooth surface is preferable. Cardboard with embossed or textured surfaces may absorb paint unevenly or cause difficulty when writing. Printing letters or designs on regular paper and gluing them to the cardboard can help achieve a clean look without complex painting skills. Using standard printer paper sizes (A4 or US letter) fits well when layering graphics on your sign. Also, if you want the sign to stand upright, prepare materials like cardboard strips or wood scraps to build a stand or frame, but those are optional depending on your display needs.
How to Design and Prepare Graphics for Your Cardboard Sign

Starting your cardboard sign design means picking clear, simple images or lettering that fit your sign size and purpose. Creating or selecting the graphics carefully ensures your message is easy to read and your sign looks professional. This includes preparing files properly for printing and knowing how to transfer or trace your letters onto the cardboard.
Choosing the Right Image Size and Resolution
Select images with at least 150 dpi (dots per inch) resolution for clear printing on A4 or US letter paper. Low-resolution images will print blurry or pixelated, especially when enlarged. Design your graphics in a word processor or graphic software where you can resize to match your sign dimensions.
Measure your cardboard sign first and note the printable area, typically an inch smaller than the cardboard edges on all sides. Then, size your image so it fits within that area. For signs larger than one sheet of paper, plan to print your design in multiple sections that you’ll piece together.
Draft your design on scrap paper or digitally at actual size to check placement and scale. Keep text bold and avoid thin fonts since they are hard to see and cut out on cardboard.
Printing Letters on Standard Paper for Transfer
Printing letters on standard A4 or US letter paper to transfer onto cardboard is a straightforward way to get neat, professional lettering without freehand drawing. Large letters can be printed spread across multiple pages, then trimmed and aligned on the cardboard.
Use a regular home or office printer with standard ink; colored or black ink works equally well. Cut around the printed letters carefully to create stencils or use transfer methods like graphite paper under the printout to trace precisely onto the cardboard. This method saves time and avoids mistakes in freehand lettering. For best results, print your letters at 100% size or scale according to your cardboard dimensions, ensuring each page matches up smooth when placed side by side.
Using Templates to Trace or Cut Out Letters
Templates are excellent for consistent shape and size when creating letters or graphics for your sign. You can print letters and designs on paper, then cut them out to use as stencils or guides on the cardboard. Tracing around templates with a pencil transfers the shapes without freehand guesswork.
A good template fits comfortably on your cardboard with little extra space. Use a ruler to position each letter evenly with spacing about 0.5 to 1 inch between letters, depending on the font style and size.
Once traced, cut your letters carefully. Plan to paint or decorate inside the letters by cutting slits about 0.5 cm deep spaced 2 inches apart around each letter’s edge to prevent cracking when bending or moving the cardboard. Follow these steps to prepare your graphics and lettering for a DIY cardboard sign:
- Measure your cardboard’s printable area and note the exact dimensions.
- Create or select images and lettering in a software or word processor, sizing them to fit your noted dimensions.
- Print your design on A4 or US letter paper, splitting it into multiple pages if necessary for large signs.
- Cut out printed letters or images carefully to use as templates or stencils.
- When transferring, lay graphite paper graphite-side down on the cardboard, then position the template on top and trace with a pencil for a clean outline.
- Trace letters or shapes firmly, checking that all details transfer clearly.
- Cut traced letters or stencils carefully, adding slits around edges if your design requires flexibility or shaping.
- Assemble any multi-part printed designs on the cardboard, matching edges closely before tracing or gluing.
Tip: Always test print your design on plain paper first to verify size, layout, and readability before using your final cardboard material.
Effective Techniques to Cut and Shape Cardboard
Cutting and shaping cardboard effectively requires the right tools and techniques to achieve clean edges and precise designs. Using a sharp utility knife or heavy-duty scissors with proper safety measures helps prevent mistakes and injuries. Scoring and layering can add dimensional details, turning a flat cardboard sign into a standee or 3D decoration.
Choosing the Right Cutting Tools
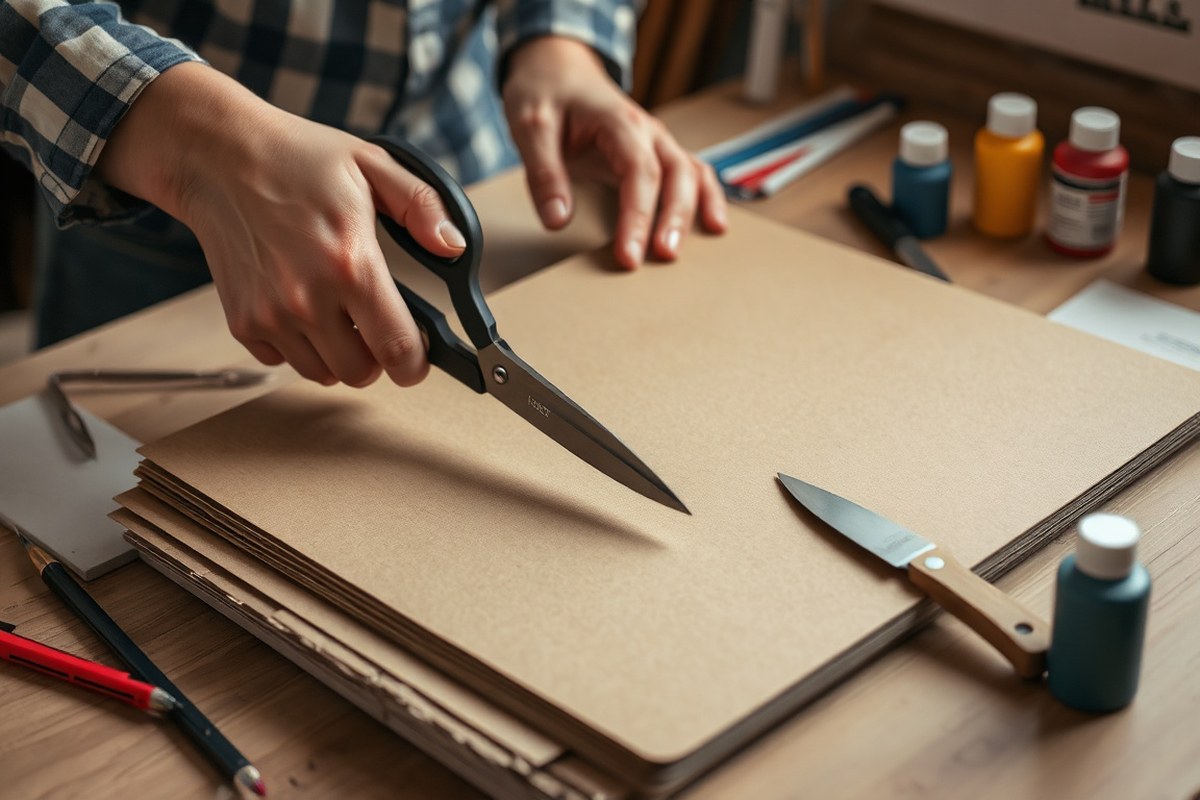
A sharp utility knife is the best choice for cutting cardboard because it allows for more control and cleaner cuts than scissors, especially for straight lines or detailed work. Always replace dull blades to avoid tearing the cardboard. Heavy-duty scissors work well for simpler or larger cuts but can struggle with intricate shapes or thick layers.
Keep a cutting mat or thick scrap cardboard underneath to protect your work surface and keep your blades sharper longer. Wear gloves to protect your hands, and cut away from your body. Avoid distractions while using sharp tools to prevent accidents.
Scoring and Cutting Techniques for Clean Edges
Scoring means lightly cutting a shallow groove on the cardboard surface before folding or making deeper cuts. This technique helps prevent the cardboard from cracking or bending unevenly, producing neat edges and precise shapes. Use the tip of a utility knife to score along a ruler or stencil line with moderate, steady pressure. Avoid pressing too hard; just enough to mark the fold line without cutting through.
To cut letters and complex shapes, first draw or trace the design onto the cardboard. Start cutting slowly using a sharp blade, rotating the cardboard rather than the knife to keep curves smooth. Avoid forcing the blade through thick cardboard in one pass; make several light passes instead.
Advanced Cutting: Slits and Layering for Standees
To create a standee or add 3D details, cutting slits and layering extra pieces of cardboard is a common technique. Slits are narrow cuts that allow you to slot two cardboard pieces together for stability without glue. Carefully measure and mark the slit width equal to the thickness of the cardboard to ensure a tight fit.
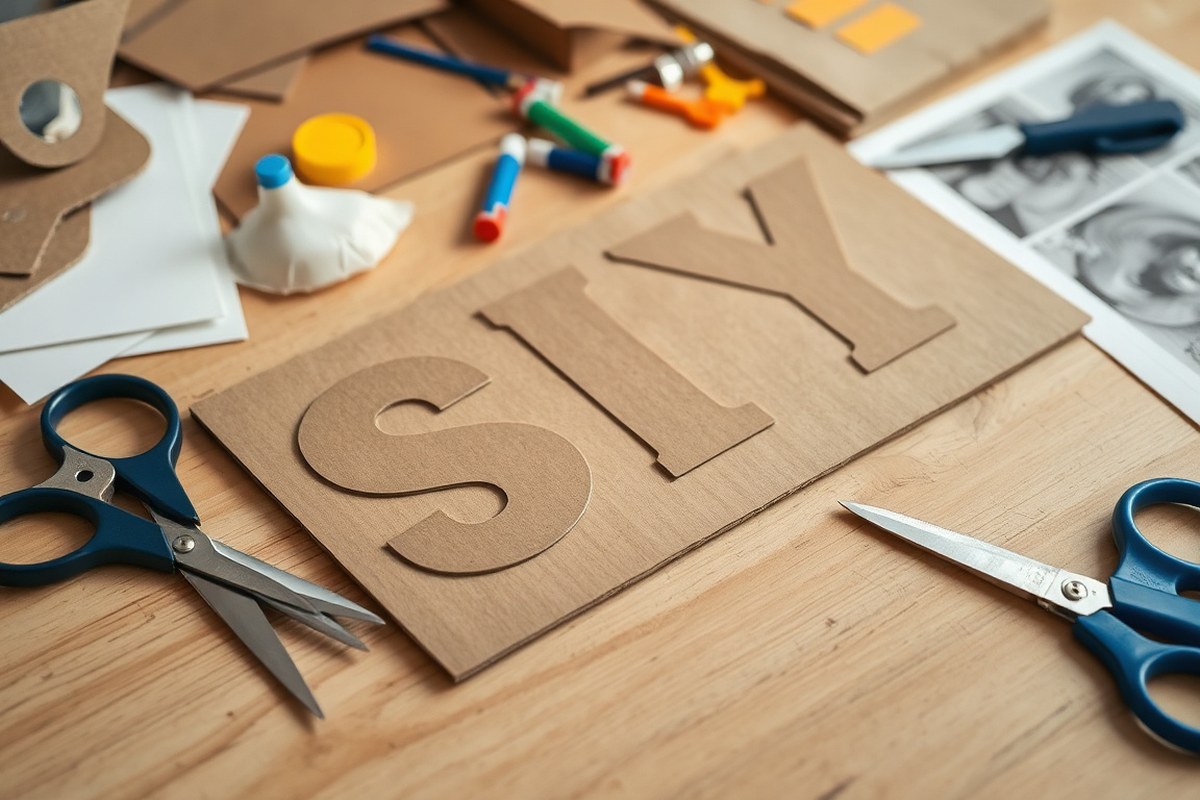
Layering involves gluing multiple cut-out pieces to raise letters or shapes off the base sign, creating depth. Cut each layer precisely using the scoring method and stack from largest to smallest pieces. Allow glue to dry fully before handling to maintain proper alignment. Masking tape edges cleanly with scissors instead of ripping to keep a polished look.
- Place the cardboard on a cutting mat to protect your surface.
- Choose a sharp utility knife or heavy-duty scissors based on the cut needed.
- Draw your design clearly on the cardboard using a pencil or marker.
- Score any fold lines lightly using the tip of the utility knife and a ruler.
- For cutting, make light passes with the utility knife along your lines, rotating the cardboard steadily for curves.
- Cut slits for standee assembly by marking the exact width of cardboard thickness and cutting straight slots.
- Glue additional layers or pieces for raised effects and let dry completely before handling.
- Use scissors to trim masking tape edges rather than tearing to keep corners neat.
How to Create Durable Lettering and Decorative Elements
Choosing the right lettering and decorative technique is key for making your cardboard sign last and look great. Painting, printing transfers, chalkboard methods, and adhesives each offer different effects, costs, and durability. Your choice depends on where the sign will be used, the style you want, and how much effort you want to invest.
Painting directly on cardboard is popular for vibrant, lasting letters. Acrylic paint is a good choice because it dries quickly, adheres well, and resists fading. Before painting letters, prime the cardboard with white chalk paint or a light base coat to help colors stand out. Use stencils to create sharp edges by taping them firmly and applying paint in thin layers. Let each layer dry (about 20 minutes) before adding the next for a smooth finish. Paint markers also work well, especially for fine details, but prime the tip on scrap cardboard first to get a steady flow.
Chalkboard paint transforms cardboard into a reusable surface. After the chalkboard paint dries (usually a few hours), rub a piece of white chalk over the entire surface and wipe it off. This “seasoning” prevents future chalk markings from ghosting. Use chalk or chalk markers to write your lettering. Chalk markers provide more control and are less dusty but may need wiping with a damp cloth to erase. This method is great if you want to change your message often or prefer a rustic look.
Printing and applying transfers provide a professional appearance, especially for detailed fonts or images. Print your design on standard paper using an inkjet printer, then cut out the letters. Use an adhesive spray or glue stick on the back of each letter for secure attachment. Press firmly and smooth out air bubbles. To protect the printed surface, cover with a clear spray sealant once dry. This option takes more prep but ensures uniform letters without brush strokes.
| Method | Pros | Cons | Estimated Cost | Best Use |
|---|---|---|---|---|
| Painting (Acrylic or Markers) | Durable, colorful, versatile | Requires drying time, skill for clean lines | $5, $15 (paint, brushes, markers) | Long-term indoor/outdoor signs |
| Chalkboard Paint + Chalk | Reusable, easy changes, low cost | Less permanent, dusty, less vibrant | $8, $20 (chalkboard paint, chalk) | Temporary or changeable signs |
| Printed Transfers + Adhesive | Clean, professional look, detailed images | More prep, less durable if exposed to moisture | Minimal (paper, printer ink, adhesive spray) | Detailed graphics, indoor use |
To layer paint properly, start with a base coat using white chalk paint on your cardboard to improve brightness and adhesion. After it dries, apply thin layers of acrylic paint with a small brush or sponge. Multiple thin layers prevent warping and drips. Using stencils, tape them down well to avoid bleeding. Dab paint lightly rather than brushing heavily.
After finishing your lettering or decoration, sealing helps protect the work. A clear acrylic sealer spray applied in light coats can prevent smudging and water damage, especially for painted or printed signs. Avoid using the sealer on chalkboard paint areas if you want to keep them erasable.
Building Stability: How to Make Your Cardboard Sign Stand Upright
Building stability into your DIY cardboard sign is essential for it to stand upright and hold up over time. Using support poles or a folded cardboard base helps maintain balance, while careful attachment prevents damage to the sign. Effective assembly creates a durable display whether your sign is freestanding or wall-mounted.
Cutting and Preparing Slots for Support Poles
Start by creating slots in the cardboard to insert support poles or sticks. These slots keep poles aligned and firmly anchored without bending the cardboard. Choose poles 1 to 2.5 meters (3 to 8 feet) long depending on how tall you want your sign to stand.
Use a sharp utility knife and a ruler to measure and cut thin vertical slits about 0.25 to 0.5 inch wide at the bottom edge of the cardboard. The width should closely match the pole diameter for a snug fit. Space the slots evenly on either side if using two supports for balance.
Attaching Poles or Stands Securely
After sliding poles into the slots, secure them with strong, waterproof tape like duct tape or packing tape. Wrap the tape tightly around the pole and cardboard at the slot area to hold the pole in place and avoid wobbling.
For added stability, create a fold-out cardboard stand. Cut another rectangular piece of cardboard about the same width as the sign and about 12 inches tall. Fold this piece into a triangle base by creasing it into thirds and folding one side to the back of the sign, taping it securely. Attach this piece with glue or tape where the sign’s bottom edge meets the support poles.
- Measure and mark the spots for slots on your cardboard’s bottom edge.
- Cut vertical slits 0.25 to 0.5 inch wide using a utility knife.
- Slide the poles or sticks into the slots, fitting them snugly.
- Wrap waterproof tape around each pole at the slot to secure it firmly.
- Cut a rectangular cardboard piece approximately 12 inches tall and as wide as your sign.
- Crease the rectangle into thirds lengthwise, folding into a triangular stand.
- Attach the triangular stand to the back bottom edge of your sign with glue or tape.
- Trim excess cardboard around the base if needed to maintain balance.
Use waterproof tape to secure poles so your sign stays stable even outside or in damp environments.
Options to Hang or Mount Your Cardboard Sign
For wall-mounted signs, punch two holes near the top corners using a hole punch or sharp object. Thread strong string, wire, or thin rope through the holes and knot securely. Hang the sign on nails or hooks. This method avoids damaging the sign’s face or design.
You can also attach your sign to existing poles or fences with zip ties or bungee cords. Protect the sign from tearing by looping the ties loosely and placing cardboard reinforcements behind the tie points. Avoid using nails or staples, which can weaken the cardboard structure.
How Long Does It Take to Make a DIY Cardboard Sign?
Making a simple DIY cardboard sign usually takes about 30 to 60 minutes. This timeframe includes cutting out the cardboard, sketching your design, and adding basic lettering or decoration. Signs that are larger or more detailed generally require between one and two hours, especially if you are layering multiple colors or incorporating unique shapes and embellishments. For projects involving life-size cardboard cutouts or complex graphics, you might spend several hours planning, cutting, and assembling.
The total time depends on several factors, including the size of the sign, the complexity of the design, and your familiarity with the tools and materials. Adding paint or glue means you must factor in drying times, which can add 15 to 30 minutes or more between steps. Using a marker for lettering is quicker than painting intricate letters, but it may not offer the same visual impact. Also, intricate shapes sliced by hand take longer compared to simple rectangular signs. Your workspace setup plays a role, too; having all materials ready at hand speeds up the process significantly.
Speeding up your workflow starts with preparation. Organize your workspace so everything is within reach before you begin. Keep a checklist of each step, such as cutting, sketching, lettering, decorating, and drying. This checklist helps track your progress and ensures you don’t skip anything, allowing for a smoother process. Multitasking can also save time, for example, cut several pieces of cardboard while paint coats dry on your lettering. Using fast-drying paints or markers can cut wait times, and layering simple designs over one another rather than painting large base coats speeds completion.
For an efficient workflow, plan your design and materials first, so you know the exact steps to take. Cut all the cardboard shapes at once, then apply any base colors before adding details. While waiting for paint or glue to dry, gather embellishments or prepare your lettering stencils. This method avoids idle time and lets you make steady progress. Remember that working in sections rather than trying to finish the whole sign at once can keep the project manageable, especially if it’s your first time.
A beginner might find that dedicating a solid hour yields the best results, balancing care with efficiency. The cost remains low, often under $2, particularly if you repurpose scrap cardboard and use basic art supplies. More complex signs with extra detail or additional layers can take longer, but the extra time often results in a more polished and durable sign. Planning how you spend your time prevents frustration and helps maintain your enthusiasm for DIY cardboard signs.
Protecting and Preserving Your Cardboard Sign
Cardboard signs are vulnerable to moisture, sun exposure, and physical wear, so protecting them extends their life significantly, whether they’re for short-term outdoor events or indoor decoration. Rain and humidity can cause cardboard to warp or disintegrate, while sunlight slowly fades printed or painted designs. Using protective coatings designed for porous materials can shield the cardboard from these elements.
Clear acrylic spray sealants are a popular choice. They create a thin, protective layer that repels water and resists fading. Apply 2 to 3 thin coats in a well-ventilated area, allowing 15 to 30 minutes of drying time between coats. Prices for a standard spray can range from $5 to $10 and last for multiple projects. For outdoor signs, consider using waterproof polyurethane sprays or varnishes, but test first on a small sample since some can darken the cardboard or cause curling.
- Use clear acrylic spray sealant indoors or for temporary outdoor use
- Choose waterproof polyurethane for better outdoor protection but avoid glossy finishes to reduce glare
- Apply coatings in thin, even coats and allow full drying between layers
- Store signs flat in a dry, cool area away from direct sunlight when not in use
- Transport signs inside protective sleeves or between rigid boards to prevent bending
- Remove dust with a soft brush before sealing or storage to avoid trapping dirt
- Consider laminating small signs to increase durability and moisture resistance
Storage matters as much as applying protective coatings. Keep cardboard signs in a dry place below 85°F to avoid mildew and warping. Lay signs flat on a clean surface rather than standing them on edge, which can cause bending over time. If signs need to be reused across seasons, inspect the coating for cracks or wear and reapply sealant annually or before each heavy use period.
For short-term outdoor use during mild weather, shielding with a simple clear spray and quick drying is usually enough. In harsher or prolonged outdoor conditions, pairing protective sprays with structural reinforcements like backing boards helps maintain sign shape and integrity. Remember, no coating makes cardboard fully waterproof, so avoid leaving signs out in heavy rain or extreme sun for extended periods.
Common Mistakes to Avoid When Making Cardboard Signs
Signs become unstable or flimsy mainly due to weak support and improper assembly. Using thin cardboard without reinforcements, relying on weak adhesives, or skipping structural bracing causes your sign to wobble or fall over. To avoid this, choose thicker, double-wall or triple-wall cardboard and add internal supports like wooden skewers or cardstock strips glued along edges. For assembly, use strong glue or hot melt adhesive, and clamp pieces together until fully dry to build a firm bond.
Paint and lettering peeling off happens when the surface isn’t prepared properly or incompatible materials are used. Cardboard’s porous texture can soak up moisture from paint or glue unevenly, causing bubbling or flaking as it dries. Applying a primer or gesso layer first creates a smooth base that helps paint adhere. Use acrylic or latex paint since they dry quickly and bond well with cardboard’s fibers. Avoid thick paint layers; instead, build color with several thin coats drying about 15 to 30 minutes between each.
Many crafters waste materials or damage signs by cutting cardboard unevenly or using dull blades. Rough or jagged edges weaken the sign and spoil its appearance. Prevent this by always using a sharp utility knife or box cutter on a flat, sturdy cutting surface. Score the cardboard lightly first, then cut through with steady pressure for clean lines. Measuring twice before cutting can avoid costly mistakes.
- Use double-wall cardboard or reinforce edges with leftover scraps for extra stability
- Prime cardboard surfaces with gesso or white acrylic paint before lettering
- Apply paint and glue in thin layers; avoid saturating the cardboard
- Cut cardboard with sharp blades on a flat surface, using a metal ruler for straight lines
- Clamp glued parts or weight them down until fully dry (at least 20, 30 minutes)
- Store unfinished signs flat and dry to prevent warping or moisture damage
Common troubleshooting involves identifying if issues stem from materials, technique, or environmental factors. Flimsy signs often respond well to added reinforcements or switching to sturdier cardboard grades. Peeling paint usually indicates poor surface prep or incompatible paint types, fixed by priming and choosing acrylics or latex. Uneven cuts and ragged edges usually result from dull blades or rushed cutting, take time and sharpen your tools regularly.
Handle wet paint gently to prevent warping, and allow each layer to dry completely before adding more or moving the sign.
Following these practical recommendations helps produce durable and attractive DIY cardboard signs while reducing frustration and waste. You’ll save time and materials by avoiding common errors early on.
Step-by-Step Action Plan
Follow these steps to create your own sturdy and attractive cardboard sign efficiently.
- Before you start: Gather all materials including cardboard, cutting tools, paint or markers, and protective sealant. Check that your cardboard is free of damage for best results.
- Day 1: Sketch your design and lettering on paper, then transfer it lightly onto the cardboard. Ensure the layout looks balanced and fits within your sign dimensions.
- Day 2: Cut out your sign shape carefully using a sharp utility knife or scissors. Confirm edges are clean and smooth for a neat appearance.
- Day 3: Apply your lettering and decorations using paint or markers. Let the first coat dry fully to avoid smudging before any touch-ups.
- Day 4: Add extra details like borders or highlights to make the sign stand out. Dry completely and inspect for any missed spots or uneven paint.
- Day 5: Seal your cardboard sign with a clear waterproof spray or varnish outdoors. Wait at least 24 hours to ensure full drying and durability.
- Day 6: Attach a stand or support to your sign. Test stability by placing it upright on a flat surface and adjust as needed for balance.
- After 1 week: Display your sign indoors or outdoors and monitor how it holds up to weather or wear. Touch up any damage promptly to extend its life.
Frequently Asked Questions
How Do I Make a DIY Cardboard Standee Using Only A4 or US Letter Size Paper?
Print your design on multiple sheets of A4 or US letter size paper, cut them out, and glue them onto a large piece of cardboard. This method saves money and allows you to create a large, detailed standee from small paper sizes.
What Is the Best Way to Assemble a Stand-Up Sign on Cardboard?
Use strong glue and secure tabs or folds on the back of your cardboard to create a stable base. This helps keep your sign upright without needing additional supports.
How Can I Make a Homemade Cardboard Standee Stay Upright?
Attach a triangular cardboard brace or an easel back for stability. This prevents the standee from tipping over and makes it easy to display on flat surfaces.
What Computer Programs Are Good for Designing Graphics for Cardboard Signs?
Simple programs like Canva or Microsoft Paint work well for beginners, while Adobe Illustrator offers advanced design tools. These options help you create crisp, printable graphics for your sign.
Can I Reuse Cardboard for Multiple DIY Sign Projects?
Yes, sturdy cardboard can be repurposed if it’s not damaged. Reusing cardboard saves money and reduces waste, just make sure to flatten and clean it before starting a new project.
How Can I Add Texture to My DIY Cardboard Sign?
Apply tissue paper, fabric scraps, or paint with sponges to create texture. Adding tactile elements makes your sign more eye-catching and unique.
Key Points to Remember
Making a DIY cardboard sign takes care and attention, but the results can be both beautiful and long-lasting. Start by planning your design clearly and working in stages to avoid mistakes. Your next step is to gather your materials today and draft your sign idea so you’re ready to cut and decorate with confidence.